Sandify.org is my website for making fun geometry patterns. I started it for making patterns in sand tables like the zenxy, and then the sisyphus. But I have also drawn some fun patterns with a pen on paper.
Hey, and thanks for this info on the Sandify site. I hadn’t run across that yet. So what about patterns for cardboard kids furniture and assistive tech devices and fixtures for individuals with disabilities? We build this stuff for kids and adults with disabilities of all kinds.
I intend to commit our cardboard patterns to CAD (sheet metal layouts but thicker) and cut out our parts on the Lowrider. I’ll share a couple of links and check out your Sandify site.
If my stuff isn’t too serious and fits the spirit of the site I’ll share some of it once I get going.
Whoa! That is awesome!. Share away. I know a lot of people here love seeing projects and seeing some that are altruistic makes it even better.
I was just putting together a nintendo labo kit with my son this last week and cardboard is a very impressive material. I think most of the boxes we use are made in such huge quanitities that they are stamped with big cookie cutters. I have also seen a lot of cardboard cut with lasers. In a similar vein, the “dollar tree foam” is a popular medium for RC airplanes (check out flitetest.com) and a needle cutter us a great tool for cutting and perforating that. So that may be worth a try.
@focusedonsound is also hoping to use it to mill Coroplast, which looks like plastic cardboard to me.
I would make an uneducated guess that the cardboard may be too soft to be cut with a mill. But it may depend on the feeds and speeds. If it gets too “mushy” it will feather a lot instead of cutting. Have you tried cutting it with a router? I know some people do mill foam, so maybe it will be fine.
As for sandify, it really isn’t the right tool for this job. You could easily design some texture with it, but if you want to share the cad and maybe make it parametric, I would look into onshape. There are some sheet metal tools included and there is a kiri:moto package for doing the CAM. But even if you just adjusted some variables and spit out a dxf, that could be used to cut it out on many platforms.
This seems like an excellent application of the tech and I love seeing use of more compliant materials (instead of trying to make a seat from metal or plastic).
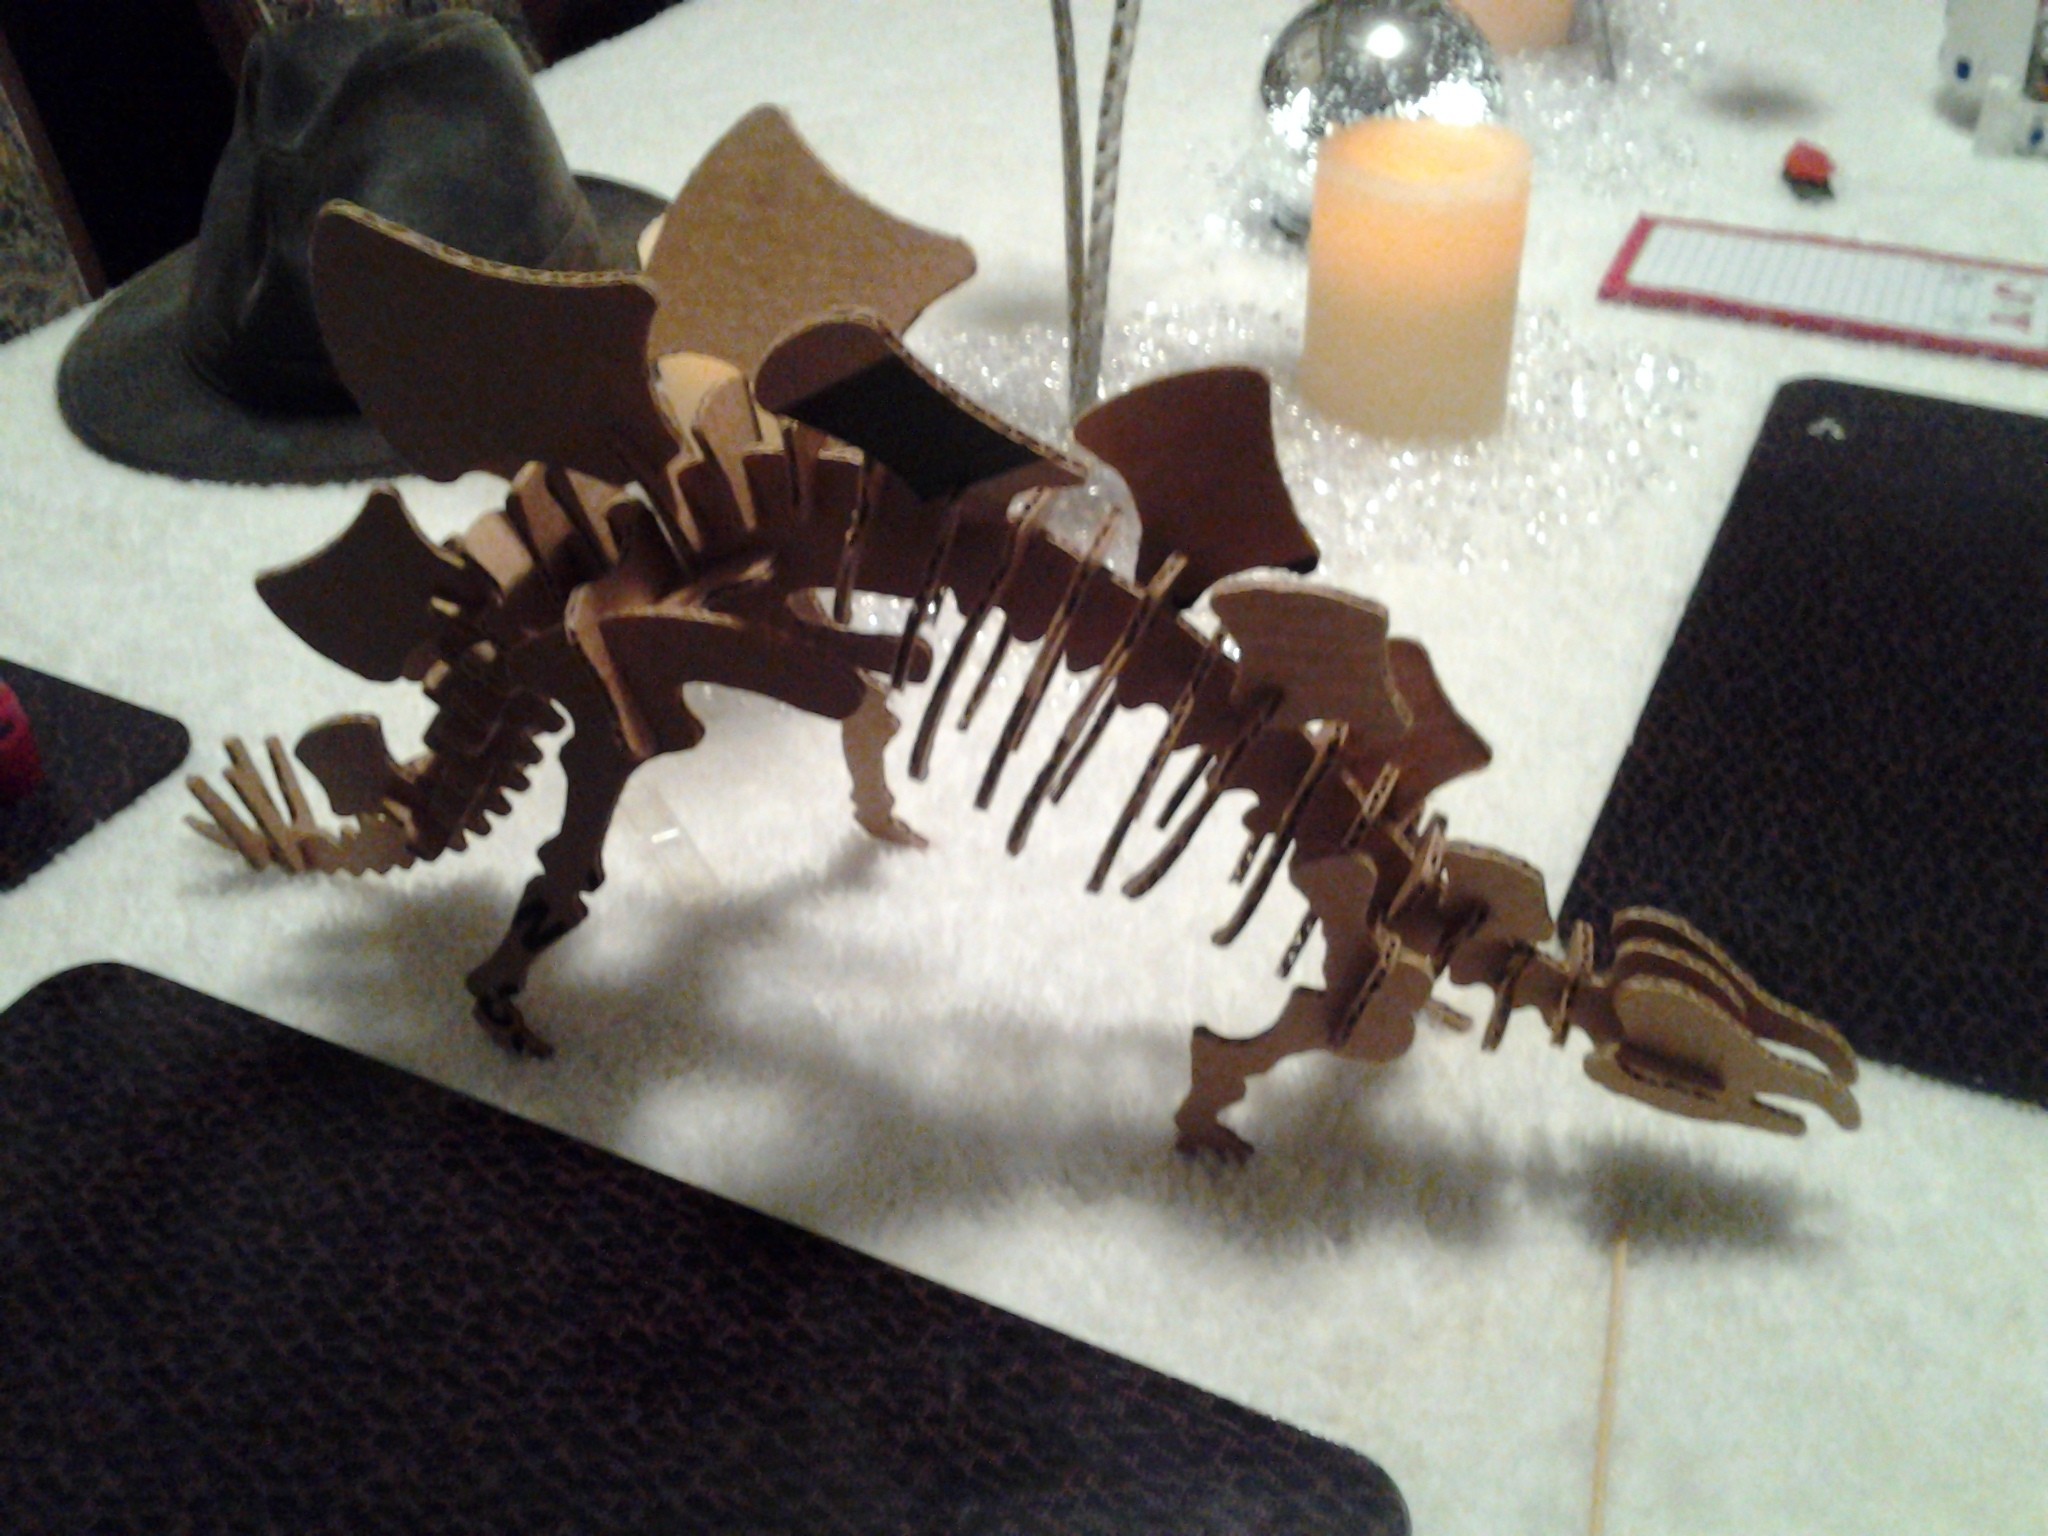
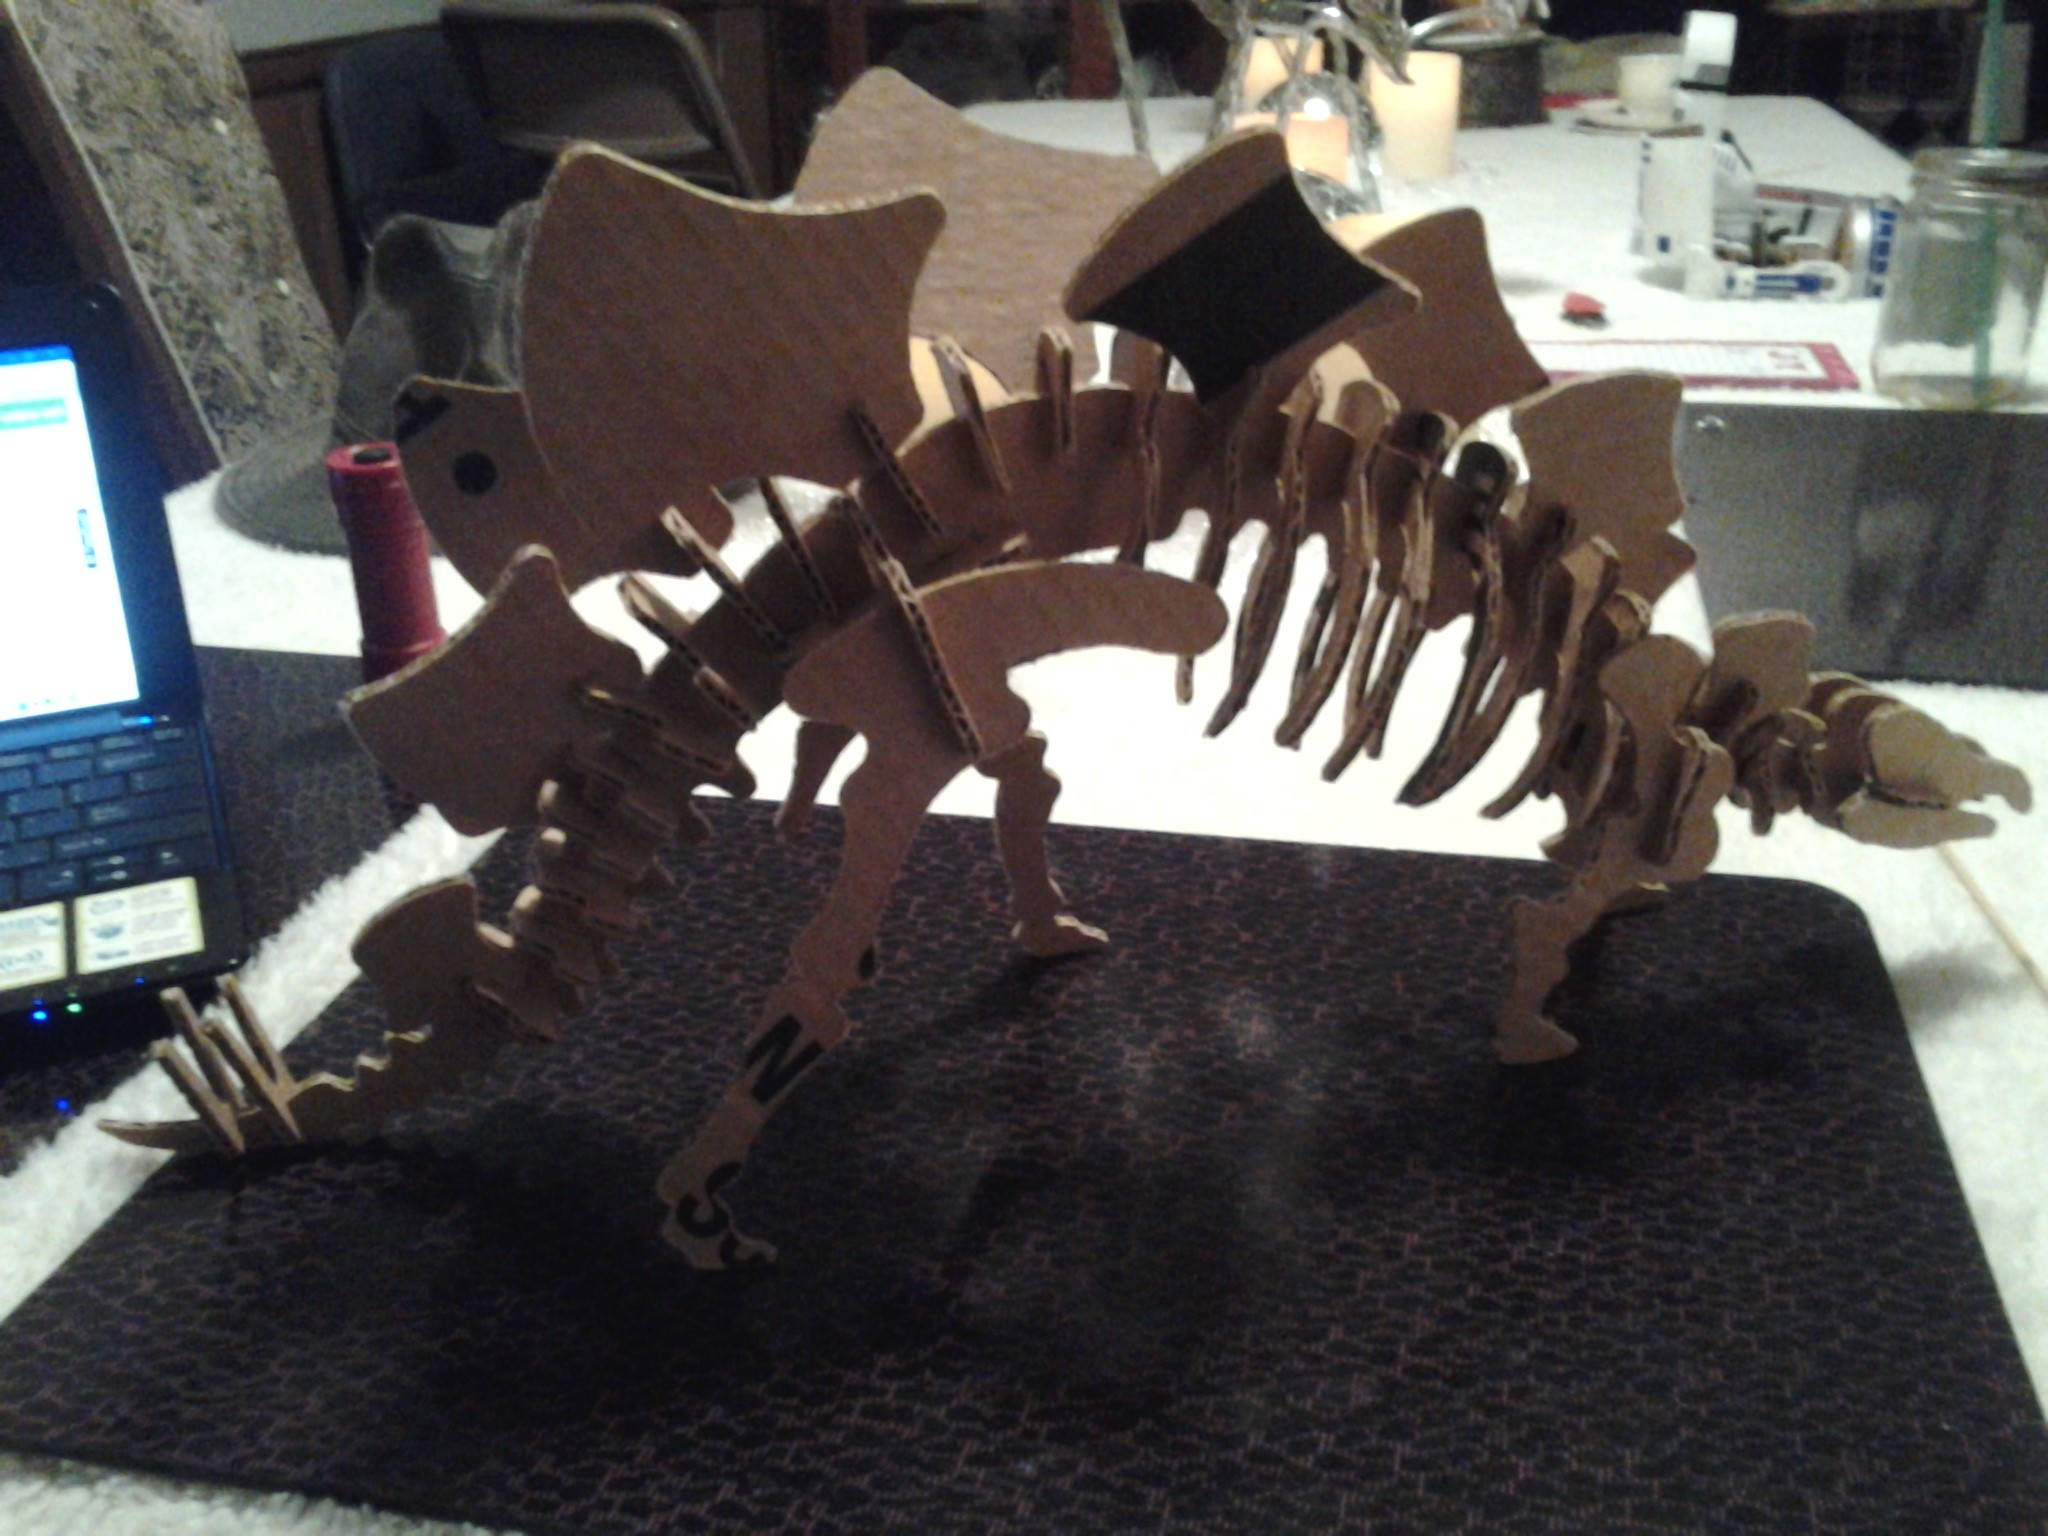
Thanks for the comprehensive response Jeff! So I actually have cut some of our triple wall cardboard on a mill before. Small diameter (1/8") single flute down cutting bits are working the best so far. Still trying to dial in feeds and speeds. It’s a little counter intuitive sometimes when working with the soft materials. I’ll share my results when I get it dialed in.
As for the CAD design we use OnShape in the lab and I personally am a Fusion 360 guy so I’m getting by using both of those solutions depending on which location I’m in and who I will be collaborating with.
Yes we try to make as much as we can configurable and parametric. I find that it helps keep me honest to make sure my sketches are fully defined so they don’t blow up when they’re resized.
Thanks so much for this suggestion @Bigchepin . Wow, that might be just what I need. So you guys have done it again… Taken my early baby steps into this and launched me forward to start looking at another level.
3D printing did this for me over the past few years and now this. It’s a great time to be alive that this level of sophisticated design and technical activity is available to we ‘Joe Homeowner Engineers’.
As I get my feet under me I will definitely move foreword into this Tangential Knife direction. You guys could have just become a part of revolutionizing the Adaptive Design movement.
Sorry for jumping backward into this thread but I had to thank you @jeffeb3 for pointing out the needle cutter concept as well. Now I need to get more confident with my machine so that I can check into this and the Tangential Cutter suggested by @Bigchepin to assess both for how they might offer application to cutting our triple wall cardboard, around 14.6 mm.
I’m in Mexico and the work I do at the Adaptive Design shop is on James St. in Syracuse @wfredette.
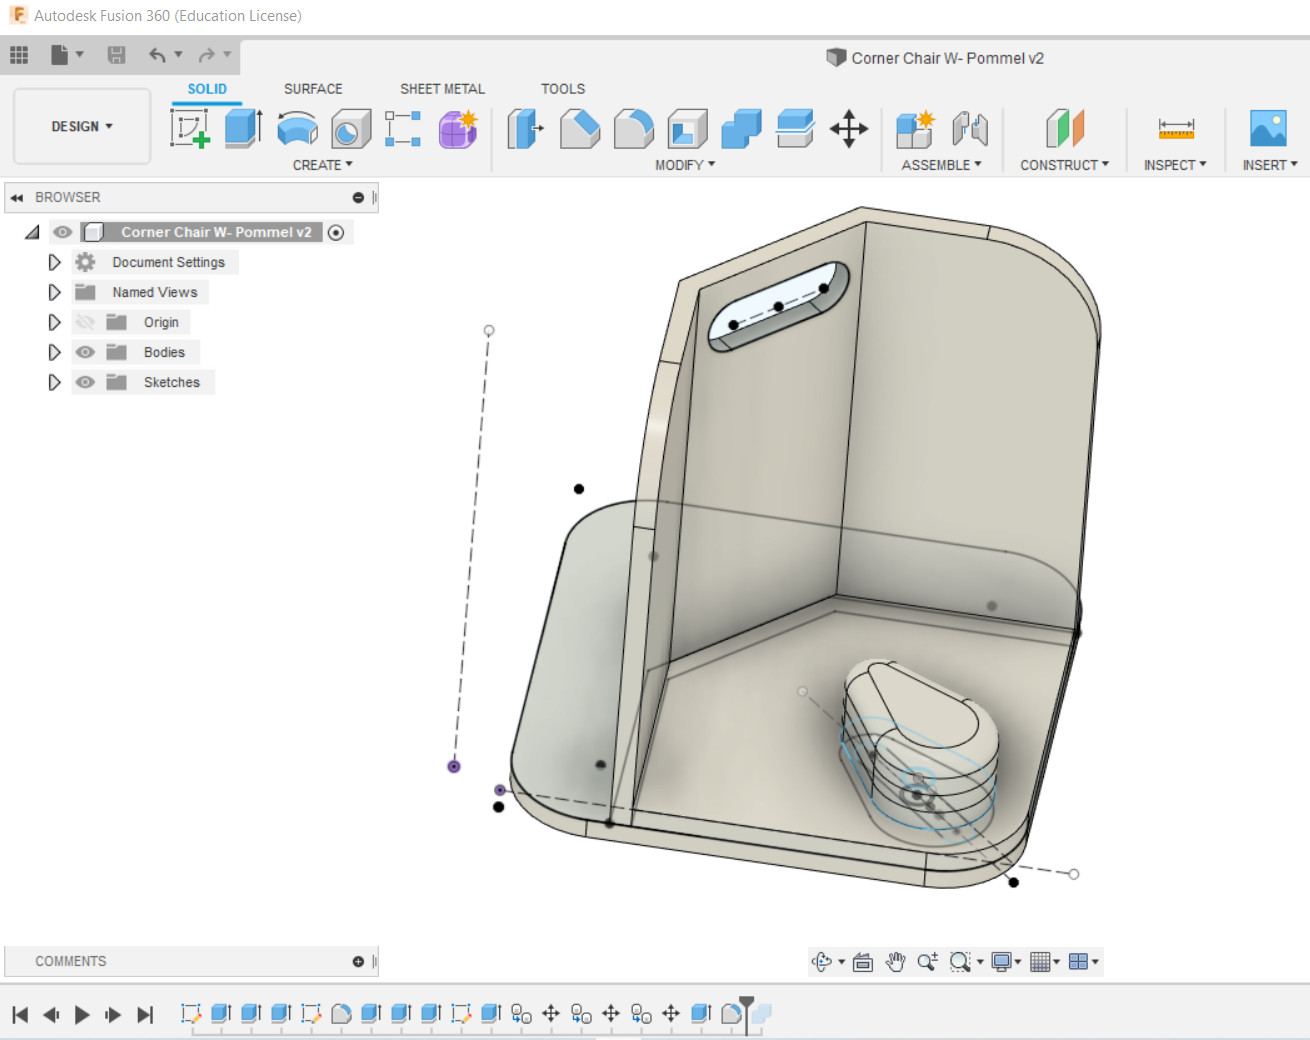
Here’s another little corner chair that is pretty popular with our clinicians that I will cut out on my Lowrider.
One of my sons goes to school in Syracuse. Your designs are interesting to me, as I’m a pediatrician. So far, I’ve only been using mine for some furniture and musical instrument projects, but there’s definitely some great potential for helping children with it.
I’ve torture-tested a lot of needle cutters using cardboard (and even coroplast) and it indeed will reveal any weakness in your cutter. But it can be done with thinner cardboard and a tight, sturdy, cutter…
Most of my cutters were designed for cutting foams up to about 6mm thick… and were only built with a stroke of 12mm or so. I’m not aware of anyone ever setting the stroke more than a few millimeters beyond that. Cardboard 15mm thick would definitely be a “test” of a cutter designed with adequate stroke… and it would do incredibly well to survive all the feed/speed testing to find “optimal” for that material.
I’d say “Go for it!”… and let us know how it goes.
Good morning @wfredette. A friend of mine from ARISE who’s been lurking this post noticed that you were a pediatrician. Awesome that you have such diverse interests and life experience.
We work with an amazing doctor at the Spina Bifida clinic at Upstate. She is active in pointing patients toward us that are a good match for our resources. Upstate even invited a contingent of us to go to Ecuador a year and a half or so to work with an AD shop in Ibarra, Ecuador.
I must admit I have had some life changing experiences working with these individuals and their families. We try to wrap all our resources together, 3D printing, the cardboard work and now this will add another dimension to what we can accomplish.
My personal unit has been more of a personal life interest as well as a proof of concept for the AD shop. It’s looking good so far. I’m currently working on an at home experience for our recipients where I’m plotting guidelines and basic instructions on a single piece cardboard project (a cellphone holder) and then cutting out the outline with an 1/8" Down/Up cut bit to give our recipients and families a hands on experience with cardboard.
Covid has driven our busy little shop remote like everywhere else…
Well thanks for introducing yourself and rock on with the router!
These are aawesome @dkj4linux. Again I’m going to work at getting solid with the machine and Estlcam first then I may look at these more involved approaches. The right bit/feed/speed combination testing has been working as a proof of concept for us. We’ll see… Thanks
This is iteration #2 of my pen mount design for the MPCNC Lowrider 2. This pen holder has detents for raised and plotting position. It can be locked in place with a 5/16 wingnut (probably a bit overkill)
This is iteration #2 of my pen mount design for the MPCNC Lowrider 2. This pen holder has detents for raised and plotting position. It can be locked in place with a 5/16 wingnut (probably a bit overkill) I think there will be one more iteration with a spring loaded pen on bearings so that the spring will either hold it up or apply some down pressure so the pen will simply pivot up if I make a newbie mistake or if the drawing surface isn’t a perfectly flat plane.)
I’m still trying to work out the Estlcam workflow for using the pen without having to raise the router up every time I want to make a plot. Working with the cardboard means a project’s workflow might involve plots and cuts. I break them out as separate G-Code files but there’s still the physical side of the workflow to consider. My concept of setting the pen lower than the bit means that if the bit is set to Z0 the pen paths have to be in a positive Z height. Not exactly sure how to do that. I was just turning the adjustment plate of the router and raising it up with the pen and the bit set at Z0.
Still trying to get my head wrapped around the workflows… Does Marlin on the Rambo recognize G53…59 commands?