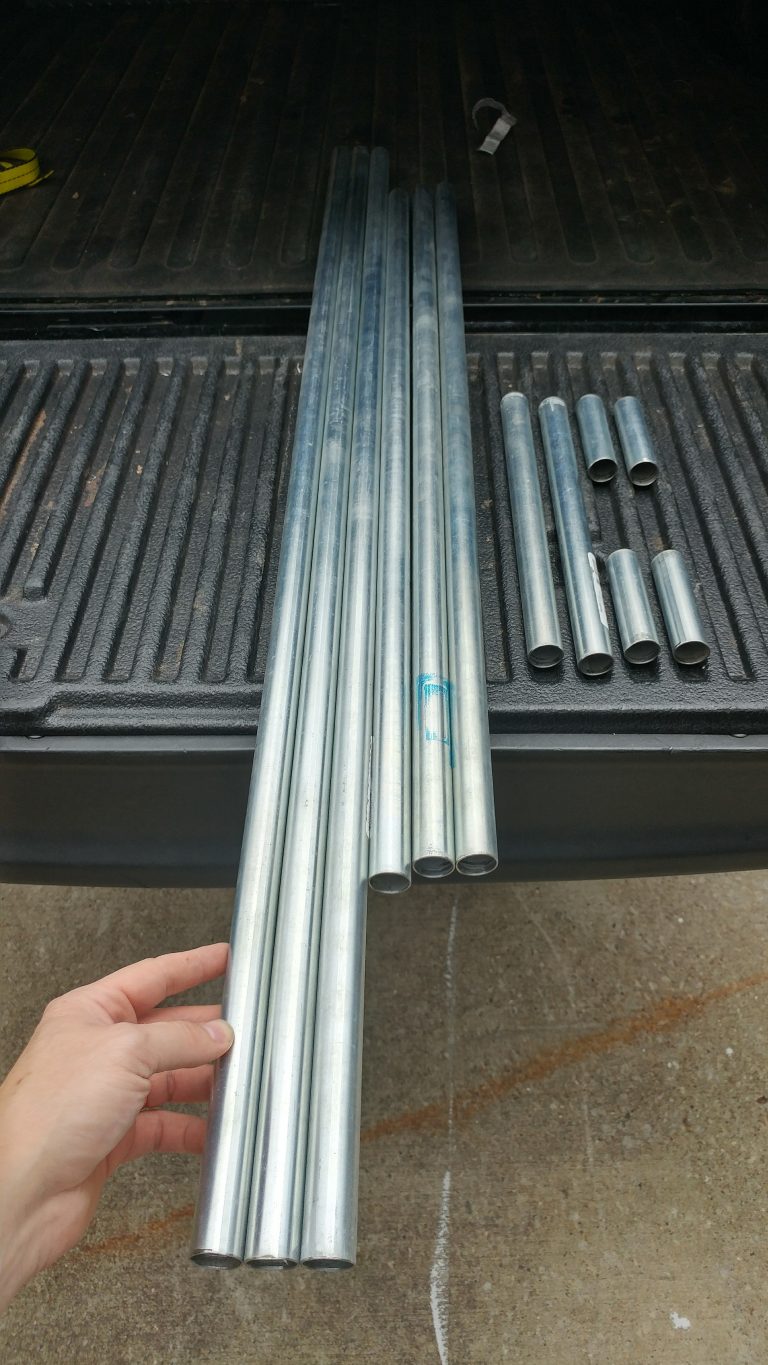
Today I started down the path of my build. I’m not sure what order other people go in, but I started with a trip to Lowe’s. I picked up all the nuts and bolts and 3 pieces of pipe.
I then came home and cut the pipes down. The conduit reamer really did pay for itself. It made the task of cleaning up the edges super fast.
My machine will have a cut size of 24"x36"x4". I used the calculator to give me the sizes of the pipes. I plan on using the DW660 for my cutter and possibly adding a draw knife or laser later on for doing vinyl.
The primary role of the machine will be milling woodwork with some acrylic/plastic, aluminum, and possibly carbon later on.
I’m on a limited budget each month (married with two kids), so this build may go slower than some others. I’ll start printing the parts for the rest of the machine tomorrow and hopefully order the bearings and some of the electronics after next pay period.
The printer I’ll be printing everything on is a modded Geeetech Aluminum i3 (one of the many Prusa clones out there). Assuming the CNC build sticks to the budget I have laid out, it’s highly possible the CNC machine will come out cheaper than what I have in the printer right now.
I fly quad copters, play with rc trucks, and have a reef tank that I will be designing parts for once it’s up. The CNC machine/3d printer are hobbies to feed other hobbies
I love this design and I think the designer did a great job with it. I can’t wait to see how well it turns out and start using it.
What, no pictures of the first bags of parts…tsk tsk.
Thanks for the kind words. I am sure you will have fun with it.
Your cut area is pretty big, if don;t have any CAM experience you really sure start smaller to learn the software side. Going bigger is very easy and should take less than an hour if you think you need to get that big.
I’ll consider shrinking it. I couldn’t decide between a 24x24 or the 24x36. I’ve been using autodesk inventor to design my own 3d printed parts. I’ve played with HSM a bit to familiarize myself with the machining side. There are some really good HSM videos on youtube for those new to cam work.
not sure why that’s not loading. I’ll have to take a look later.
Ok. I see what’s going on here. My IMG tag that I’m using is for http, but taking a look at the source on the page, it looks like it’s trying to call https… that’ll never work.
I started off printing everything at 50mm/sec. It was working well until one of the nuts vibrated off of the build platform. Then it was no longer level.
I re-leveled the build platform, used some blue loctite this time, and lowered the speed back to 40mm/sec. Back to printing…
I also ordered some more of the parts… bearings, steppers, pulleys, and cable.
All I have left to purchase now is a board for the bottom, the spindle, and the control board.
Pictures. (Still can’t seem to get the URL img link to work.)
One picture is after I persuaded the pipes to go in the feet and most of the rest of the hardware. The second is of the cut pipes. I know… not that exciting, but still.
Also. If you look closely at the picture of the hardware, you’ll see a mistake that’s causing me to go back to Lowe’s…
64 hours of printing down ad roughly 30 more to go. Only two prints that had to be redone. 1 was because the bed became un-level and the other was to make some of the leg pieces slightly larger. I went up 1% and they came out much better the second time.
I’ve been using the Inland filament. I weighed one of the empty rolls and have been using that to figure out if my current roll has enough filament to finish a print or not. Yesterdays print took just under 20 hours and I had <3ft of filament left on the roll when it finished.
I have one more plate full of parts to print and I have to order the spindle (probably the Dewalt DW660). Then it’s just a matter of waiting for the rest of the parts to show up.
I got quite a bit done this weekend, but it’s still not moving. I was hoping to get far enough to do some test moves, but life got in the way of hobbies. That and I kept doing steps out of order and would have to redo part. I have all the hardware assembled (I think), and now I just have to run the wiring for the steppers and hook up the power supply.
I did a lot of playing with Autodesk Inventor and it’s HSM plugin. I was able to use the Fusion360 POST that I found in a different thread and was able to export a simple gcode to write my name with a sharpie. I also got a pen holder printed.
If you consider all the other ‘life’ stuff I got done this weekend, it actually makes me feel like I got a lot done.
Here’s the required picture for build progress updates, and yes… There are a lot of ‘bright’ colors in it. My wife says I’m sometimes stuck in the '80s and my color choices sometimes reflect that. In this case, I was trying to print the entire thing without buying new filament.
The colors remind me of salt water taffy. Nice big size.
Do you use your scroll saw much? My grandfather was a woodworker, and it was his primary saw. I don’t own one. Maybe I don’t need it with a CNC machine though.
I use it fairly often. The first few years I had it I made a bunch of wooden puzzles for Christmas presents. Then another year I cut out a bunch of 3d Christmas ornaments.
It’s great for making quick delicate cuts in things. Unfortunately, a lot of my woodworking are larger items that I typically end up having to use a jigsaw or bandsaw on. My wife is a teacher, so she comes home a lot with a big stack of wooden dowels that she needs them all cut down to X inches and it works pretty good to do that quickly.
Let’s put it this way… I have to cram all of my woodworking tools in less than half of a 2-car garage. The scroll saw is the only bench tool I have permanently mounted in a location where I can use it at any time.
I guess whether or not you need one depends on what type of woodworking you do. The CNC is great if everything your cutting is cut with the machine… otherwise there’s a lot of times that I’m doing a build where I need to make something fit a spot that isn’t ‘perfectly’ cut. Trying to measure the error and adjust a drawing for it to then cut with the CNC would take longer than making a quick paper template and cutting it freehand on the scroll saw. I also do a lot of my builds ‘off the cuff’ where I’m making up my measurements as I’m building the item.
And I need to try and rename the title of this thread… If the other machine can be called ‘Fisher Price’, then I definitely think I need to take the ‘Miami Vice build’
I bought the Ramps board setup from this website. The steppers are 64 oz/in from amazon. The power supply is the stock one that came with my 3d printer (12V 15A). I spent this morning wiring them up. I originally had the z axis backwards, but after flipping that around I was able to do some test moves using a sharpie.
I’m pretty impressed with how easy it really all came together. That’s a huge adda-boy to the designer. My 3d printer took me 2 weeks to get my first print out of it. The fact that all I had to do here was generate some Gcode and put it on an SD card was pretty impressive.
I’m using Autodesk Inventor with the HSM plugin to create the Gcode. The Post processor I’m using is the one I found on this site. For the sharpie, I used a 1/8" end mill as my ‘cutter’ in the software.
Now I just need to design/print a box for the controller get a fan on the drivers (although they didn’t feel warm at all), and order a spindle (probably the Dewalt).
Here’s some quick videos. Ignore the fact the pen didn’t touch for all of the first ‘print’. The second one was more reliable as I did a better job of leveling the platform. I’ll have to build a real bench to put this thing on instead of the hobble-together chipboard it’s currently on.