I built an MPCNC last year, and decided to build a Lowrider for some bigger surface area. I started this project mid-January of 2020.
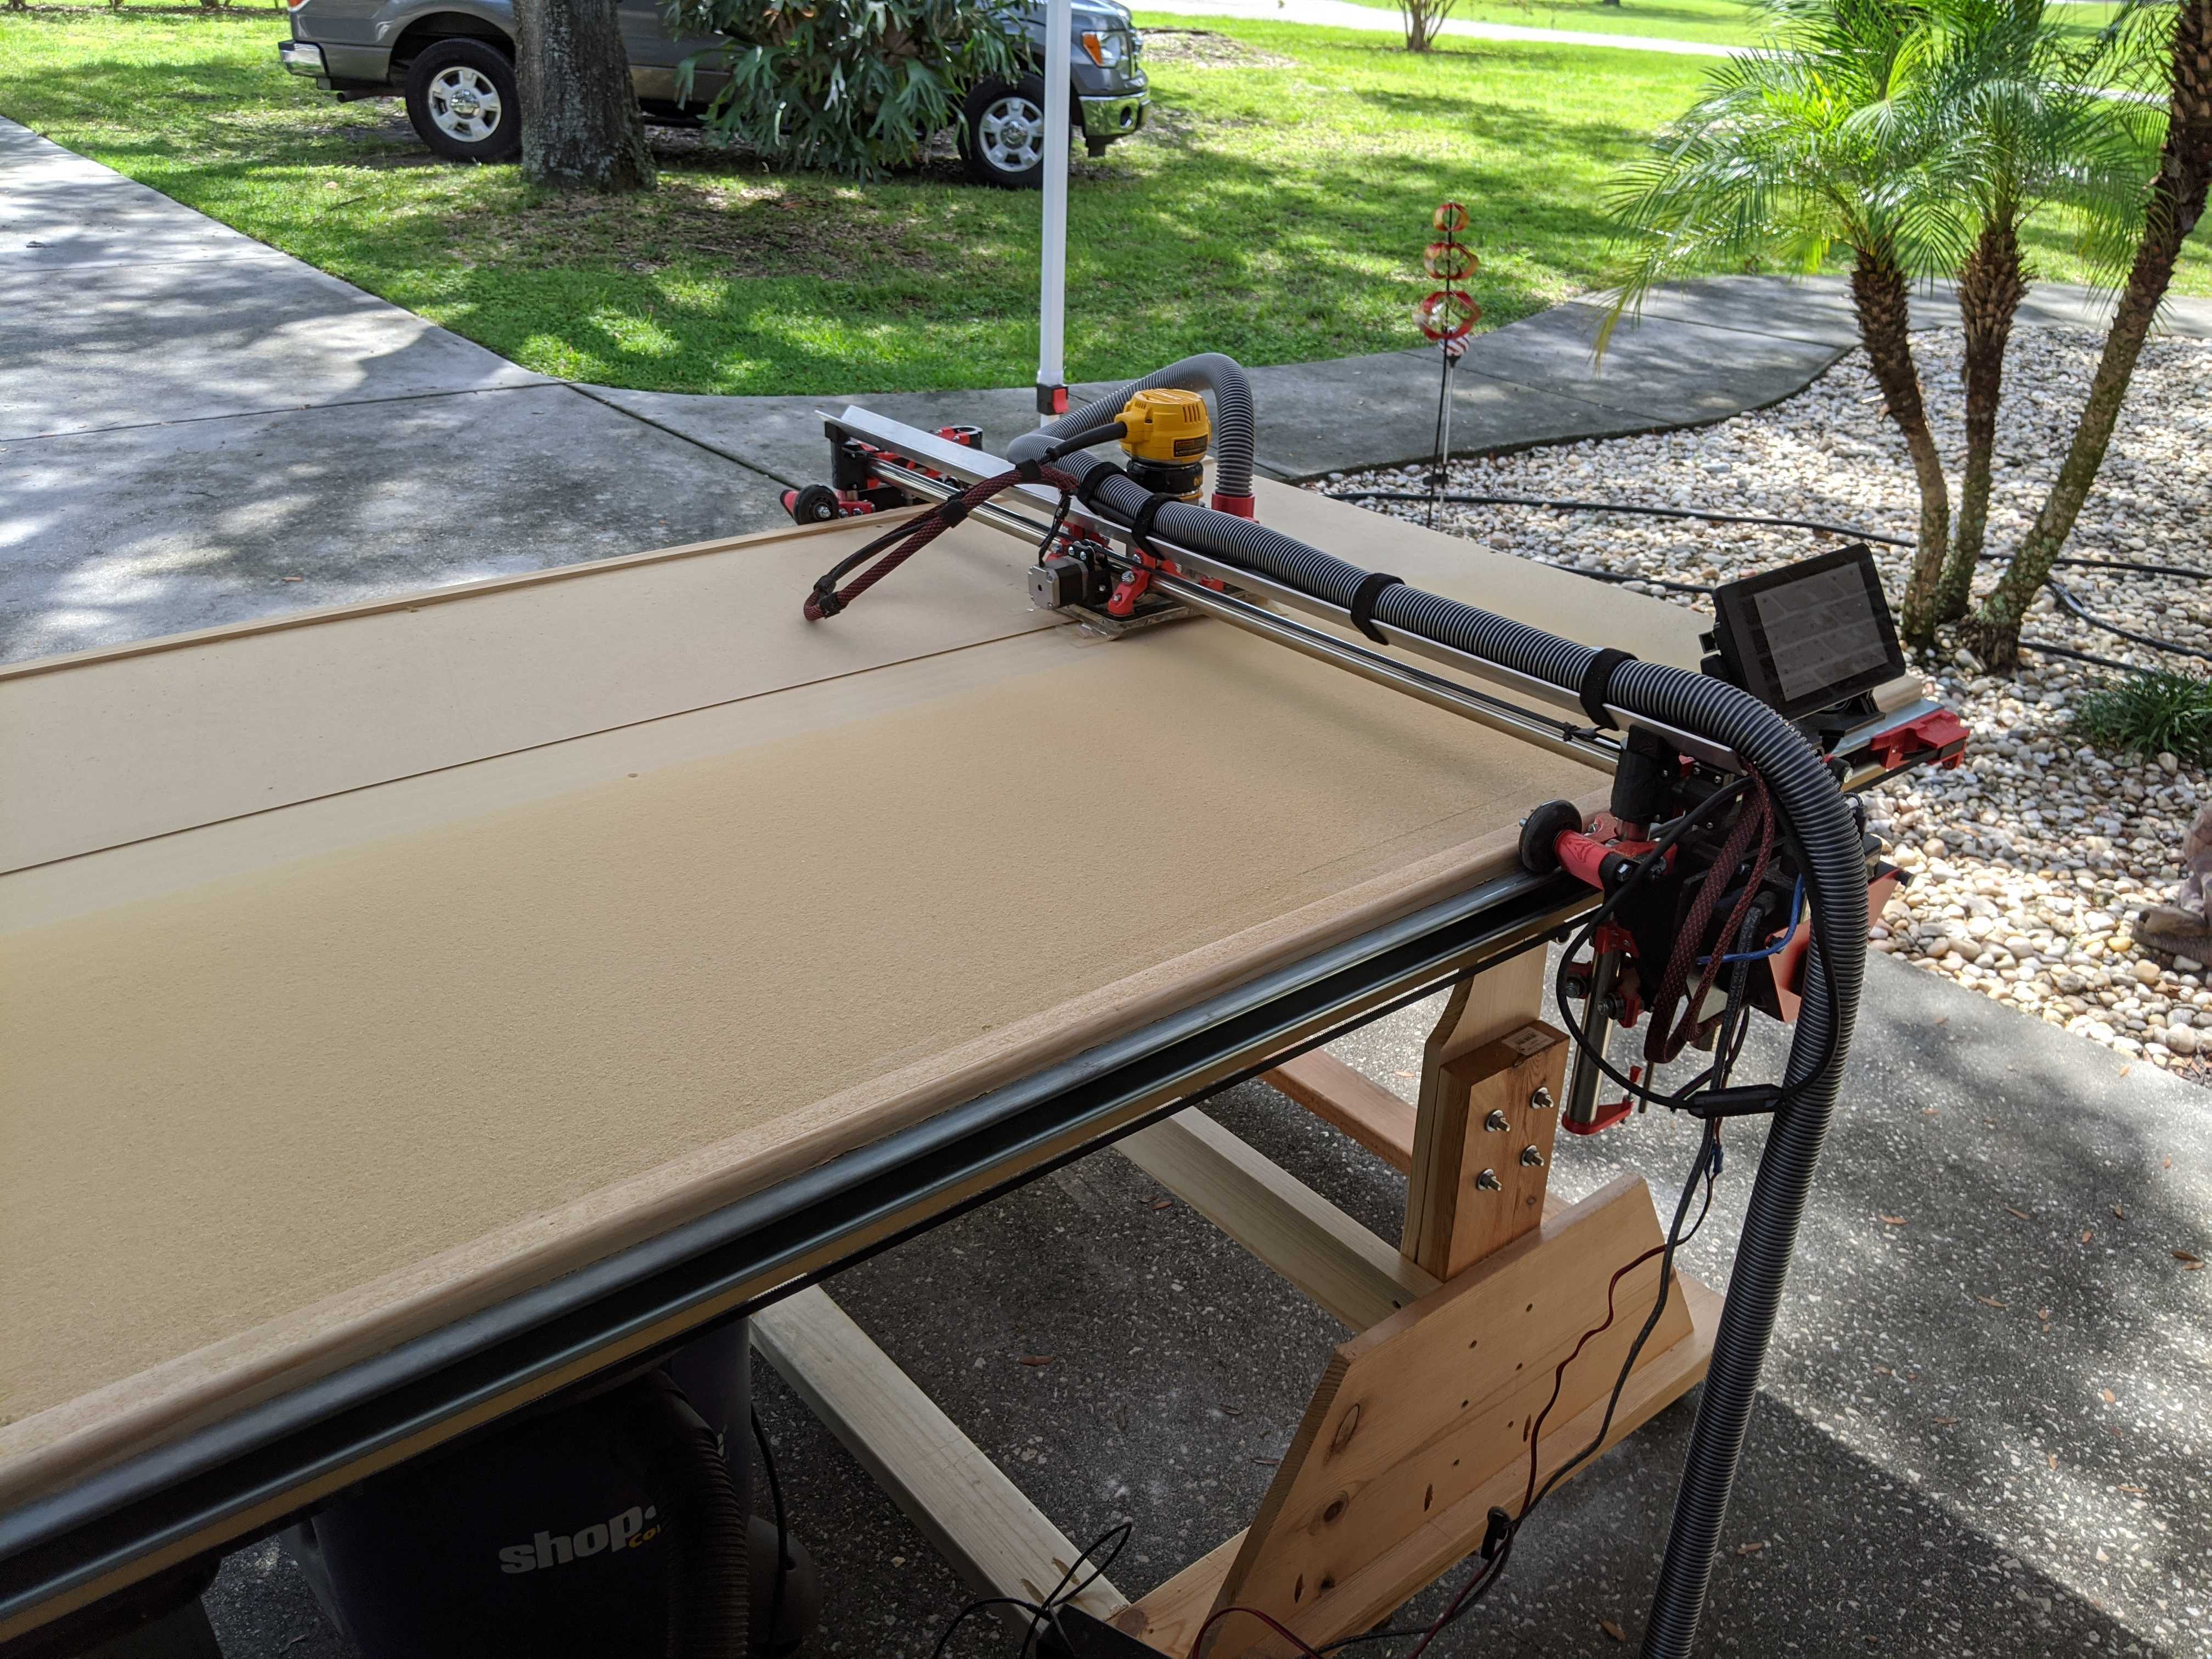
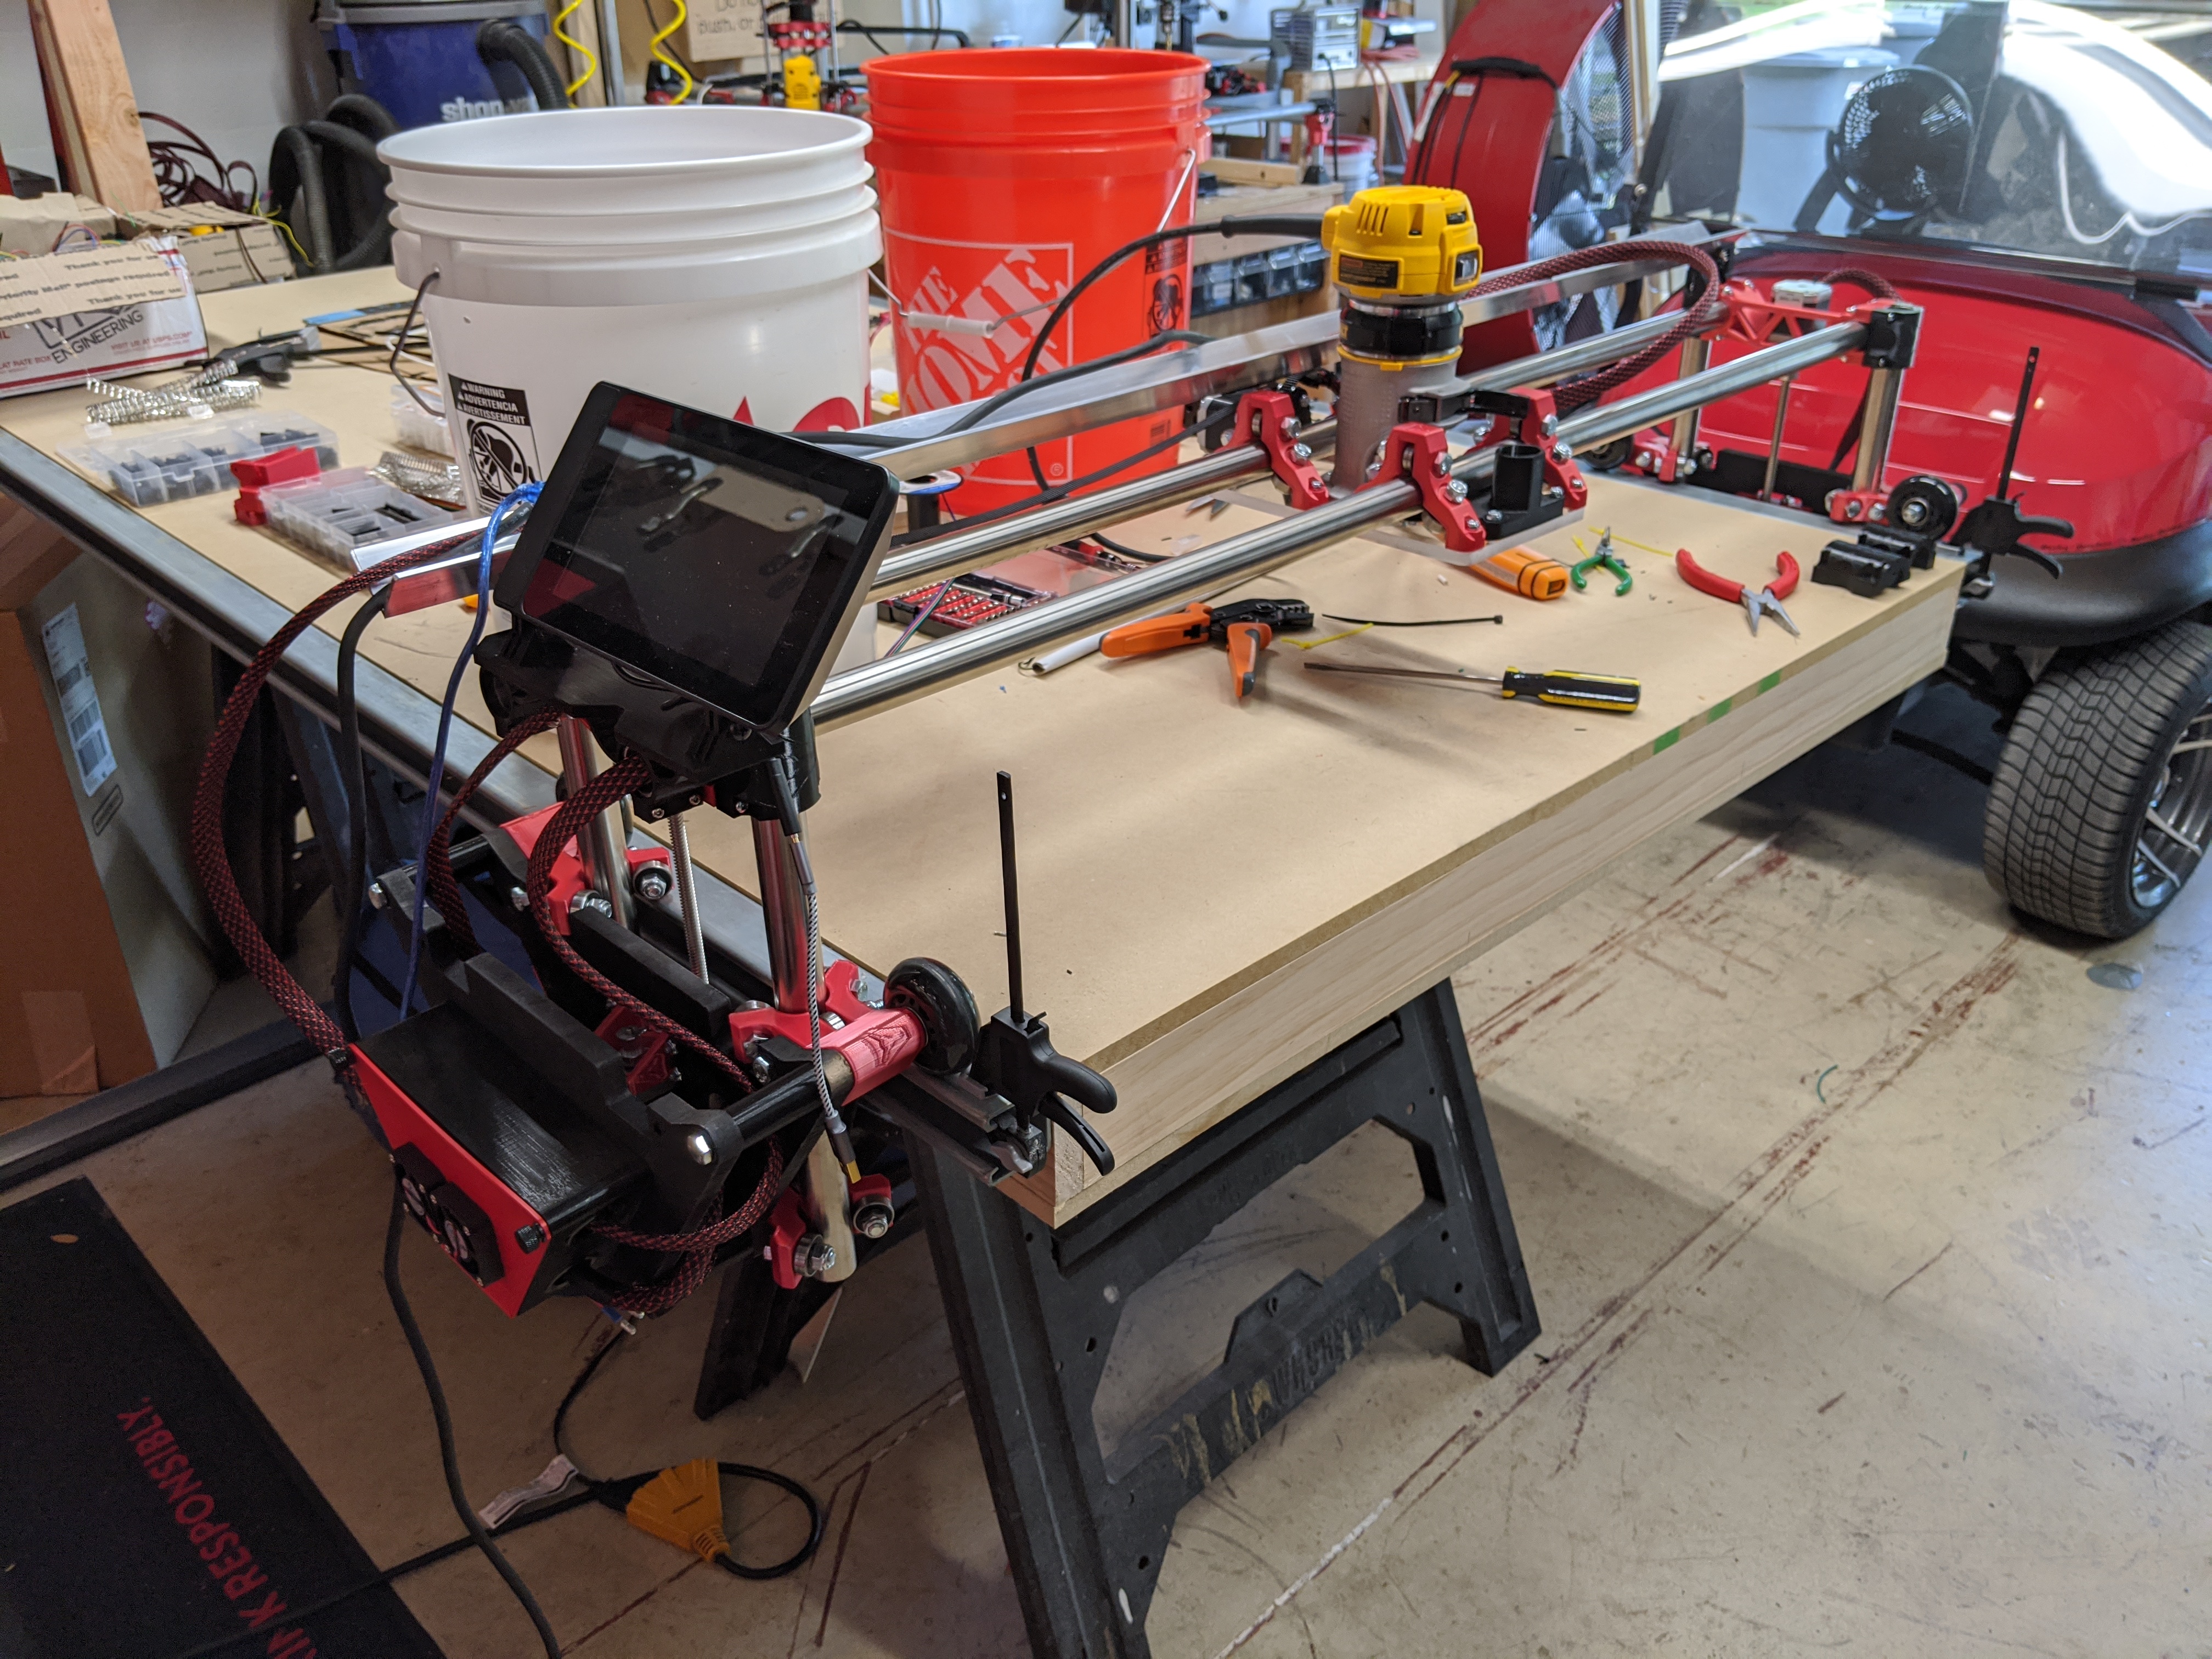
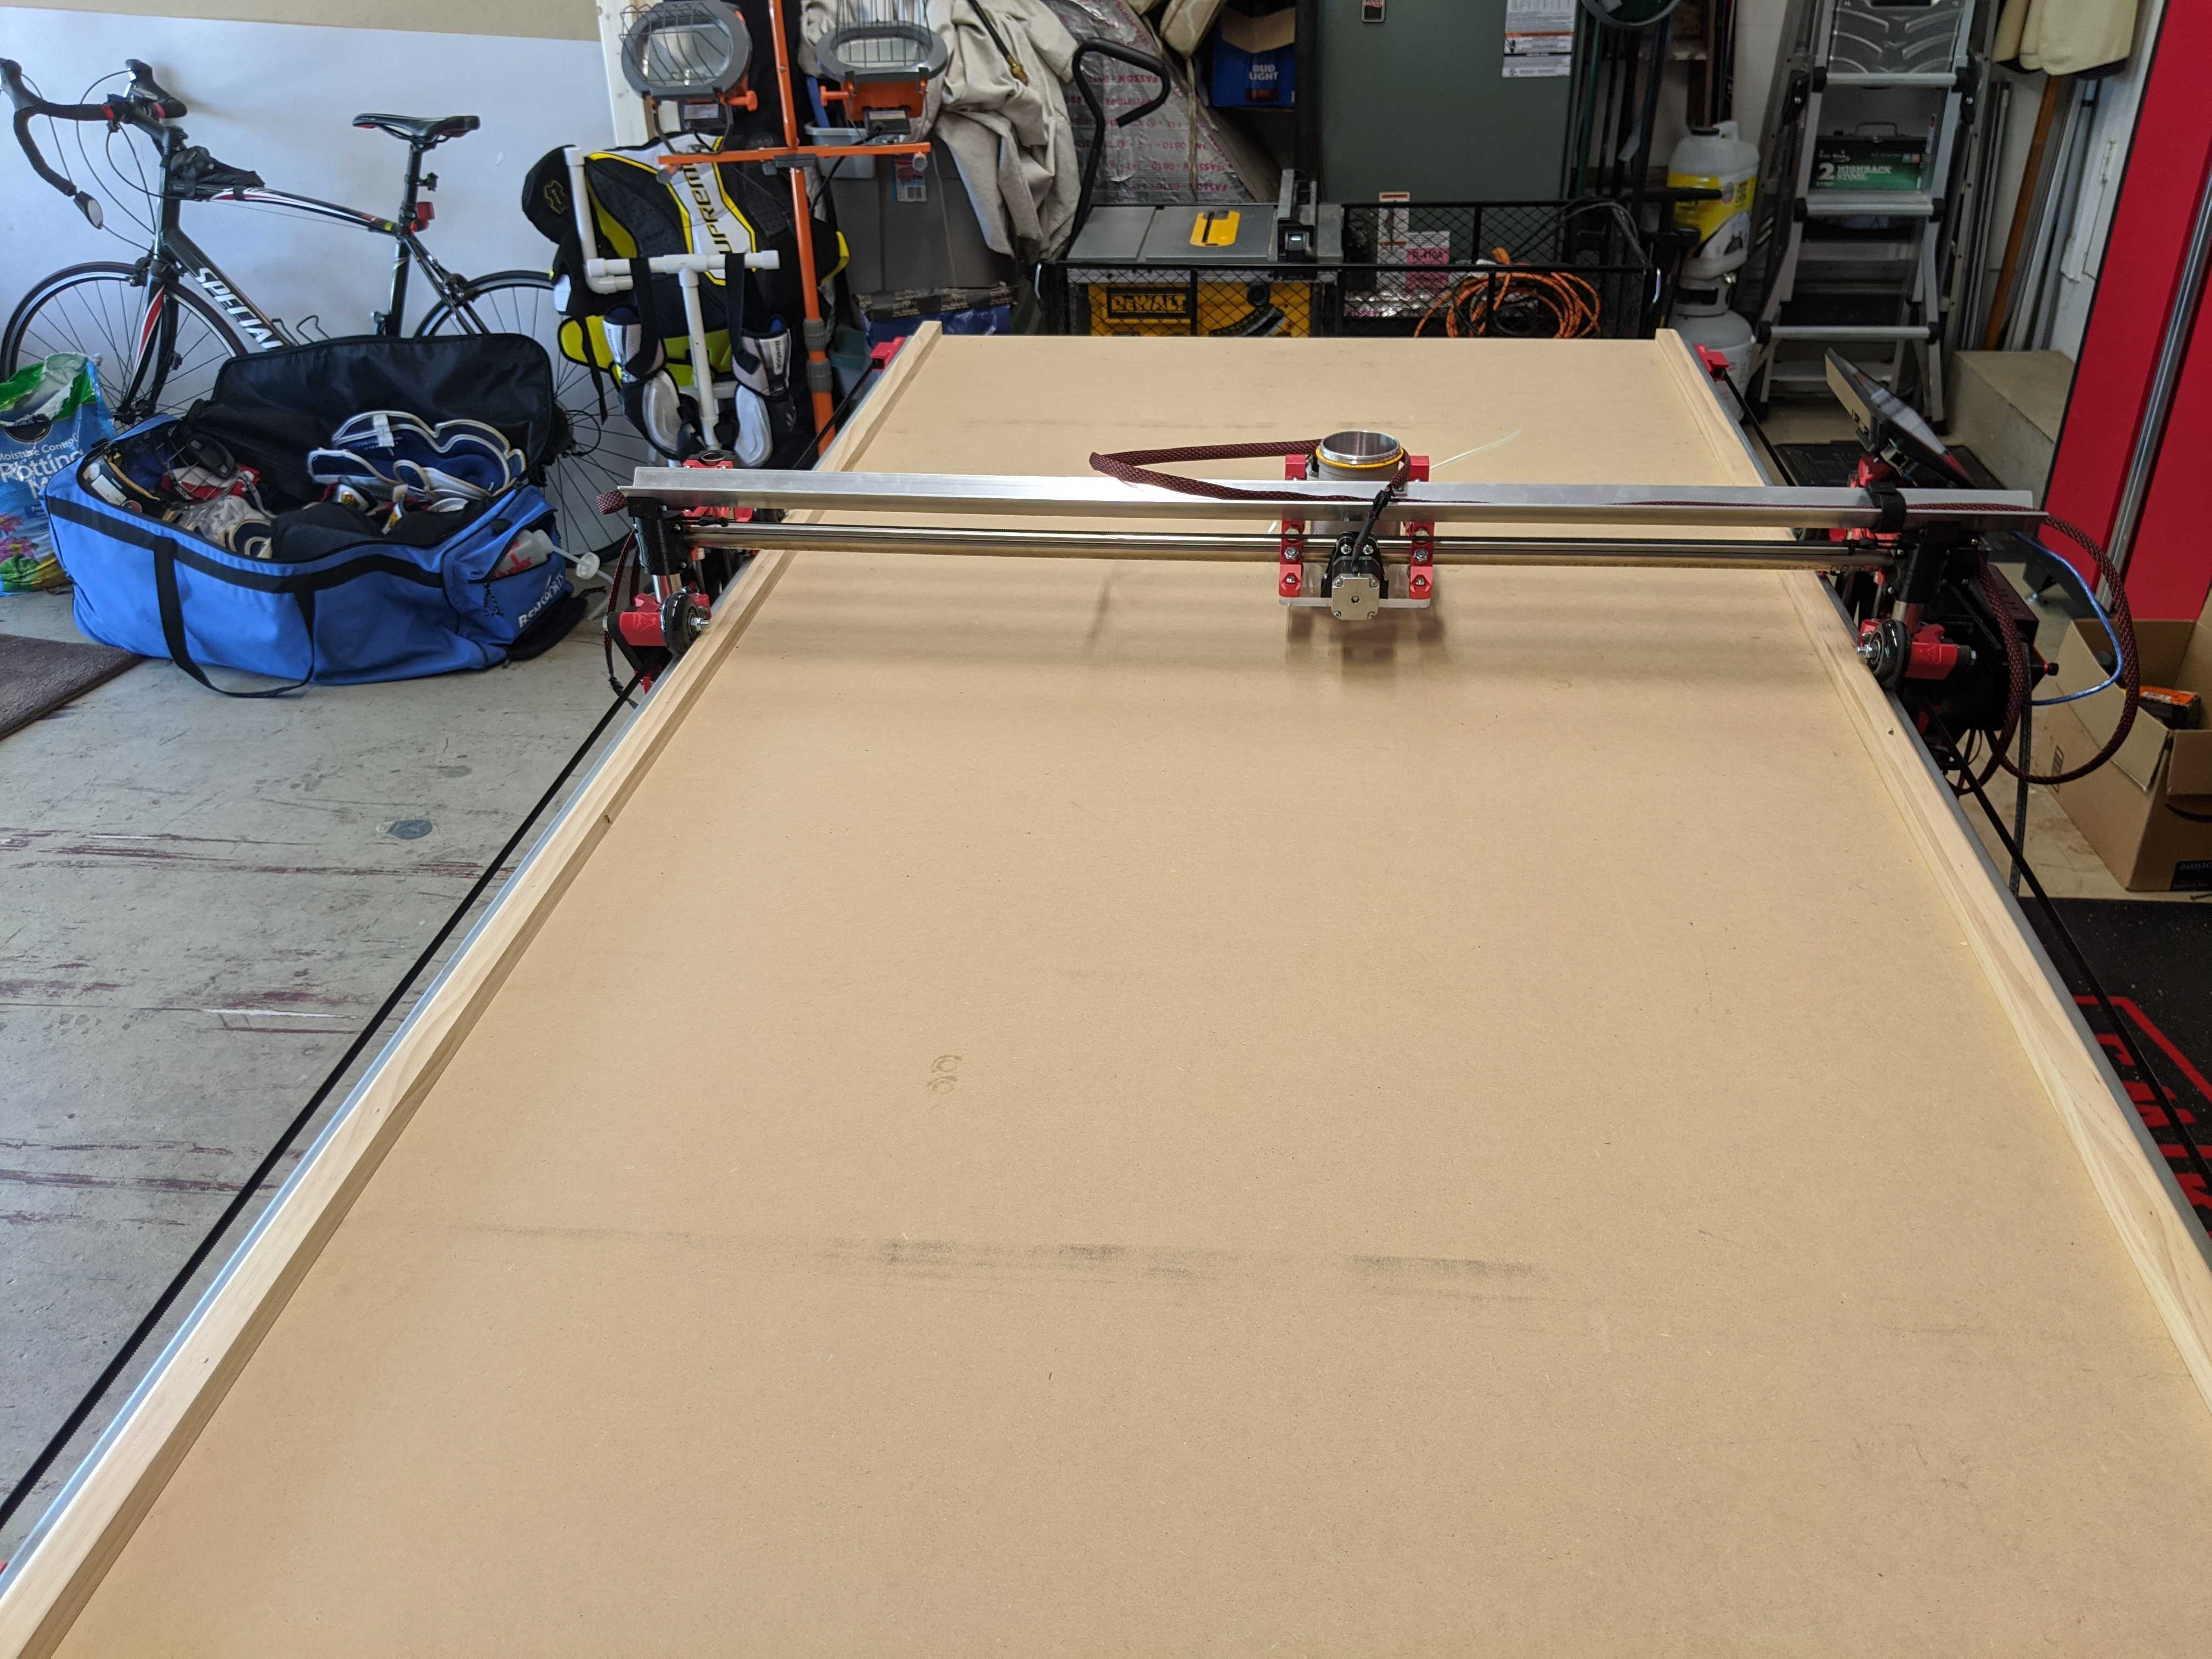
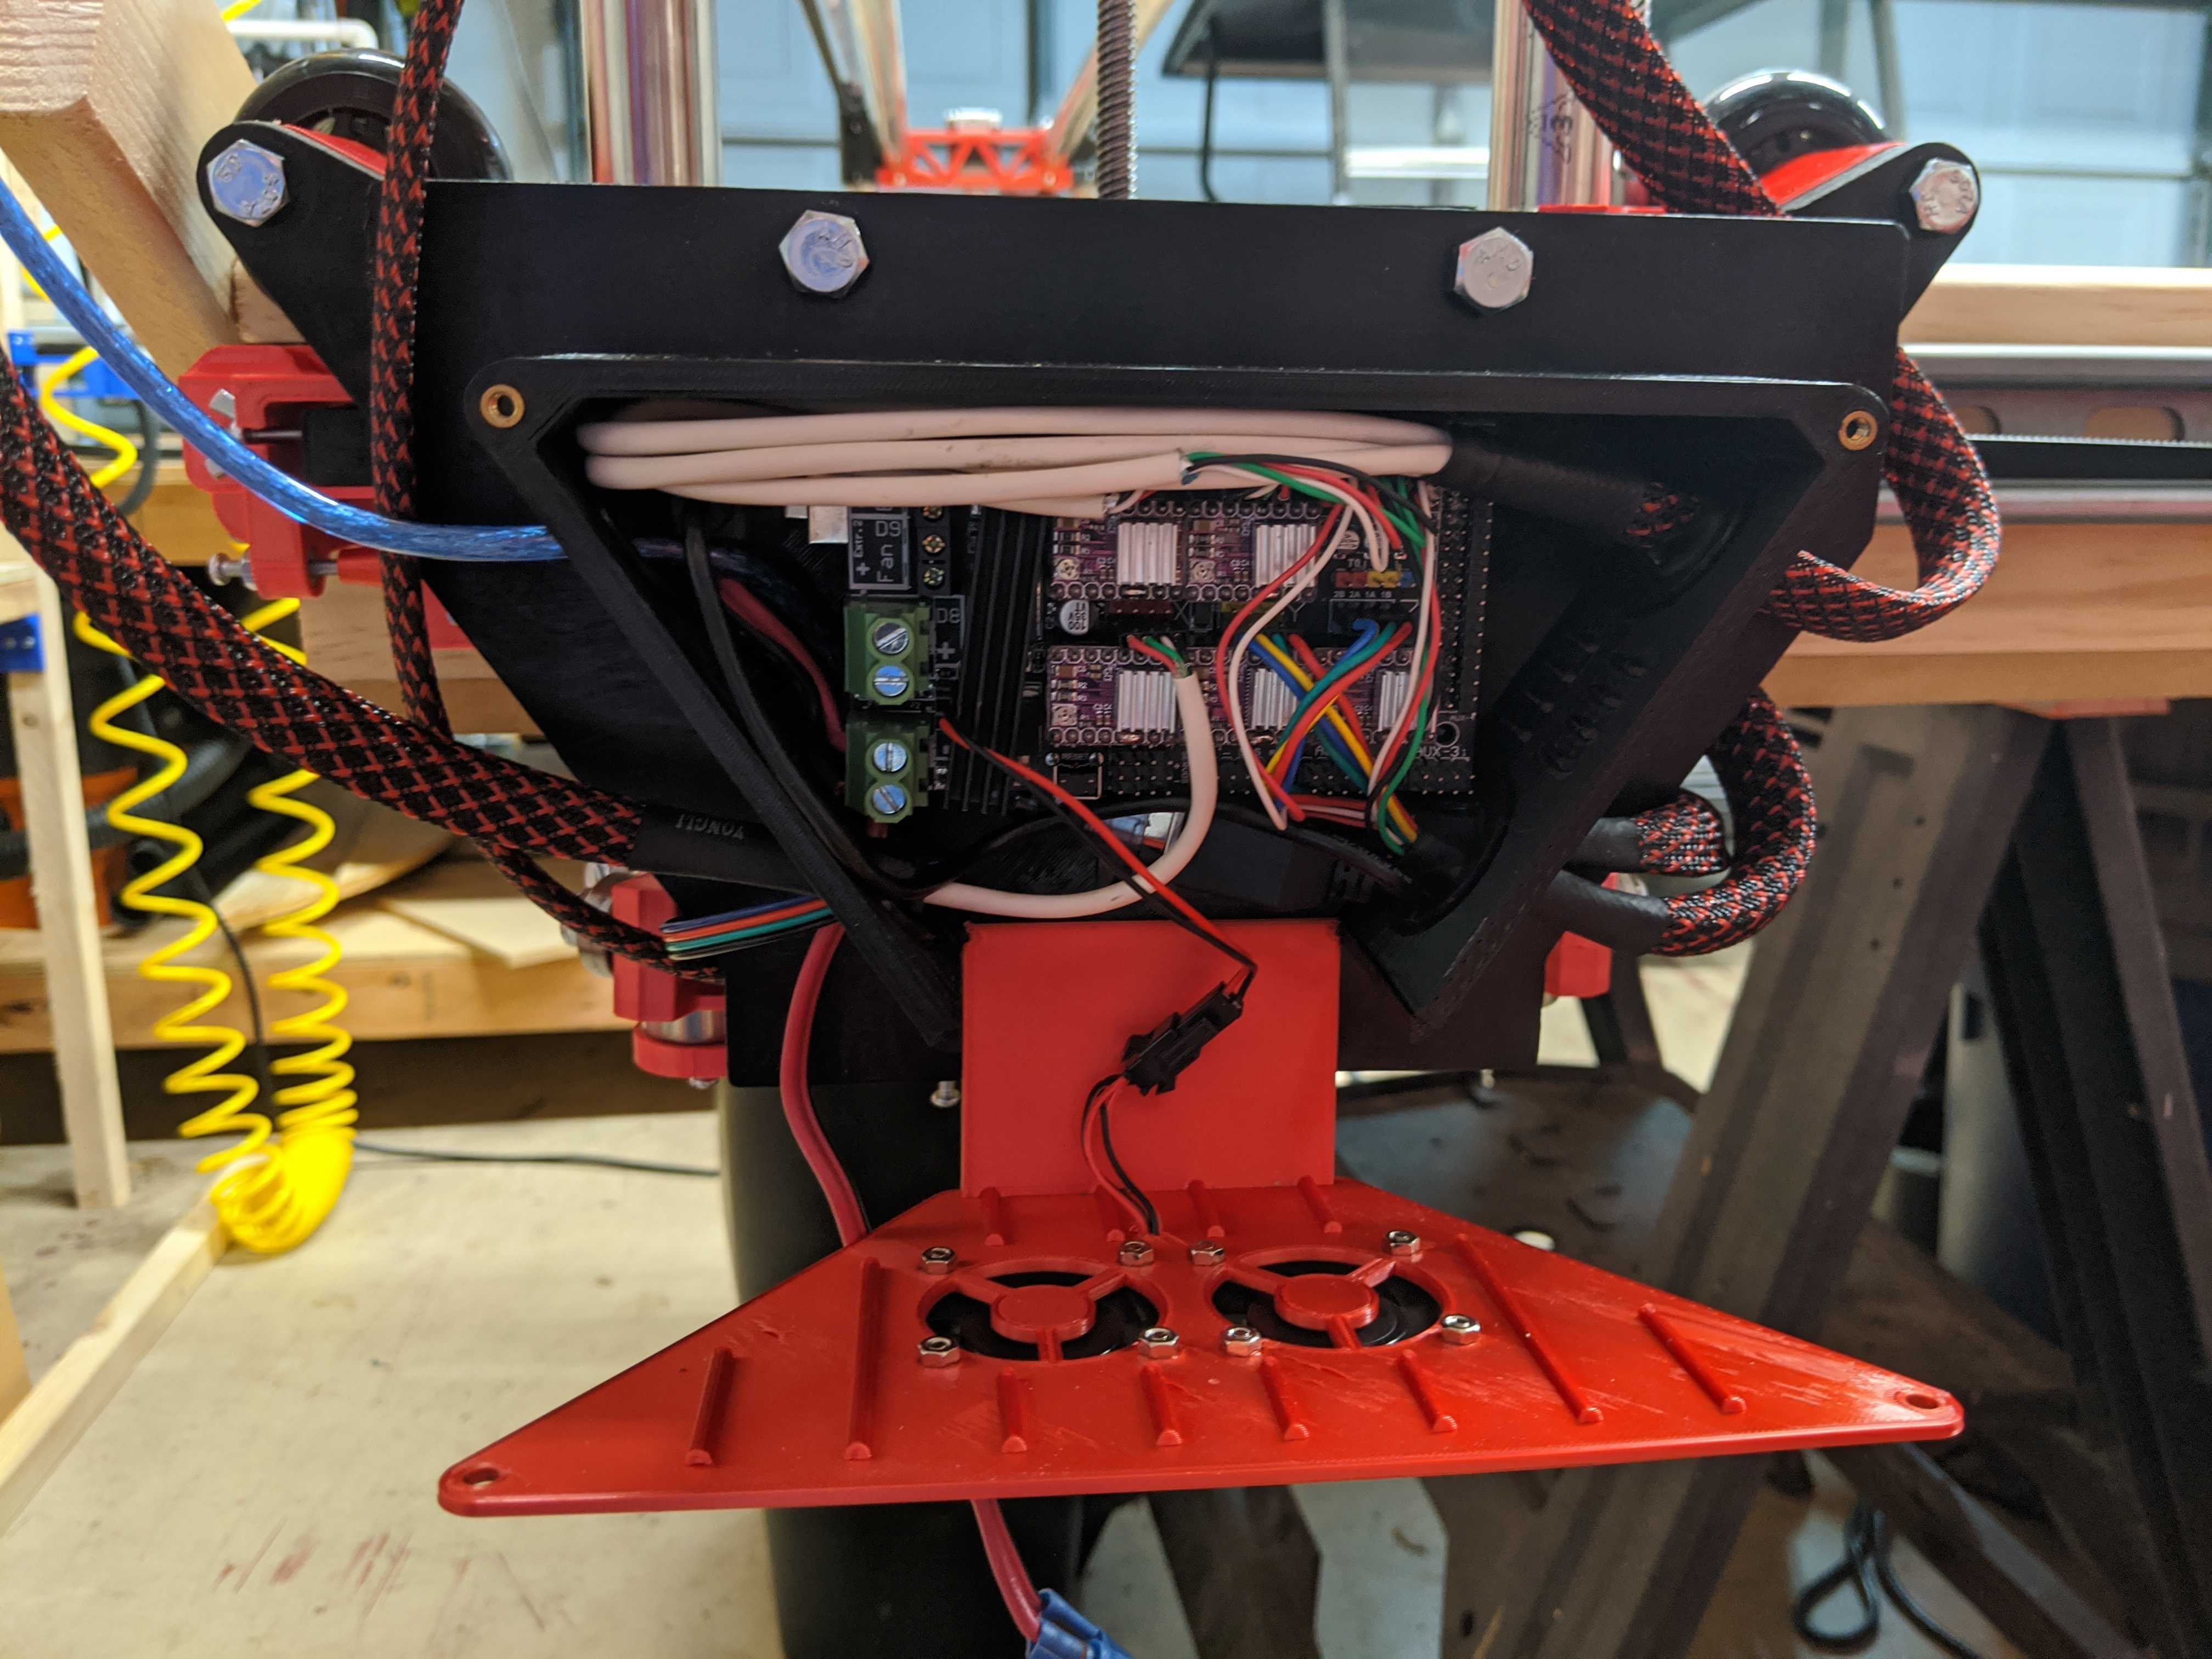
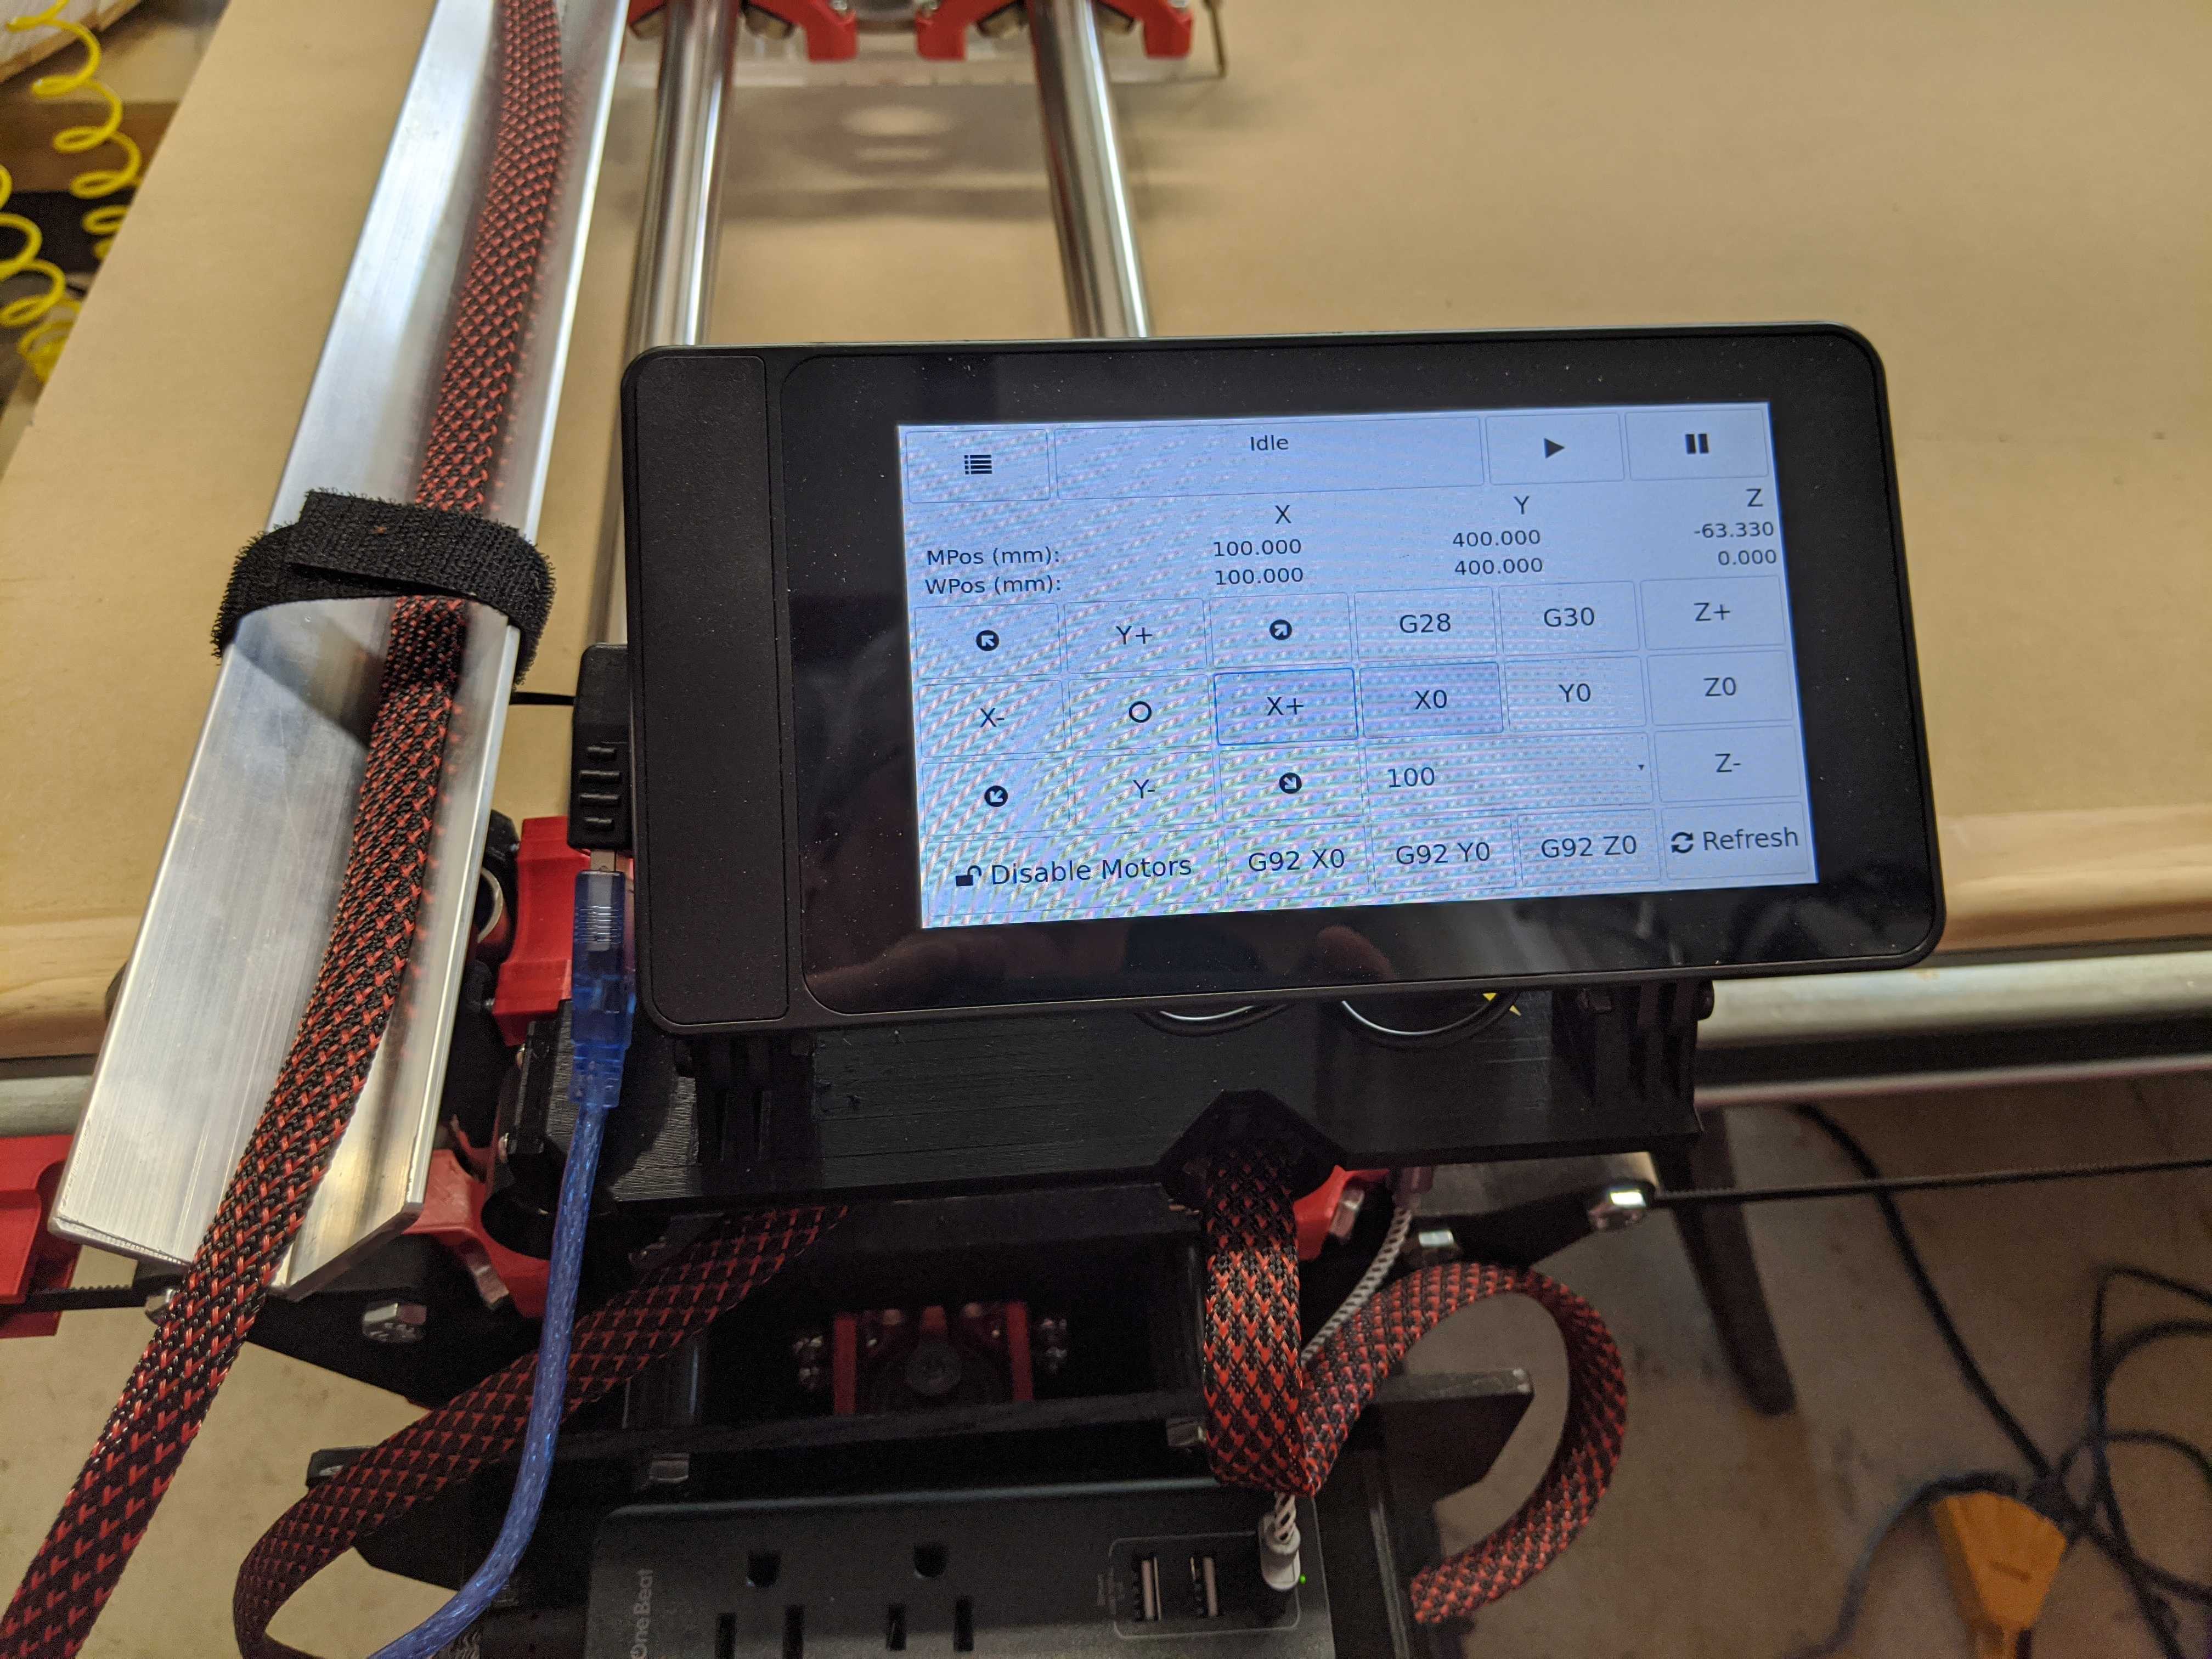
So, this is my new LR2 with a 6’ x 3’ work surface. It features a 7" touchscreen display run by a Raspberry Pi and cncJS, RAMPS 1.6 control board with DRV8825 drivers, GRBL 5x firmware, custom RAMPS case in the shape of the Y-plates, and limit switches at all motors for auto squaring/auto leveling homing. The table is a torsion box made from 1/2" MDF and 1x3 lumber from the big orange store. I used my MPCNC to make the Y-plates and also the plate to mount the control board on. I also cut a 3/8" acrylic 611 plate on the MPCNC.
Huge shoutouts to @vicious1 for the LR2 design, @johnboiles for his work on the GRBL firmware, jeffeb3 for his posts on here that REALLY helped me along the way, and the V1 community for your participation in this forum.
Larry Wimble
I have the same Ramps 1.6+ board as you with the same DRV8825 drivers (bigtreetech). I was trying to copy Teaching Tech’s (MPCNC Lowrider part 2 - belts, wiring, firmware: Ramps + SKR V1.3, TMC5160 & touch screen - YouTube) video but adding all 5 drivers to the ramps. However, when looking at ramps boards, I assumed they were all the same with bug fixes. I bought the 1.6+… newer version right! well, wrong. Now I am lost in coding like everyone else building a CNC. Anyway, I now have all the motors running in the correct directions but my dual endstops are all over the place. Is there a way i can get a copy of your files to compare with mine? ( I like to get as far as I possible can before asking for help. This also gives me a clear picture of what I have done wrong or what I am missing. As well as giving me a moment to cool it and think rationally. LOL)
Also, I have a Raspberry Pi 3b+ with Pi 7" screen not doing anything… it was for another project that failed (octopi for my prusa). Octopi is way better on my pc. it would be awesome to use that instead of the little reprap display I am currently using. (Though I haven’t looked into this route at all… I have spent all my time trying to get my ramps working before anything.)
Your build is very nice! I see a few items in your pictures that i would like to incorporate into my own machine now. But before I do that, i need to get it working.
Thank you for your help!
Also, you can run a raspberry pi with octoprint with a touch screen. I would start with the octopi image, and then find the touchui plugin. Then look at the touchui docs for how to set up the screen without running a full display manager.
Jeffeb3, you are hard core!
I am working on a LR2 like what Larry Wimble has. Except Larry’s is beautiful!
I have been using YouTube and V1 to obtain a LR2 clone since last october. (https://www.youtube.com/watch?v=w0PzxTOlwRY) “Some Old Guy”, used the dual X setup and made (E1 or Y2) the new Z2. Without him, I wouldn’t have motors running! But the endstops didn’t work right. when homing XY, my machine tries to move vertical in the Z direction. Also, It might be trying to move in the X direction but it kind of jitters instead. If you know who I should read to get me there. please send me the link.
Extra story:
I pretty much killed an old wedge style prusa clone to make the LR2. I have the old style Ramps 1.4 board that I kind of destroyed, in a printing accident. I hate it when printers walks off… literally. So, that board needs lots of TLC in order for it to function. Meaning I bought a new ramps 1.6+ boards from china. Except I didn’t do a lot of research when buying it. It was somehow half the price of an old Reprap ramps like I have.
Currently I have the ramps 1.4 board setup and I am trying to get across the finish line. Then later I was going to make sure the 1.6+ was the main board, as the LCD only works when plugged into a laptop.
When buying main boards, I also got the SKR 1.3 (Teaching Tech Tutorial) as well as a GTR v1.0 because it was so cheap off Aliexpress! But there is hardly any info at all to get these boards working and I want a working LR2!
If looks like many of the LR2 settings are similar on all Marlin type boards. IE motors, direction, endstops, homing, and more. So, I have been trying to take pointers from whatever I can find. But I am not a programmer and I tend to copy paste code and see what it does, then backtrack and try again. I have a hard time understanding what looks to be basic knowledge on this site.
Thank you for your help!
This can be a rough way to learn. Software can be so mich more complicated and intricate than electronics or mechanical stuff. So for you to sticking with it.
I am asking because I have recently made some configurations for low riders and I chose dualY and dualZ. They are for several boards but not the ramps 1.6+. I don’t have a ramps 1.6+, but if you have a skr and 5 drv8825s, and you dont mind the dual Y dual Z setup, I might have some firmware for you.
The E0 is going to be the second Y motor. The E1 is going to be the second Z.
The skr 1p3 is the skr 1.3 (not pro). The ramps is for the regular ramps 1.4. DualLR is the low rider version. _8825 on the skr is for drv8825 drivers, not tmc anything.
Each of those zips has a full copy of Marlin, and if you’re on windows, you’ll need to compile it with platformio. The skr version also has a firmware.bin file inside if you don’t want to change anything.
I’ve attached my config.h to this post. Things to know:
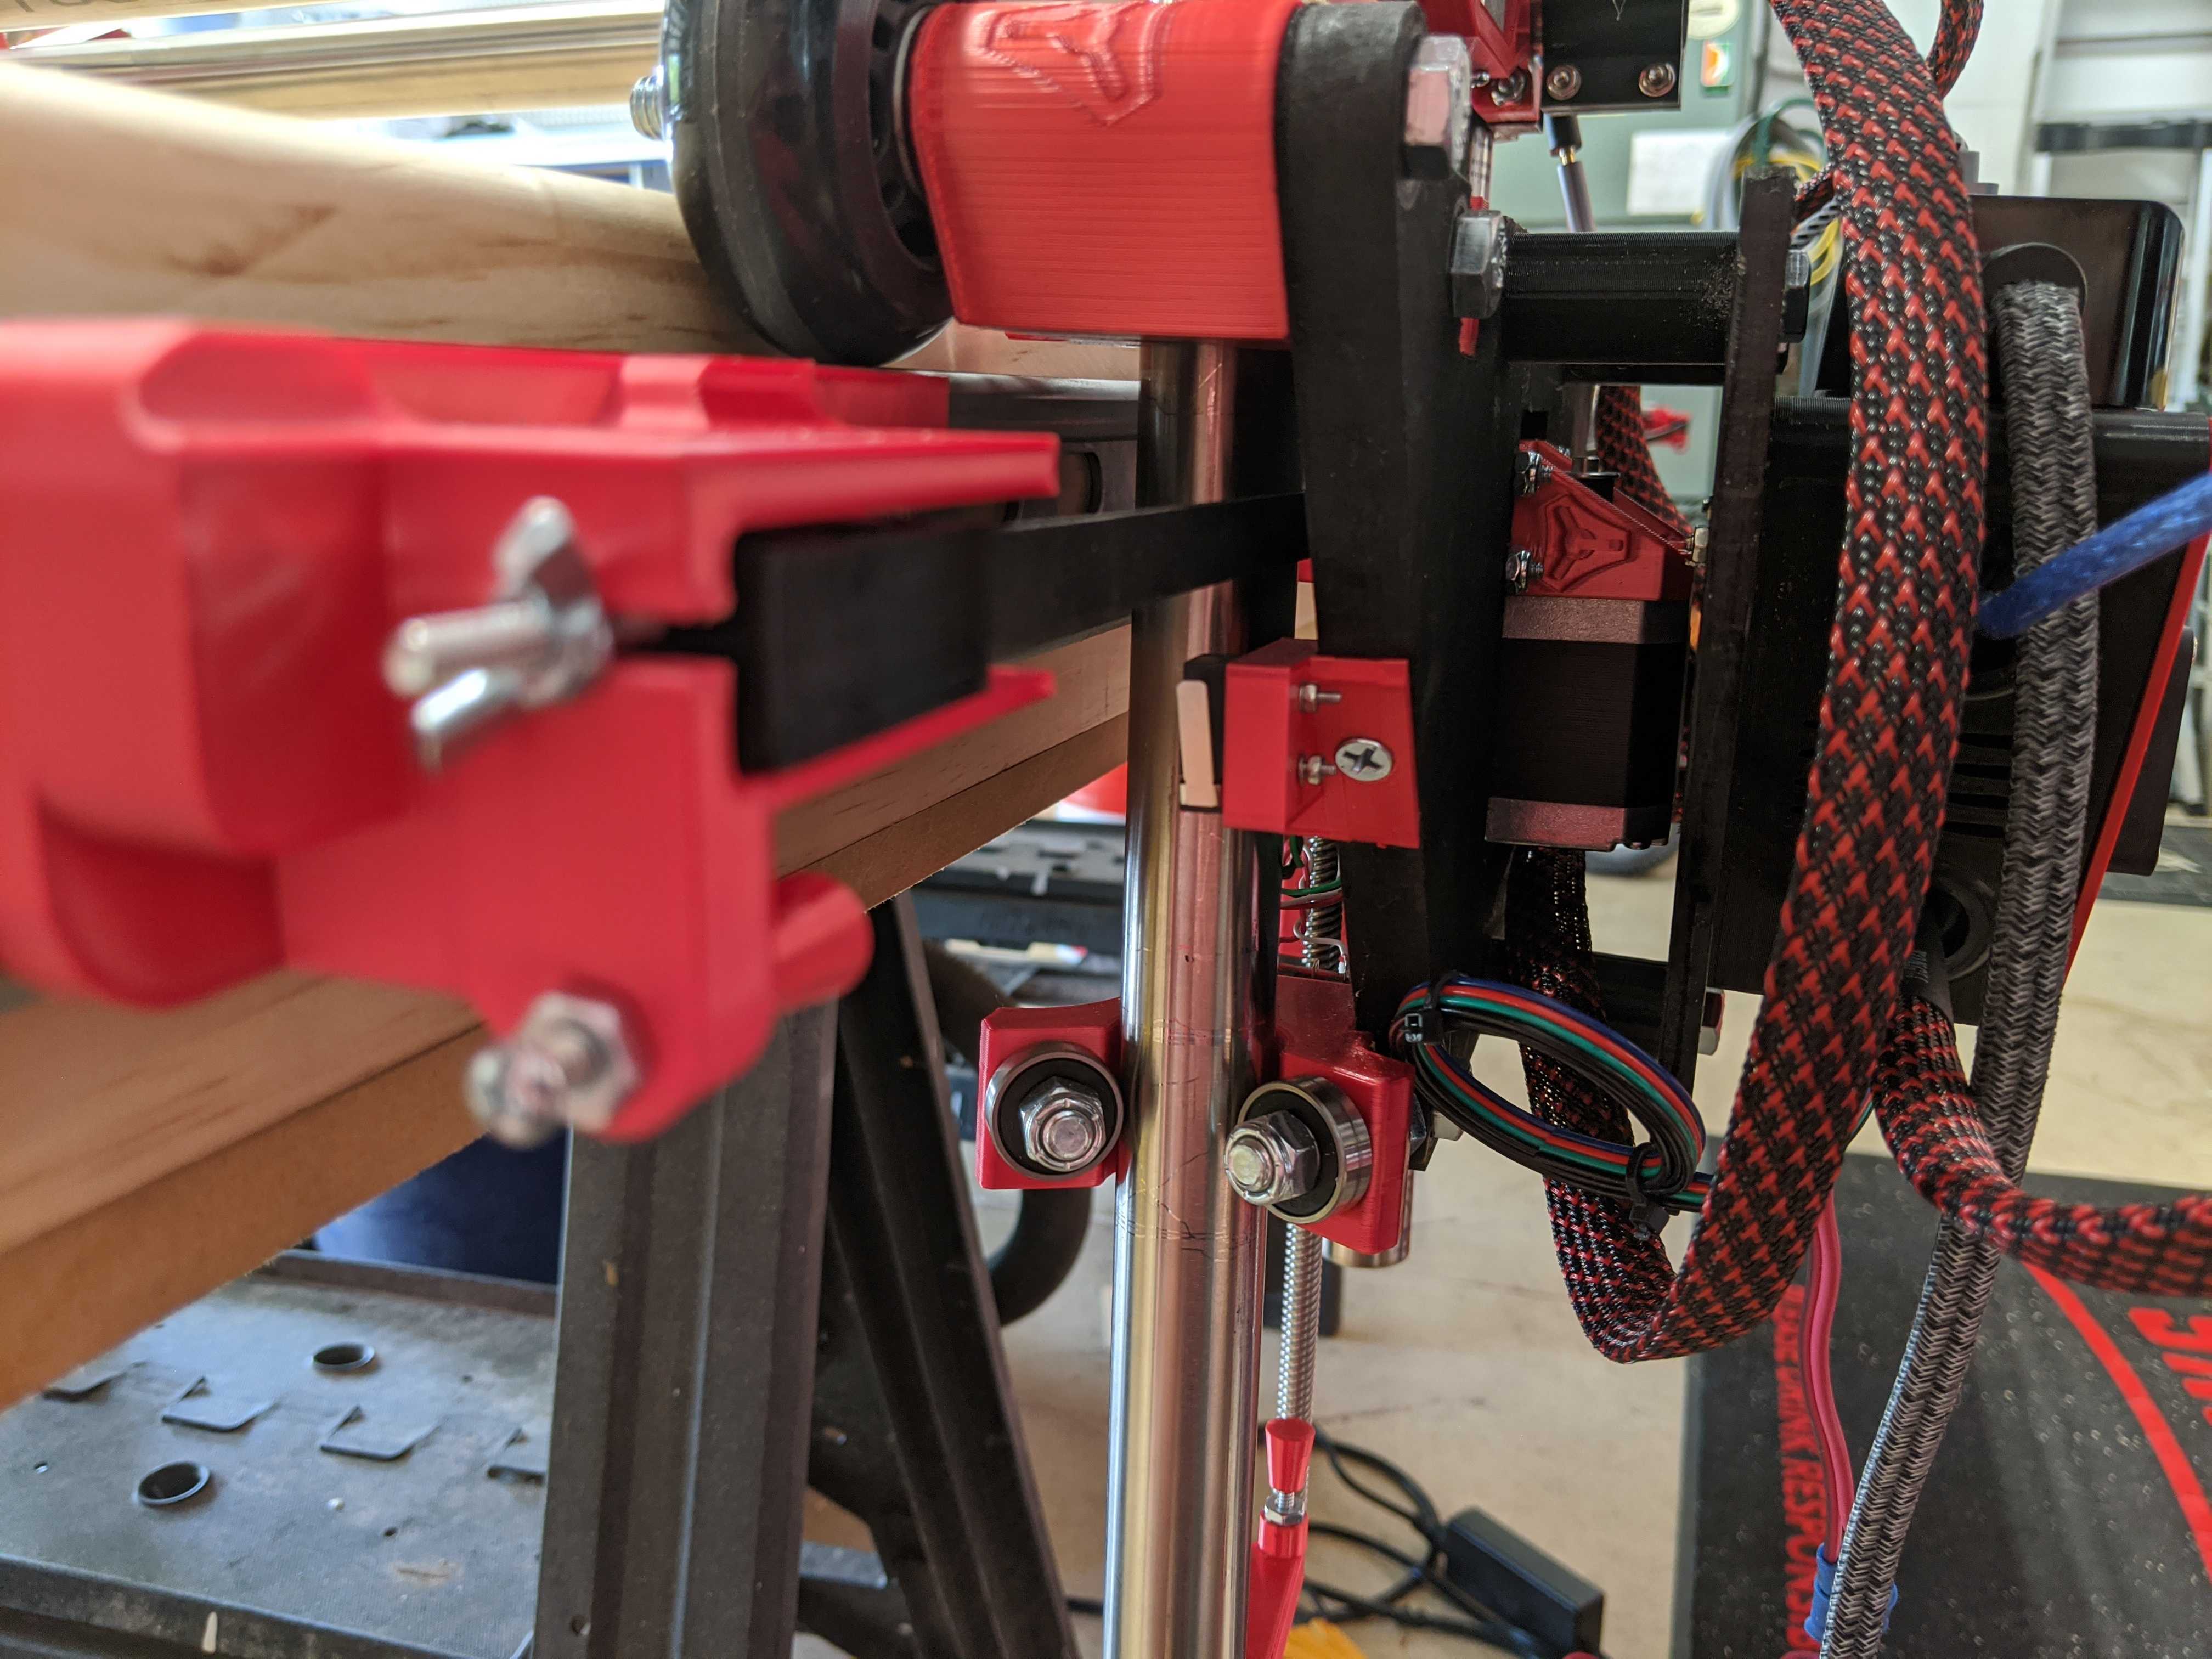
My drivers are in the order of X-Y-Z-Z-X. My long axis is the X axis. Also, all of my limit switches are normally closed.
Challenges I faced with the limit switches: When you have 2 limit switches on an axis, GRBL won’t tell you which one is tripped. It only says “X” or “Y” when you issue the ‘?’ command. You have to figure it out.
Let me know if you have any other questions. I’m happy to help out.
Thank you both so much!!!
It will take me awhile to compare code on Larry’s Config_h. But I really want to understand what is going on.
Jeffeb3, I will try the SKR1p3 2209 and change the drivers to 5160. Again, i was trying to copy Teaching Tech’s stuff and then figure out why it’s doing what its doing. Also, it doesn’t matter which X or Y is the Length or Width of the table. It’s one-two connectors that can be moved with ease. It is way harder to code it!
Super happy about all of this, thank you again!!!
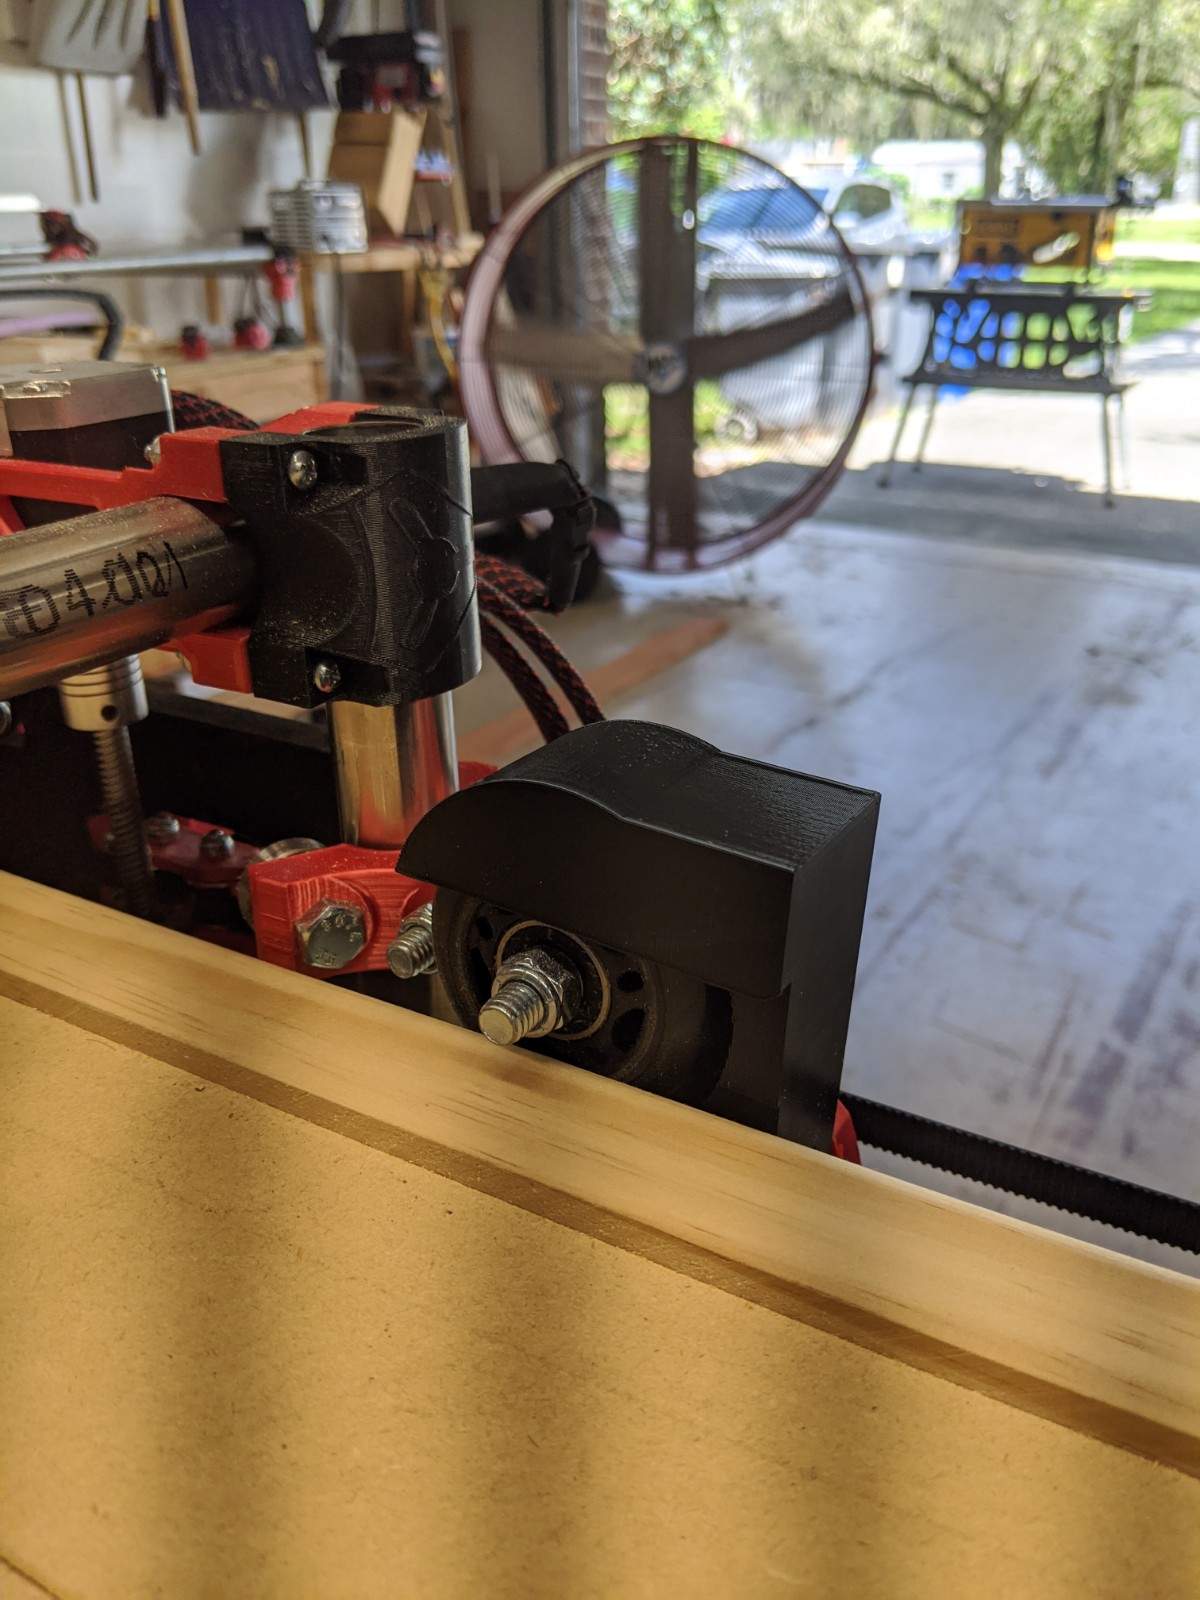
I’m not sure what you mean by attachment, but I can tell you that I screwed them to mounts that I modeled and 3D printed (which I have, alas, lost the files for the Y-plate mounts). As far as the electrical connection goes, I crimped my own using these:
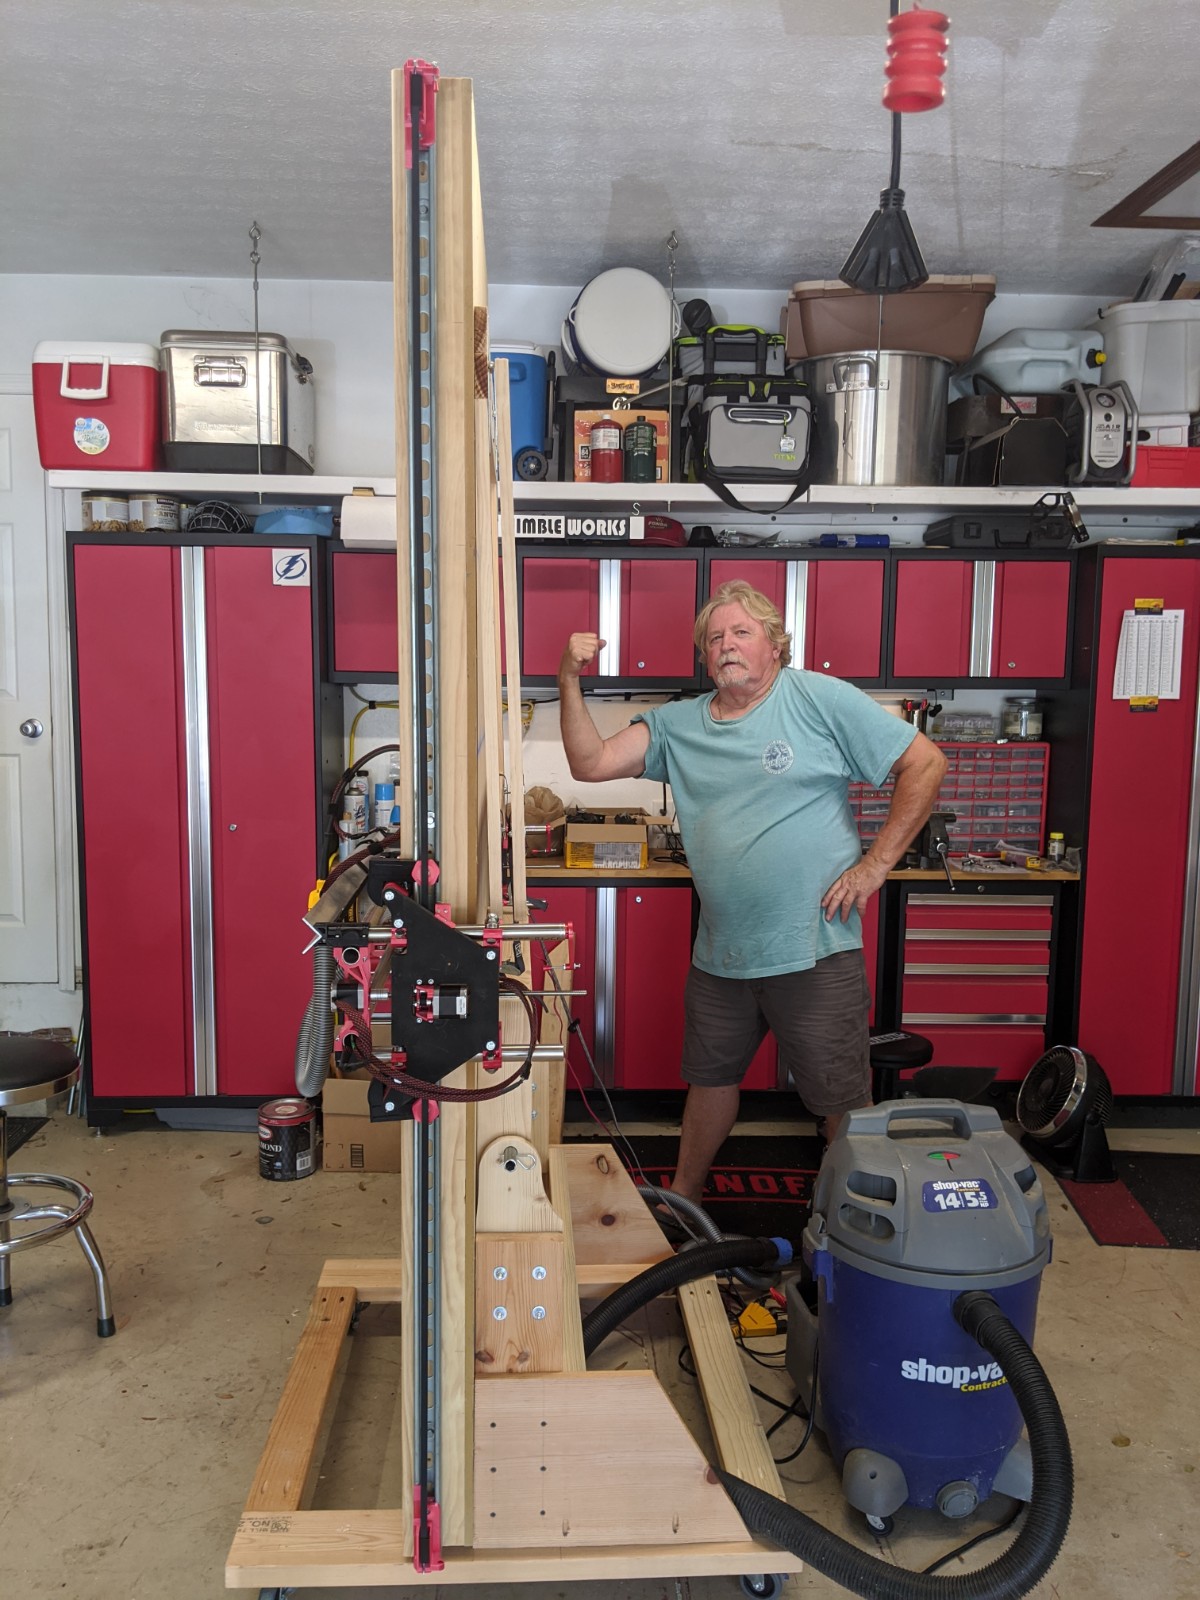
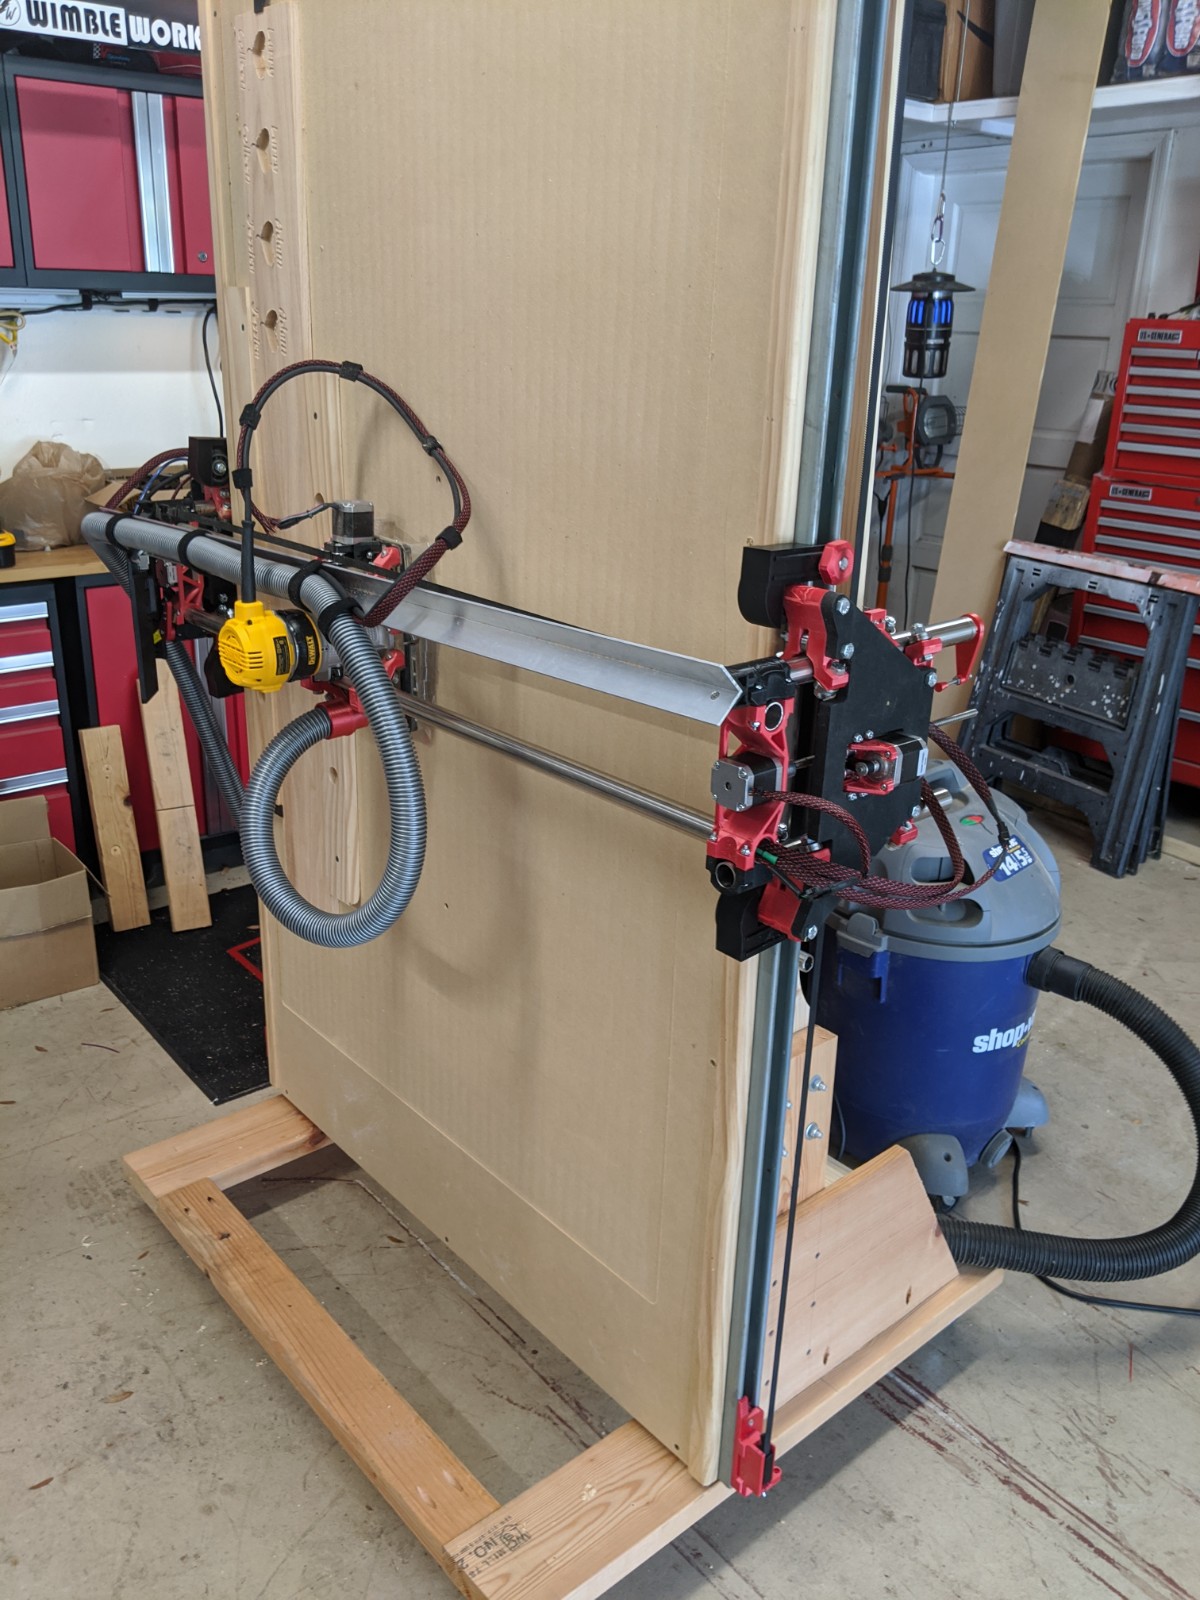
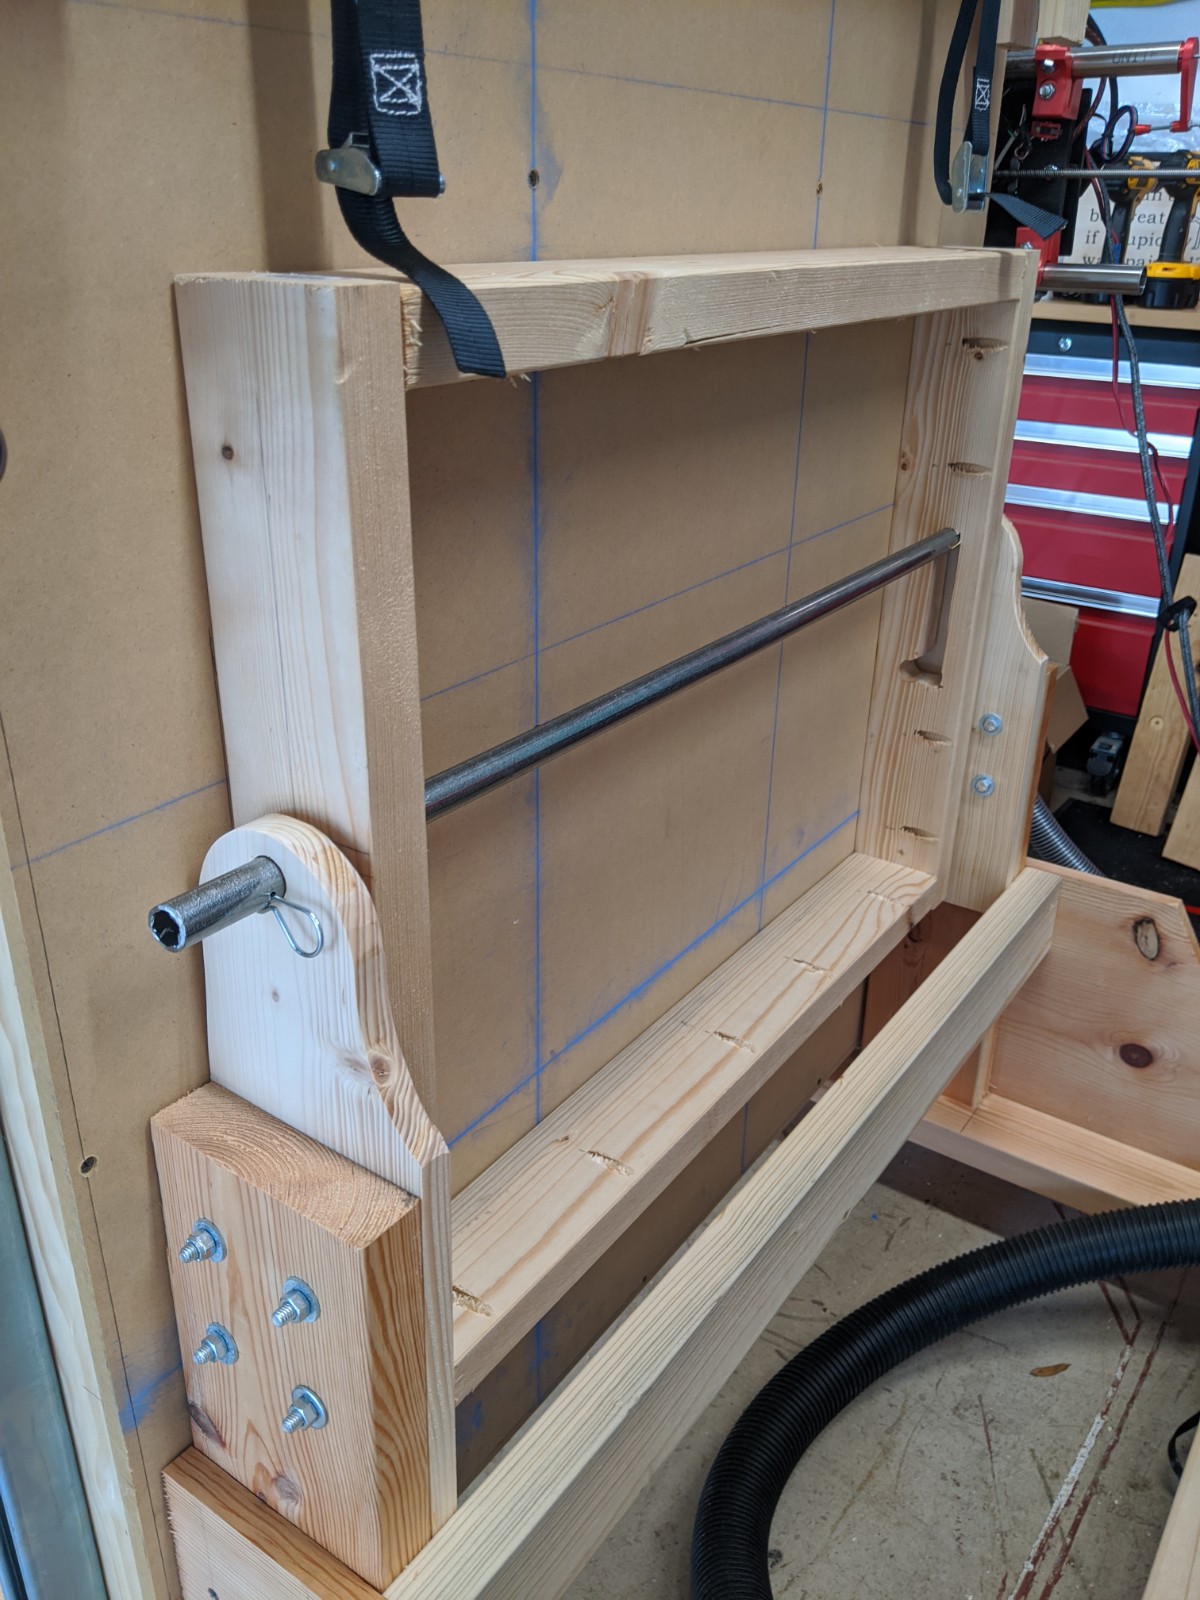
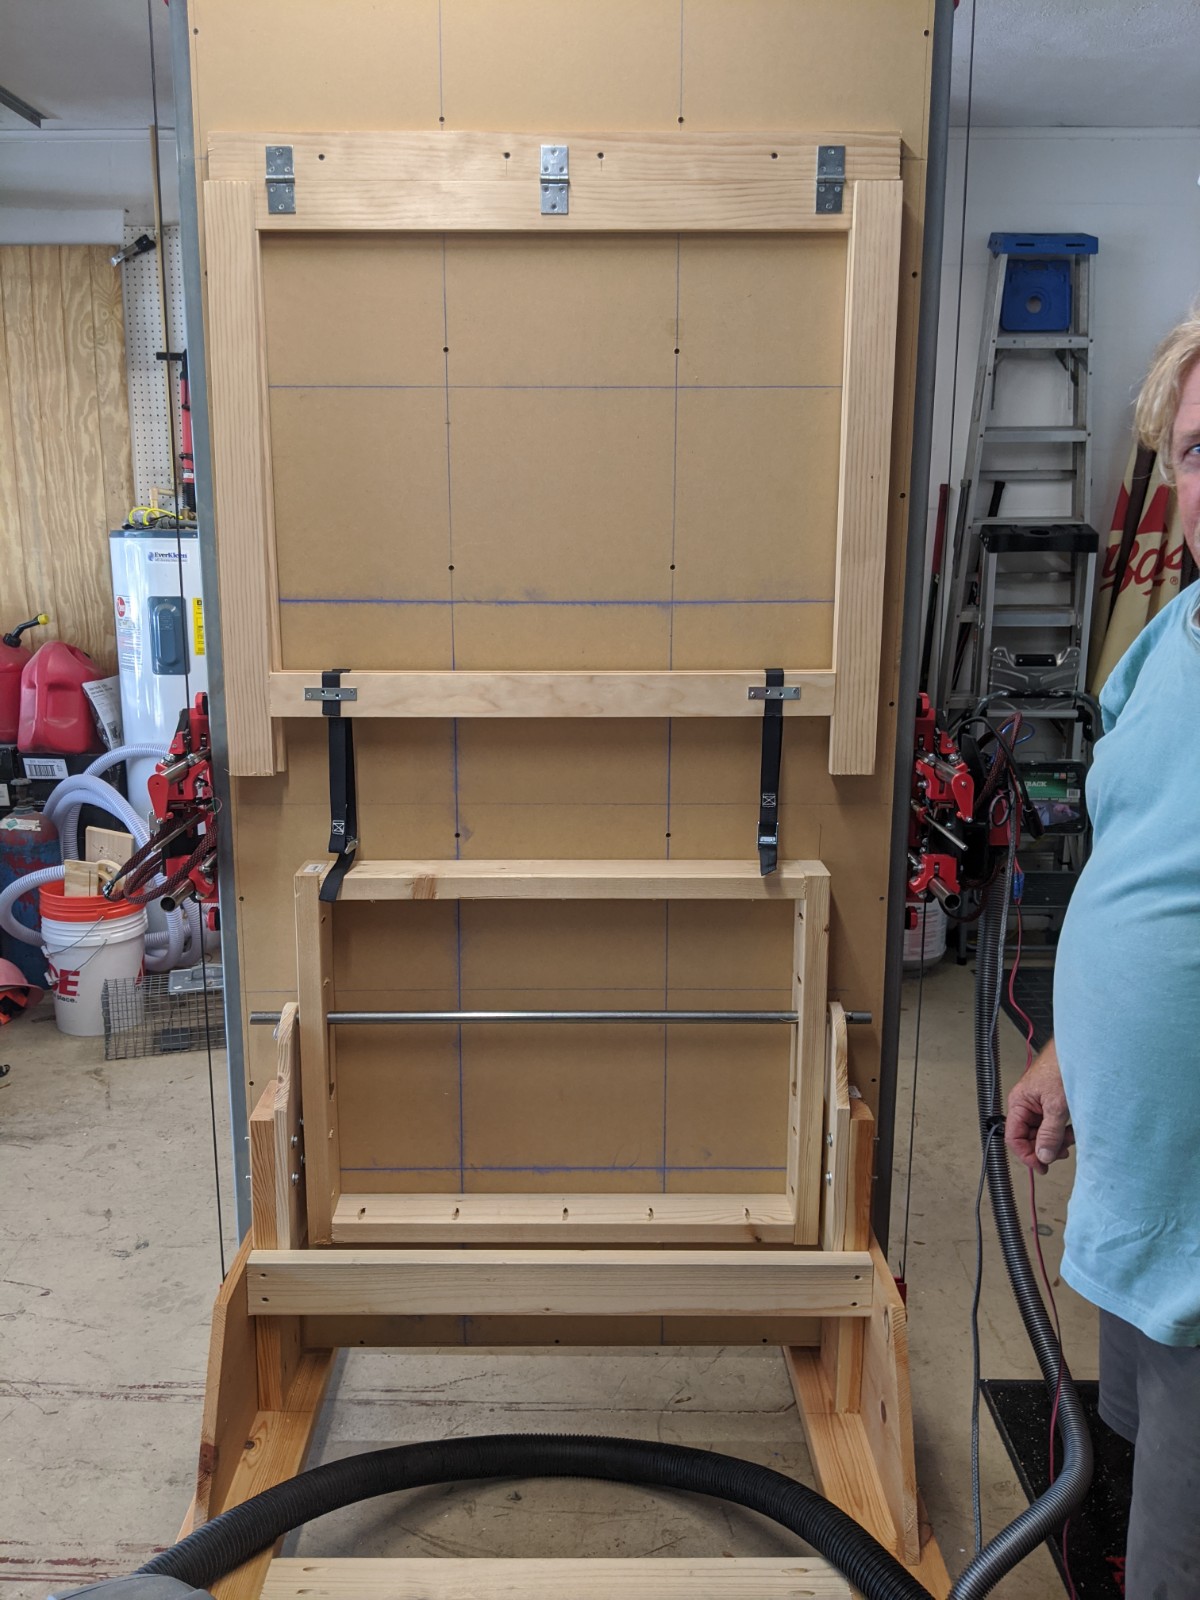
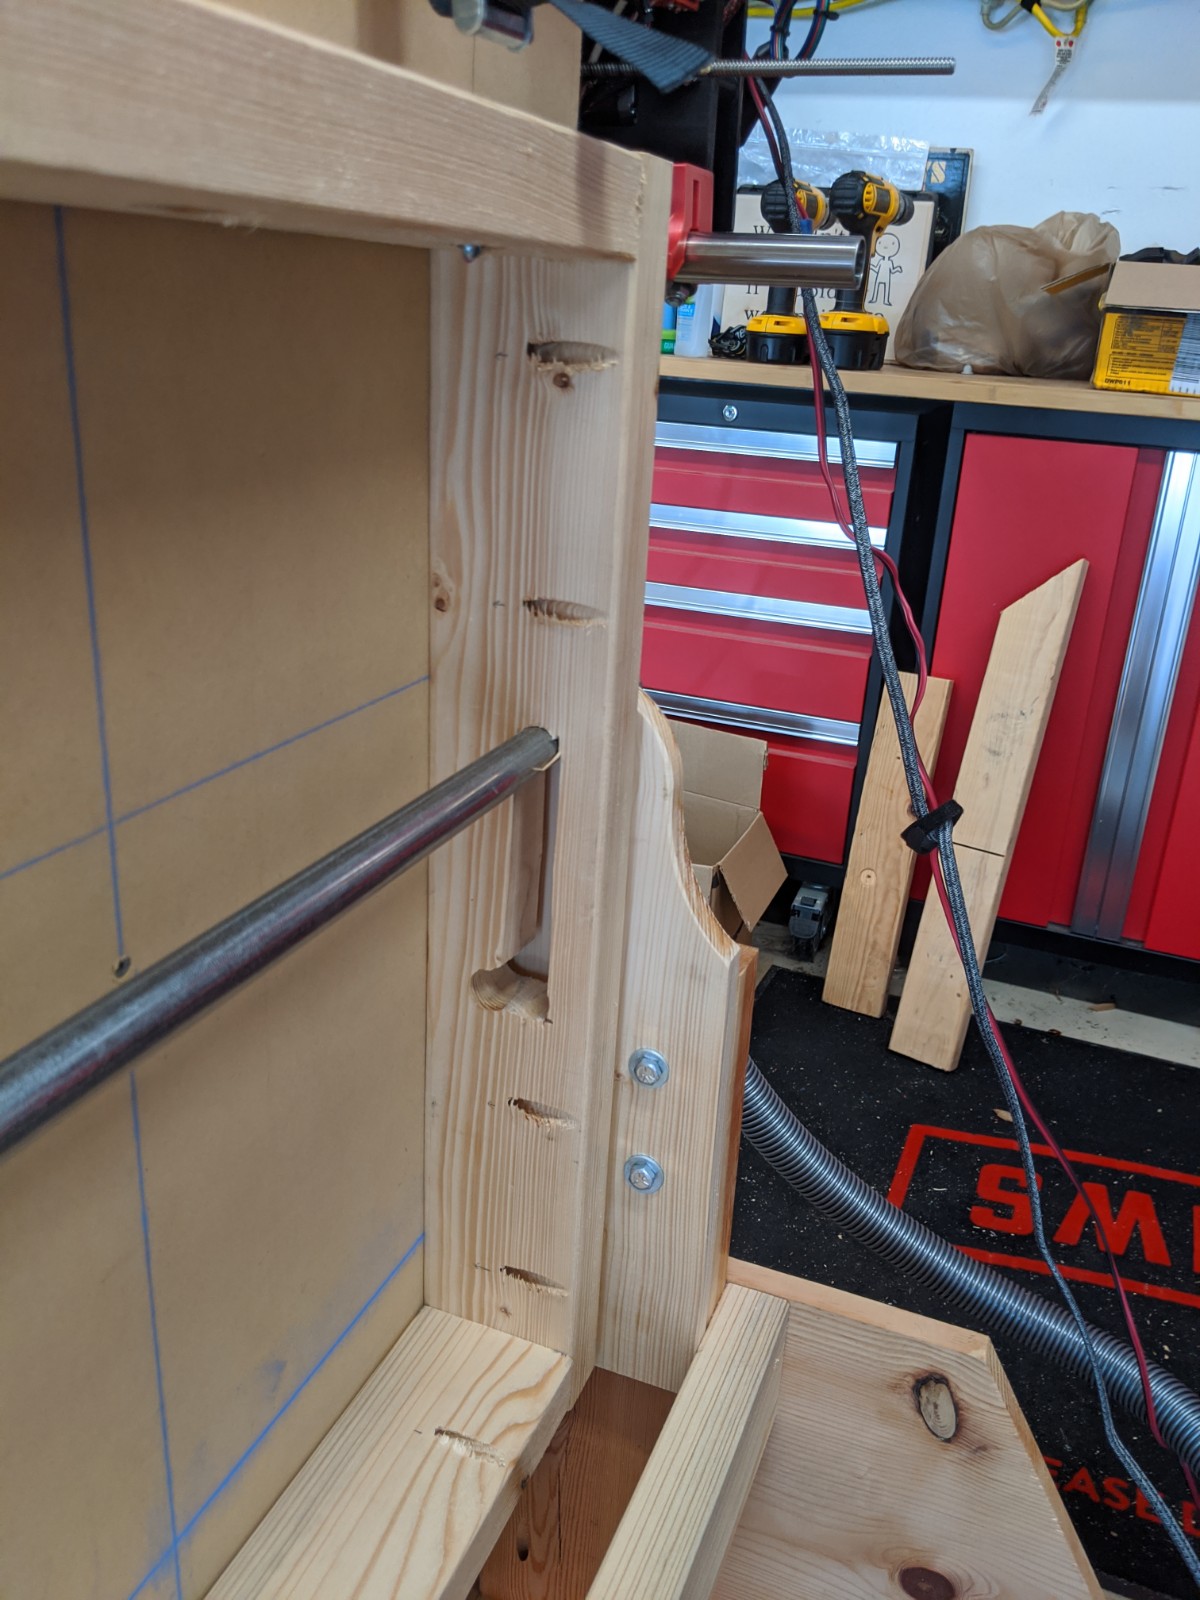
For storage, I made it so that my LR2 can be folded vertically. I designed some wheel clamps that hold the wheels down to the unistrut. I made a “cart” which mounts to the bottom of the table using a piece of 13/16" pipe as the pivot point. For the other end, there’s a saw horse that folds down.

 Anyway, I now have all the motors running in the correct directions but my dual endstops are all over the place. Is there a way i can get a copy of your files to compare with mine? ( I like to get as far as I possible can before asking for help. This also gives me a clear picture of what I have done wrong or what I am missing. As well as giving me a moment to cool it and think rationally. LOL)