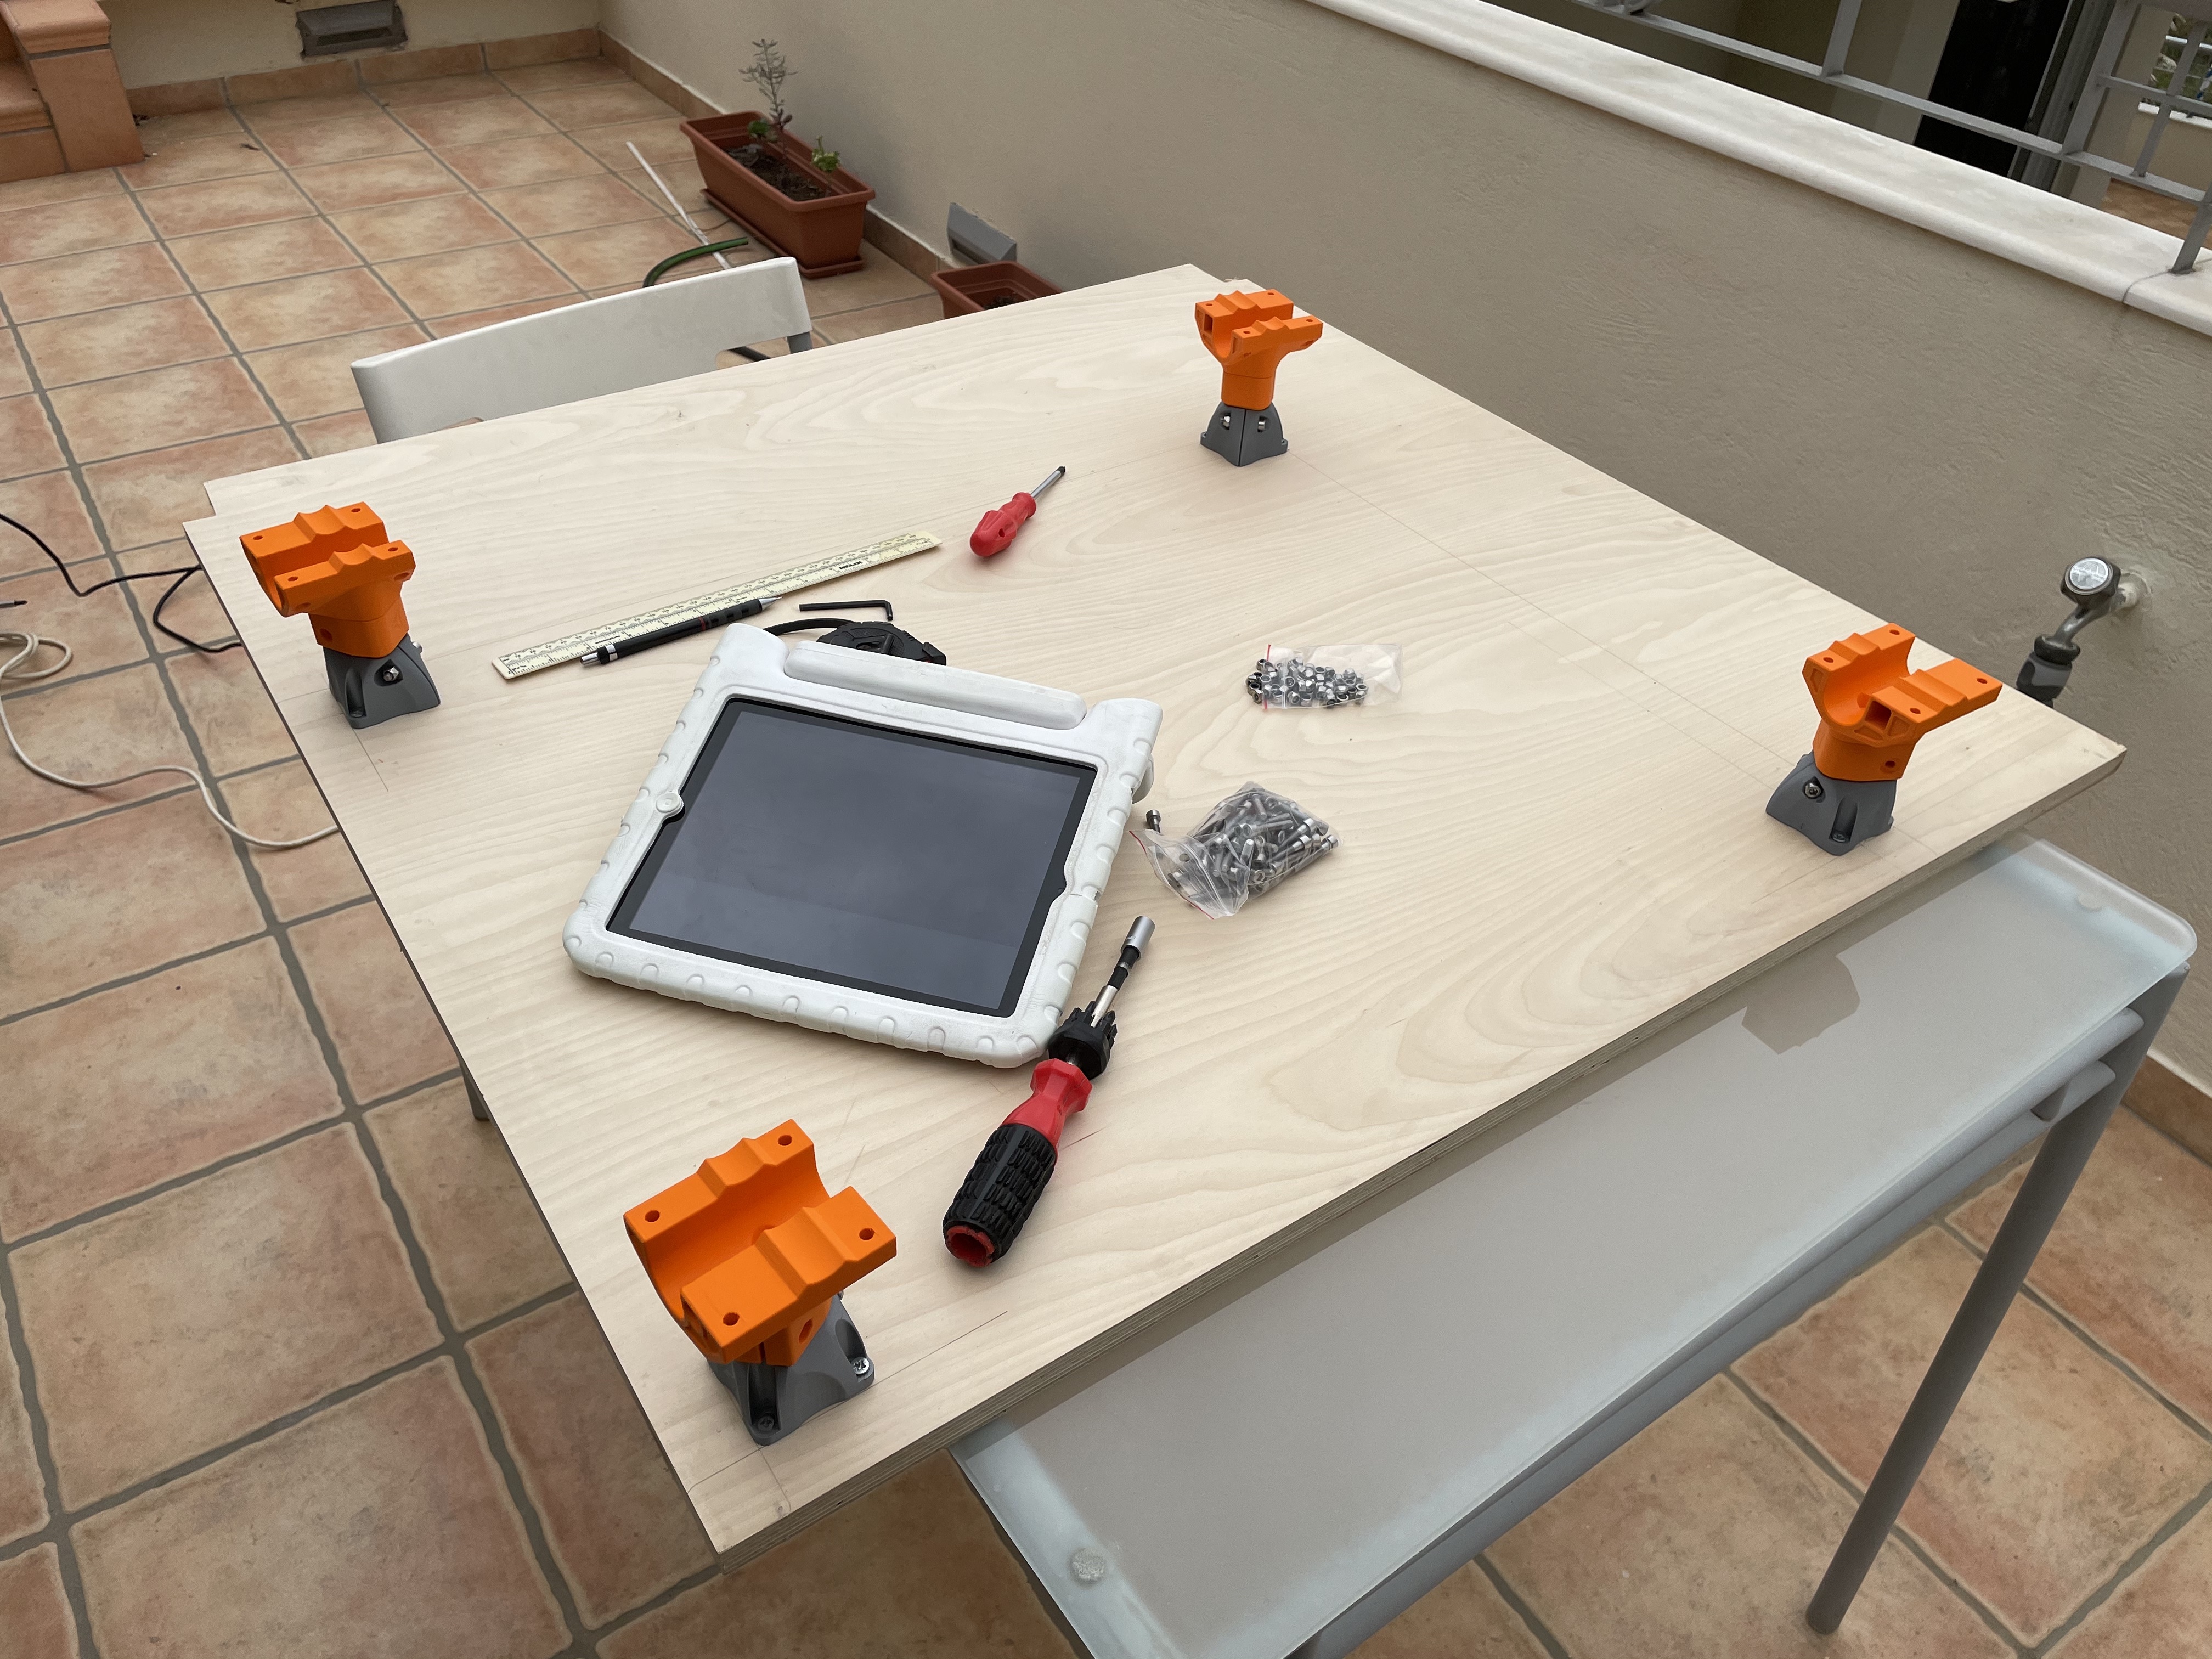
It’s been a few months i got my 3D printer and MPCNC is the first big project i try to build using it
I started working on it last week and by now I have all the required parts printed and all other parts where purchased locally. Now lets start with some mods i had to make
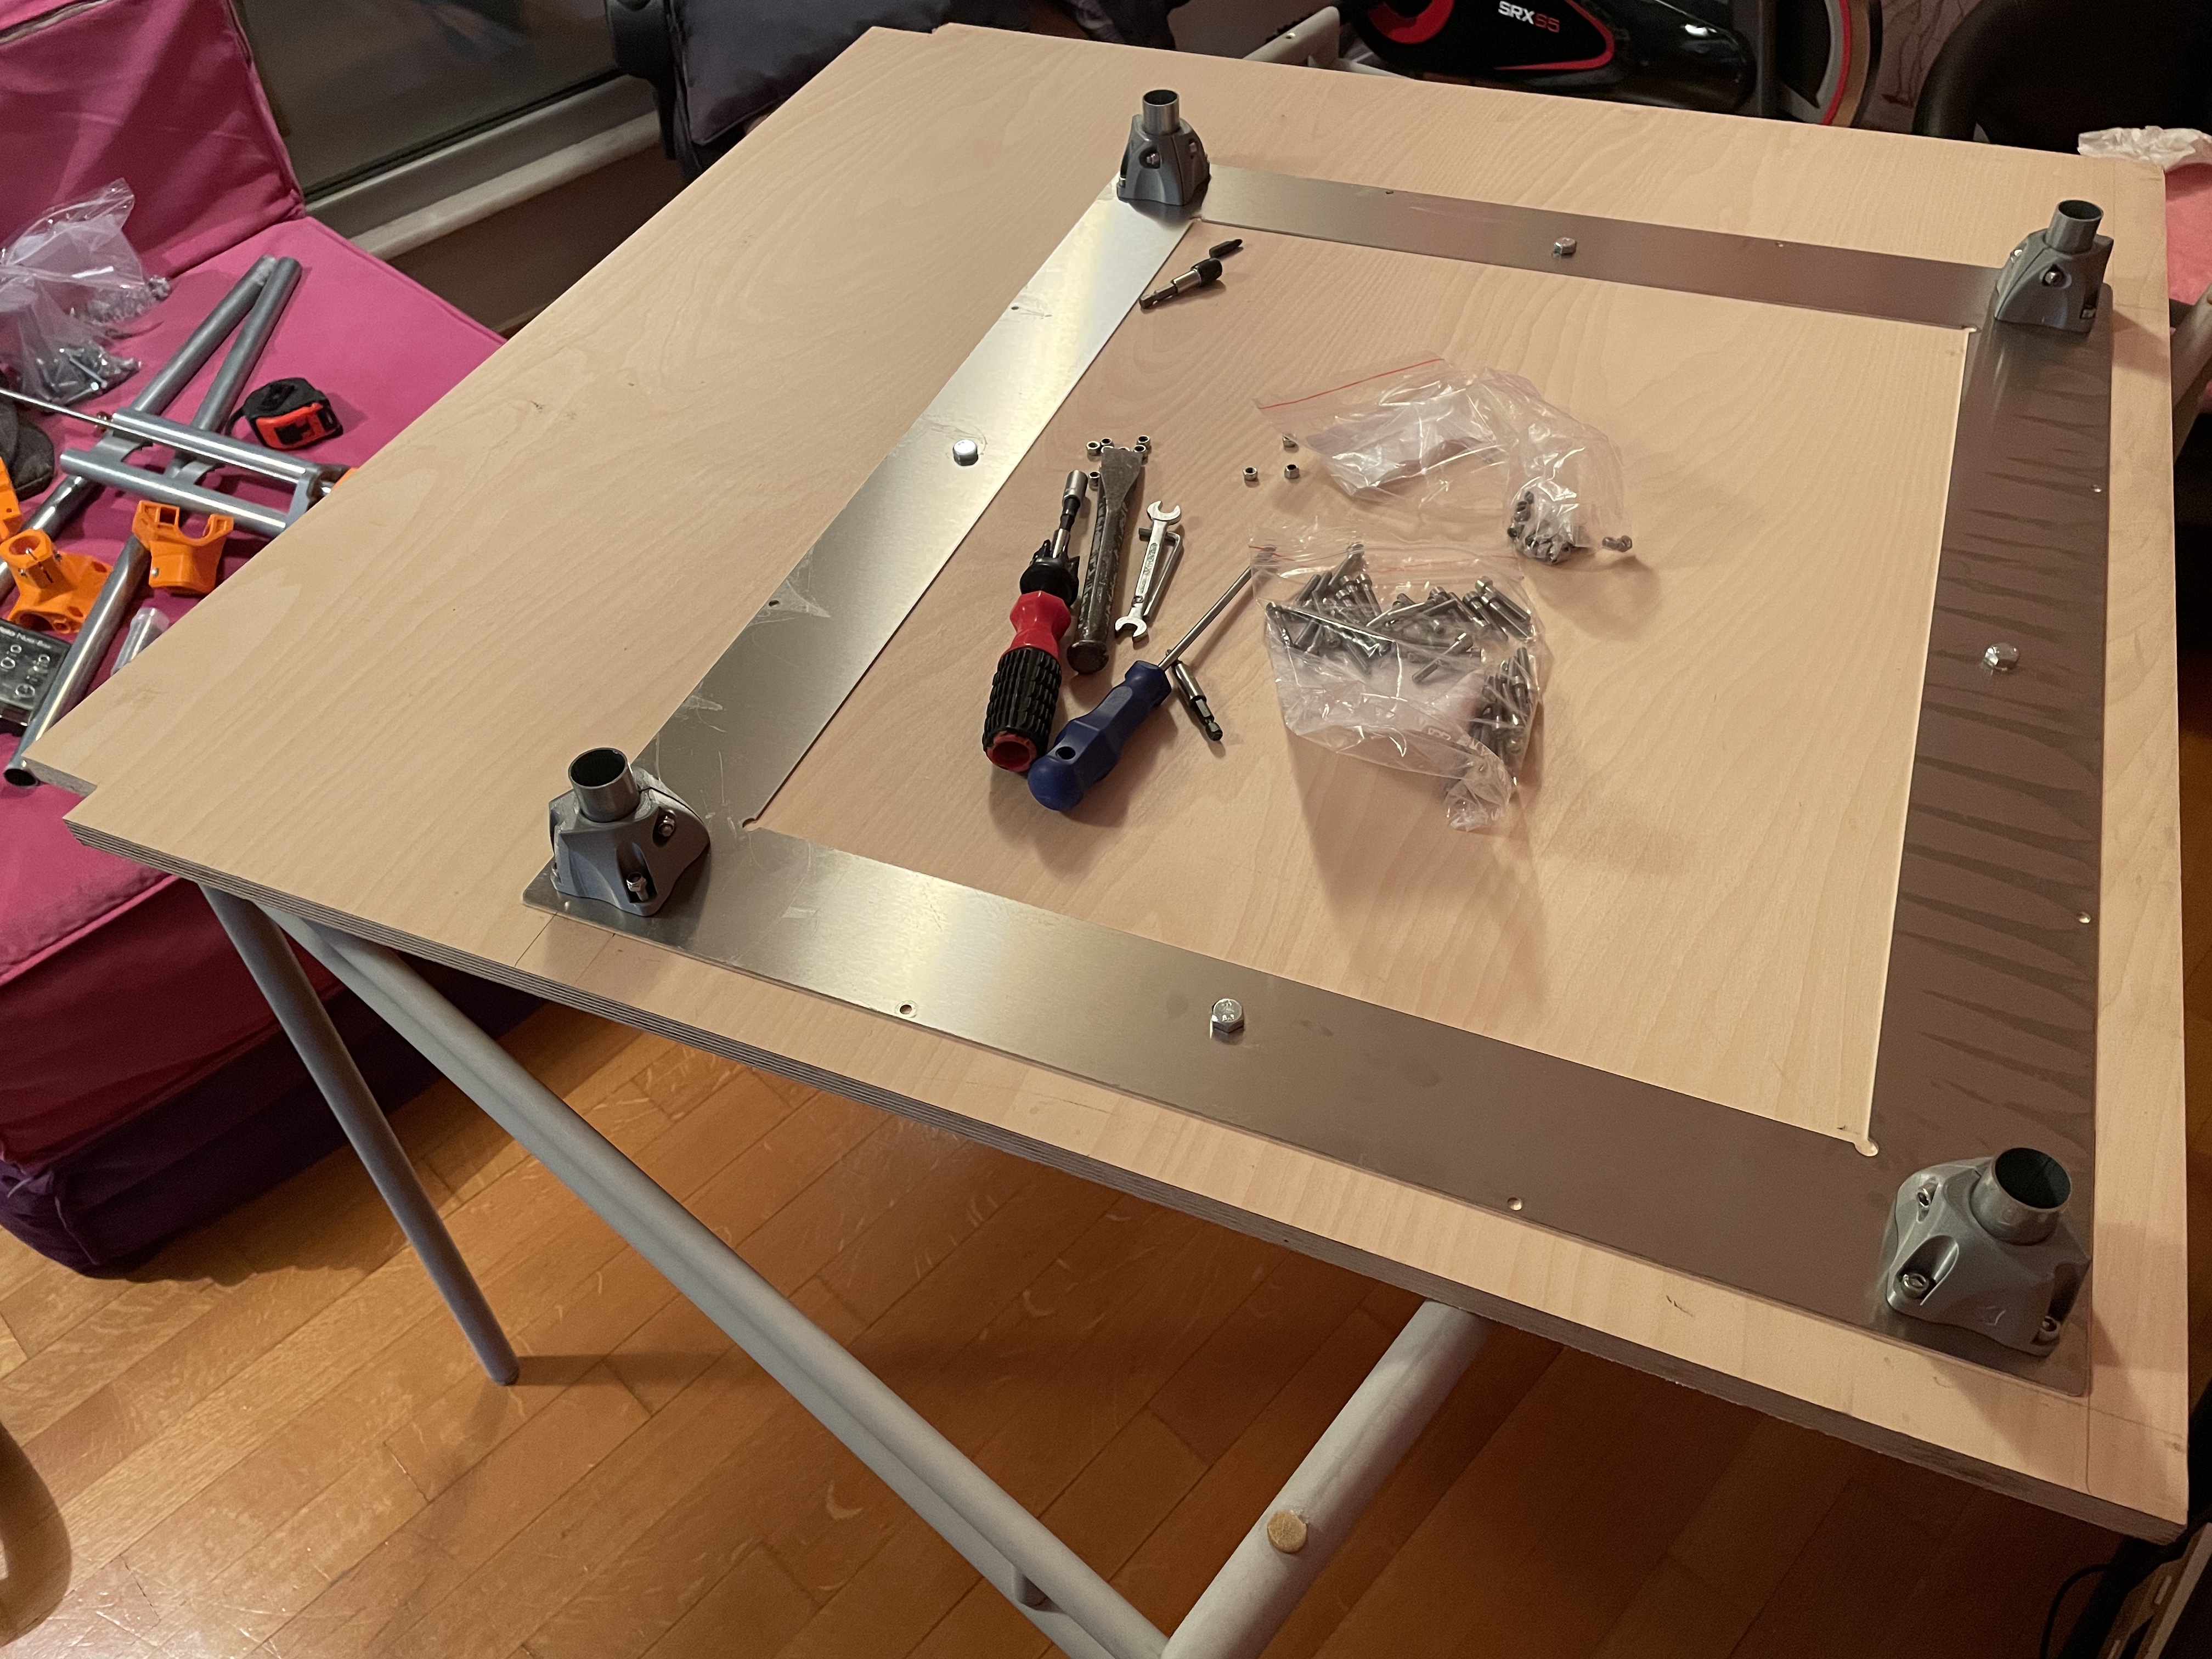
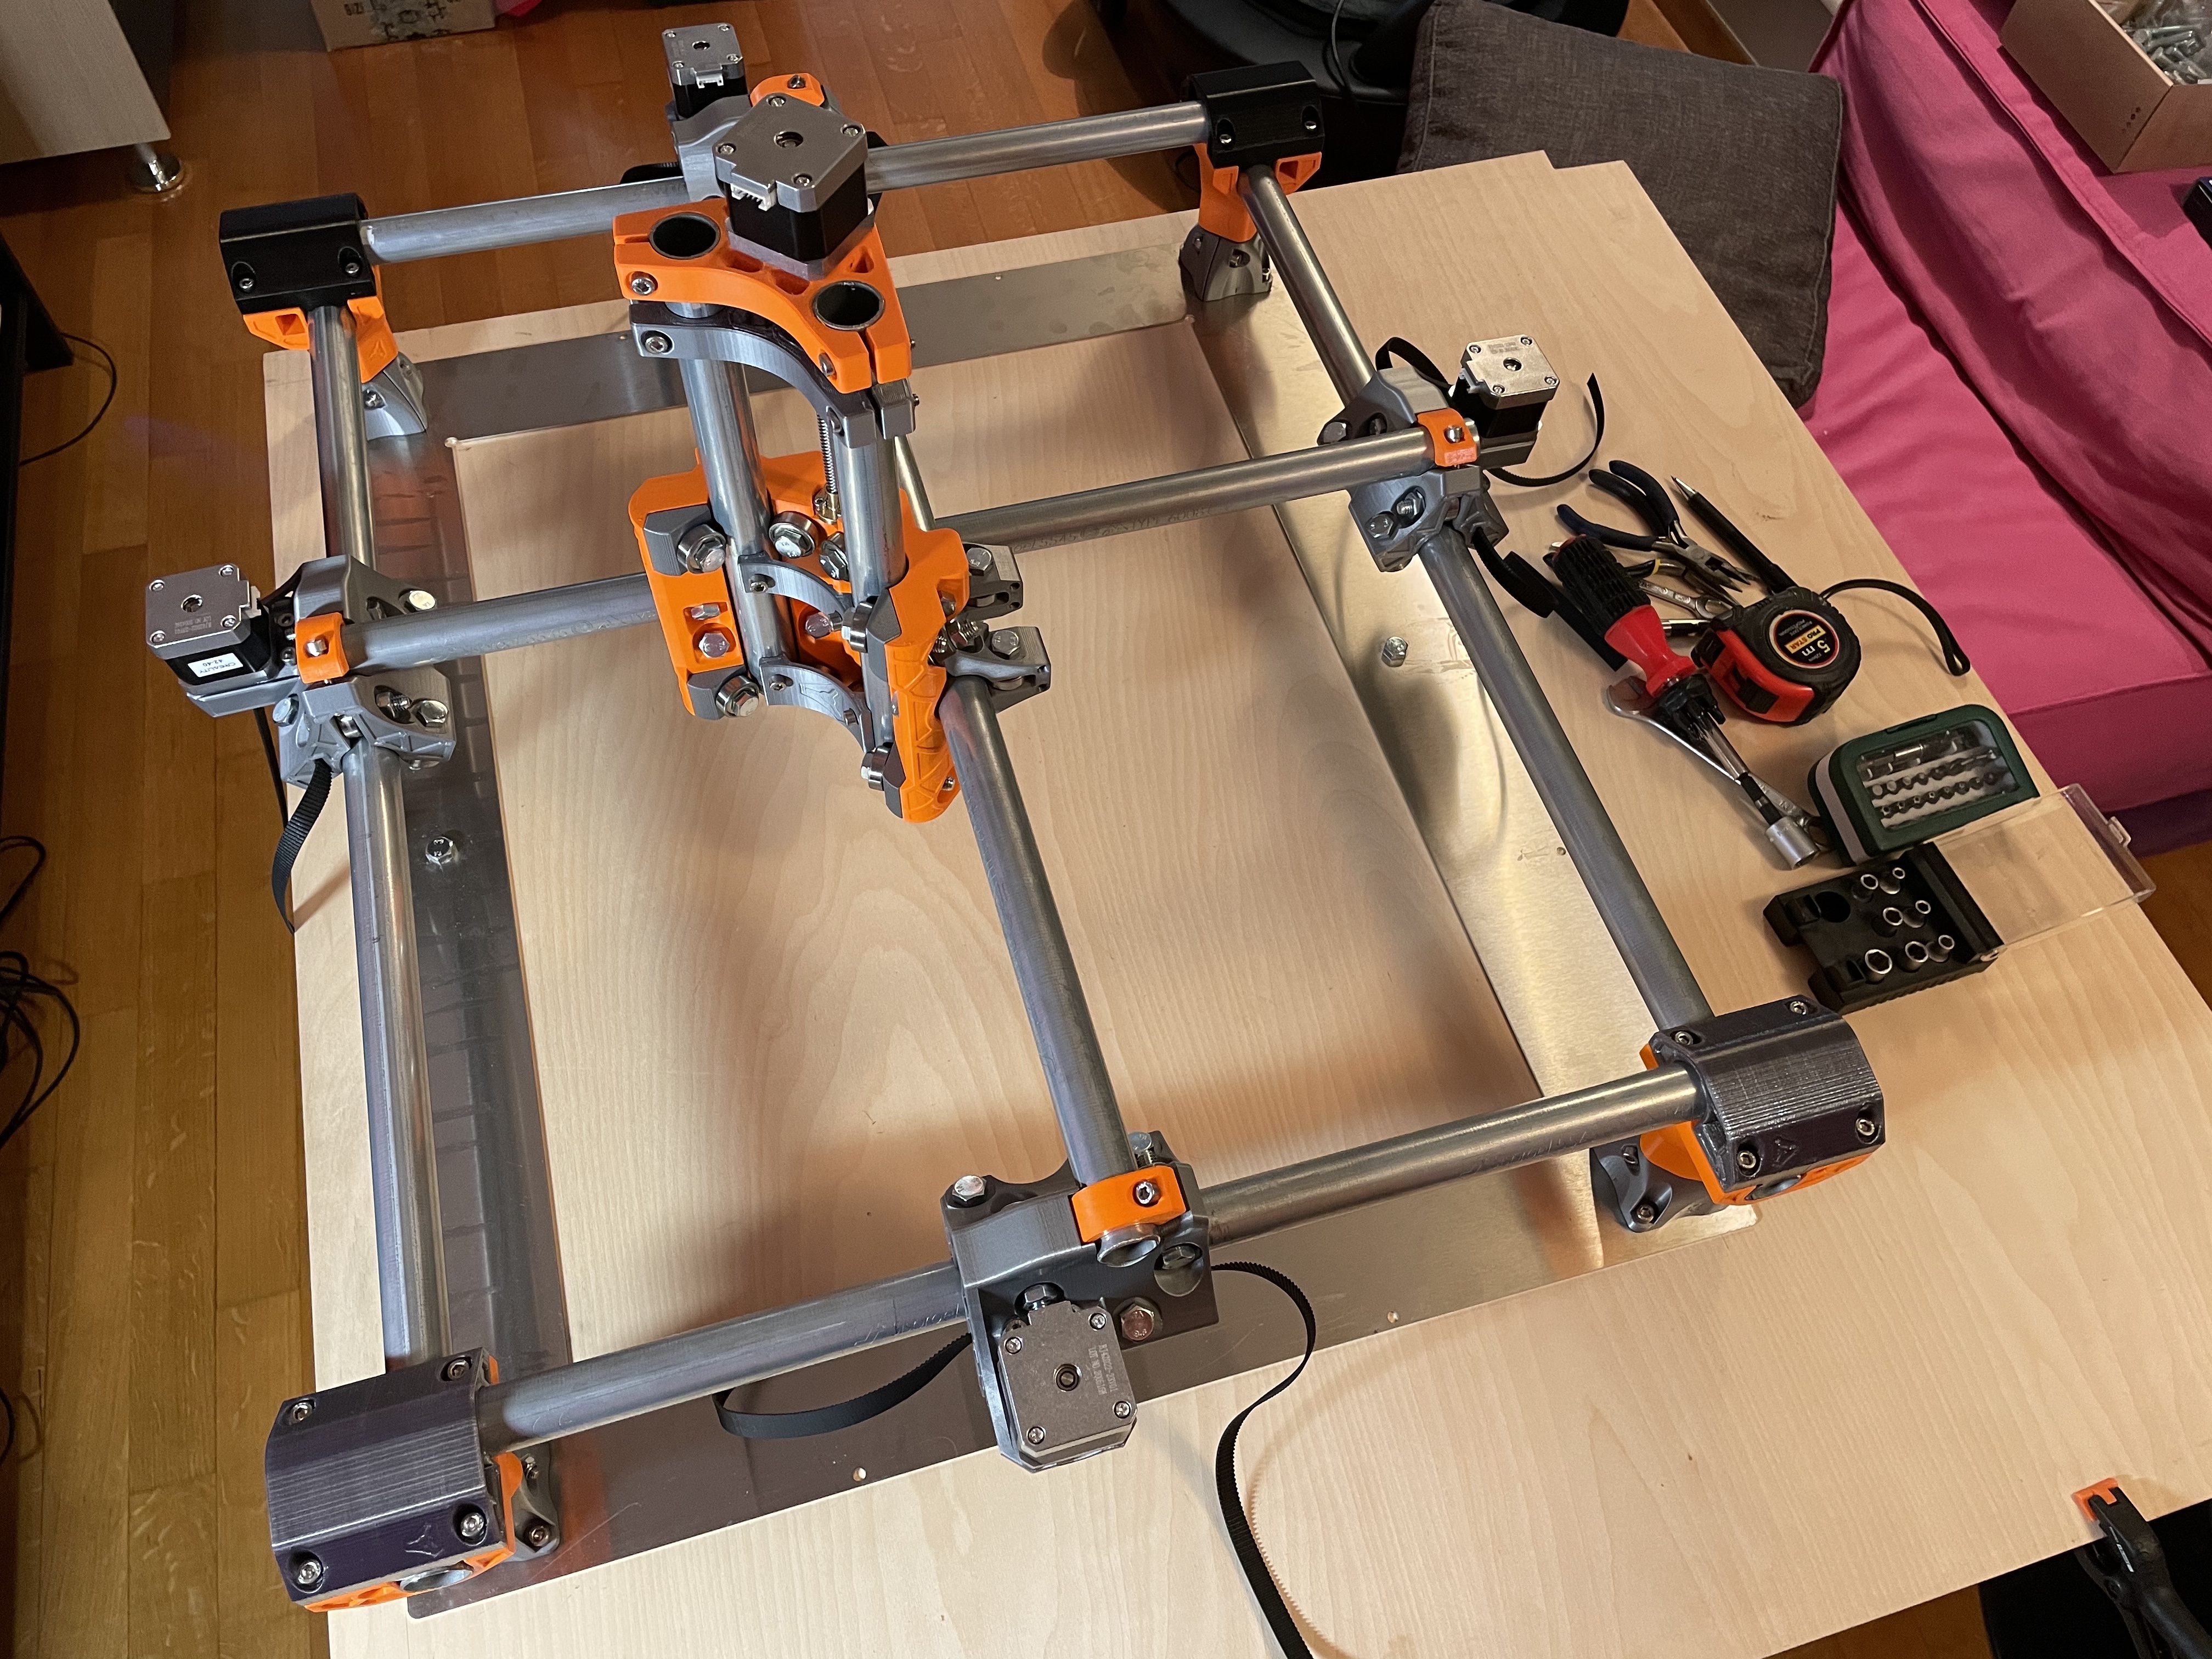
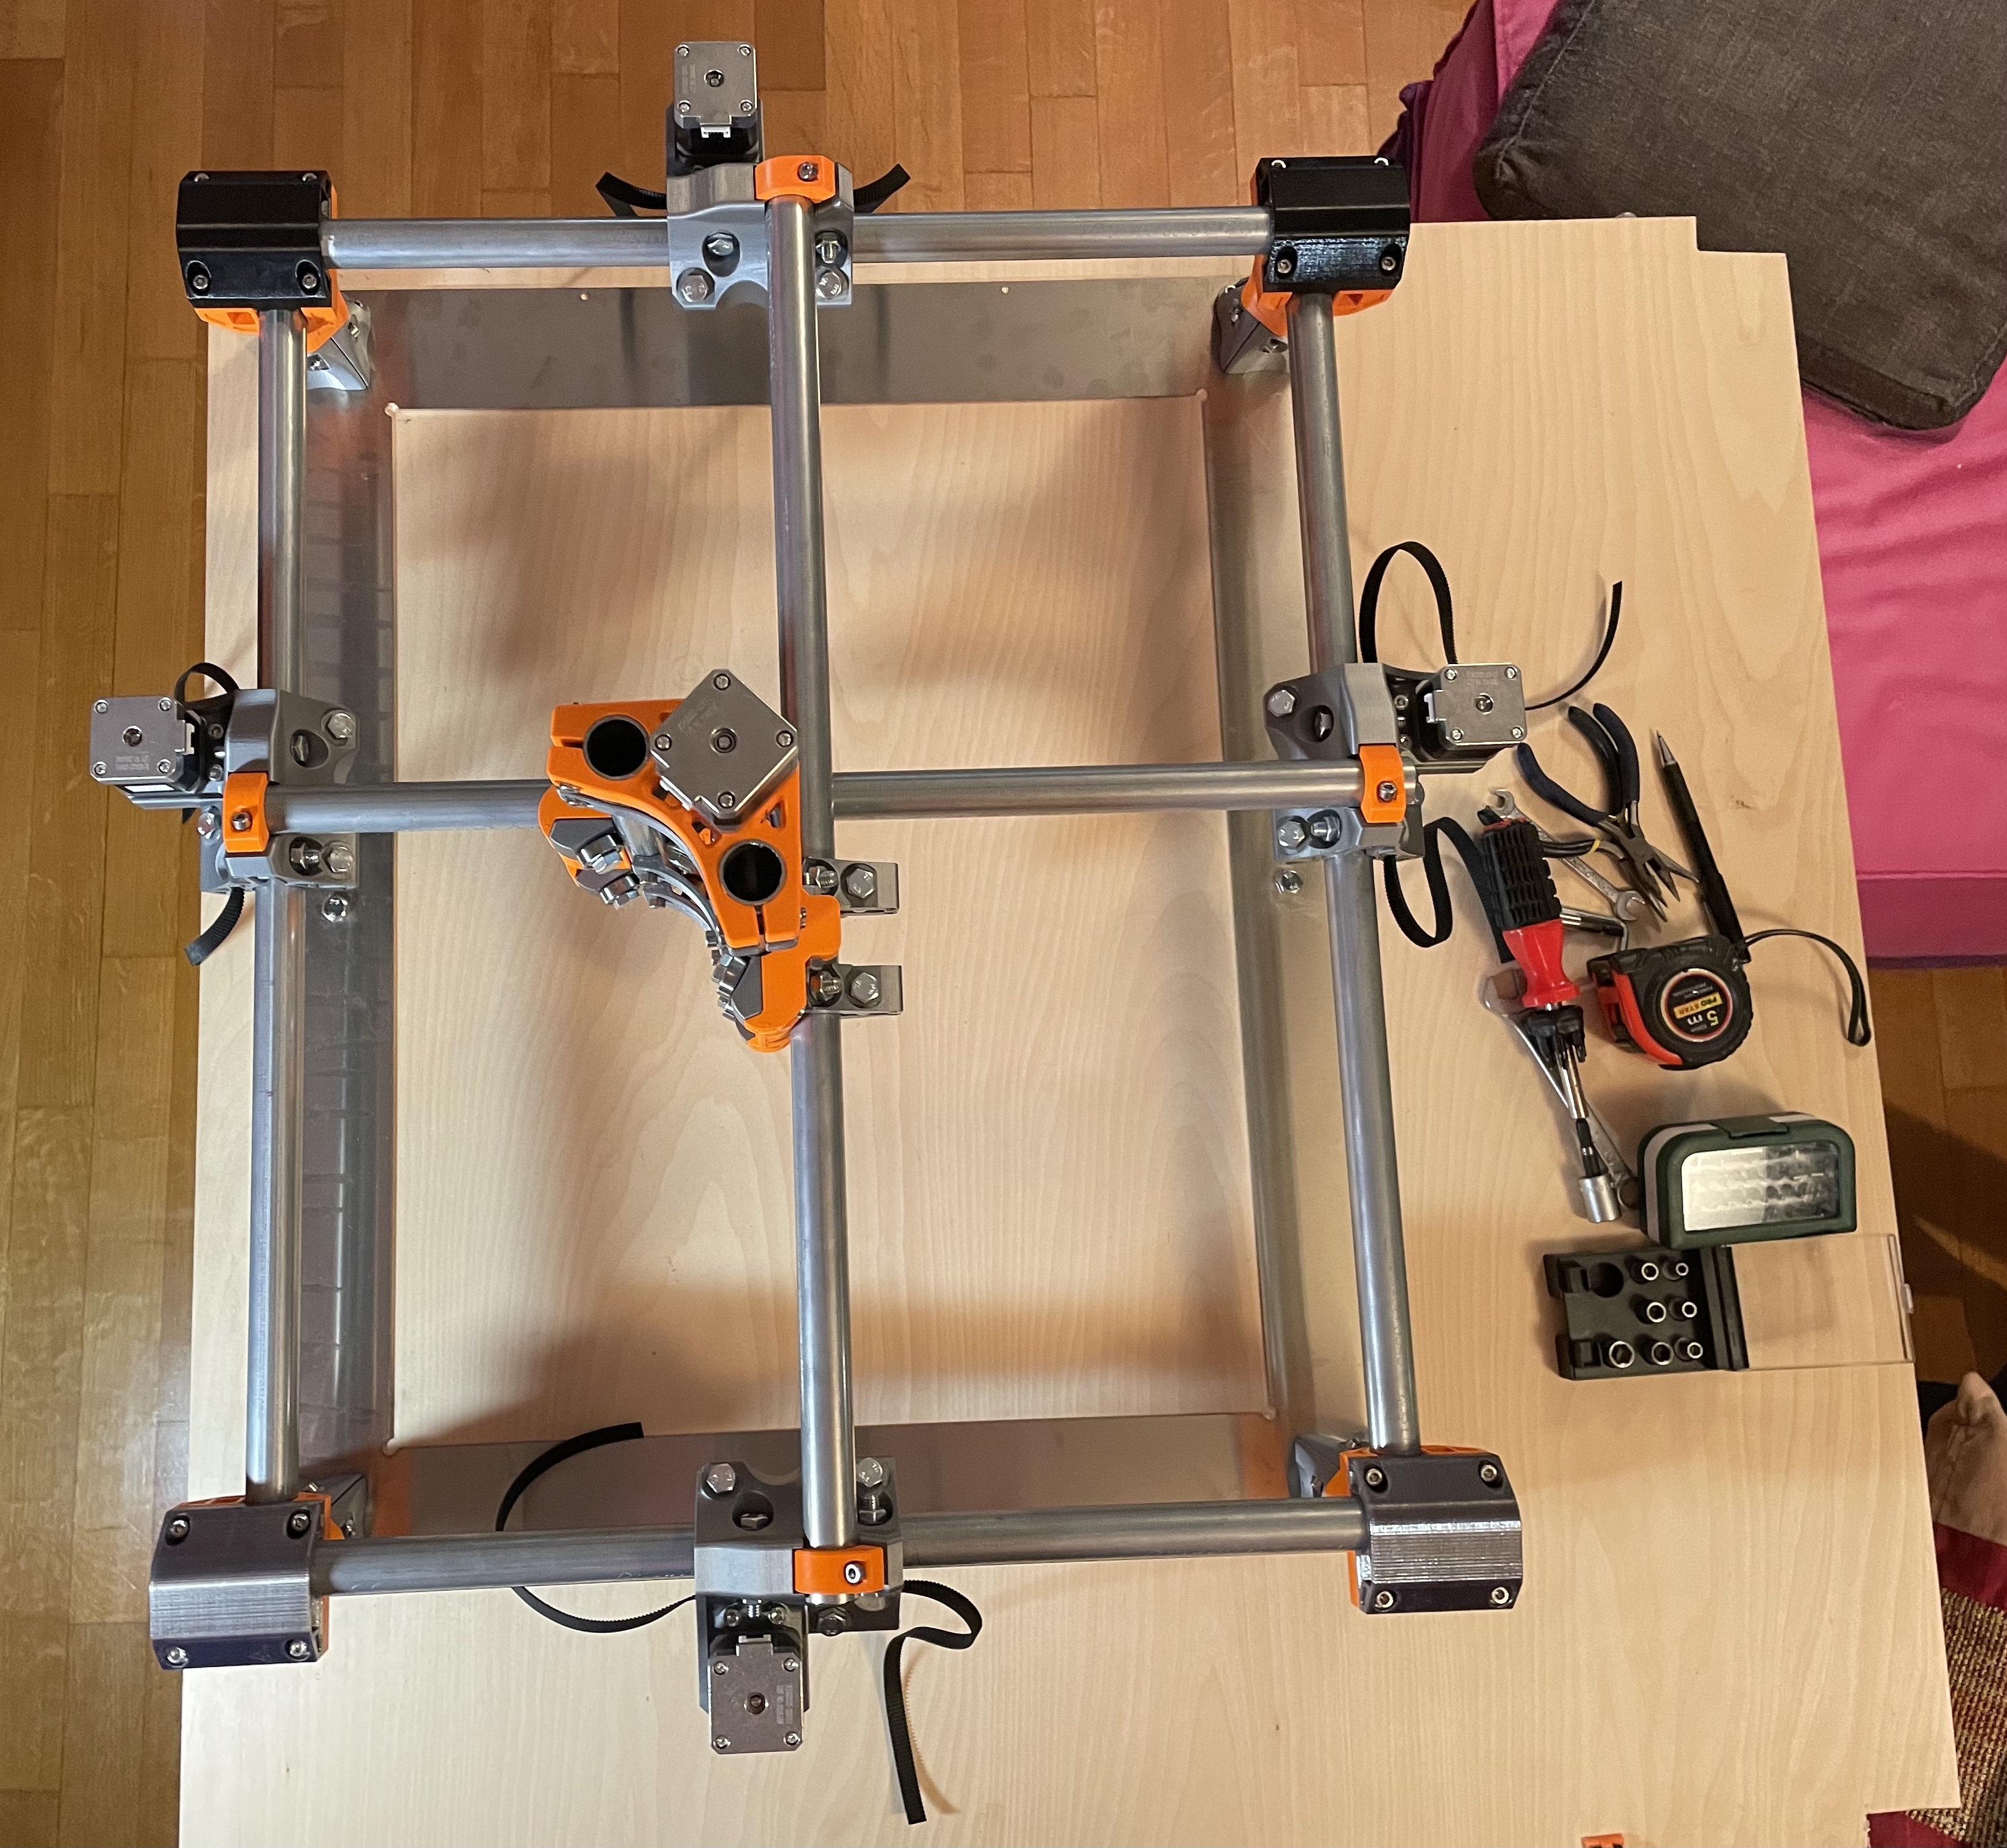
This metal frame helped me be spot on with the diagonals and the parallel sides. I’ll upload my drawings for this metal frame which is based on the default Primo size for anyone who might find it helpful
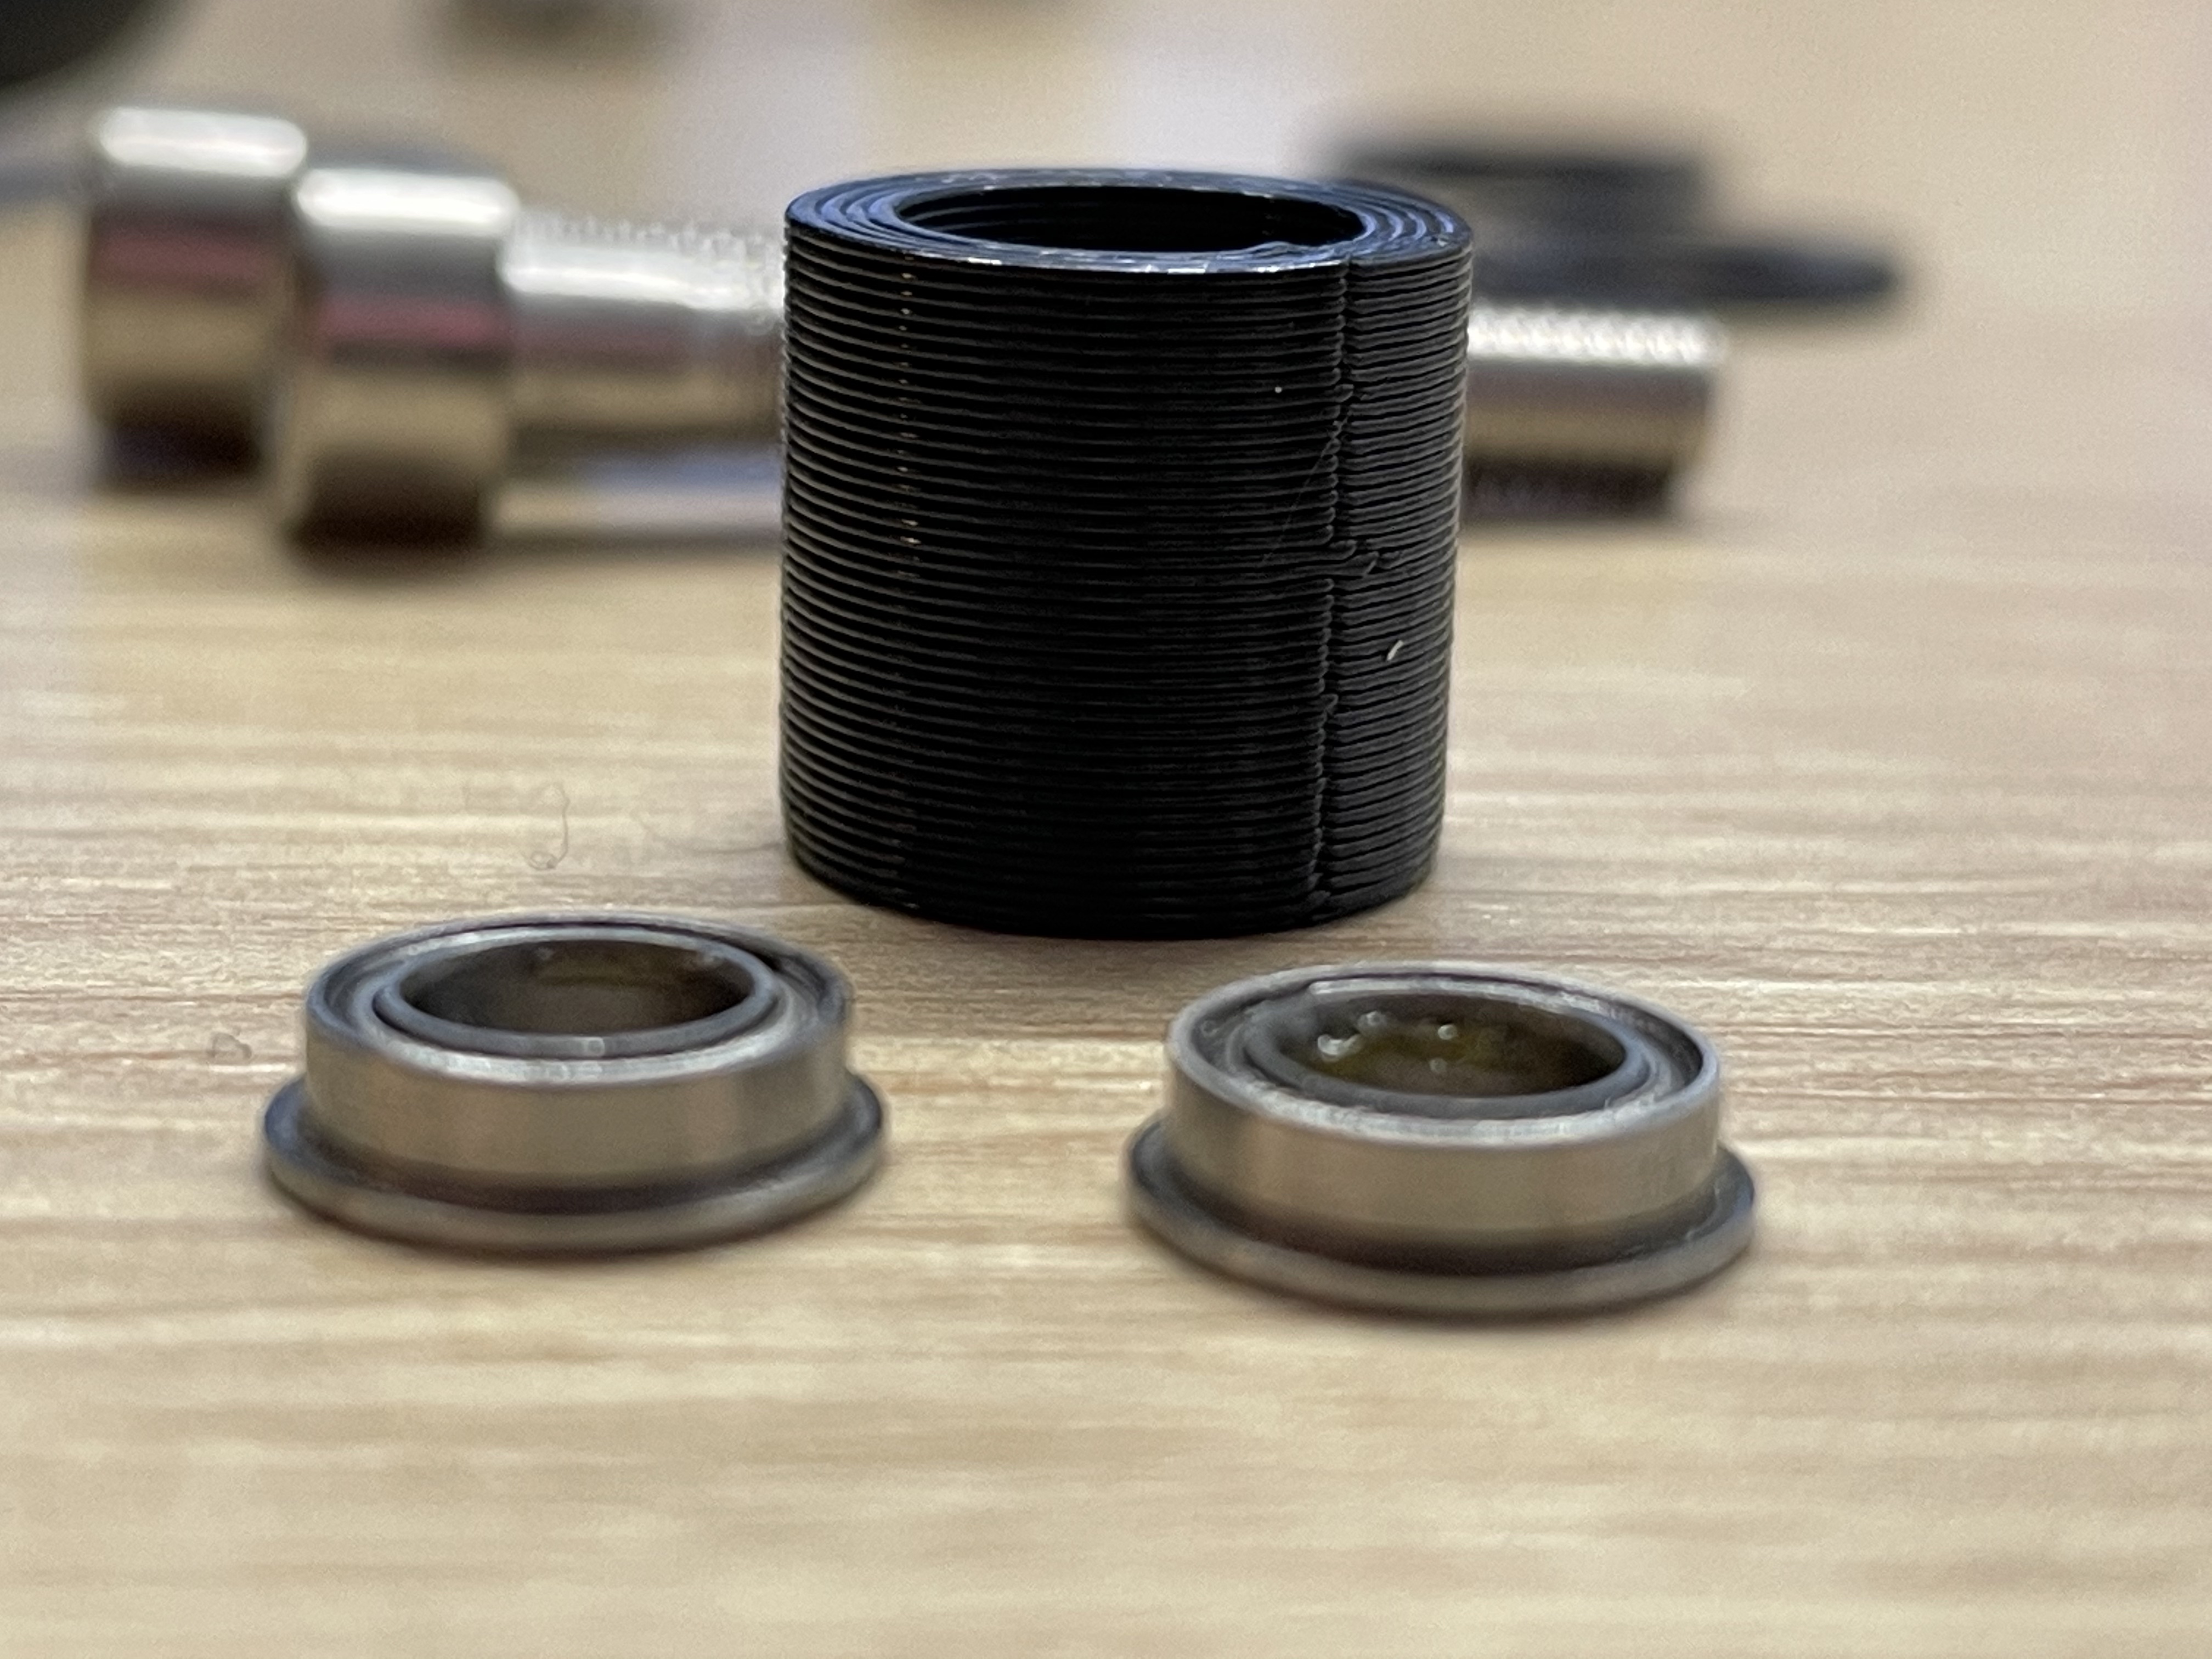
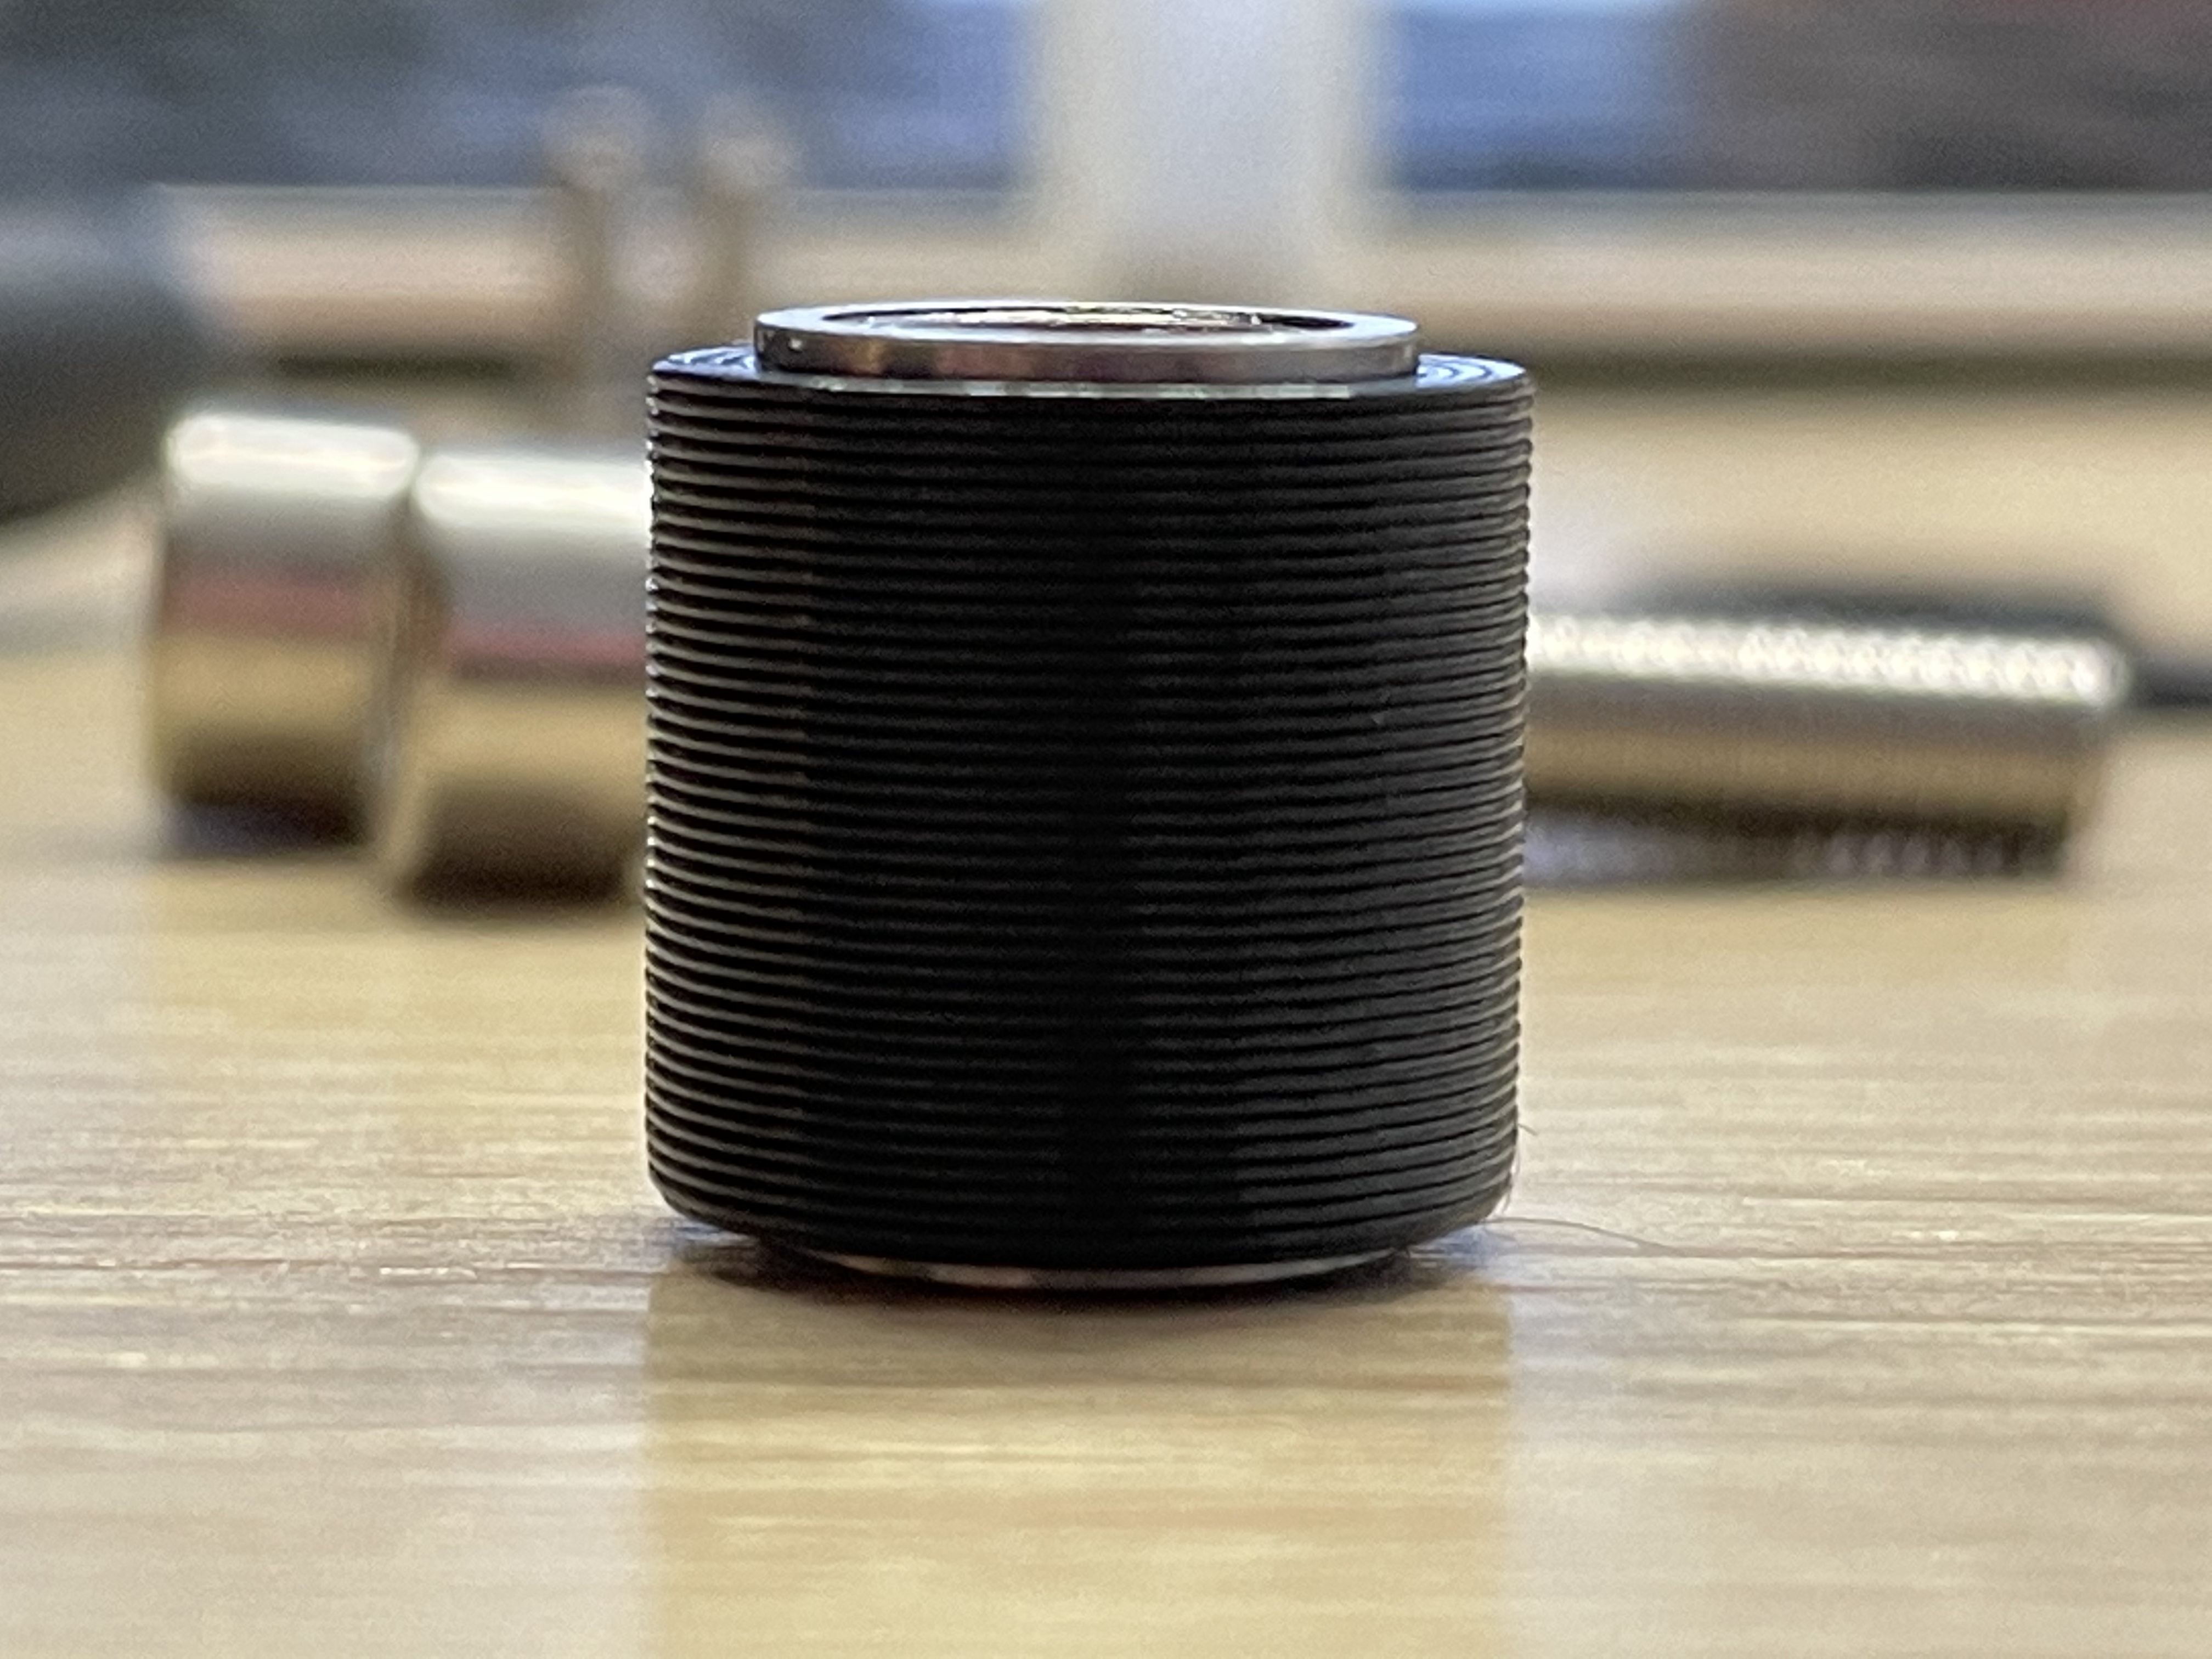
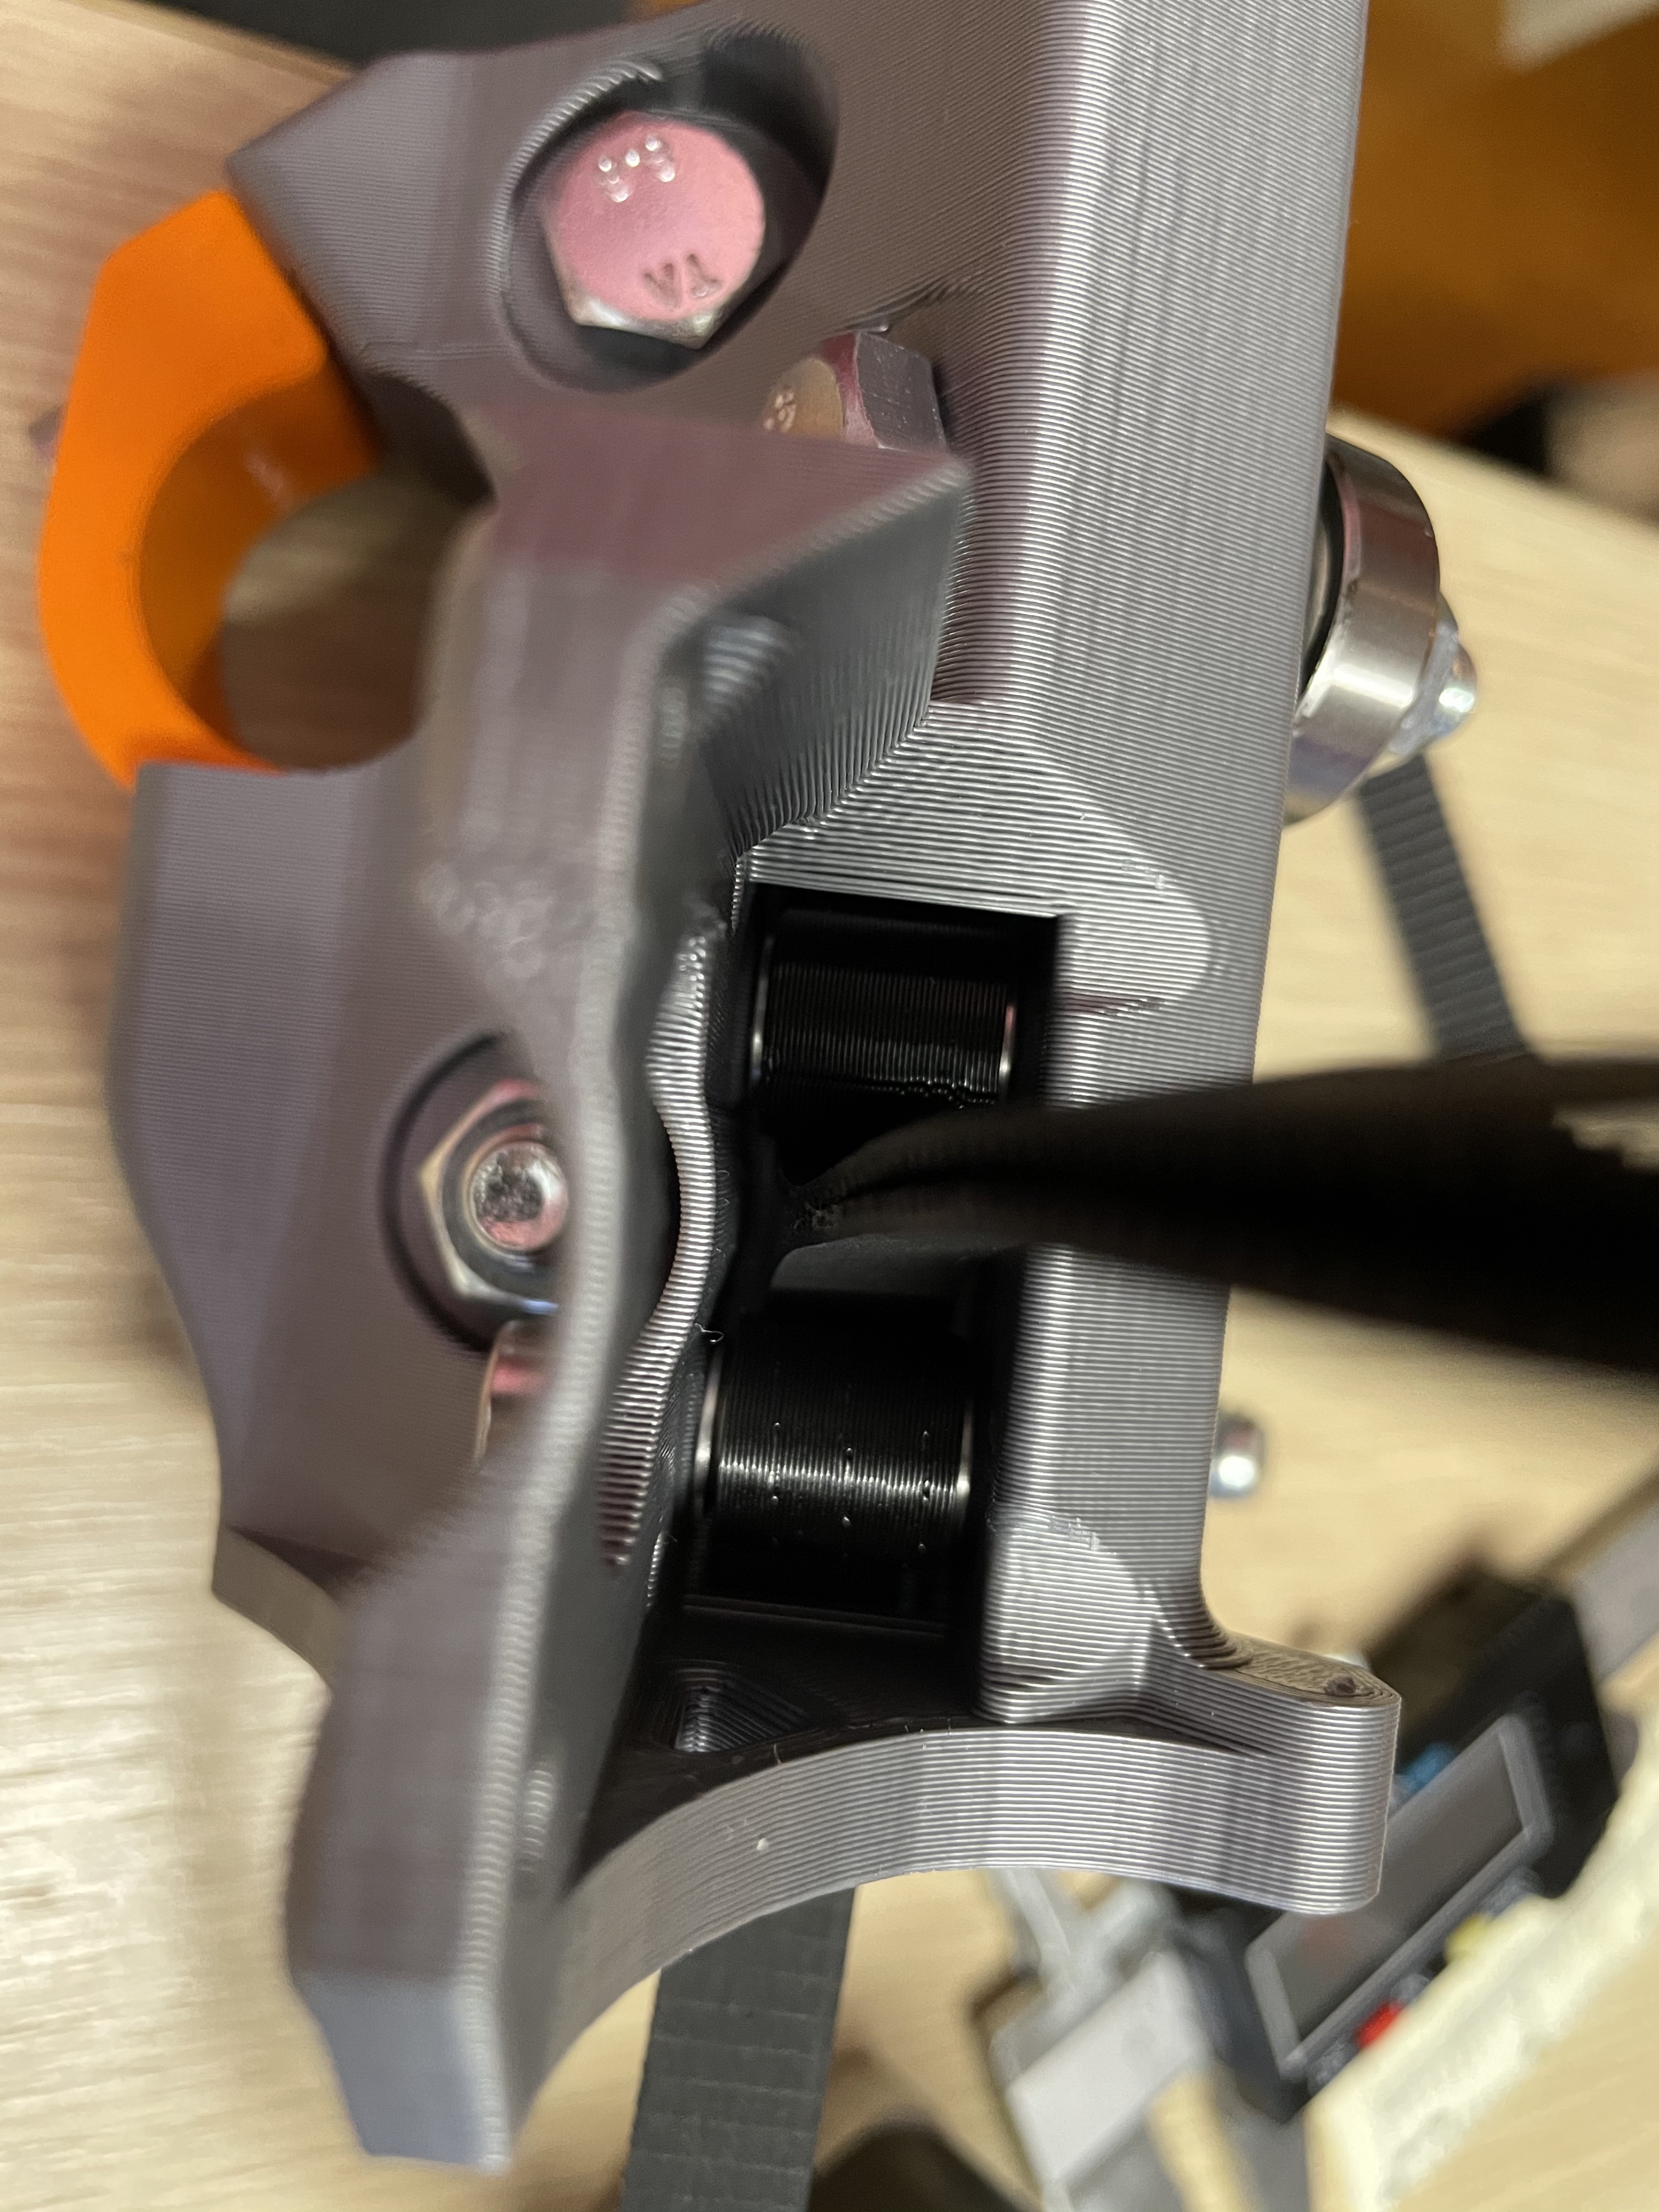
As you can understand I missed the Idlers when i placed my order and i then realised it will take some time before i get them as they were out of stock. Still i had these tiny bearings in hand and made my own printed version of idler. As you can see they fit perfectly in place and they are spinning just great. Any reasons why i should not even try to get the MPCNC up and running with these in place instead of the actual idlers?
And now lets get to some questions…
(As i said i have no experience with CNC whatsoever so please excuse if your replies sound all Greek to me. Wait i can speak Greek ). Anyways let’s get to the questions.
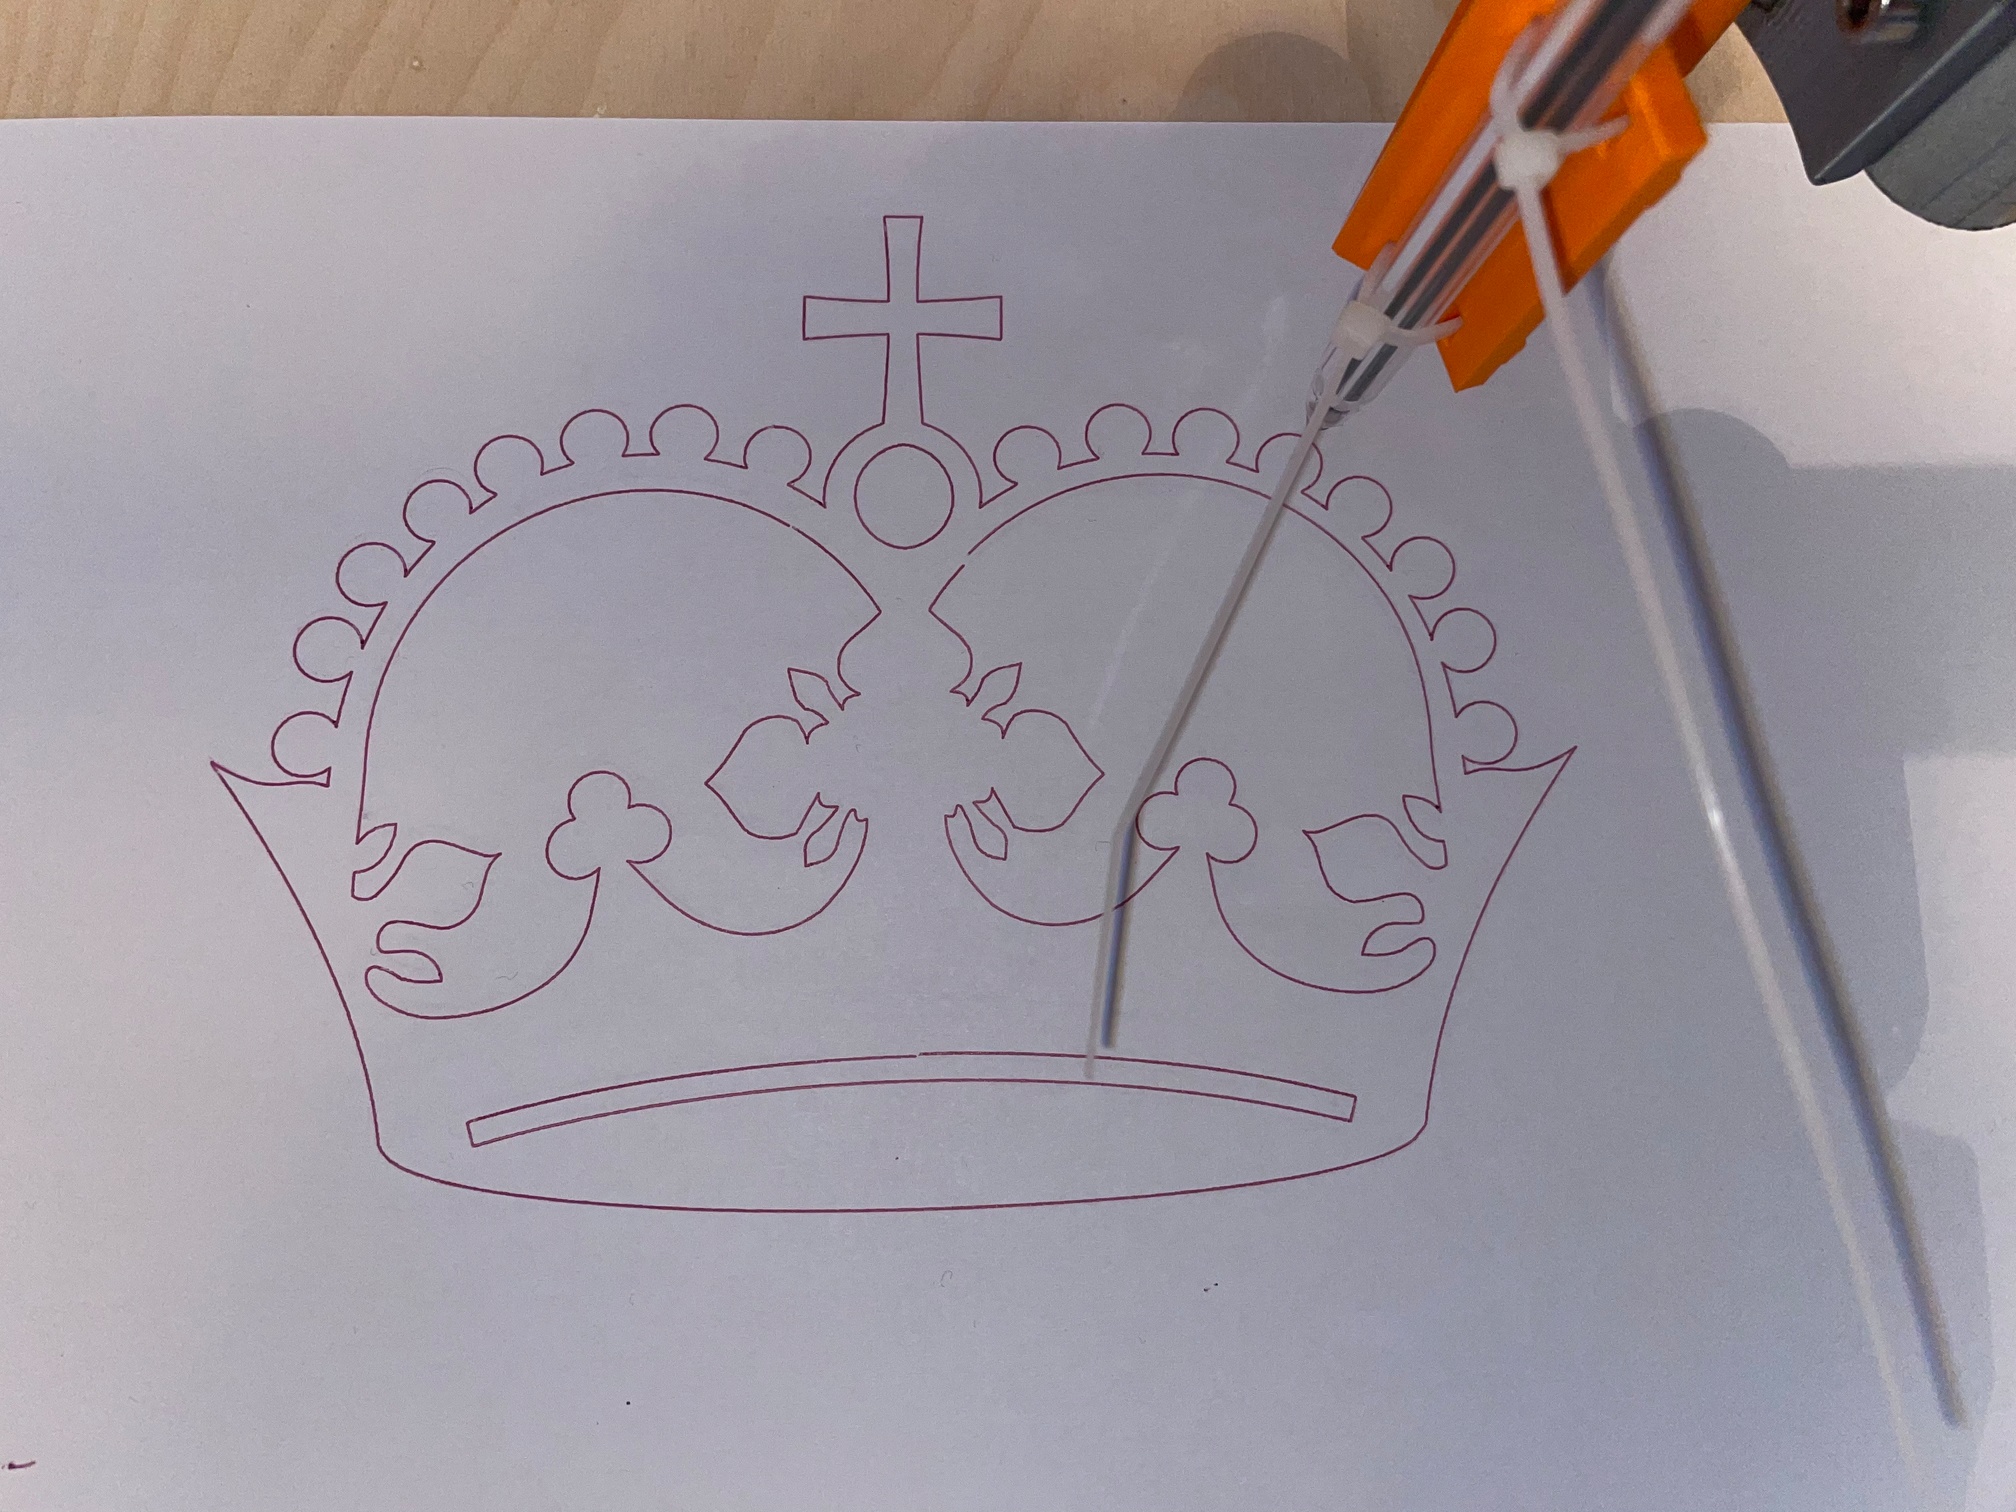
once MPCNC is up and running i will try the crown test. For this i will print the pen holder and cross fingers, but then i need to decide on a power tool. My number one choice to date is this Makita: RT0700CX2 - ROUTER/TRIMMER which to my eyes looks very similar to the one mentioned in the Primo setup. Any reasons this won’t wok? Any better value for money options available in Europe?
V1 maintains a version of the firmware for the Ramps board. Note that according to the lore on this forum the Mega clone boards have a higher failure rate out of the box, and are more delicate in terms of handling user mistakes and are prone to blown voltage regulators. Your link does not list the parts that come with your Ramps package. The V1 Maintained firmware is setup for DRV8825 drivers. If you get other drivers (A4988 drivers are common), then you will need to edit configuration.h and make the changes.
You don’t show which end stop switches you got with your kit. Most of the common bare switches will work. If your switch is on a circuit board with an LED, then I would advice getting bare switches instead. Note that for the Primo, there are mounting holes on the trucks for the bare switches, so you won’t need to print additional brackets. And the Primo files include an STL file for a stop block for the switches.
The Makita you selected is a good and a common choice for international builds. It doesn’t come with a smaller collet for 1/8" or 3mm bits, and you will likely want one.
Most microswitches have 3 terminals, labelled C (common), NO (normally open) and NC (normally closed. When the switch lever is not pressed, there is a connection between the C and NC terminals. When the lever is pressed, the connection changes to be between the C and NO terminals. For safety on larger CNC machines NC is preferred since the machine will stop if a wire gets cut for any reason. Most 3D printers are configured to use NO switches for homing.
The switches you got (on PCB’s with indicator LEDs) are designed for use on 3D printers and will probably work fine if you want to use them as Normally Open (NO), which means they pass a signal only when the lever is pressed. If you want Normally Closed (NC), you can just cut the switches off the board and wire to the NC and C terminals, which should be marked on the switch.
Not all V1 firmwares are configured to expect limit switches, and may folks run their machines just fine without them. I believe that the default for V1 firmwares that do have limit switches enabled is to have them set for NC operation, but you’ll want to confirm that before deciding to make any non-reversible changes (like cutting the switches off the boards).
From the site your link leads to - “The Funduino Mega 2560 is functionally identical to the extremely popular and easy-to-use open source Arduino Mega.”
This is not a true arduino, it is a copy that works the same. Sometimes the manufacturers of the copies substitute lesser cost components that can lead to failures. 5v regulator failures are pretty common on arduino mega clone boards.
These board mounted switches use a 4 pin connector, but only wire up three pins. With care, the wire/connector can be moved to the NC from the NO slot. But I find two issues with the board-mounted switches. First the the mounting holes do not match up with the ones on the Truck of the Primo, so an alternate mounting solution should be found. The second issue (minor) is that if you plug all three connections in using the supplied connector, they run power out to the switch…which is another thing to potentially short out at some future date.
Sorry I missed the link. These are the board-mounted switches that I would not use. They can be made to work, but have the issues above…don’t mount to the primo mounting holes, run power to the switch unnecessarily, and need to be rewired to be NC.
The stepper drivers are the default ones in the V1 maintained Ramps firmware. You will need to set the voltage.
Tom’s spot on about the clone boards. Funduino is a brand that tends to run a bit more money than the bottom-end, no-brand clone boards, so it might be of a somewhat higher quality. That is, I think there is a named business behind these boards.
BTW: An official Arduino Mega board from the Arduino store costs over $40 USD.
Edit:
’ll replace it with the original one as soon as I got my MPCNC up and running.
I wouldn’t bother unless your system is not working. A lot of boards just continue to work. A external 5V source can be used if you ever blow a voltage regulator.
The Makita is a good (and common) choice. I wouldn’t go with a battery router. All it means is that you need to source a 1/8" collet for your machine. Ryan sells one in his store. The Elaire corporation sells a variety of collets, and I believe this is where Ryan sources the ones he sells in the store. Carbide 3D also sells a pair of collets (1/4" and 1/8") that will work on the Makita since their router is a Makita clone. There may be other places. You just need to research and plan for this purchase. As an alternate, you can source some bits 1/8" and smaller with 6mm shanks for the collet that comes with the router, they are just more expensive and have a limited variety. And you are likely to break some bits as you learn about your MPCNC.
I am lucky enough to have a friend who has access to a CNC machine and got this done for me. My initial try (with the tools i have) was OK for the sides but had a difference of 5mm between the two diagonals, meaning that the whole structure was not squared. All sides where parallel but corners where not 90 degrees. After using this base i have zero tolerance
Even that i pre-threaded the nuts so they are not that stiff, i have two Belt Slides that the nut turned into them and now it is impossible to take them out (or not)? I checked if there is an access point on the top of the corner bottoms but there is not one. So I’ll have to work very carefully with the tension using only the opposite bolts, still IMHO an access point is needed for nut on the corner bottoms so that if you take the corner top out you can stop that nut from driving you nuts…
I’m just saying the clones can have issues, not that the one you’ve got does. I don’t know that you need to replace it immediately, just be ready to suspect it if you run in to issues.
The flaws i see are on the spots that the pen picks up and then finishes a line, they are not connected as i suppose they should be but i’ll try some fine tuning. Any hints on what to fine tune first to make the lines connect better?