V2 has built in 2209’s
Did you try sending $Stepper? Maybe it is one if those settings.
Hmmm, no Let me try that.
Nope nothing fun in there.
Don’t know if this helps but Bart says “The TMC2209 stepper drivers run your stepper motors super quietly and you can completely configure them via software (no more pots and jumpers)”.
In his default config he has:
#define TRINAMIC_RUN_MODE TrinamicMode :: StealthChop // Optional TrinamicMode :: CoolStep or TrinamicMode :: StallGuard
#define TRINAMIC_HOMING_MODE TrinamicMode :: StealthChop // Optional TrinamicMode :: CoolStep or TrinamicMode :: StallGuard
And Trinamic says:
Unlike other voltage-mode choppers, StealthChop2 doesn’t require configuration. Instead, it automatically learns the best settings during first motion following power-up and optimizes settings further in subsequent motions. An initial homing sequence is sufficient for this learning process.
So to me it reads like no current setting at all, no pots, no software, it just takes care if it automatically.
1 Like
One note here for TMC2209 StealthChop mode, when enable it reduce the noise by reducing the torque, just be aware 
2 Likes
That is great to know! Thank you!
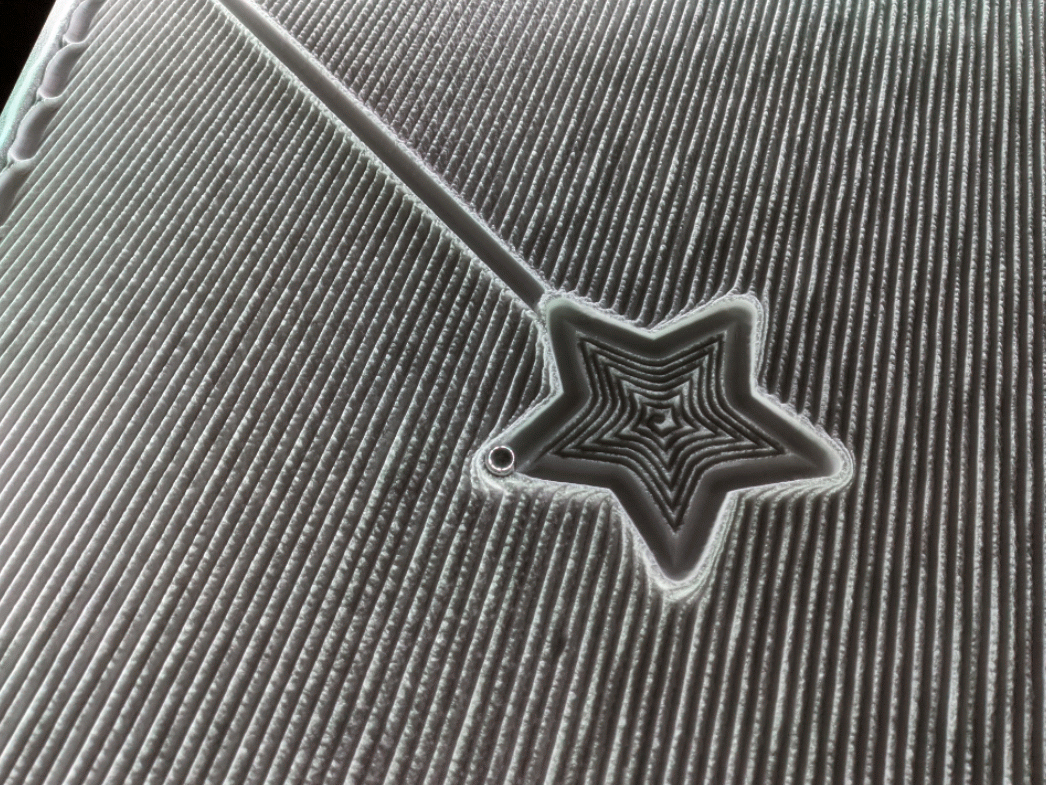
I have been working on it for the last few days. There are a few minor tweaks I want to make. It is soooooo good this time around I really want to put some finishing touches on the actual table design on this one.
I had some friends stop by and give me honest feedback, the biggest one was what to do with the edge beyond the “sand”. I have tried printed parts, lightly dusting, combing…might just have to add a border again not sure.
I have plan to hook up the end stops to the GRBLesp32 board today fingers crossed.
2 Likes
I have been banging my head on the wall trying to figure out what the heck I could possibly be doing wrong.
I have learned a lot about GRBL, that is the good part.
It turns out…the issue I was having my printed parts are invisible to the optical endstops. I was trying to be cute and use semi transparent red like the rendering. Big thick part absolutely no trigger. I dabbed an ancient fluid on there, white out. Couldn’t find any nail polish. Triggers perfectly now.
So any GRBL guru’s out there? I have an idea, it is absolutely not needed, we discussed this before about the unique homing requirements of the ZenXY v2. It can absolutely be done in the starting Gcode.
…but, I thought since we have these custom homing routines available I might give it a shot.
I need to use a large Homing pulloff in case the X axis is at home (#define DEFAULT_HOMING_PULLOFF 15.0 // mm) The bad part is right now if I home it also parks at X=10. So anyone know how to do a custom homing routine so if you home with the buttons in the gui it homes and parks at 0 but still keeps the pulloff?
The actual issue is if you home Y, then X it parks at Y=10 and the X trigger will not hit. Again, this is not the case with starting Gcode we can easily(I think) just tell it to home Y move to 0, then home X and move to 0.
I think what you want is:
- Move Y in the negative direction until it triggers.
- Move X in the negative direction until it triggers. (both of these would exit immediately if they were already triggered).
- Move to (10,10).
Is that right?
Corexy has a long custom homing function. Much longer than I would expect. It looks like it mostly handling lots of potential user choices.
I think the main piece from a regular $H is just calling limits_go_home, but I am not sure, and I am not at my computer right now. It may also be in the end of that for loop. Maybe we can just move some of the approach stuff into a separate loop to get what we want.
Still monkeying around with it. I tried a few things something is still wrong.
Reflashing.
What I want is
Move Y, negative, until it triggers, then (either stay there, or move -2 so the X flag will catch).
Then move X, negative, until trigger, (the x trigger is 12mm or so early so it will either need to move -12 or just set it’s position to x=12.
Two catches.
1-when powering up and it is already at machine minimum X is about 12mm from releasing the trigger, so that is easy to handle with the pull off value. it will move at least 12mm in the positive direction before it throws an error.
2-For whatever reason If I “home all” Y goes negative, triggers, then moves an additional 12mm away (the pull off distance), then starts homing X. This could possibly be a bug.
Hmmmm seems to have something to do with work offsets I think. I am not used to grbl at all. Getting closer.
Well, This works manually.
$HY
G92 X0 Y0
G0 Y-18.5
$HX
G0 X-28
G92 X0 Y0
Homing either axis resets each axis to the pulloff distance (in this case 15), even if it was not homed. So you have to G92 it each time.
Different from Marlin, I am pretty sure it is intended to use work coordinates at all times, not the standard coordinates. Kinda funky, at least I think I worked it out this way. I will try to really nail down the work coordinate thing another time.
This big table is coming up X692 Y1306…anyone want me to run a pattern you create?
2 Likes
Well that didn’t work in the starting Gcode…this does
$HY
G92 X0 Y0
G0 Y-18.5
G92 X0 Y0
$HX
G0 X-28
G92 X0 Y0
1 Like
OMG, this thing is sweeeeeet! I will get together a build thread at some point soon.
I know this has taken forever but I have learned a lot and it was worth it!
Sandify is super simple and amazeballs at this point. So needed on a giant table and very rectangular lets you do some fun stuff. The table is looking fantastic, I have a cool pattern running now.
The pen laser board from Bart Dring is stupid awesome. I can make a pattern, and upload it from any device that I am on, I can even start it. Chaneg accel and speed settings, as well as all sorts of other things…
Then, Change the mood with the WLED setup and the lights…
This is what I wanted the Zen to be. You can run it crazy crazy fast, or silent and extra zen.
I am as happy with this as I am with the Primo. I will start getting some pictures now.
7 Likes
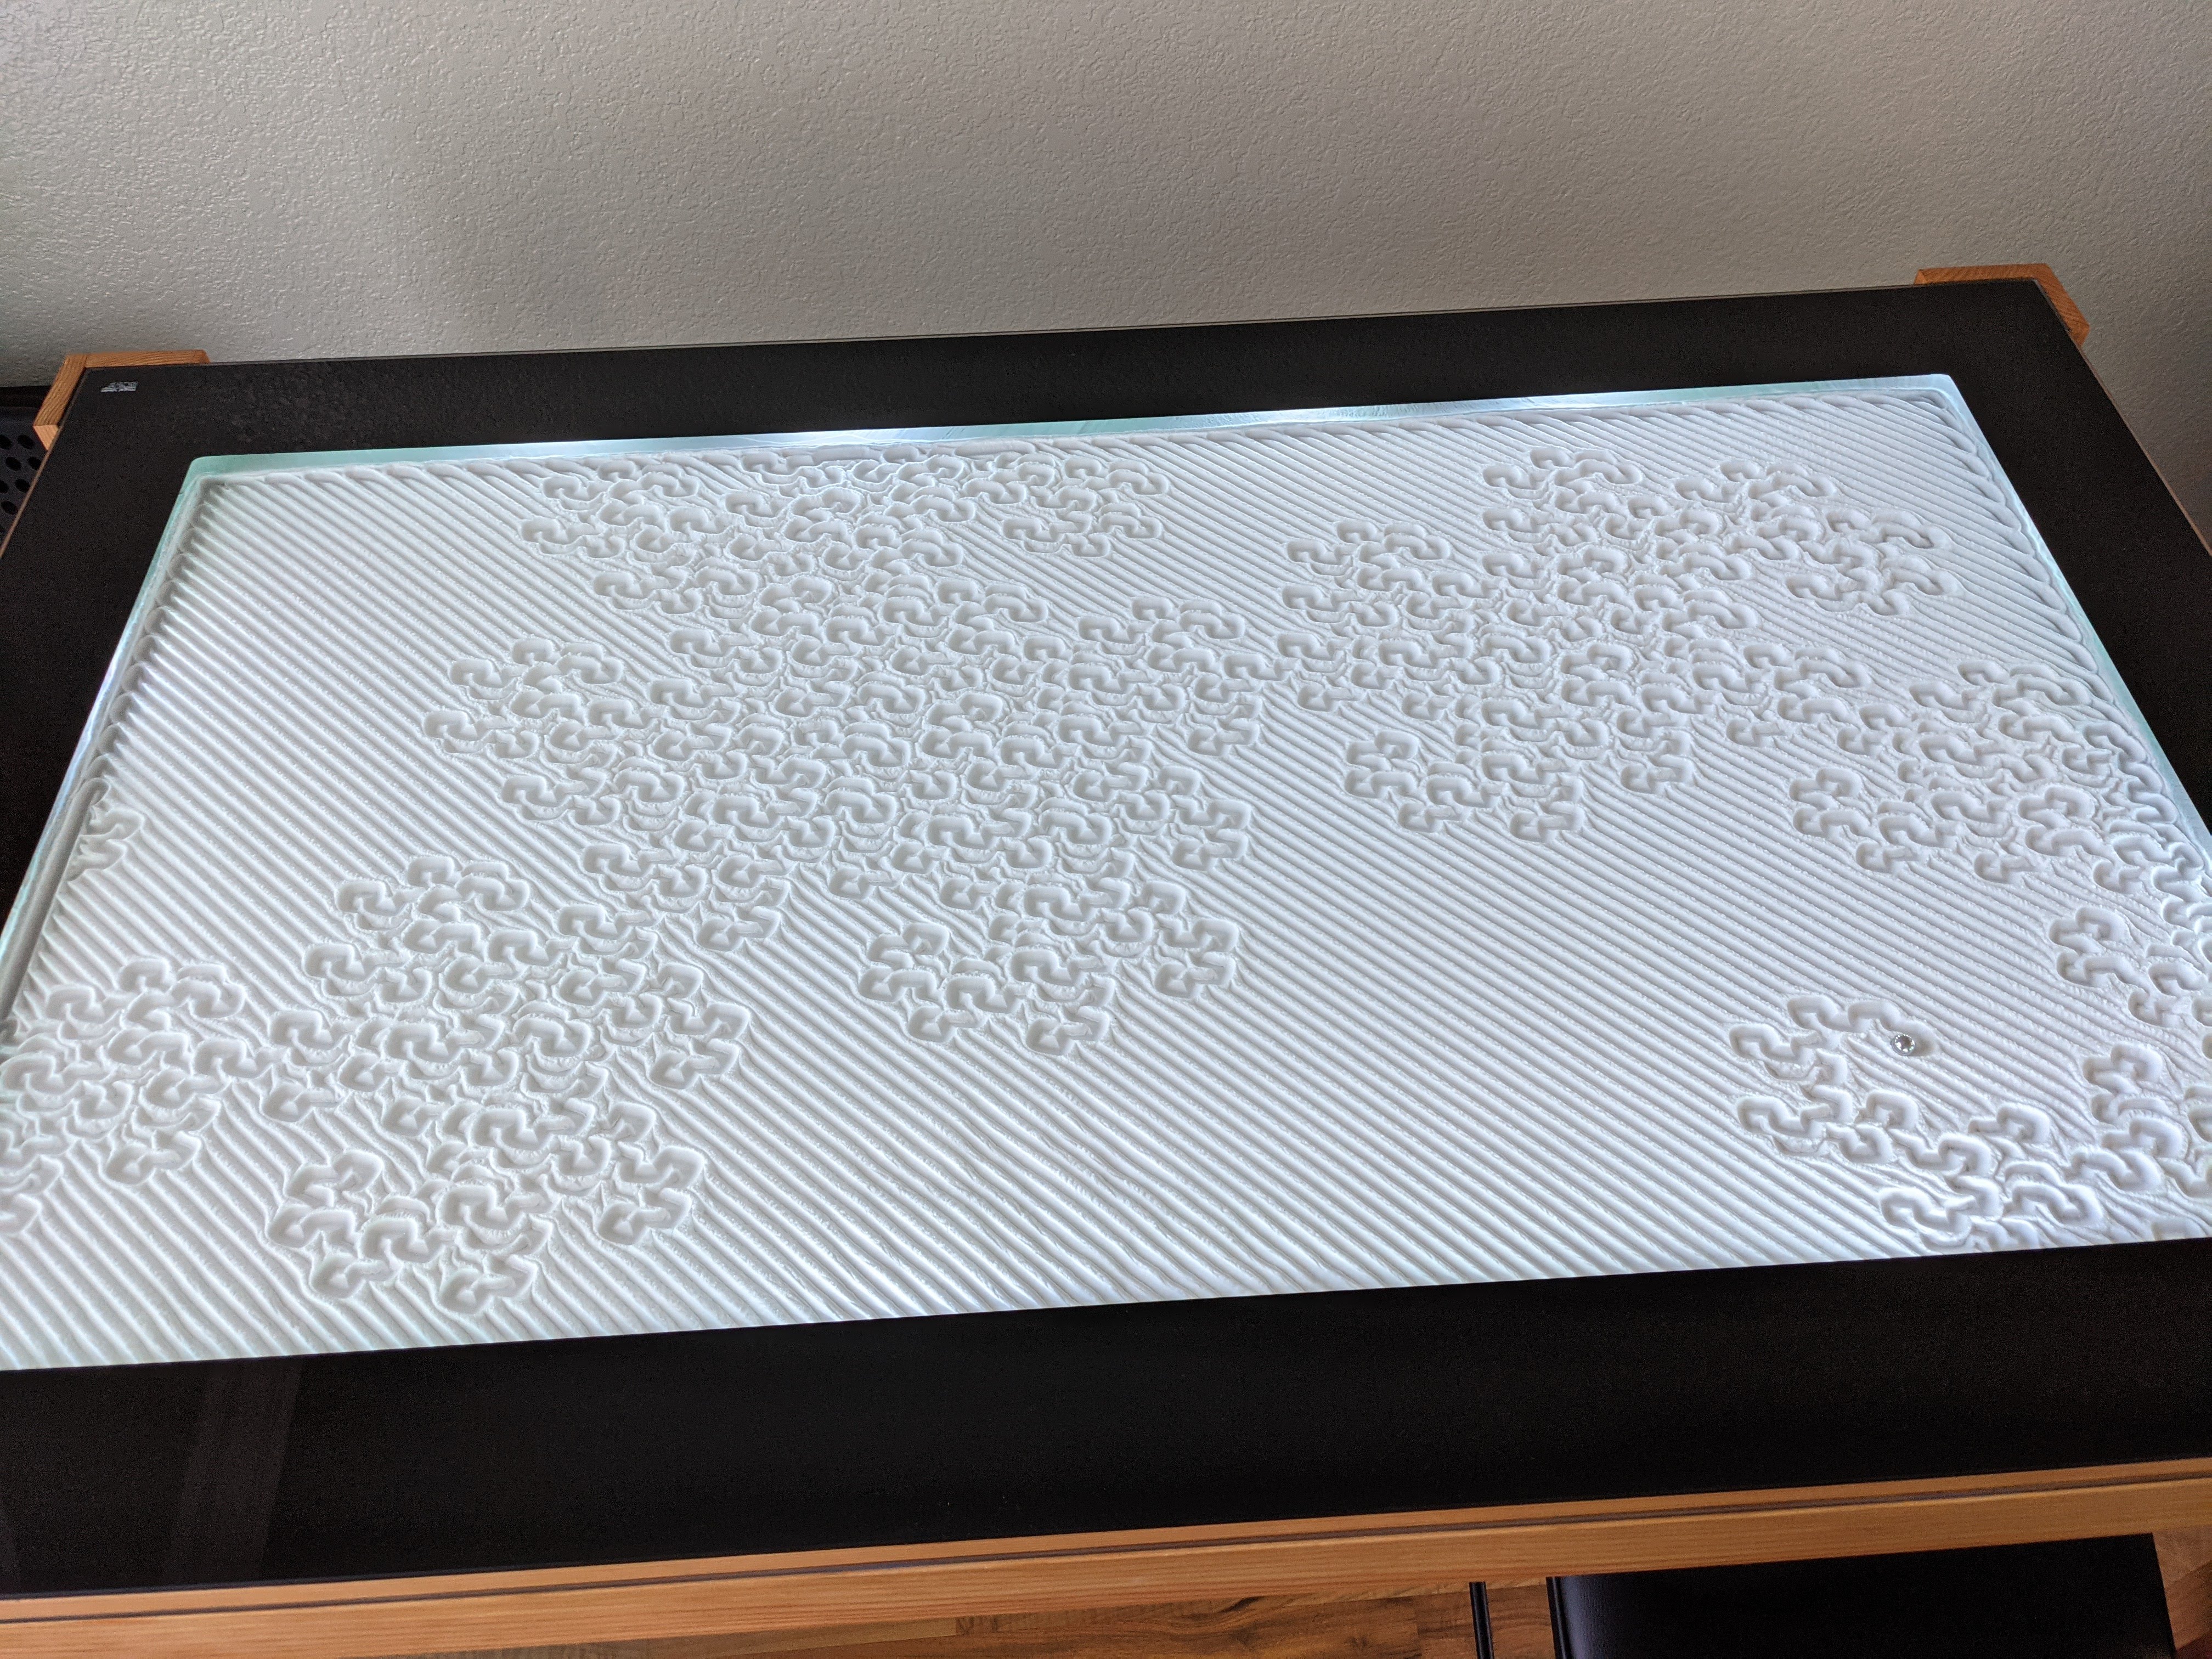
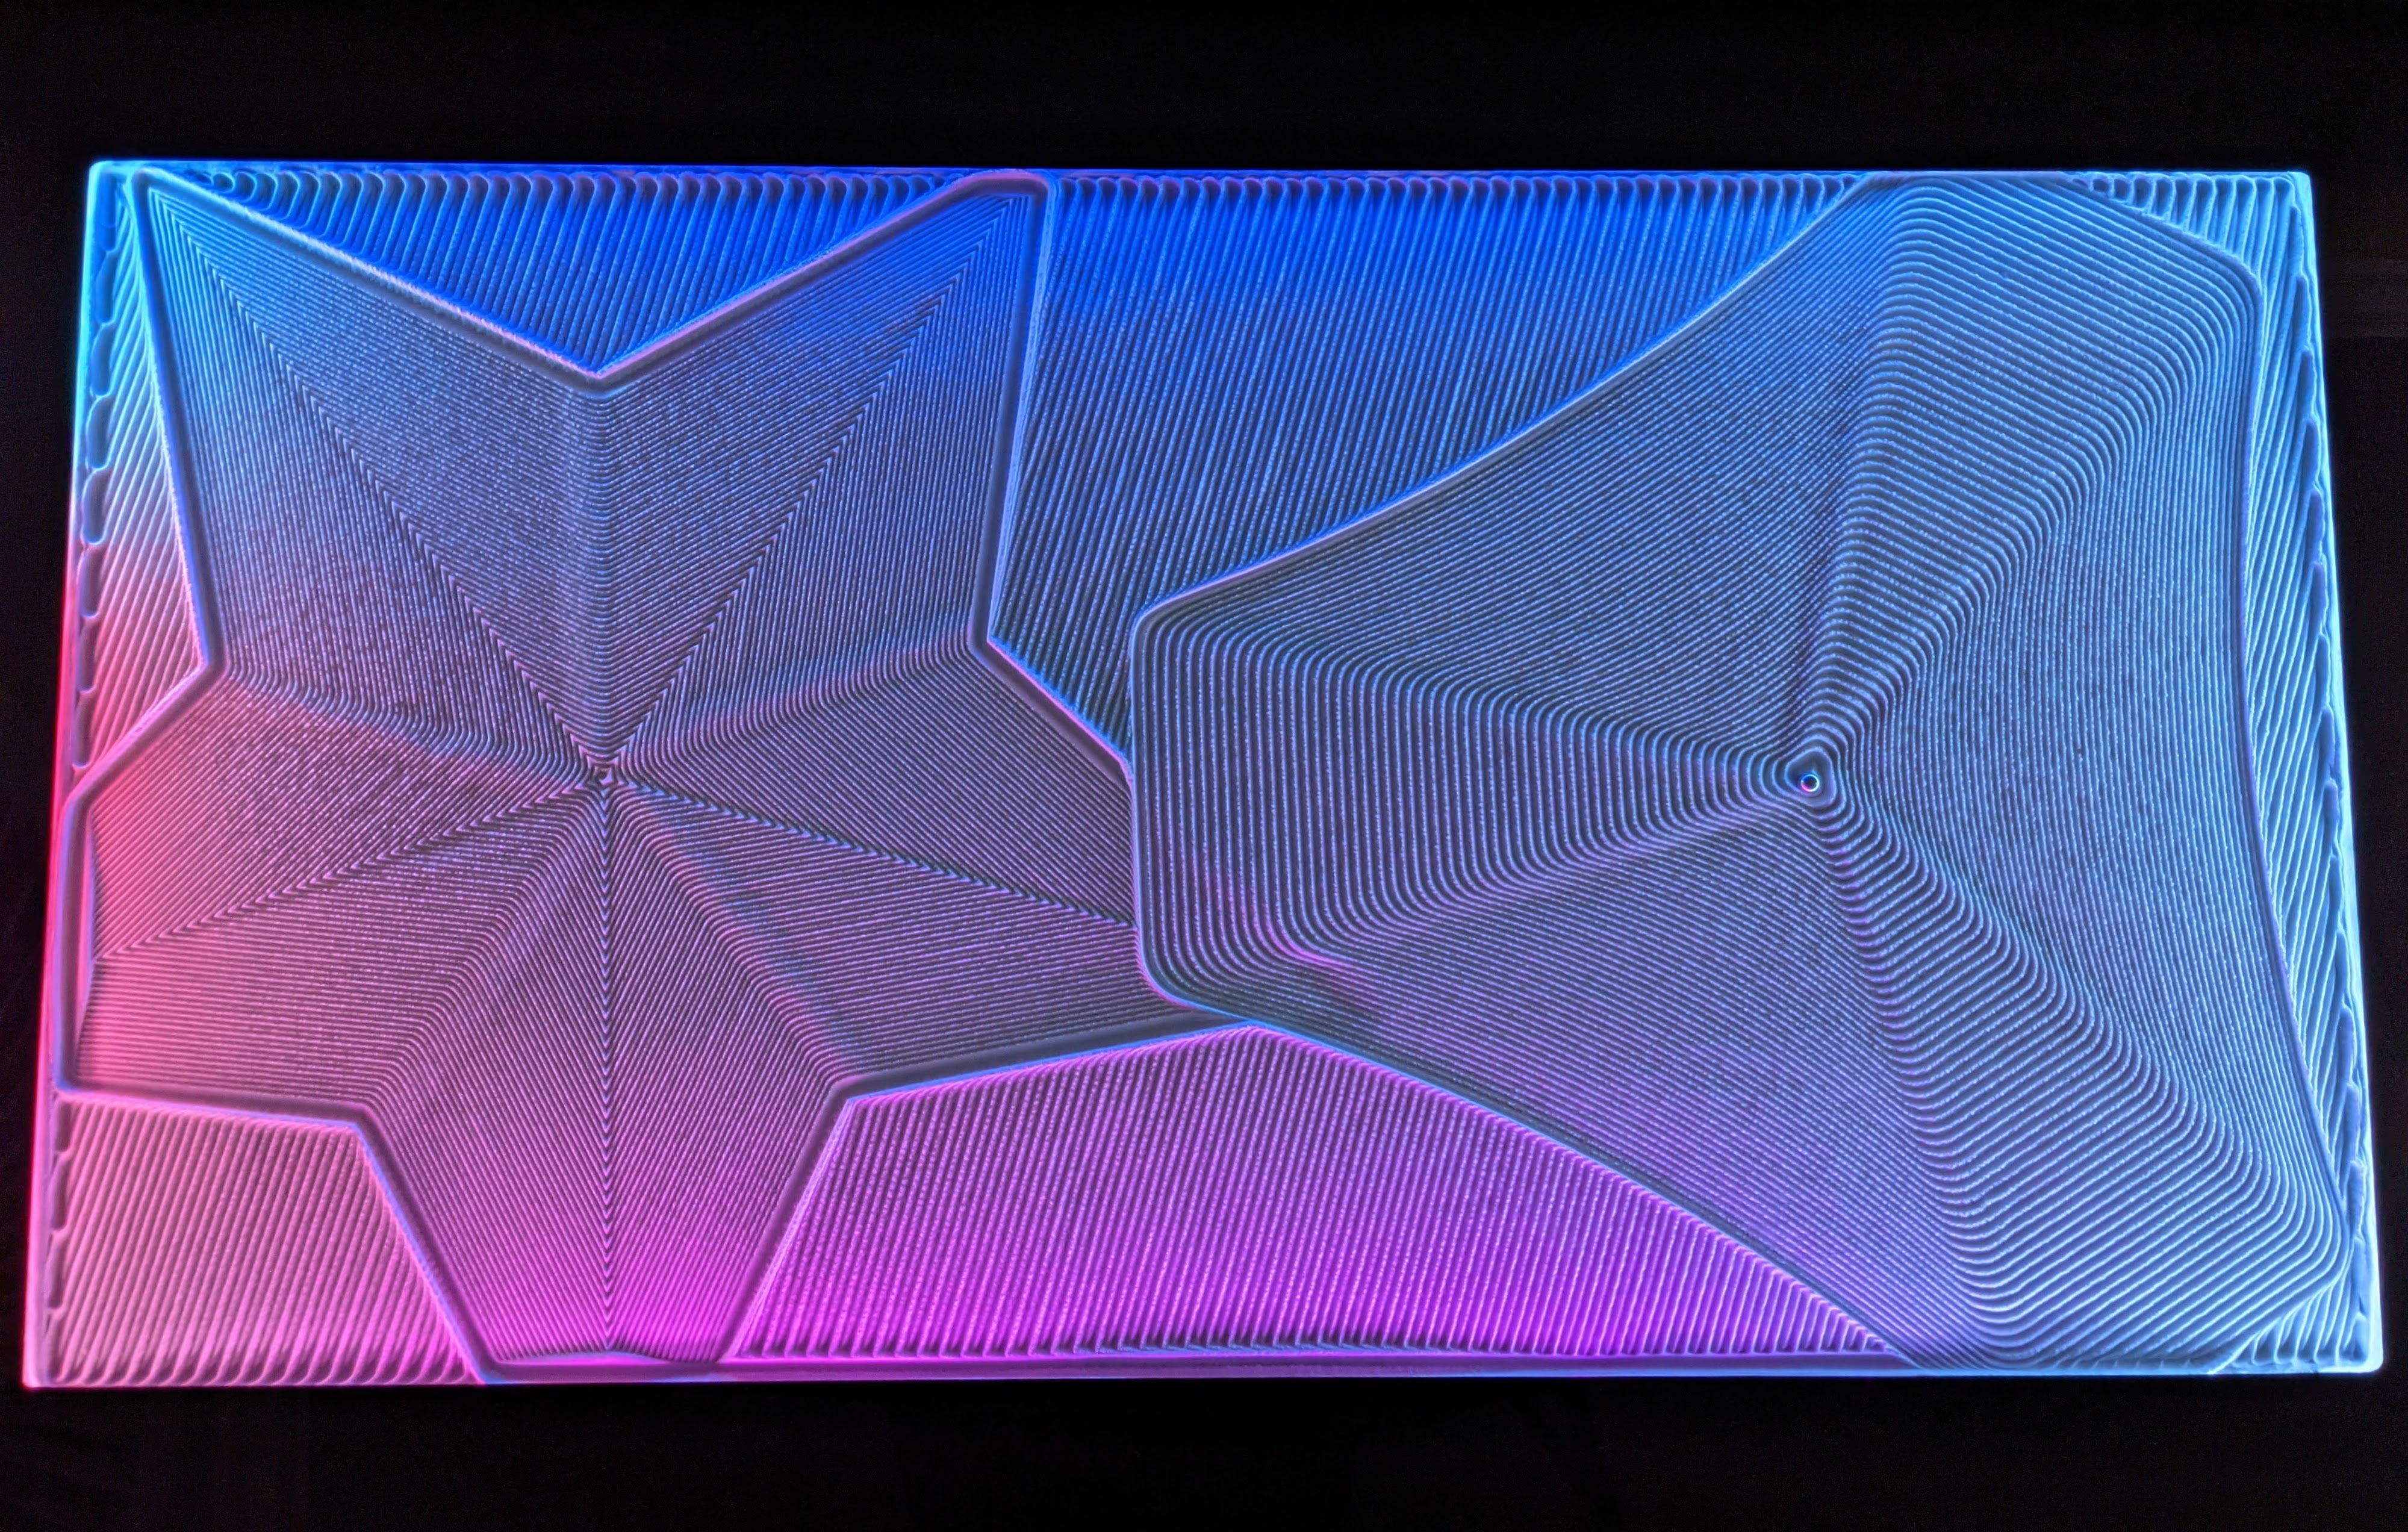
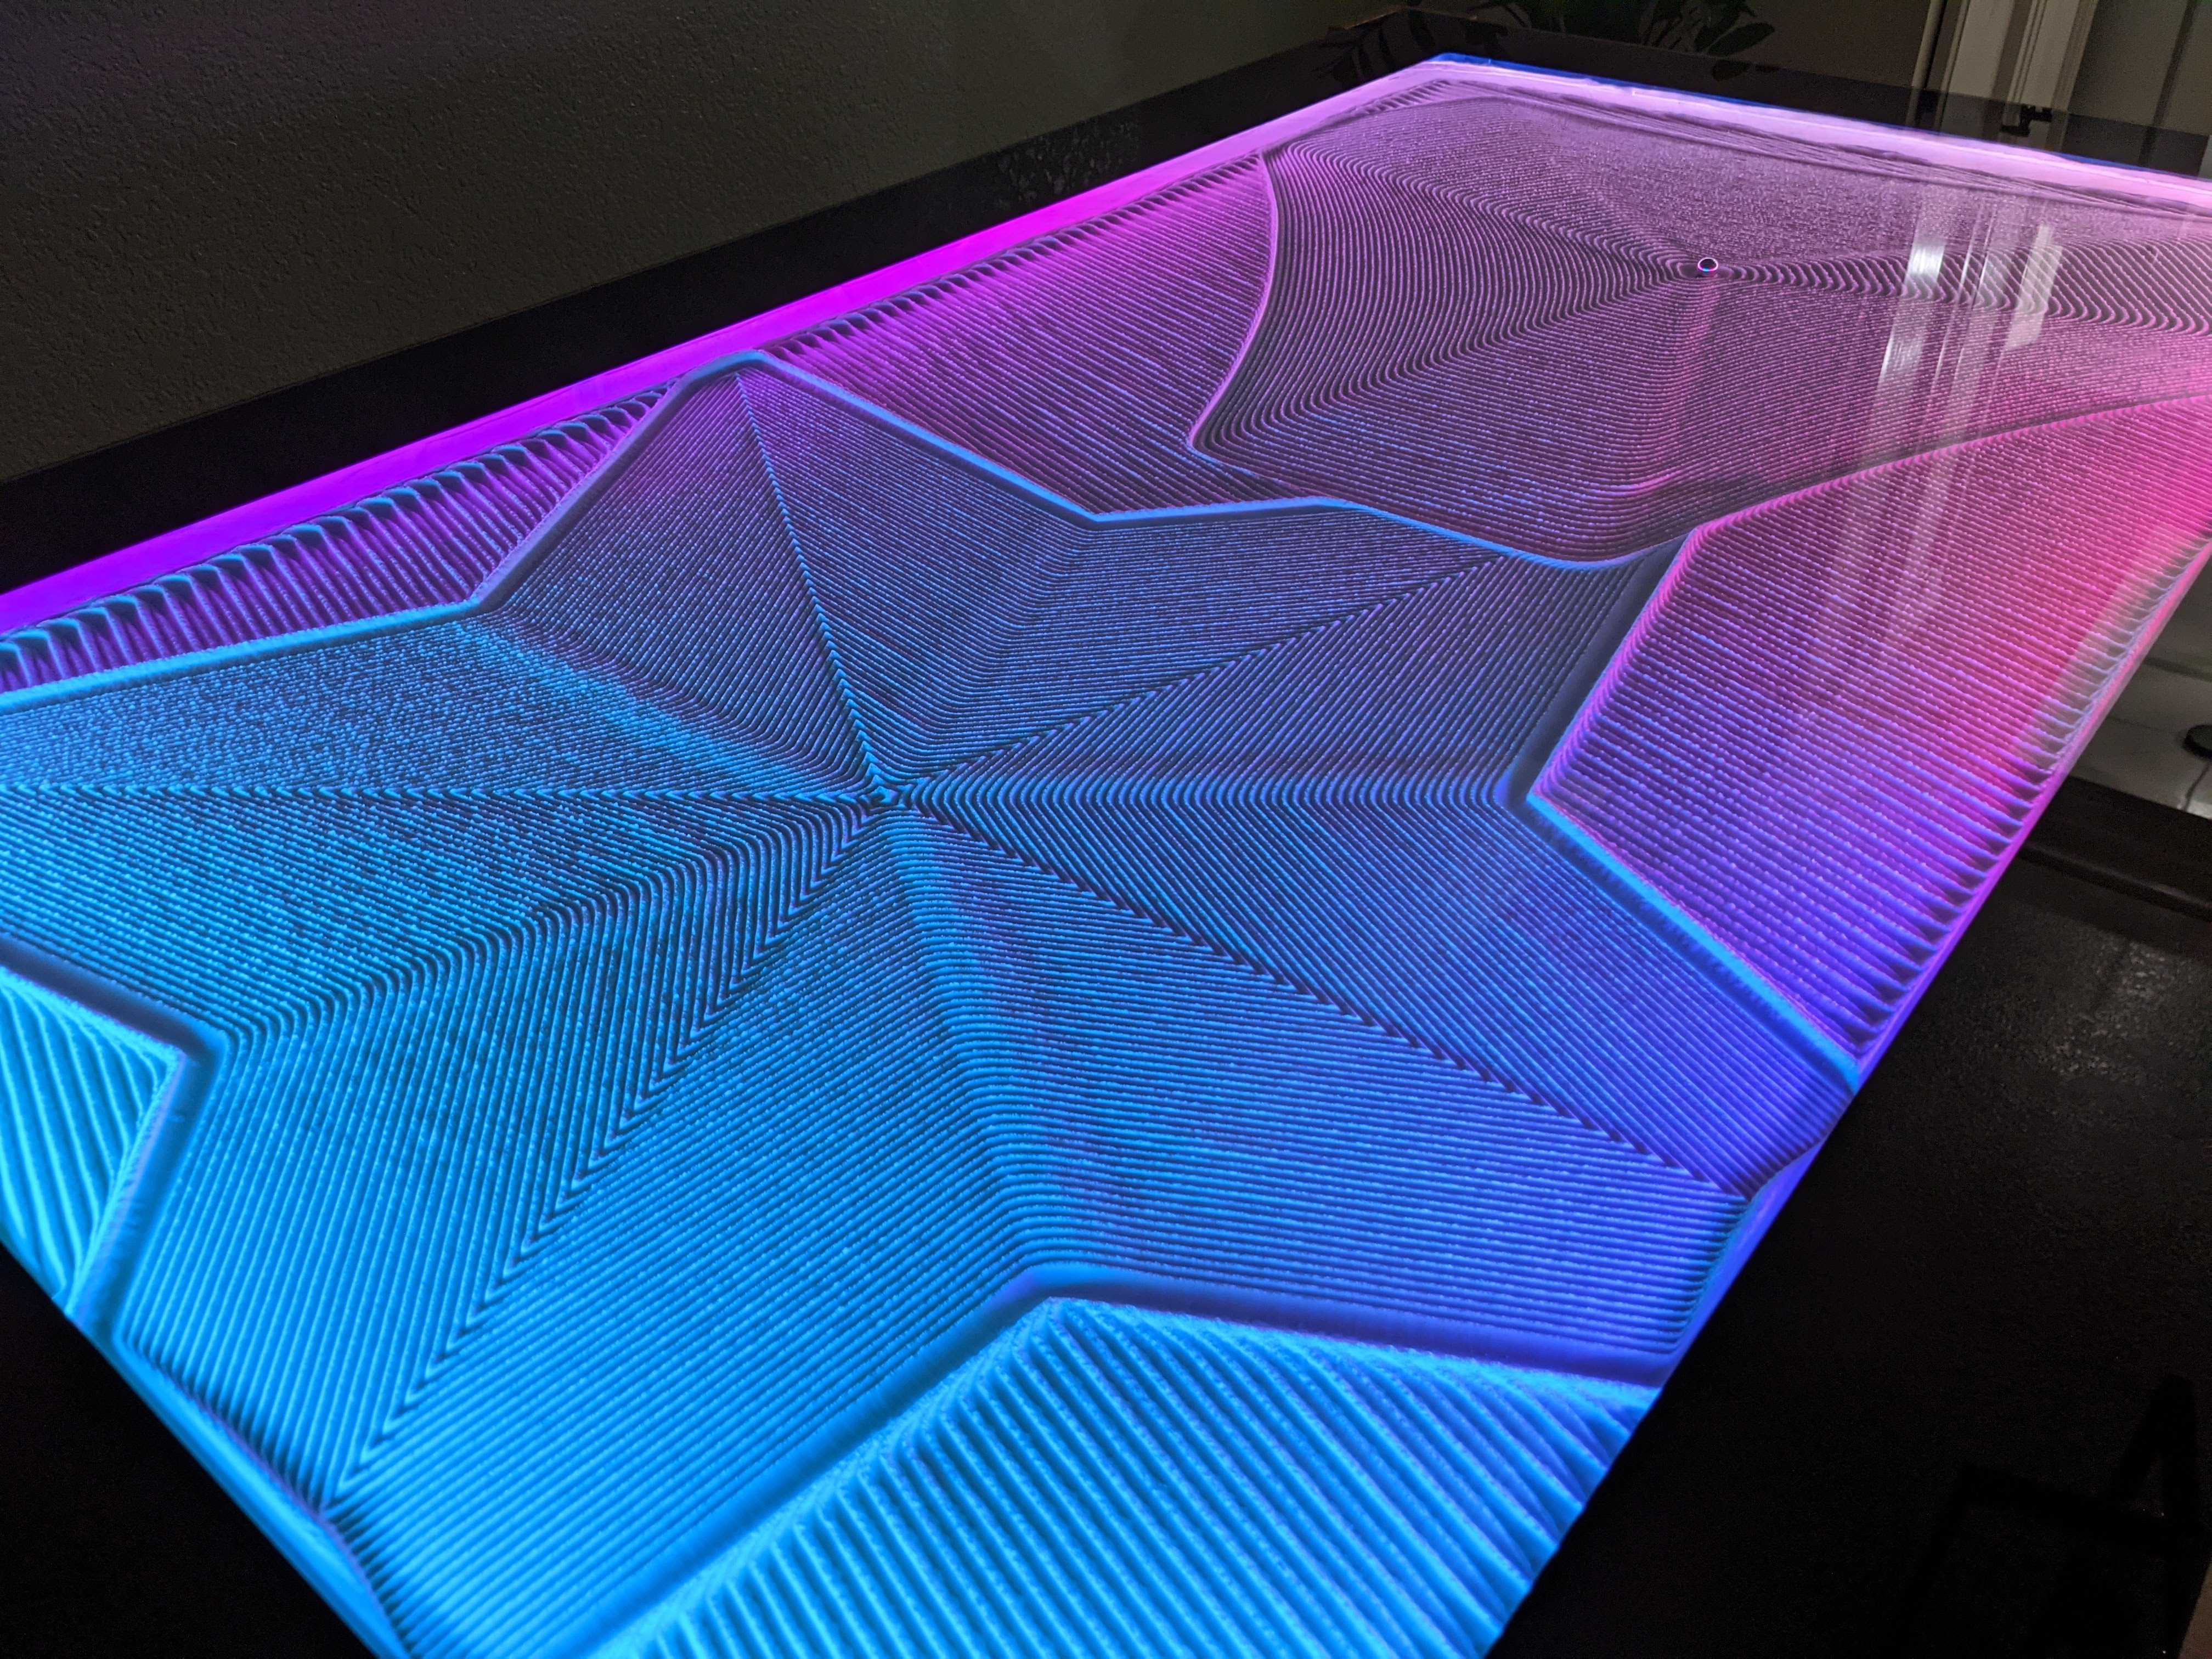

That is so big. Very cool to see such detail on the large patterns. The lighting Looks awesome too. Very nice work.
2 Likes
This looks fantastic! I have my 3-D prints complete and my V1 mechanical components order arrives today. Is the plan to have a control board flashed with the firmware in the store in the near future? (My weakness is in the electronics…specifically the coding)
1 Like
Thanks!
Currently, the only way to get this board is direct from the source, https://www.tindie.com/products/33366583/tmc2209-penlaser-controller/. Any board will work really but This does seem like a great fit for this application and I will make the config public once I am sure I did it right.
2 Likes