I started using OnShape and immediately fell in love with it. The license is free for hobbyists and it fits neatly into my workflow. I can do pretty much everything with it except for the CAM part because the CAM/slicer plugin Kiri:Moto does not support Marlin.
What are my best options for using Kiri:Moto with a Mini-Rambo 1.3 board running Marlin? Should I just flash the firmware to GRBL?
Is GRBL GCODE easily transformed to Marlin GCODE programmatically using something like a Python script?
I really like Onshape too. I use the Kiri plugin for making SVGs, but sure wish the gcode could be processed for the Marlin MPCNC firmware I am using. It would be great and not make me learn Fusion.
I’d be interested in this answer too and will do some poking around. There is a list of post-processors for the different machines. I know folks have been making post-processors for Fusion. It might be worth figuring this out and getting a Marlin/MPCNC build put into it.
They don’t have a lot of info in them. I’m going to spend some time setting up the workspace and seeing what kind of gcode I can come up with. I know there are several topics here that have discussed the differences between how Marlin and Grbl process gcode. I can’t imagine it is that difficult, just getting the right commands and presets down.
First I have to understand a few things. For example, origin. I am used to having the table be Z0 in EstlCAM. For some reason my part and the stock weren’t sizing correctly but I un-check the offset at the bottom and now it’s working.
I’m also curious about how the Gridspace part works for sending the code directly to my machine. Would be nice to have it go straight to CNC.js.
I was under the impression that Kiri:moto, while not explicitly supporting Marlin did work with it. Teaching Tech uses it for his CAM operations and successfully cut on his LowRider2 from kiri:moto. Although he was using the website, not the OnShape plugin.
I’m not using Marlin myself, so this should be taken with a grain of salt, but the G-codes for travel and feed moves (G0, G1, G2, G3…) are pretty generic and will probably work just fine on most machines. There may be issues with arc (G2,G3) codes on Marlin, possibly dependent on FW version.
I think the the setup and finish codes (M codes, G28, G92 etc.) seem more likely to cause problems due to different implementations. These are usually only found in the first and last few lines of code though, and are easily edited, if necessary, in a text editor.
I ran something last night and noted that it inserted a tool change at the beginning of the code. Will need to look into that. I can just delete that from the script. I guess it is standard for machines to do automatic tool changes as the first operation. In EstlCAM the tool change only kicks in for a subsequent operation and not at the beginning.
Everything else looks pretty good so far in the previews.
One think is that I don’t see a way to do carving as a distinct operation, such as in letters or vbit engraving.
I’m finally able to get back to this and test it out. Really a flawless run (well, after the first attempt that didn’t have the correct stock thickness).
One thing was that I can’t get it to not to put an M6 into the code. I delete it and it sticks it in. So that is a minor annoyance to either delete it in the gcode or hit resume at the very beginning.
Mind you, these are straight pocketing operations and cut outs. So in the next few days I’ll try and get something done in wood.
Not being able to do v-carving is a downside, but for straight 2.5D milling, it’s good.
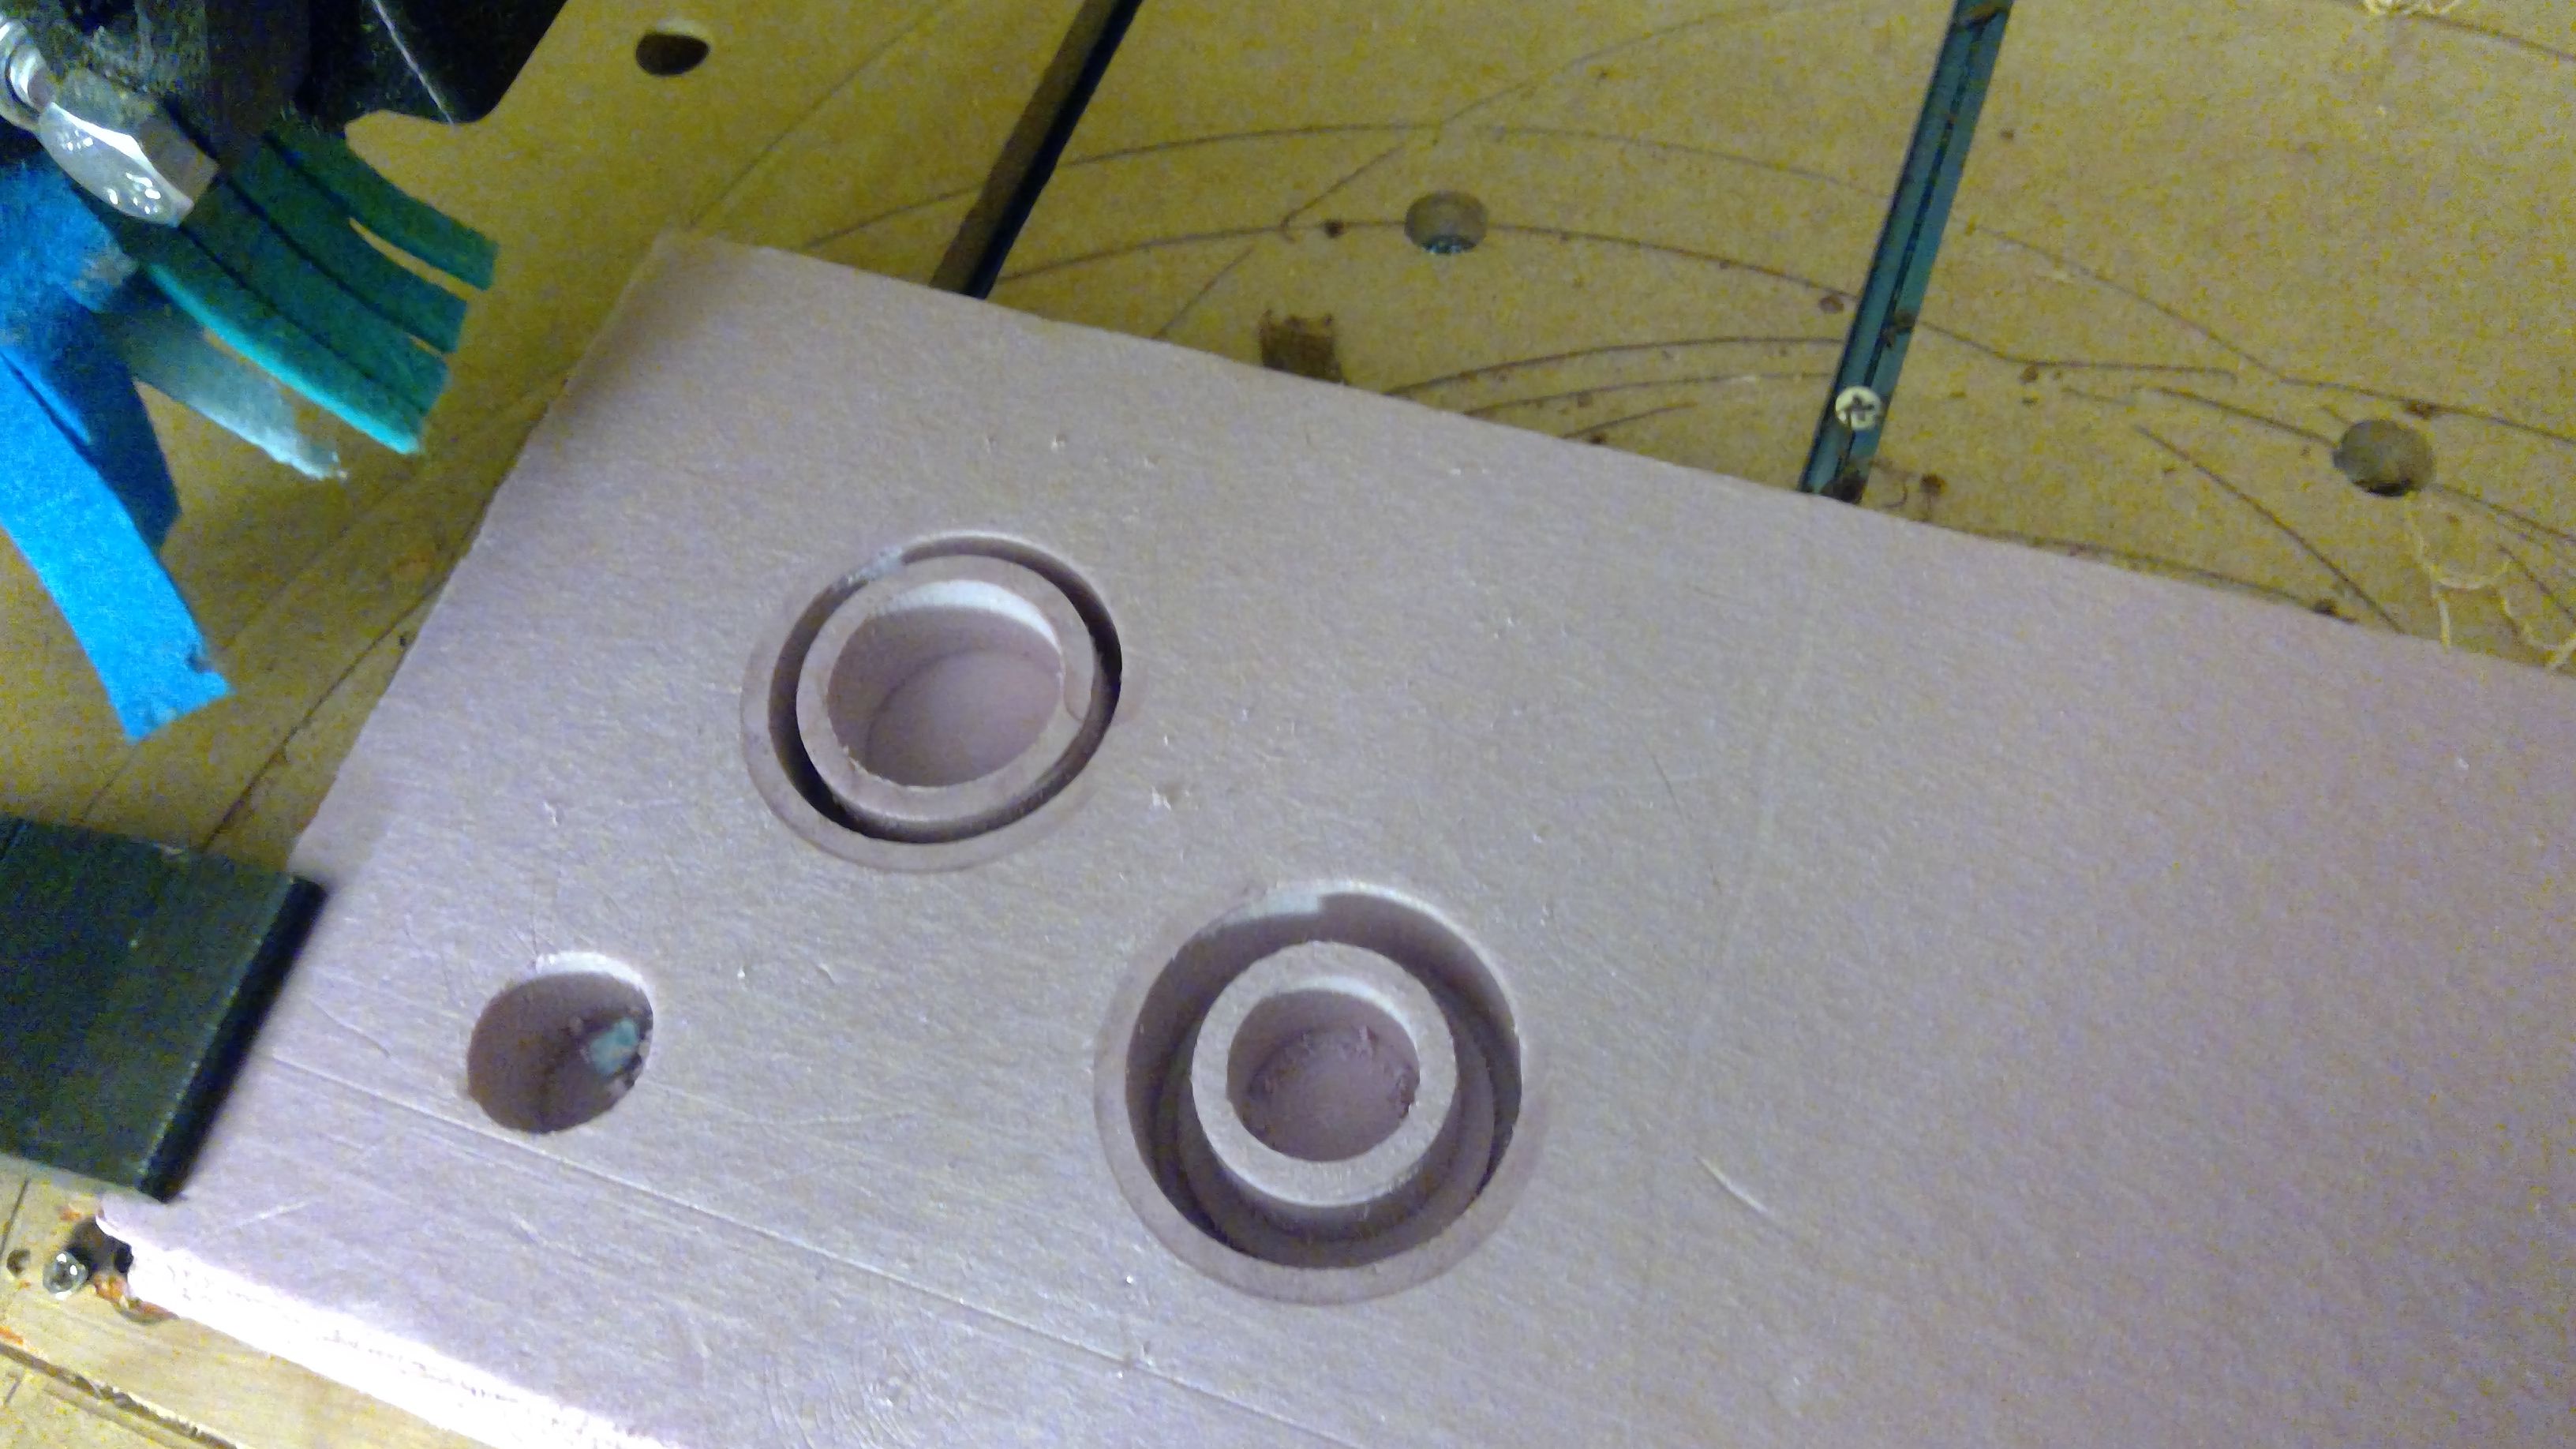
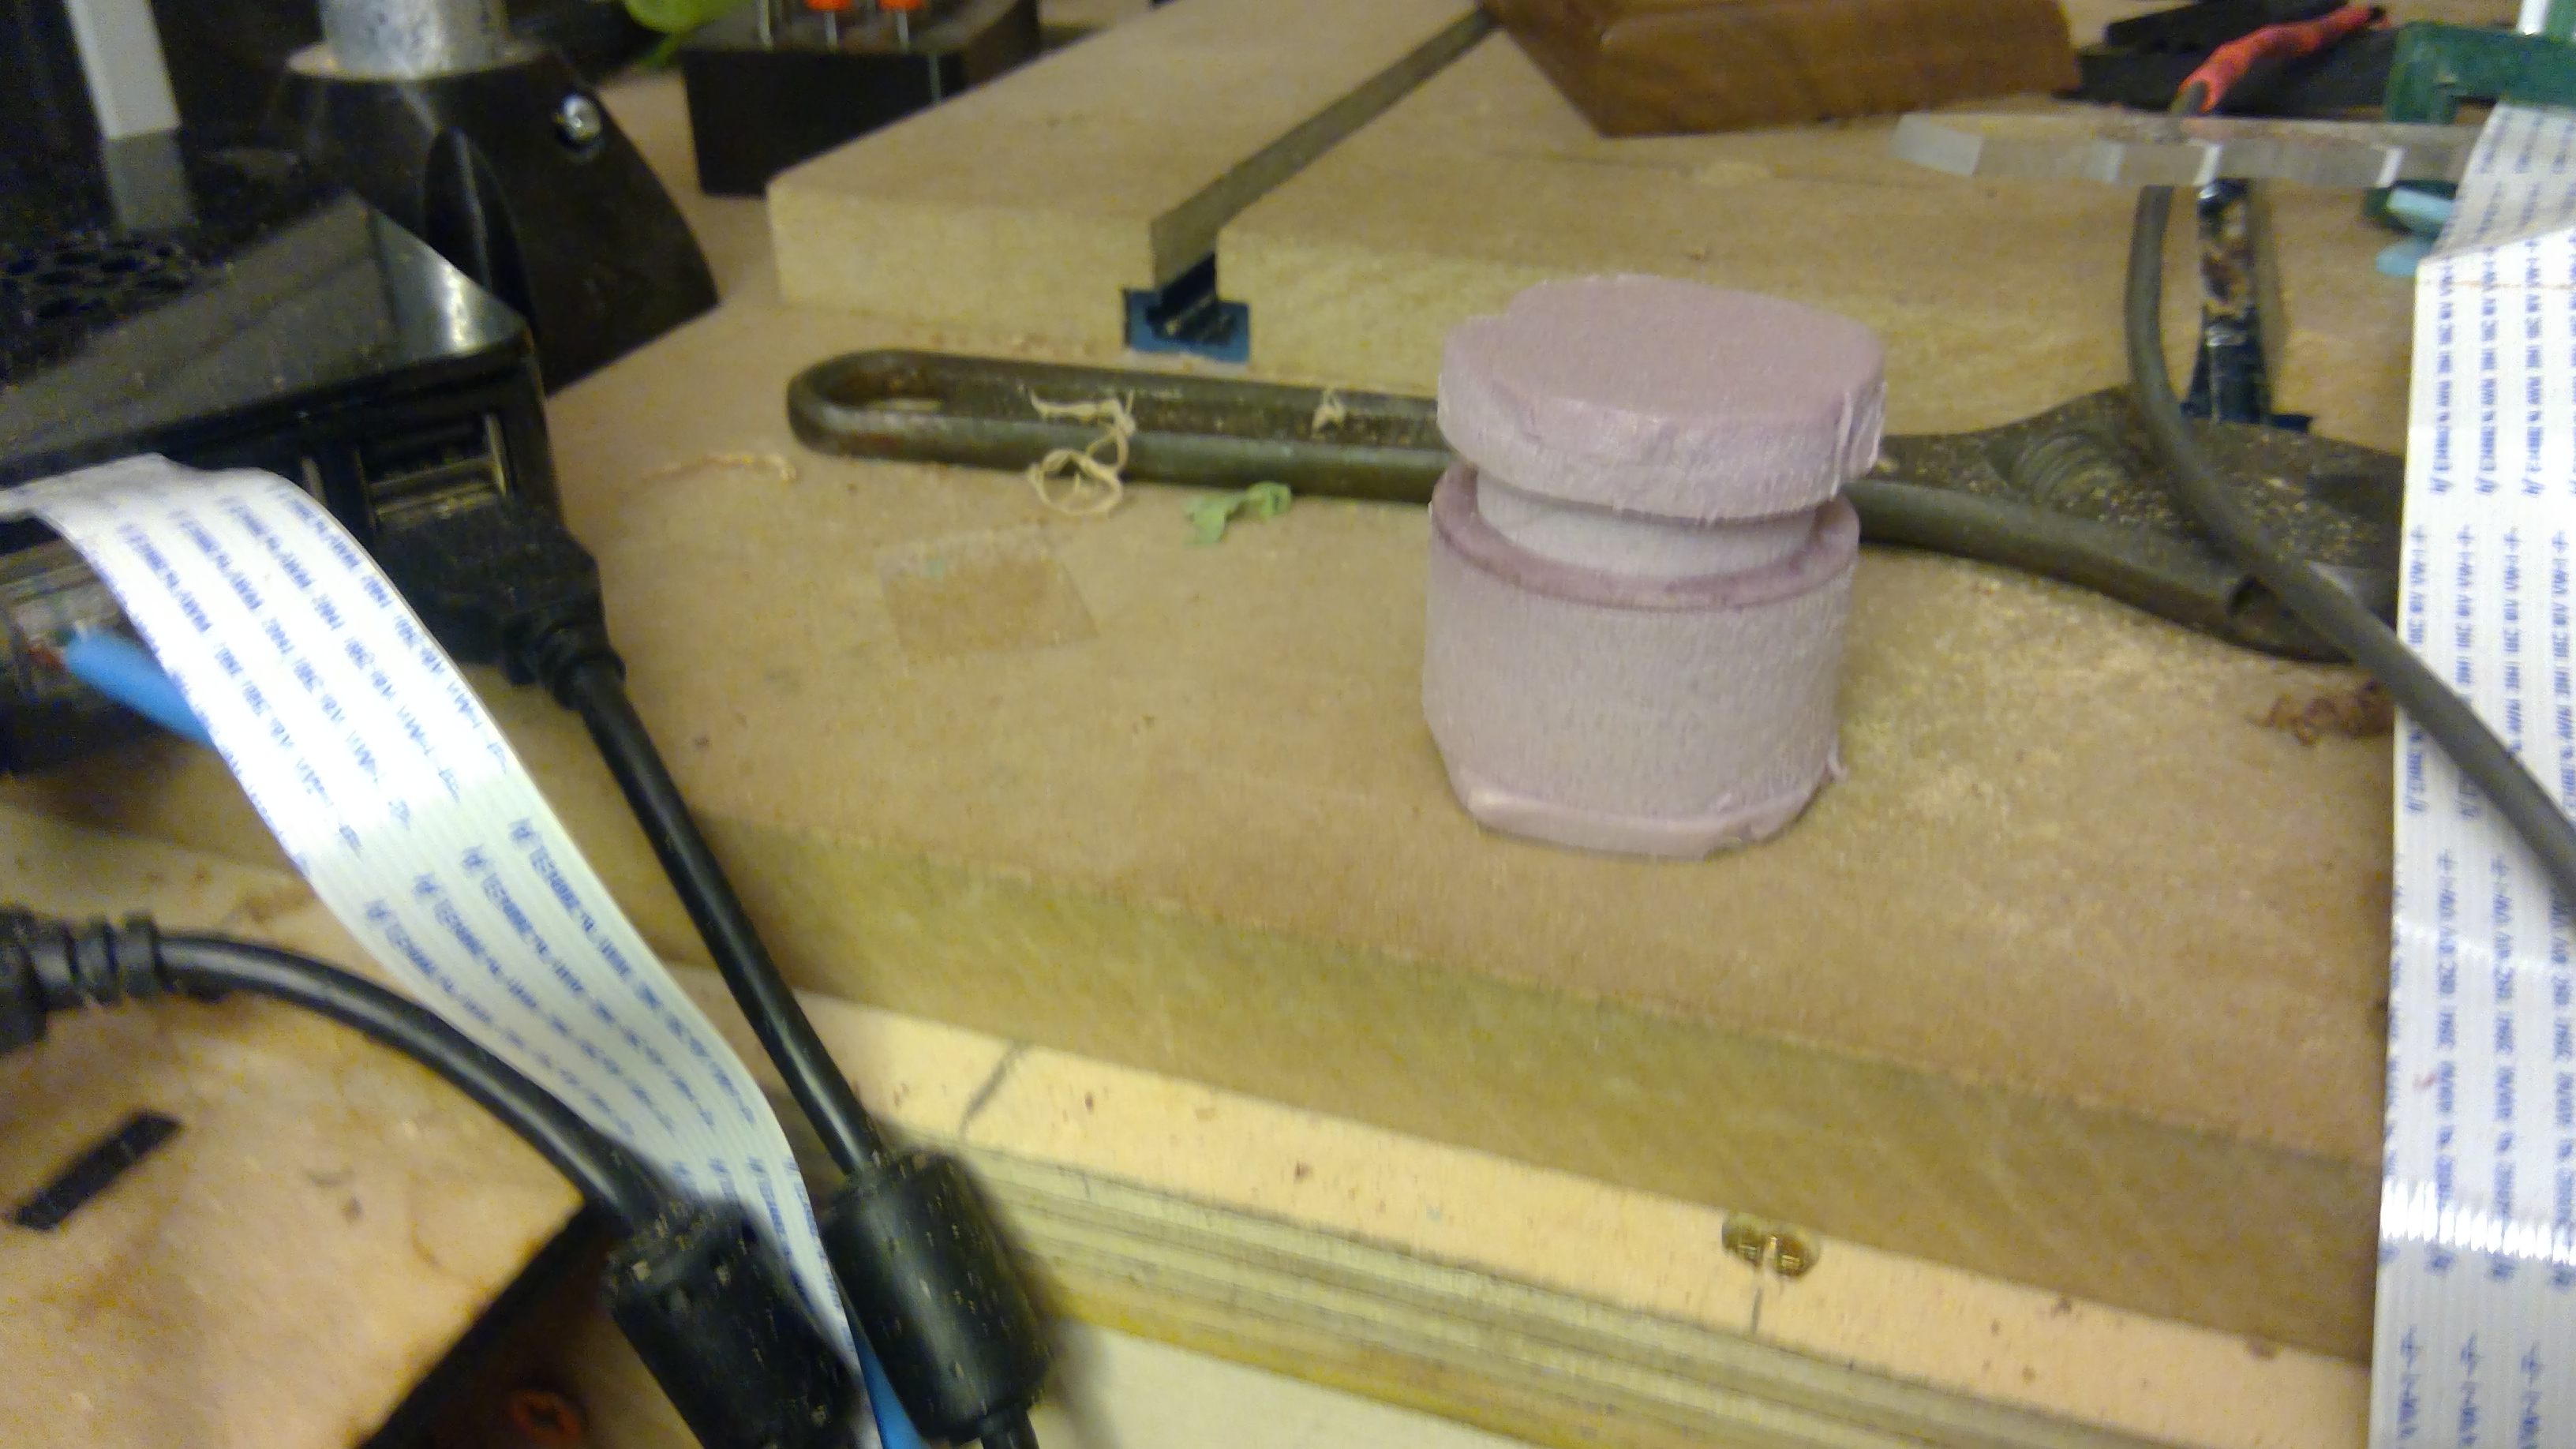
Fits right in. The foam is 25mm and the part is 20mm so I couldn’t do a parting operation since the endmill isn’t long enough. So I cut it with a utility knife.
Hey there. I’m the author of Kiri:Moto. It drives a lot of Marlin based 3D printers and CNC mills at my household. If something is amiss, I’d love to know. You can clone and alter any device in the default device directory. Just select the device type and click the “+” button on the lower left. Then you can override the gcode templates.
In the next few days I will be releasing an update that supports V and tapered bits. This code also does a substantially better job with ball mills and linear X/Y finishing.
AWESOME! Hope to have some more people trying this out to get some “local Experts”, I have not had much time to cut much, let alone experiment but it is on my list of things to try. The Scienci guys gave me a little walk through of it at MRRF last year.
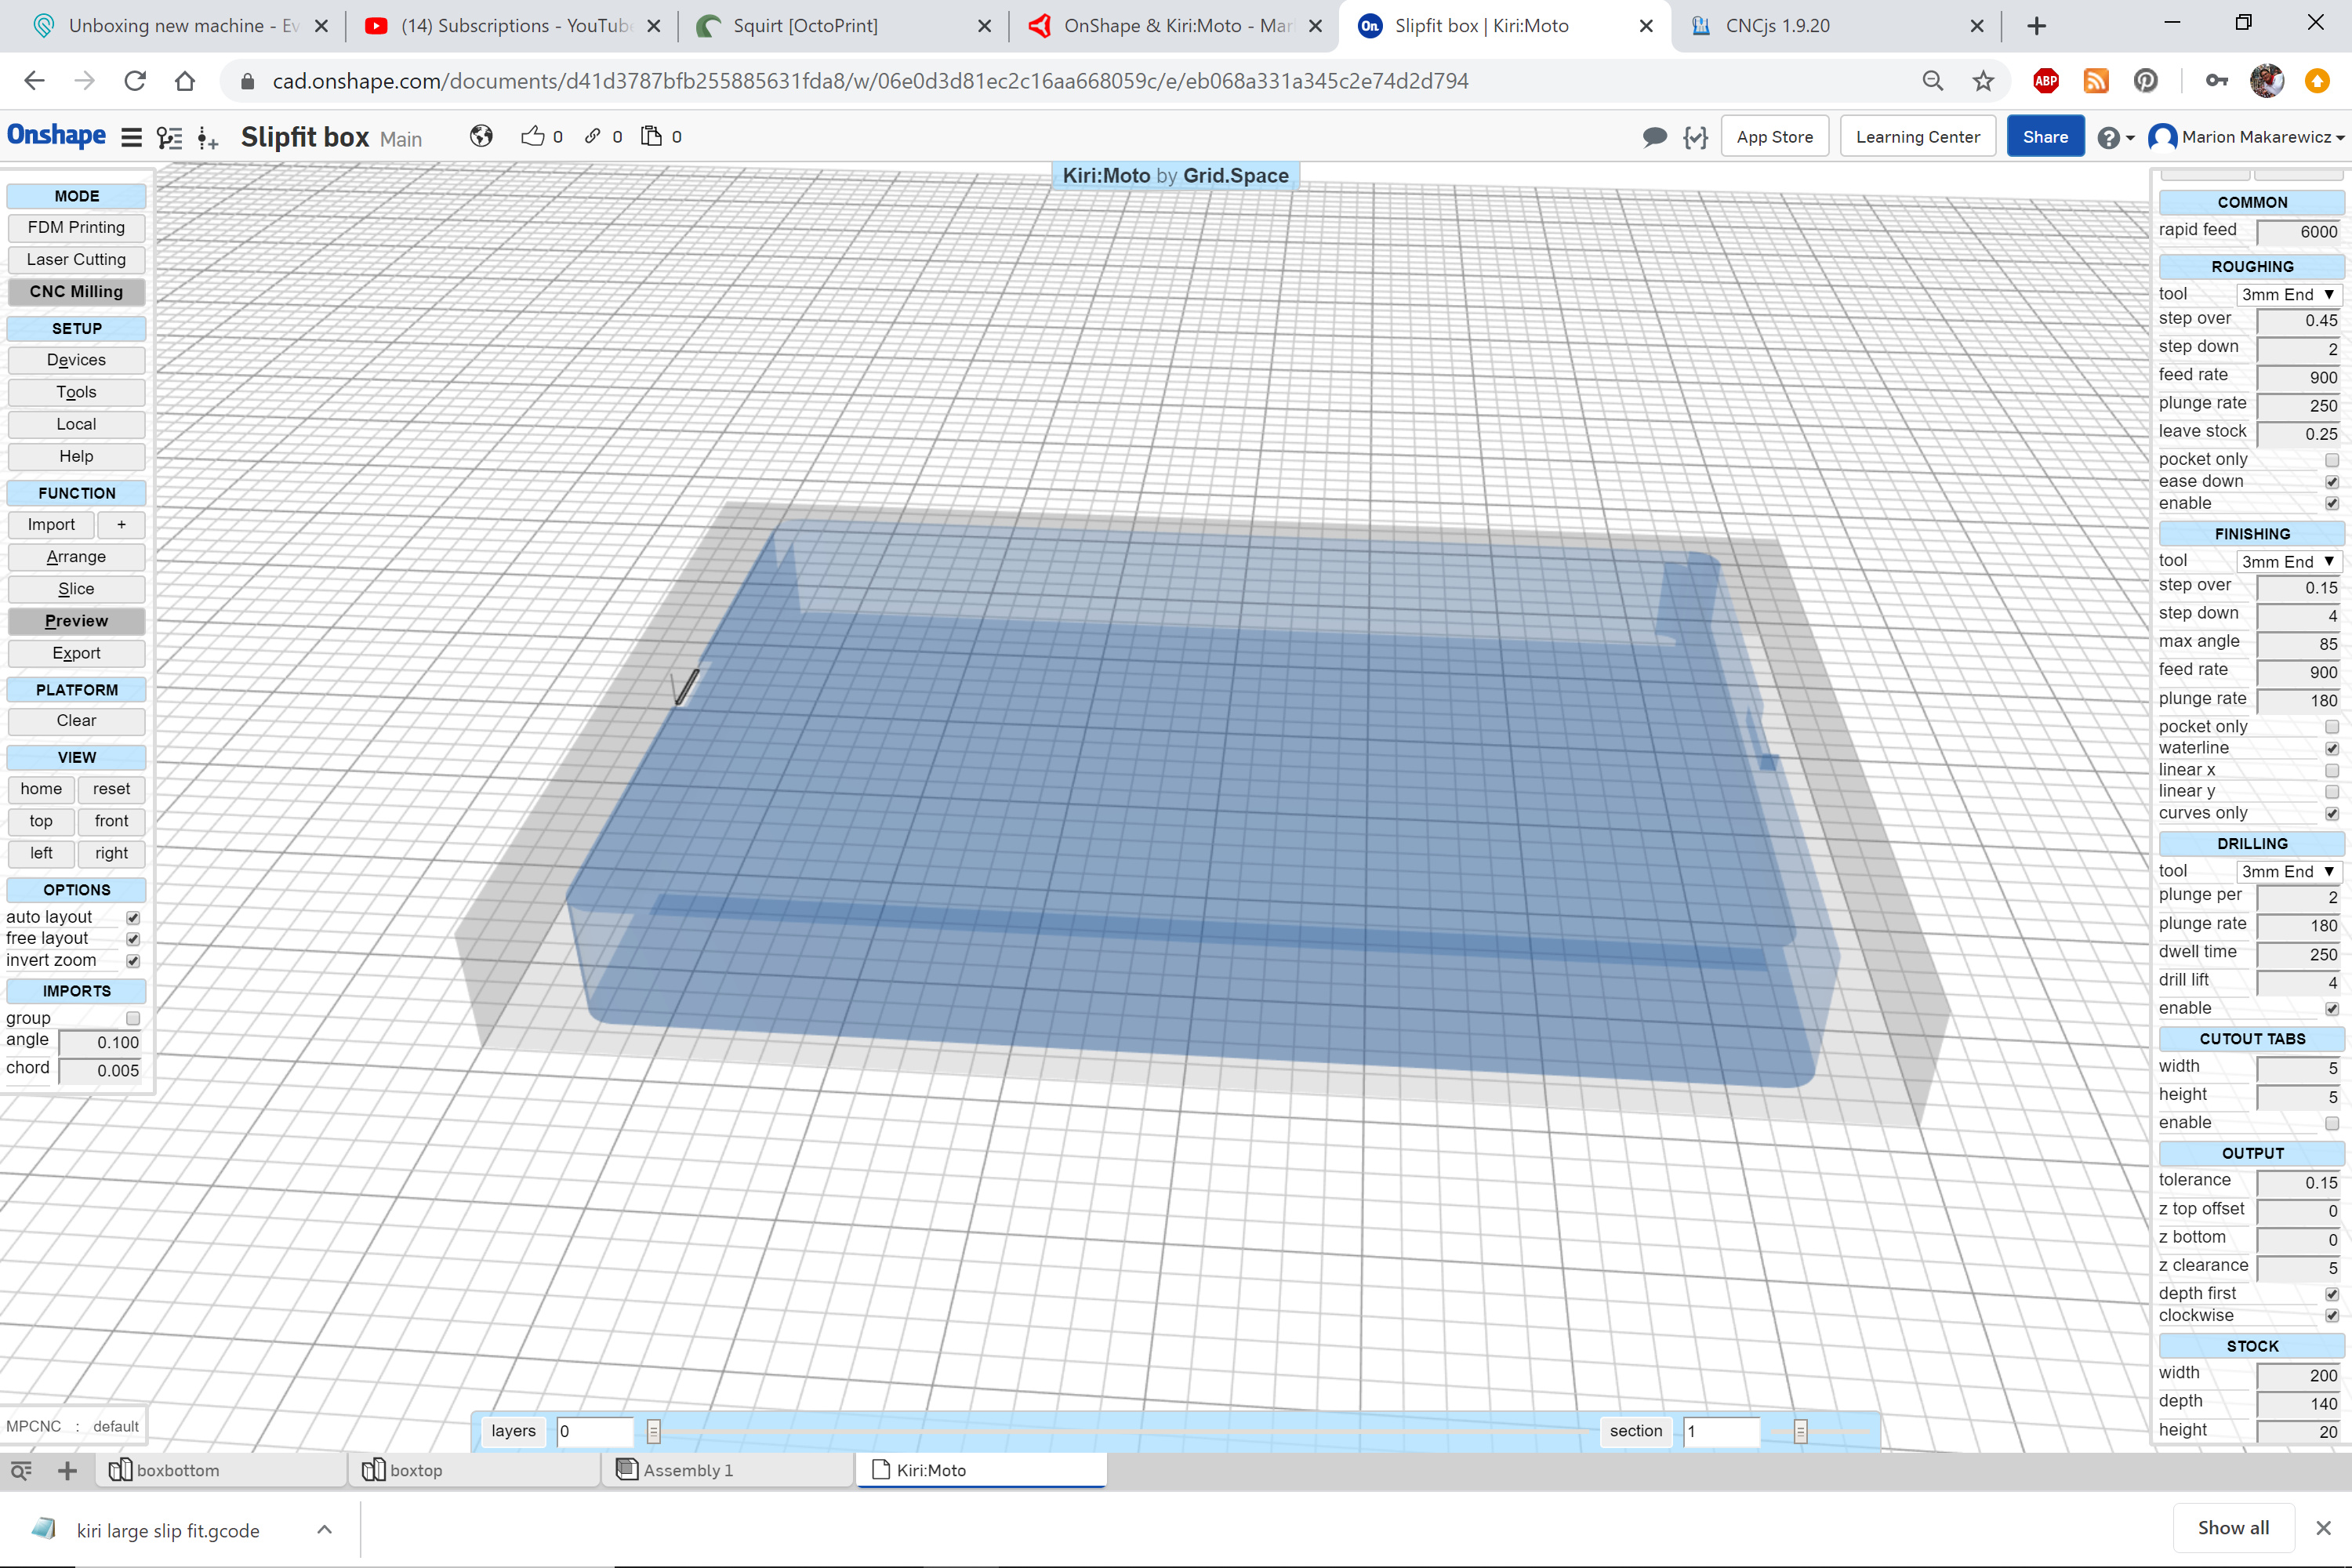
Wow @stewart. Thanks for posting and joining. I love Kiri:Moto and use the laser SVG generation all the time. I just did a large millinjg job last night and will post the results here. I have no complaints about the the end result at all. I look forward to using the v carve. I’m still trying to understand some of the features as they are explained since I am not too familiar with all the terminology in milling and cnc work yet. I have had to do some study of the concept of “waterline” and don’t think I still have it figured out.
As to x or y finishing, I assume that is instead of a progressive, spiraling square going out from the center, the tool path is a complete raster across or down the axis on the finishing pass and not checking waterline it will go up and down the steps of a pocket all the way across one direction. I did a gcode view to see what these differences are. Nice to have these options.
I was able to clone an existing setup and work from that and didn’t see any errors in the code. It really is faster than stepping through all the EstlCAM operations for simple pocketing.
Thanks again. I need to look at support options for this and give back something because it really made my laser work go well with OnShape. This may save me from going to Fusion!
I need to poke around with the uploading function. Not quite figured that out. Would be great to be able to save some steps and push straight to my CNC.js setup instead of saving the file and then uploading it. Again, I have noticed this feature but haven’t taken the time to see how it works.
Great to hear! I have some upcoming improvements to the laser functions that I hope you will find useful. First, it’s getting proper device definitions like the FDM and CNC modes. Second, it will provide options for coloring or separating line groups in ways that your laser driver or software can interpret with different settings.
The 30 second version of waterline is that it is the cleanup pass after roughing that provides crisp clean edges to everything. While it is possible to do an all-in-one job with roughing, sometimes you may want to use a separate endmill for the finishing passes. Alternatively, for simple 2D cutouts, you only need to run a waterline pass.
I plan to put up more videos when I’m done with this batch of new code.
I’ve just pushed Kiri v1.7.4 that has this new feature. Under output it’s called “merged” and it will pancake the slices adding new colors when polygons stack directly. I will post a YouTube video shortly with visuals. But I think you will be very excited when you see what it does. It greatly simplifies our typical workflow, especially if you like to have things like engravings inside of a cutout.
My pleasure. I’ll be making a lot of use of this, too. Because I’m a new user, maybe, it won’t let me include a link to the YouTube video I posted about it.