I found a link to pictures of the stool I blatantly plagiarized… Those are some pricey stools! Also, it’s clear at a glance that his stools make even more efficient use of material than my rip-offs do.
A search seems to indicate that the designer, Barry Simpson, has passed away; but I don’t dare share my CAD design. Frankly, if a newbie to CAD/CAM like me can knock one out in fairly short order, anyone else looking to make one can too.
By fay the hardest part of the process for me was figuring out how to make all the dimensions some fraction of a single overall “Size” dimension, so it was scalable. That was just a learning exercise for myself, though. Drawing a fixed size version shouldn’t be too difficult.
I’ve been a Linux geek for quite a while, and before going to the recommended EstlCam, I decided to try the options available on Linux. I’ve been using FreeCAD for all my CAD/CAM work. I like it, and it’s been working great for me, but FreeCAD doesn’t currently support V-carving.
Having seen a couple of references to F-Engrave, I gave it a try. I’m impressed! I ran through the V-carving tutorial, and got this…
I don’t actually have a v-bit yet (going to be ordering one now for sure), so this was done with one of the 1/8" ball nose end mills Ryan sells. The program supports this (I guess that would make it “U” carving?).
I just used an off-cut of lumber from the porch project I have in progress (on hold 'til the weather improves). I picked the flattest piece I could find, but didn’t expect much as a lot of the cuts were a fraction of a mm deep and I didn’t think the wood was really flat enough. I probably need to pick up a surfacing bit too…
F-Engrave supports V-carved signs and such as well, of course. It also has functions that specifically support V-carved inlays, which I’m quite excited about.
More Props to Ryan for his CNC designs that can do this stuff…Have a virtual beer on me Ryan. 8^)
Came out pretty good I think. Especially considering how warped and twisted the pallet wood was. Took a bit of clamping to get it sufficiently flat. Edit to note that I used F-Engrave to generate the gcode.
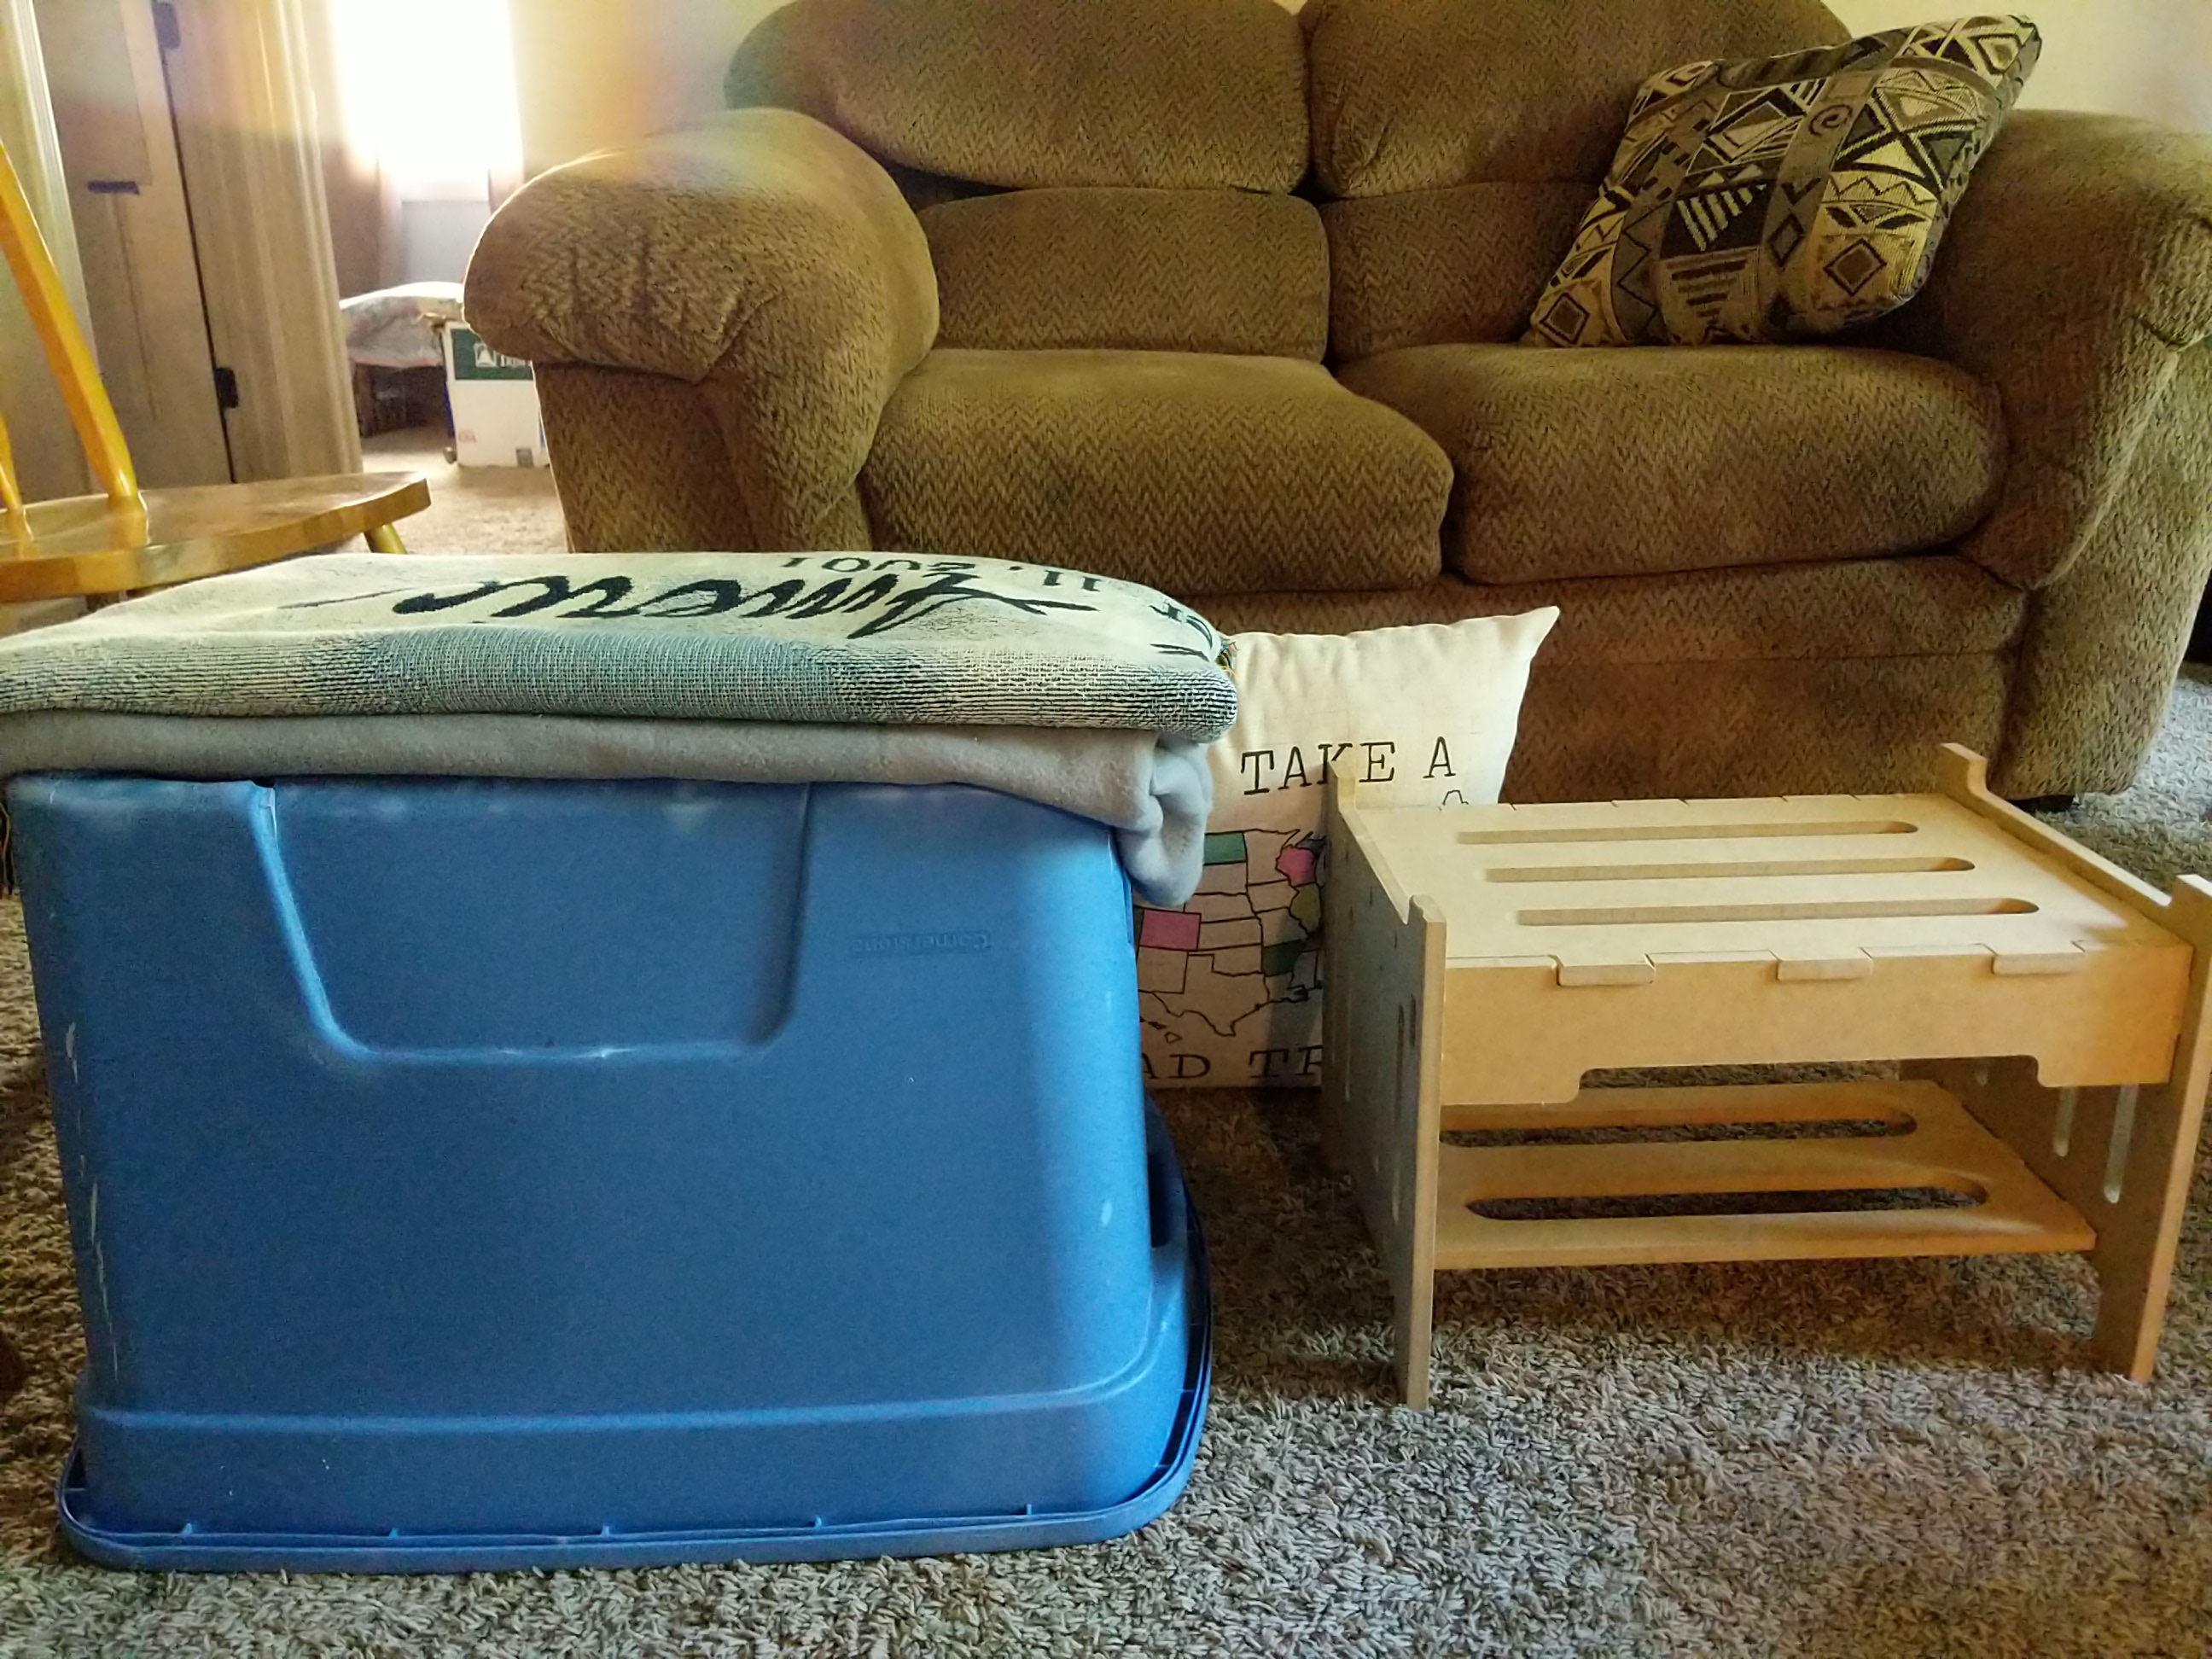
I’ve also made a step stool to make it easier for the dog to climb onto the bed.
I fully expected to use a couple of pocket screws to hold this together, but found it was unnecessary. The tab and slot ( or mortise and tenon? ) arrangement locks it together really well.
Perhaps it’s time for an update. I find the “Things You’ve Made” category inspiring. Hopefully I can inspire others too. 8^)
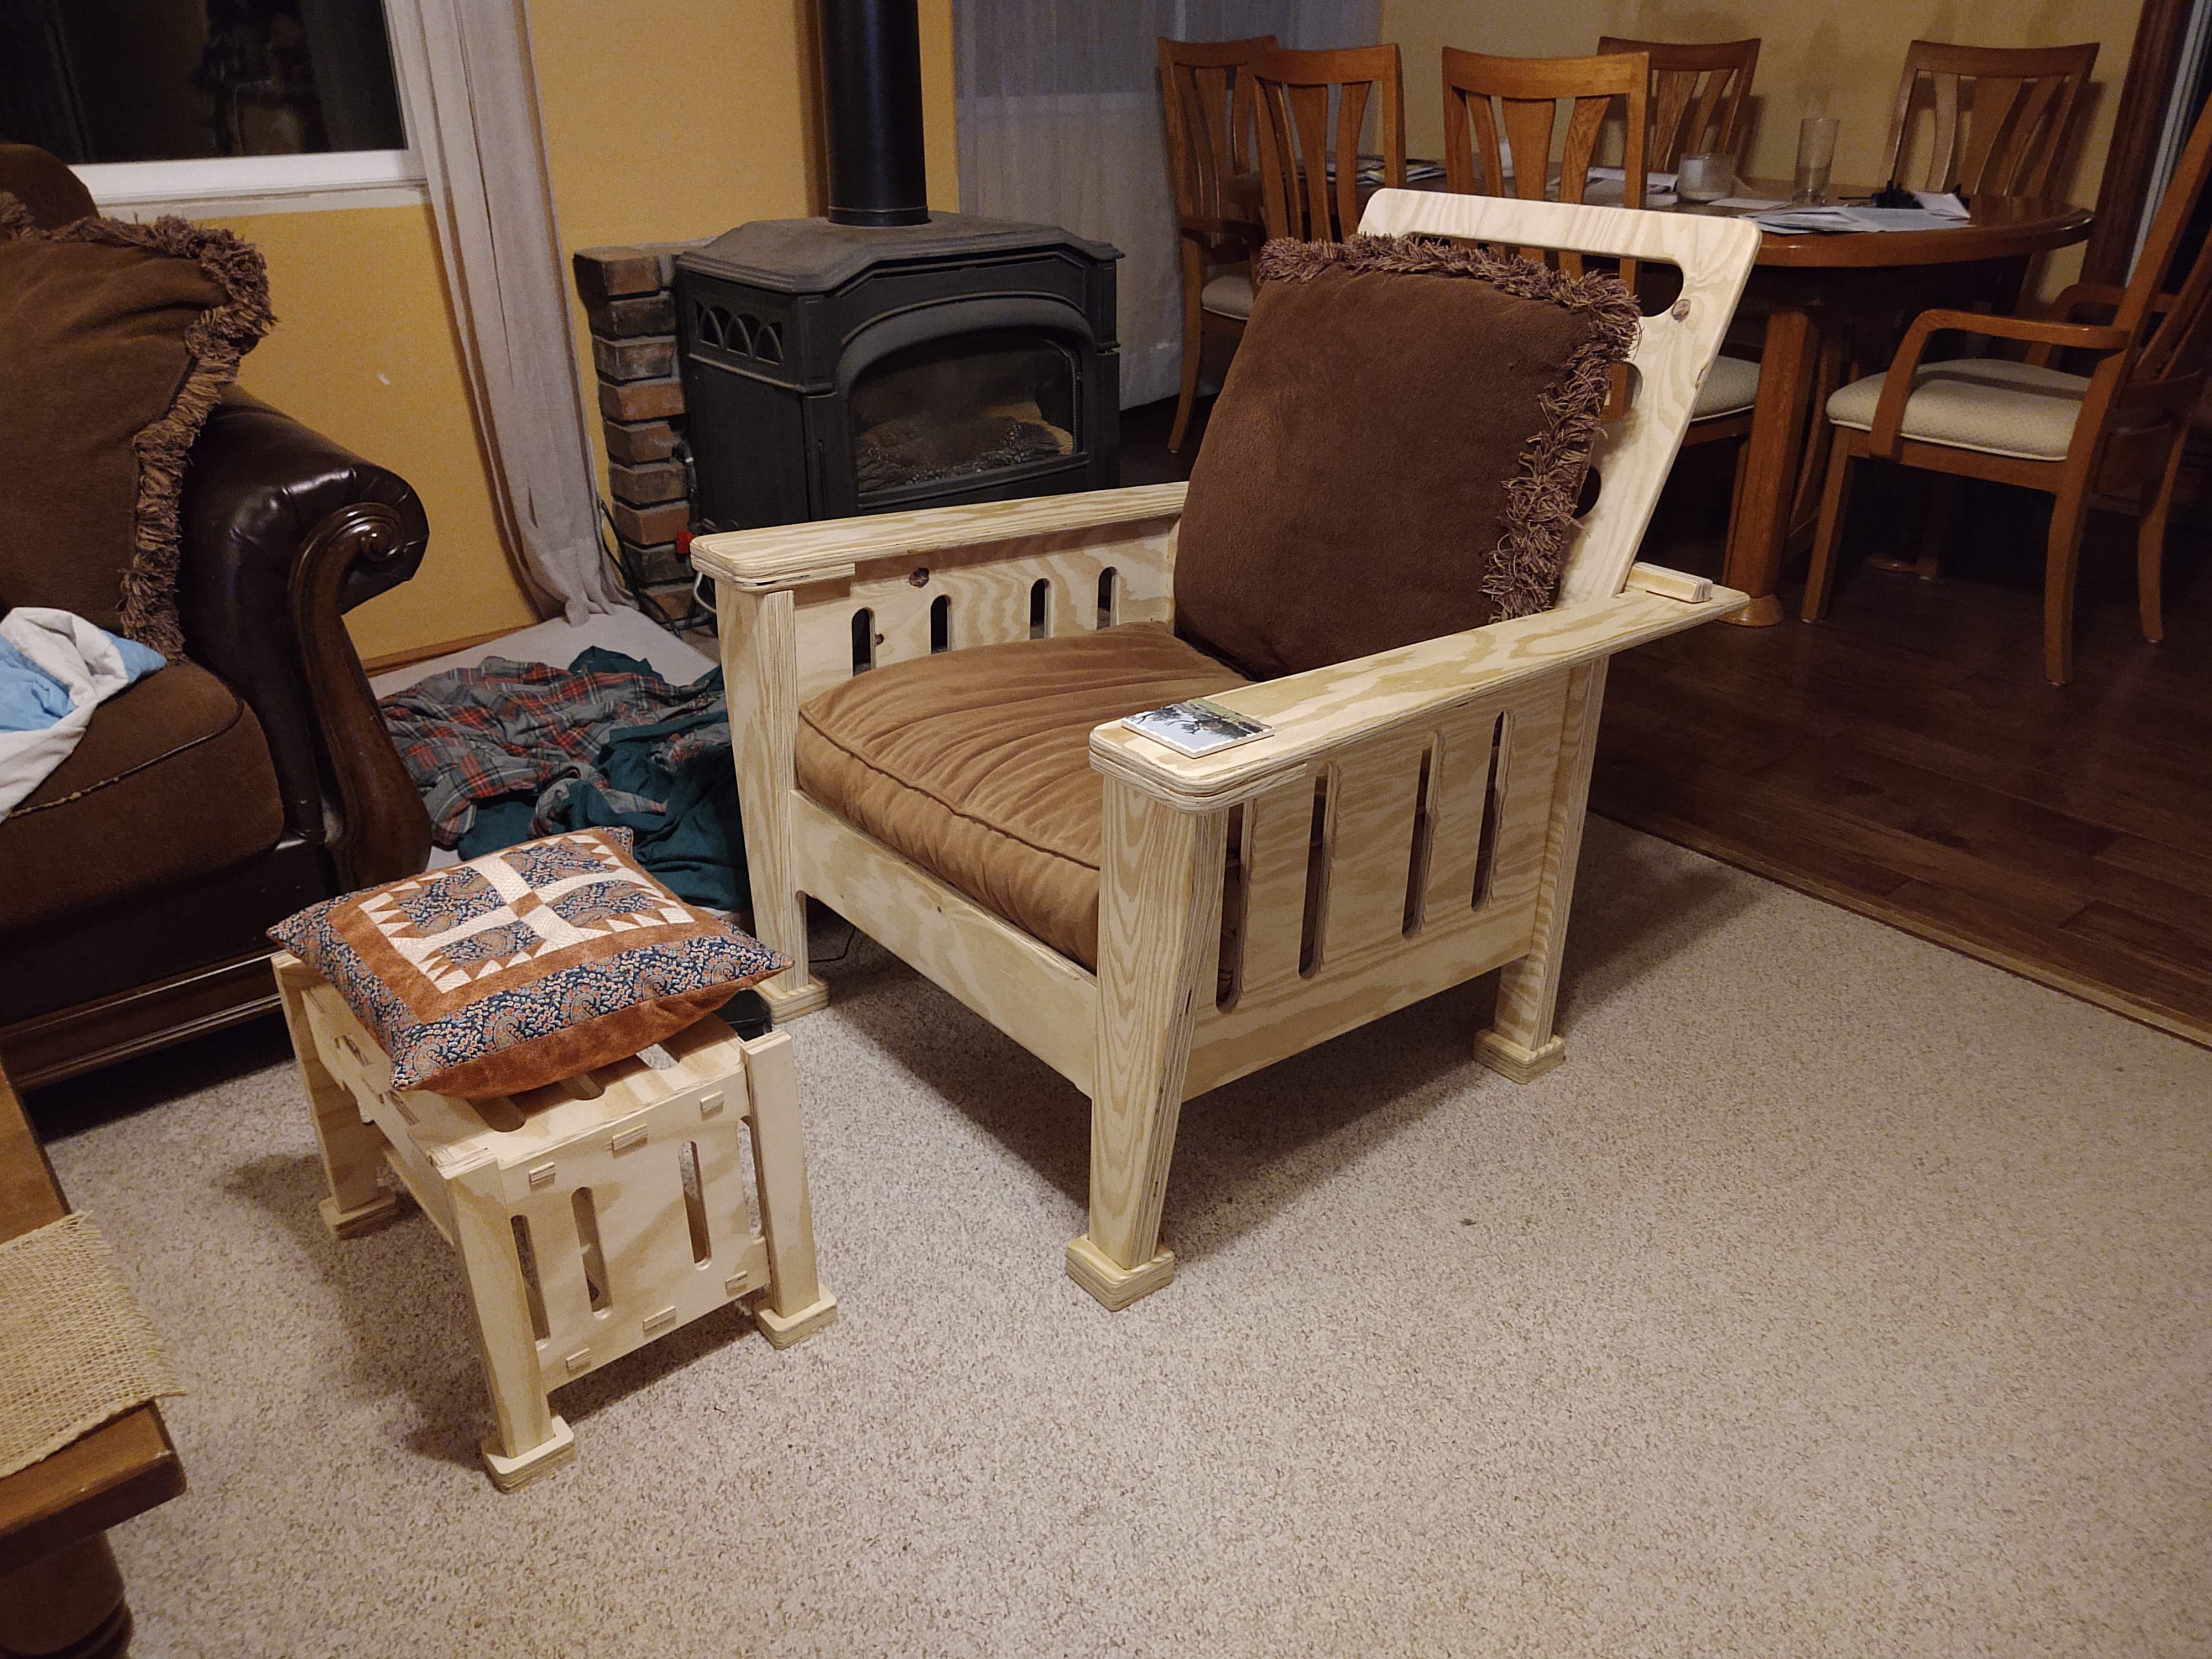
All the furniture in my living room is second hand freebies, and no 2 pieces match. It is my intention to rectify that. Here’s a prototype of what I’m planning.
The design is loosely based on Arts & Crafts/Craftsman/Mission style furniture. This is made out of $35 a sheet 3/4" home center plywood, and will end up as porch furniture (This is actually the second example I’ve made, the first is stained and sitting on the front porch already).
I have upholstery fabric and foam on the way to make proper cushions. I was a bit dismayed to discover what upholstery fabric and foam cost. Seems a bit foolish to put ~$150 of foam and fabric on a $35 chair…
I’m working on a slightly modified/refined version for the living room that I’ll be making out of baltic birch.
You may have a point there. The upholstery cost just makes me think I should probably be using better materials… Unfortunately, I can’t afford to make everything out of baltic birch, even if the stuff is wonderful to work with.
I do really like the chair. It’s comfortable, rock solid, and I think it looks good. The broad flat arms are like having a built in side table too. Very convenient place for a drink.
I think I have enough baltic birch on hand for a coat tree, coffee table, and one of these Morris chairs, if I’m real careful with my layout. I think I’m just about confident enough in my CAD/CAM skills to start using the precious stuff.
Thanks! I’m afraid a traditional woodworker might be appalled at the “unholy” marriage of Craftsman form and digital ply fabrication, but I like it.
I suppose I could make plans available for a (phe)nominal fee.* 8^)
There’s a couple little details I should probably fix first, if I’m going to share. In particular, the feet were a total after thought. I realized immediately after assembling the first one, that feet of end grain plywood were destined to get destroyed. I drew up feet that fit the rear legs great, but the front legs taper right to the bottom, and I was too lazy to account for that. My quick and dirty fix involved a hand saw, but I’ll correct it in CAD before sharing.
I started work at 0300 this morning, and I’m feeling a bit stretched at this point, so give me a day or so to fix that…
Also, there’s a couple of bits not drawn up in the CAD. Cleats for the seat bottom to rest on and the bar for the adjustable seat back, both of which I just cut on the table saw. It might make sense to add the seat back bar to the CAD…
I did the CAD/CAM in FreeCAD. It looks like I could export .svg, .dxf, .stl, etc. What would be the best format to share? I used a variable to account for material thickness (~18mm), and the width of the slots and length of the tabs used for joinery reference this, but I think just scaling EVERYTHING to account for thickness variation should work…
I can’t see actually charging anything…might have to figure out how to accept tips or something. I’m open to recommendations in that line…I have a paypal account, and Thingiverse has some sort of mechanism…
There are .svg’s and .stl’s of all the parts. Hopefully that will work for anyone interested.
Consider this released under a Creative Commons Attribution-ShareAlike 4.0 International license. No Warranty expressed or implied. If you break it, you get to keep the pieces and the bruised bum. (If you manage to break it though, I wouldn’t mind seeing pictures…of the breakage, but not the bruised bum).
Construction Notes:
The slots are sized for ~18.4mm thick plywood. That’s what the material I used measured. If you’re material is any thicker or much thinner, you’ll need to scale ALL the files appropriately. i.e. if you use 19mm plywood you’d scale the drawings by 19/18.4=1.0326 about 103.5%
I cut 8 of the “foot” part, but only cut the perimeter of 4 of them (not the “pocket”), these were then glued together to make the feet
The legs need to get cut off at an angle. After assembly, I used a straight edge from the bottom front edge of the front leg to about an inch up on the back leg to mark my cut. I used a belt sander to angle the front legs, and a hand saw to cut the back.
The pockets in the arms and the horizontal ones on the “H” shaped “Back” part should only be a touch more than half depth. I made mine 10mm deep. The others are full depth holes.
The arm doubler is not shaped to match the arm. After assembling the frame of the chair, I set the doubler in place, applied glue to the top of it, and then put the arm in place on top and clamped. I then trimmed the doubler close to size and used a flush trim router bit to flush it up.
There are 2 parts not included in the .zip. These are seat cleats that need to be glued to the inside of the front and back horizontal rails. These are just ~1.5x24" sticks that I cut from the leftovers. The back cleat gets glued on with its top edge flush with the bottom of the horizontal pockets and the front cleat gets glued on about an inch higher.
All of the slots and tabs will need “dogbones”. If you cut them with an 1/8" bit they will be nearly unnoticeable.
I used a piano hinge to attach the seat back to the frame.
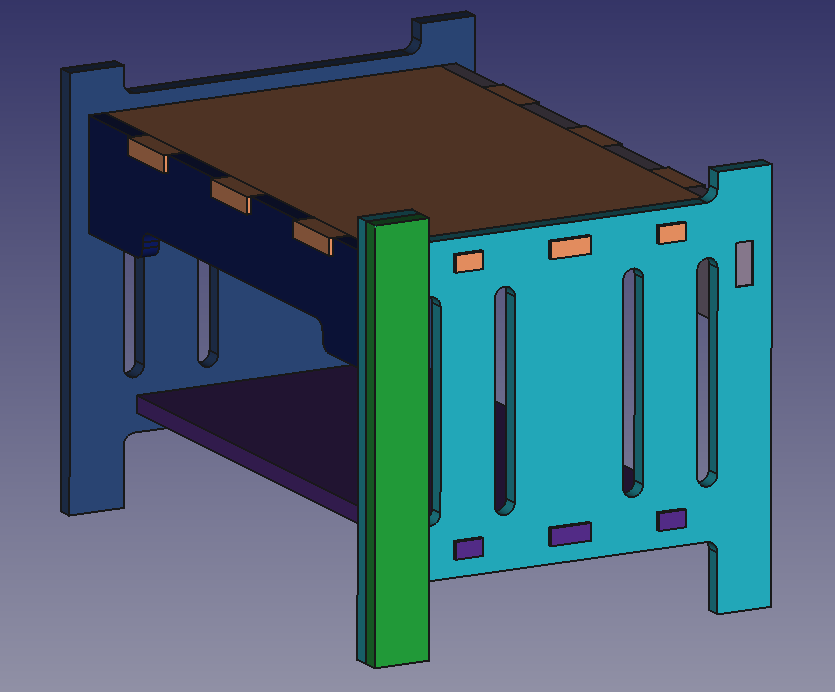
The grain on the “H” shaped pieces should run horizontally and the grain on the legs should run vertically. When assembled this results in the grain running in the “expected” directions on the most visible faces. (see layout example below).
I got all the parts for one chair except the seat bottom out of a single 4x8 sheet of plywood.
I included “mirrored” parts, but they are redundant. The parts are all symmetrical and cutting 2 identical parts and flipping one over would work. However if you’re plywood has only one nice face, and you want to lay everything out for cutting at once, then the mirrored parts are useful.
The chair will need a seat cushion that is about 6" thick. 2" - 3" is probably adequate for the seat back. Lots of possible approaches to upholstery. You’re on your own there.
My Lowrider only has a 24x64" working area. This picture shows roughly how I laid out my cuts.
A more efficient arrangement is certainly possible if you have a full sheet machine. Alternatively the absolute minimum cutting area required is about 24x36". There are probably some MPCNC’s out there capable of cutting this.
I expect I’ve left something out. Feel free to ask questions. I’ll add the footstool/ottoman in a day or so.
Really tho, all joking aside thanks for sharing these! These are amazing, and I absolutely LOVE the design! I plan to cut a set for sure, but I think I’ll wait til you post the ottoman, 'cause that gives me time to finish my cabinet I’m working on haha
I totally agree about putting $150 material on a $35 frame. You know it will look pro. It’s still cheap for a sick custom piece of furniture. But WHY is the cloth so expensive?!
I walked into Fabric Land with my mom once and was in awe of the huge selection of cool patterns and types of materials on big rolls just BEGGING to be put to use in cool projects. Then I saw the prices.
I’m waaaay too cheap for that.
I think you should give it a go on at least one prototype though if you’re considering doing a living room set. I can’t picture it in my head, because I really like the way it looks now. I do know that the results of a quick upholstery job can be pretty mind blowing, and you may suddenly decide that it’s worth the extra cost.
Epic share. Thank you for including a license, and all the instructions and designs. I hope anyone who makes one shares some pictures/thoughts. Thank you, Pete!
So…when I said it seemed foolish to spend so much on foam and fabric for a $35 chair, I had actually already committed to such foolishness. 8^)
UPS dropped off a bunch of foam and fabric yesterday.
Unfortunately, my plan was to use a friends commercial sewing machine to sew up the cushions, and with social distancing, spending hours at a friends house sewing is not in the cards. Perhaps he’ll let me borrow the machine, but it may be some time before I get the cushions made.
This might be a good opportunity to note that the chair is going to need a seat cushion that’s about 6" thick. 2"-3" would probably be about right for the seat back cushion.
I’m planning loose cushions that can be easily removed or flipped over, but there are other possible approaches to the upholstery.
Time for another edition of Paradox Pete’s occasional updates…
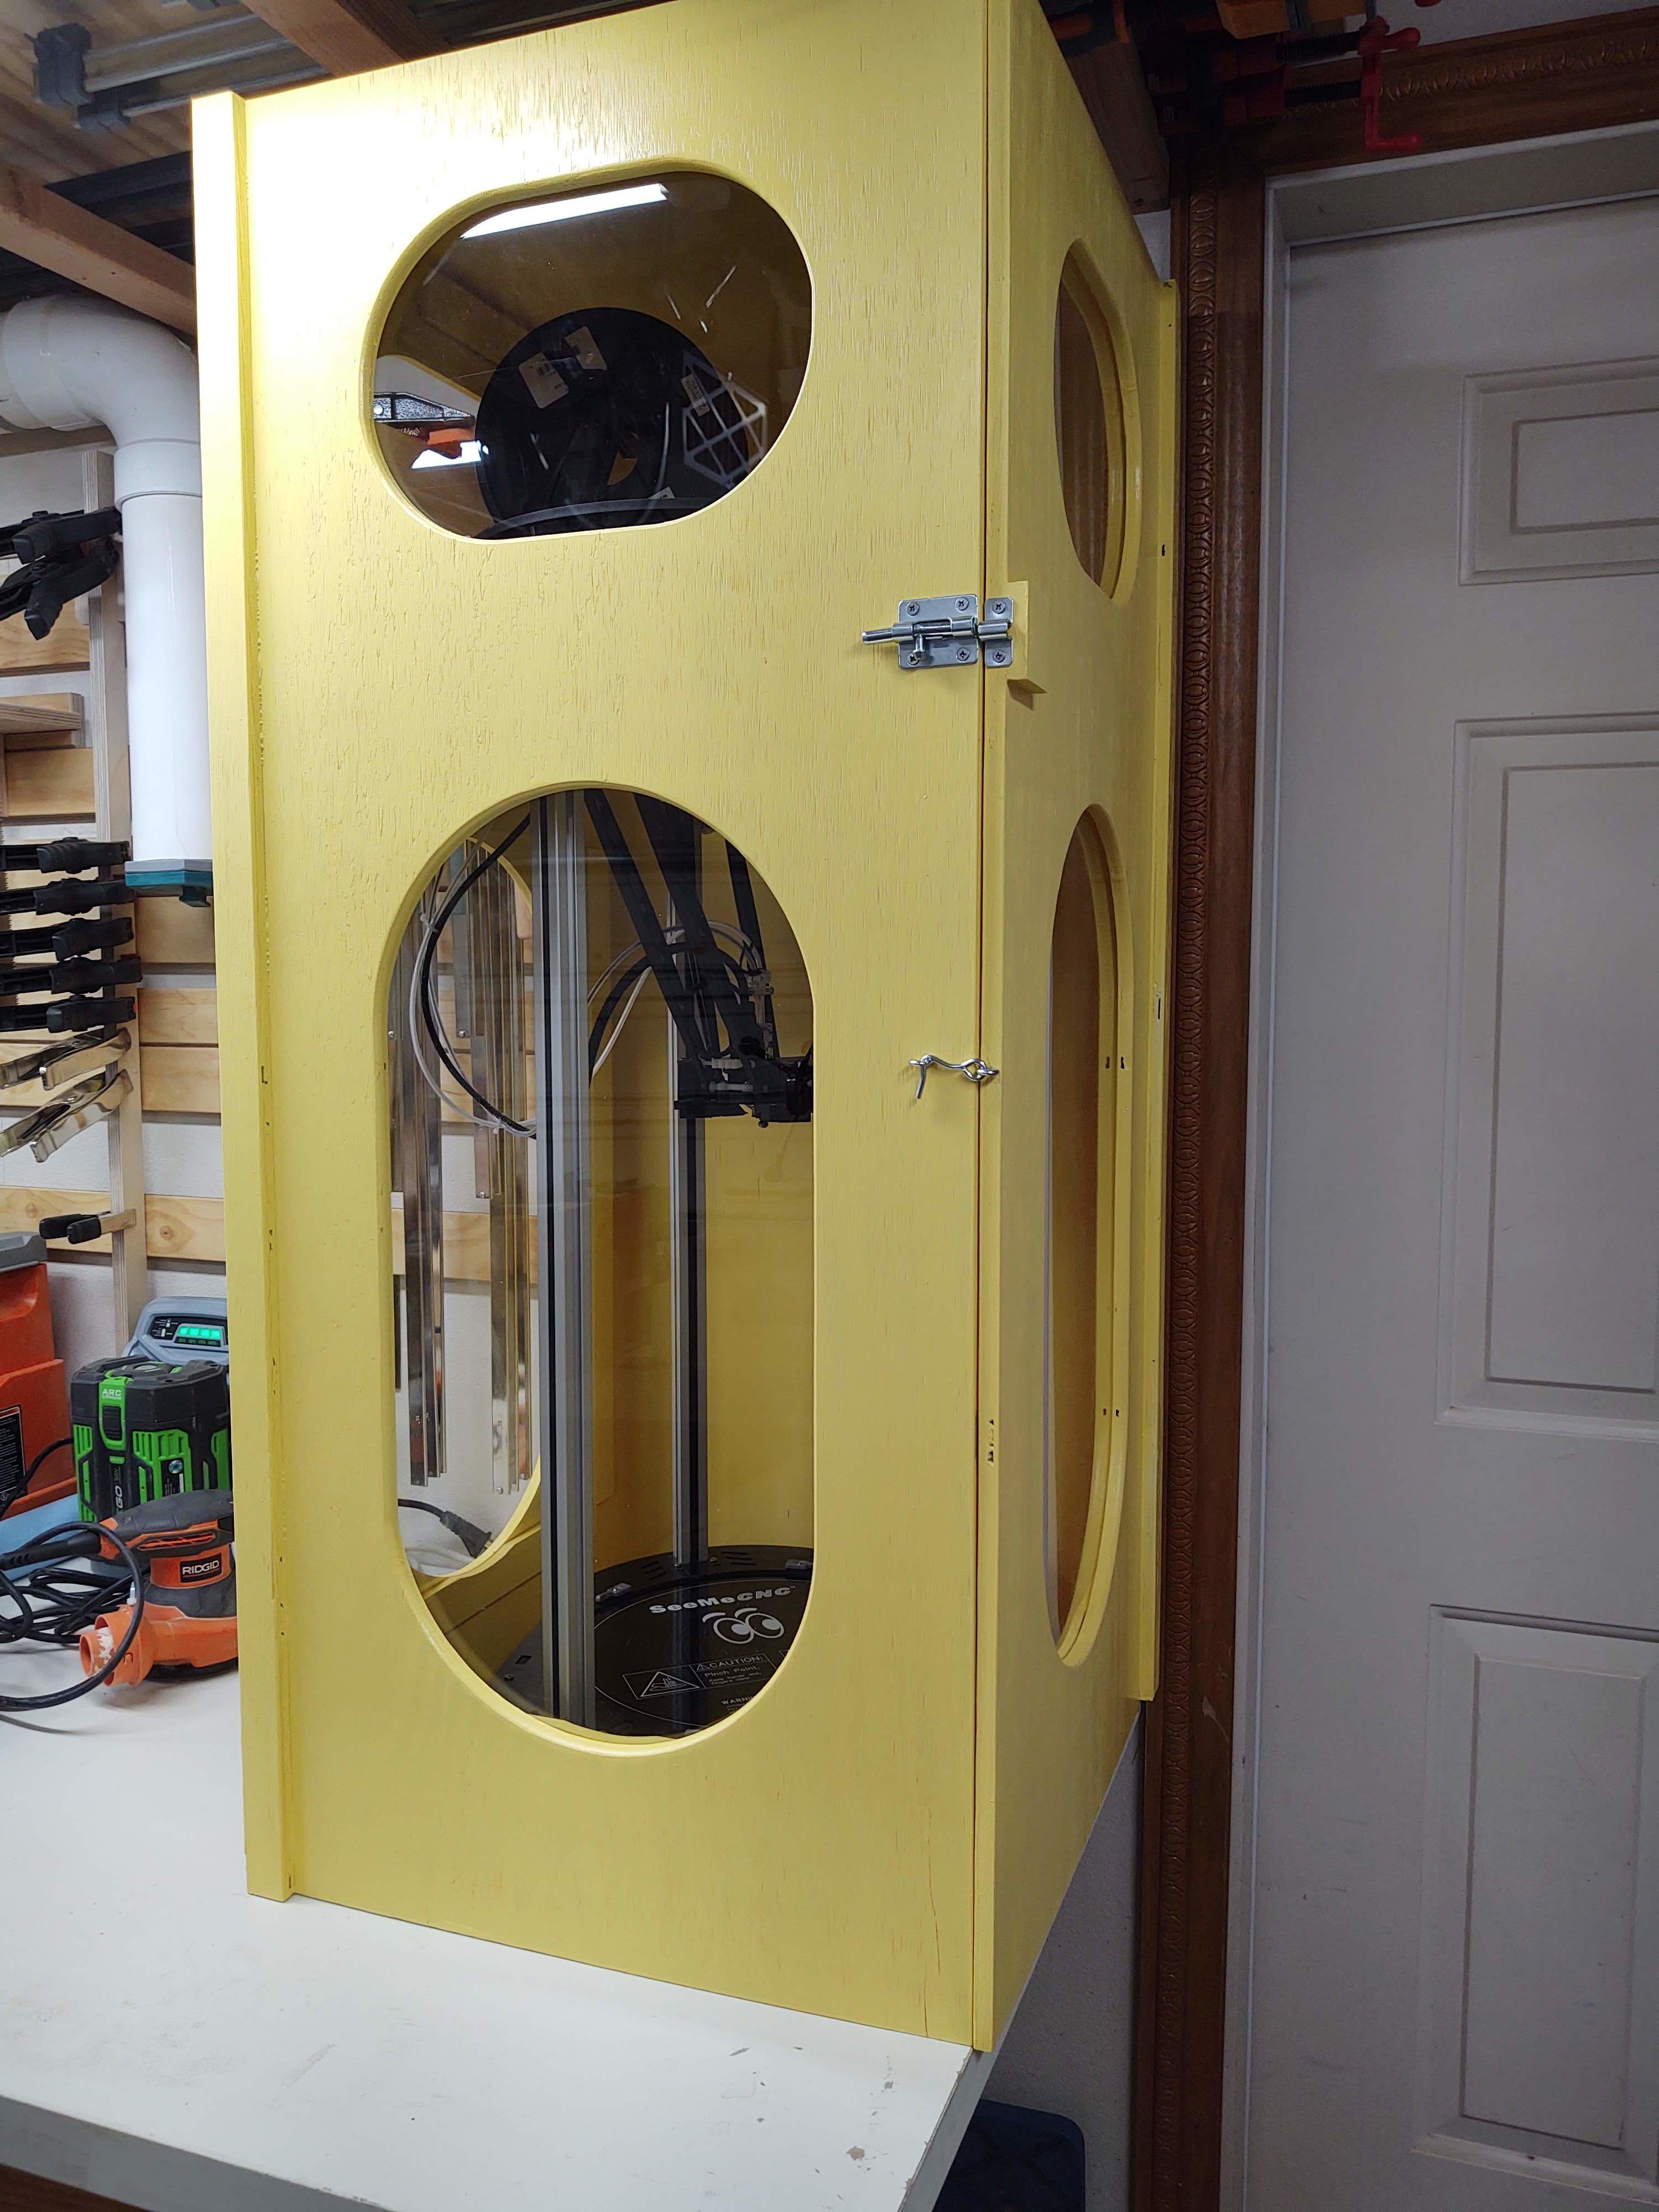
Among my recent projects is an enclosure for my Rostock Max 3d printer, enabling me to get it off the floor in a spare bedroom, and onto a bench in the shop (garage). It doesn’t hold a candle to @stevolution’s Rostock envlosure, but it serves the purpose.
Steve and others have commented on the Rostock being temperamental, but I haven’t had that experience. I think mine is a later model (v3.2ish, I think), and it just works. I don’t do anything with it except change filament on occasion and clean the print bed. I’m very pleased with it.
My other recent project is a combination coat tree / floor lamp.
There isn’t a coat closet convenient to my front door, and I tend to just toss jackets and such on the nearest chair, so a proper place for them seemed like a good idea. I added a torchiere like light as the area could use some extra light, and shelves to put hats and gloves, dog leashes, wallet and keys etc.
With about 29 interlocking pieces, it’s a more involved assembly than my previous efforts, and the tapering design added a little challenge as well, but it all came together OK. It isn’t quite finished. There are holes in the legs by 2 of the shelves where I intend to string leather cord supporting panels to enclose the shelves producing a sort of basket area. I haven’t decided if I want to make the panels from wood or fabric/leather…
Thanks for the files! I’ve been using a tubberware container for a footstool and it’s not what busy people would call fine furniture (it does the job well though). Got my lowrider running decently and this was the first longer project. Went together perfect after chiseling out my forgotten over cuts.