Hi everyone. First post here. I was hoping to complete my build and just show up here with a few pics of my completed machine and the cool things I made, but it’s looking like I could use some advice to get 'er finished.
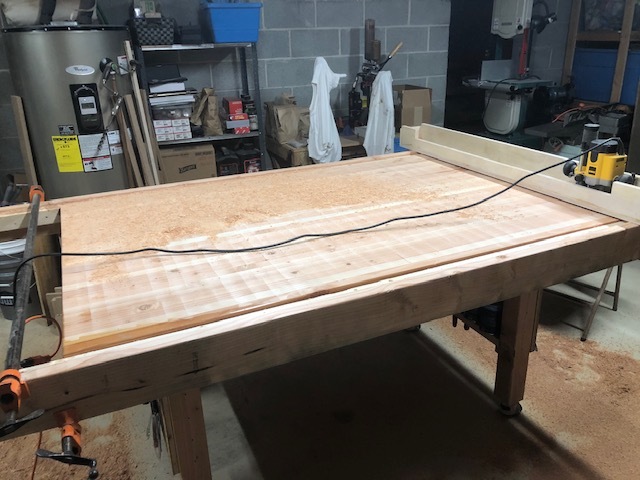
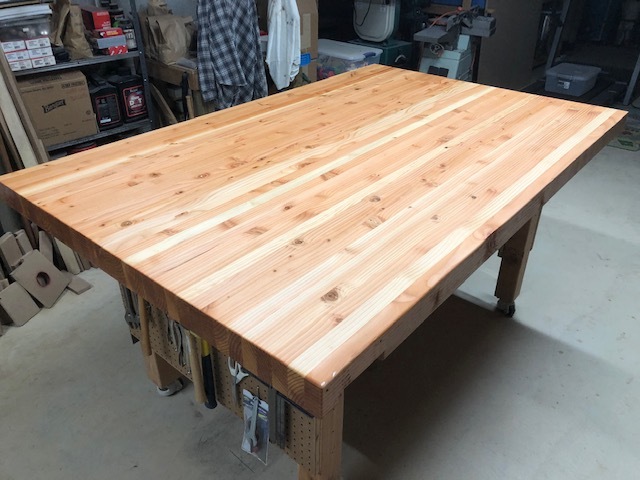
So my progress thus far… since my shop space is limited I decided to get dual use out of my existing 4’ x 6’ workbench. Of course this bench was never particularly flat so the first part of the project was to plane it down with the router!
This worked pretty well and I ended up with a very flat surface.
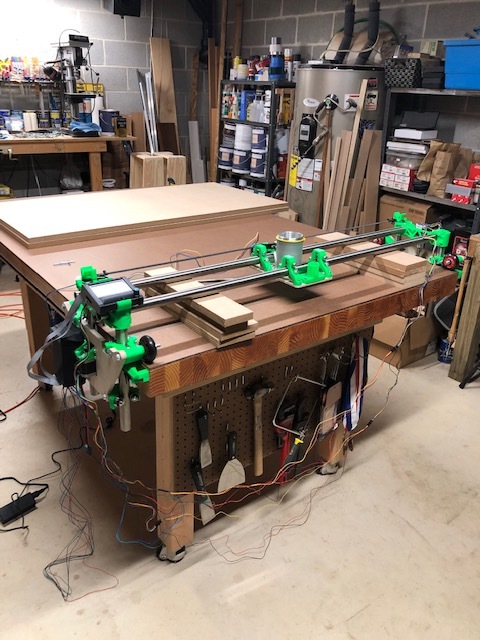
I had no real issues printing all the parts in bright green PLA on my cheapo Tevo Tarantula printer. I started with 1:1 templates and made the Y and 611 plates out of baltic birch using the bandsaw and drill press.
All of the subassemblies went together fine and this past Sunday I finally got the time to put everything together.
Everything seemed to be nice and square. The 611 plate moved freely along the X. The gantry moved up and down and the whole thing moved along the Y smoothly.
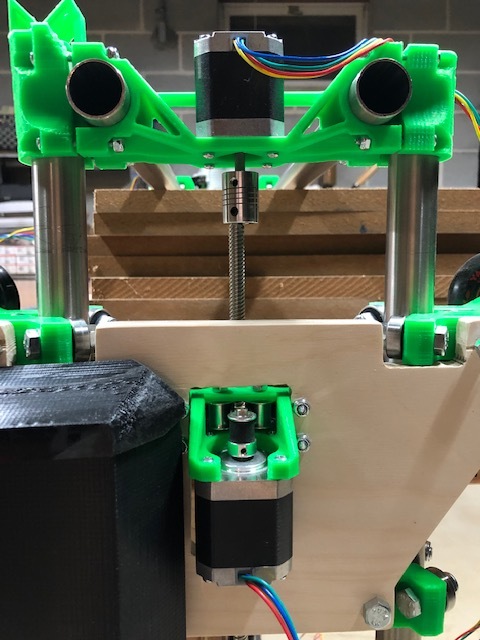
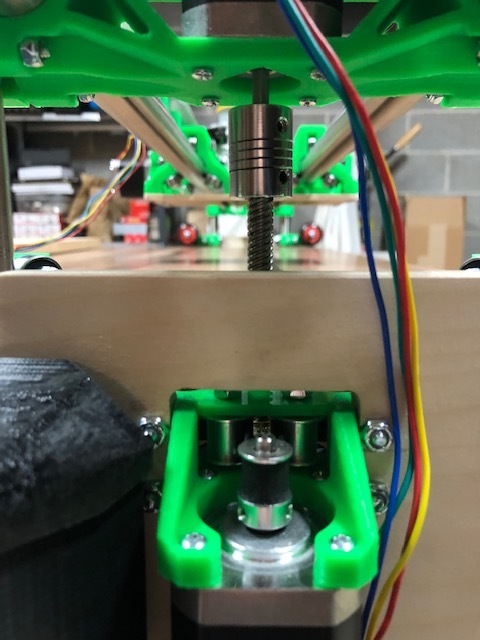
The problem I ran into is the alignment of the left Z axis lead screw. The right side lined up perfectly and moves without binding. Here is a pic of the misalignment on the left side
Looking at your picture, it looks like most of the screws holding the XZ assembly on that side are still loose. except for the one on the lower right in the picture with the misalignment. Perhaps that is pulling things out of square?
Good observation Pete. Those screws were certainly loose in that photo, however, it made no difference in the alignment of the Z stepper and the lead screw. I had loosened and tightened everything several times in an attempt to line it up better.
How about shimming under the nut trap? You can also remove a few screws from the nut trap. It just needs one to avoid spinning, the weight of the gantry will hold it down.
Any chance at all that the motor bracket hole or mounting holes are slightly off? I mean, i know you had a template, and I’ve never seen this before, but I feel pretty good about all the printed parts, so it’s worth asking.
At the top of the Z tubes where they fit in the XZ assembly, there are “lips” that the tube should bottom out on. If one of the tubes is sitting over, rather than against the lip, it will force things crooked.
Also, with everything still loose, it might be possible one of the free floating bits that go between the X and Z tubes has shifted?
Thanks for the suggestions guys. I’m beginning to think I just whiffed on the location of the stepper hole in the Y plate. It’s not obviously off center, but not sure what else it could be. I agree with Tony the printed parts are not likely at fault. Later tonight I’m going to try flipping the Y plate 180° and see what effect that has on alignment. Will report back. thanks again.
And what’s even better, I powered it up and was able to move all 3 axes! Will spend the next day or two cleaning up the wiring and hopefully by this weekend I’ll have a crown picture to show y’all.
One more random question whilst I’m tidying up my build: Does anyone have a good vacuum hose recommendation?
Well damn, that’s excellent! I think most people just use a standard, regular old shop vac hose and run it on the angle with the wiring. It’s that what you mean?
Wish I would have checked the forums yesterday. I had the same problem and found the Y plates are directional. Or at least that is how mine carved out on my MPCNC.
An important note for individuals looking to build the lowrider2. Put the plates together, if they don’t match up… flip one.
Yeah Tony, I was just inquiring if anyone had a shop vac hose they really liked, i.e. lightweight, flexible, cheap, whatever. Need to pick one up.
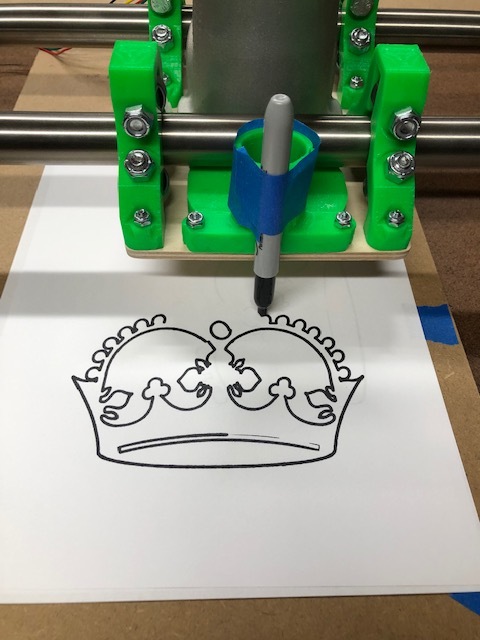
Anyway, I couldn’t wait to clean up the wires before I gave it a quick try. Taped a marker to the carriage, started the gcode, and a mere two minutes later I had my very first crown!
It’s not perfect, but that’s almost certainly due to the shady marker attachment. I suppose my next step will be to start with the .dxf and use Estlcam to make my own gcode (hopefully getting the same results). Making sawdust can’t be too far behind.
I appreciate the help from everyone here so far, and a big thanks to Ryan for sharing the design and providing this forum.
Congratulations on your crown! Yes, the next step should be to ‘pen-mill’ an image, to familiarise yourself with the software. Take something like the V1 logo, use Inscape to turn a bitmap into a path, then use estlcam to convert it to gcode, and check it draws on the right side of the lines, at the right scale, speed and height.
I really like the hose from Dyson vacuum cleaners. It’s more flexible than most. The other nice thing about Dysons is that all the parts are available as spares, so when the hose on ours split, I ordered a spare and cut off the split end of the old one to use the rest for my shop vac.
Spares are $10-15, unless you happen to know someone who is replacing a broken hose, so this might not be very helpful
OTOH, other brands may have improved their hoses in the 20+ years since I’ve used anything else…
Yeah, I’m certainly not an expert. And I’ve managed to get a variety of test pieces to measure within a few thousandths of an inch (pure luck) using the Y-plates on the lowrider2.
Fusion360 indicates they aren’t directional, however after the sixth set in MDF and the third set in baltic birch I decided to roll with it. Must be my MPCNC or my toolpaths (or both), however I lack the knowledge to figure out what is up I guess. Each of the 9 sets turned out identical: directional. As I’m not the only one encountering a directional feature with the Y-plate assembly, is this something needing addressed? As indicated, my lowrider2 was touched by an angel so I’m not willing to dissect it to solve where I went wrong (or right!).
Happy to post pics, g-code, Y-plates, or whatever.
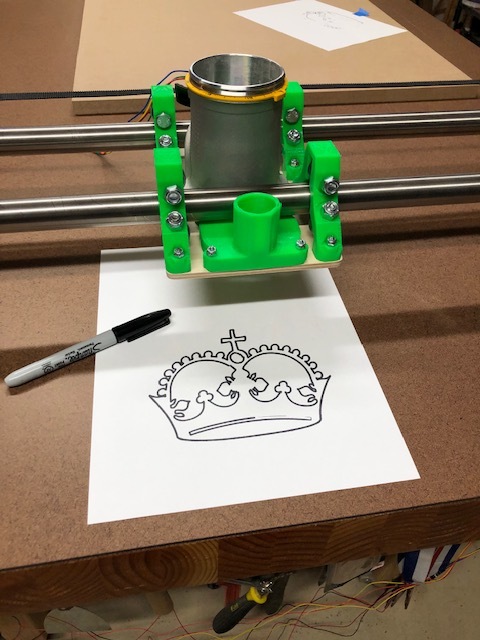
Per Robin’s great advice, I downloaded a copy of Inkscape and practiced converting text and images to vectors then used Estlcam to make gcode. I was mostly successful in these pursuits (and just one Sharpie was mangled with a Z coordinate boo boo ).
So Saturday morning I took the time to clean up all the wiring with braided sleeving, making sure to tape all the connectors. I was pleased with how it tidied up.
At this point I was feeling bold enough to slap down some plywood and fire up Dewalt. I’m happy to report that this went (mostly) according to plan, and I was able to cut the flat parts for a friend who is planning to build a Lowrider.
I’m also happy to report that I detect no asymmetry in the Y plates and they line up perfectly when compared to a 1:1 print. Other than needing to add a vacuum hose, I’m calling this build complete, or at least usable as is!. I do appreciate all the help I’ve received here.
Congrats!! I just finished mine as well, and made my first real test cut last night. And we are held up at the same exact spot! The vacuum hose! haha My Cen-Tec 30’ hose came today, but I won’t get a chance to get up to my shop to put it on til tomorrow.
It’s such a satisfying feeling to build this machine, and then use it make things so precisely isn’t it? Congrats again on finishing your build! Here’s to never having a clean shop again! lmfao

 ).
).
