Nice work so far. This is my plan for my build someday soon. The only thing I’m curious about is elecrical noise with the high freq starts. Some guys don’t seem to have any trouble with it at all.
Any news on your plasma build?
I just figured out you are using the same plasma cutter as I am. Expect some nasty EMF and be very cautious about shielding everything if you don’t want to destroy your Rambo.
I fried two or three Arduinos before figuring out the issues.
I’m curious about that Makita RT701C compact router. How are you liking it for this use, so far?
Any sense of a comparison between that and the default recommended Dewalt rotary tool?
Nothing new regarding the plasma yet. I havent really prioritized the plasma yet, as i really dont have any good use for it (just fun). I am using shielded cable for the steppers, but haven’t terminated the shield in any of the ends, and the casing for the rambo is plastic. I’m aslo kind of afraid of destroying the board… For now i will probably just try to get to know it, and probably play around a bit with aluminium as well.
The Makita router seems very good so far. plenty powerfull, and the speed adjustment works perfect. So far i havent used it at any higher speeds than speed 3 i think, so the sound isnt so bad. I have no reference to the Dewalt though since it doesn’t support 230V.
I also tried using a bigger surfacing bit (somewhere between 11-13mm) and it was a perfect match to the MPCNC with the Makita router. I dont recall the speed I used, but it was around the recommended starting speed, and 2,5mm DOC, 45% stepover.
Looong time no update… turns out i wont need a CNC plasma (who figures) so i’ve decided to stick with the spindle… (maybe a laser?)
I havent really done much with it, but im considering upgrading it to a primo build.
I have got it a little dusty lately, so I’ll post a few pictures of my latest project.
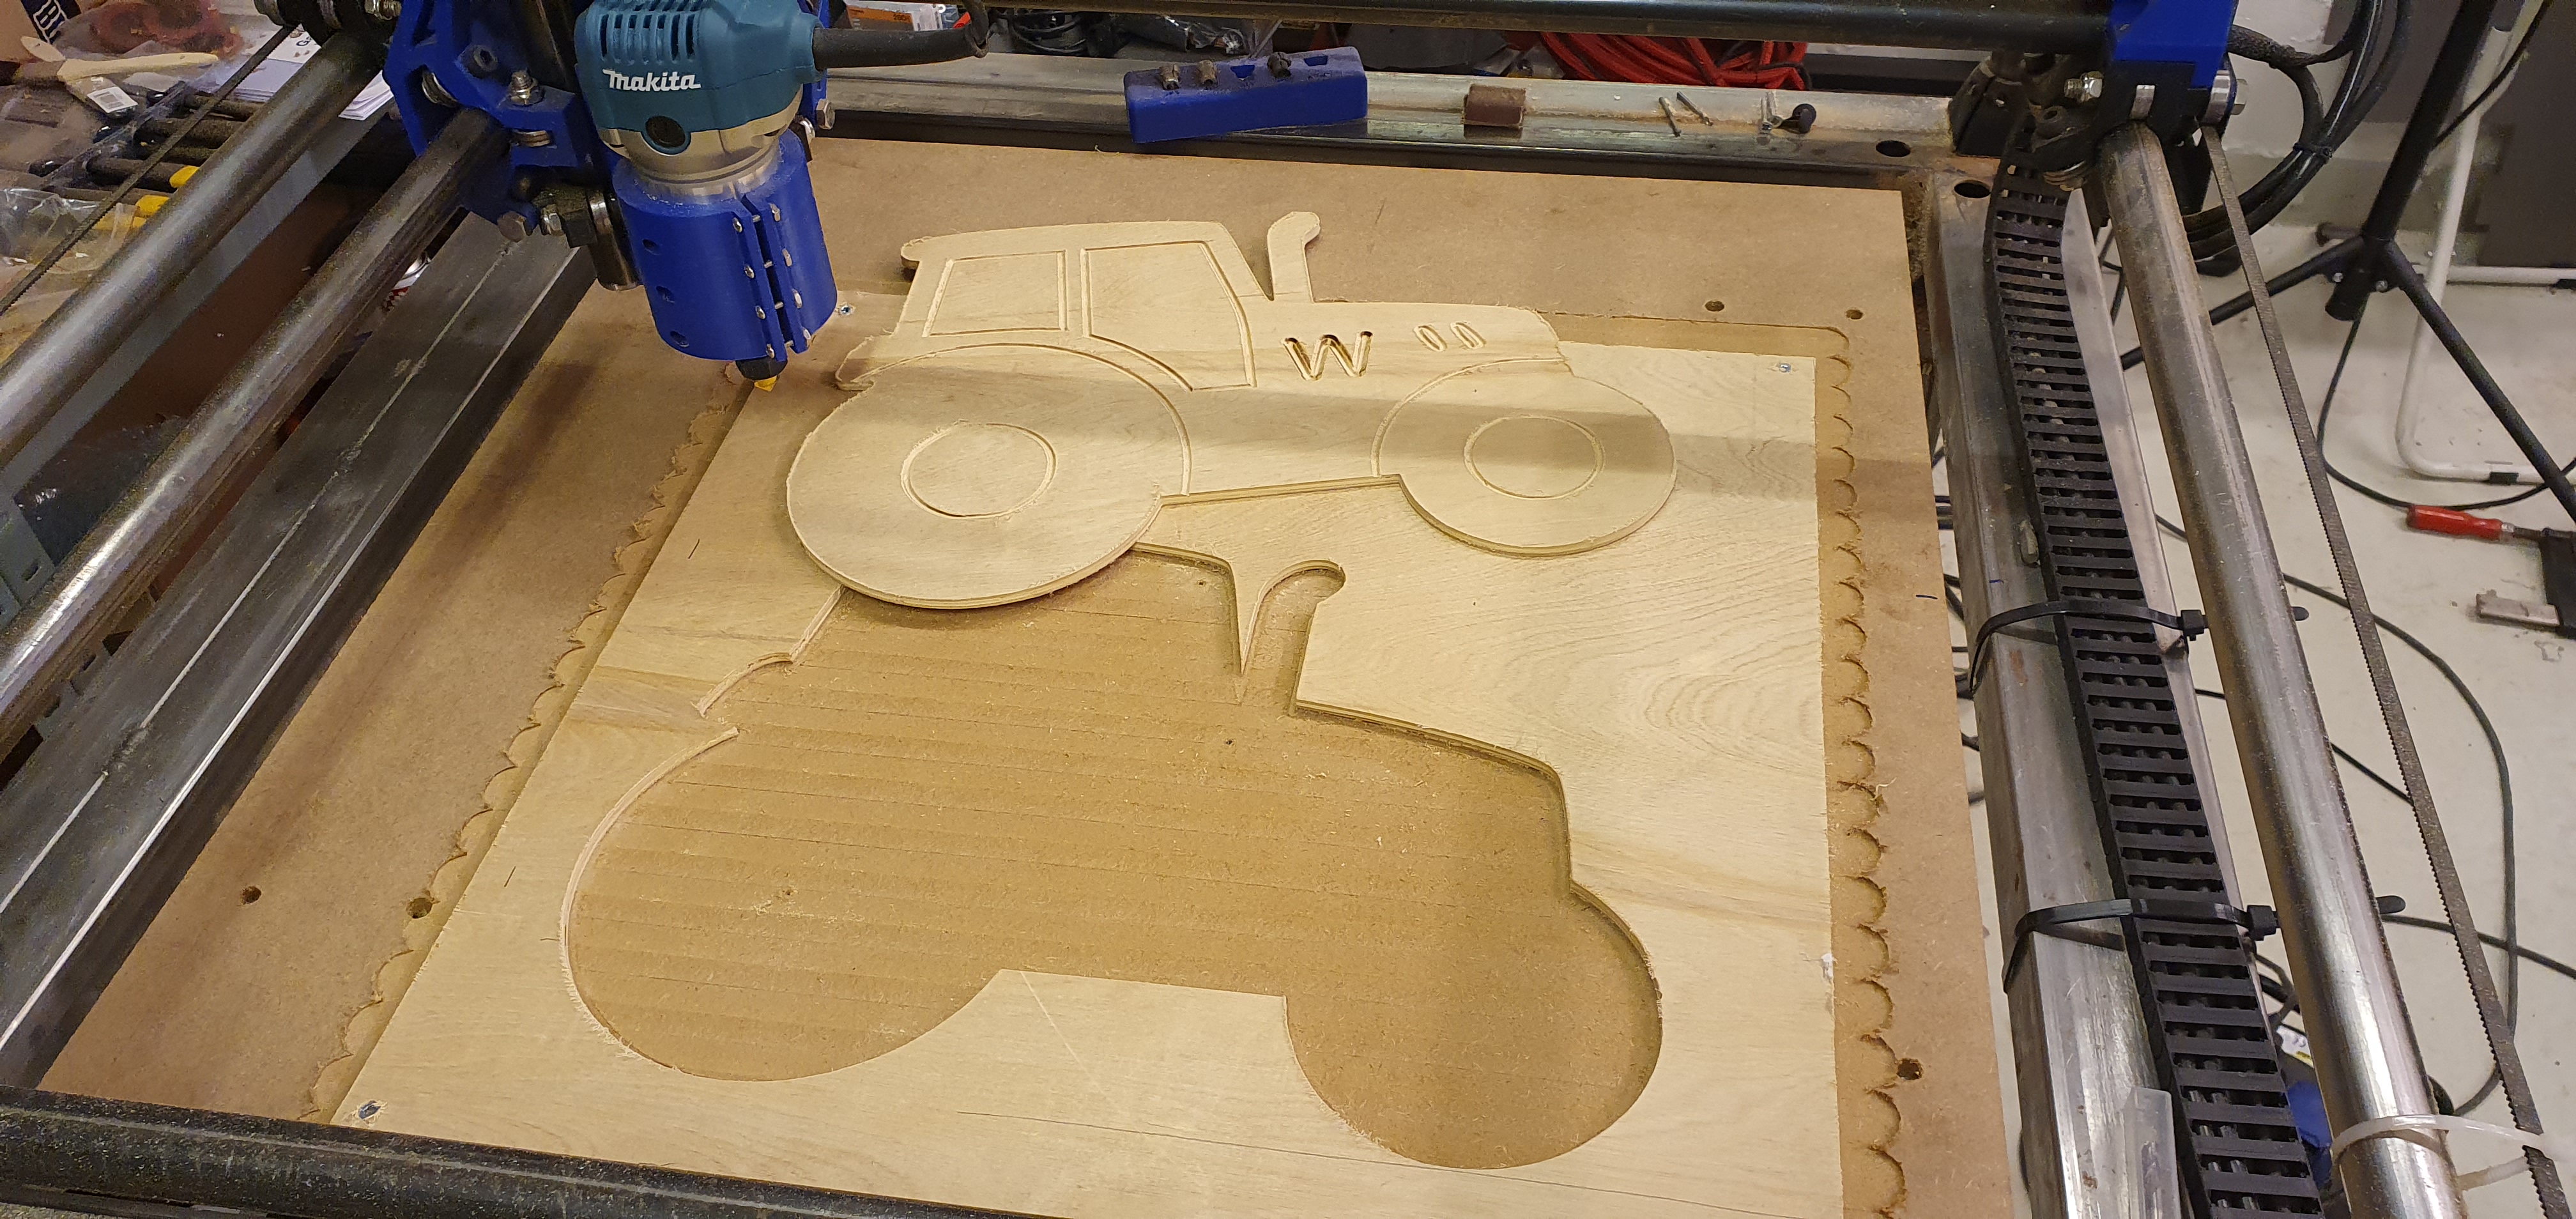
My brother wanted a nightlight for his 2 year old who loves tractors, so i figured I’d make him a tractor lamp.
This project also involved a toolchange, so that was kind of fun.

4 Likes
Welcome back! 
2 Likes
Hei fra Tromsø!
1 Like
Thank you!
Hei fra vestlandet! morro med flere nordmenn her 
1 Like
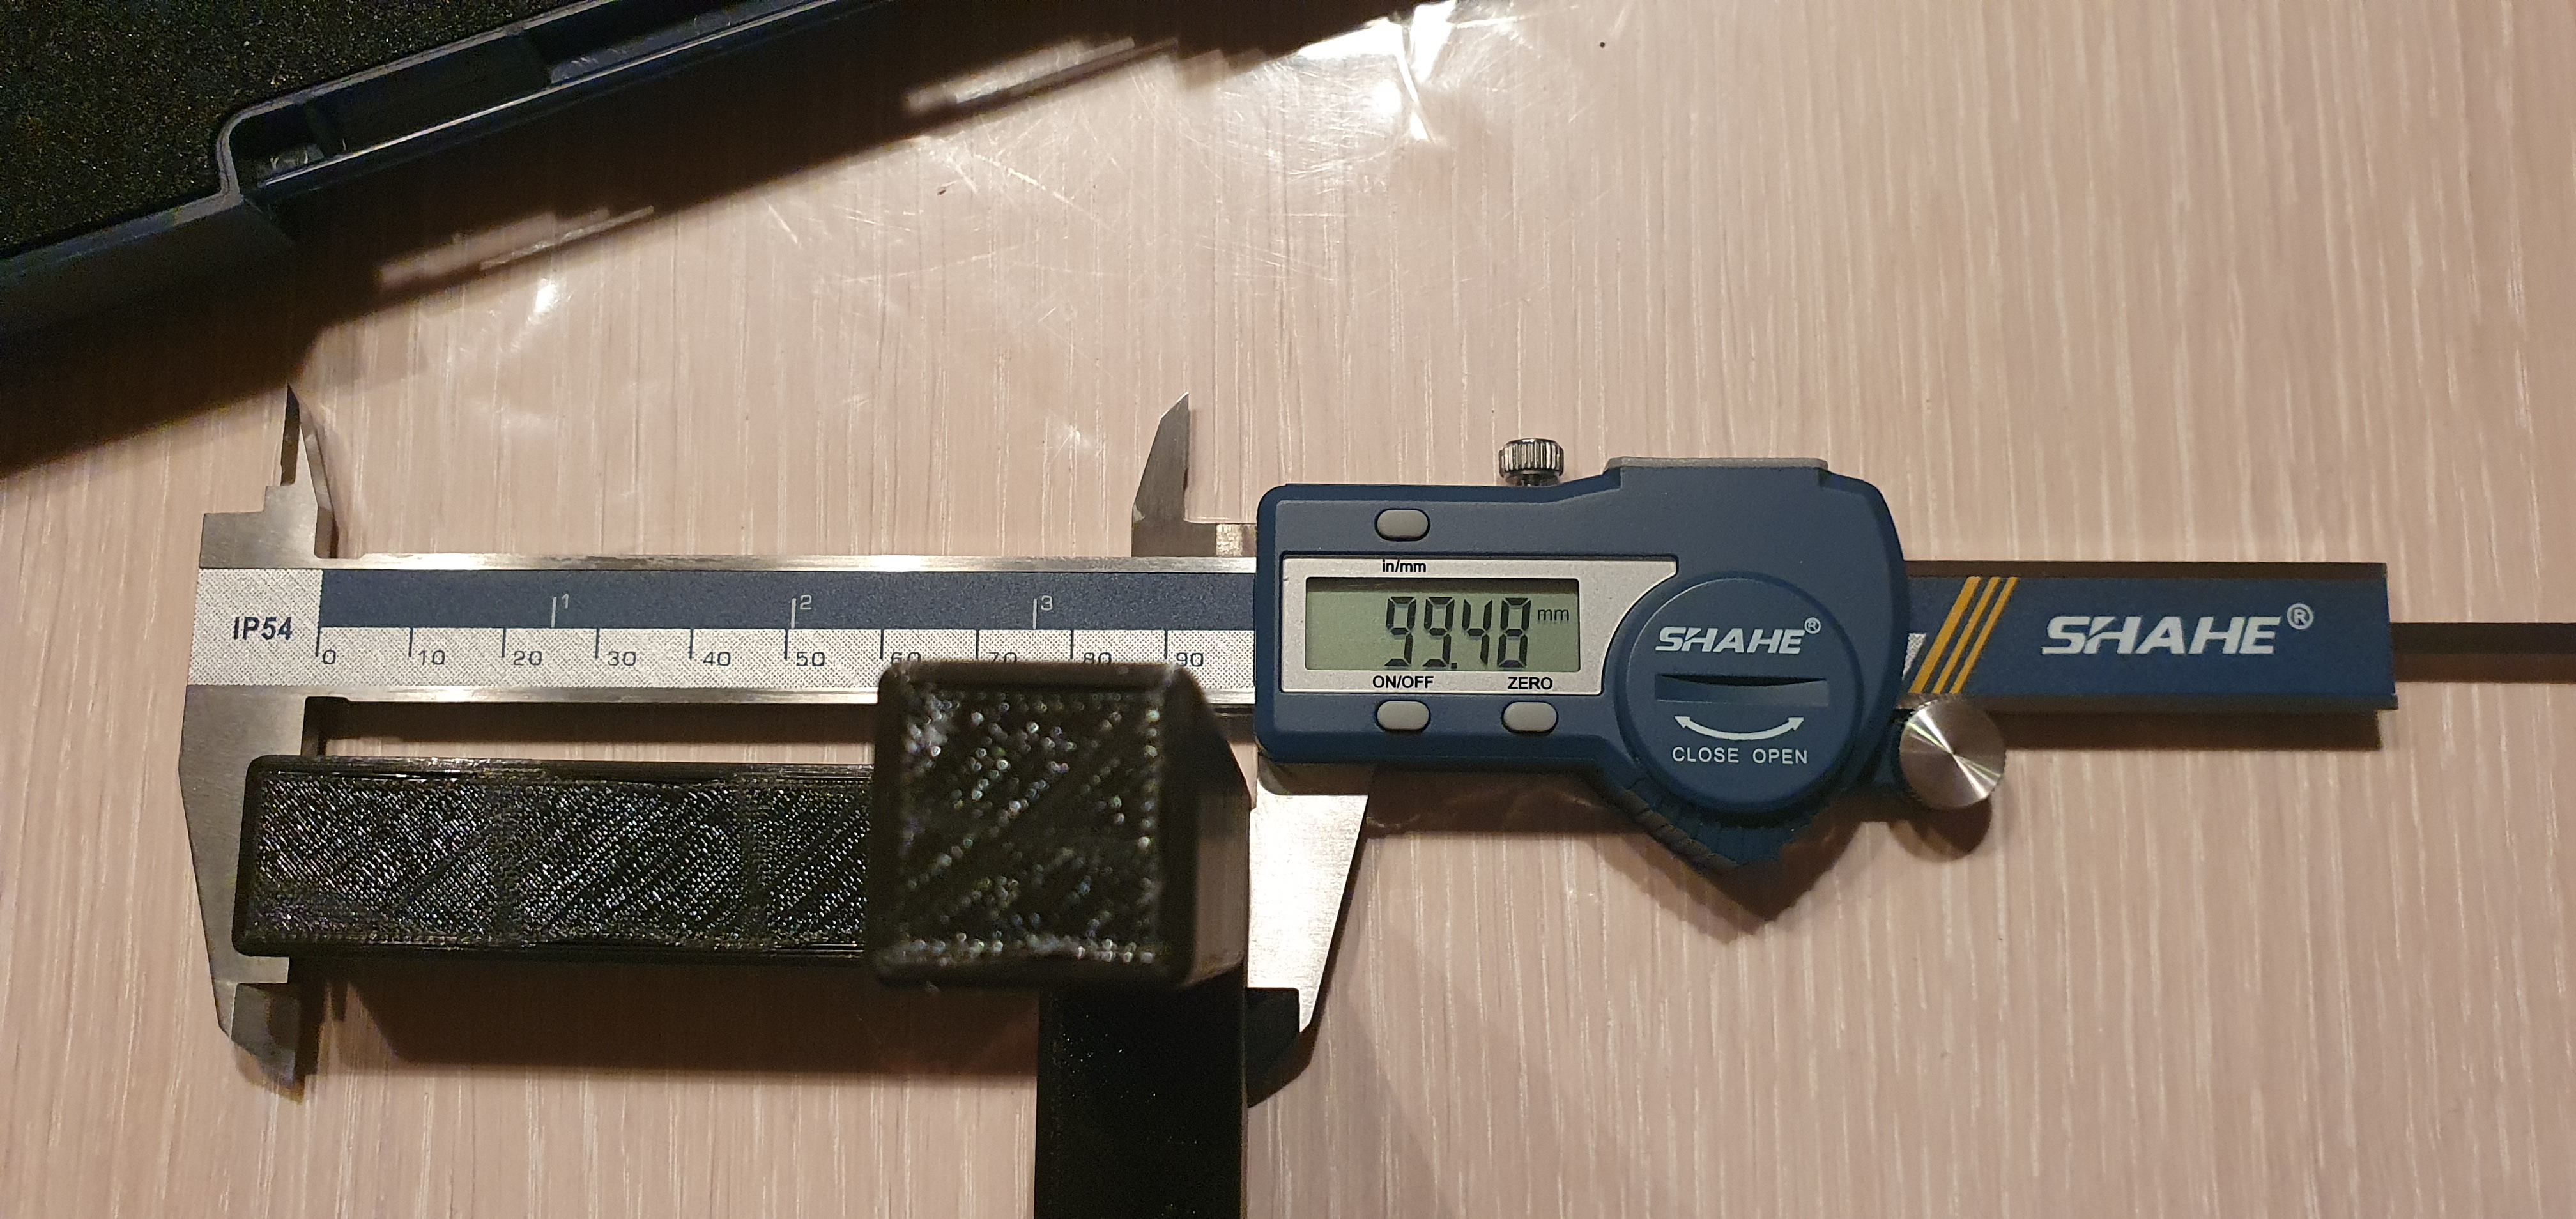
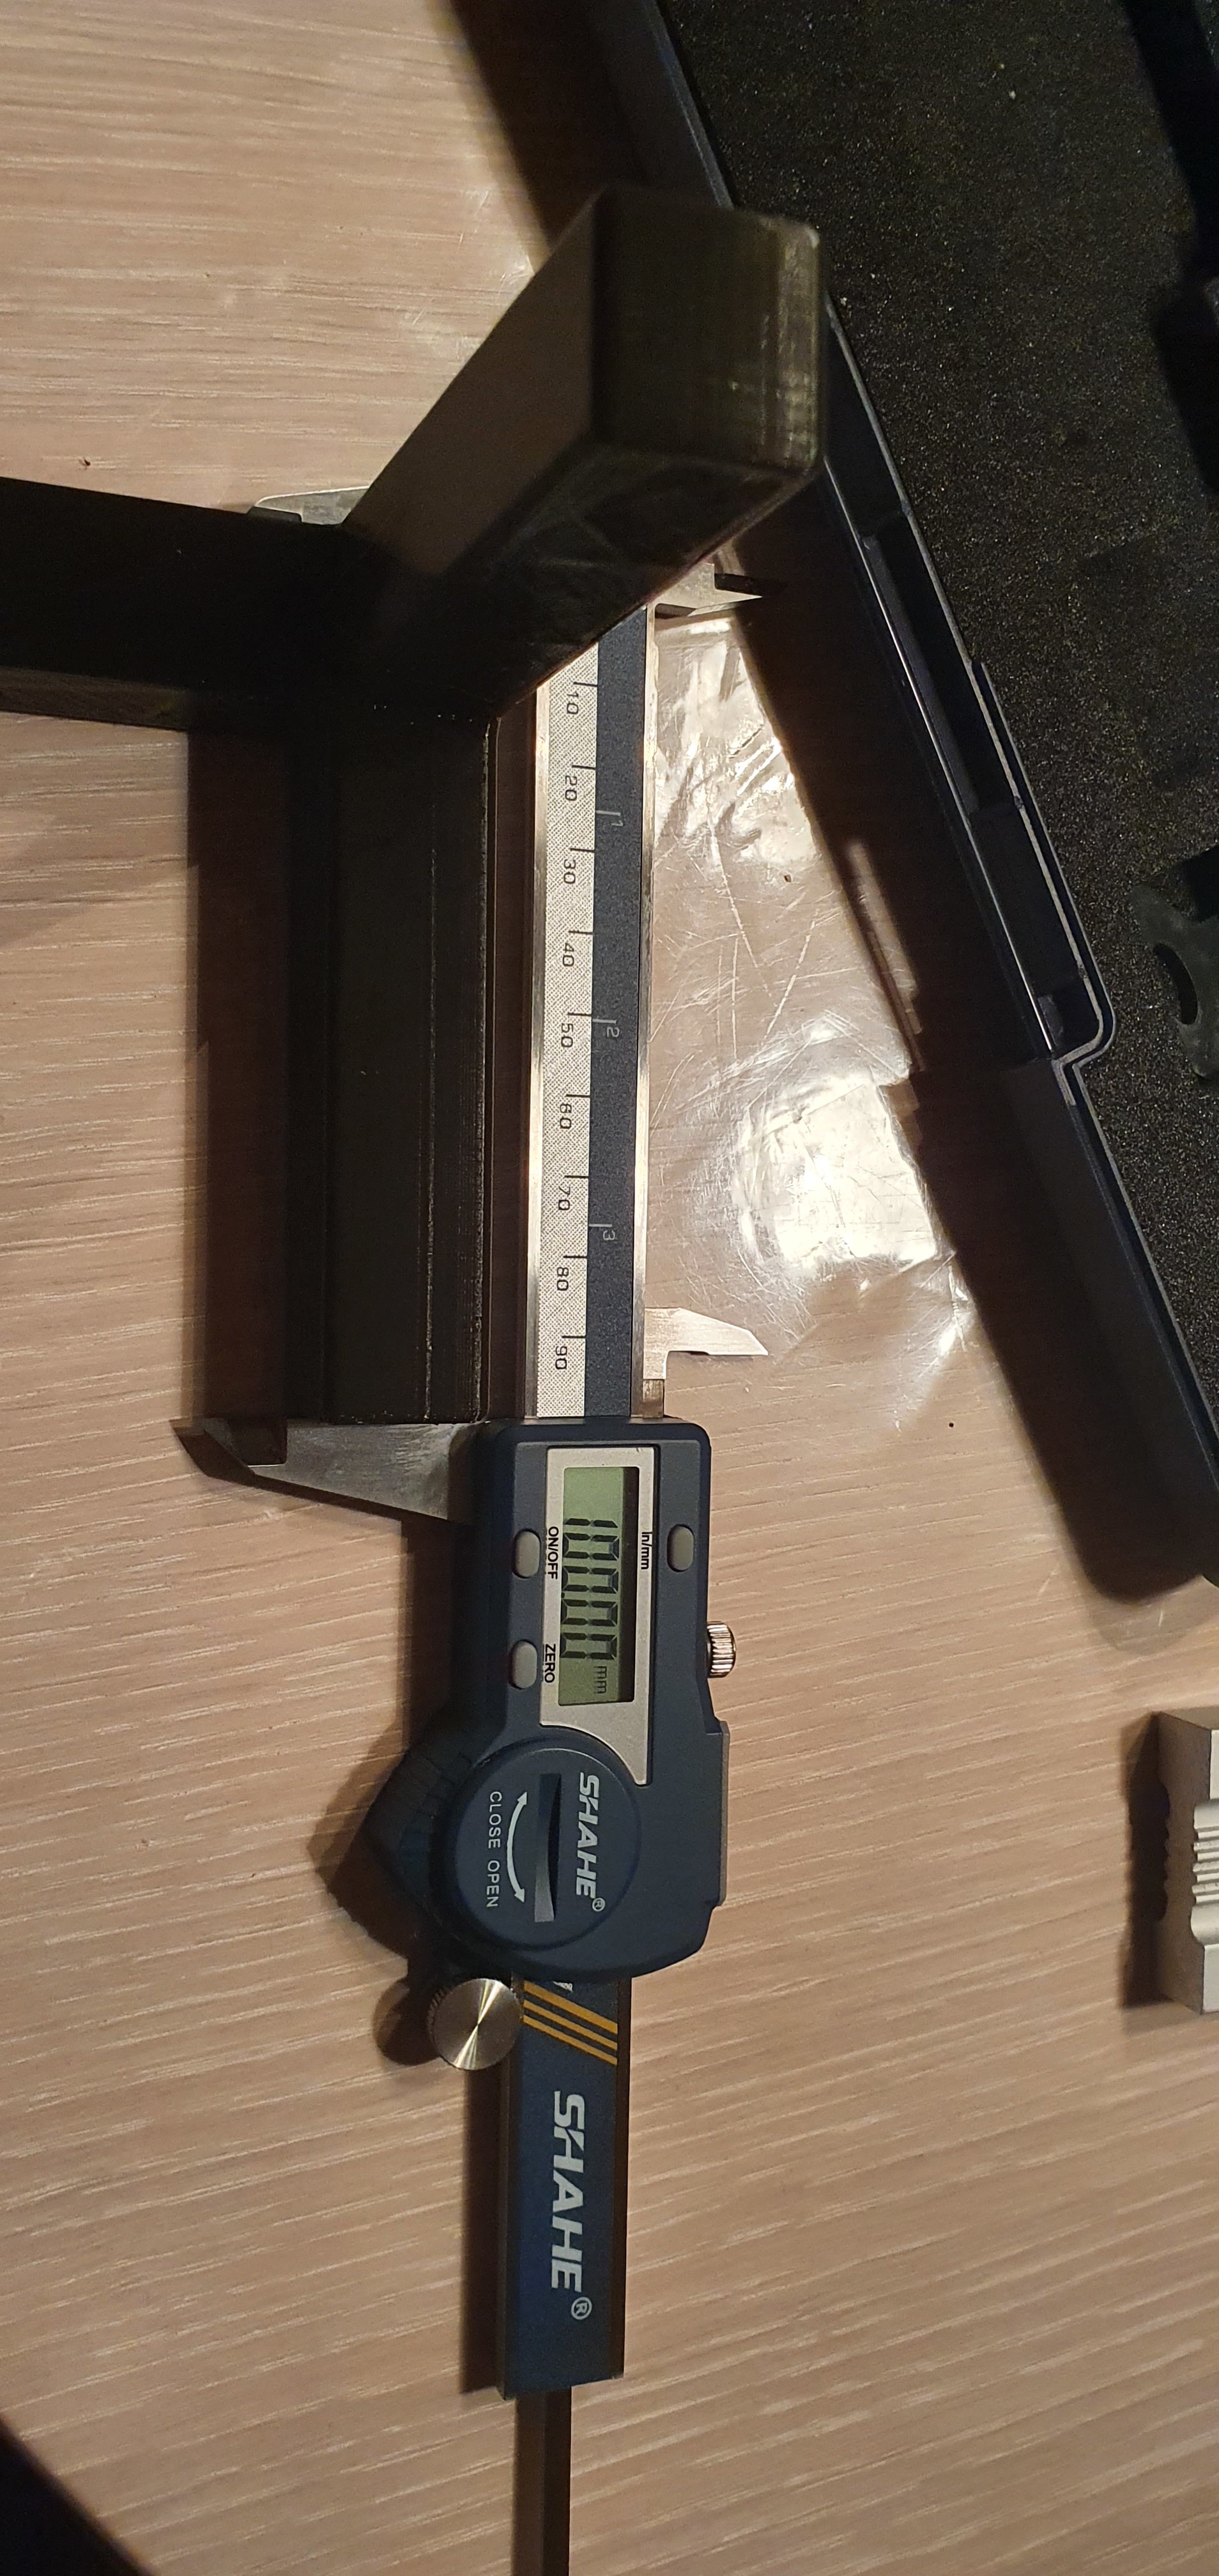
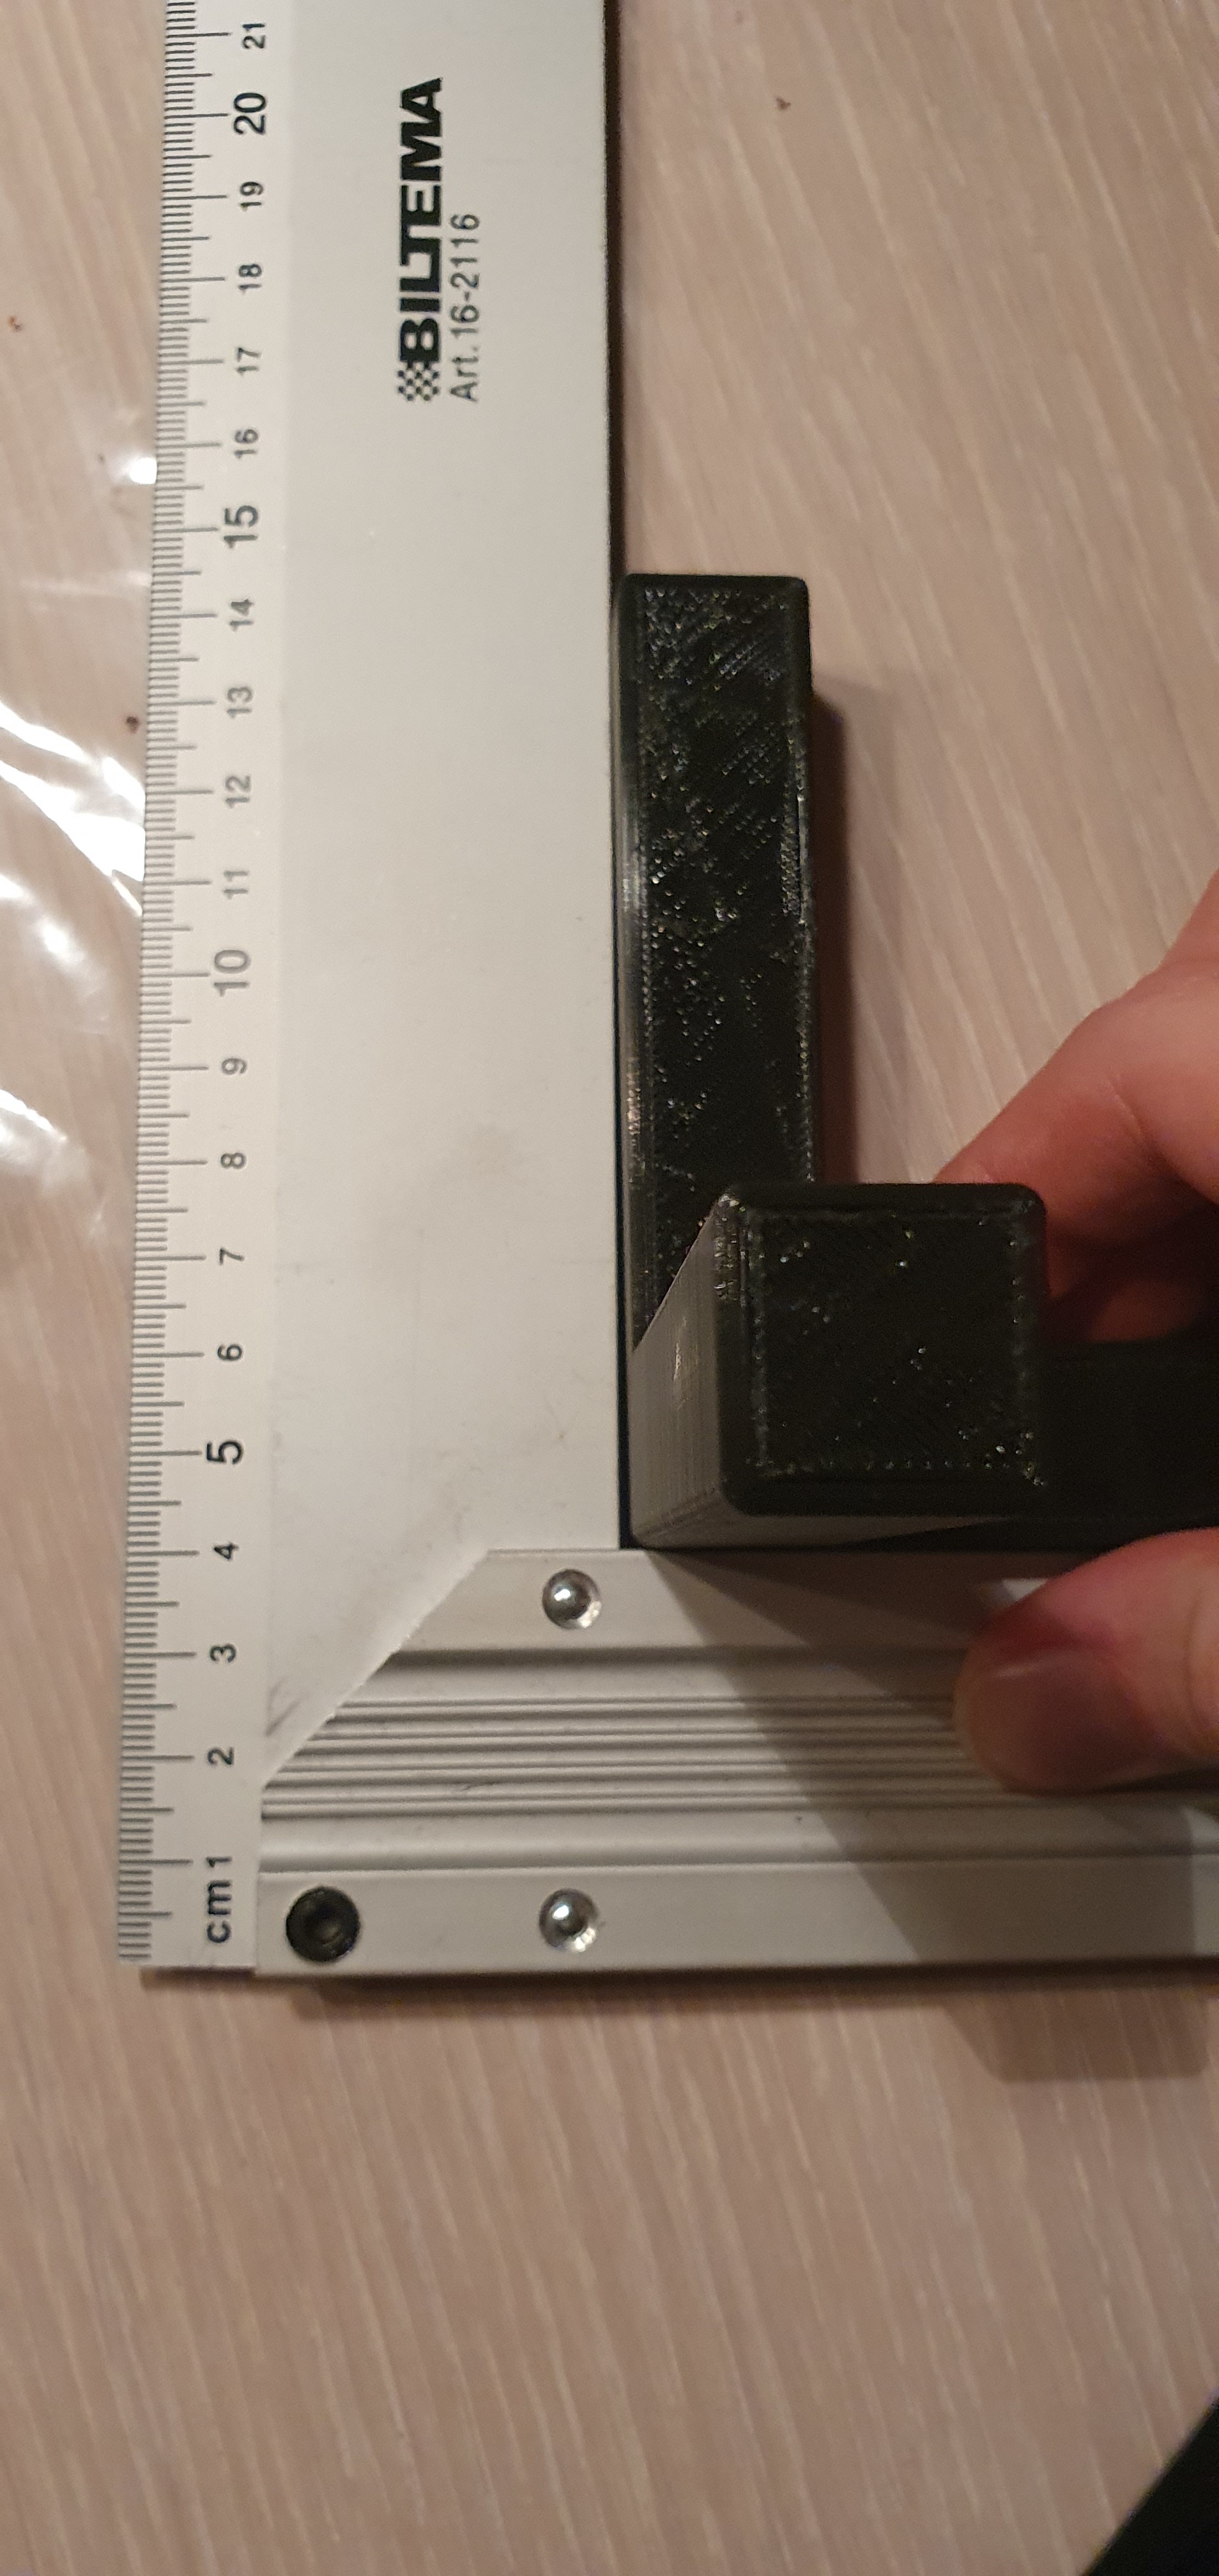
Before i even consider starting to print parts for the primo version, i want to be sure that my printer is up for it (especially the core). How much accuracy is recuired from the printer? I did an xyz test a while ago, and it wasnt exactly perfect… the surface is caused by thin walls, but im more conserned about the angles. will this cause me issues?
The part is supposed to be 100mm all directions.

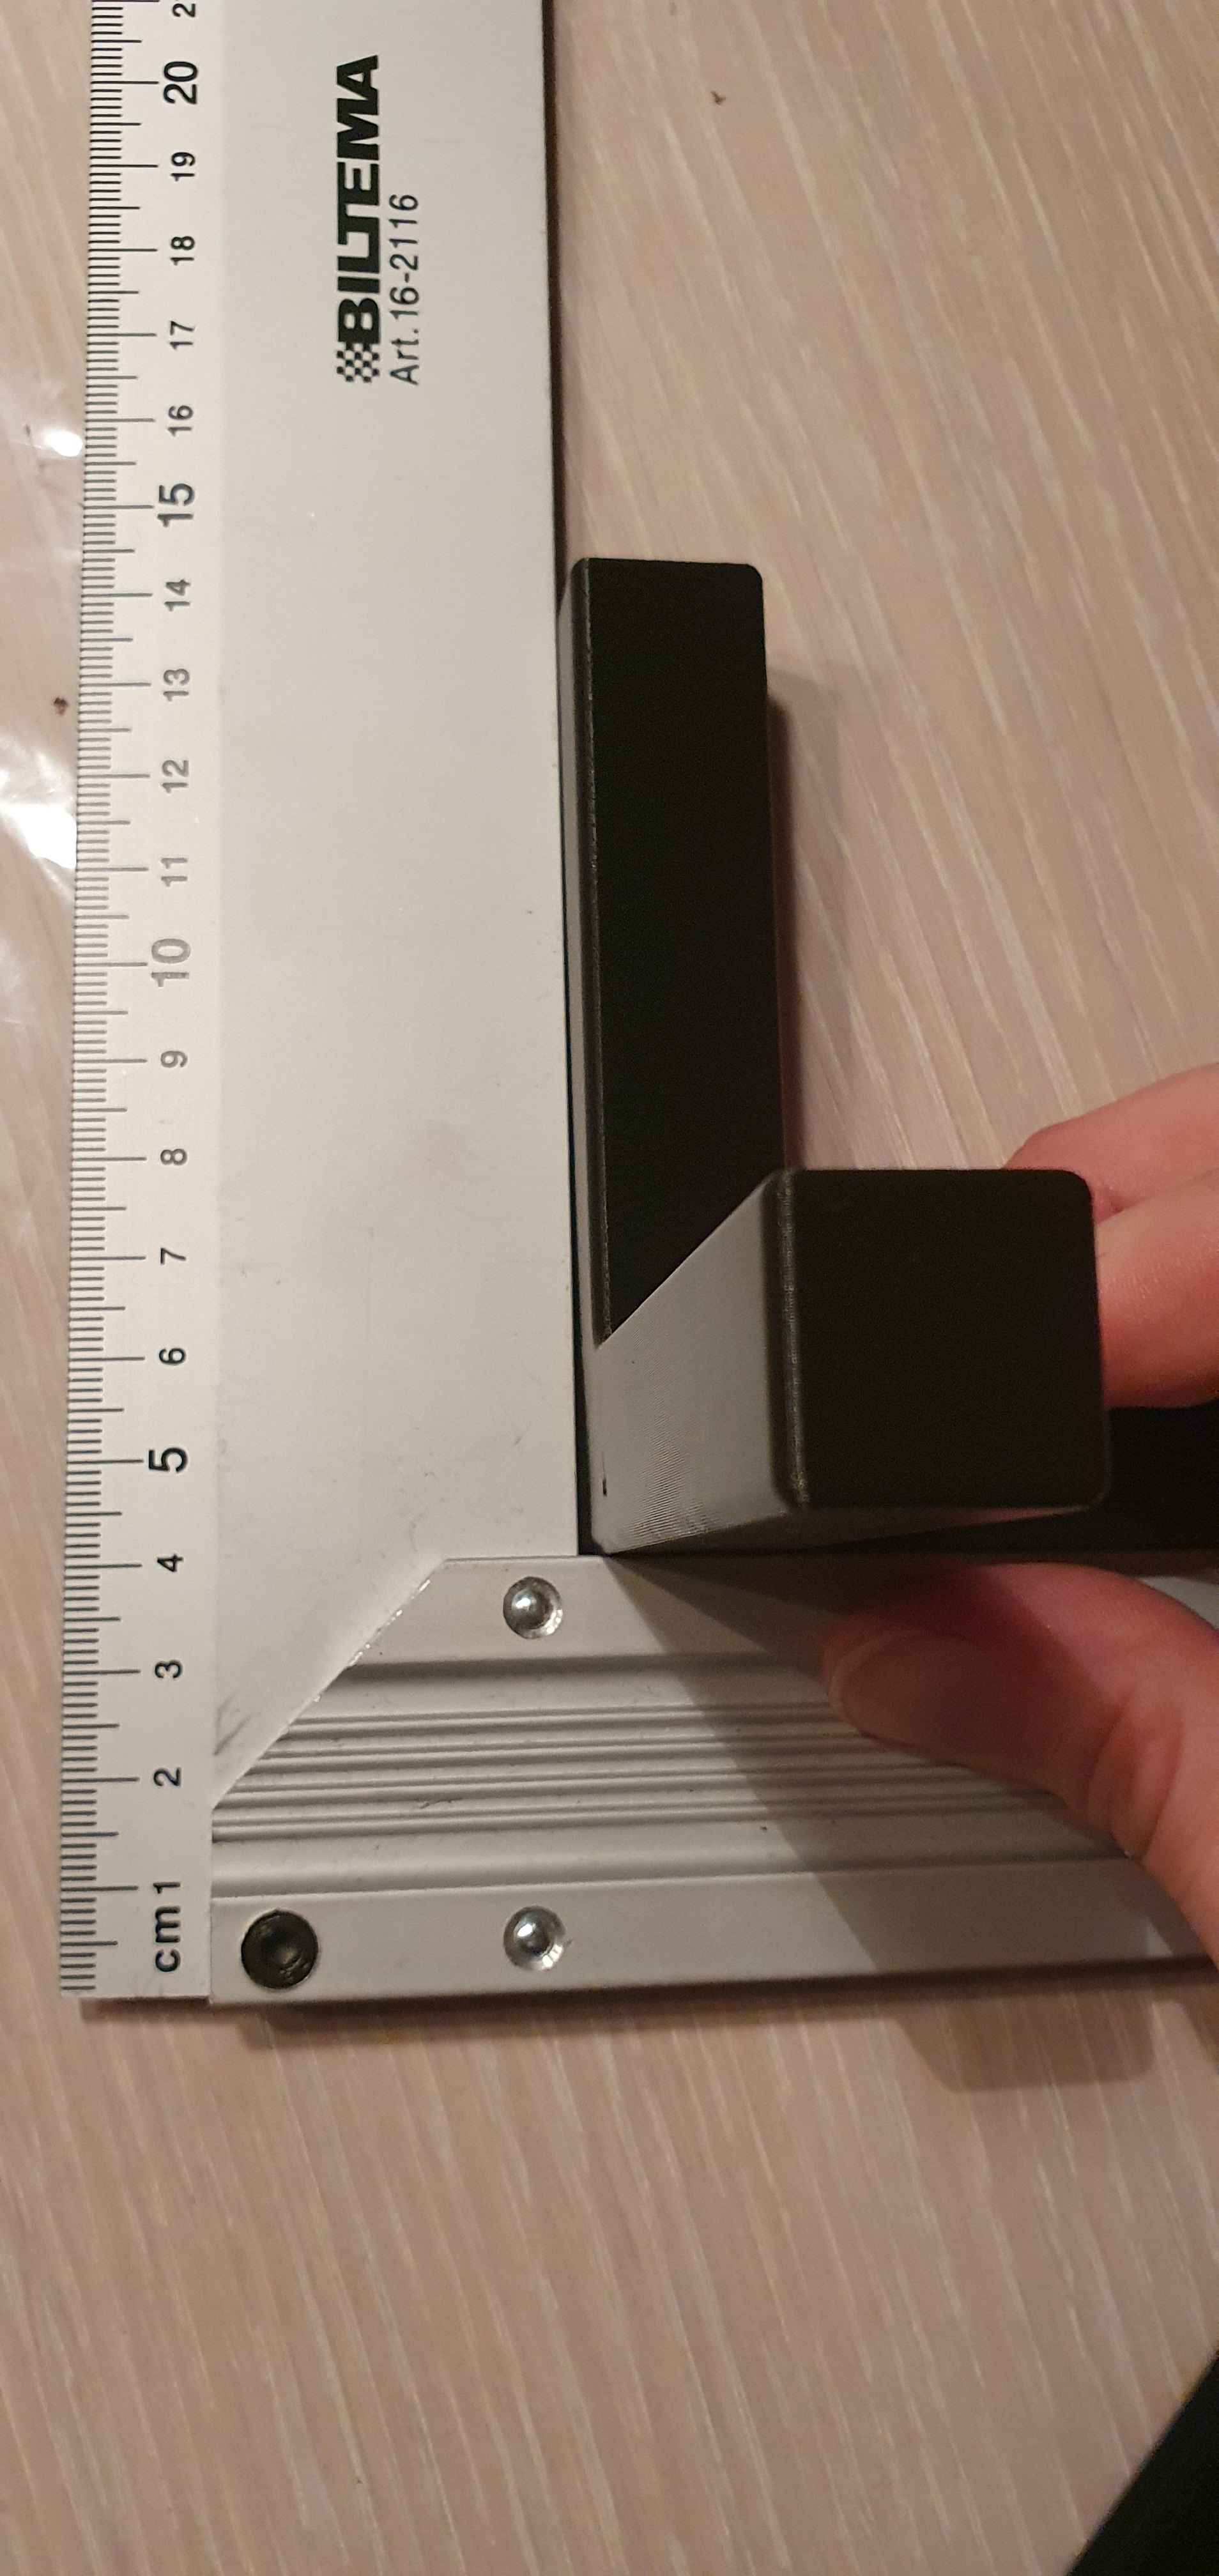
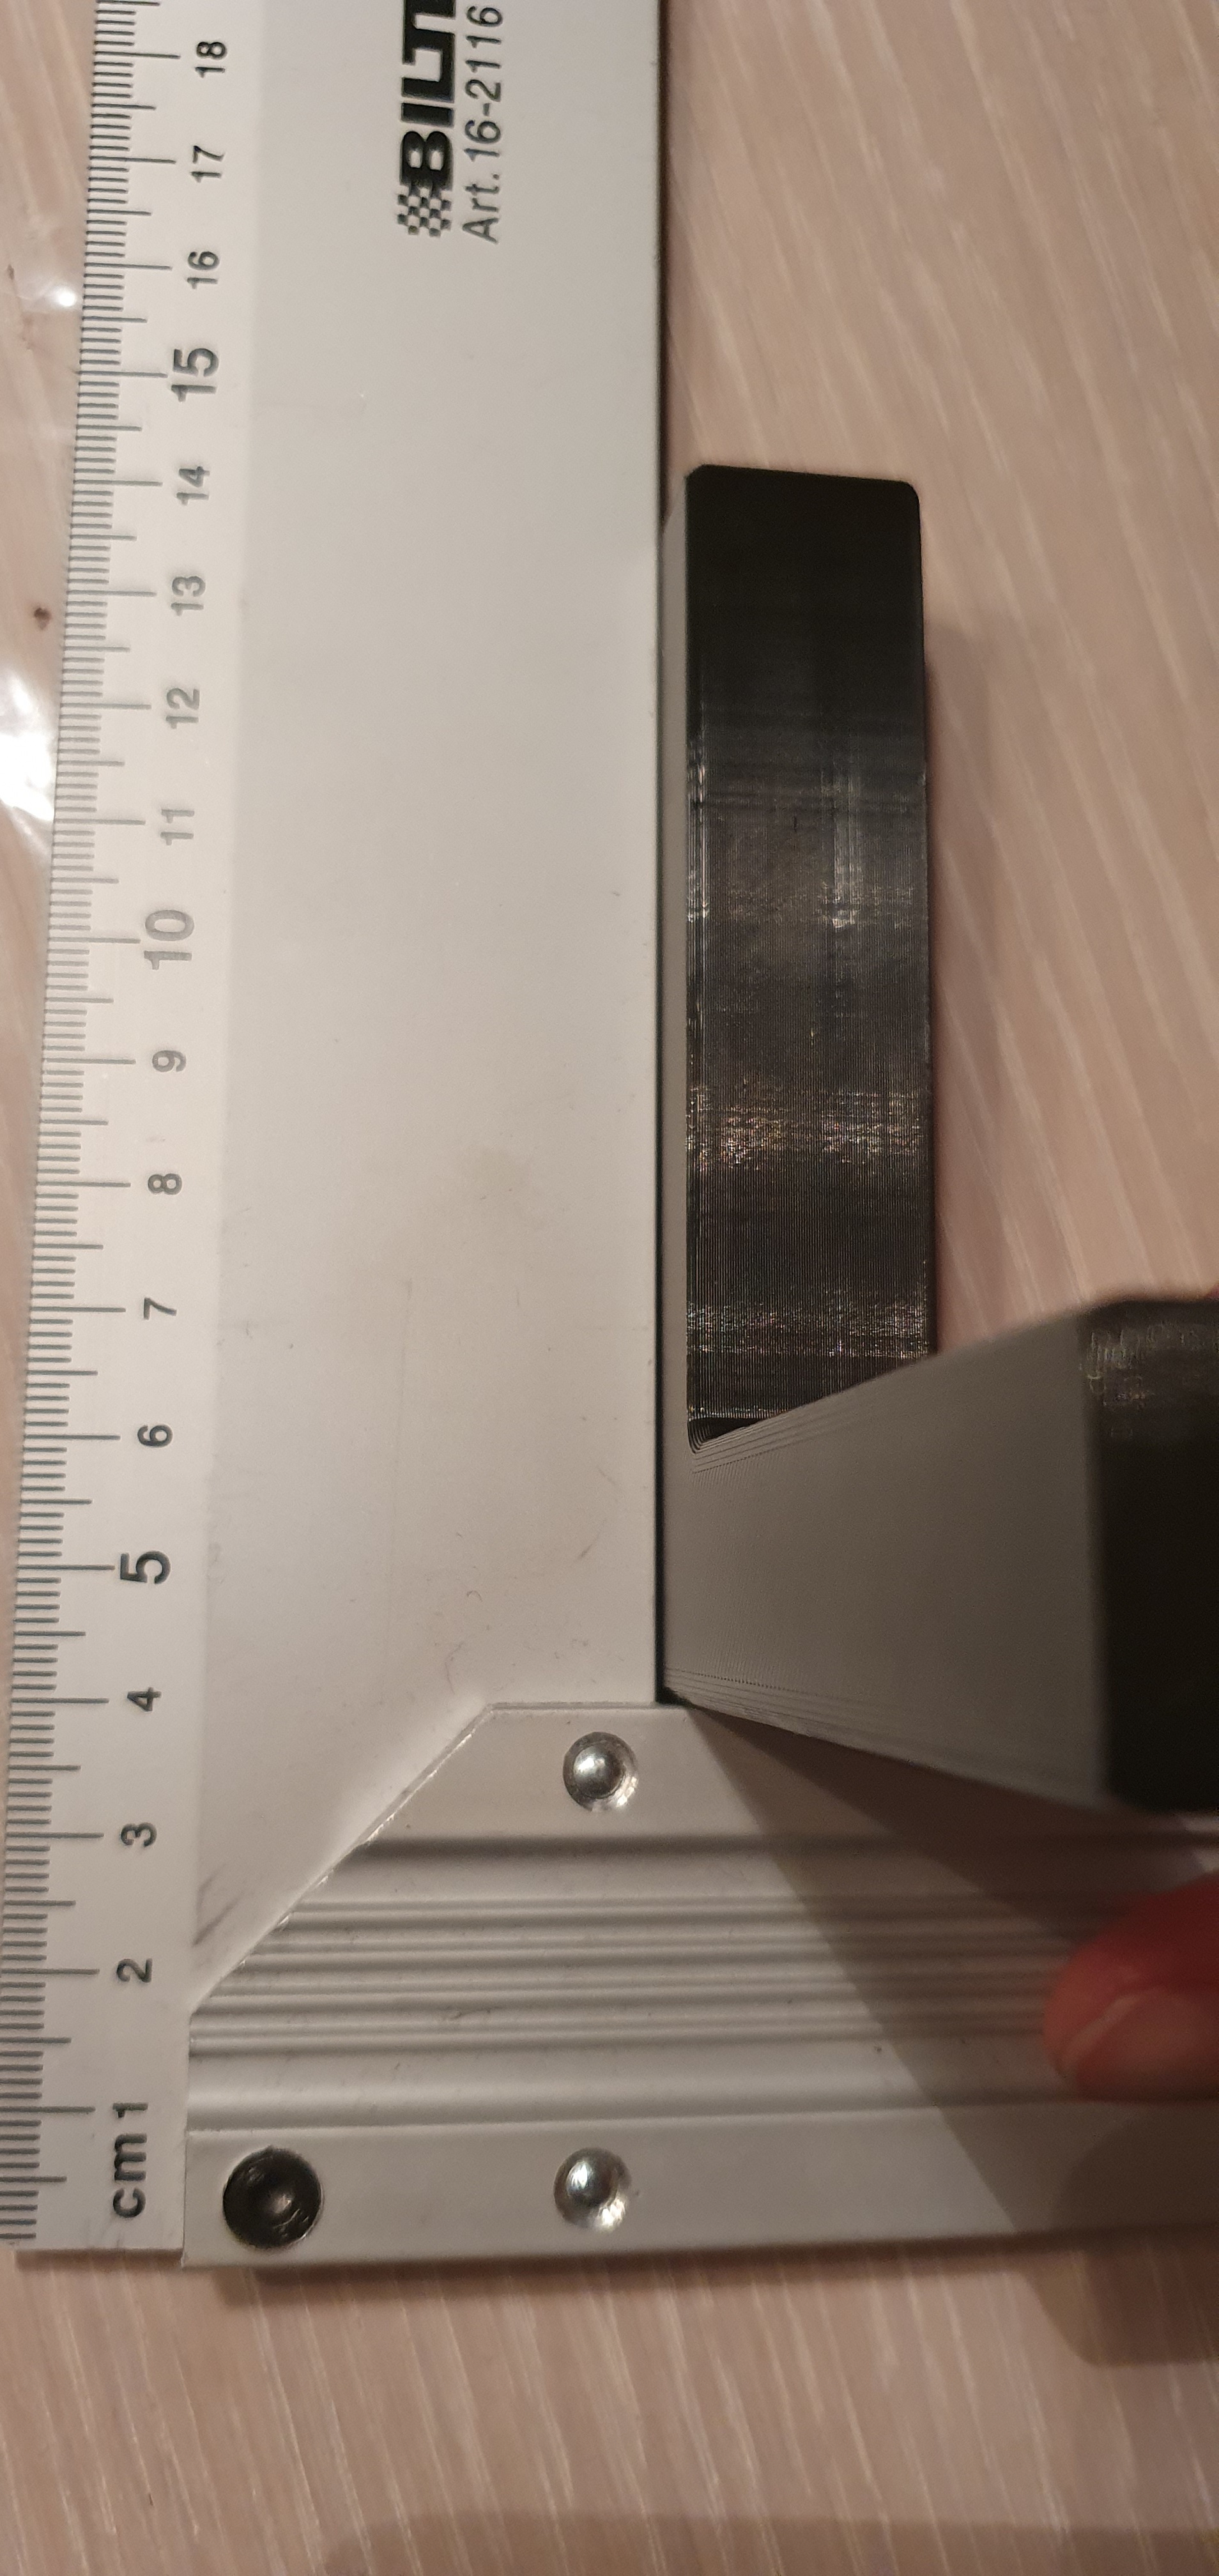
I had lots of troubles with my out of square printer. I’m not sure if it was the lack of precision from the printer, or it was my general lack of knowledge and experience that was to blame for my troubles. I honestly don’t know how much it matters. But I know for myself, that I would always suspect that the lack of precision in the print might be a bad influence…
Sounds like I need to get it properly square first… The last thing I want is to rush into getting it printed, only to get lots of issues later on because the gantry etc isnt square of the printer… The weirdest part is that the x-y angle is not 90 degrees 
I think i need to print another test with thicker walls before i start changing anything
After some proper adjustment, i think my Ender is ready. I had to file down the rails for the X-axis, as it was approximately 6mm off in a distance of 30cm 
Hopefully it is straight now, as ive straightnened all of the axis.
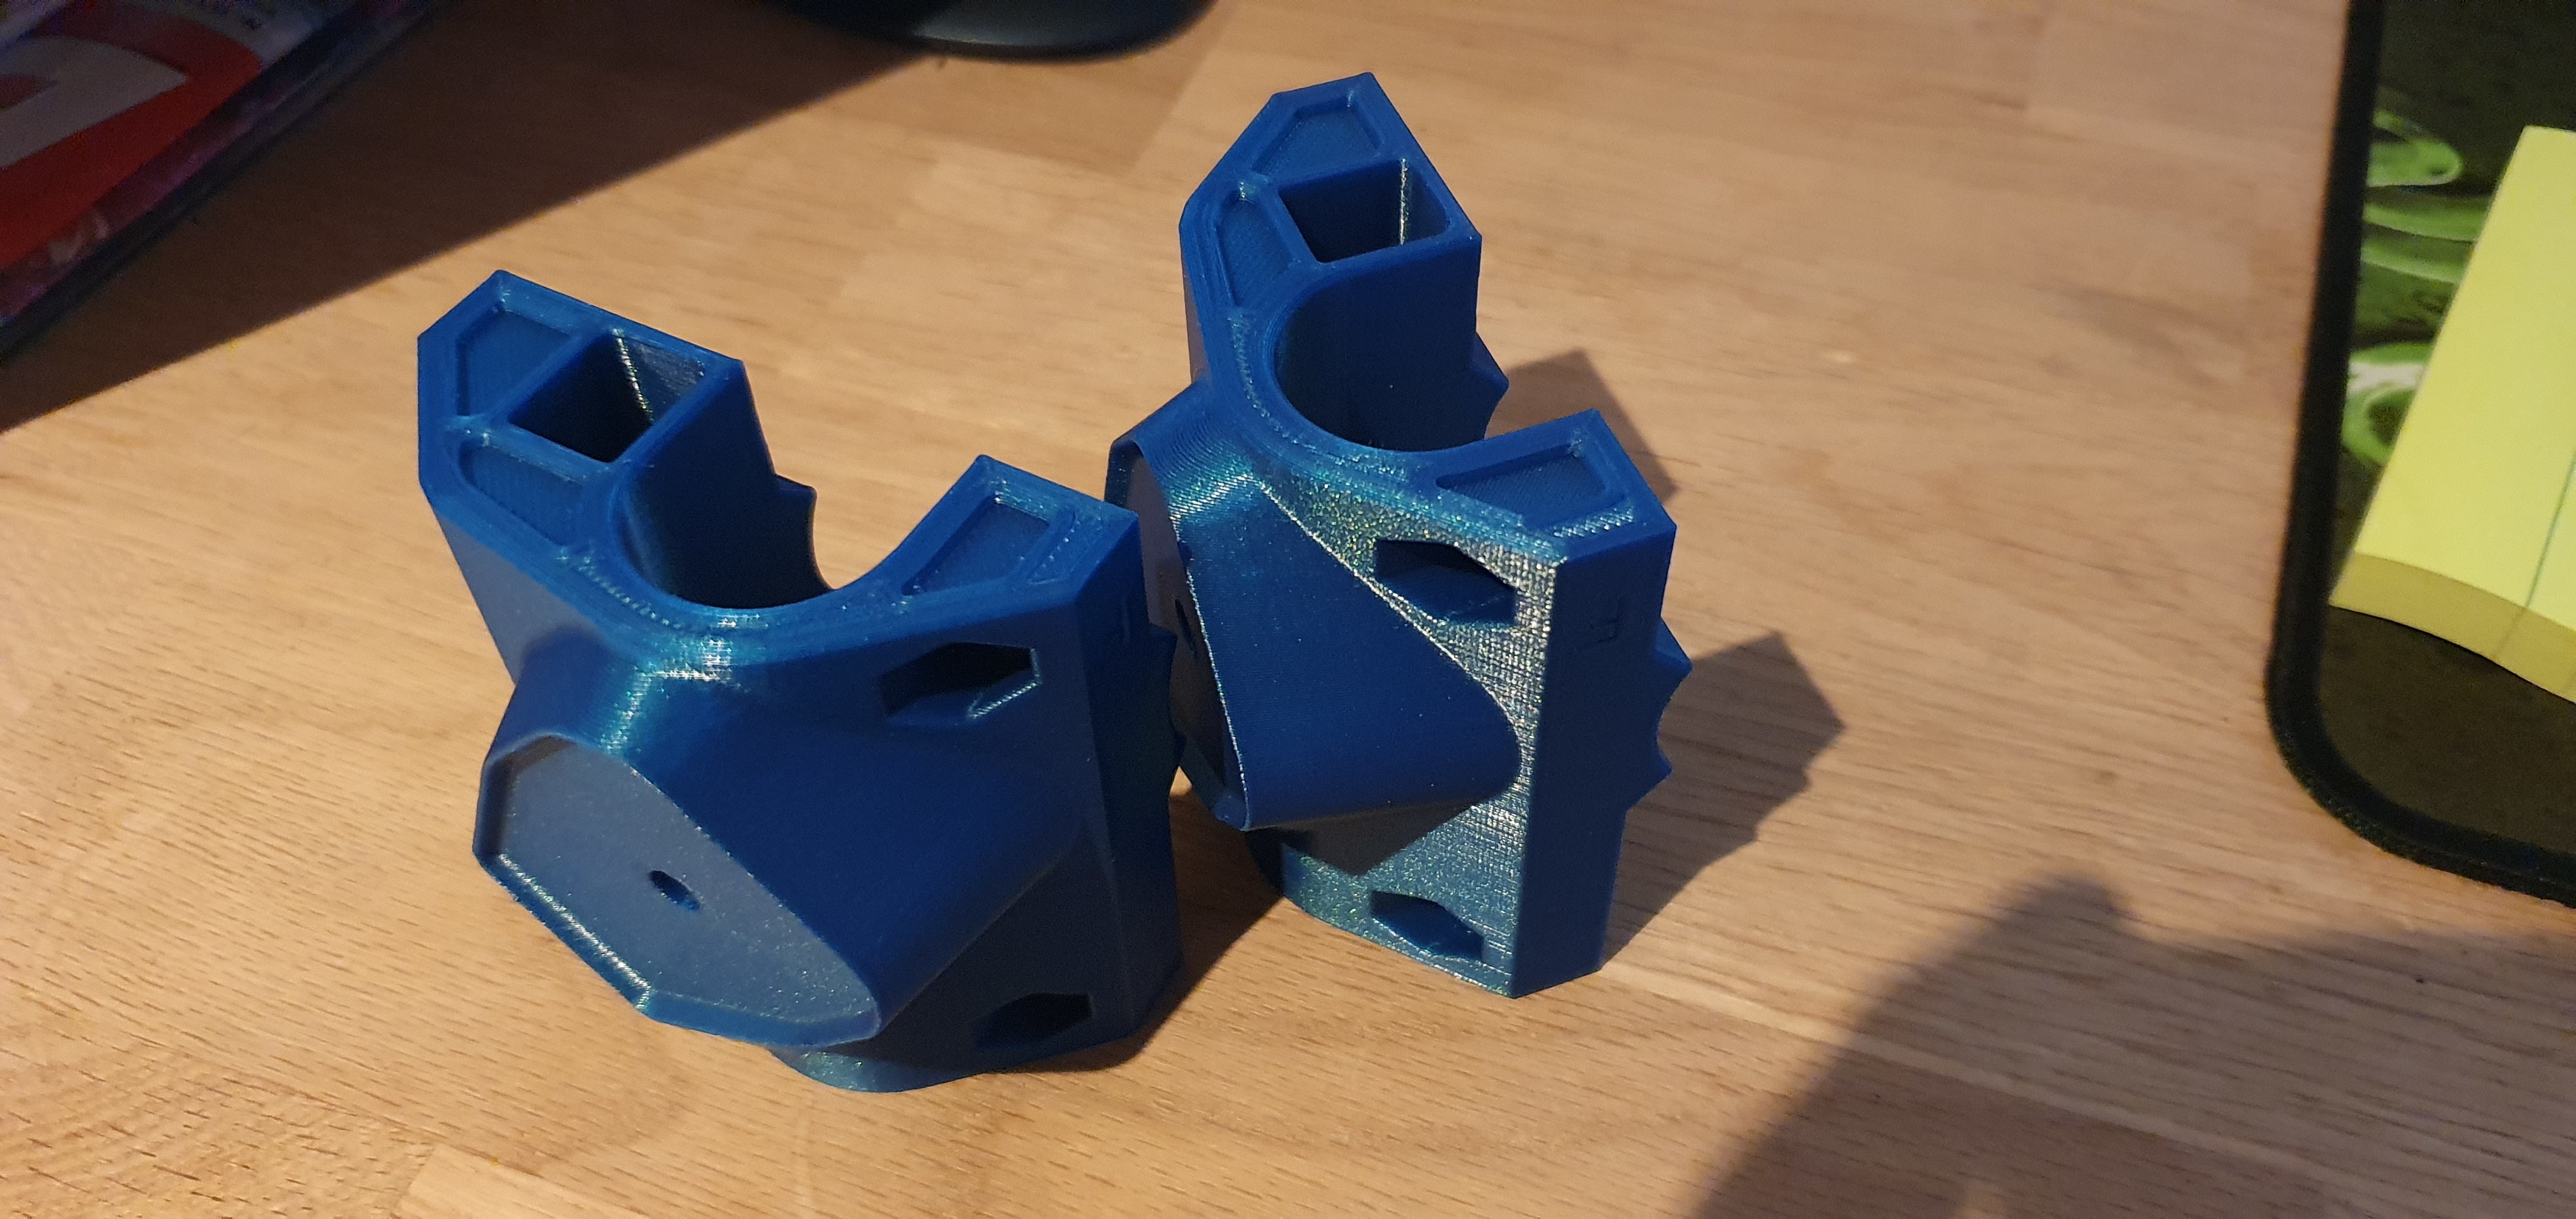
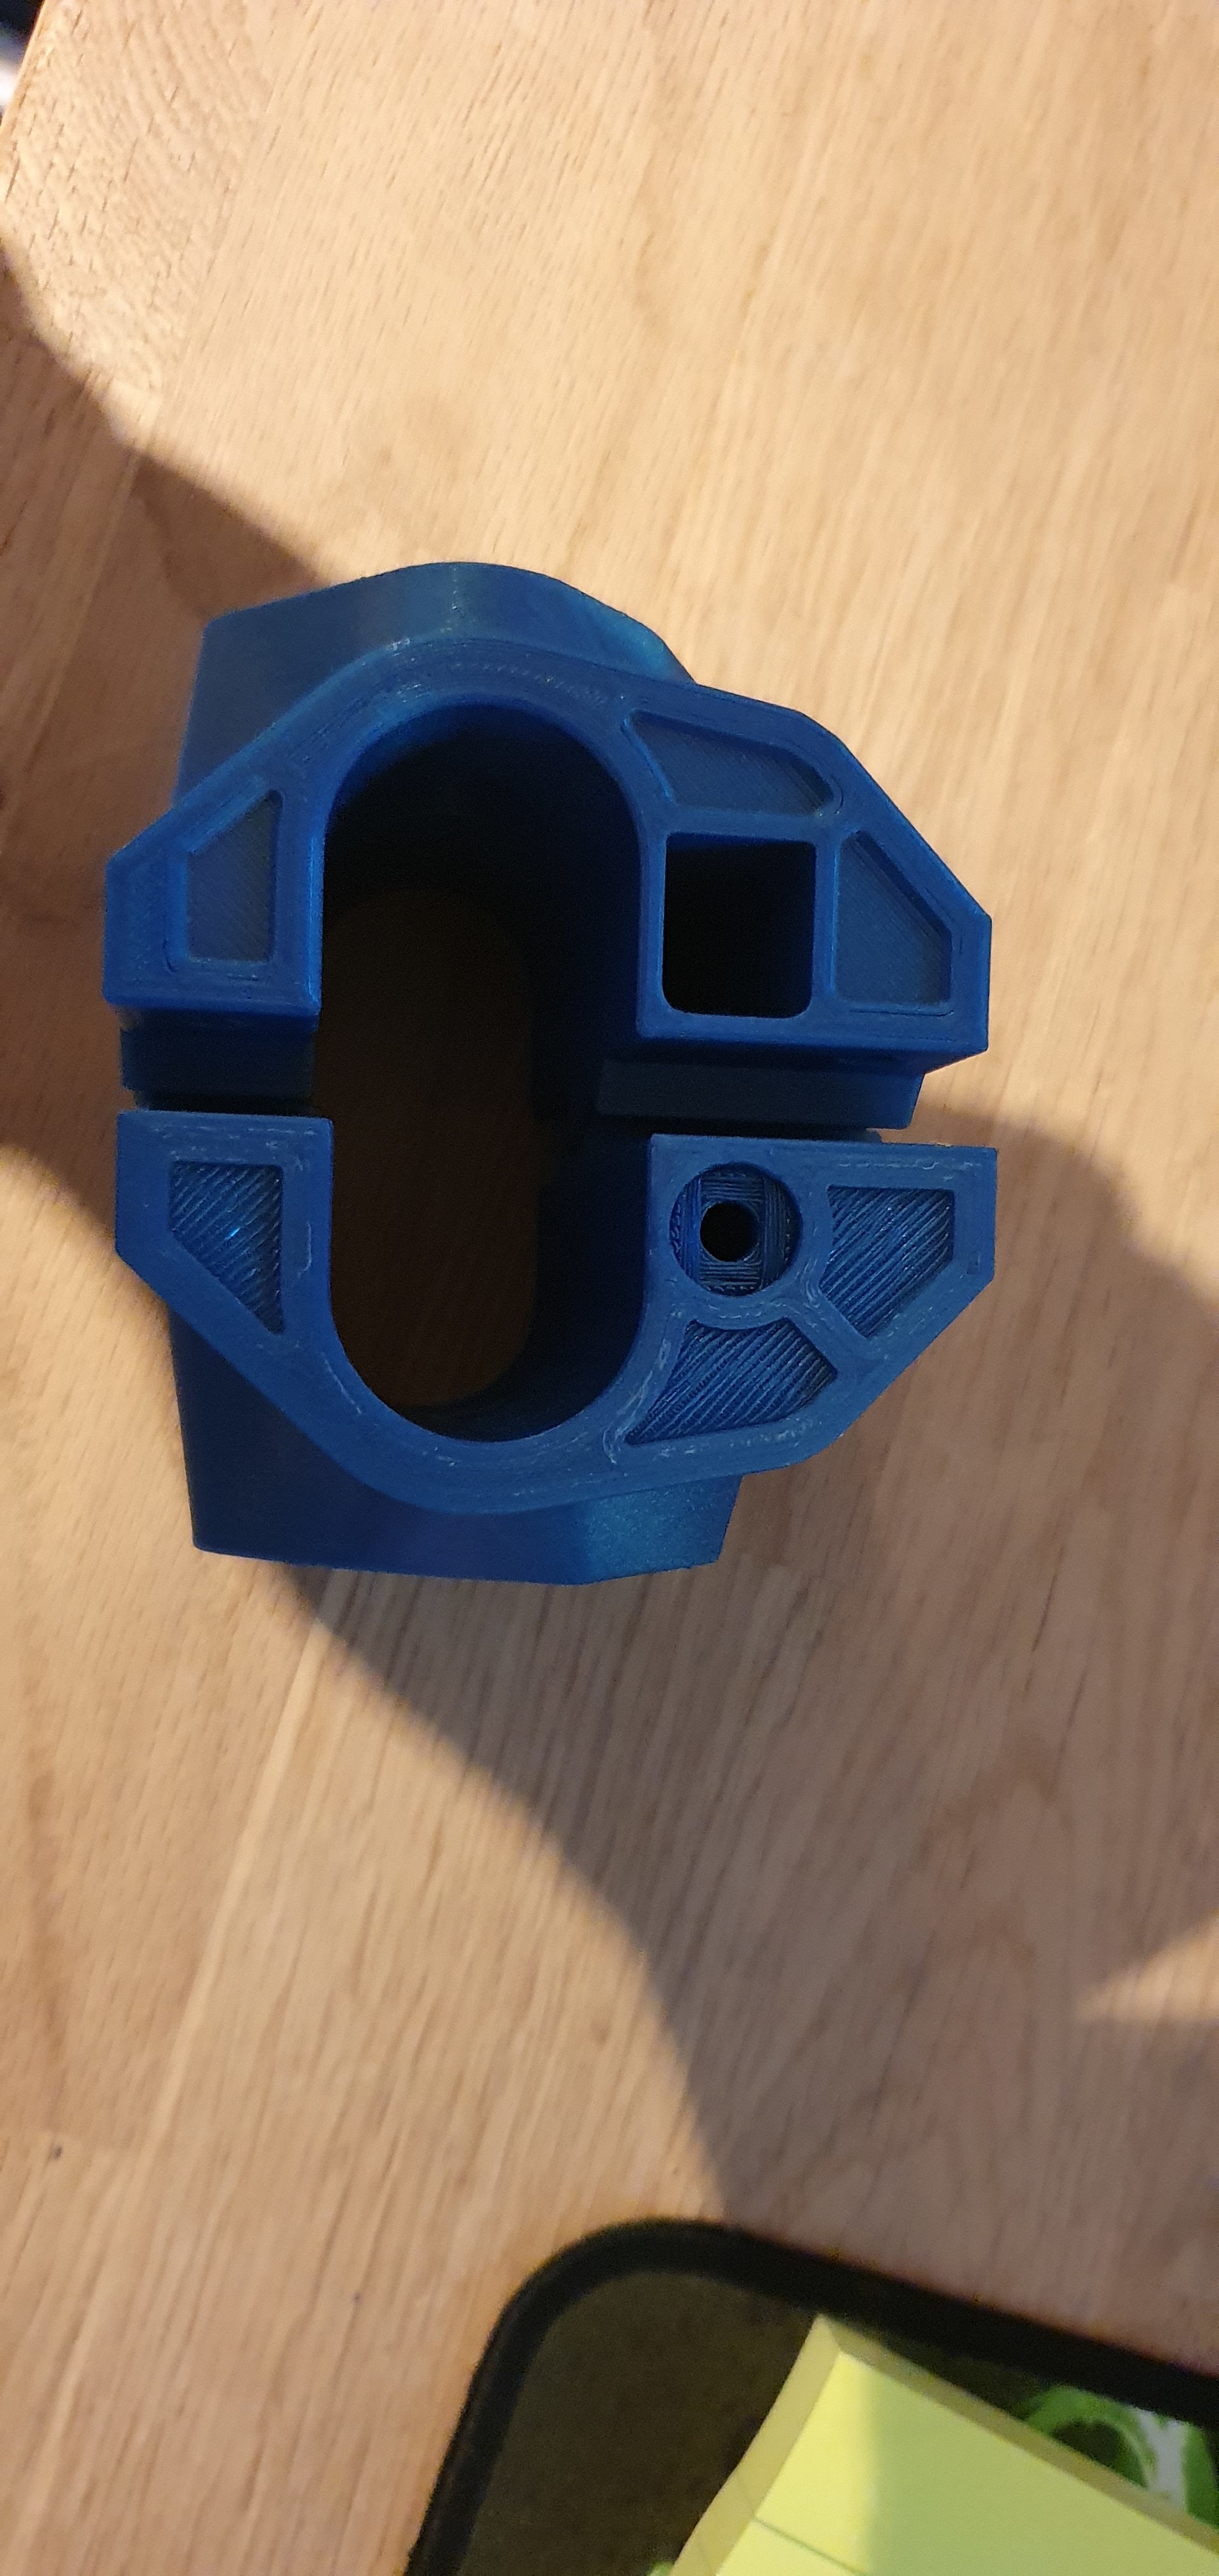
Started yesterday printing the bottom corners for the PRIMO build

5 Likes
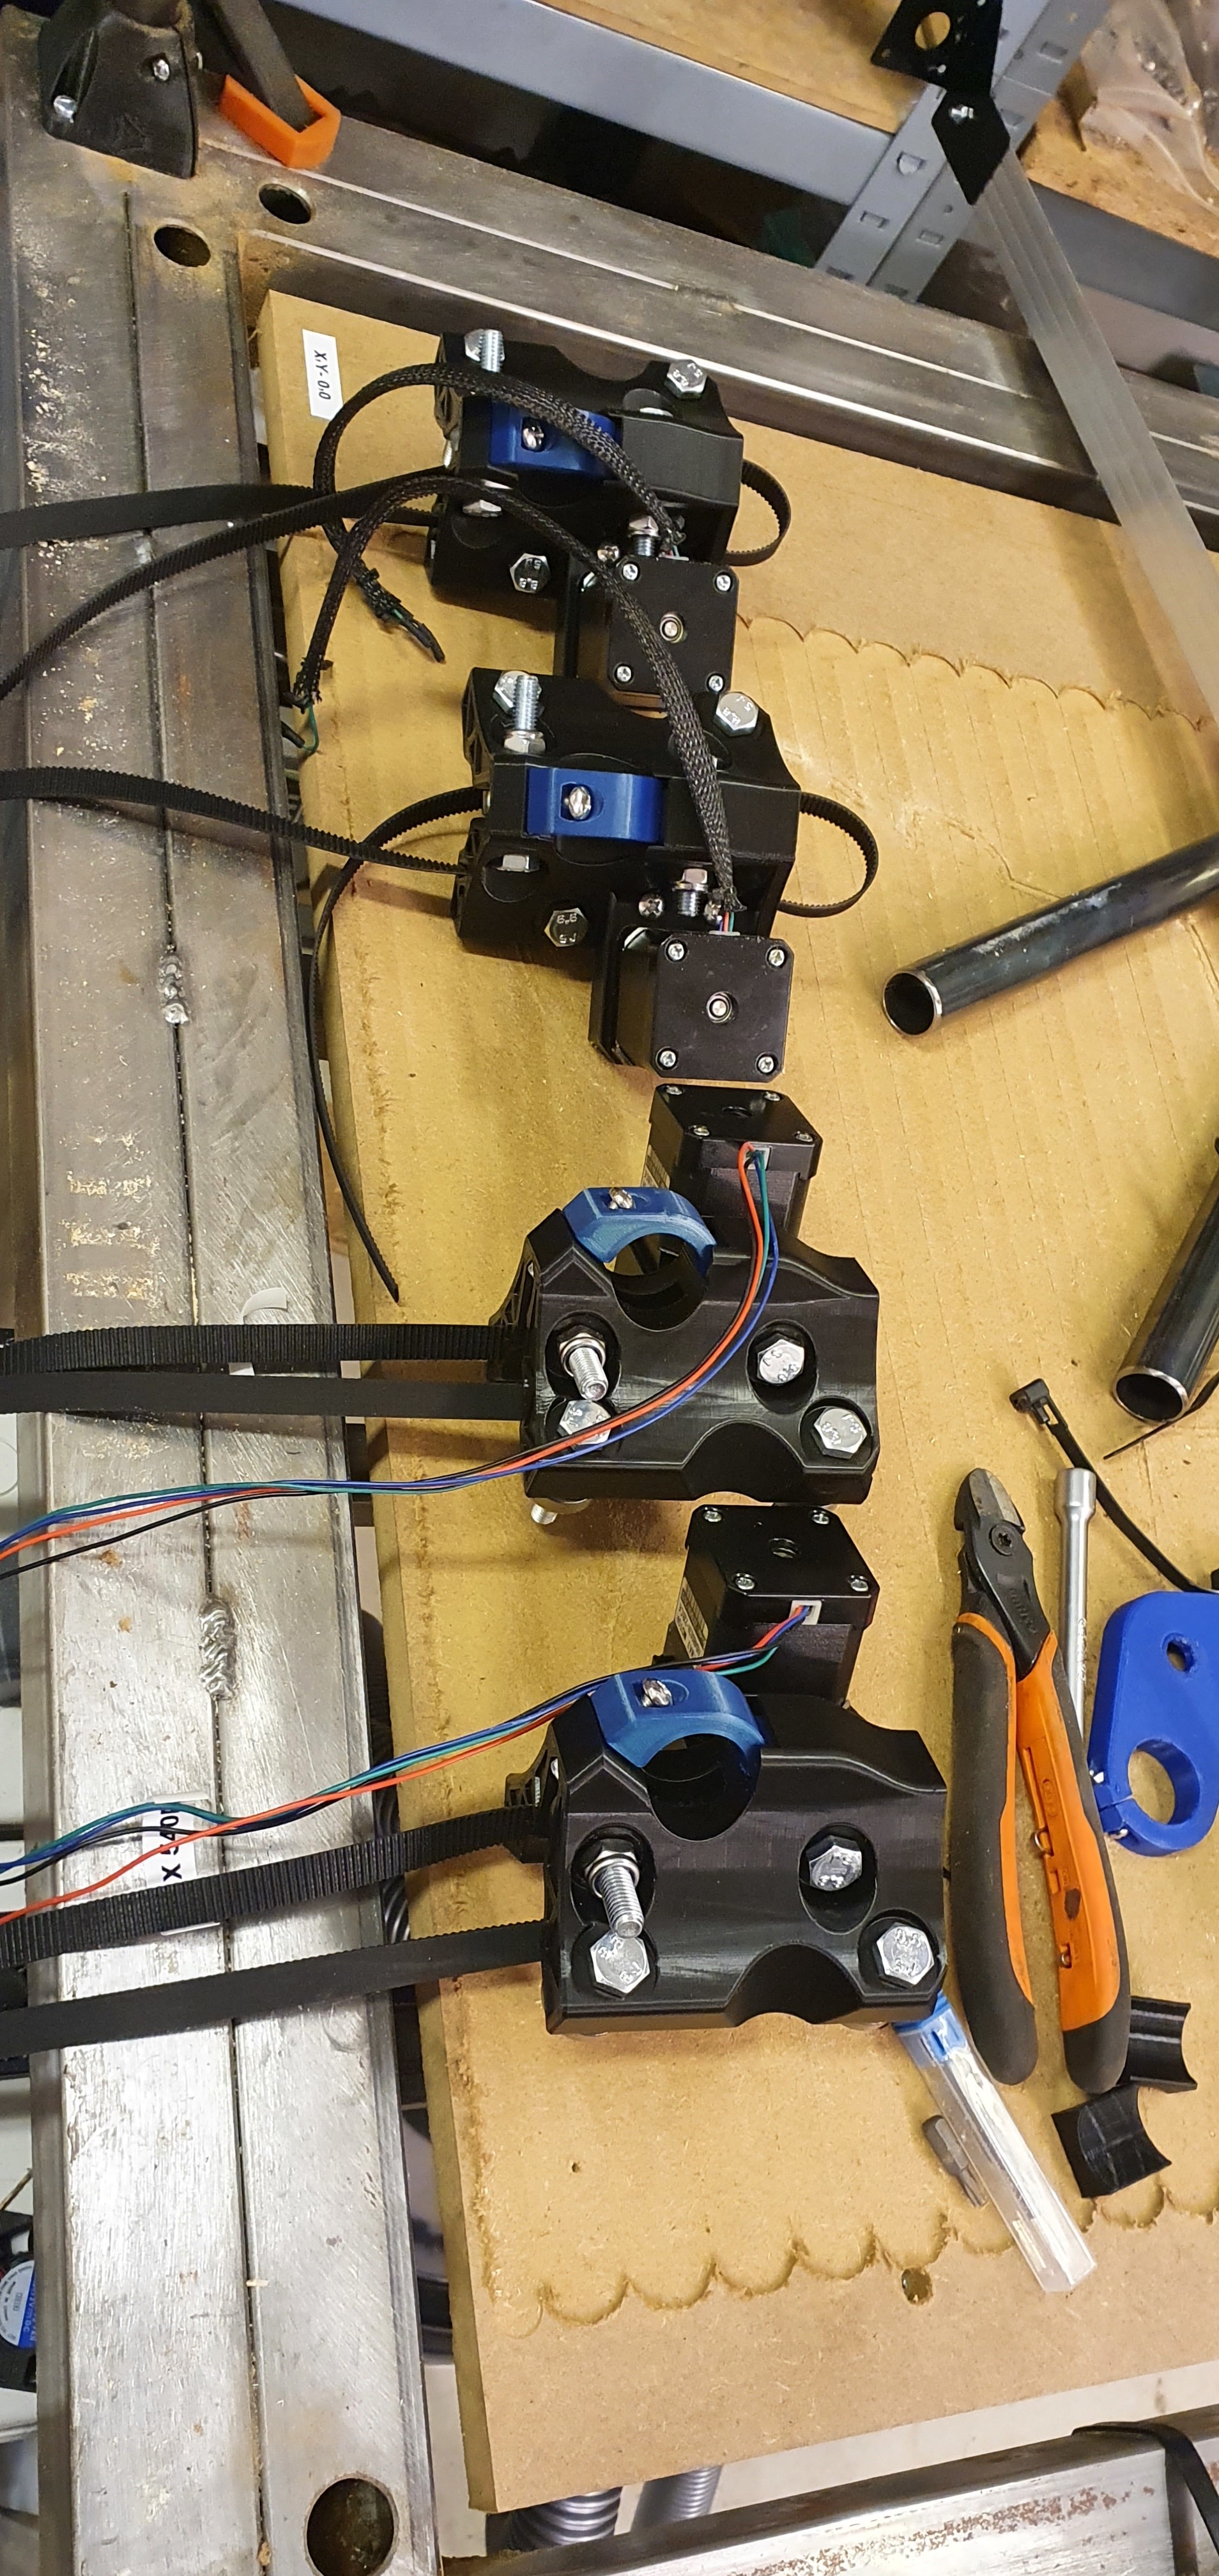
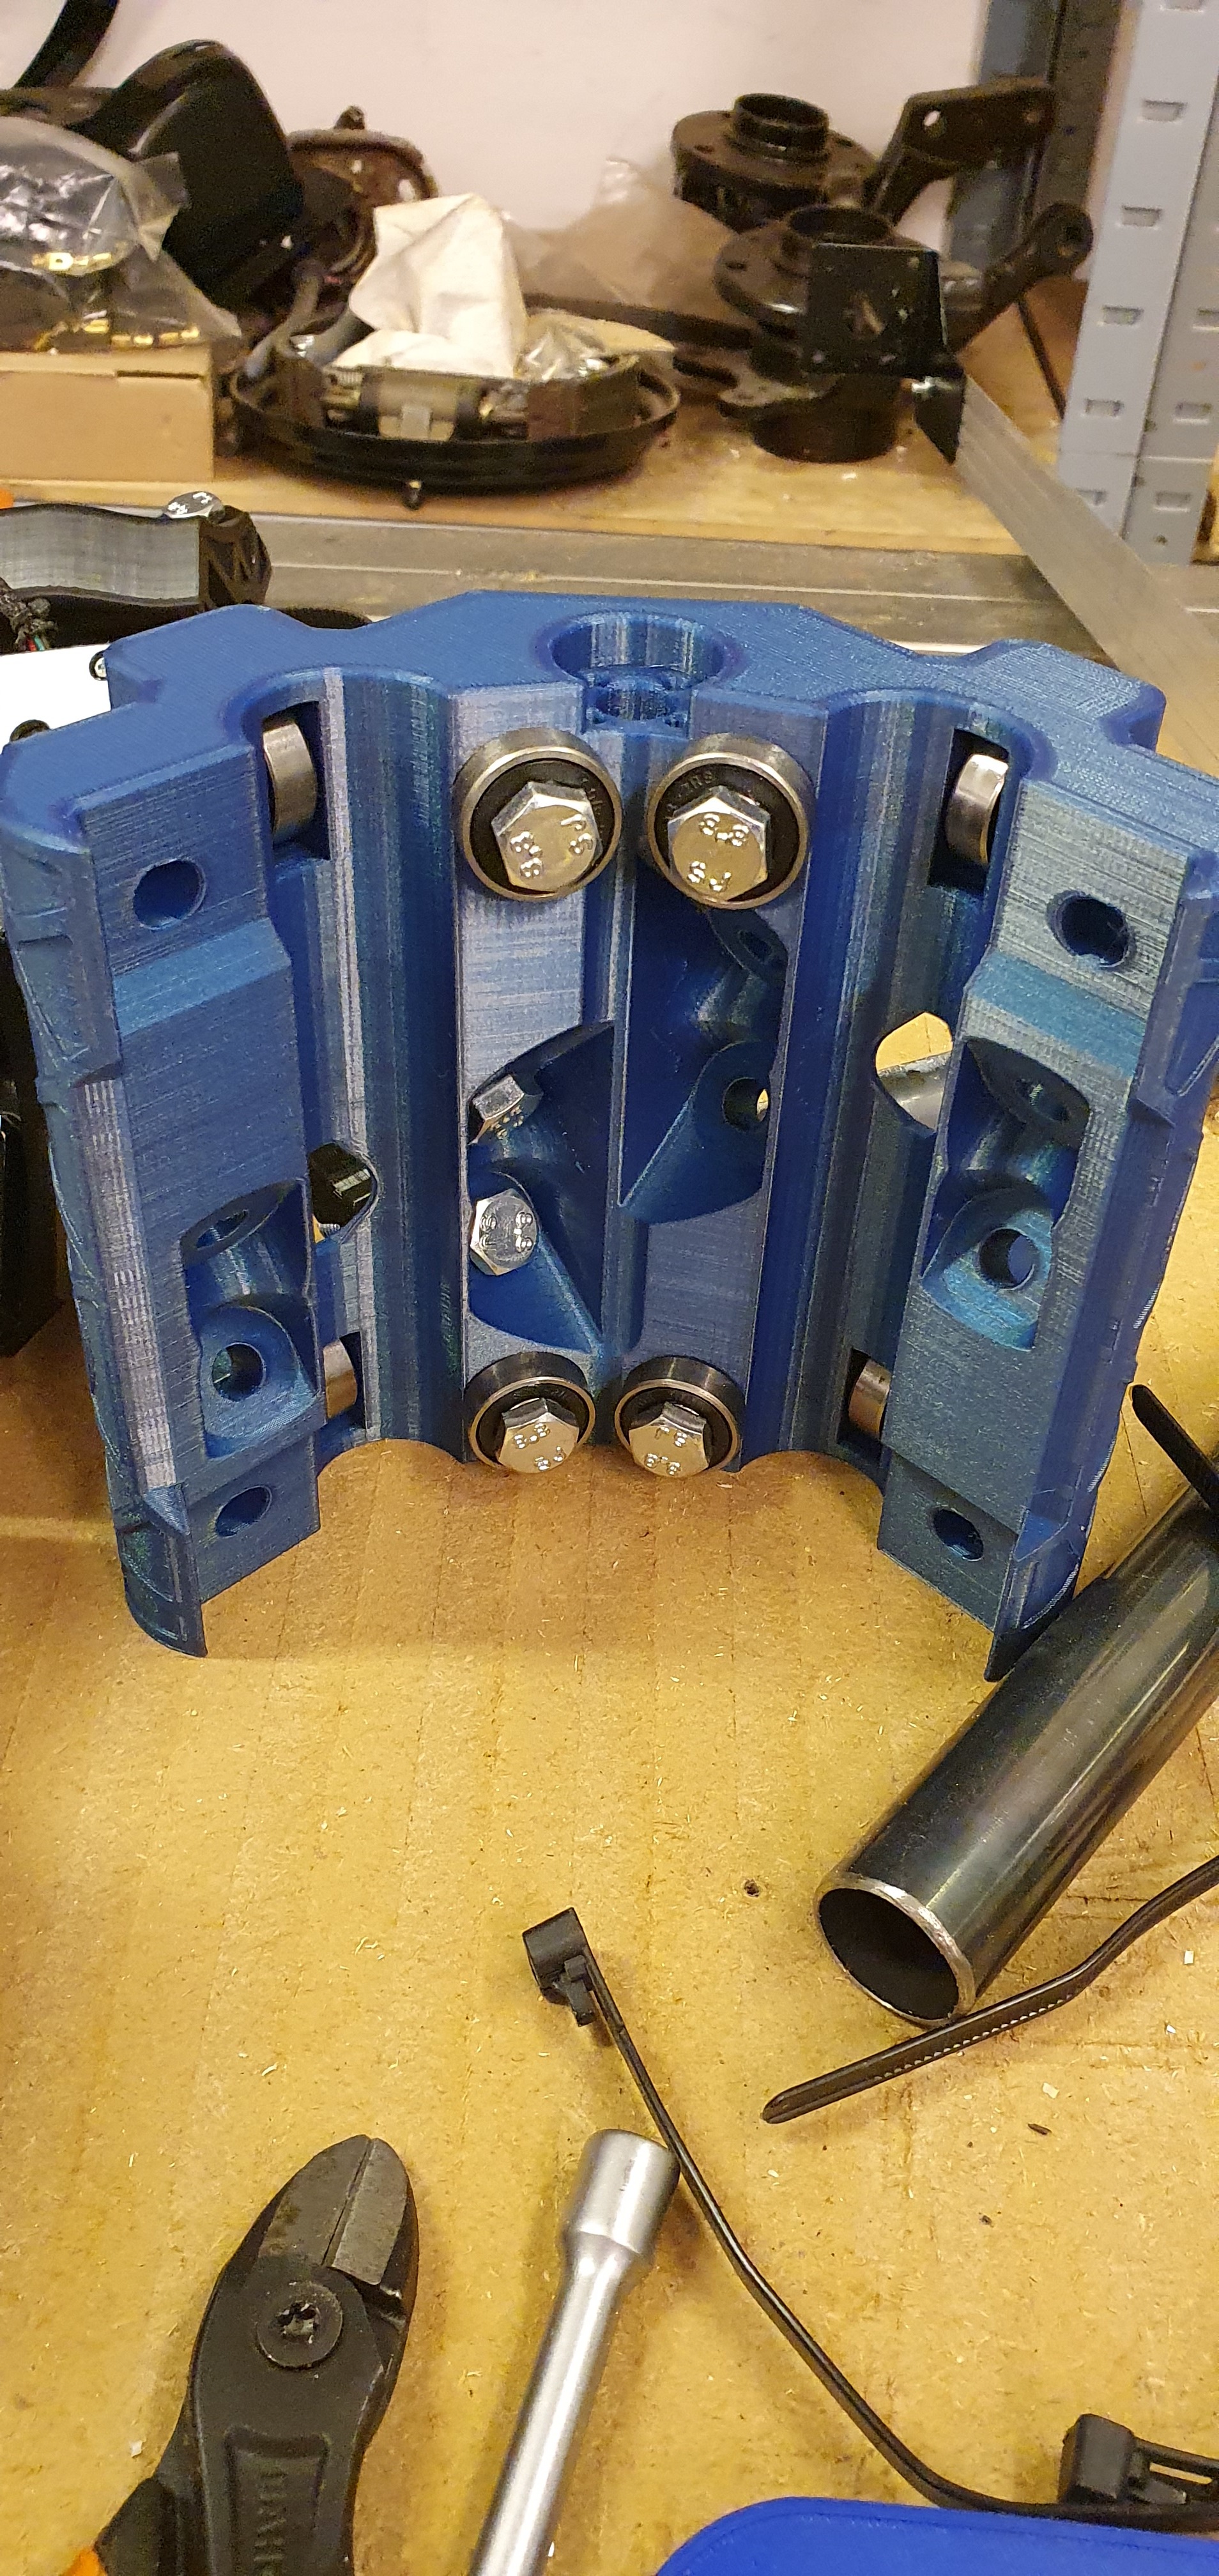
All of the printed parts are ready, and i have started assembly. I’m lacking some steel tubes though. I have also planned to go for dual endstop this time, And partly because of that i have purchased a proper steel cabinet for the electronics. The old solution with the display/controller stuck to the side was inpracticle, so I designed a box for it, and I will also fit it with proper connectors when I receive them to be able to disconnect it if I want to. I fitted the case with magnets, but they are probably to weak to hold the cables as well.
3 Likes
Hi Johannes,
I’m also from Norway, and I look forward to see what more you poste about your machine.
And I wonder where you got your steel tubing? (biltema?)
I have built one cnc machine from another design, but I think this one has a bigger community and it’s easy to ask question if I have some problems.
Great to see more people from Norway also.
Regards
Glenn
Hei Glenn! I’m also from Norway, I live in Tromsø. The Biltema pipes are good, just make sure they are straight. Rolling them on the floor is a good technique 
I got my pipes for the Primo build at Elektroimportøren, 25mm GUR. They are a little thicker than the Biltema ones.
Just checked their website, the price has doubled!! Ouch… I’ve heard there’s a steel shortage caused by covid, I guess this is why.
1 Like
Hi Glenn! I have used biltema pipes until now, but biltema is all out where i live… I was not aware that elektroimportøren also have steel pipes, I will check that up. I find it hard to find any proper steel dealers that will sell to private people for an acceptable price…
1 Like
Thanks, Turbinbjorn and Johannes.
I will see where there is some good prices. I order lot of metall from a company in Sortland.
I’m making a bench grinder. And I have a CNC machine but the design is ok, but I lose steps when I try to make something in wood. But I guess is due to low voltage.
I have too adjust the stepper drivers and see how that works.
Small update:
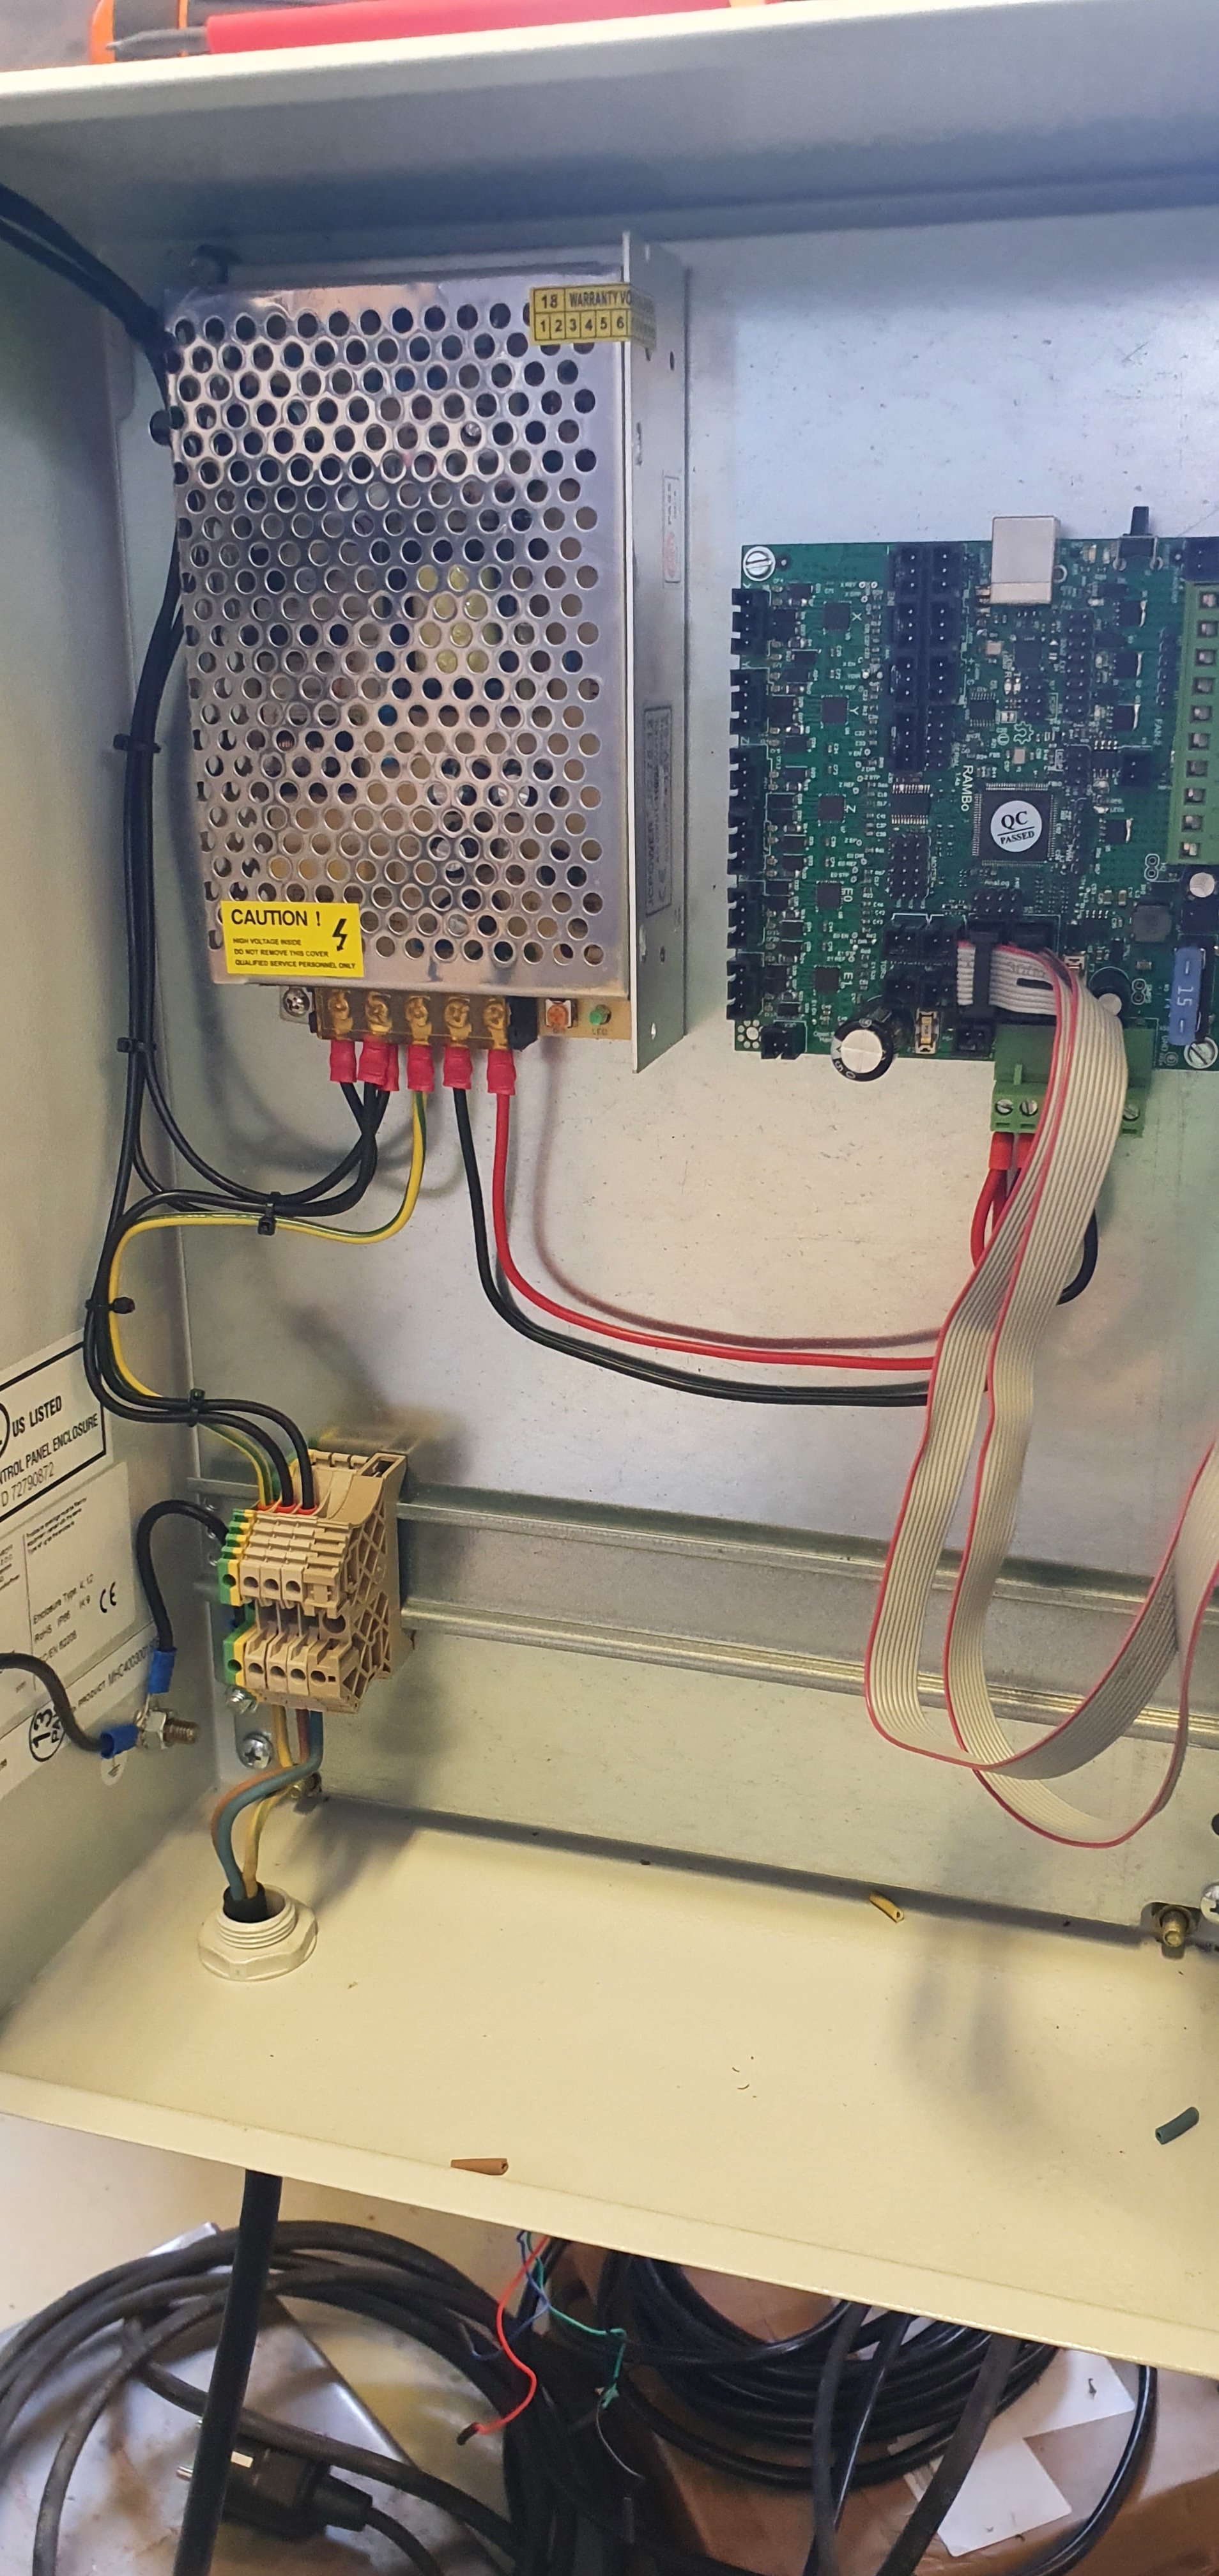
I have assembled all of the mechanical parts, and only cabling is left.
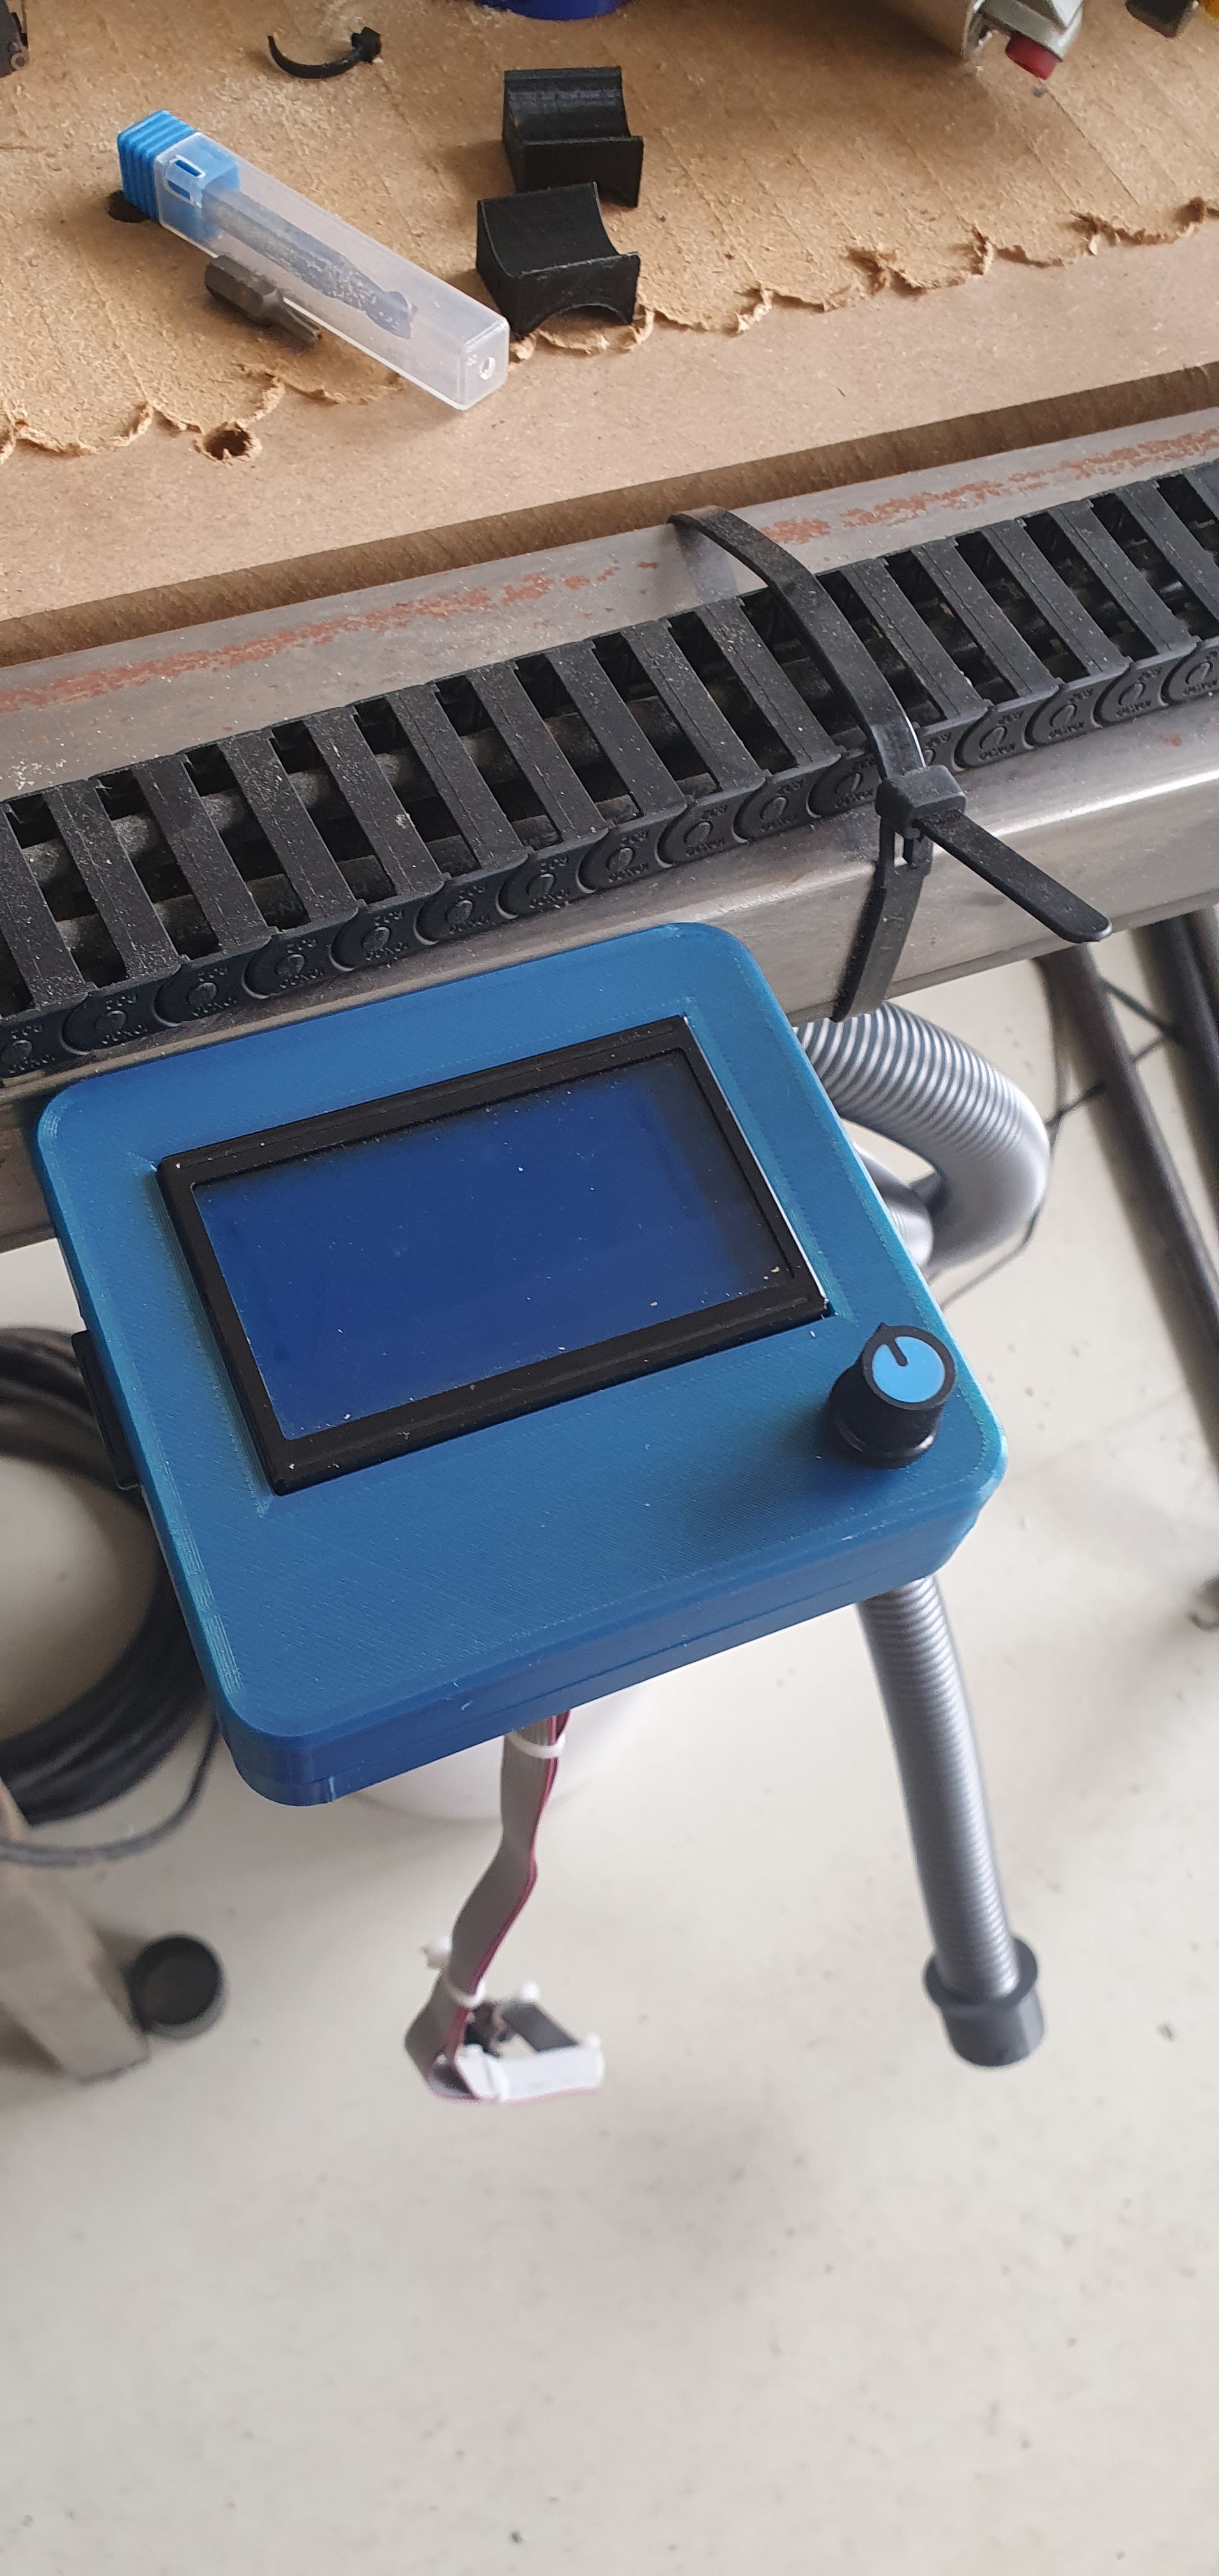
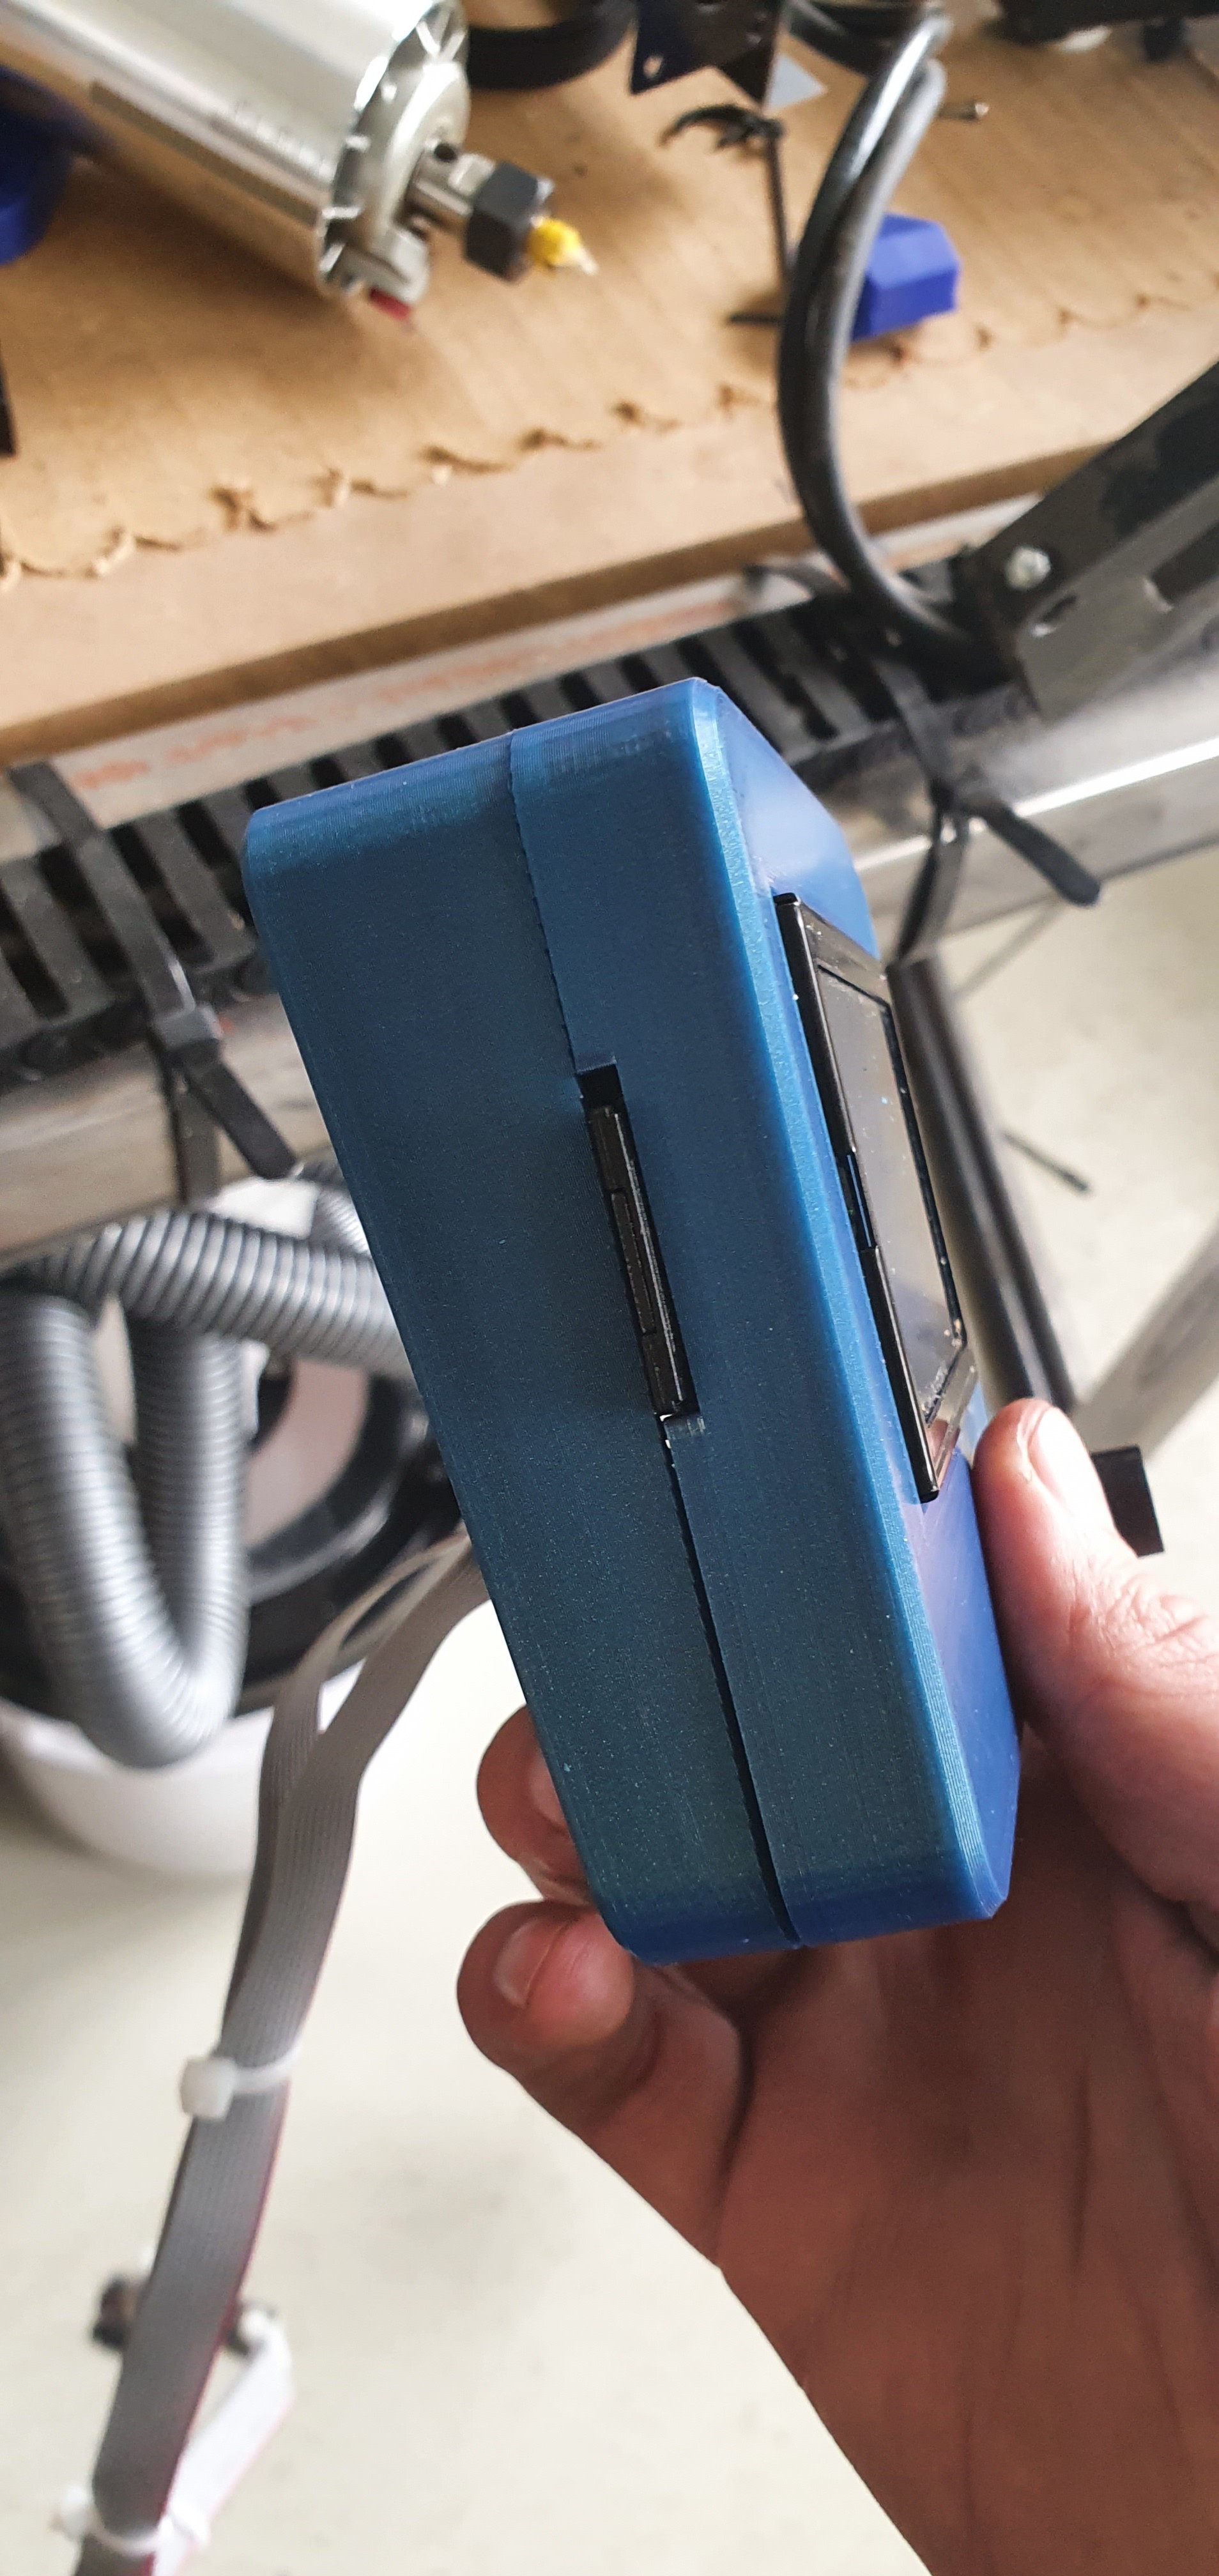
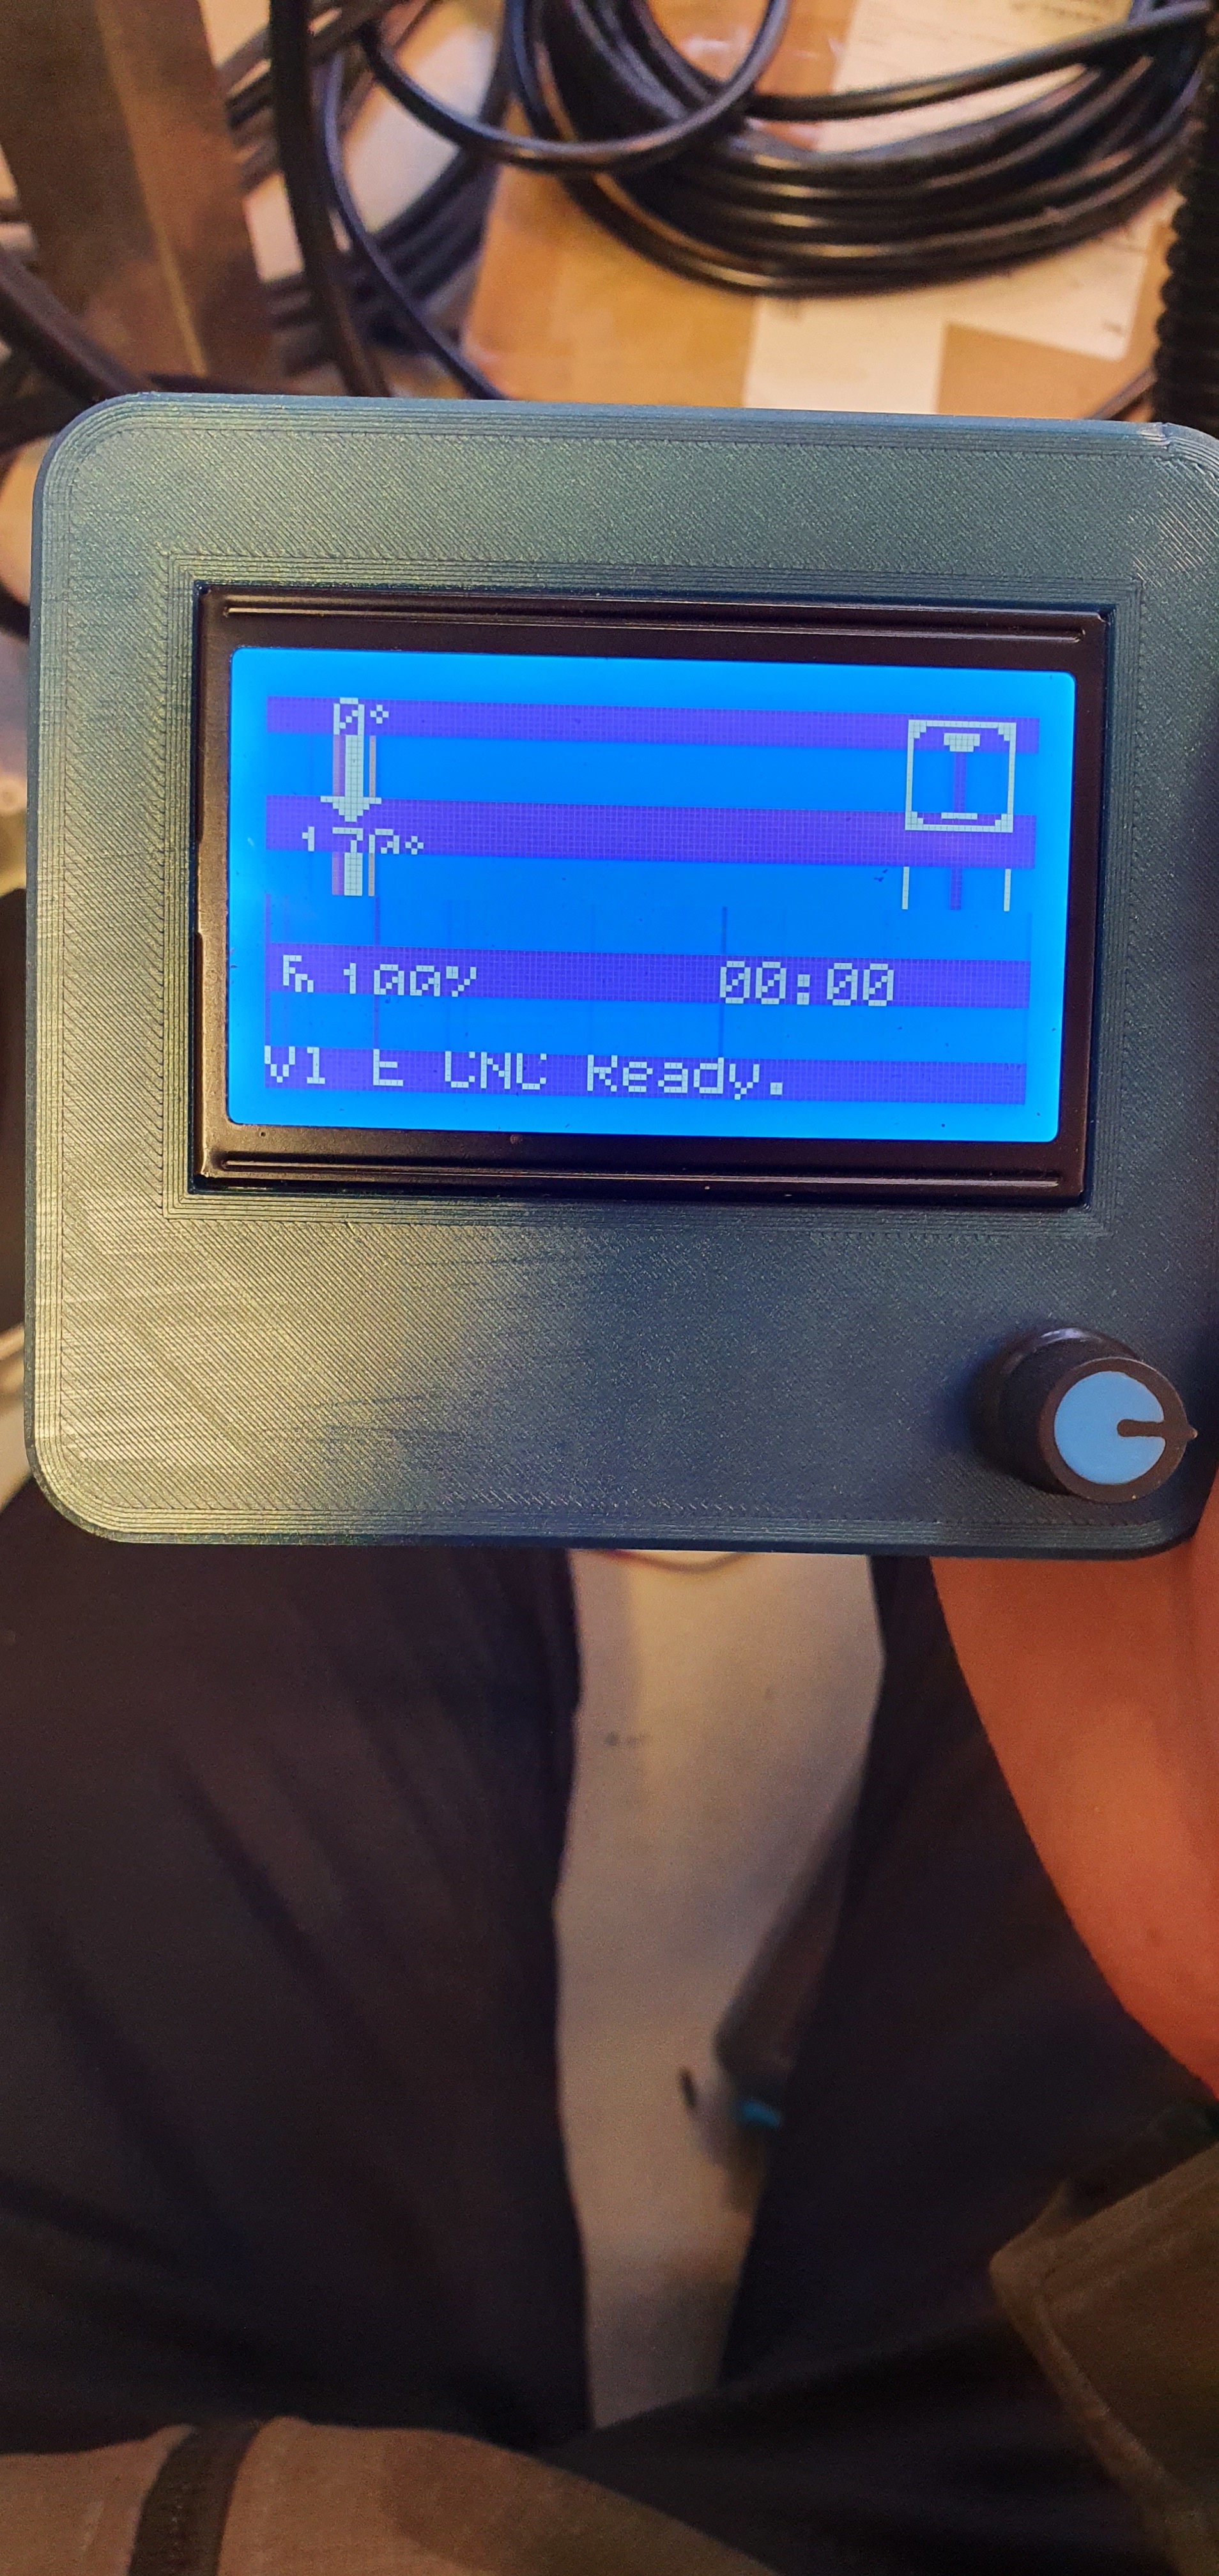
I made some cables for the display to be removable, but turns out either the plugs make some sort of problem, or the cables are to long. They display doesnt work properly, so i have to use regular ribbon cables or shorten the ones i have. A shame, as I really liked the solution.
Heres how the display looks with the extended cabling
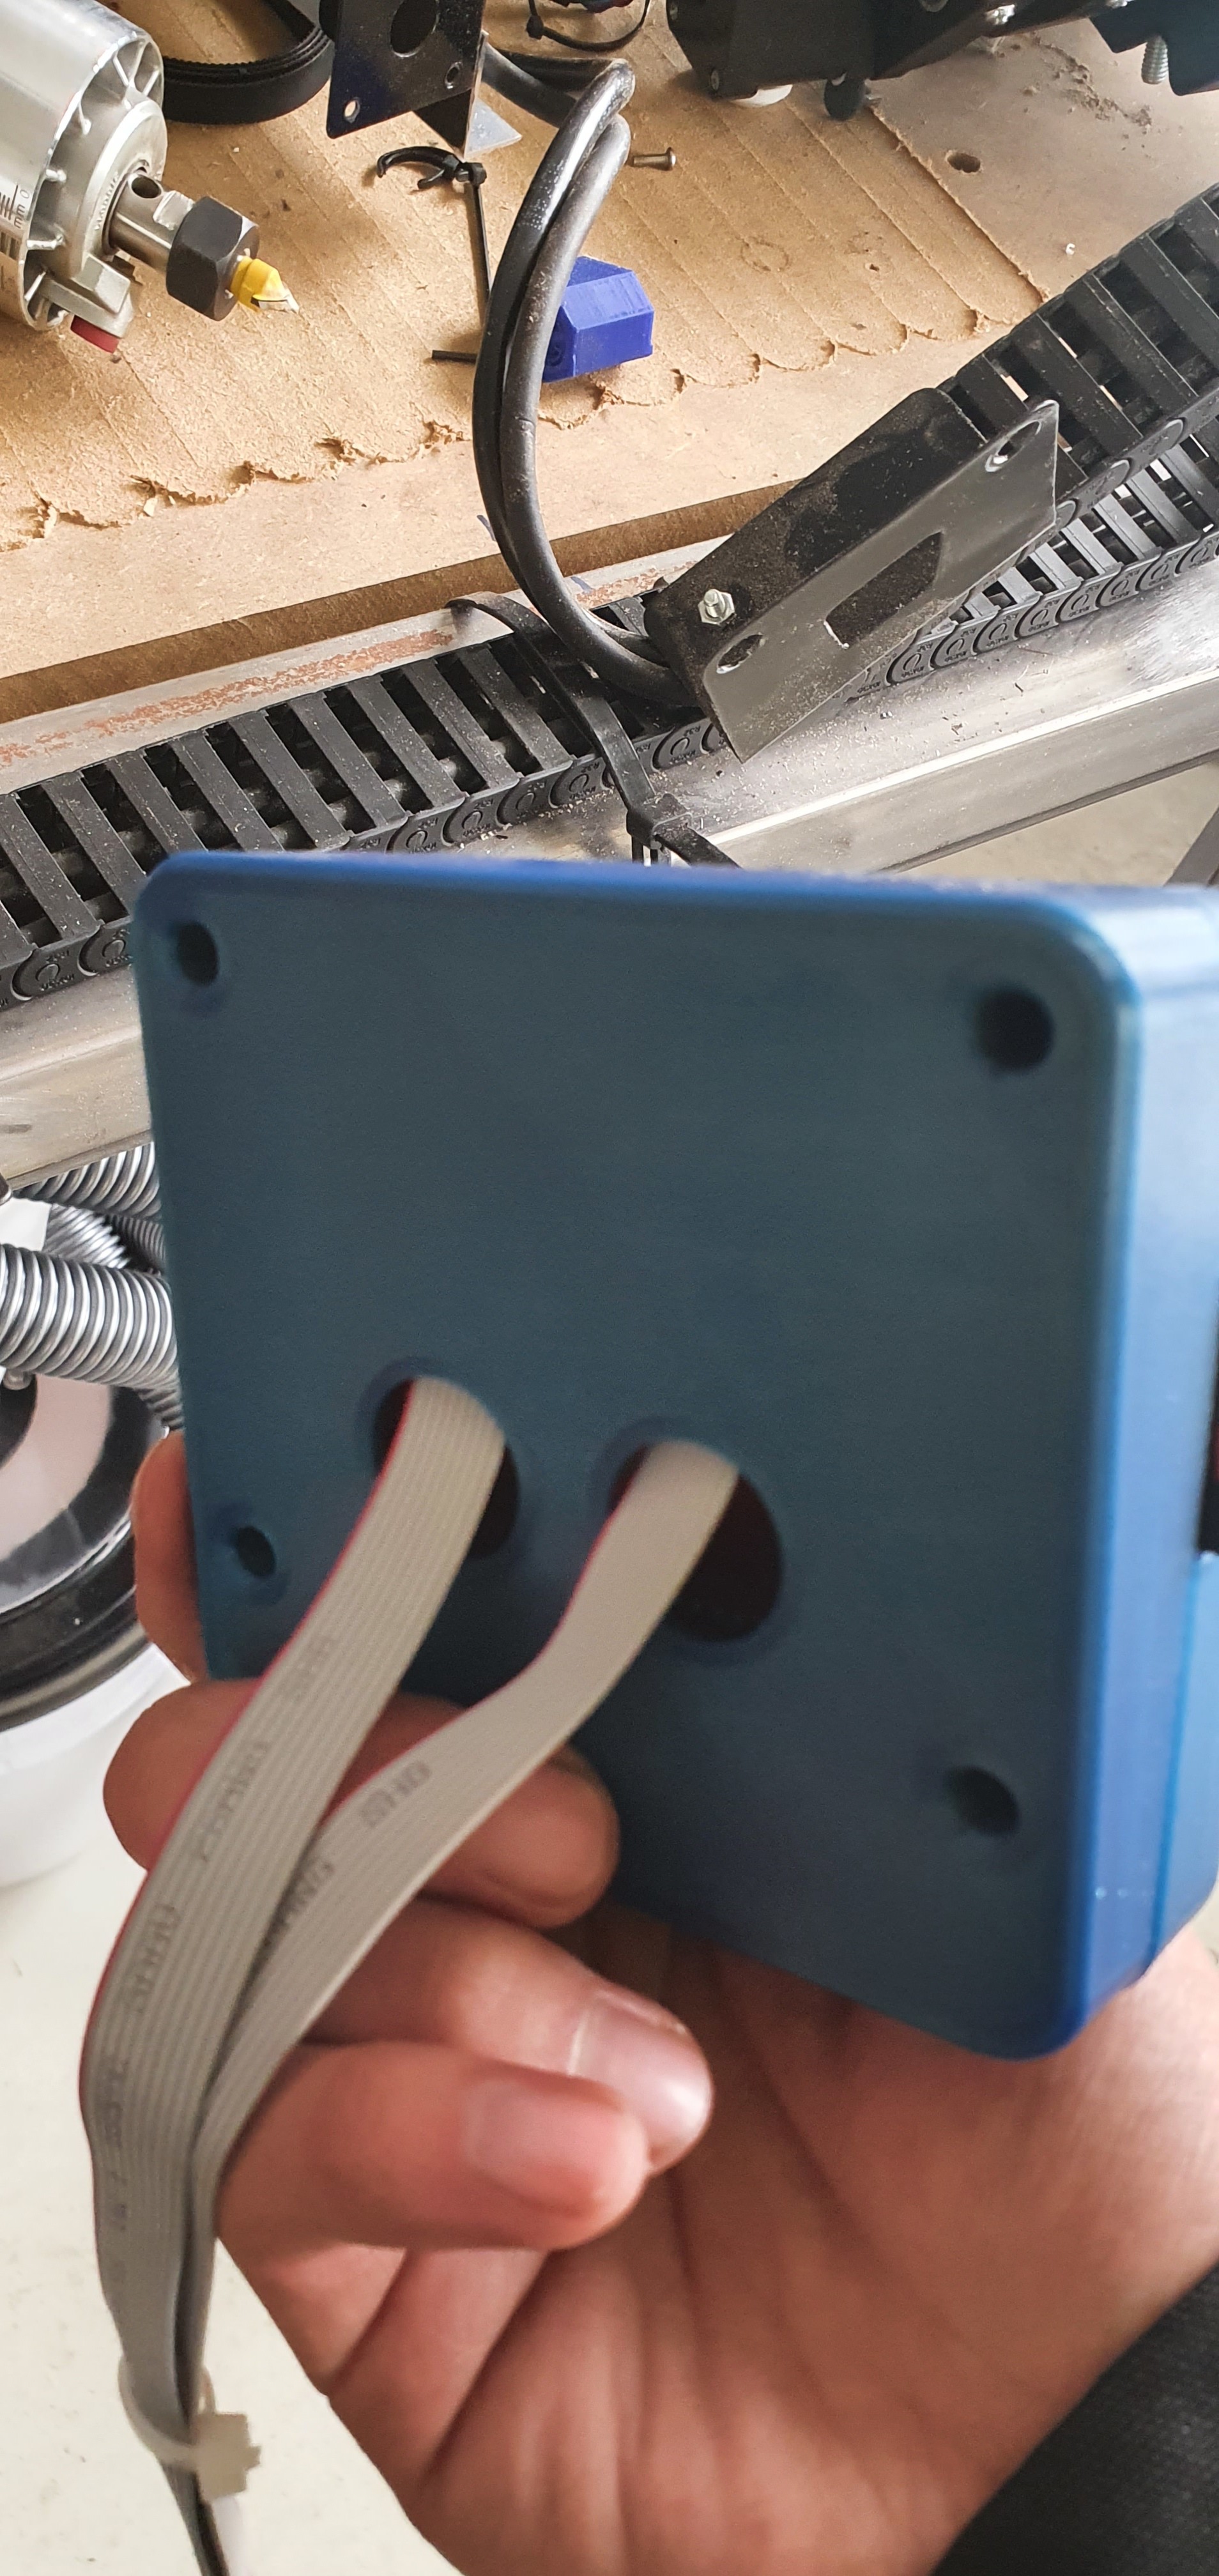
Plugs on the back of the display

Connections inside the electronics enclosure.

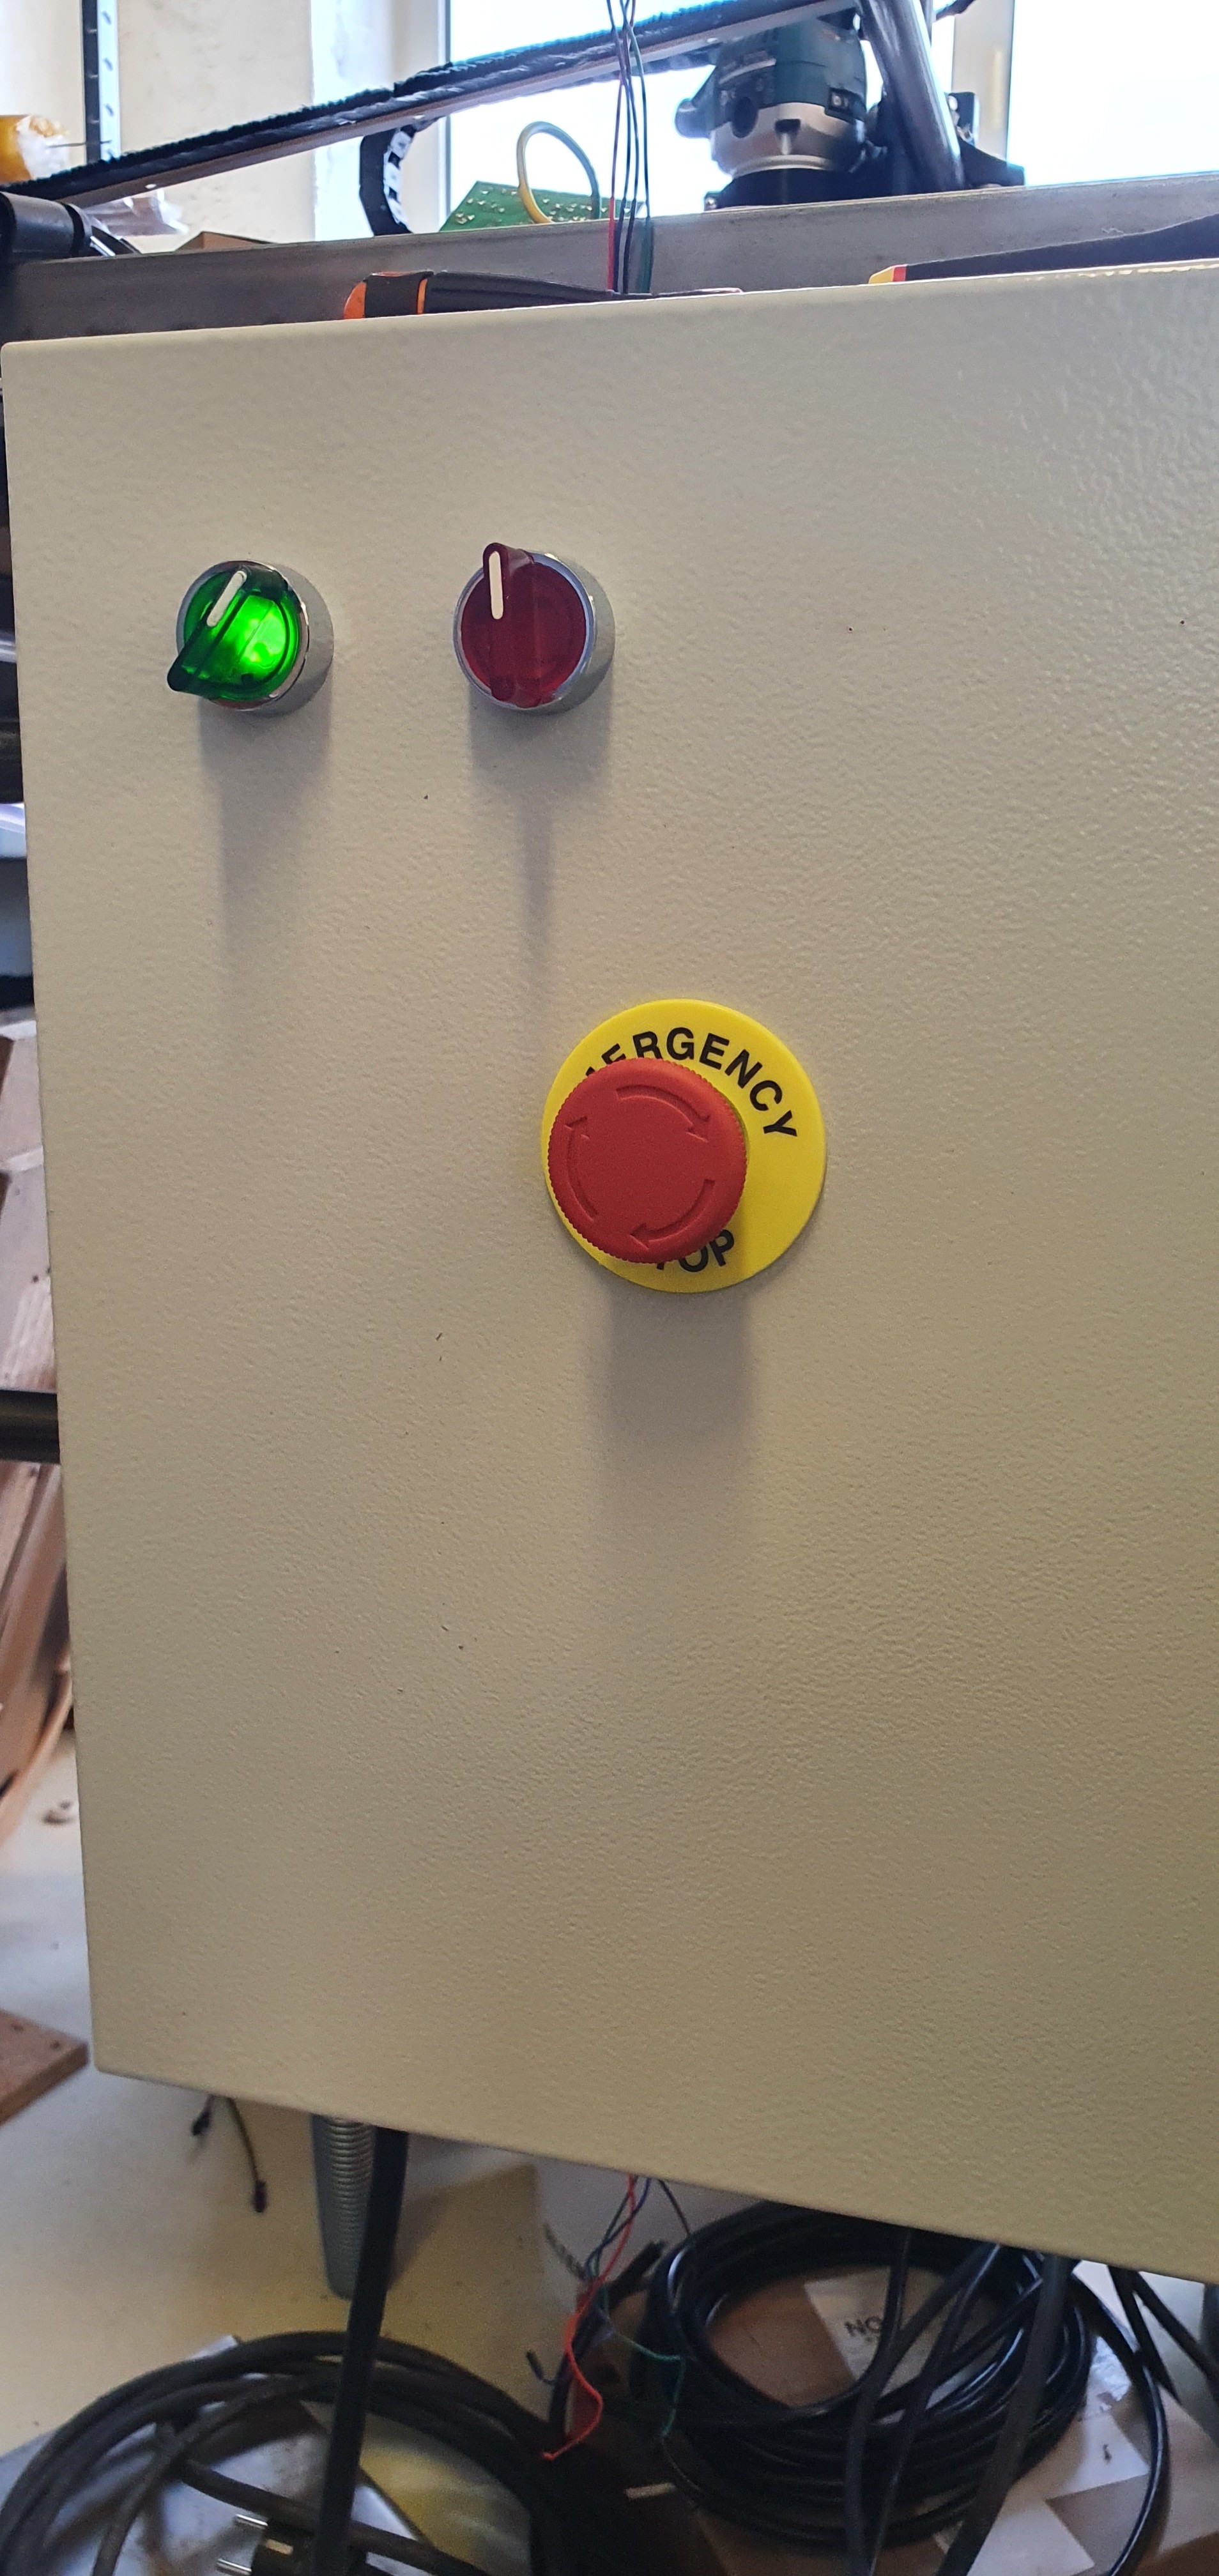
Cabinet door with Emergency stop, ON/OFF switch (green) and what will be ON/OFF/Auto selector for the Makita spindle.
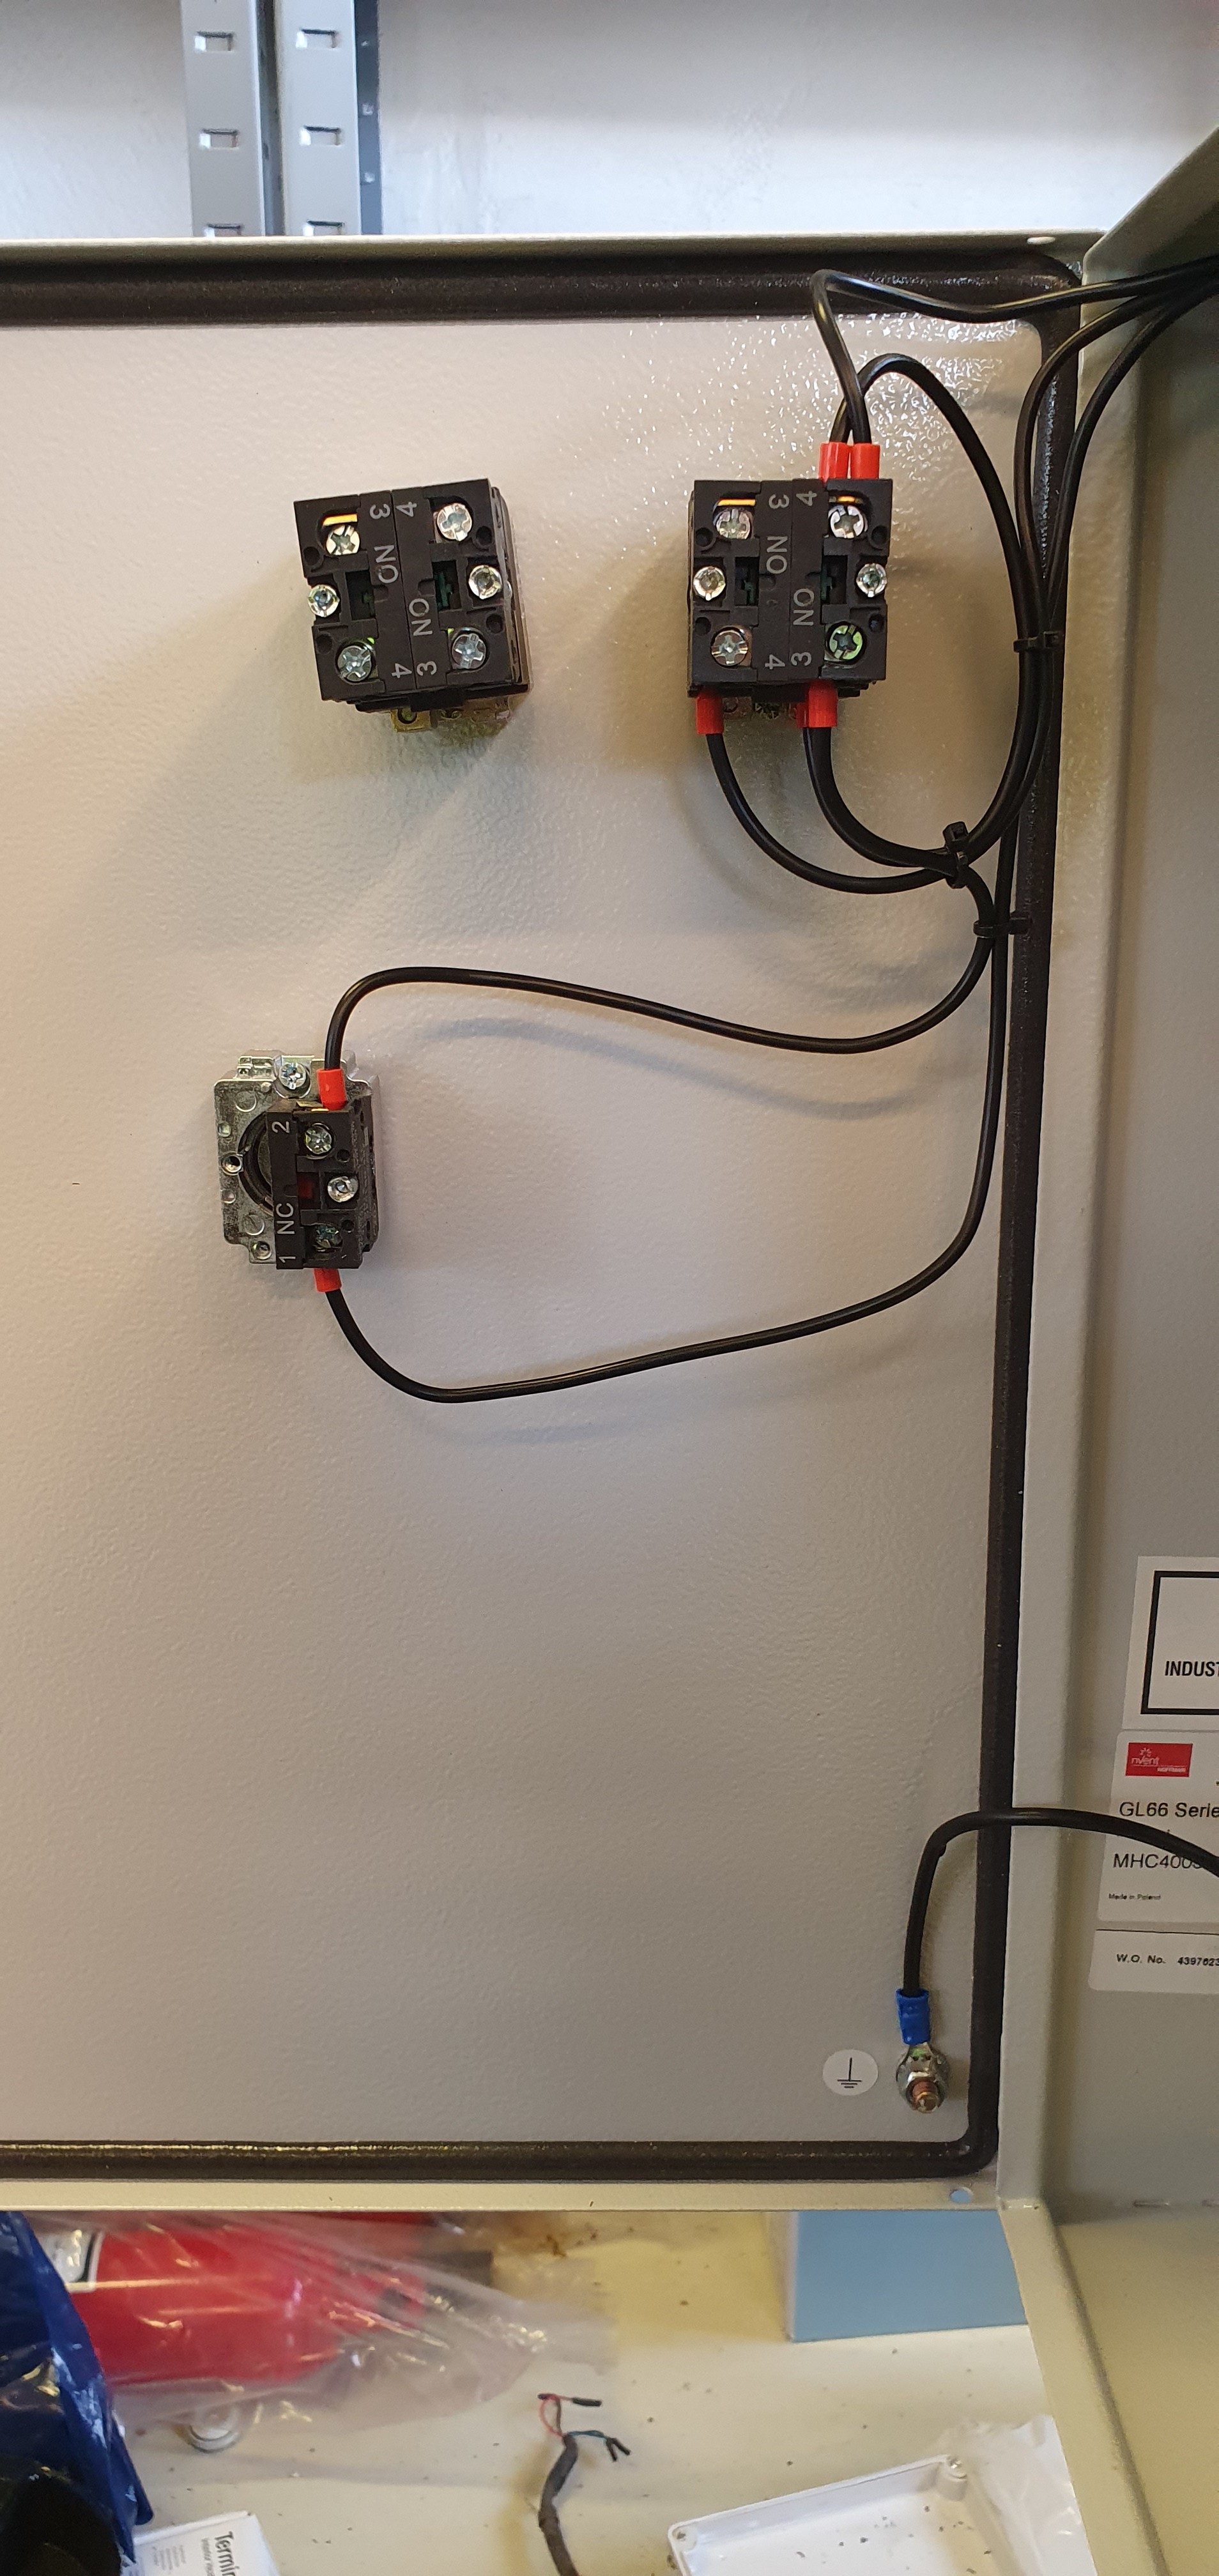
PSU and RAMBo board, DIN rail with terminal clamps on the bottom.
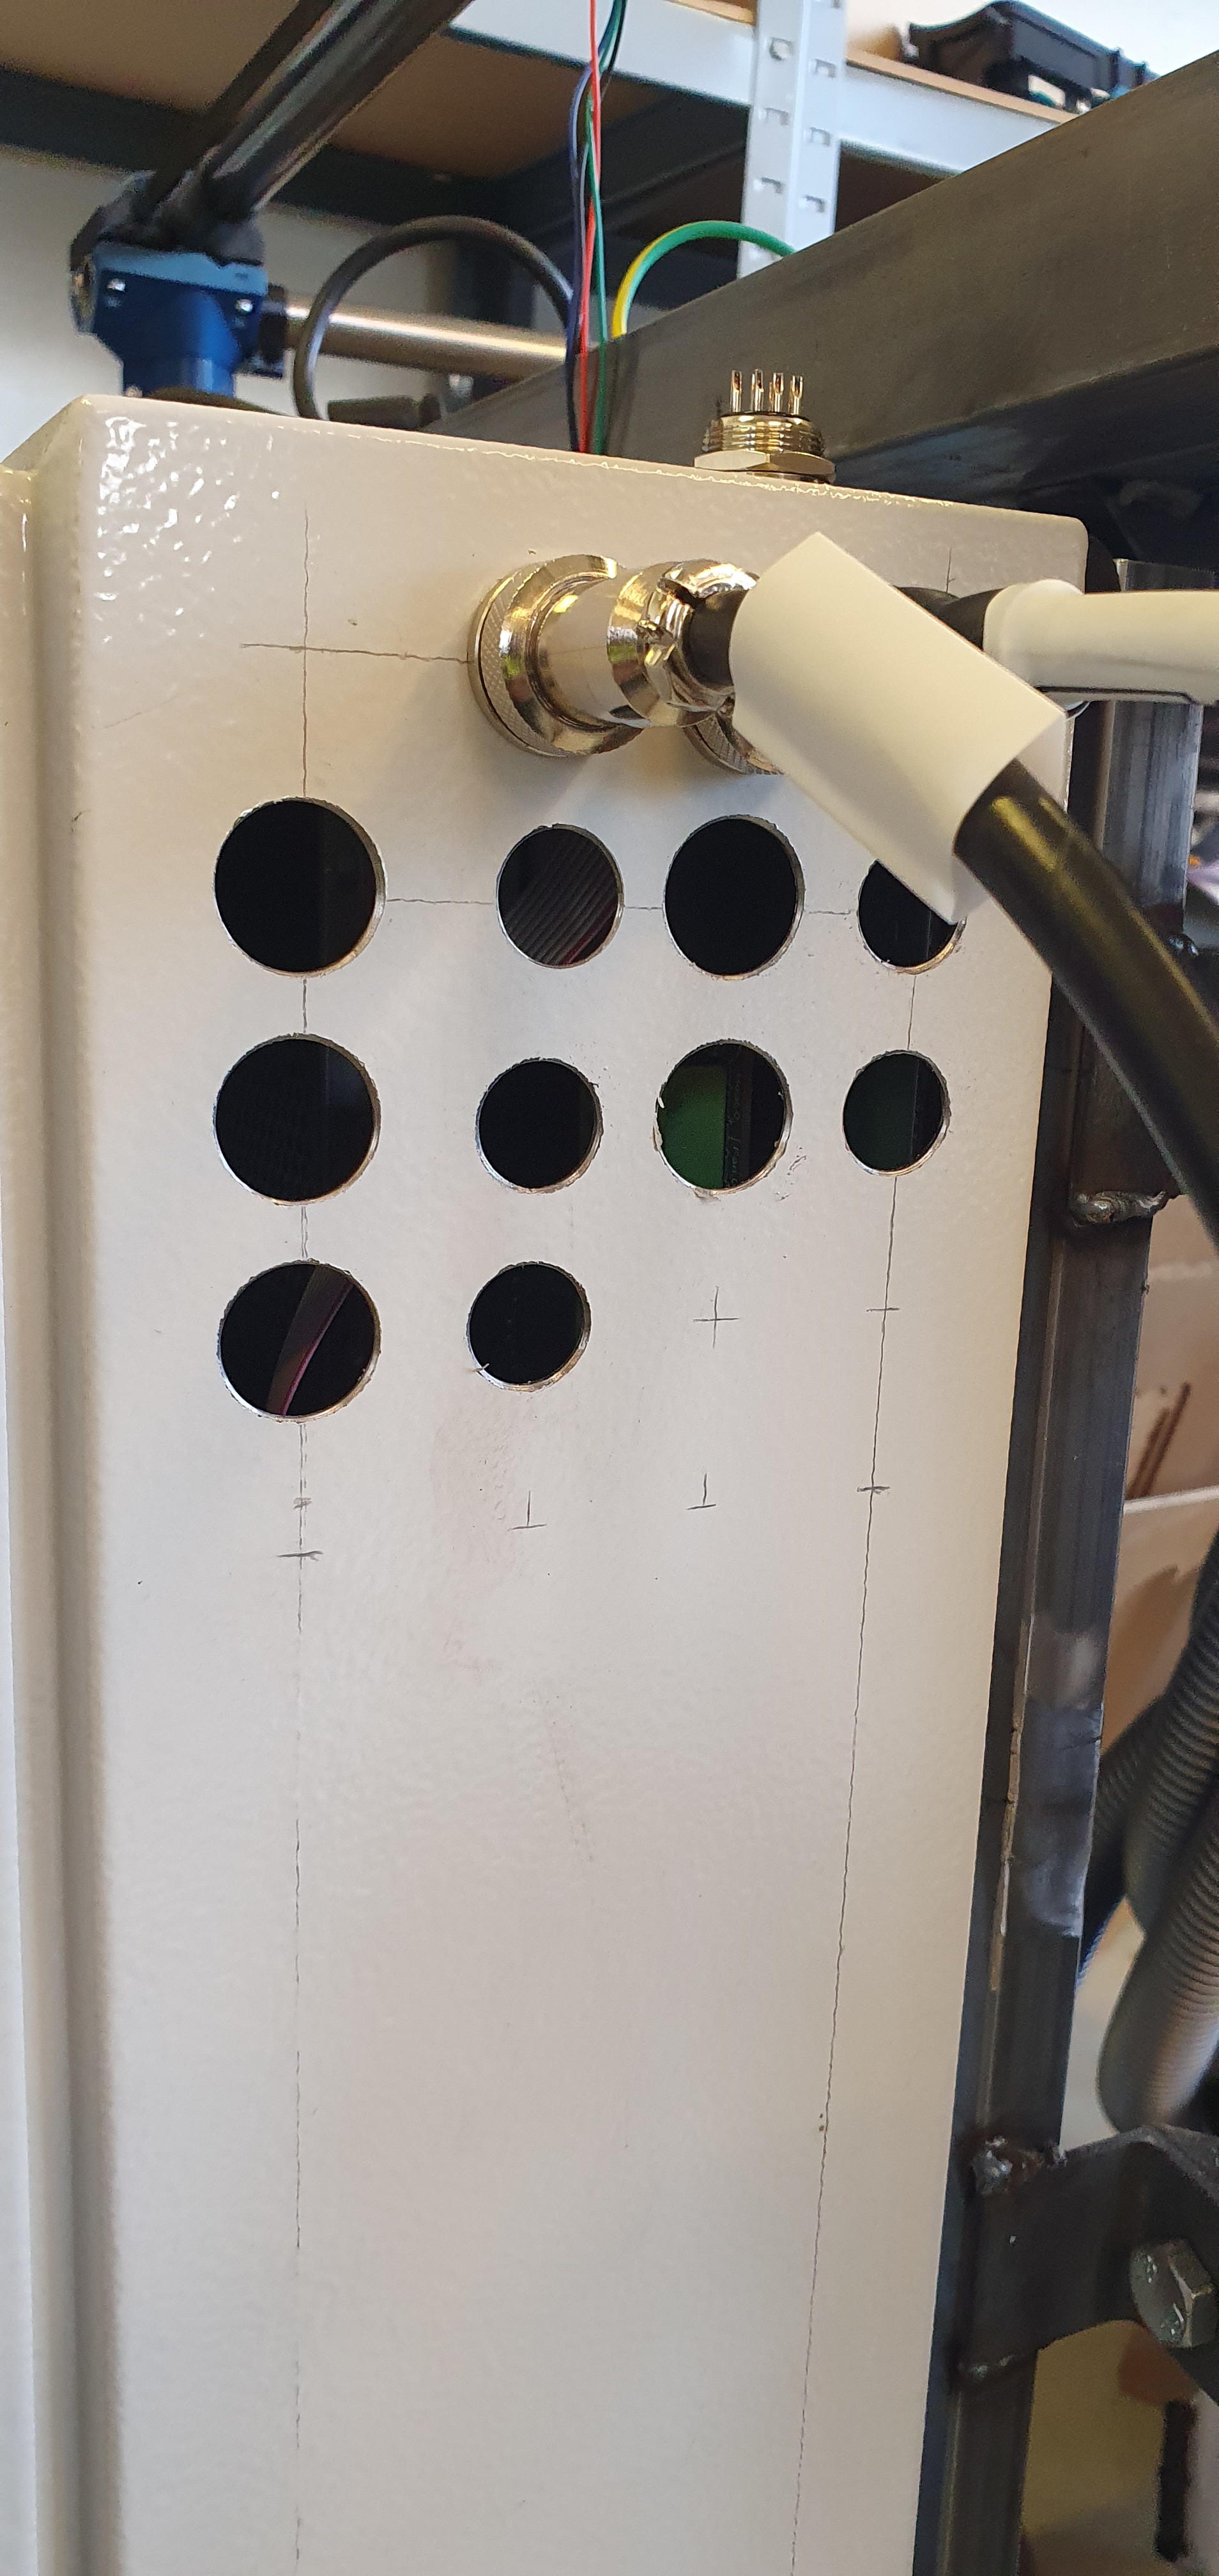
Two plugs for display cables on the top, holes for connectors for stepper motors and limit switches below

1 Like
The cables I ship are about as long as you can reliably go without LCD issues, unfortunately.