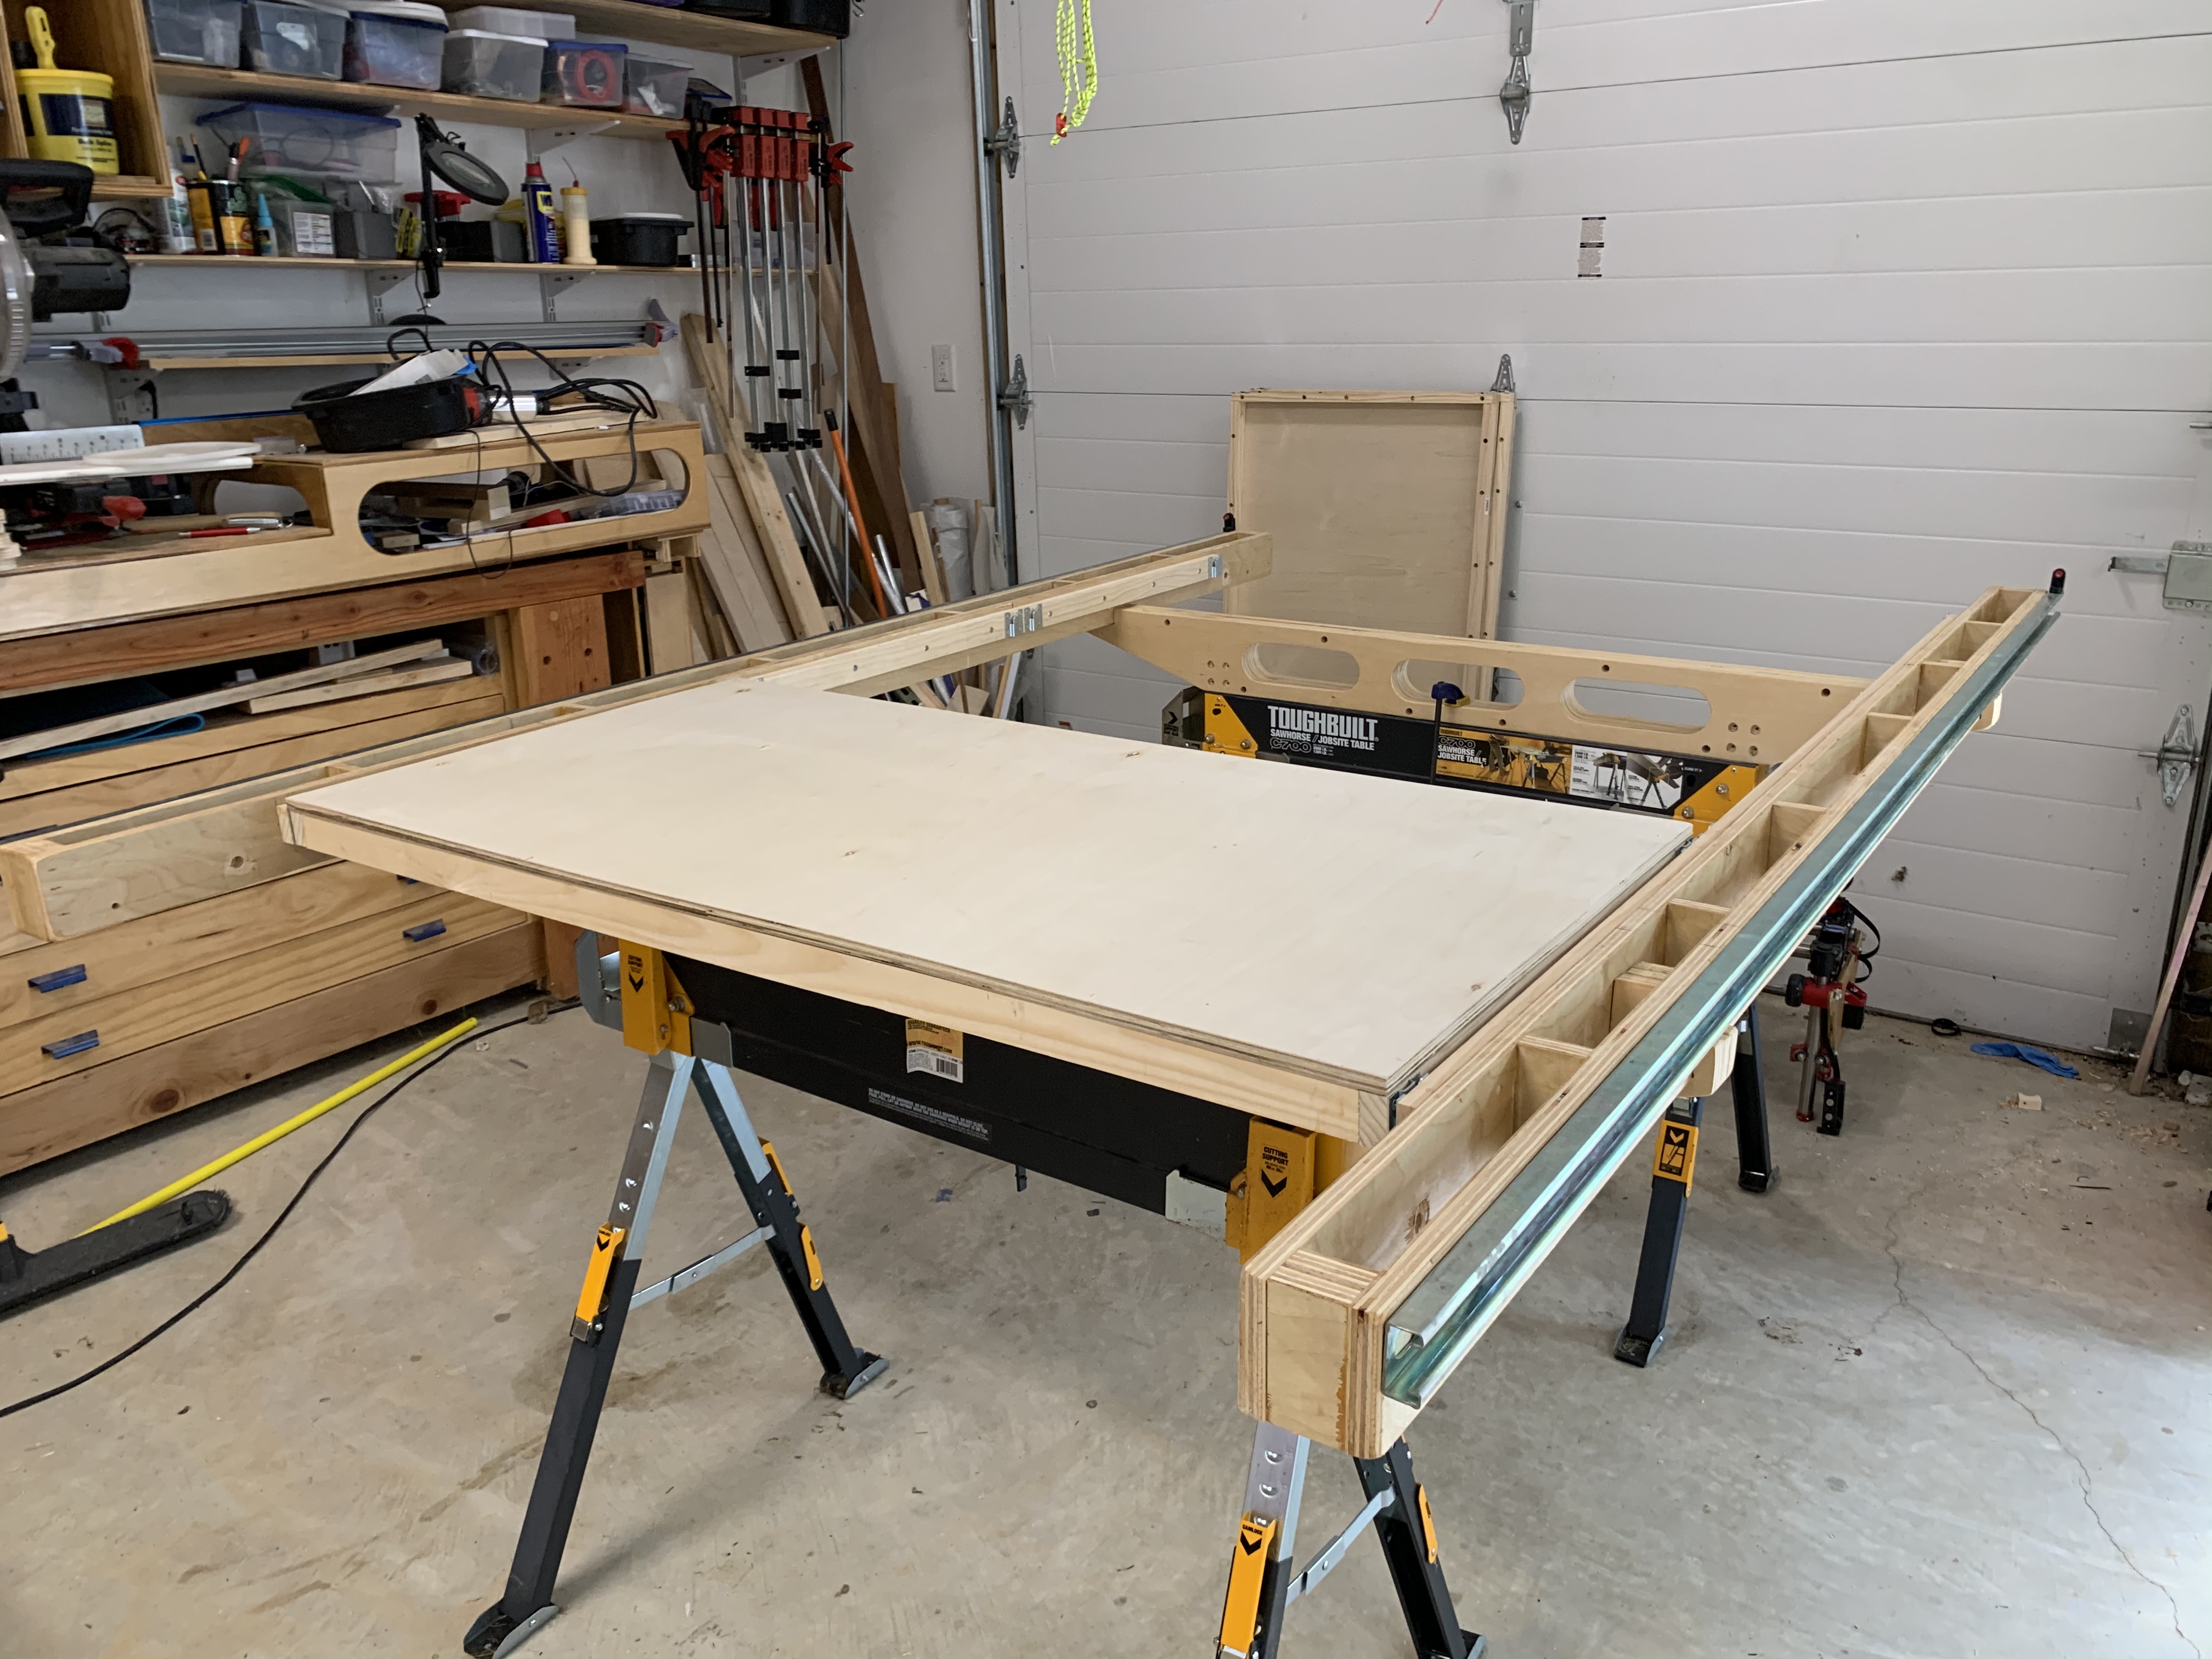
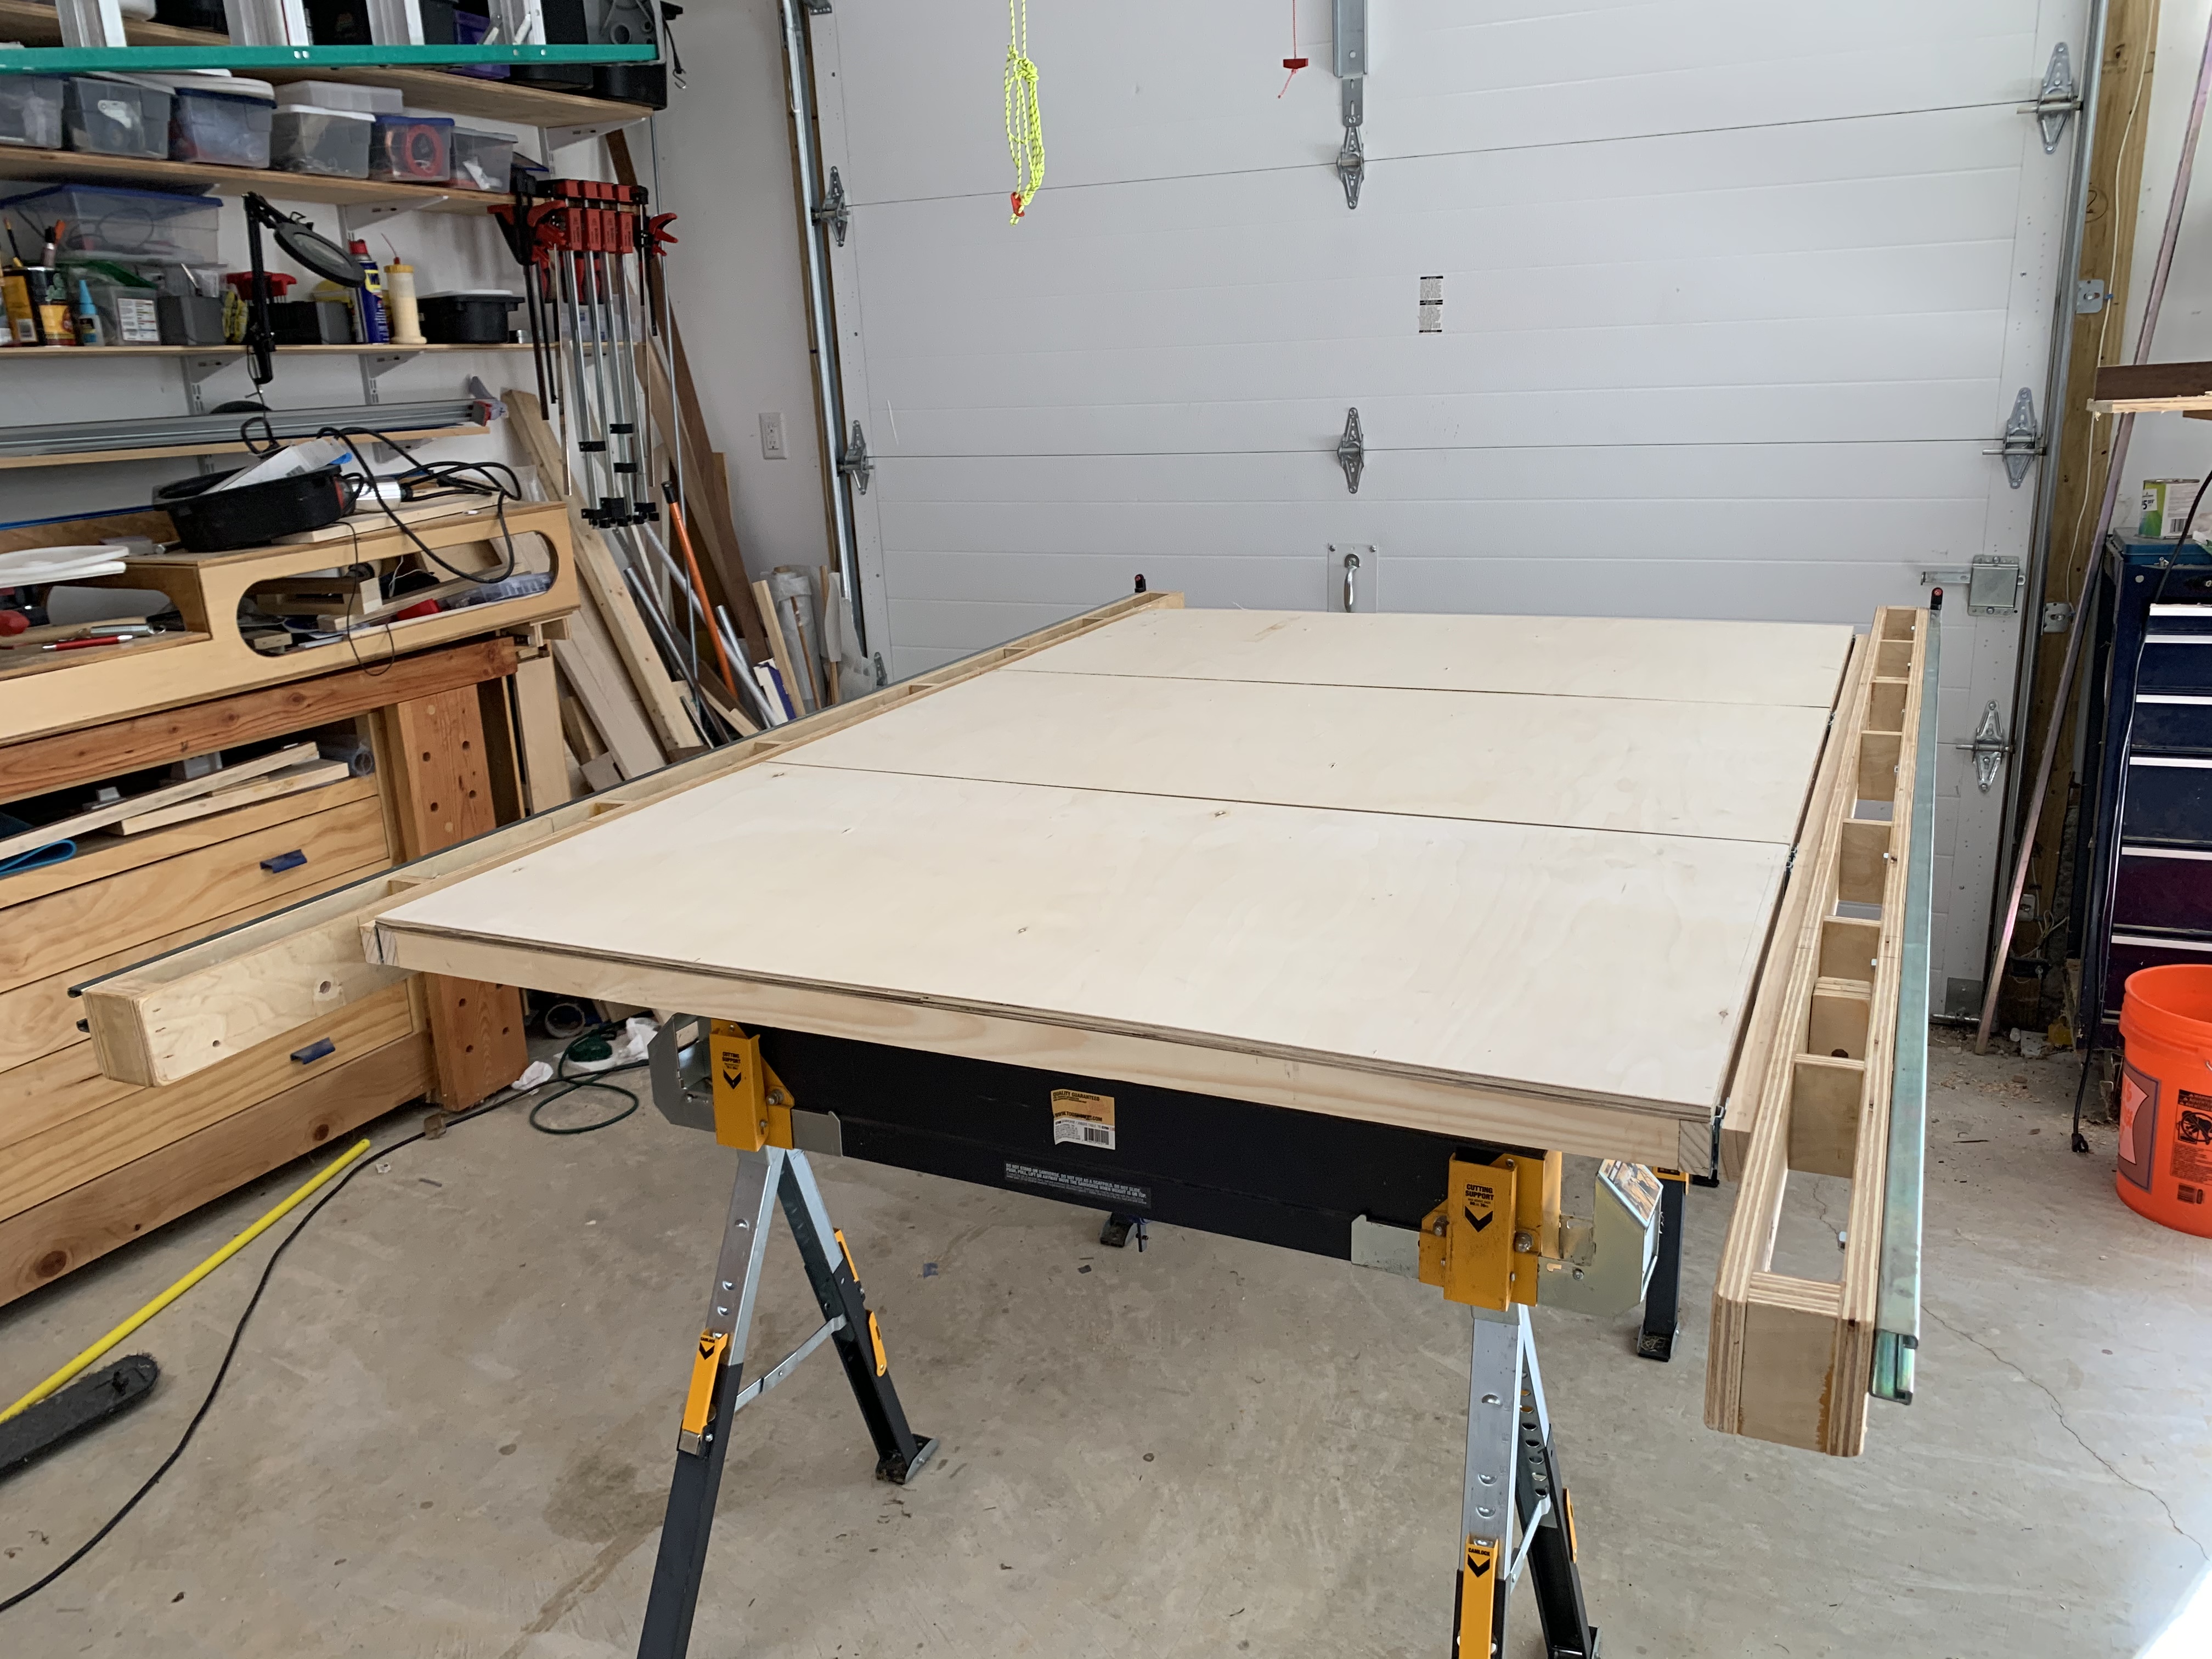
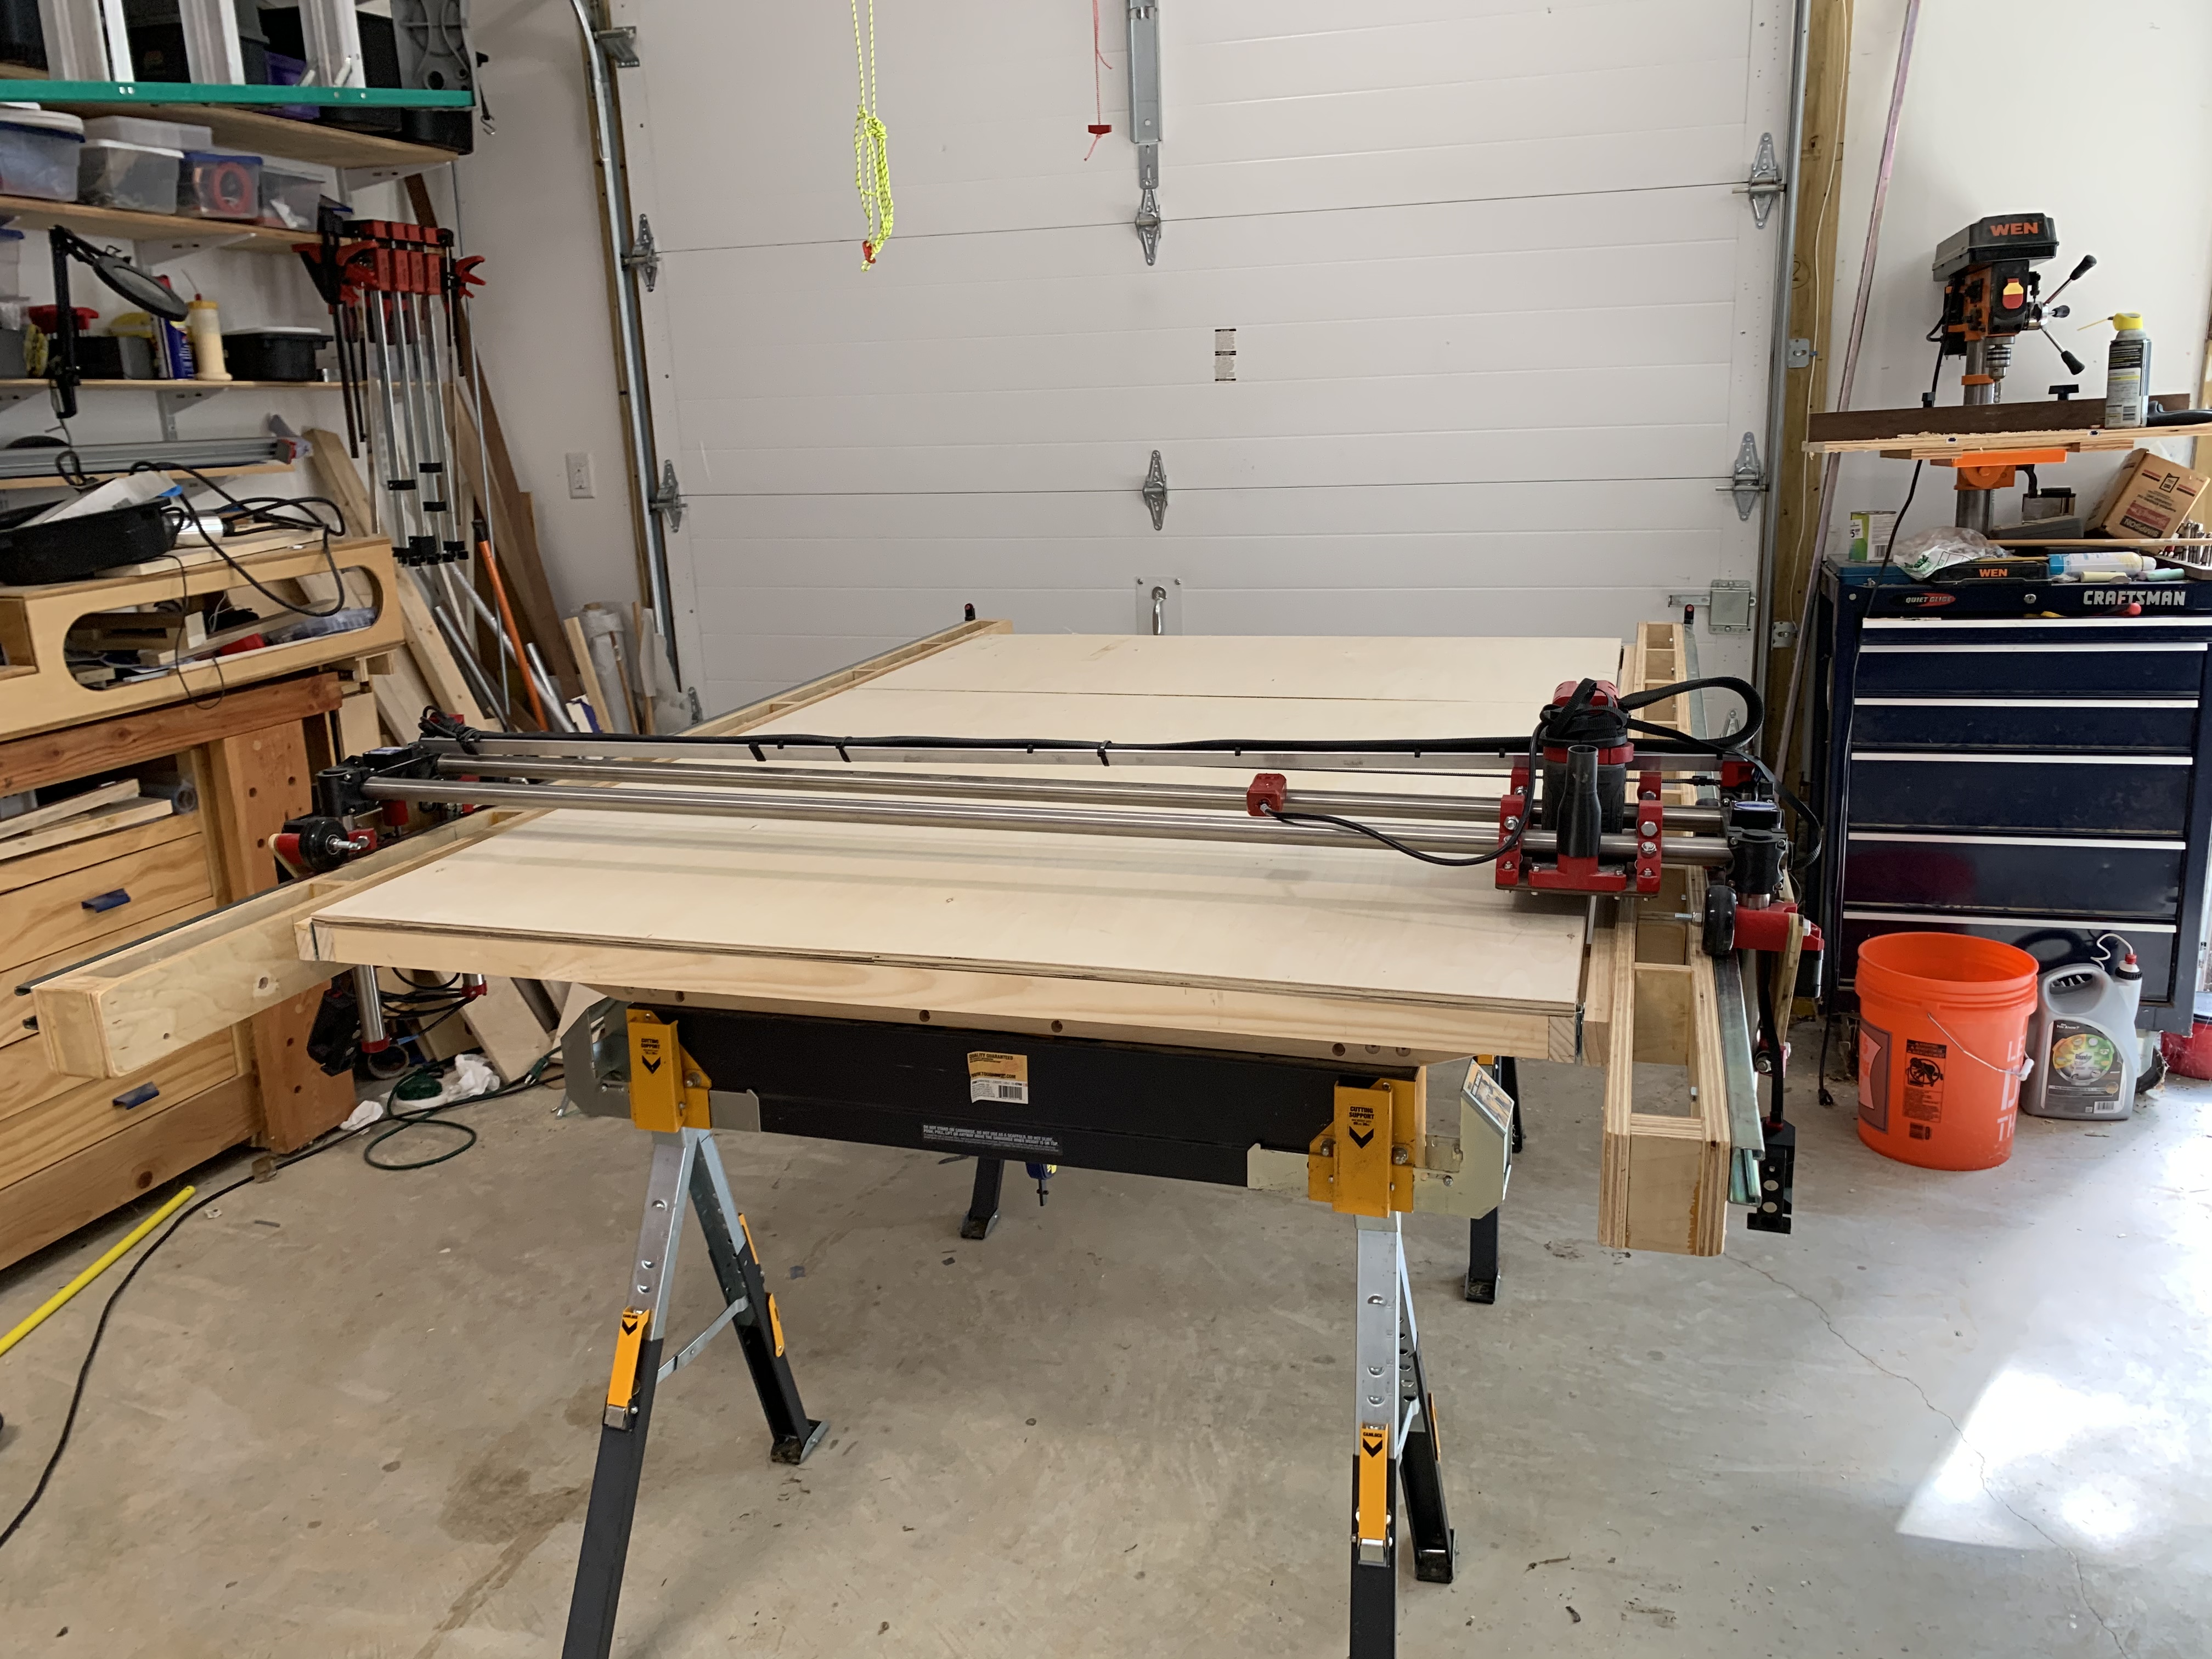
So I’ve been watching you guys with your fancy tables for a while and trying to figure out how to origami a full size build into my garage and still park the cars.
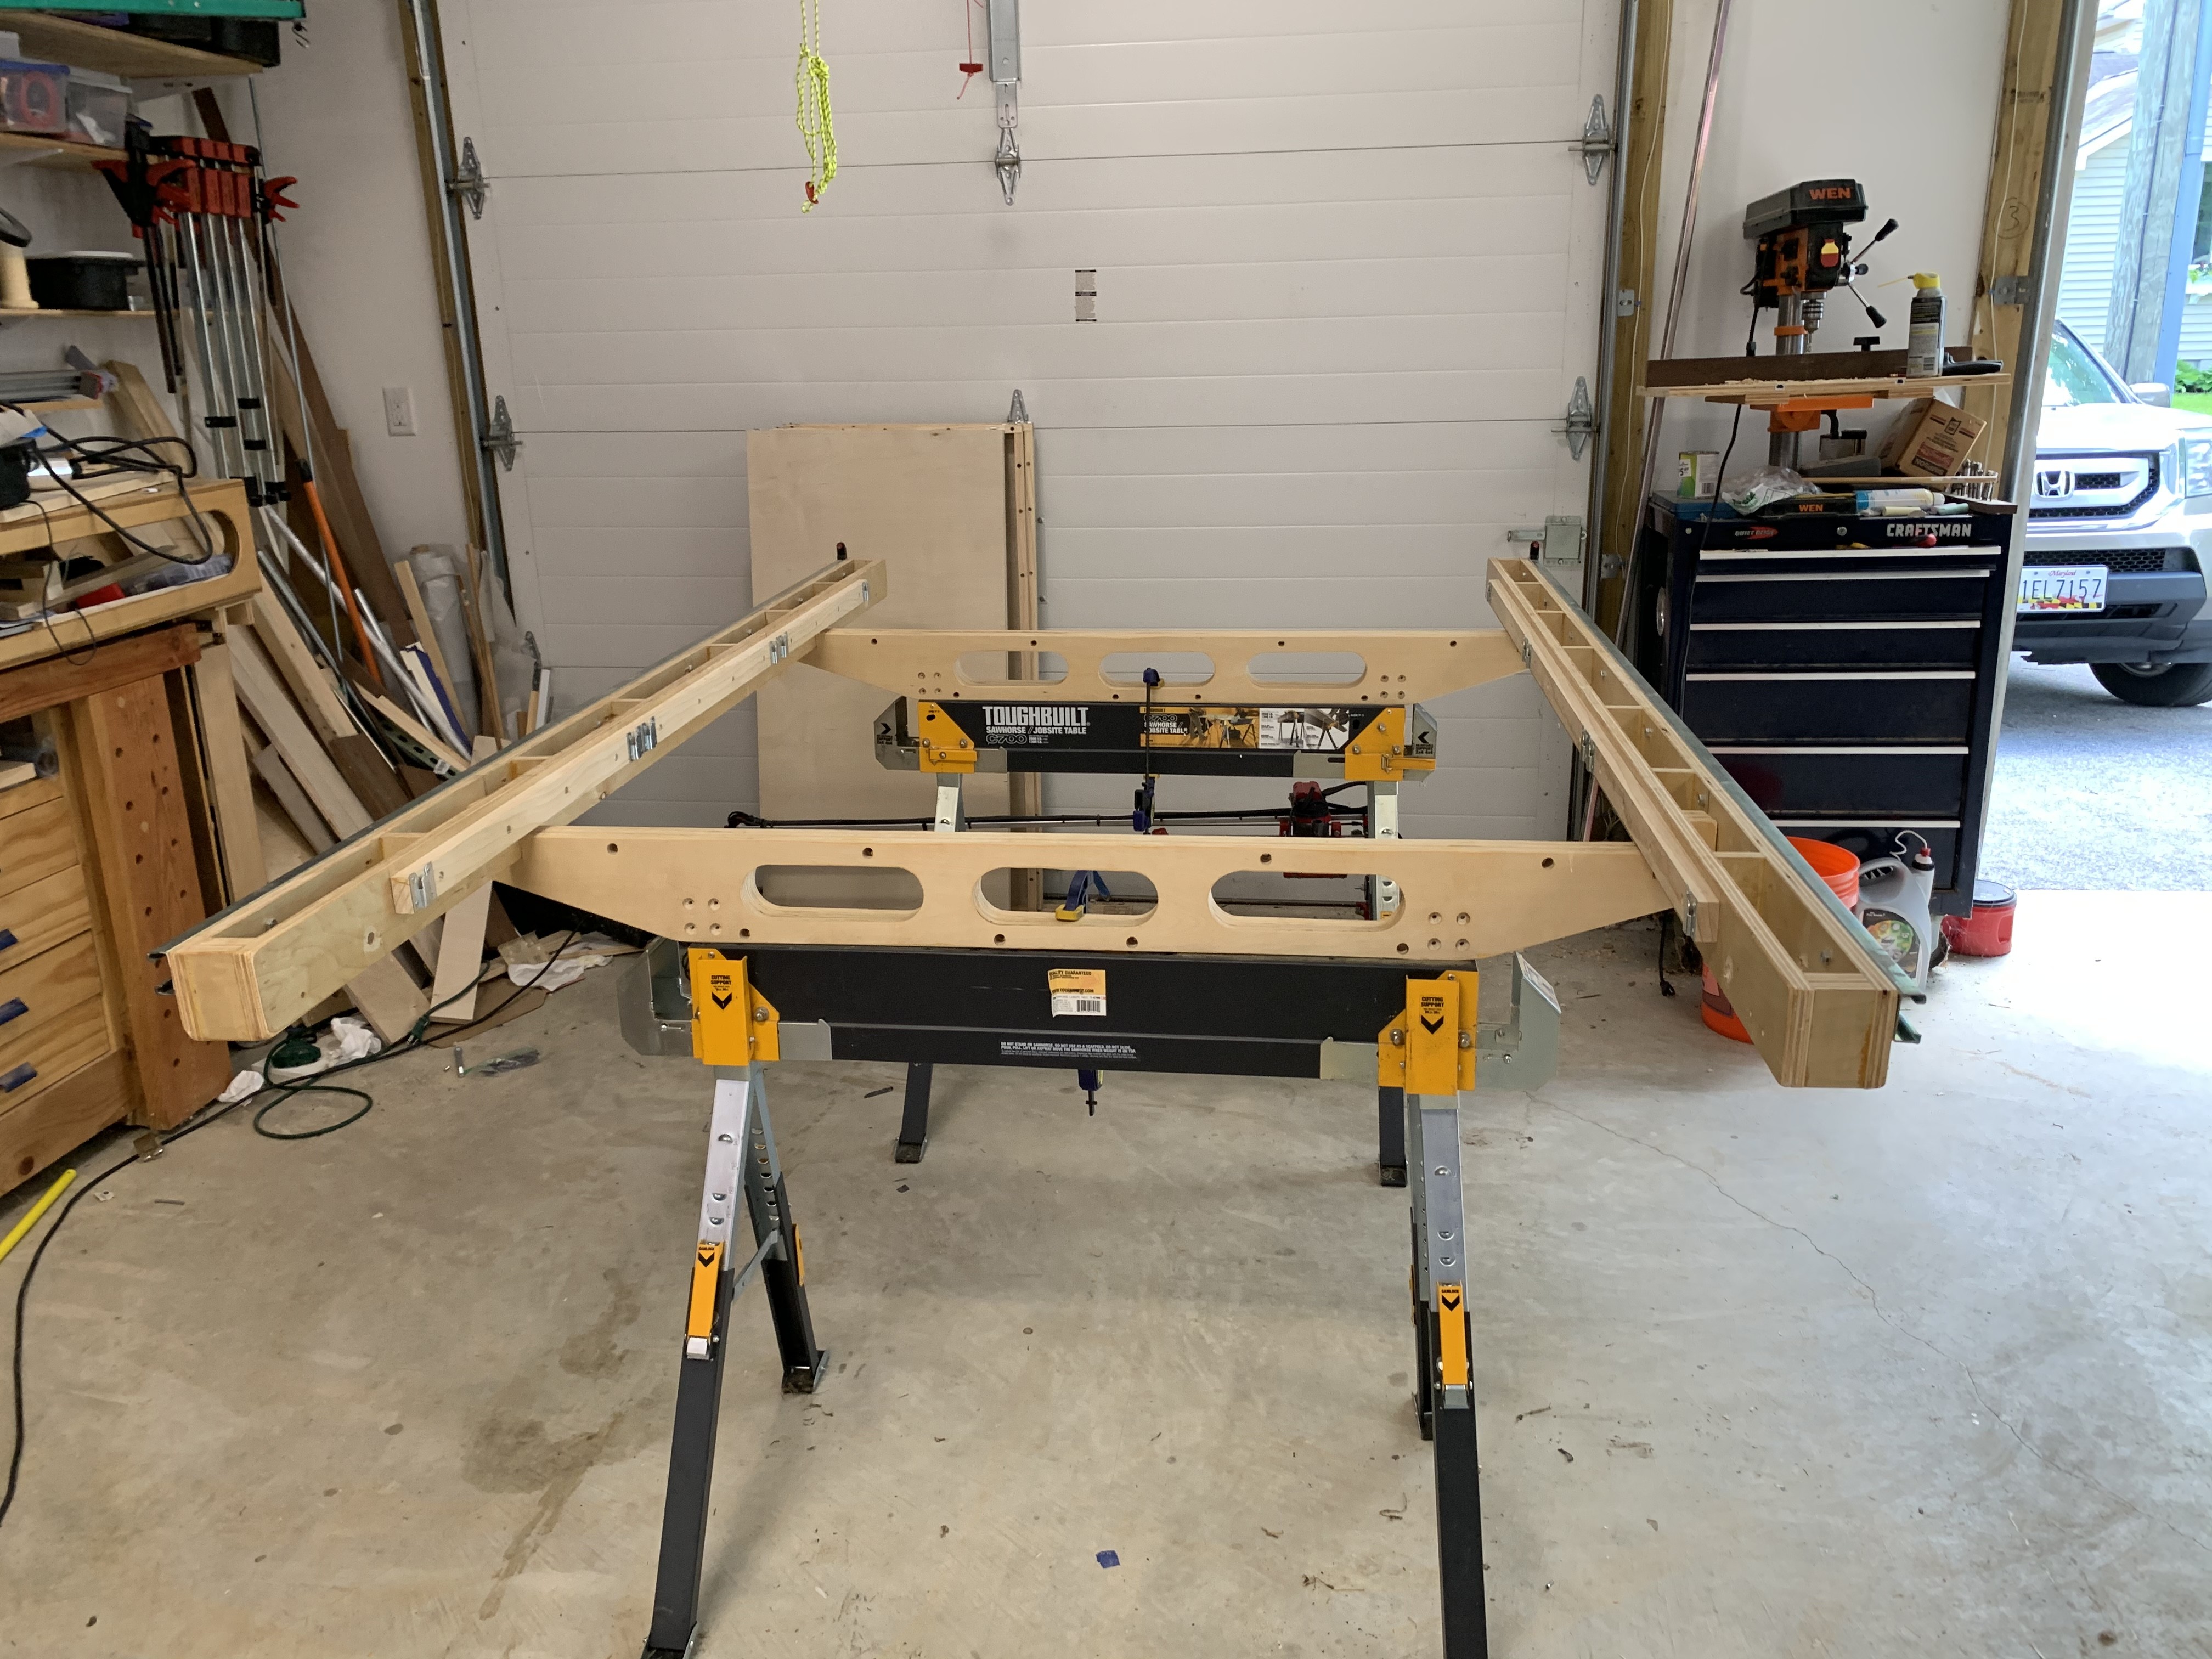
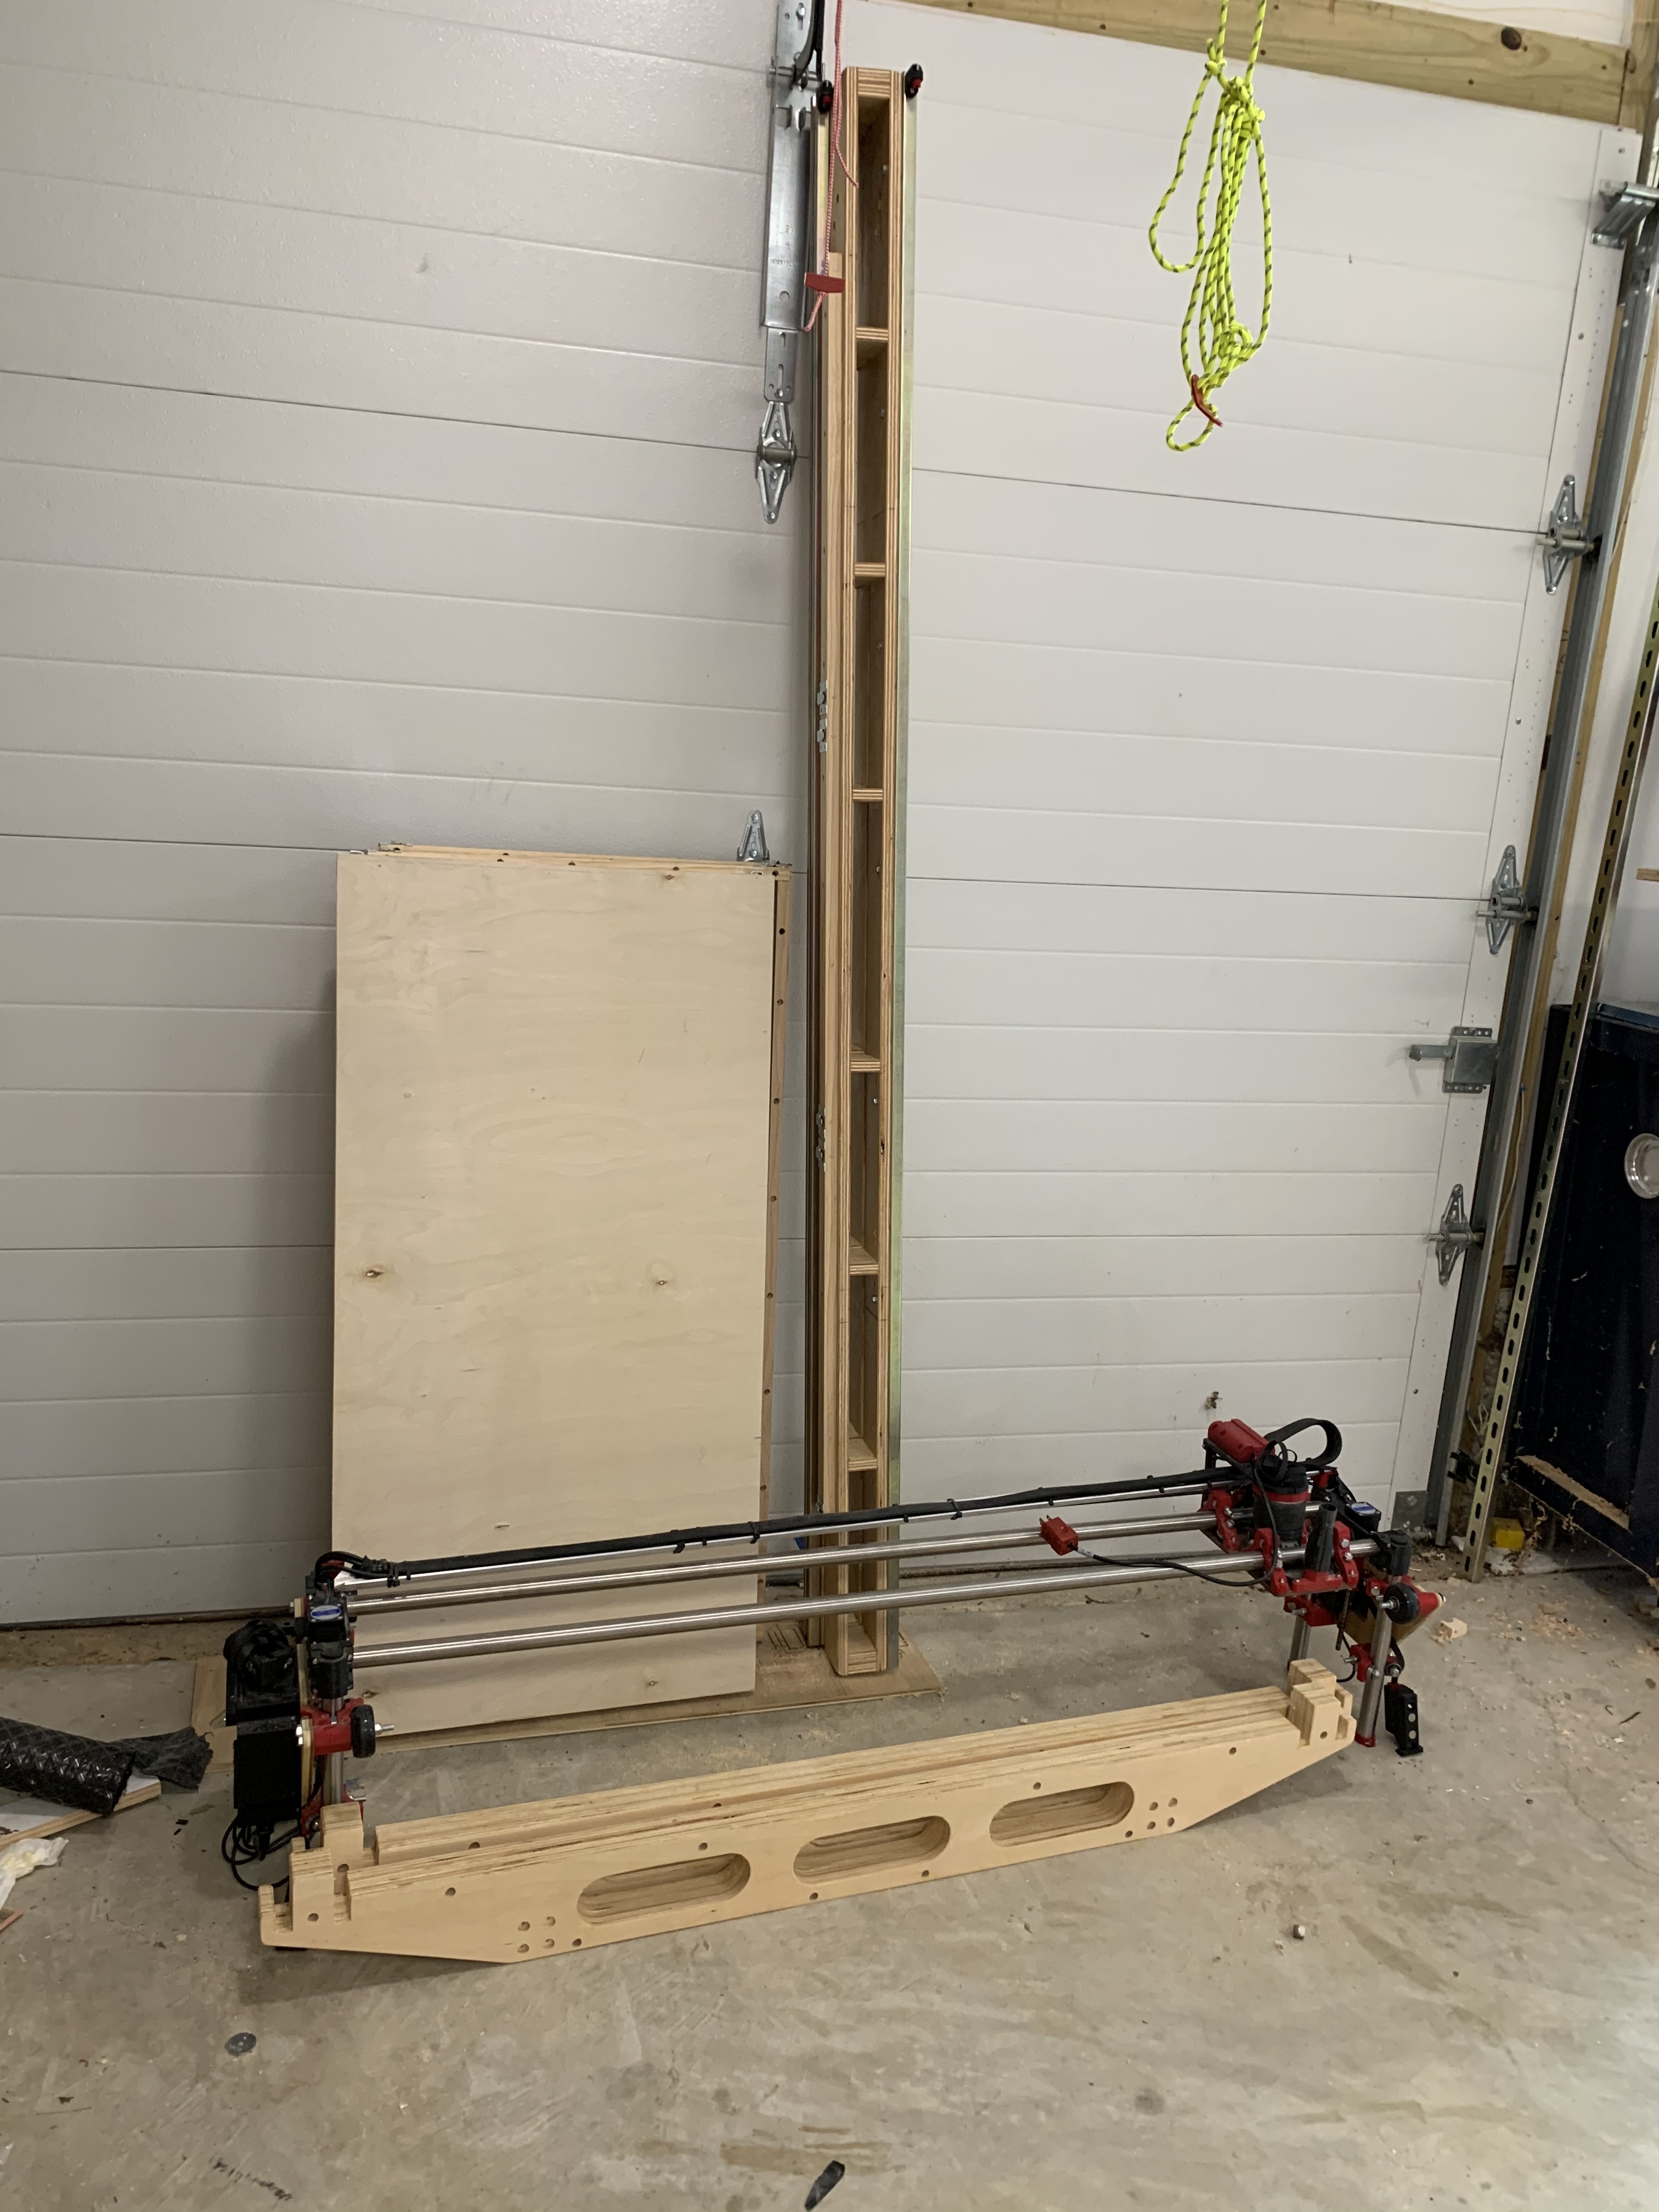
I didn’t trust hanging it and I didn’t have the floor space for the fold up models so I’m taking a third path and building a table that can break down and hang on the wall or get tossed in the back of the car.
The design has worked well and I’m sharing my journey in case someone else has similar design constraints.
Here were are my. requirements:
No part should weigh more than 50lbs
Assembly time should be under 5 minutes
Design should be mostly auto squaring and accurate.
Very nice, my compliments and thanks for sharing your idea. I also have the space problem, like many I believe, your idea is fundamental to solve the problem.
Do you have the possibility to share CAD drawings?
Thanks
I’m happy to share. Please keep in mind that this was organically designed so the dimensions are going to be wacky.
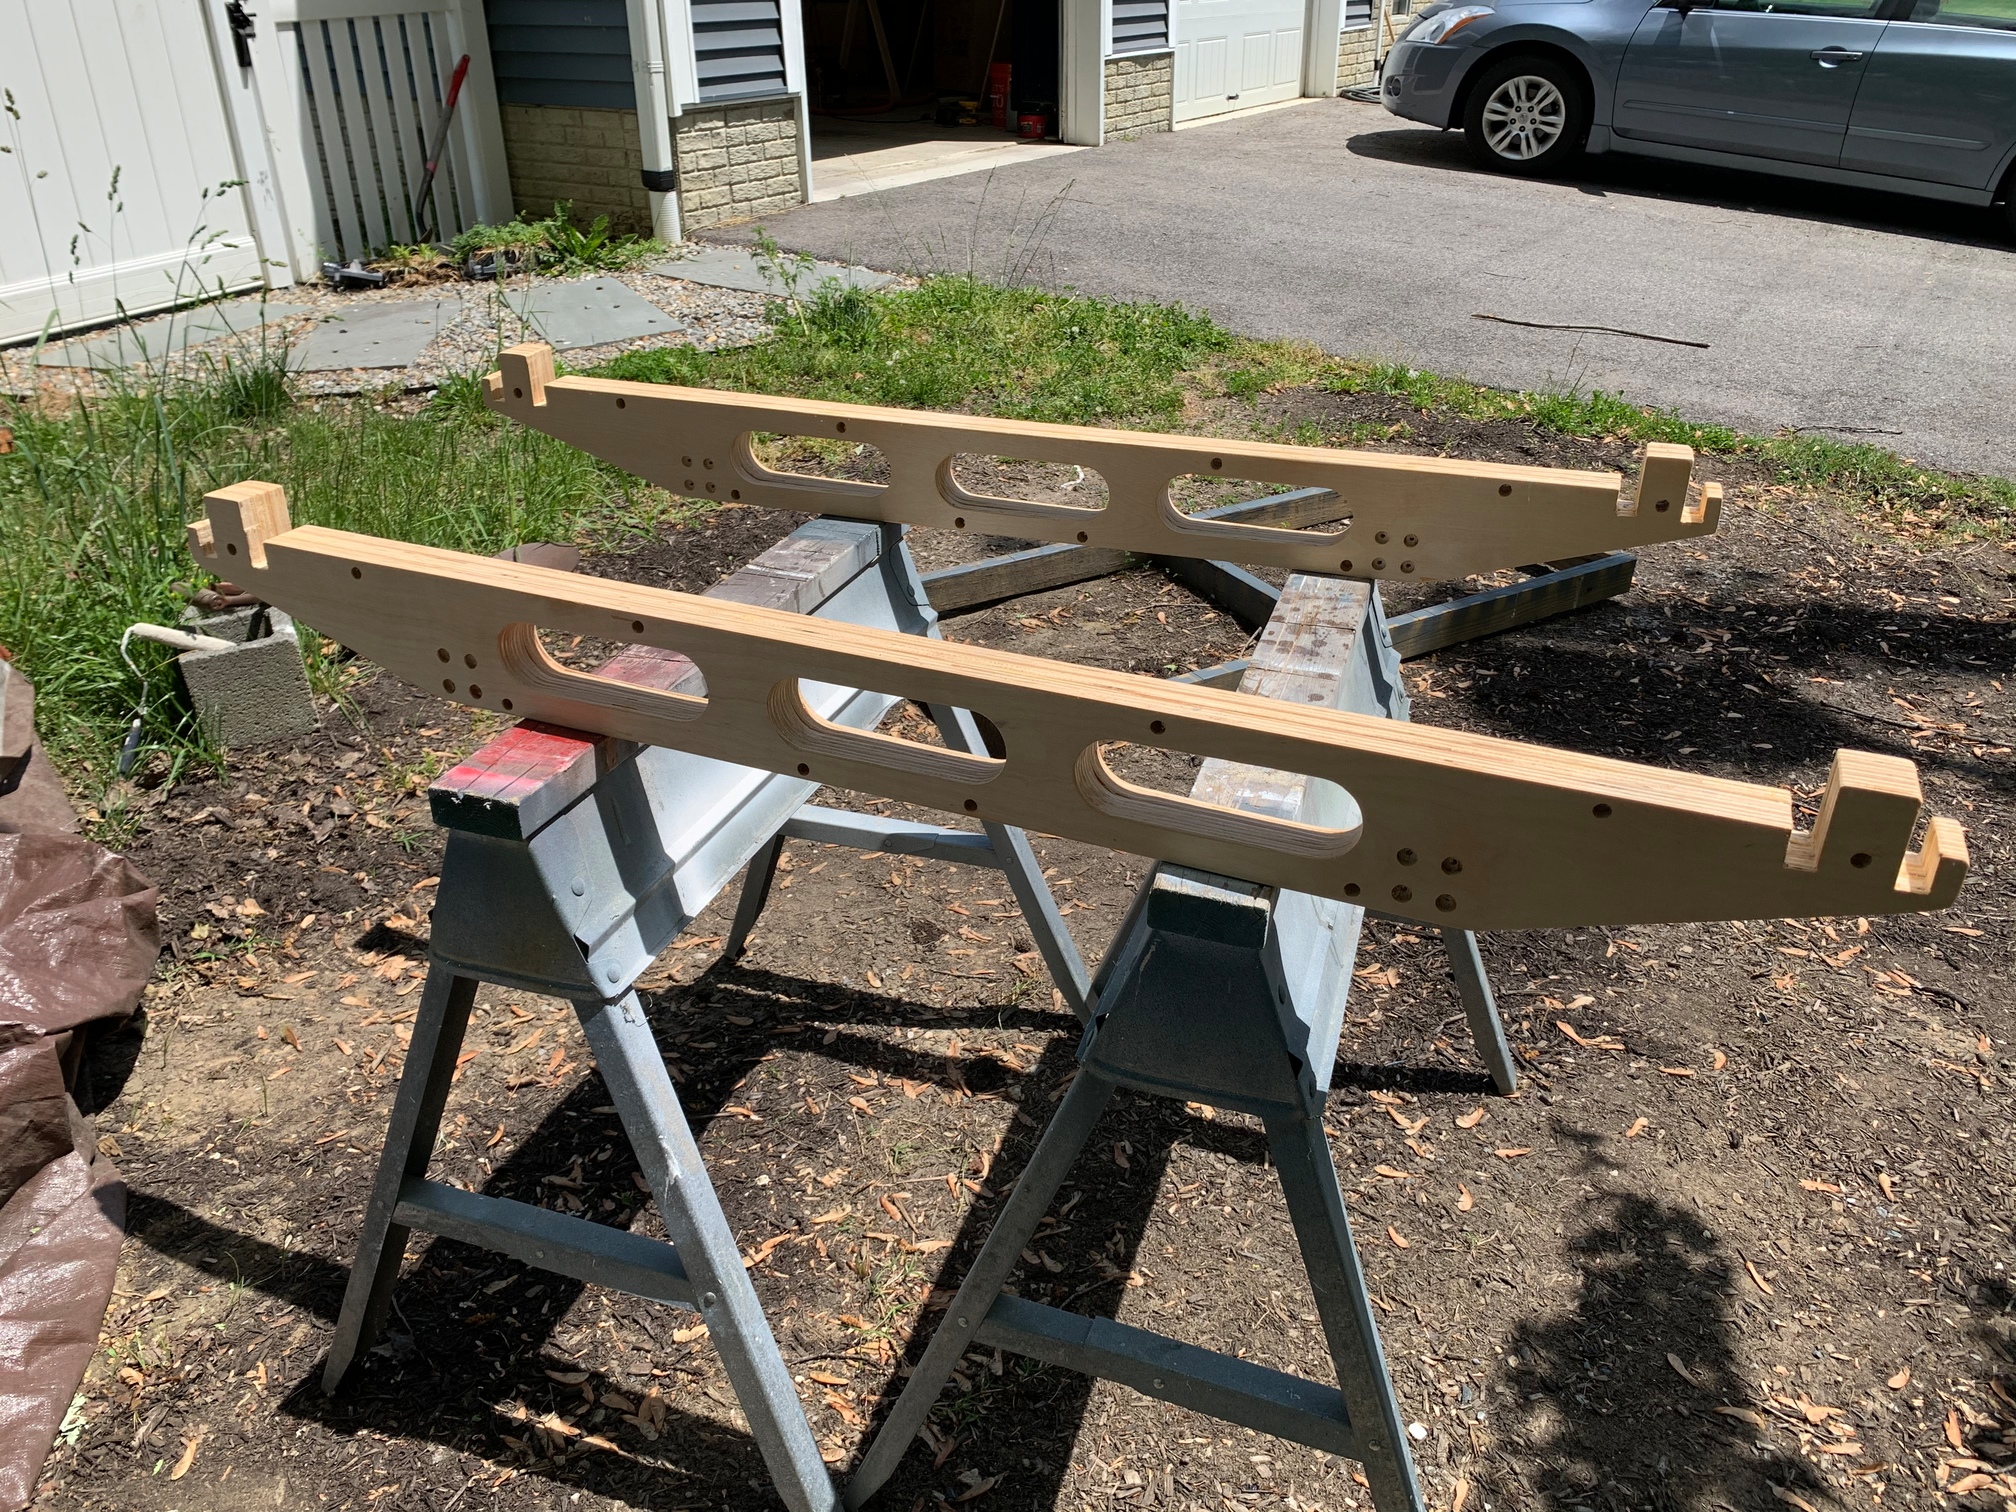
I built the rails first out of scrap ply on the table saw. Their dimensions defined the size of the build. I’ve been using the rails clamped to 2x4s for a while which is a decent way to bootstrap the build.
I built the cradle to match at a later date. I purposely undersized the joints with 0 tolerances and fine tuned with a rasp to get a tight friction fit. If I was doing it again and plywood wasn’t $80/sheet I’d design the cradle first.
I did use parametric sketch which is a first for me so it should be easy enough to tweak. I’ll post the files this weekend.
Thanks Ryan, Here’s my plan for that for what it’s worth…
As I have to store the cradle anyway I’m going to build a stubby set of rails just big enough to get the lowrider wheels on. Add some stop blocks to the ends and have a micro table that can hang or put on a shelf. I’m a bit worried about the weight though so we will see.
The one piece of the lowrider that I worry about in portable mode is the the bottom of the z tubes. They are a pretty big unsupported lever. I think I may design a bracket to keep them from being able to twist.
Here are the DXF files for the cradle as promised.
Laminate 2 exteriors and one interior of 3/4 ply together using the holes for registration when laminating the layers. It may need a bit of filing depending on the thickness of your ply.
The extra holes are for an adjustable foot system that I’m still playing with. It should just slide into the slot when done so try not to be too sloppy with the glue.
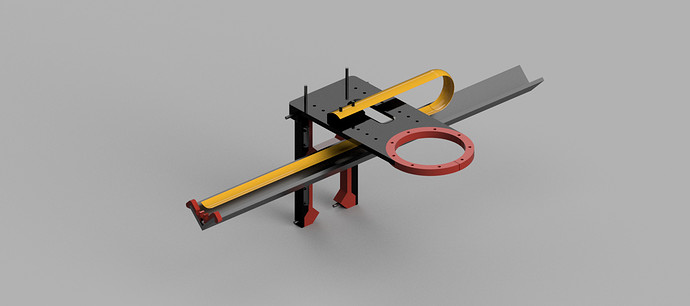
Here is the end clip that fits onto the end of a piece of 3/4 unistrut
it’s designed to work with:
I made mine with a pair of magnets which are probably unneeded but that’s what the holes on the bottom are for.
This was really just a prototype that happened to work really well so I never bothered to refine it. The endcap doesn’t match up quite right and I probably should have used the wider strut instead of the 3/4 but I didn’t know it existed.
One issue that I found was that because I keep a coil of extra belt for larger configurations that it sometimes got in the way when homing as the excess belt would get pinched.I’ve also found that sensorless homing does better with a firm bumper.
I created this hard bumper that attaches to the top of the unistrut and hits the wheels as a stop. The bolt can be adjusted to fine tune the squareness of the lowrider.
This will require a longer rail than the calculator provides for.
The flush mount brackets that I used to hold the panels to the rails are from Rockler:
Don’t be tempted like I was by similar ones from amazon as the tolerances are too loose and they rattle. I now have a 50 pack of the cheapos in the drawer.
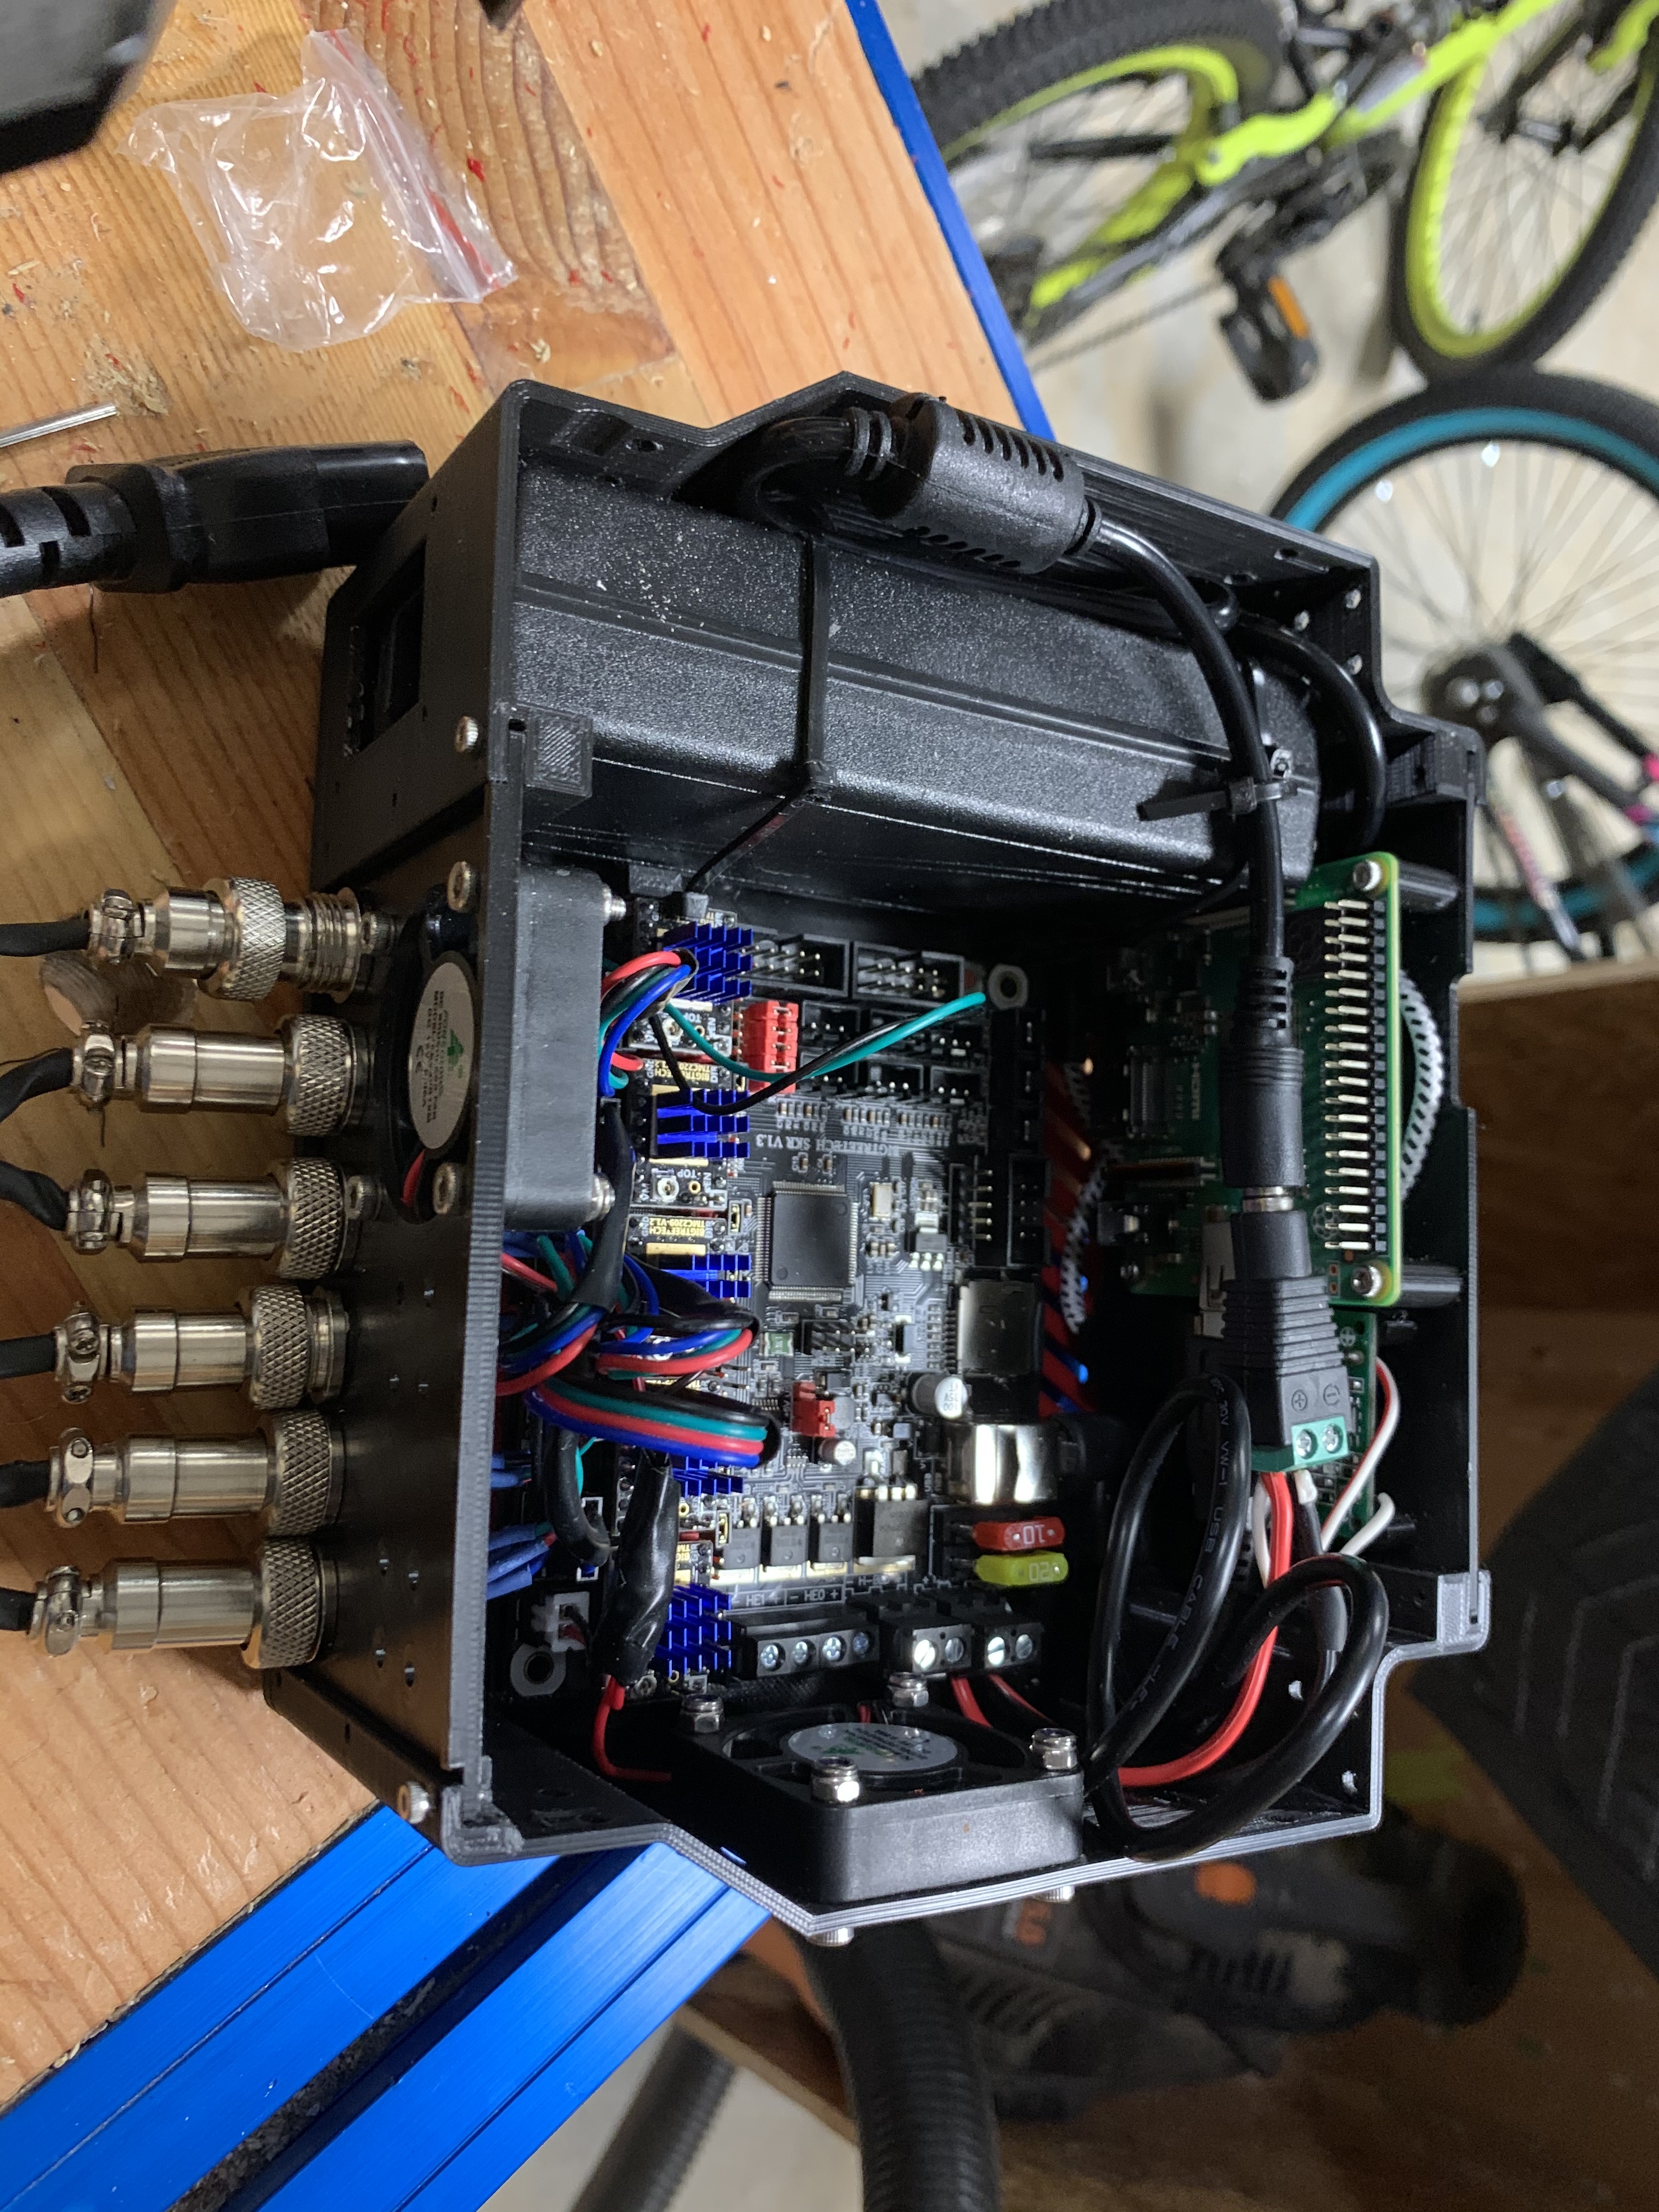
Keeping with the theme of keeping my low rider portable I wanted to keep the electronics package self contained.
I had a separate control box on my mpcnc and a tft display which were constantly getting banged around and I had issues with wires coming loose etc.
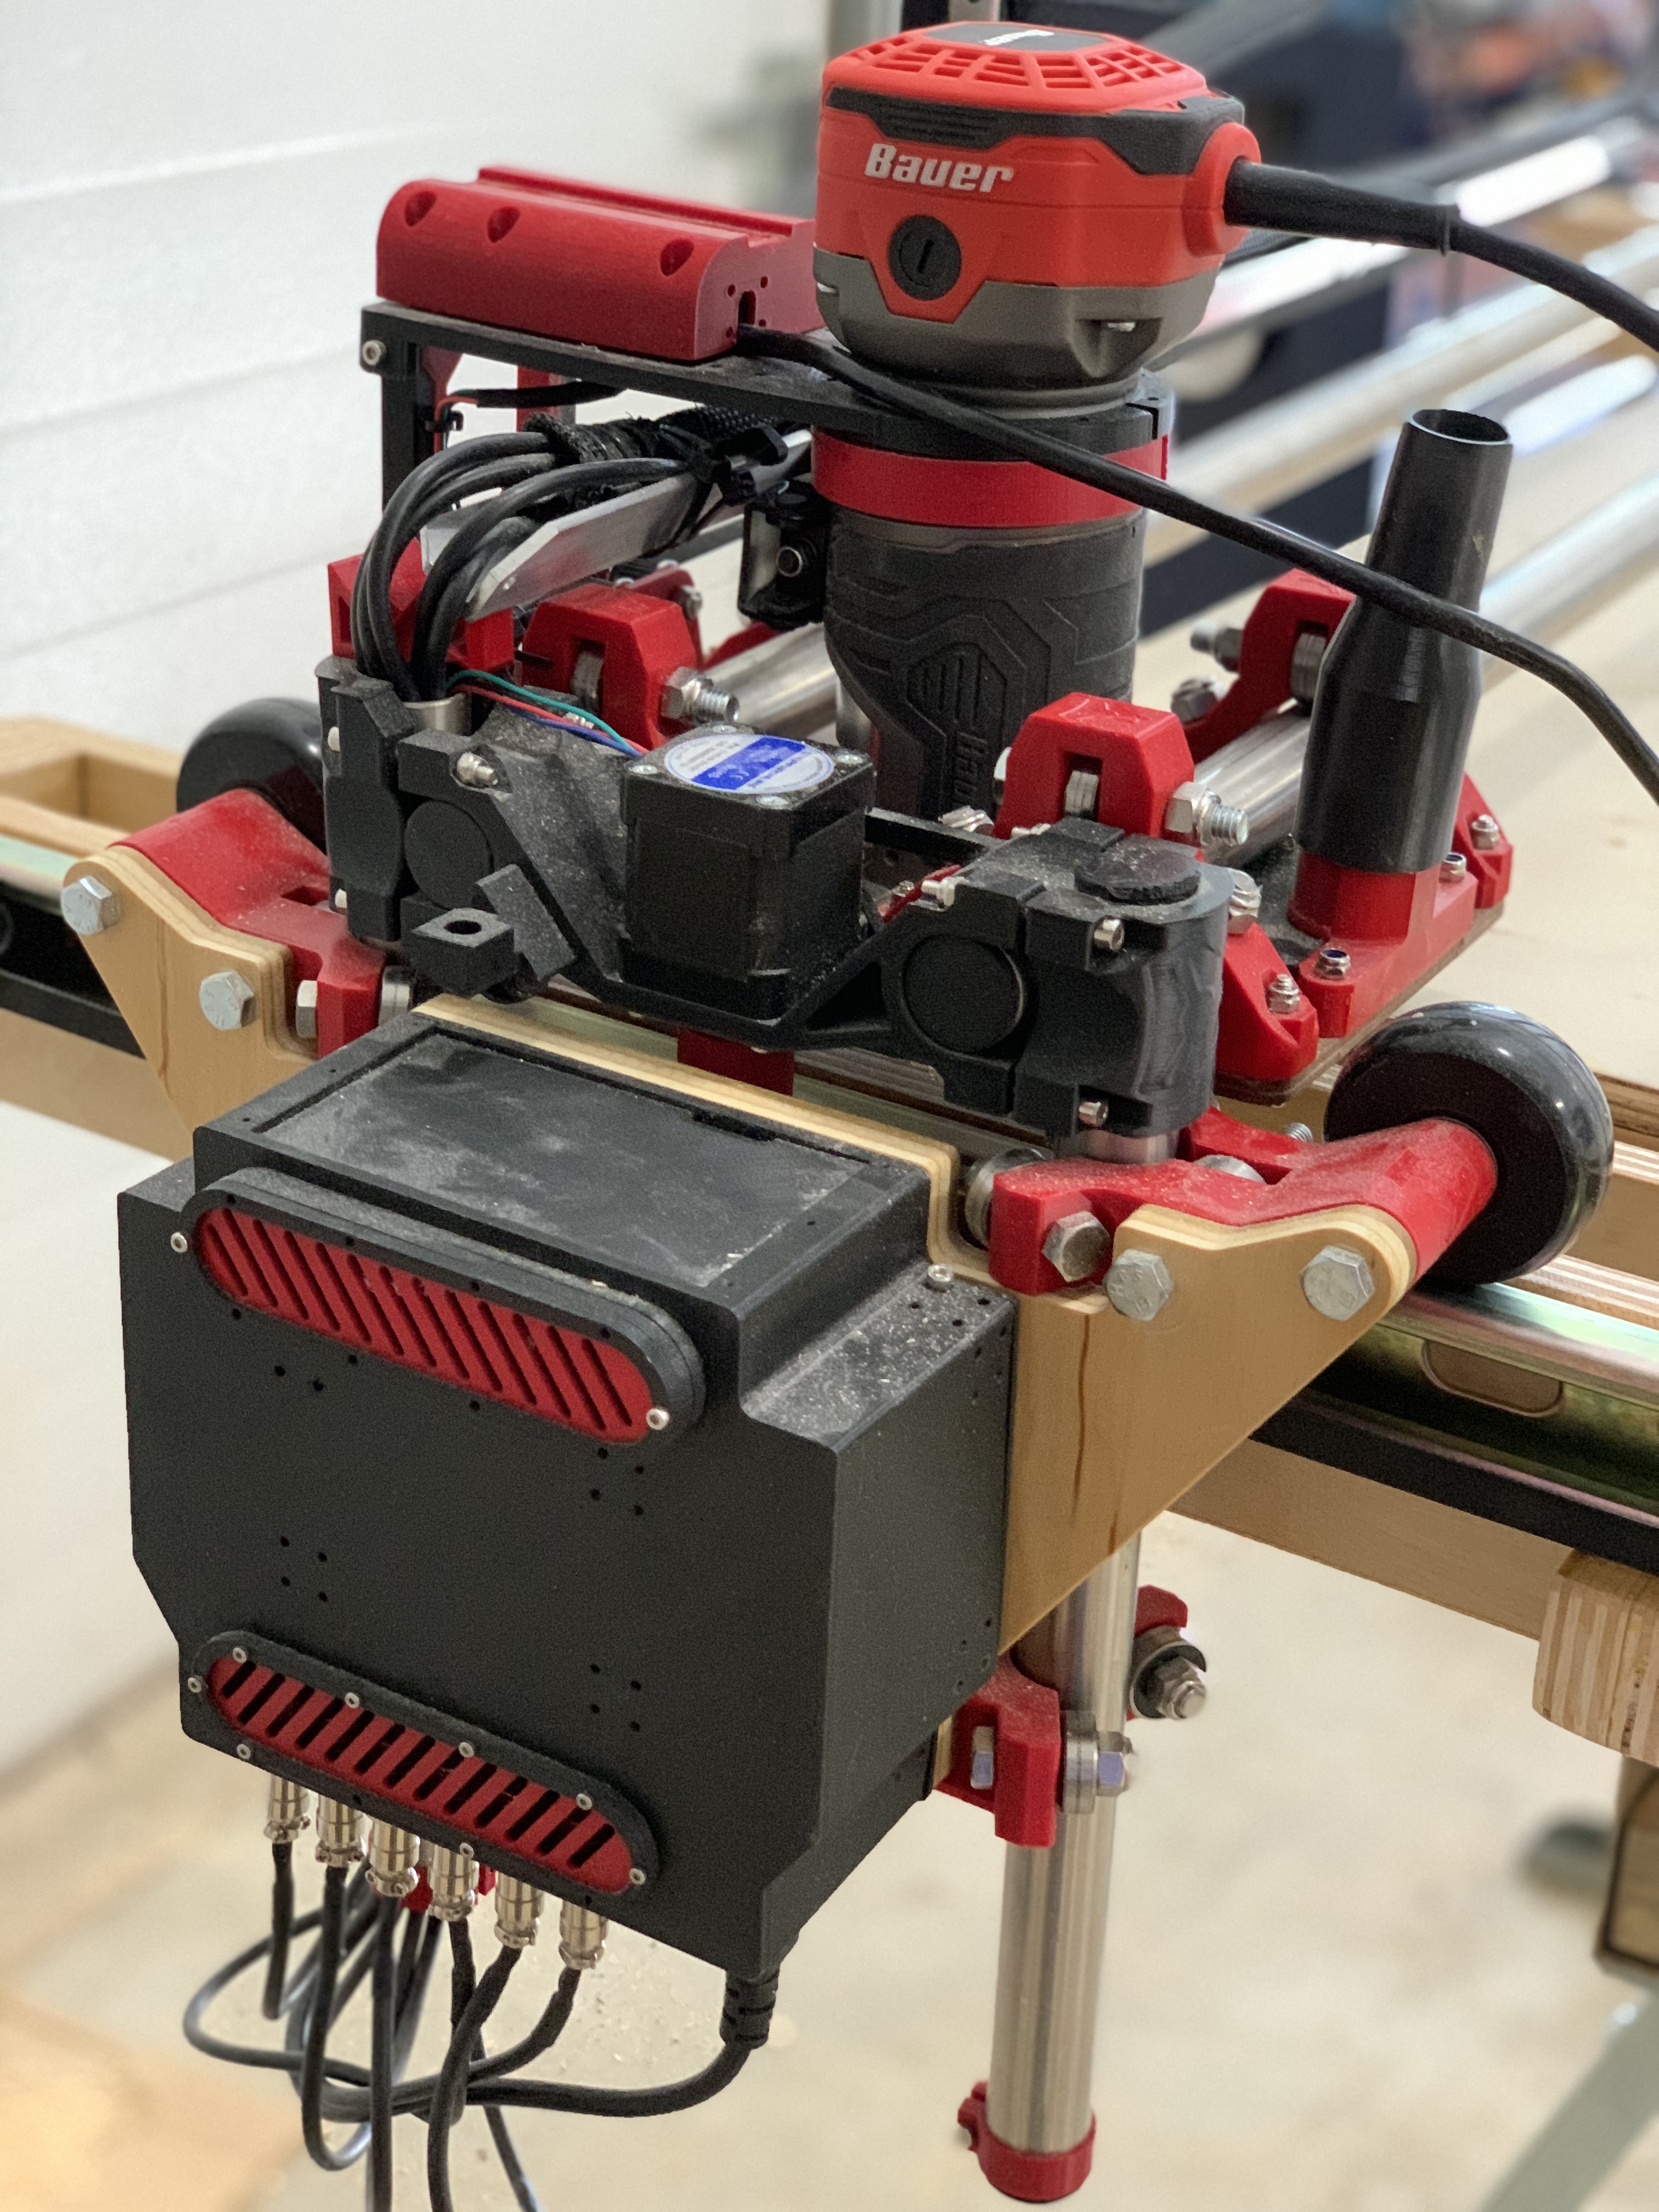
The low rider case houses an SKR 1.3, power supply, buck converter, and a raspberry pi 3A. It’s hard to tell from the picture but the electronics actually cup around the stepper on the y plate to keep it as low profile as ready.
I really like the tidiness of this. Is this box on thingiverse or would you be willing to share? I went with the same aviator connectors on mine but I used a very small box that only held the board, a fan, and a switch.
I posted this a bit ago in a different thread but I wanted to include it in my build log for completeness.
This is a Bridge that clips onto the lowrider2 X axis servo motor and to the router to receive the wiring bundle coming from the drag chain. It’s designed to fit the Makita 700 routers but should work with others as well.
This is so fantastic it’s got me thinking of scrapping my folding table (which still isn’t complete or good enough to share).
What an elegant way to have a table that breaks down so small. Even with a portable folding table, you still have a considerable (26" x 10’ in my case) footprint to deal with.
Being one who does not have a dedicated shop space at home, and one who shares a two car garage with my significant other along with a tractor, landscape tools and power tools, this will be a much easier sell than my table (which I have yet to have the cojones to bring home from the shop!)
FYI you shared the nc files not the dxf, I’m not sure my routing parameters will match what you use. If you could share the dxf’s that would be appreciated.