So this past weekend I started messing around with pouring some resin. Haven’t gotten it perfect yet but I’m getting there!
Any tips are welcome!
So this past weekend I started messing around with pouring some resin. Haven’t gotten it perfect yet but I’m getting there!
Any tips are welcome!
Now I’ve only done this a couple times, but my recommendation would be to seal the wood first with a varnish or clear-coat, then pour the resin. That way it doesn’t bleed into the grain.
I actually just did that last night for the first time. I had some linseed oil laying around, let’s see if that does the trick.
Maybe I’m wrong but it’s it possible linseed oil may have a negative effect on adhesion.
I’ve done a few bits and pieces like this, and it’s completely timber dependent. Some it absorbs horribly, some not at all (Beech and bamboo are like sponges, Oak seems mostly OK), but a layer of mineral oil is enough to stop it. I ran a quite few examples of this type of thing through the thicknesser, and at first they cut beautifully, but lately, whether because the blade is not as sharp as it was, or because the temperatures are lower, the cuts are awful. Now I just sand away the excess.
Clear acrylic works to seal the wood too.
We will see here shortly, I haven’t tried it before and I’m really just testing things out.
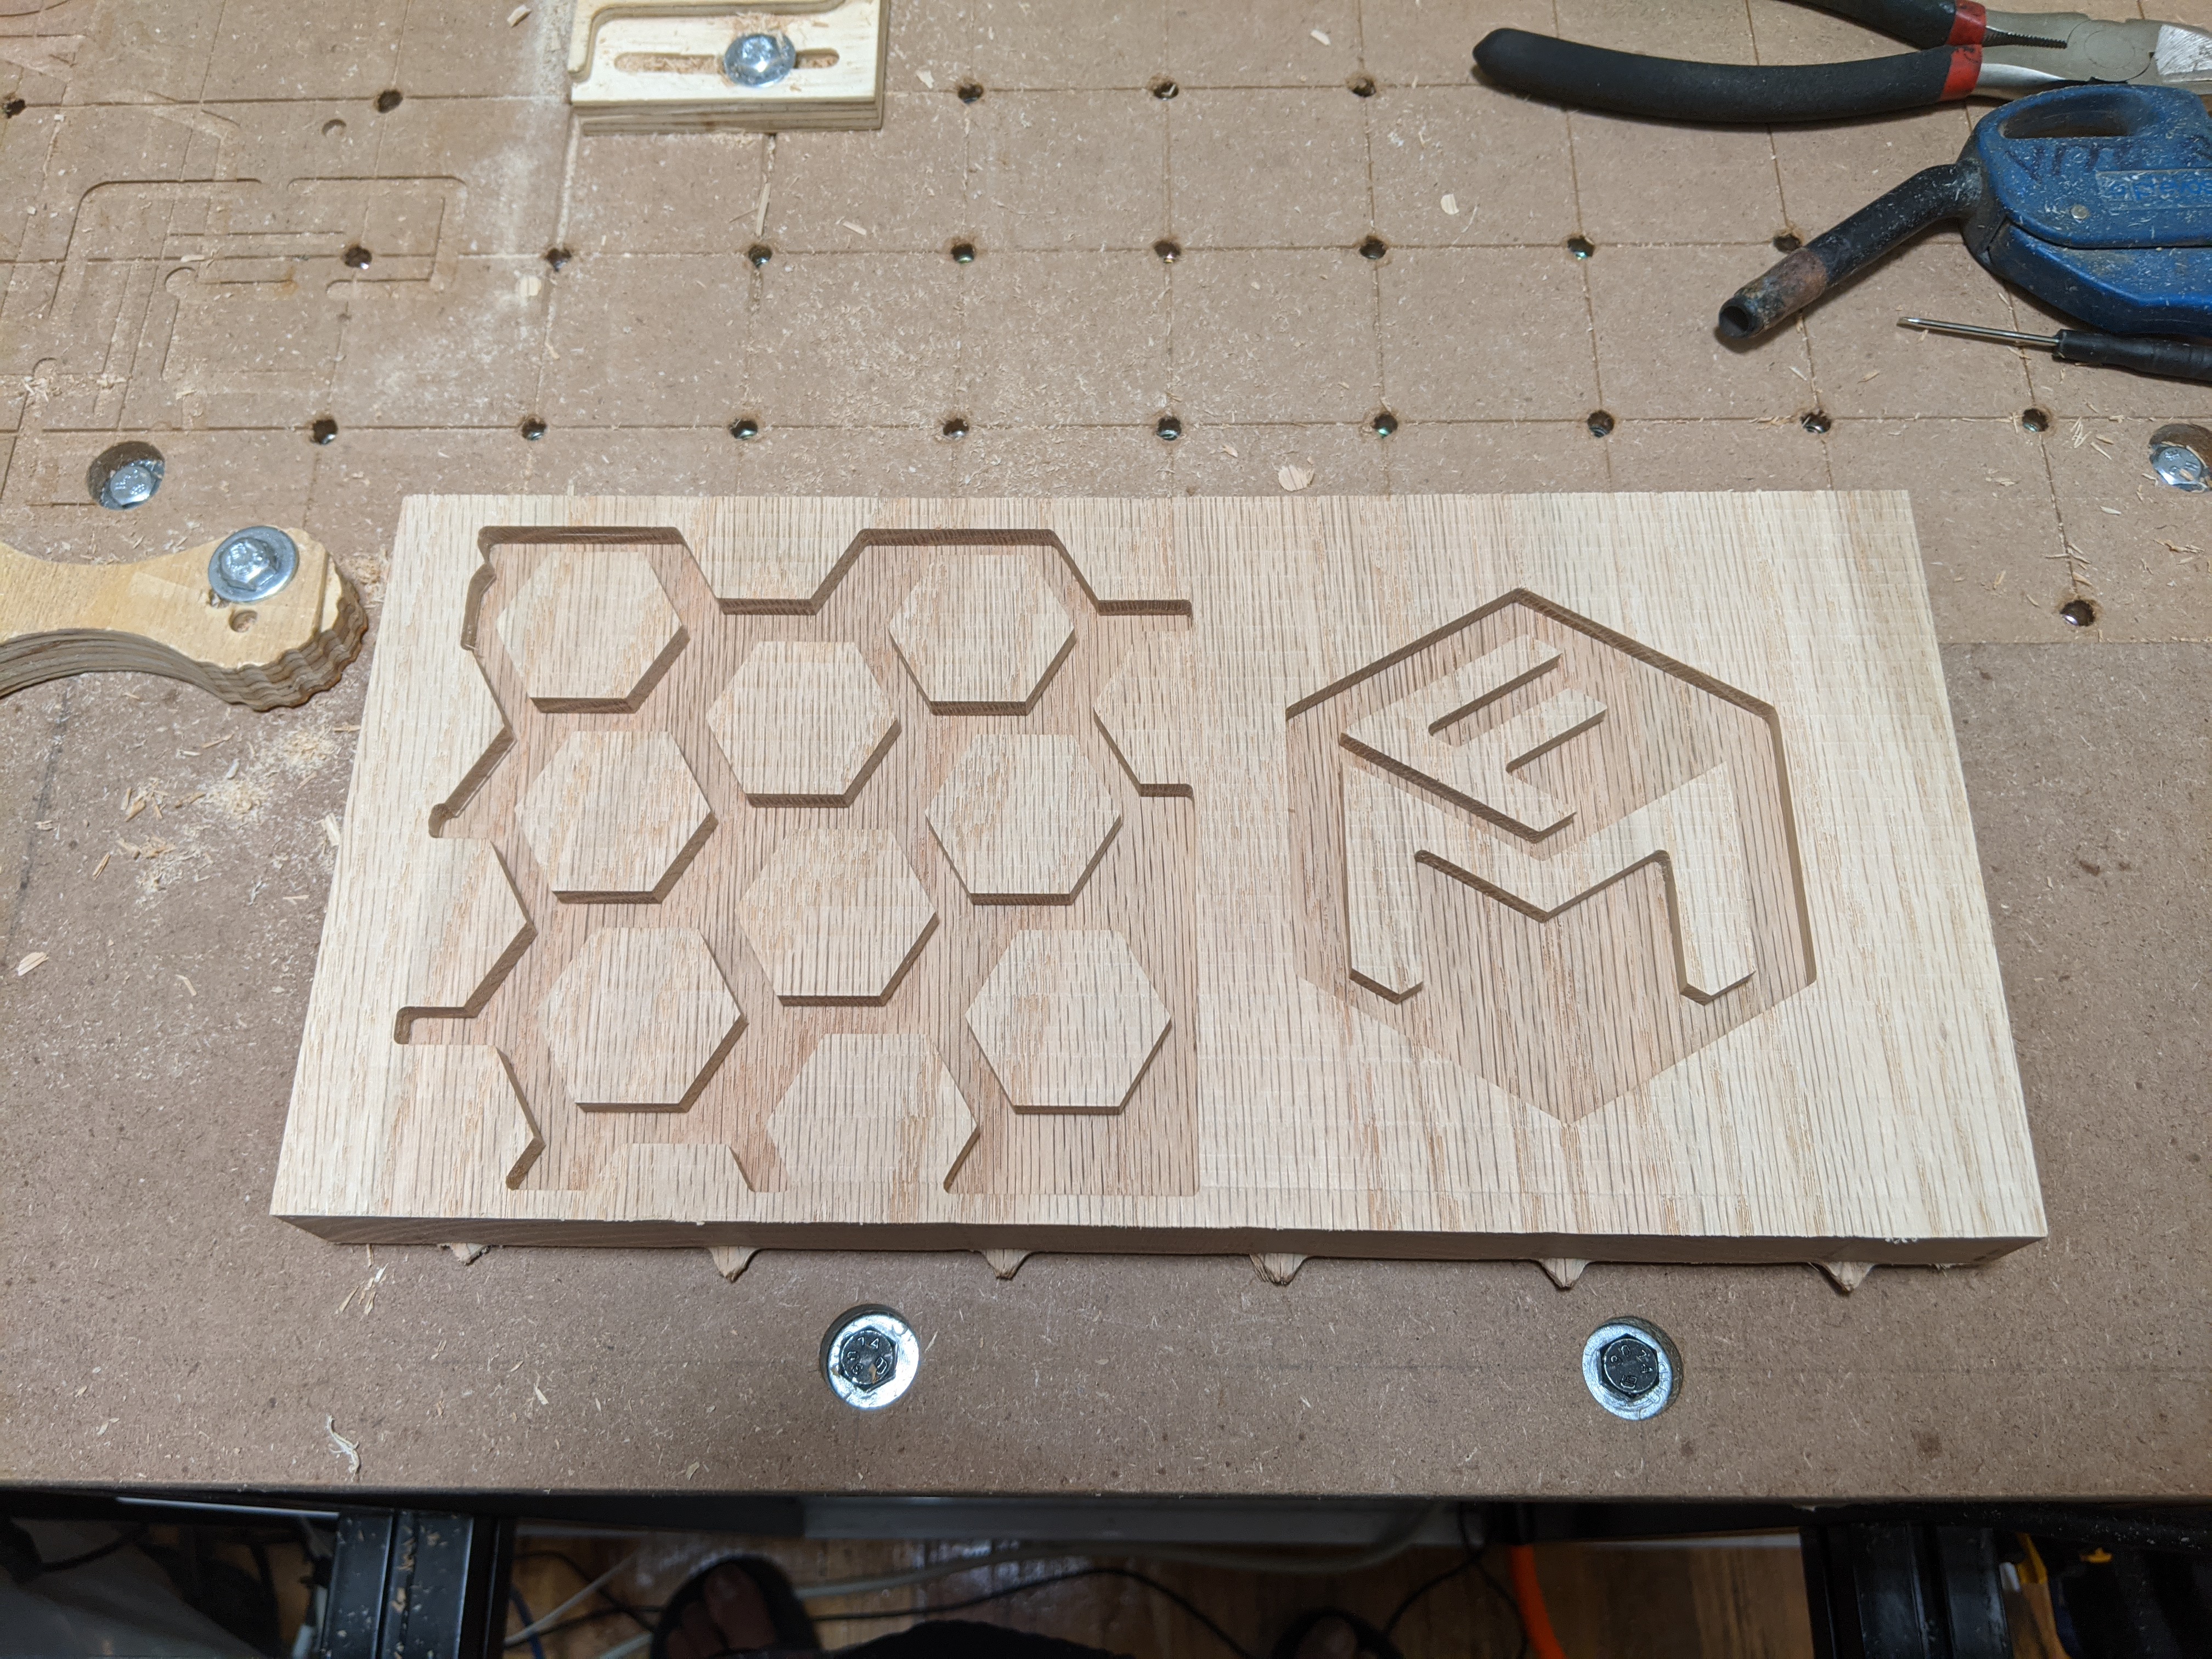
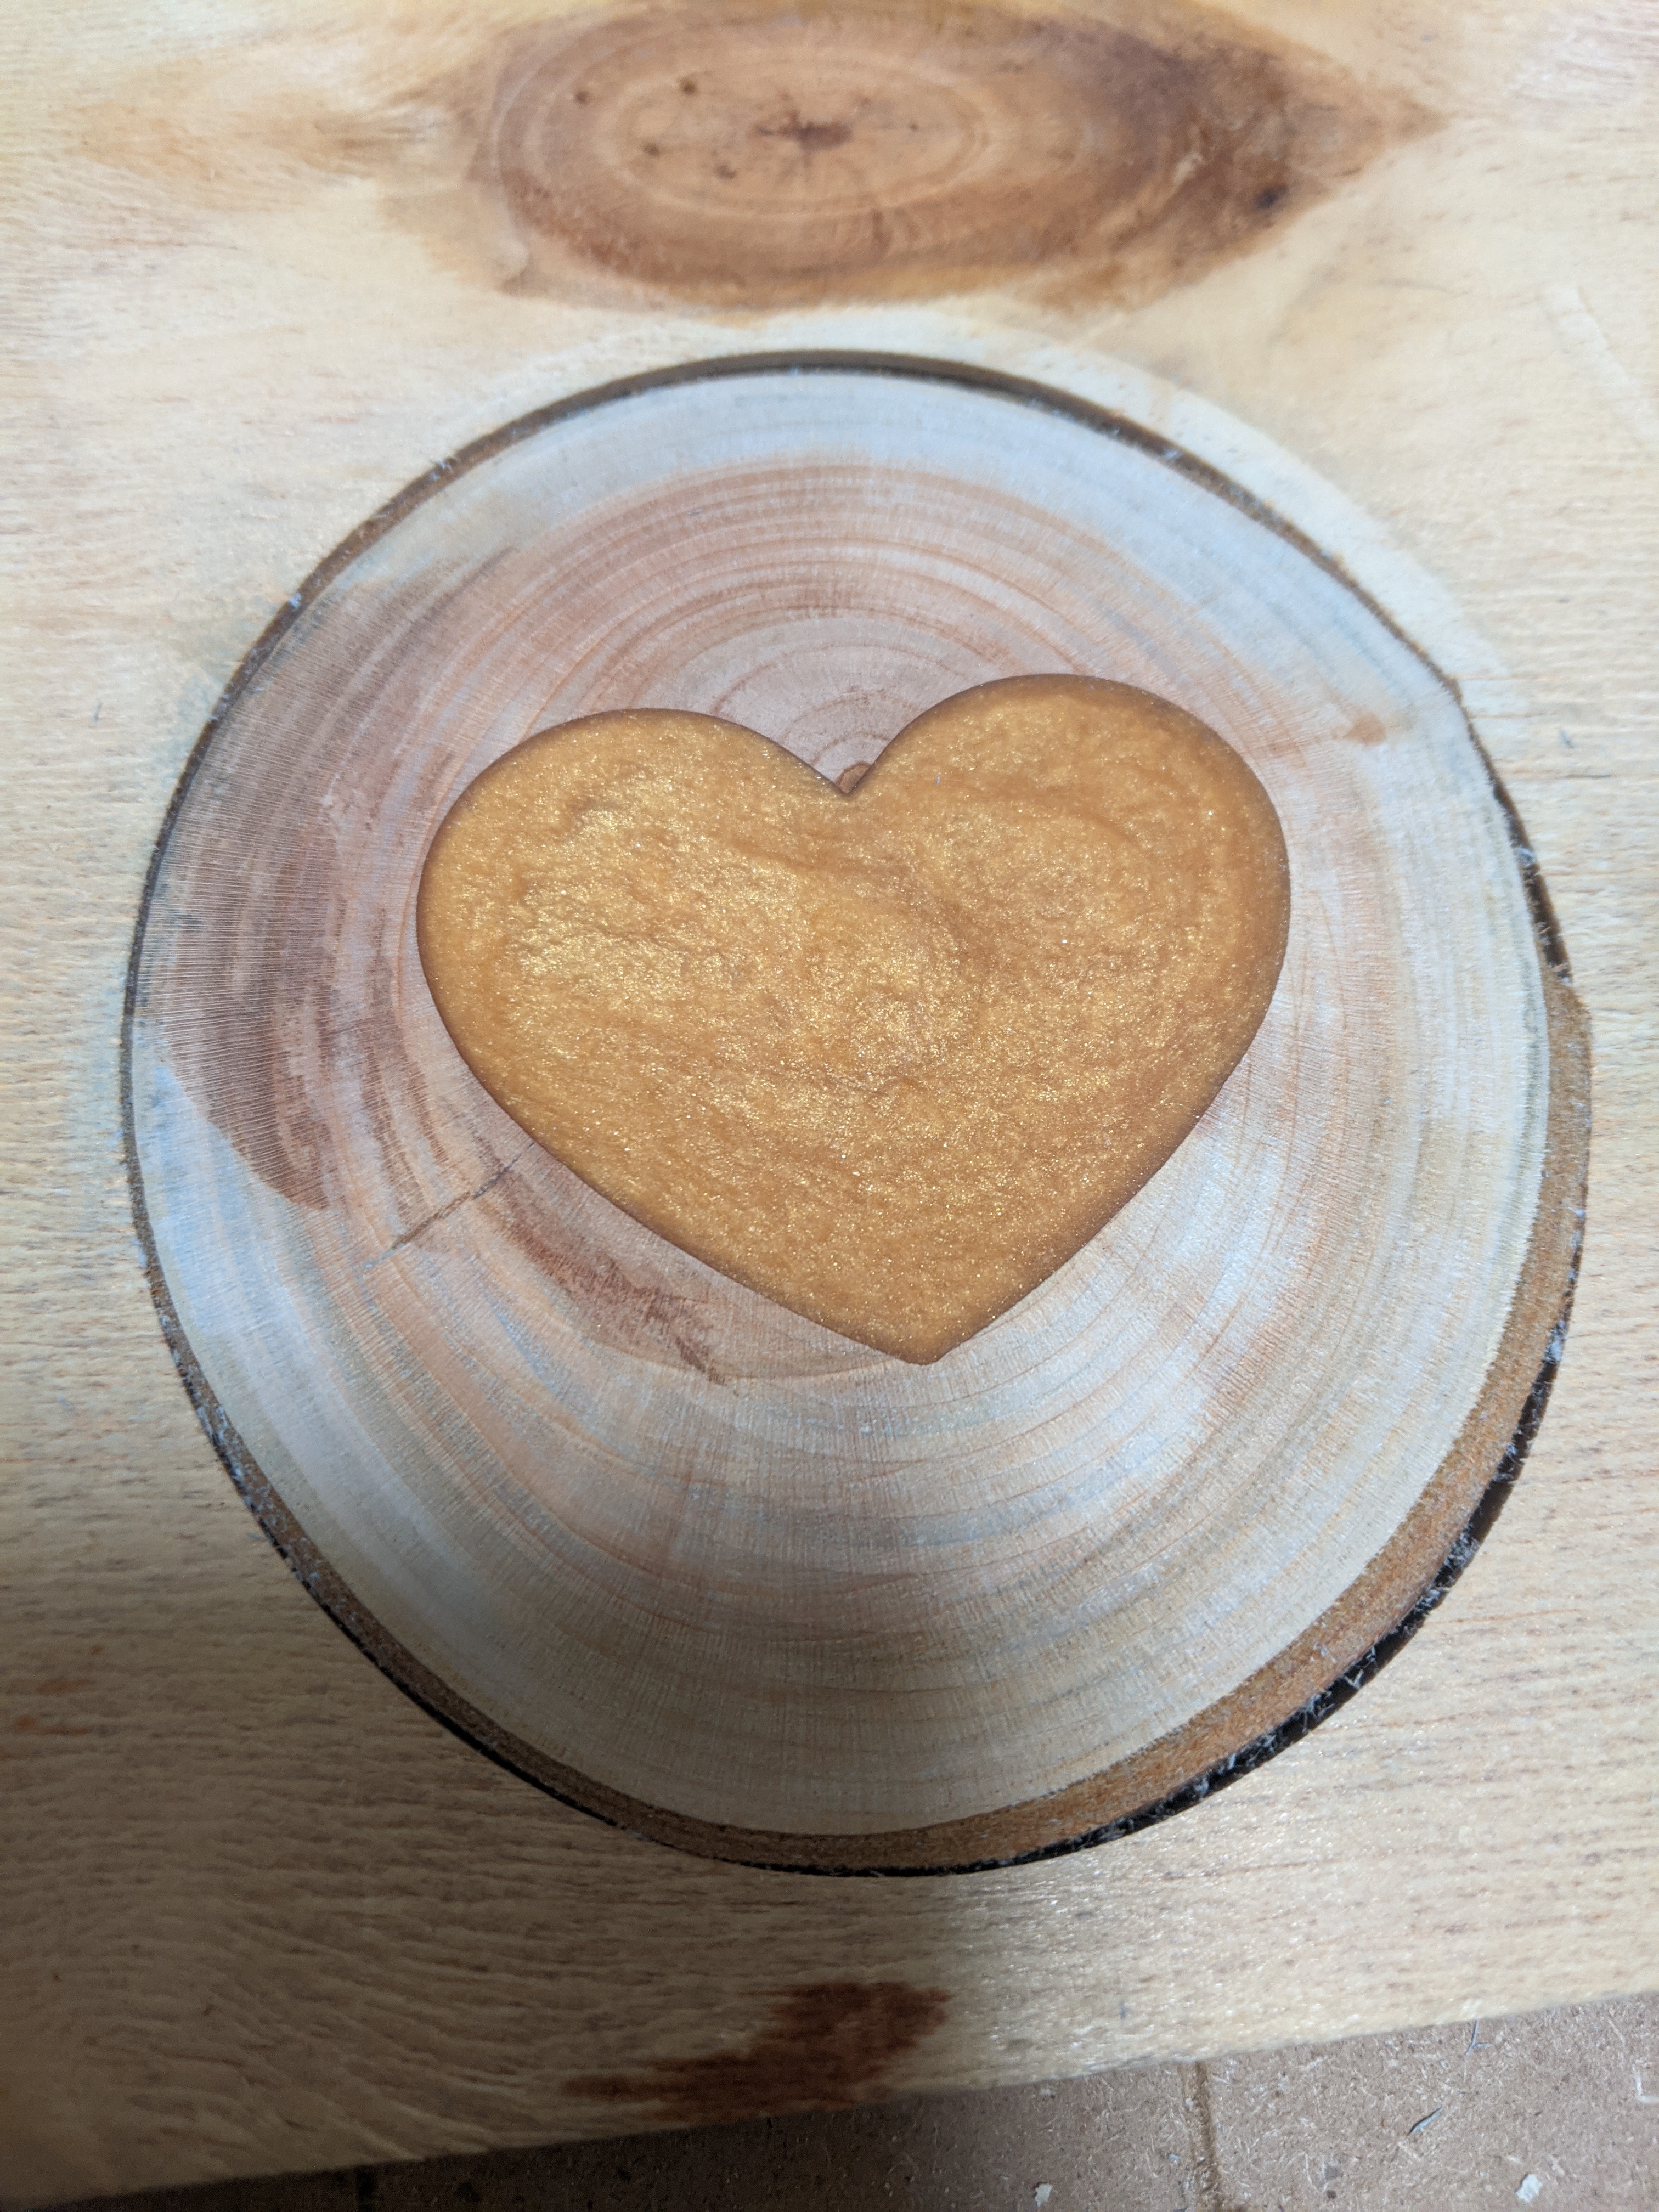
So I made these cuts out of some oak I had laying around waiting for sealing and resin
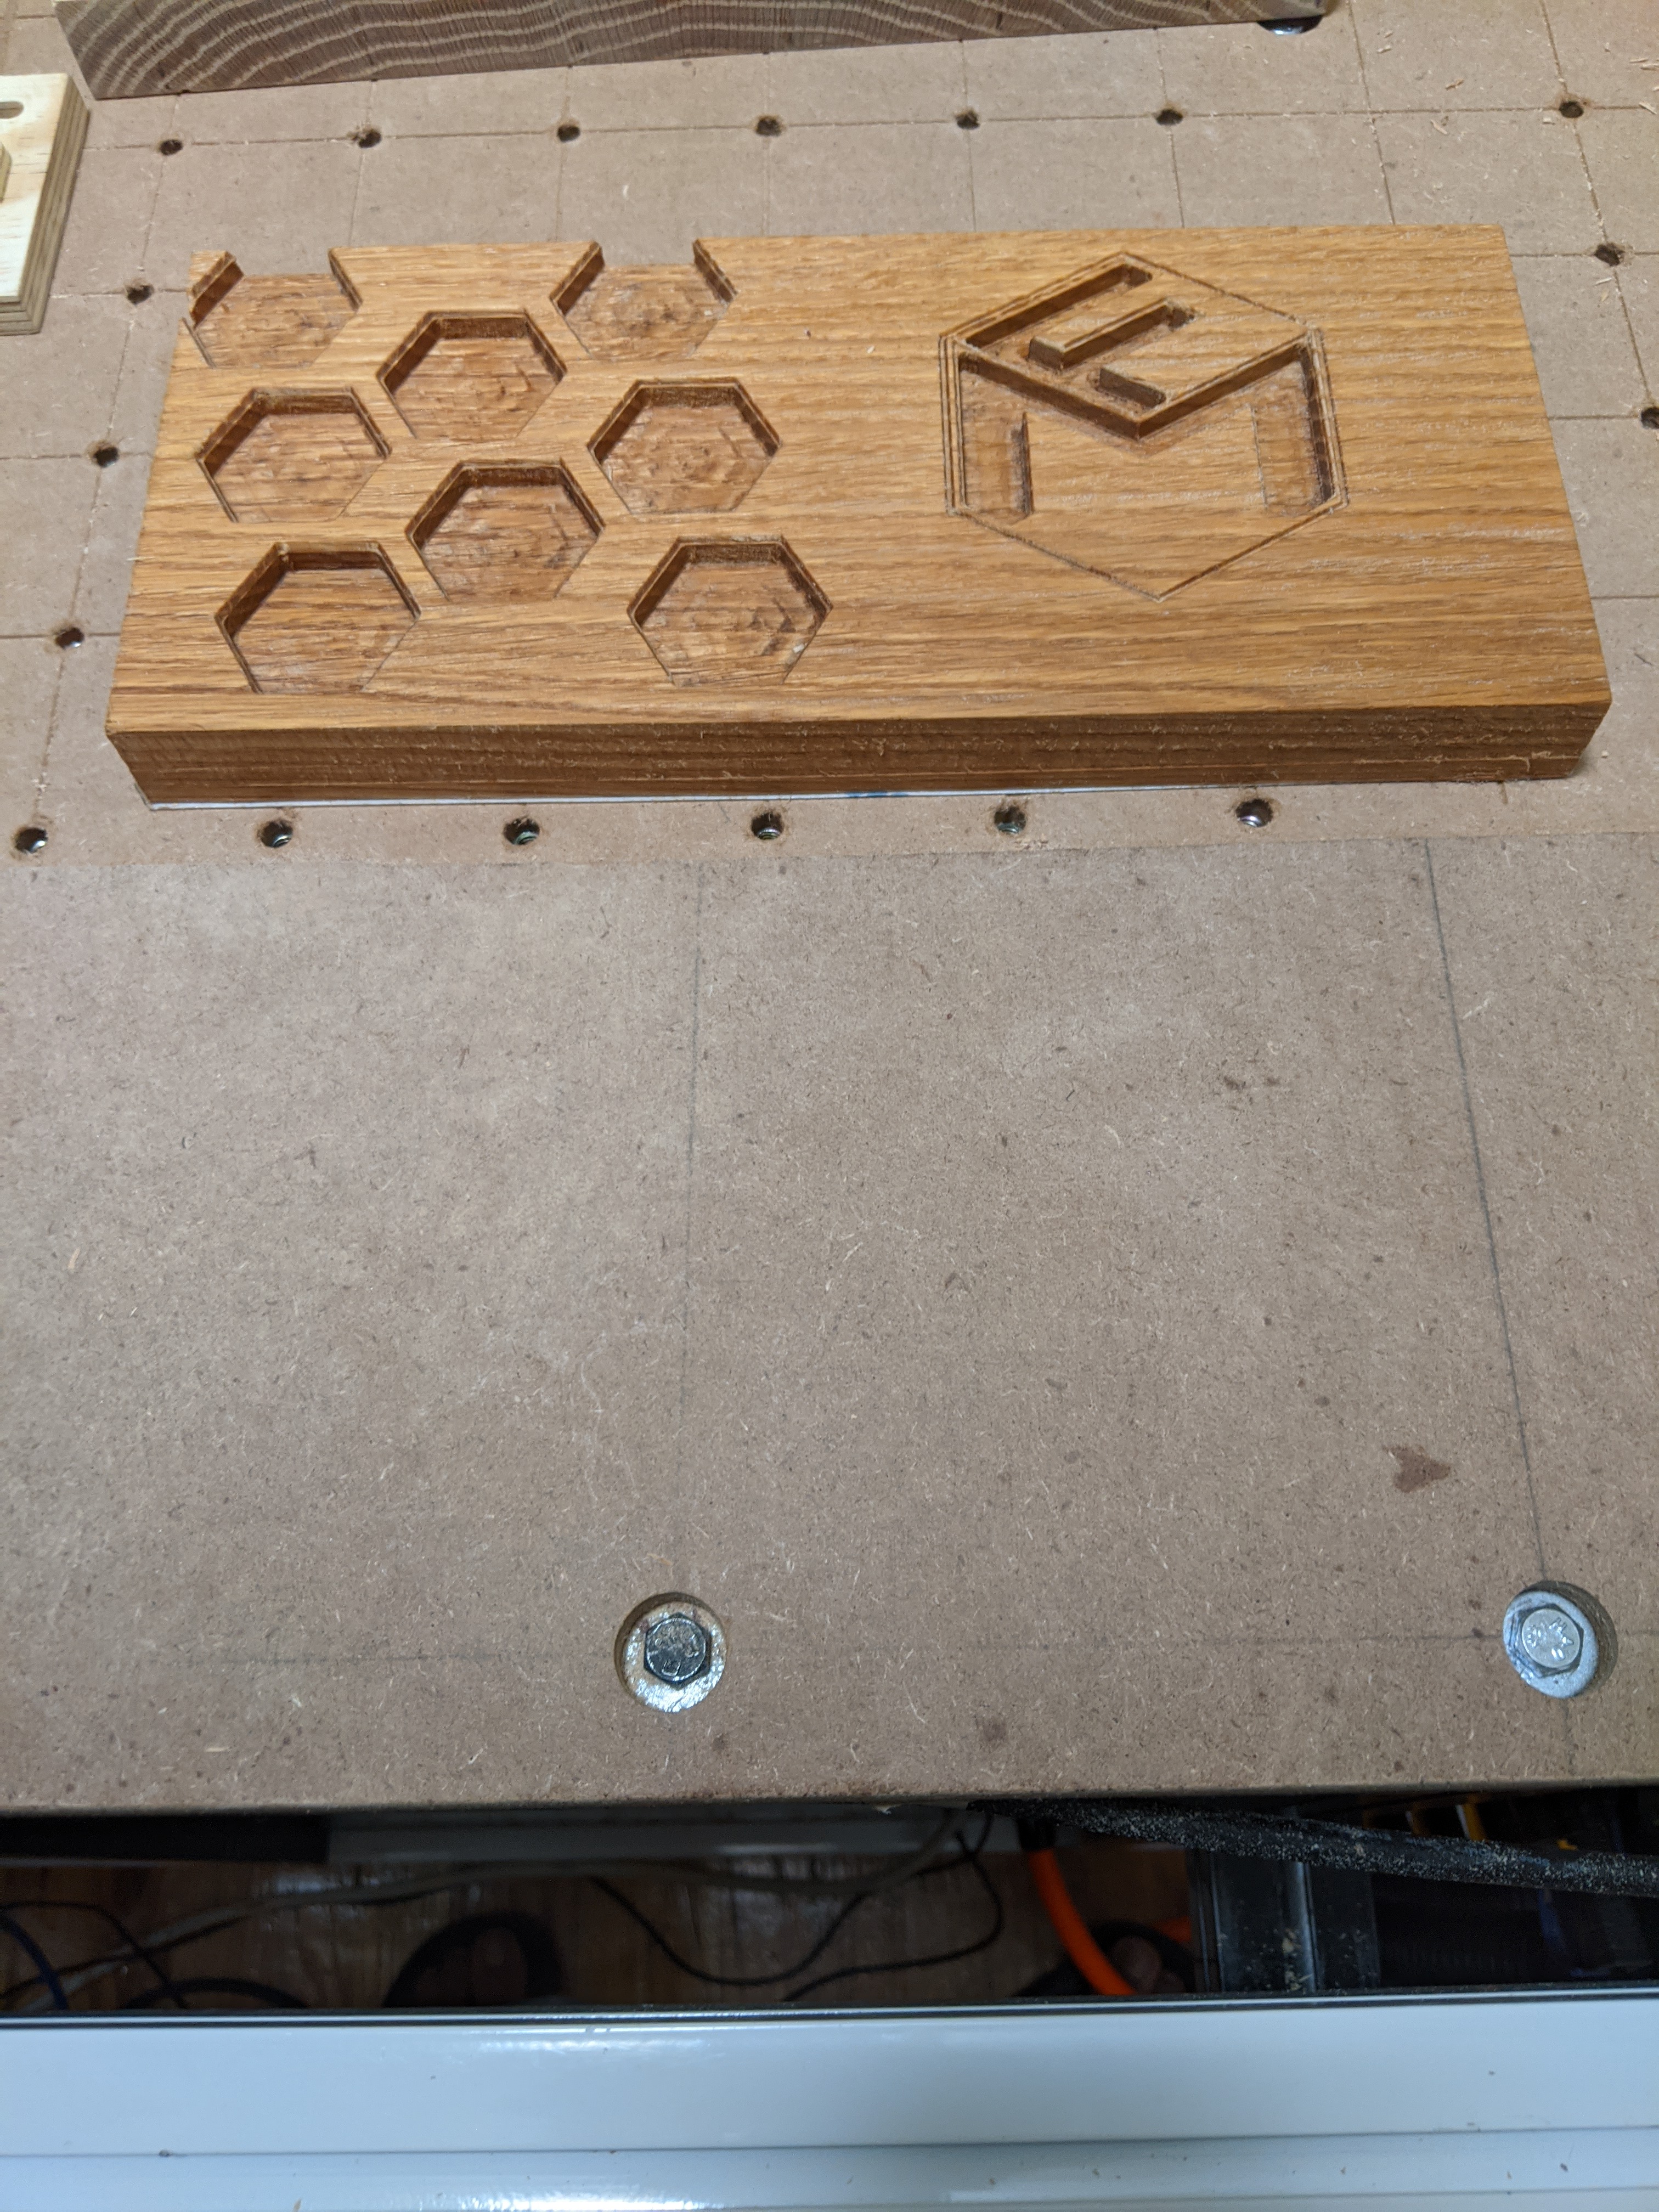
Uploading: PXL_20200925_062127603.jpg…The last photo is on the first linseed oil test, came out pretty good so far
Oak with no char marks, nicely done.
Based on the confidence you gave me with your speeds and feeds that you shared, I’ve been going pretty hard trying to get proper feeds and speeds. I’m pretty happy with the results.
Thanks for your help
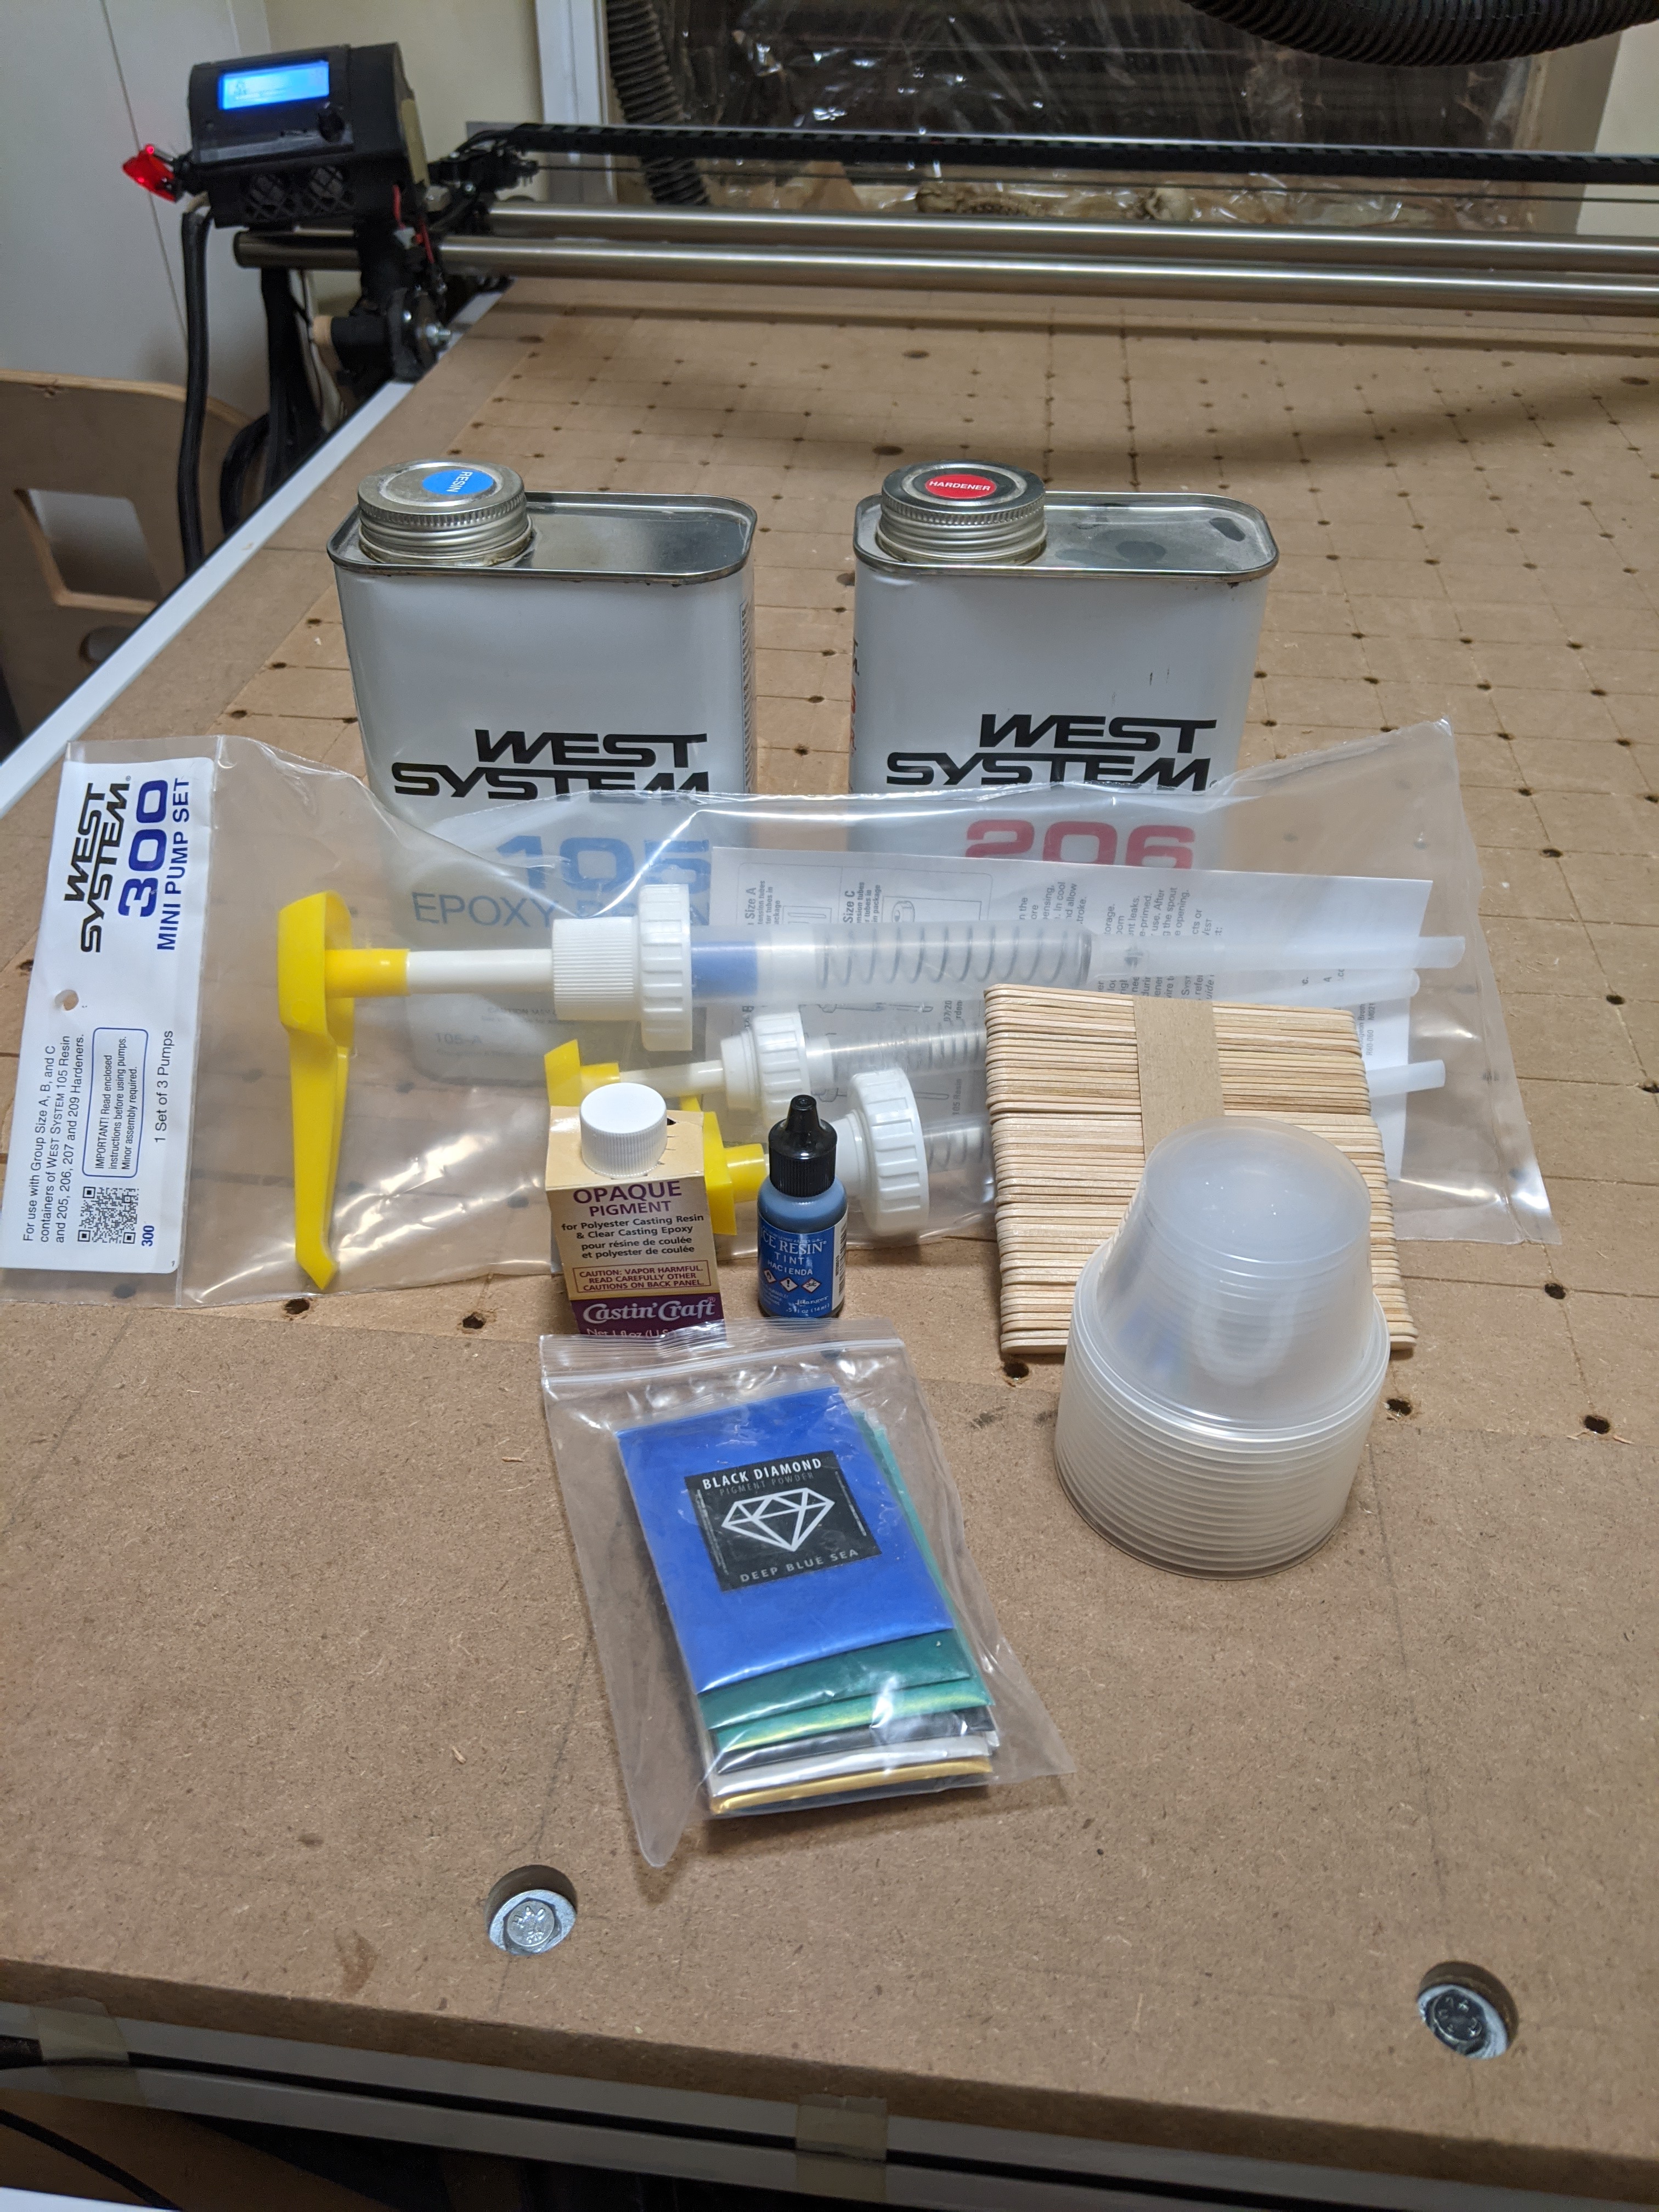
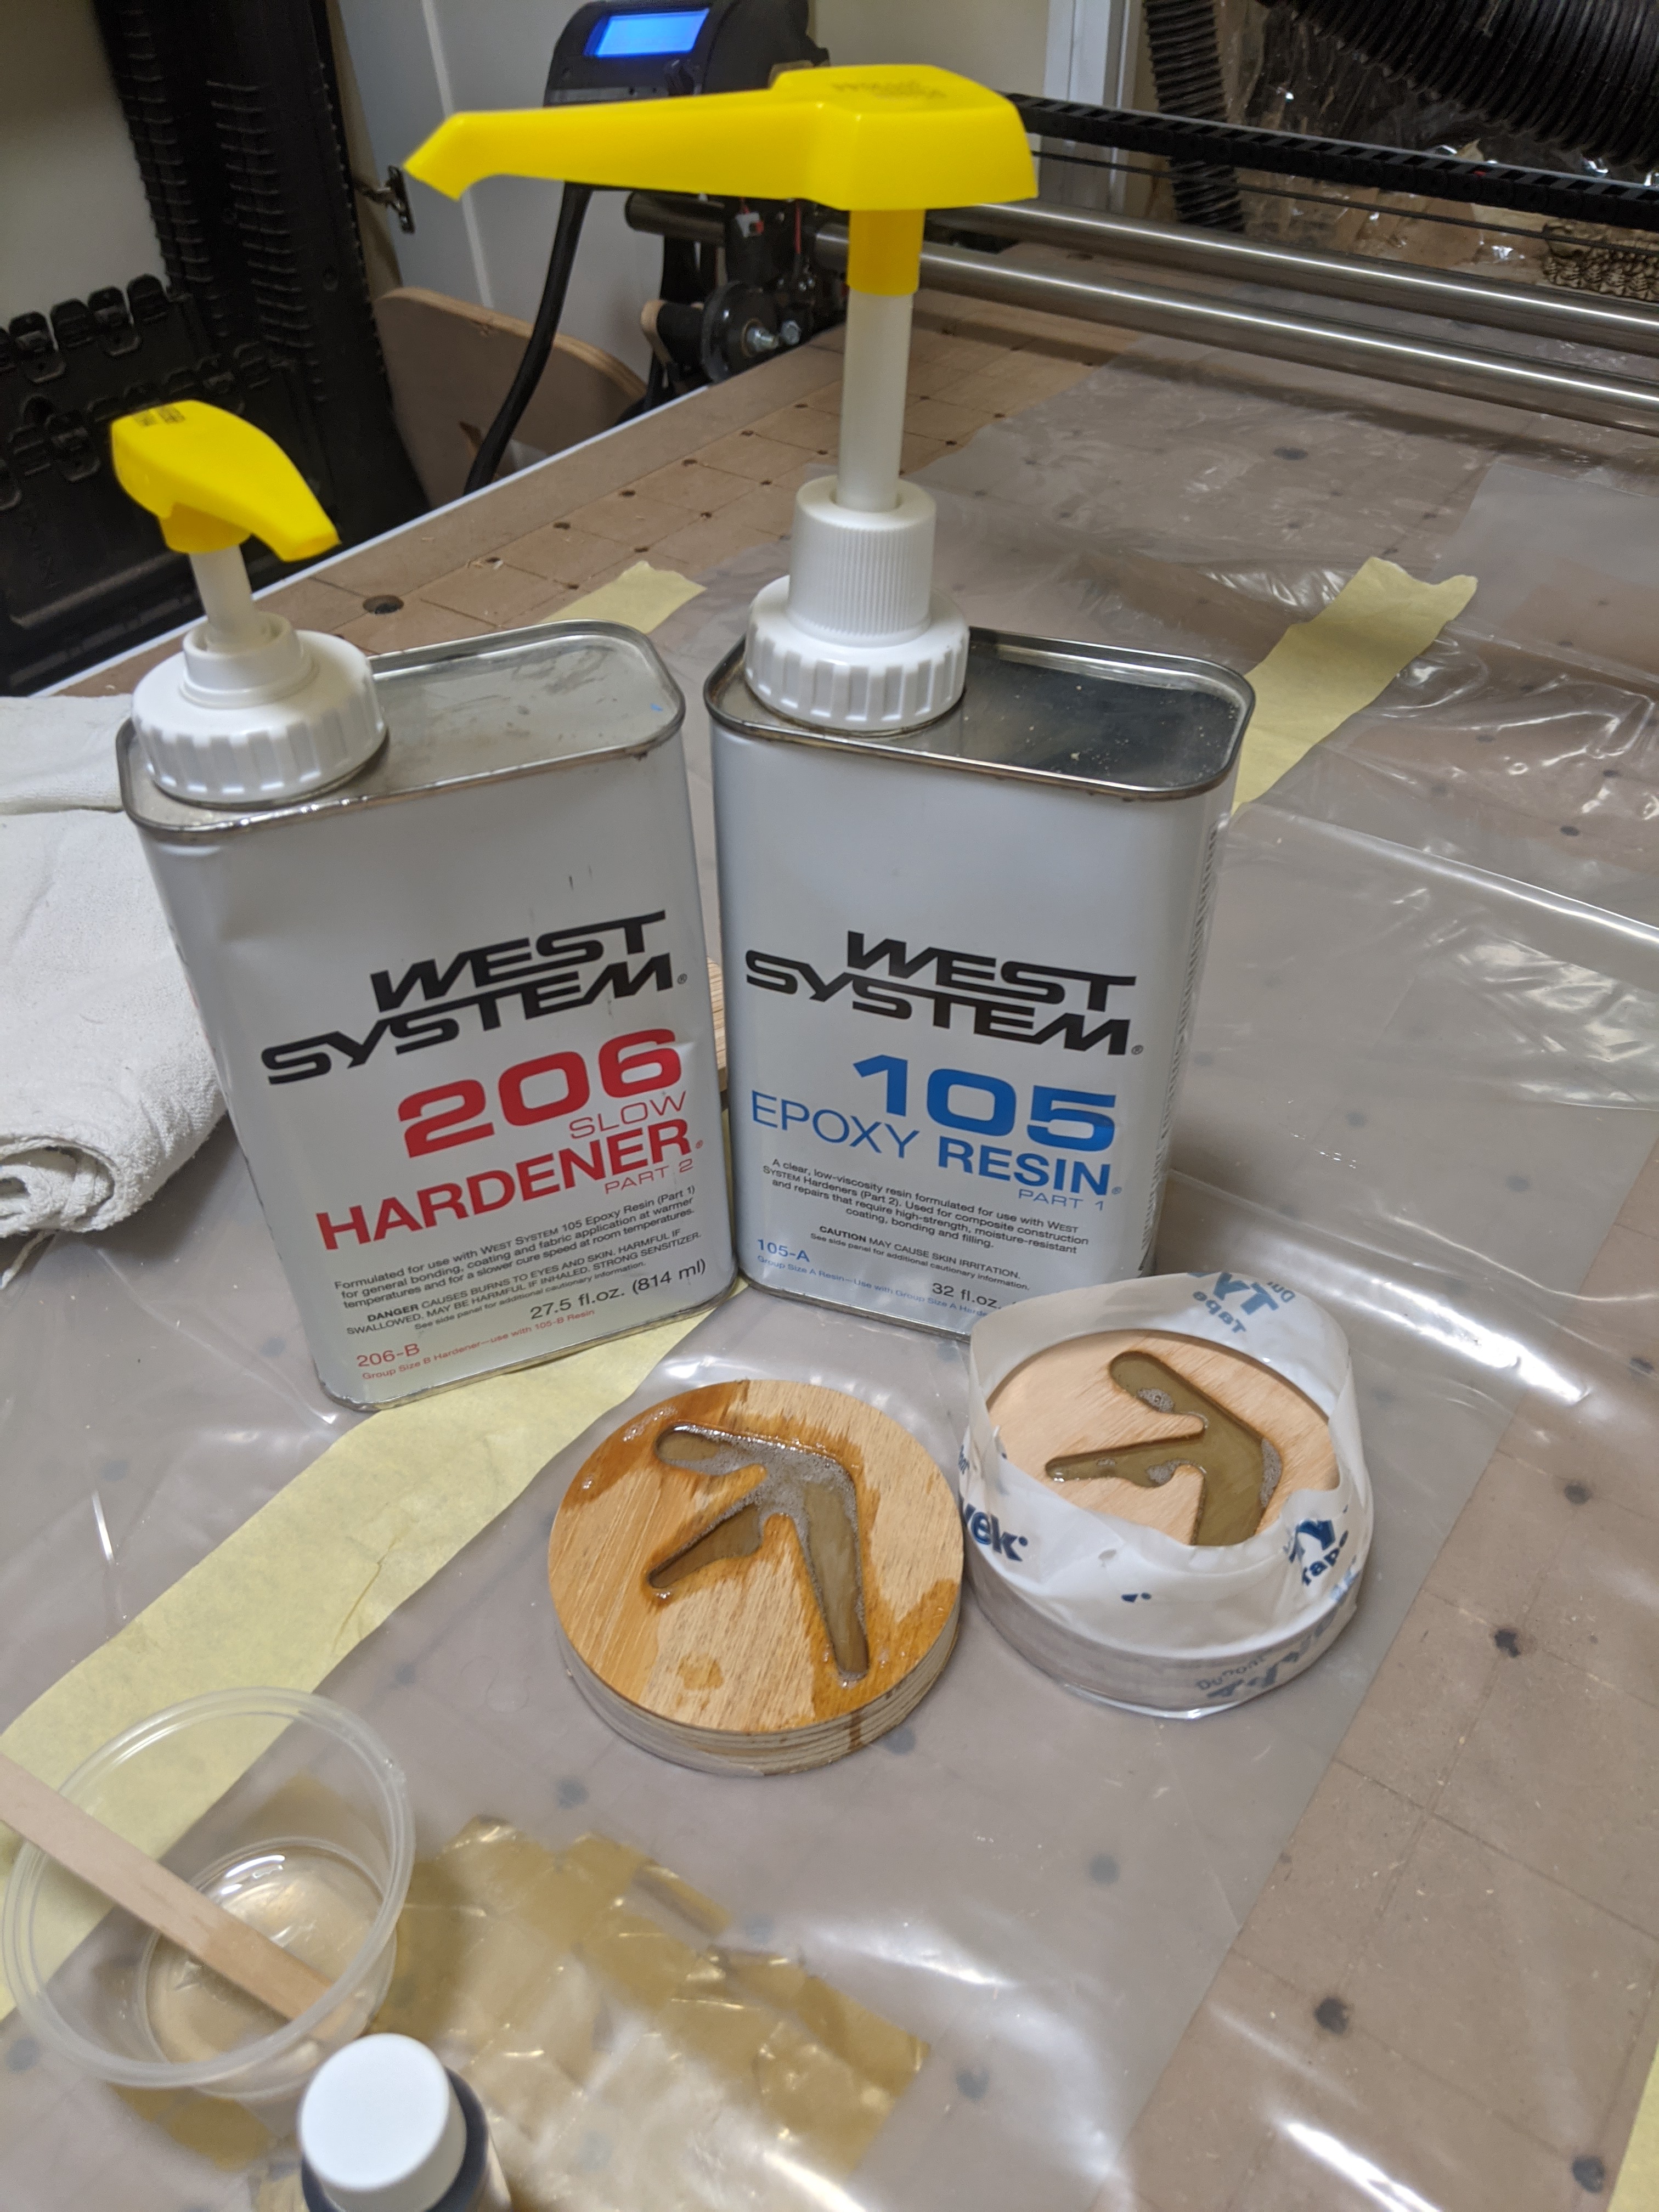
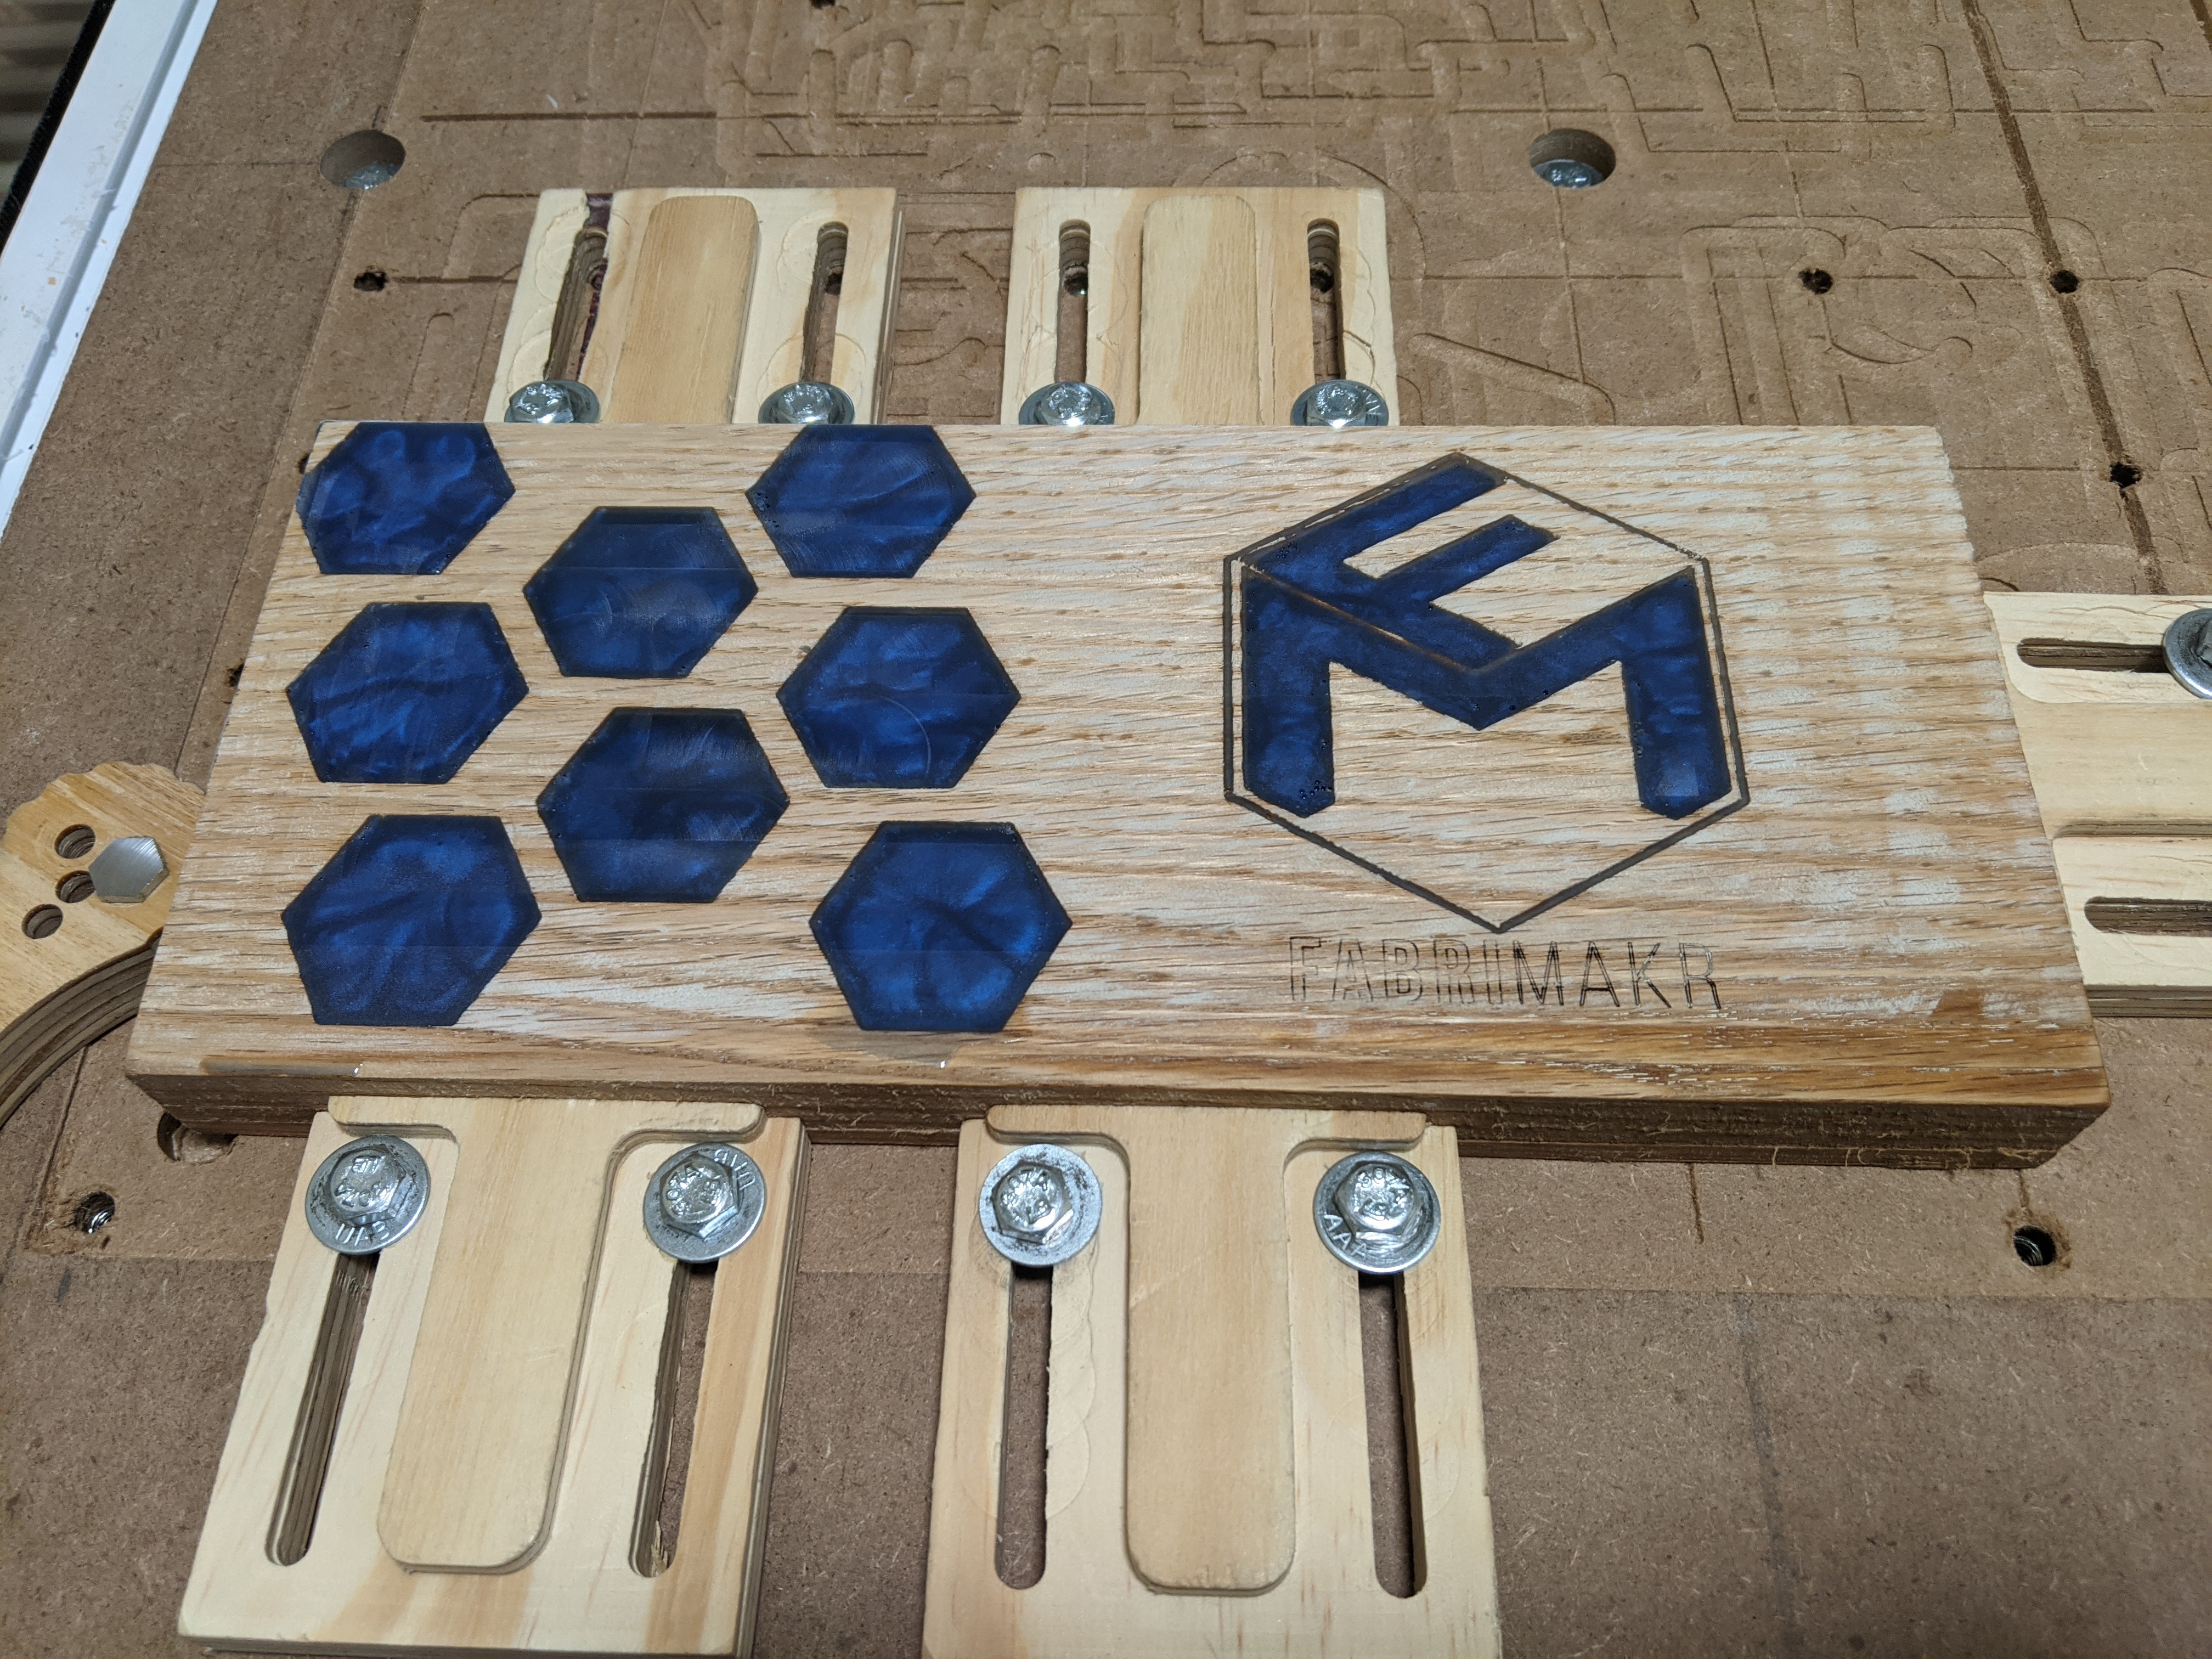
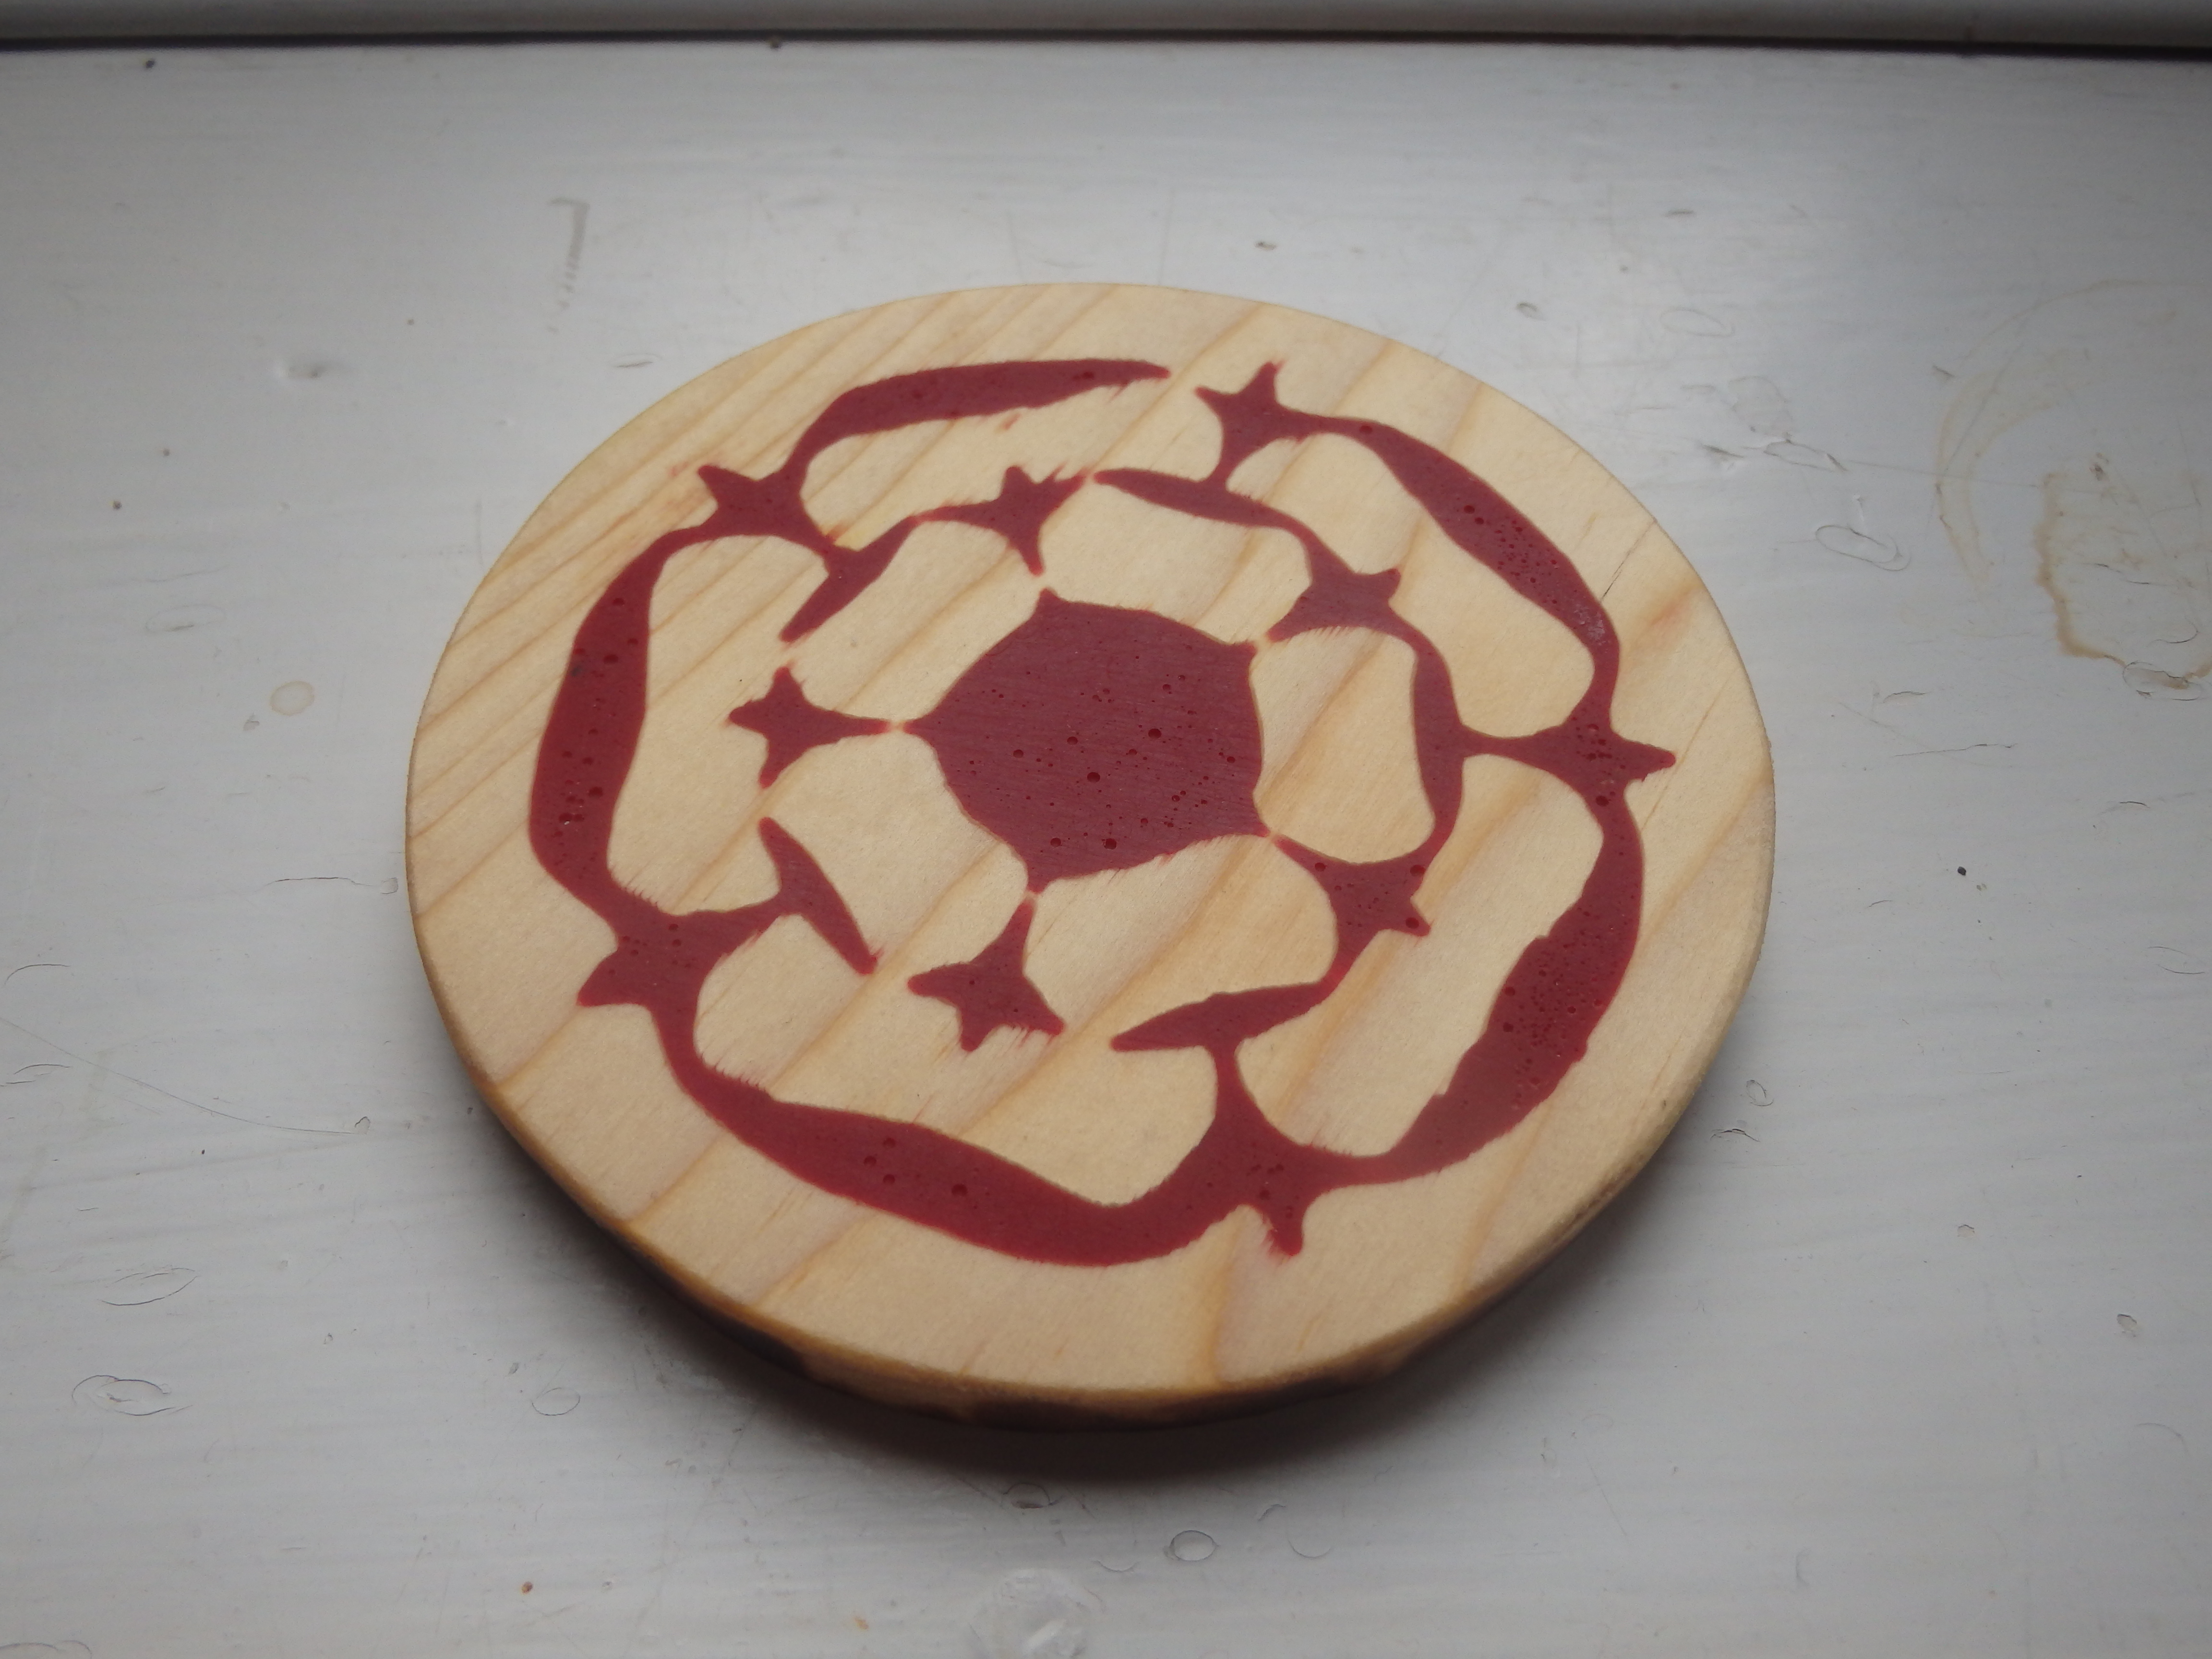
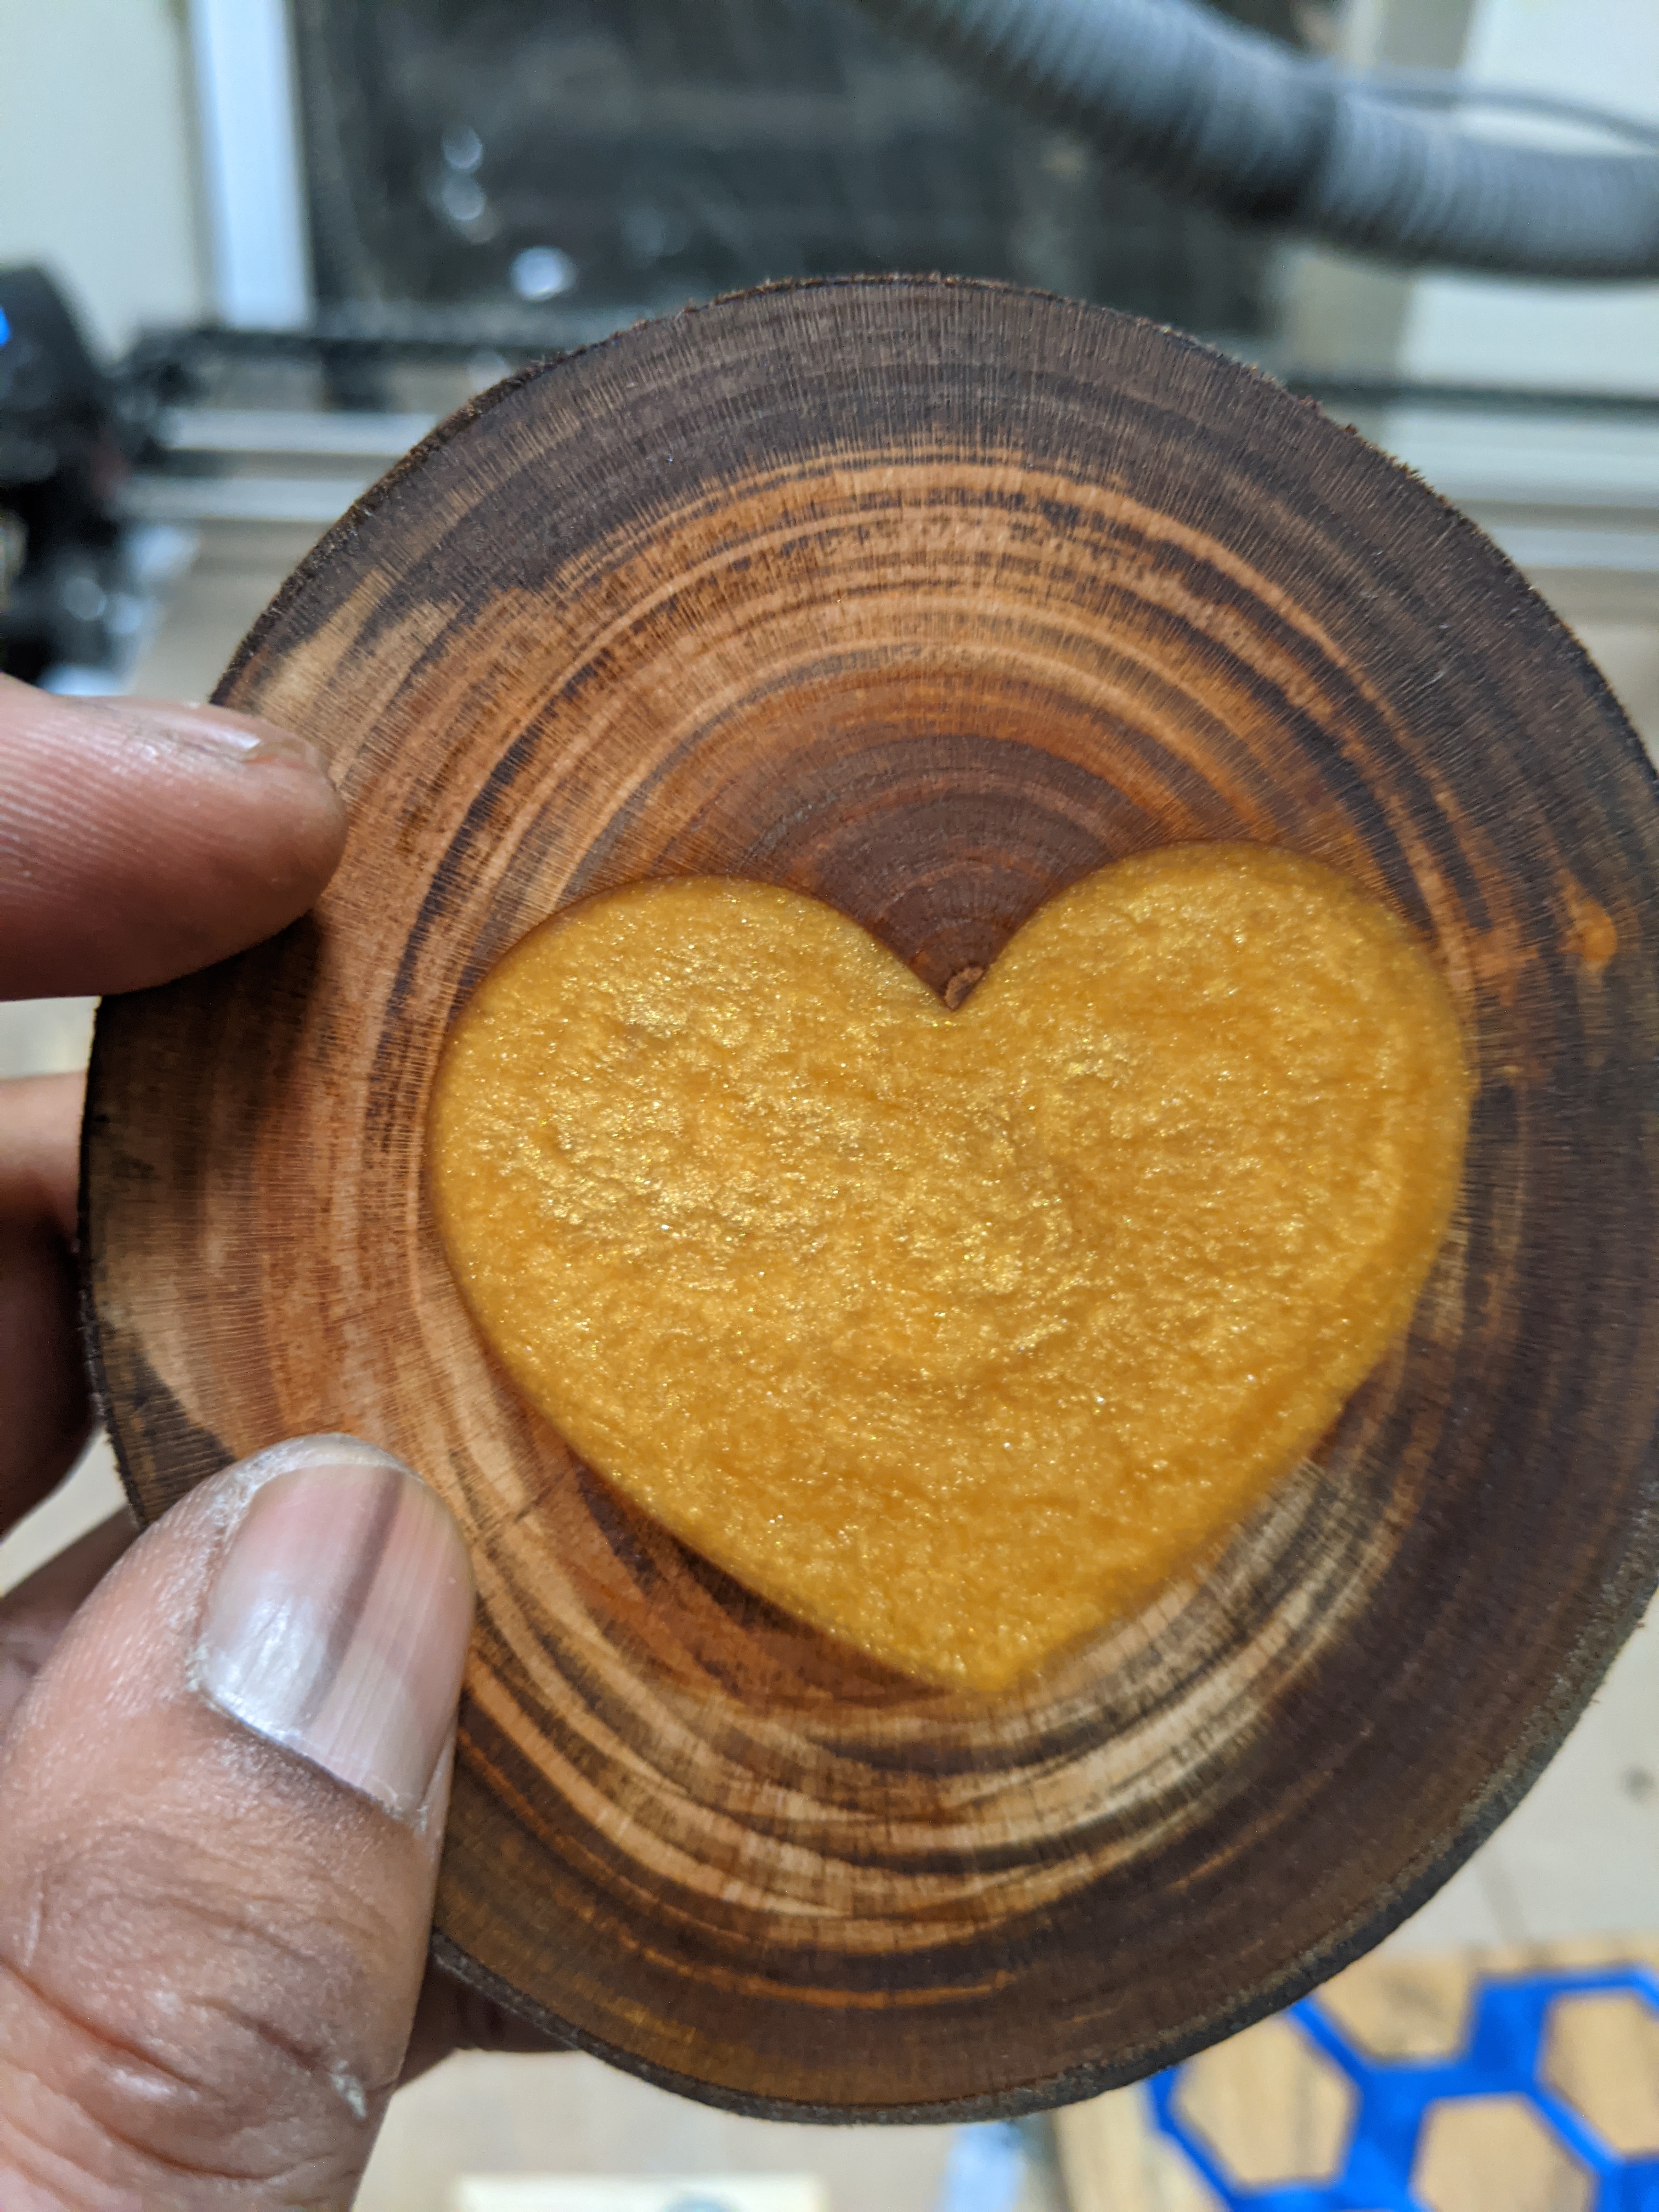
Here at the latest resin pours, turns out a pressure pot is seriously needed when messing with resin!
That’s a lot better than my first attempt:
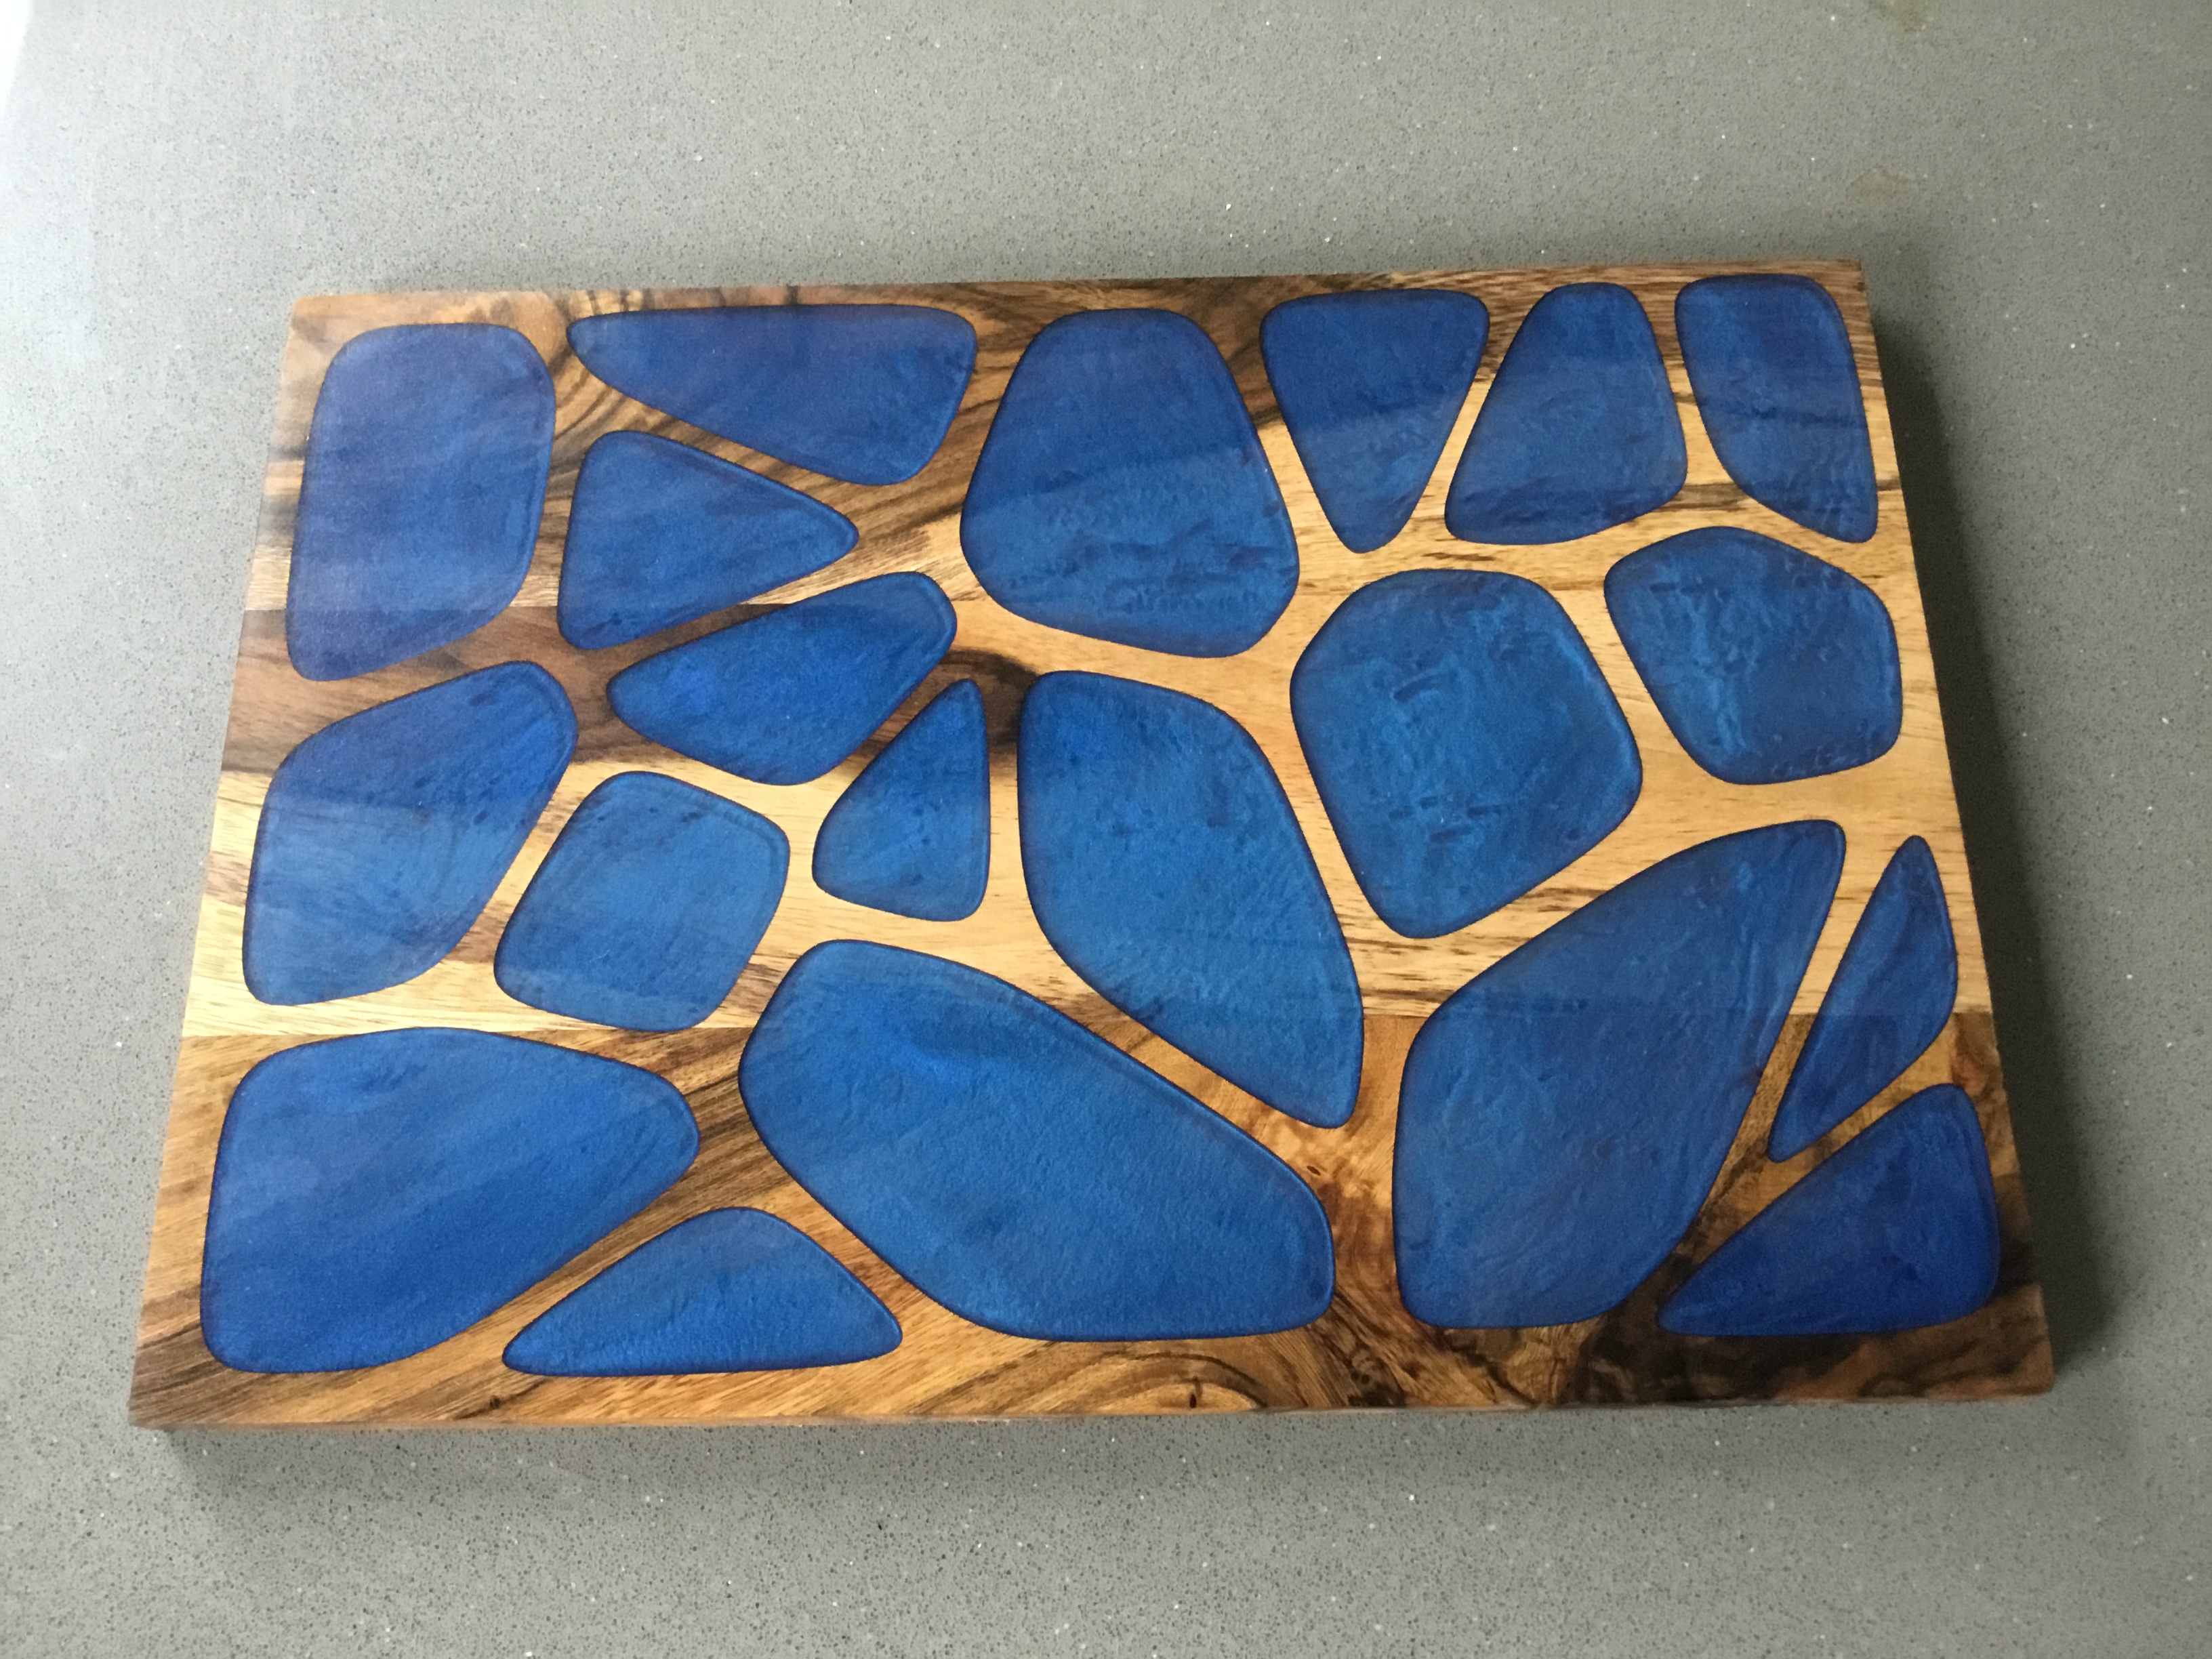
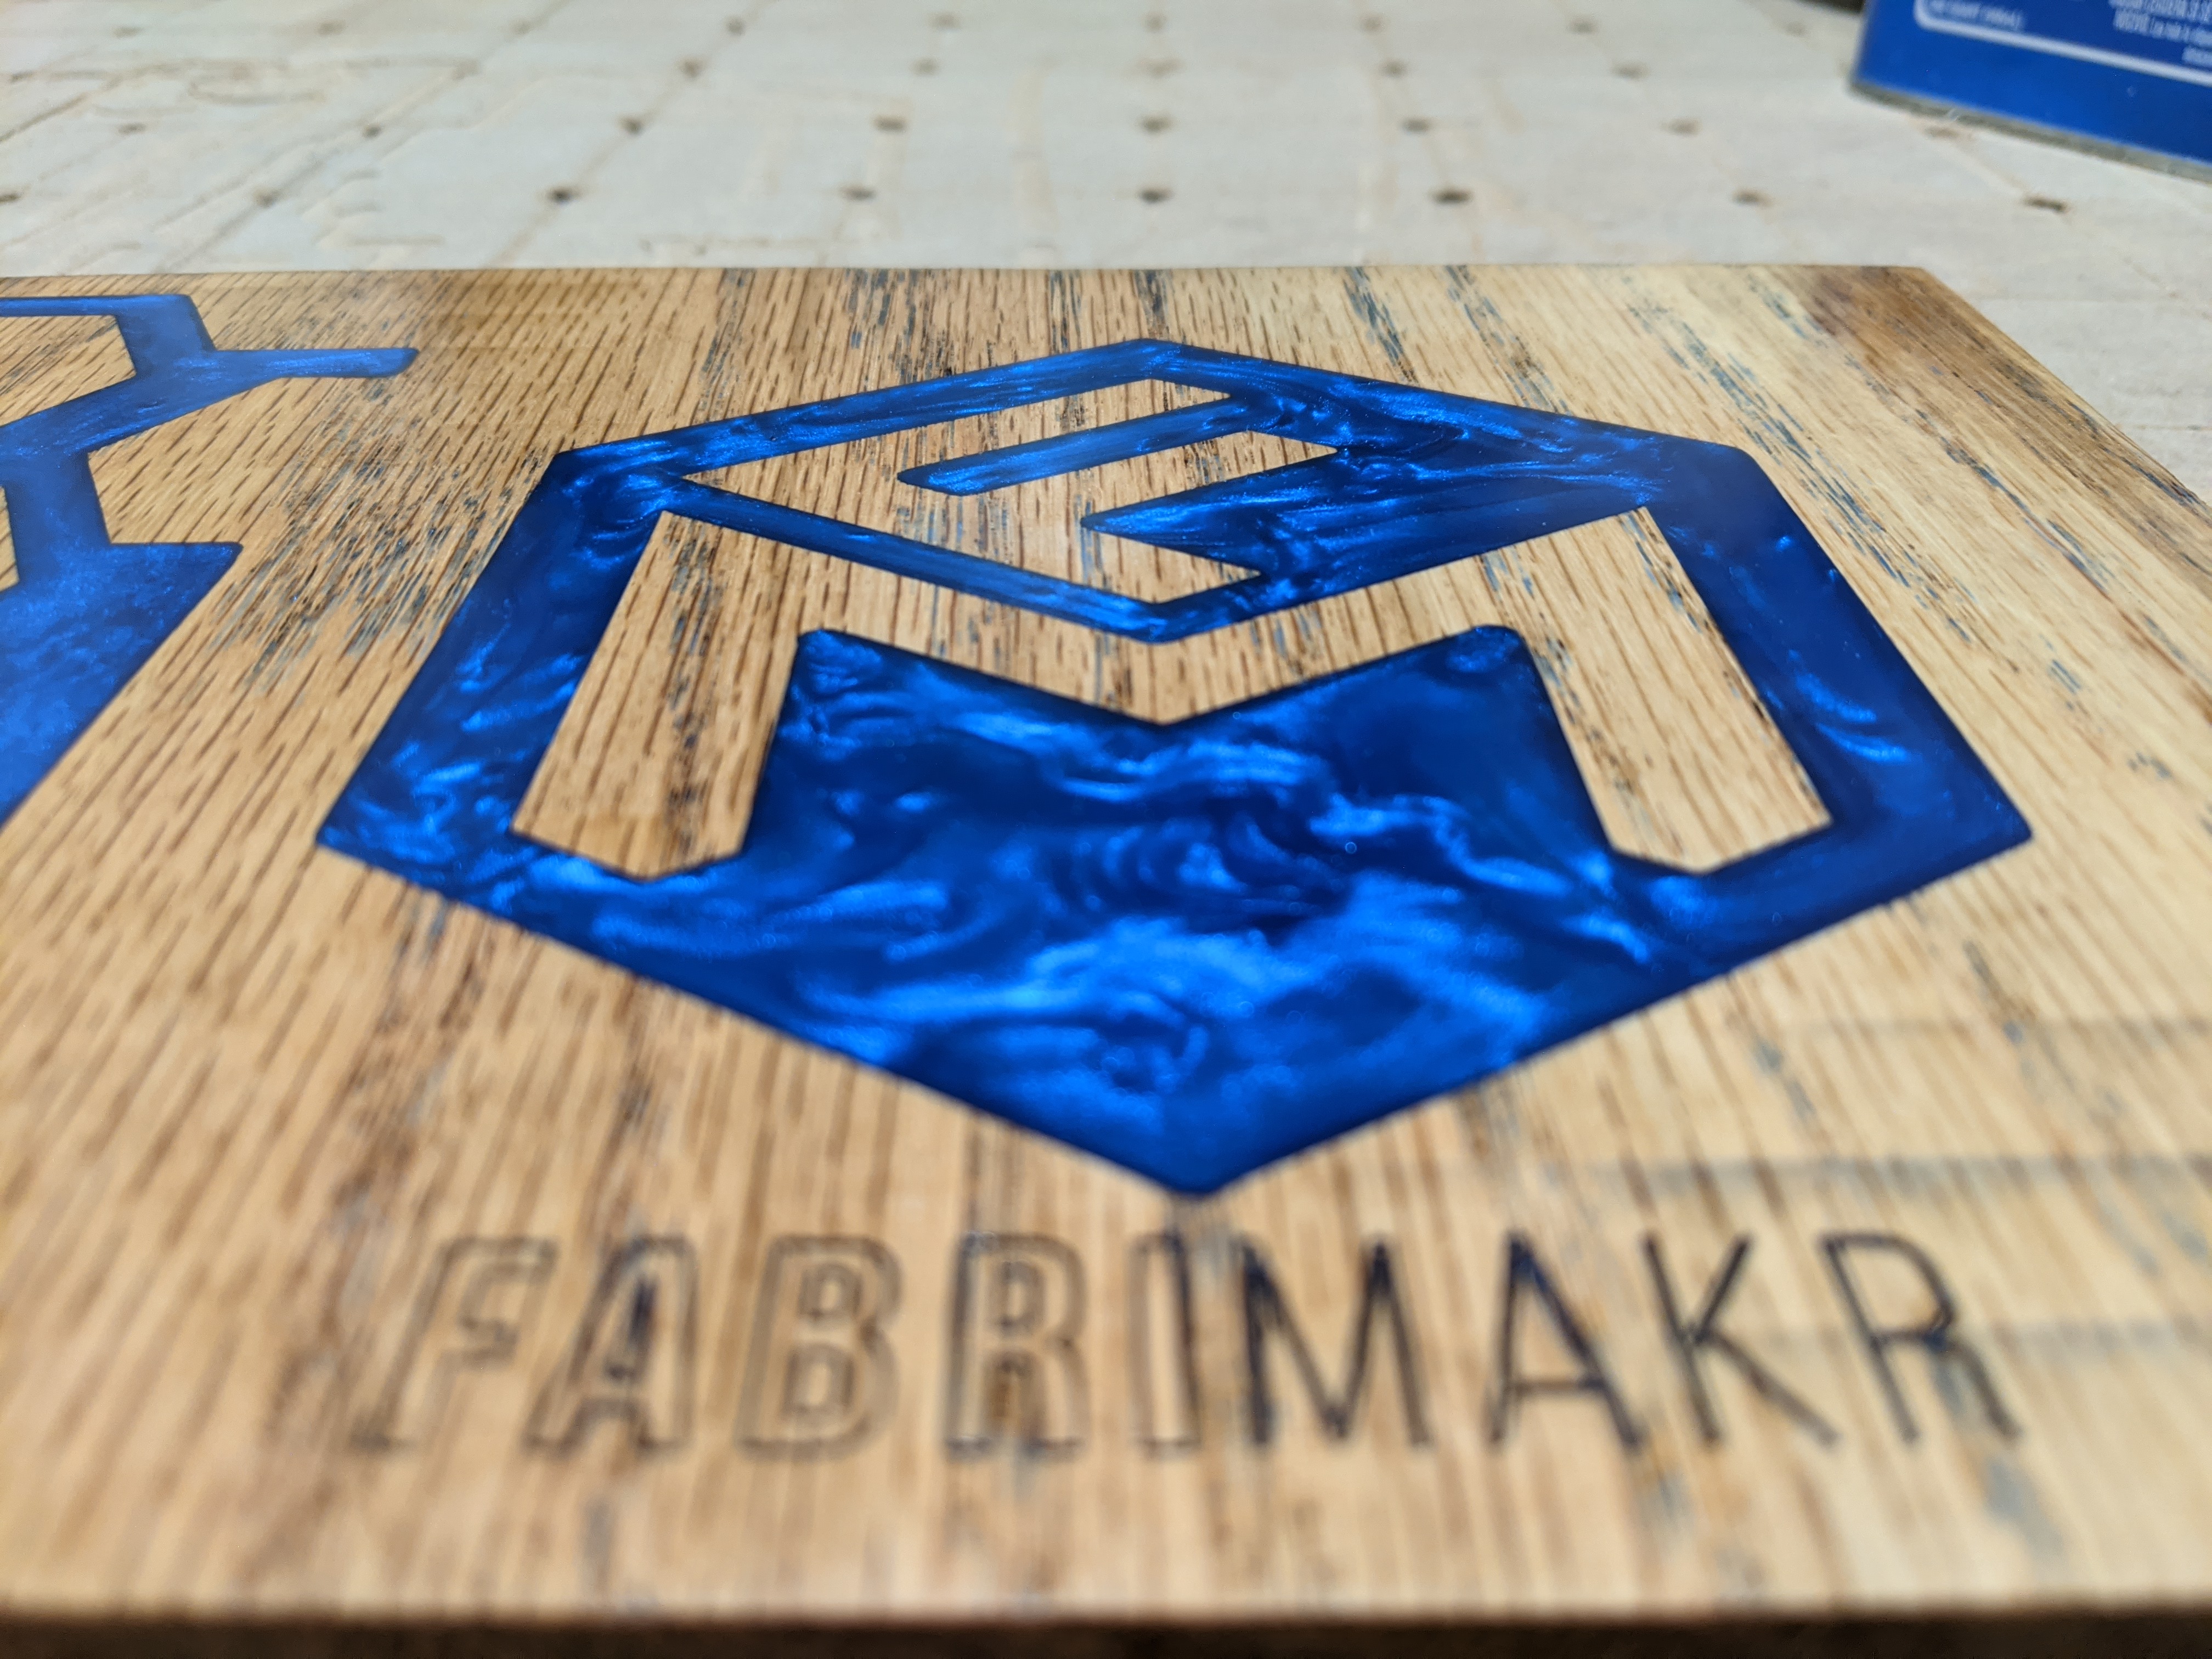
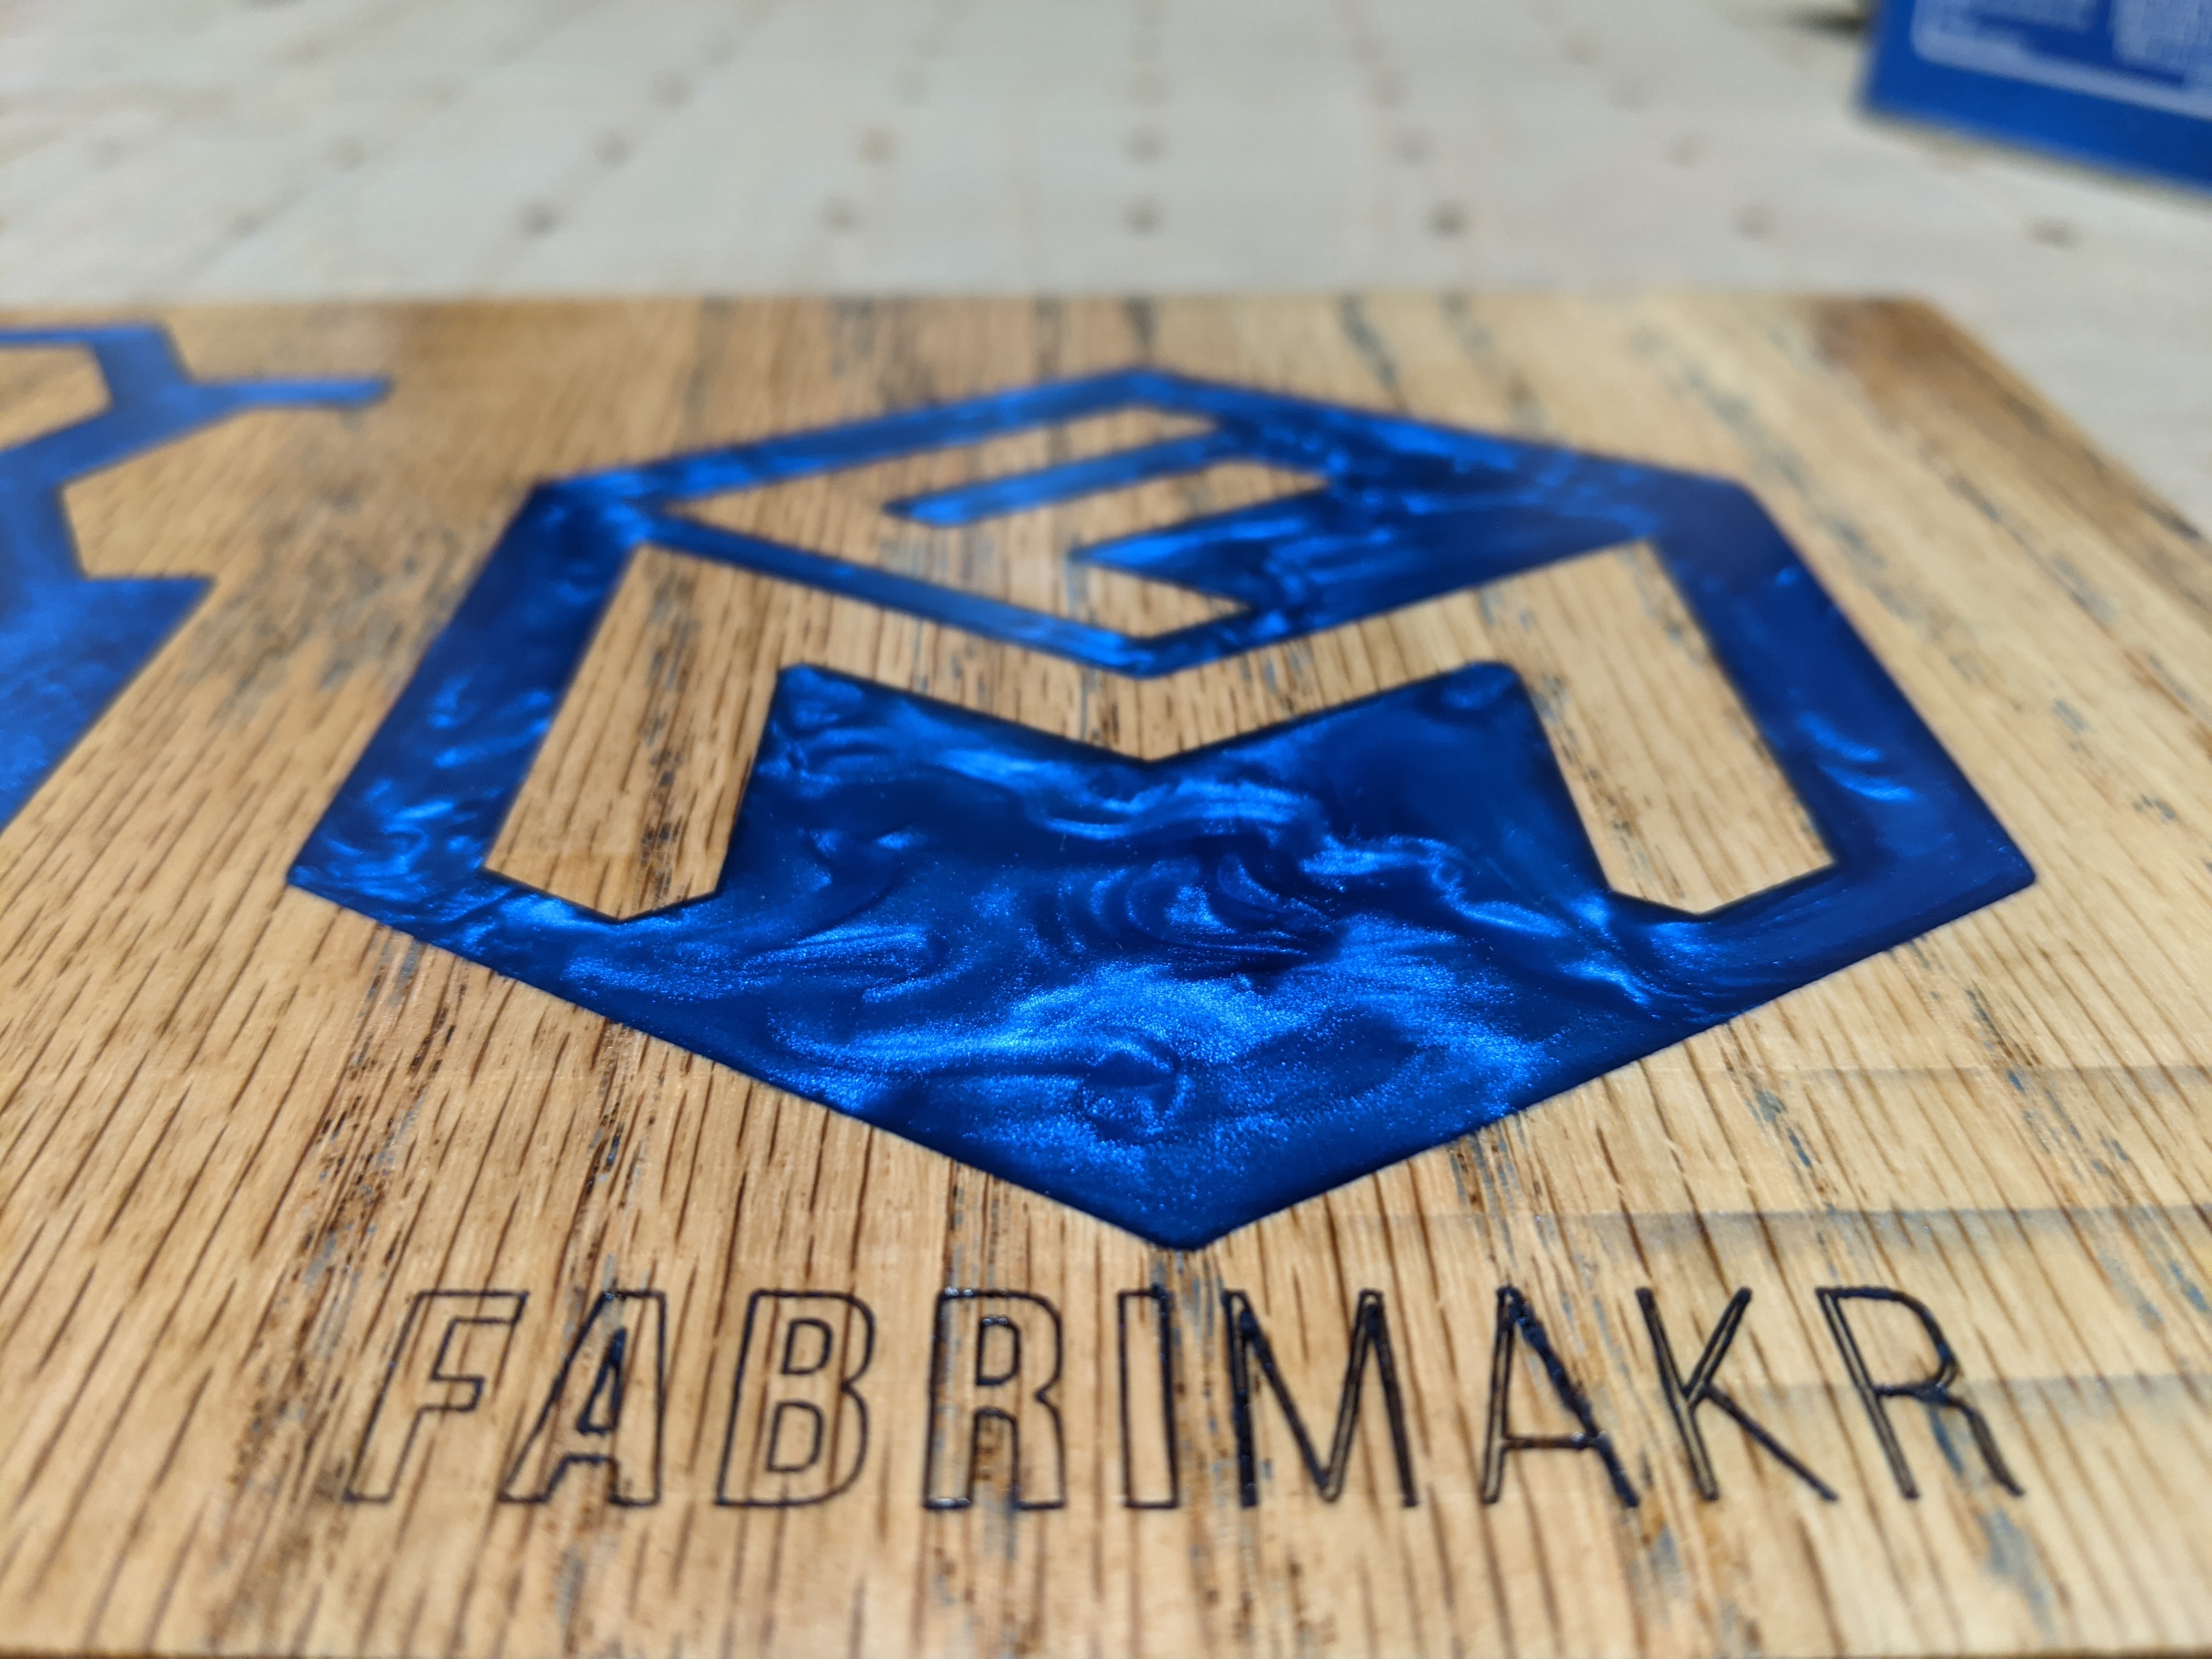
This is a 100mm coaster, using acrylic paint in old boat-repair West epoxy (that had gone rather brown after 5 years in the garage).
There’s quite a lot of bleeding along the grain of the wood (it’s soft construction grade wood). There are bubbles in the epoxy, and some of the thin lines got lost. Some of these are due to inexperience, others to my ‘expense is not an option’ approach when trying new things 
What sort of dye do you use to get the lovely translucent effect?
Do you do anything special to get the dark edges and swirl effects?
Do you sand the epoxy at all, or is it just really carefully poured?
How do you fix the bubbles?
Has anyone written a guide for this yet?
Thanks!
so to answer your questions:
What sort of dye do you use to get the lovely translucent effect?
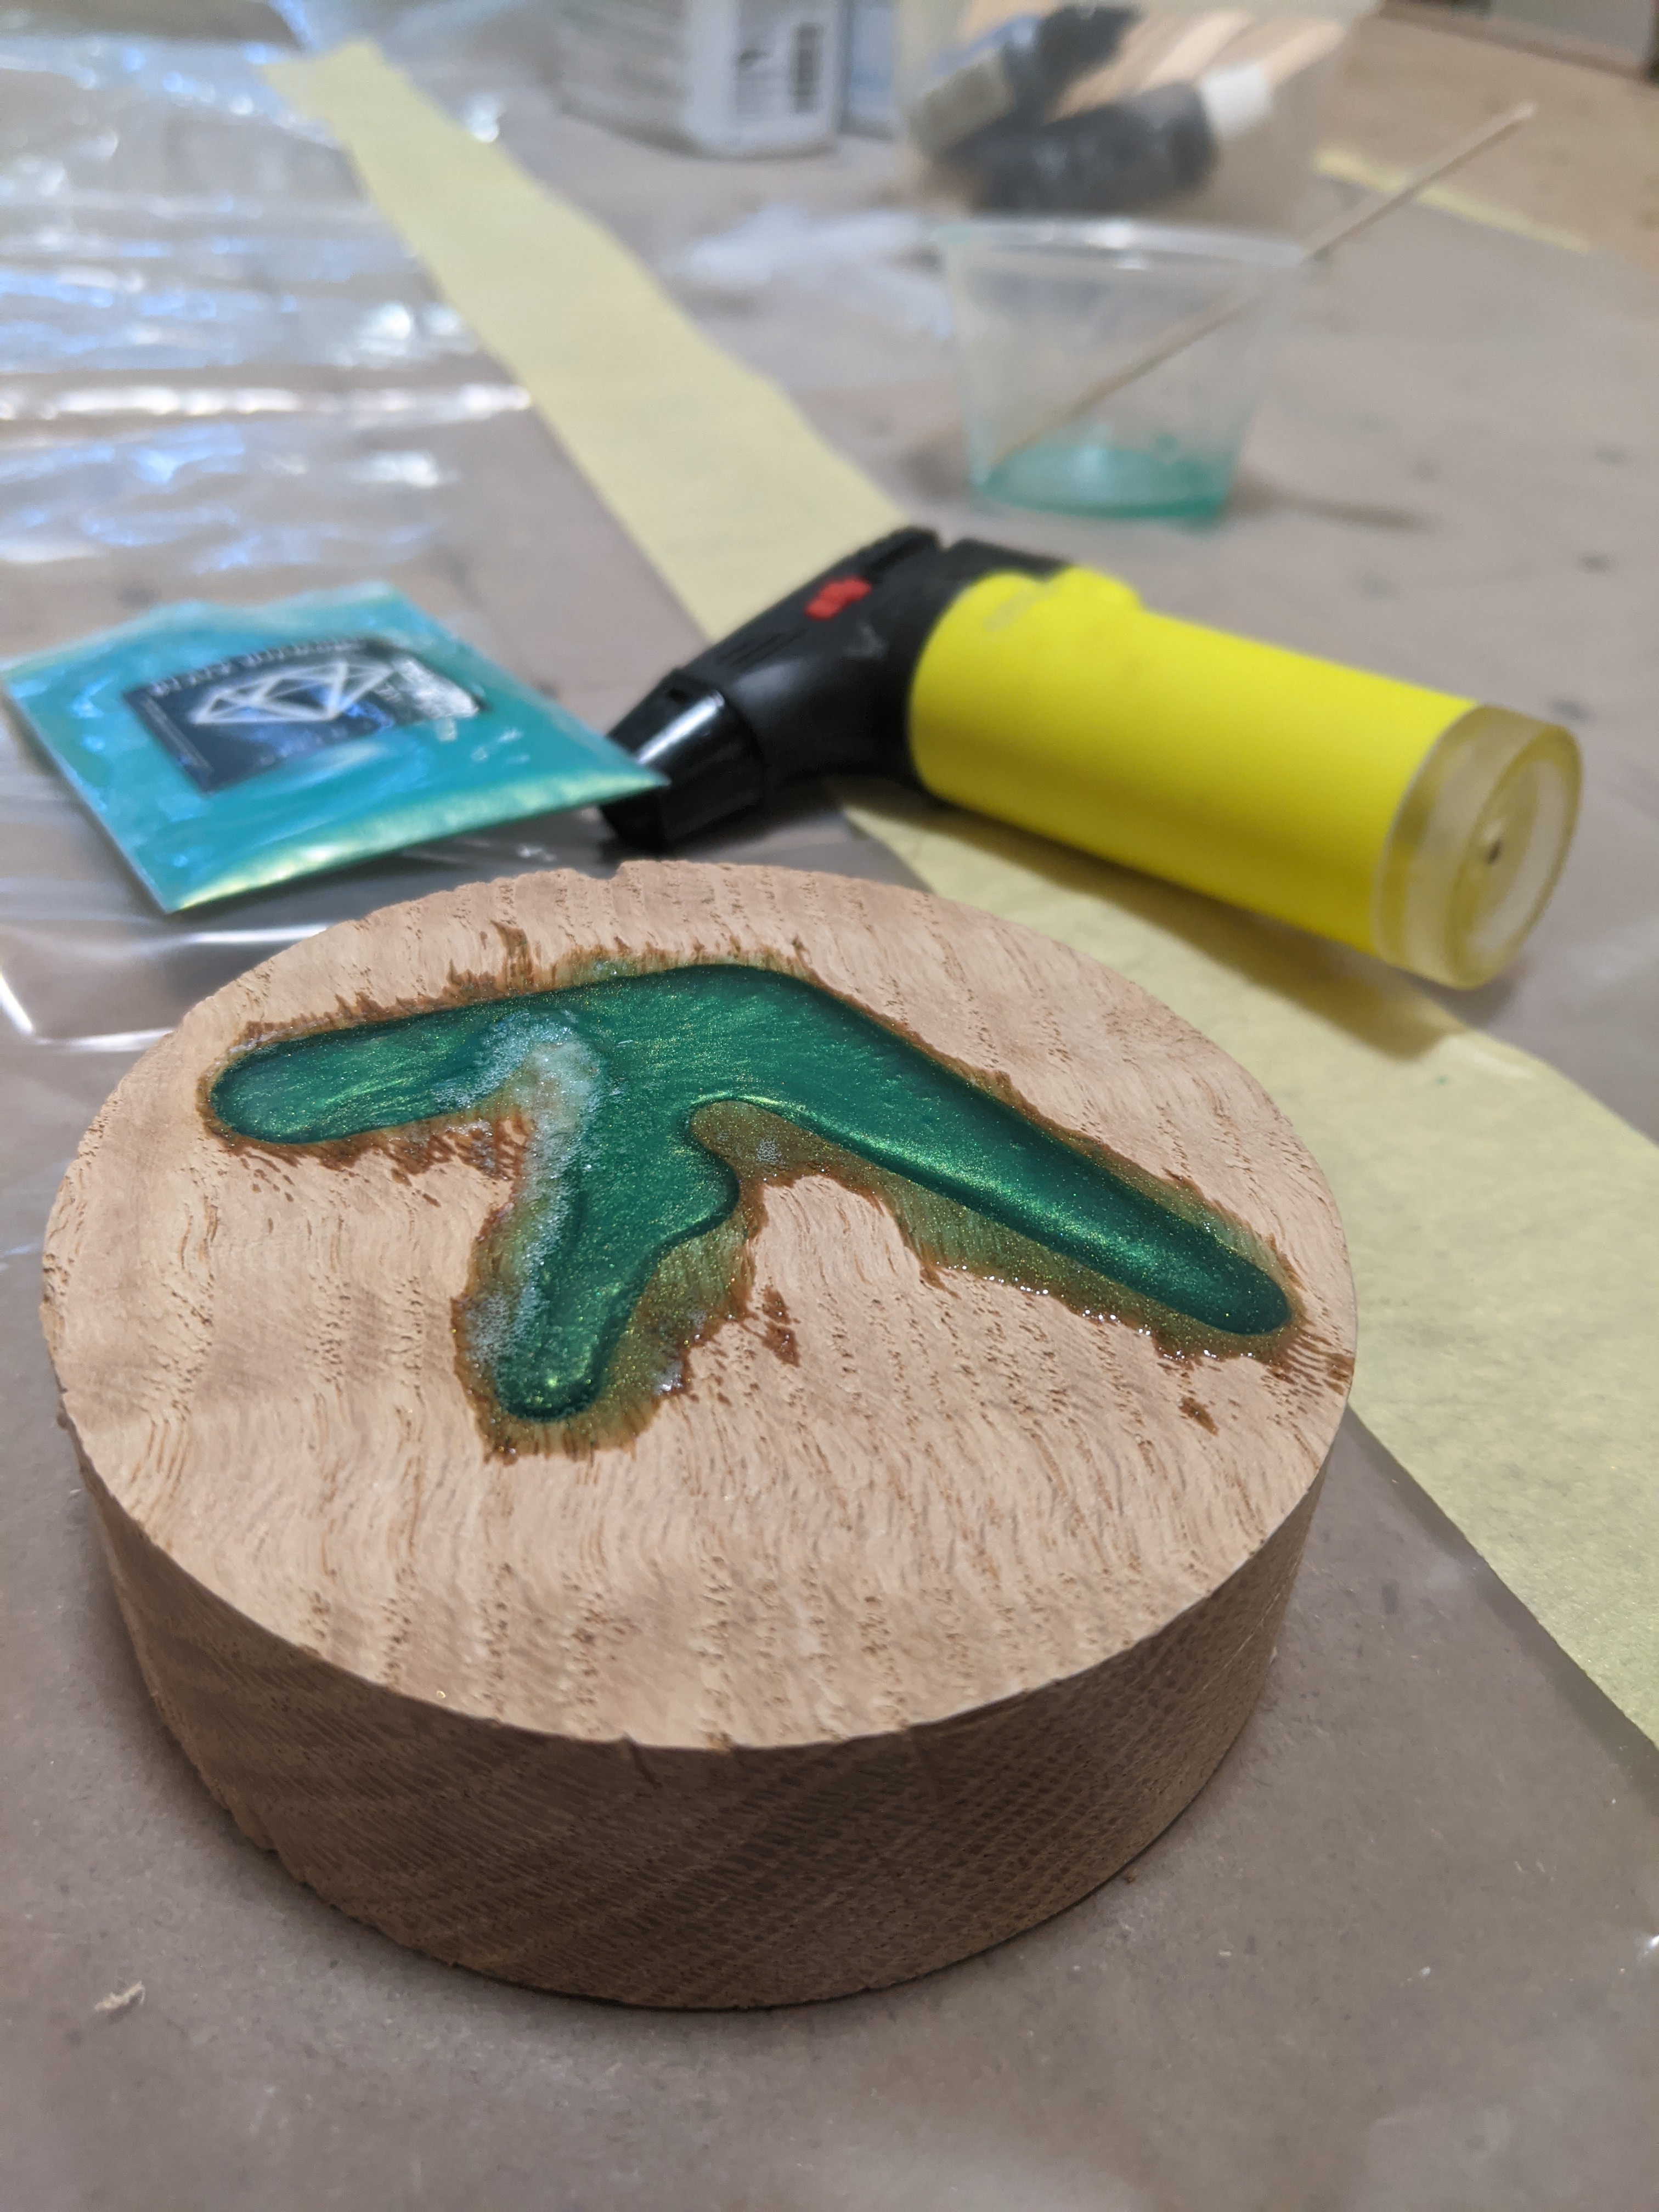
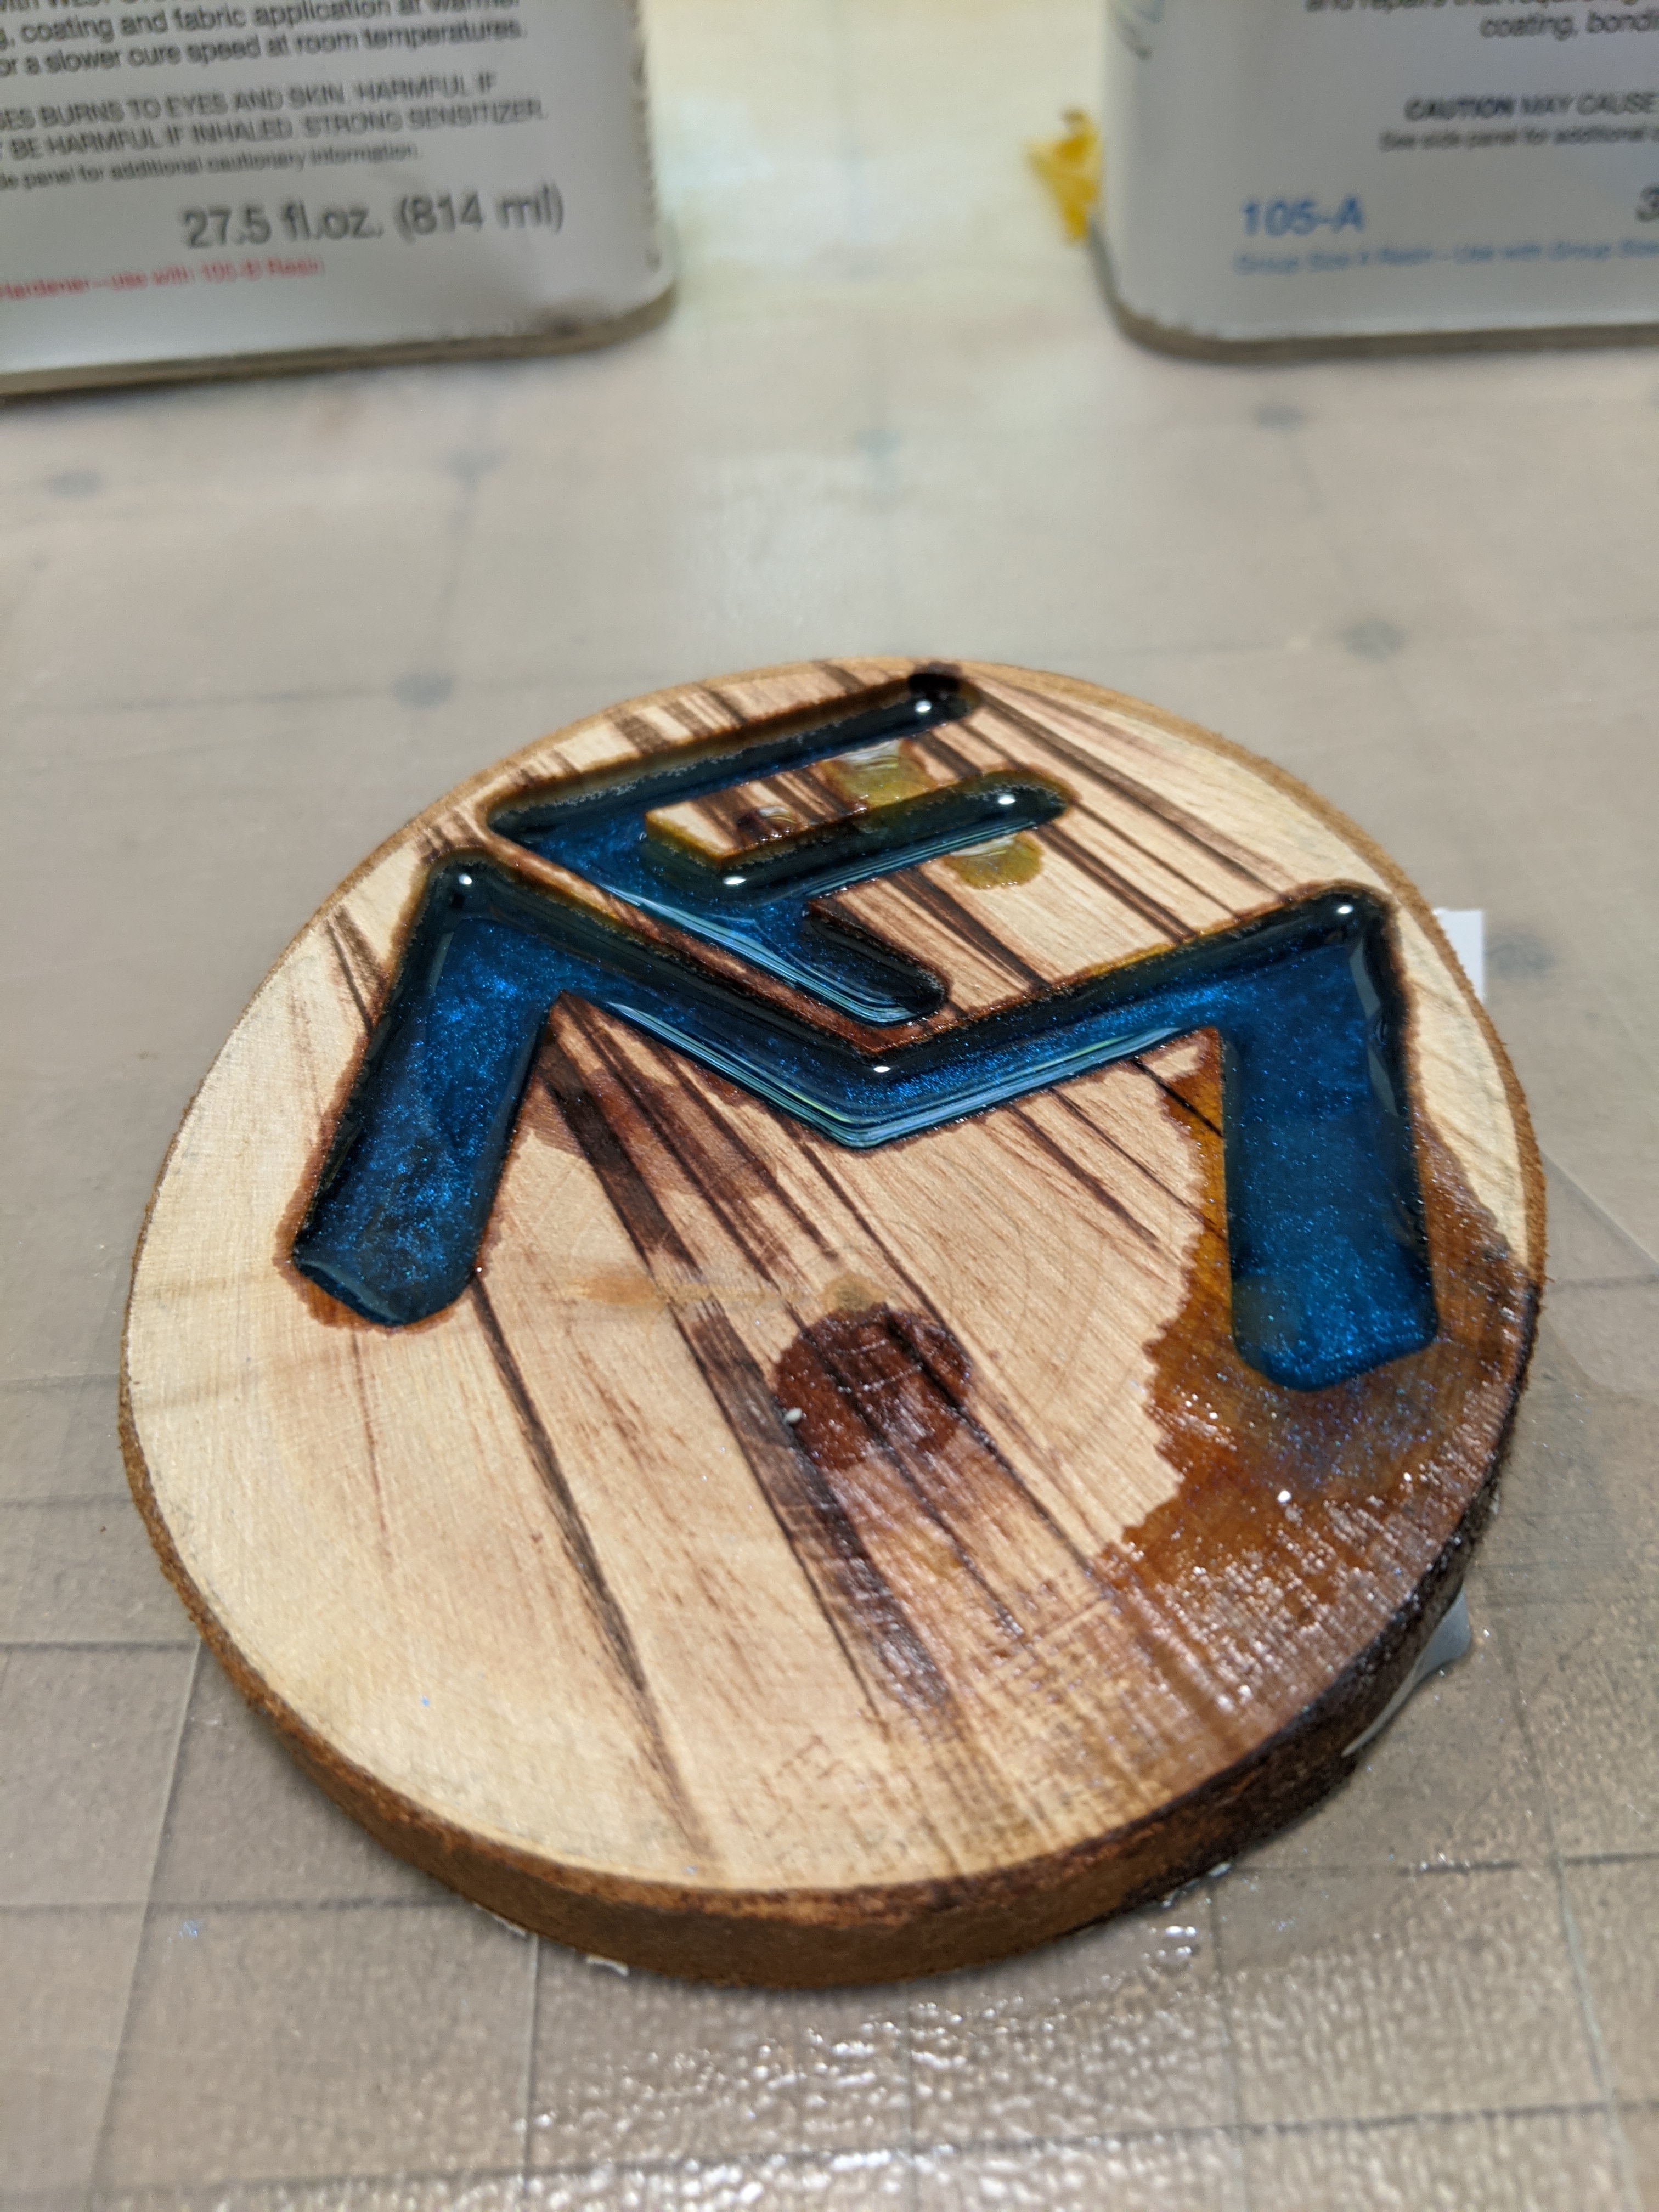
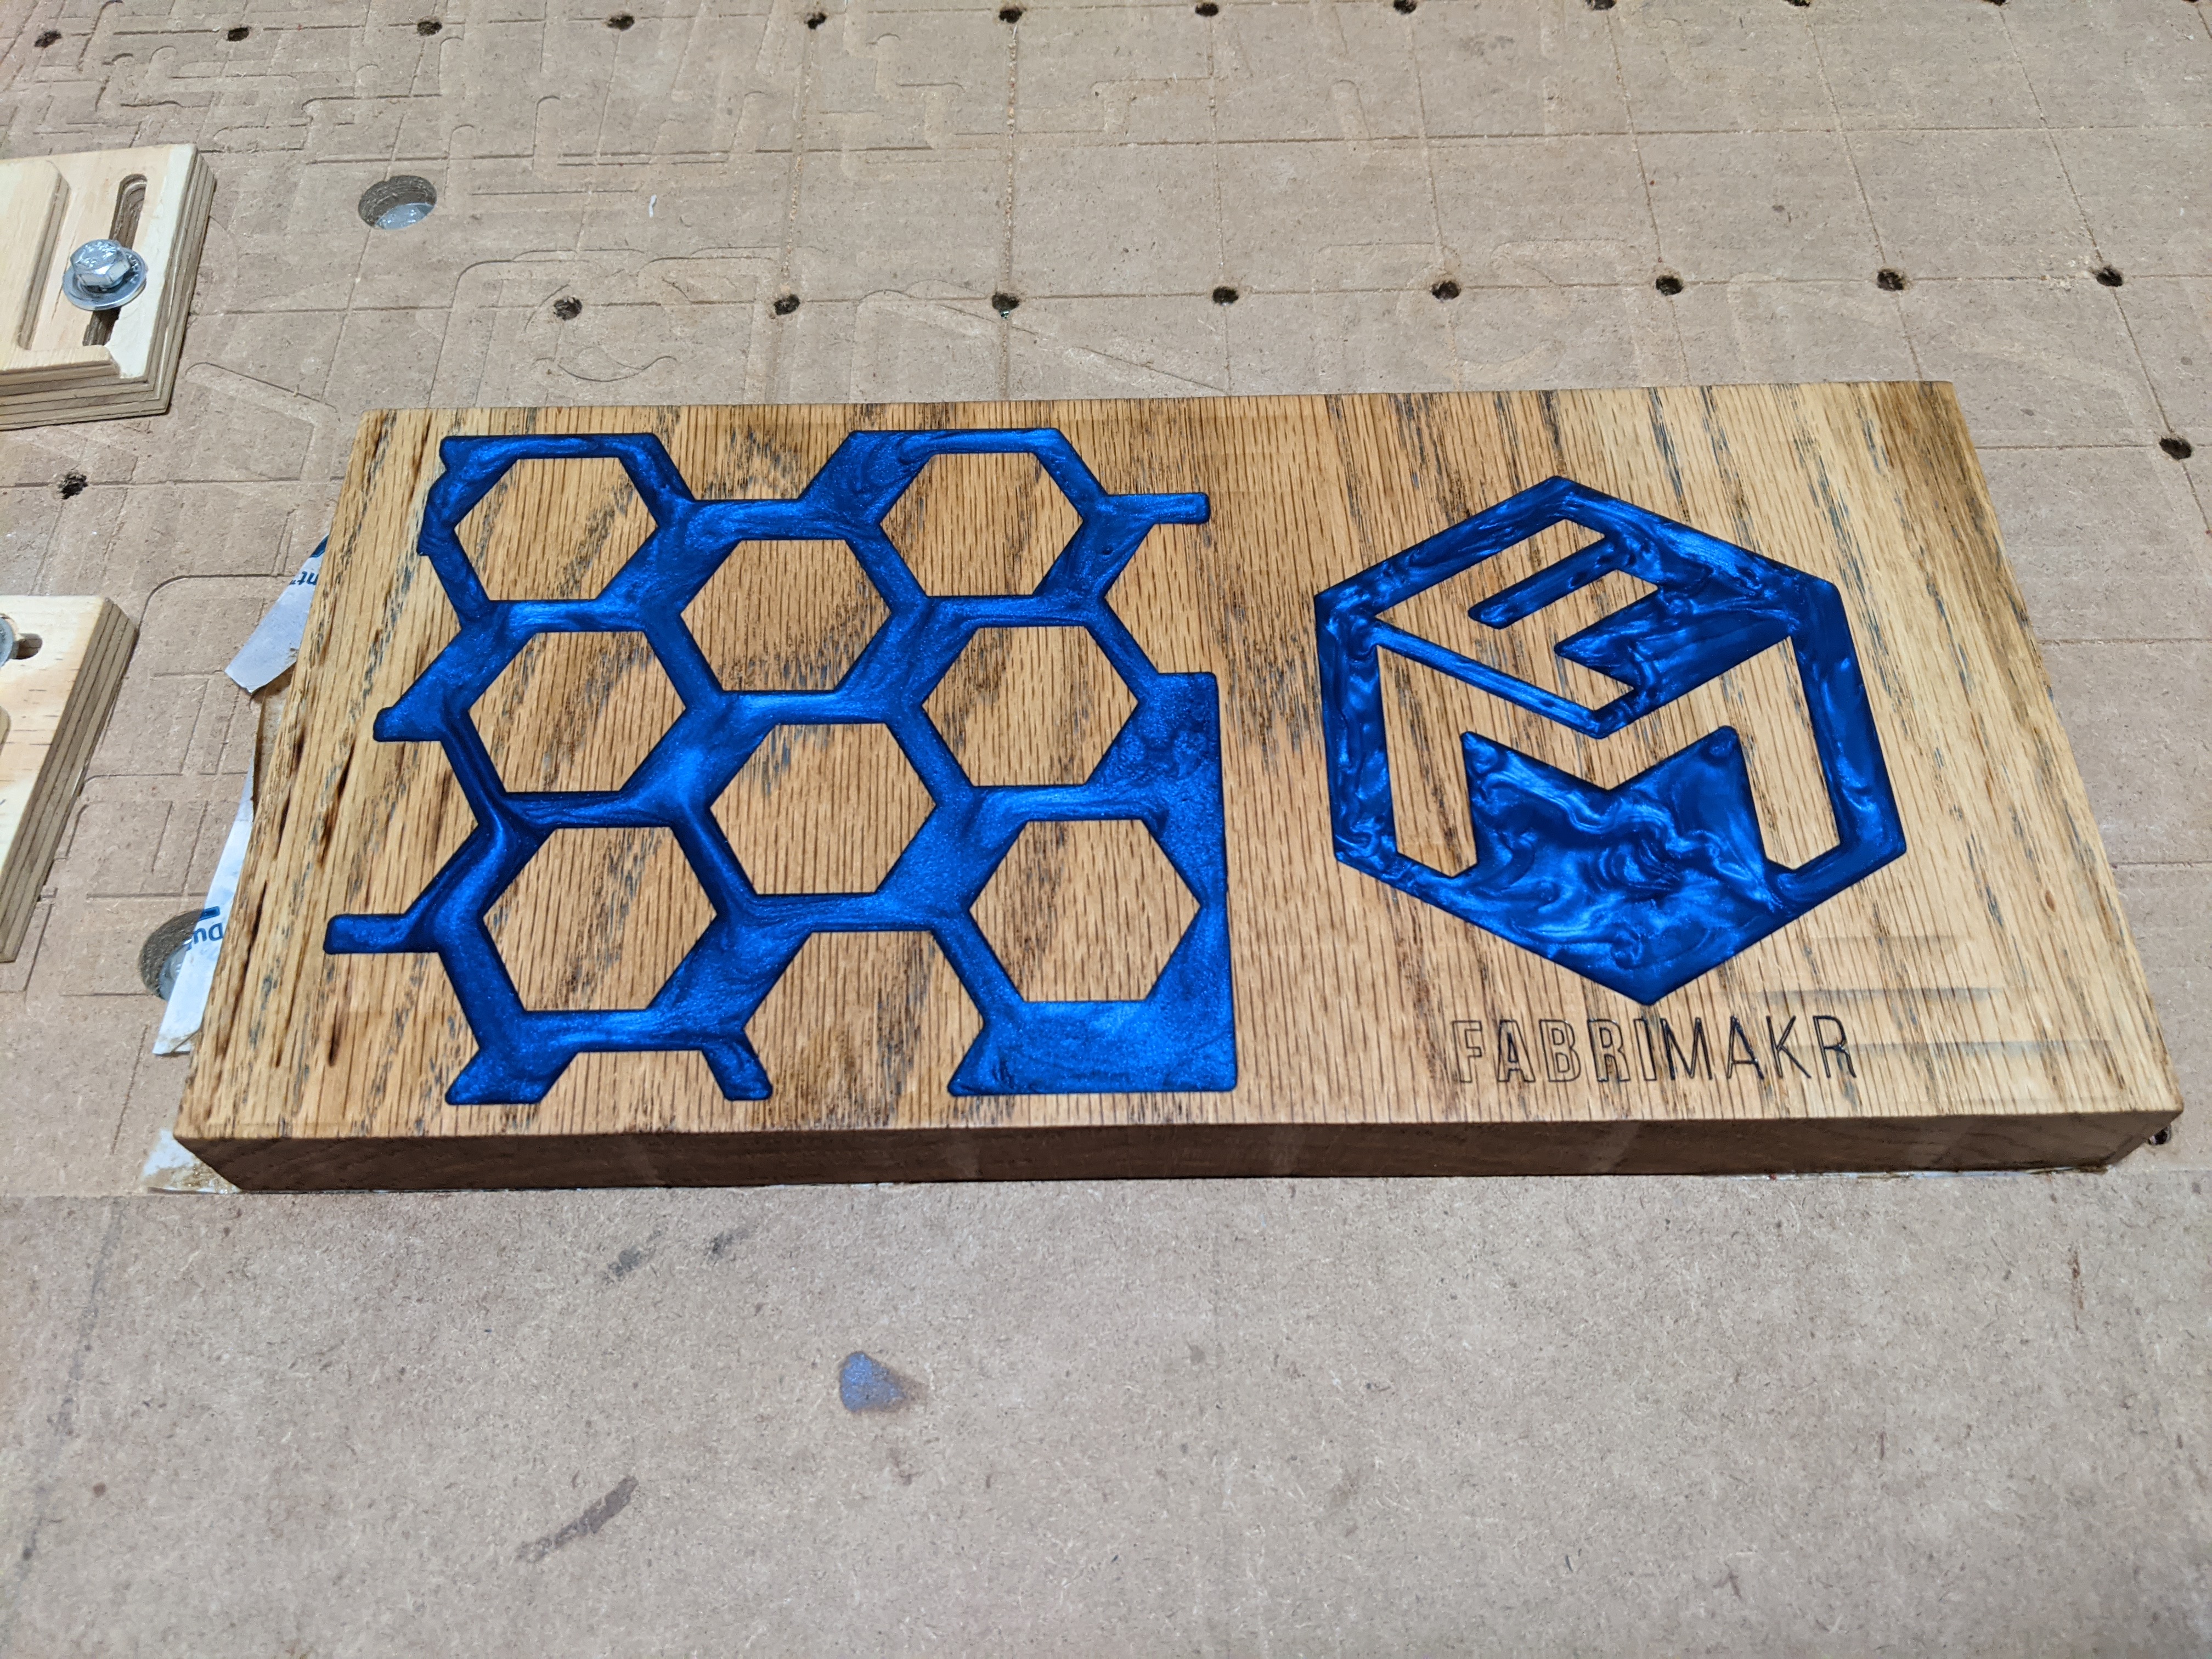
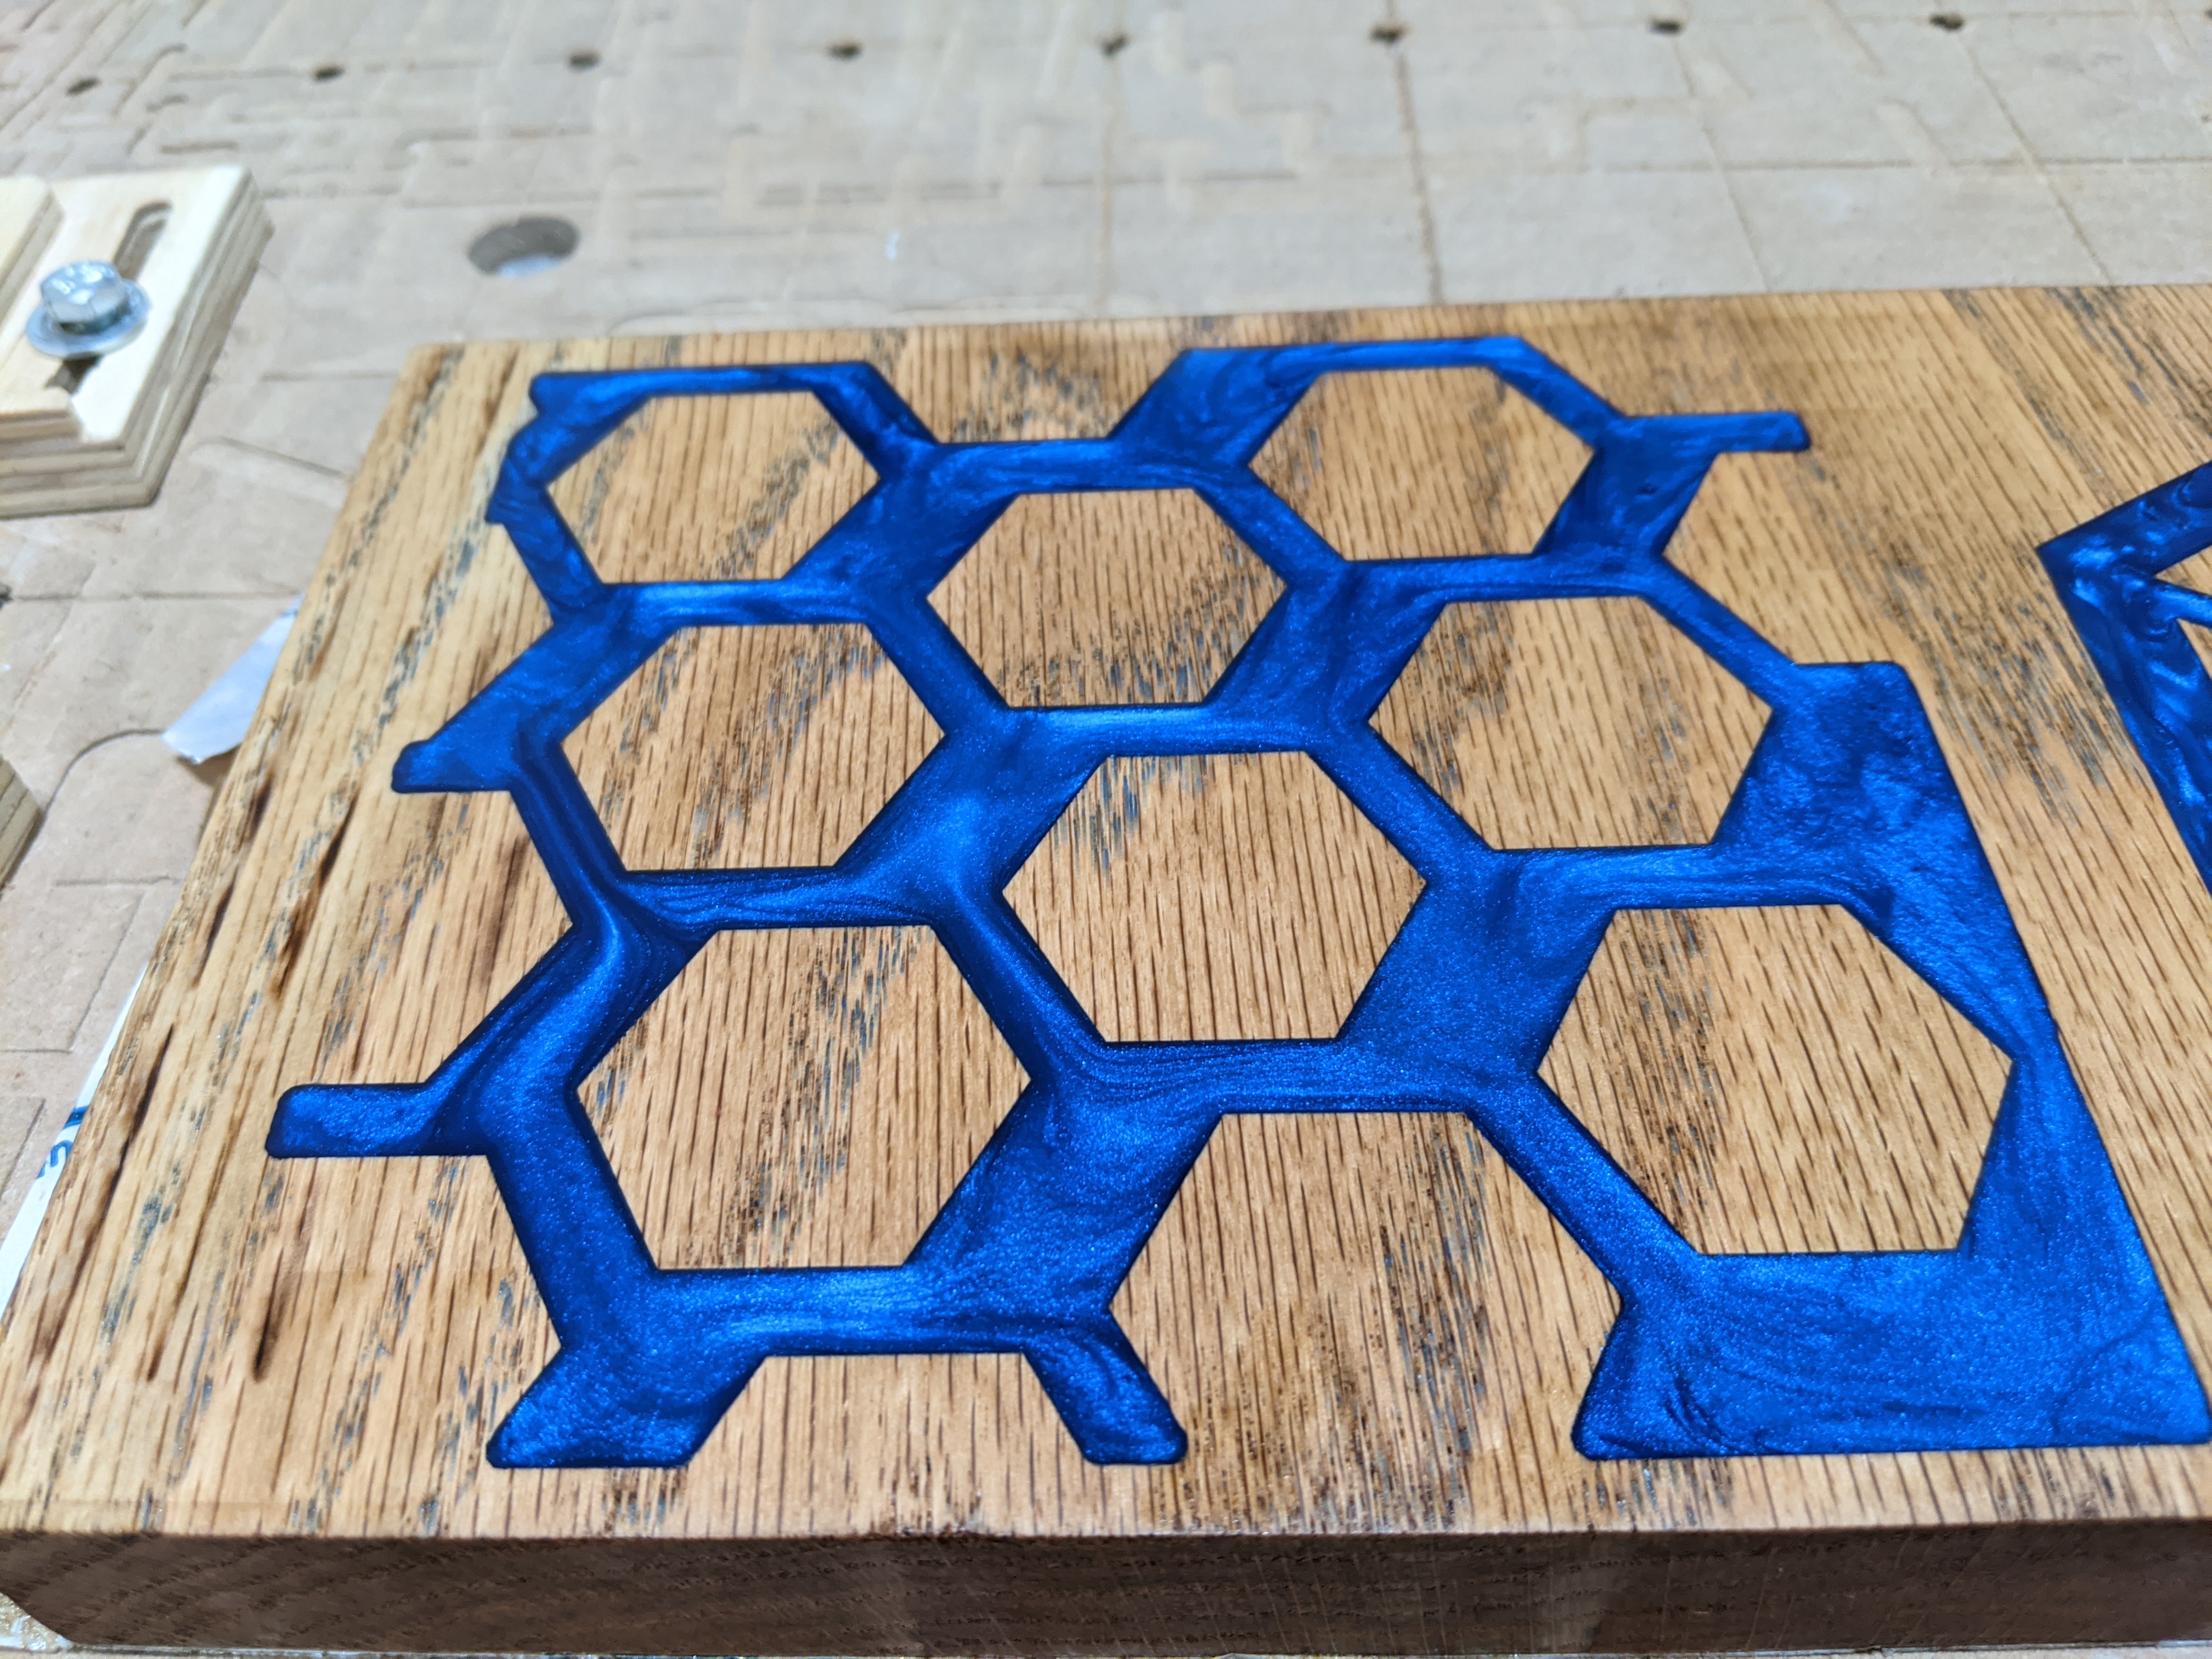
Im actually using a mix of Ice Resin Tint (Alcohol based Dye) and Black Diamond Mica Powder Pigment
Do you do anything special to get the dark edges and swirl effects?
The Mica Powder is what is giving it the swirls, super obvious when mixing
Do you sand the epoxy at all, or is it just really carefully poured?
You can def sand the epoxy thats how you will ge the super clear polished resin look however the last 2 photos I posted we just after resurfacing on the CNC after drying with a flycutter bit. This saves a ton of time prior to the sanding process. However they were also carefully poured haha
How do you fix the bubbles?
Prior to pouring I degass the resin but putting the resin in the mixing cup into the pressure pot for about 20min. I then Remove the resin and pour. Within the first 20min or so im hitting any bubbles that form with a blow torch quickly. I then let dry for about 3 to 4 hours before surfacing. If after the surfacing I find more bubbles I mix up another batch of resin and just fill the bubbles. no need to go over the whole piece. Sanding might fill your bubbles with dust, which you def need to remove before filling. That I could not remove with any kid of air or alcohol so I had to use a dremel once to make the bubbles bigger for filling.
Has anyone written a guide for this yet?
Not that I know of, All the info im giving you is based on trial and error, suggestions from friends and YT university, my Alma Mater. But its funny you ask, Im actually working on writing up a workshop for my MakerSpace so maybe when its done I can post here
I no pro by any means just happen to be working at it on a regular basis so progress comes quick. Hopefully this helps
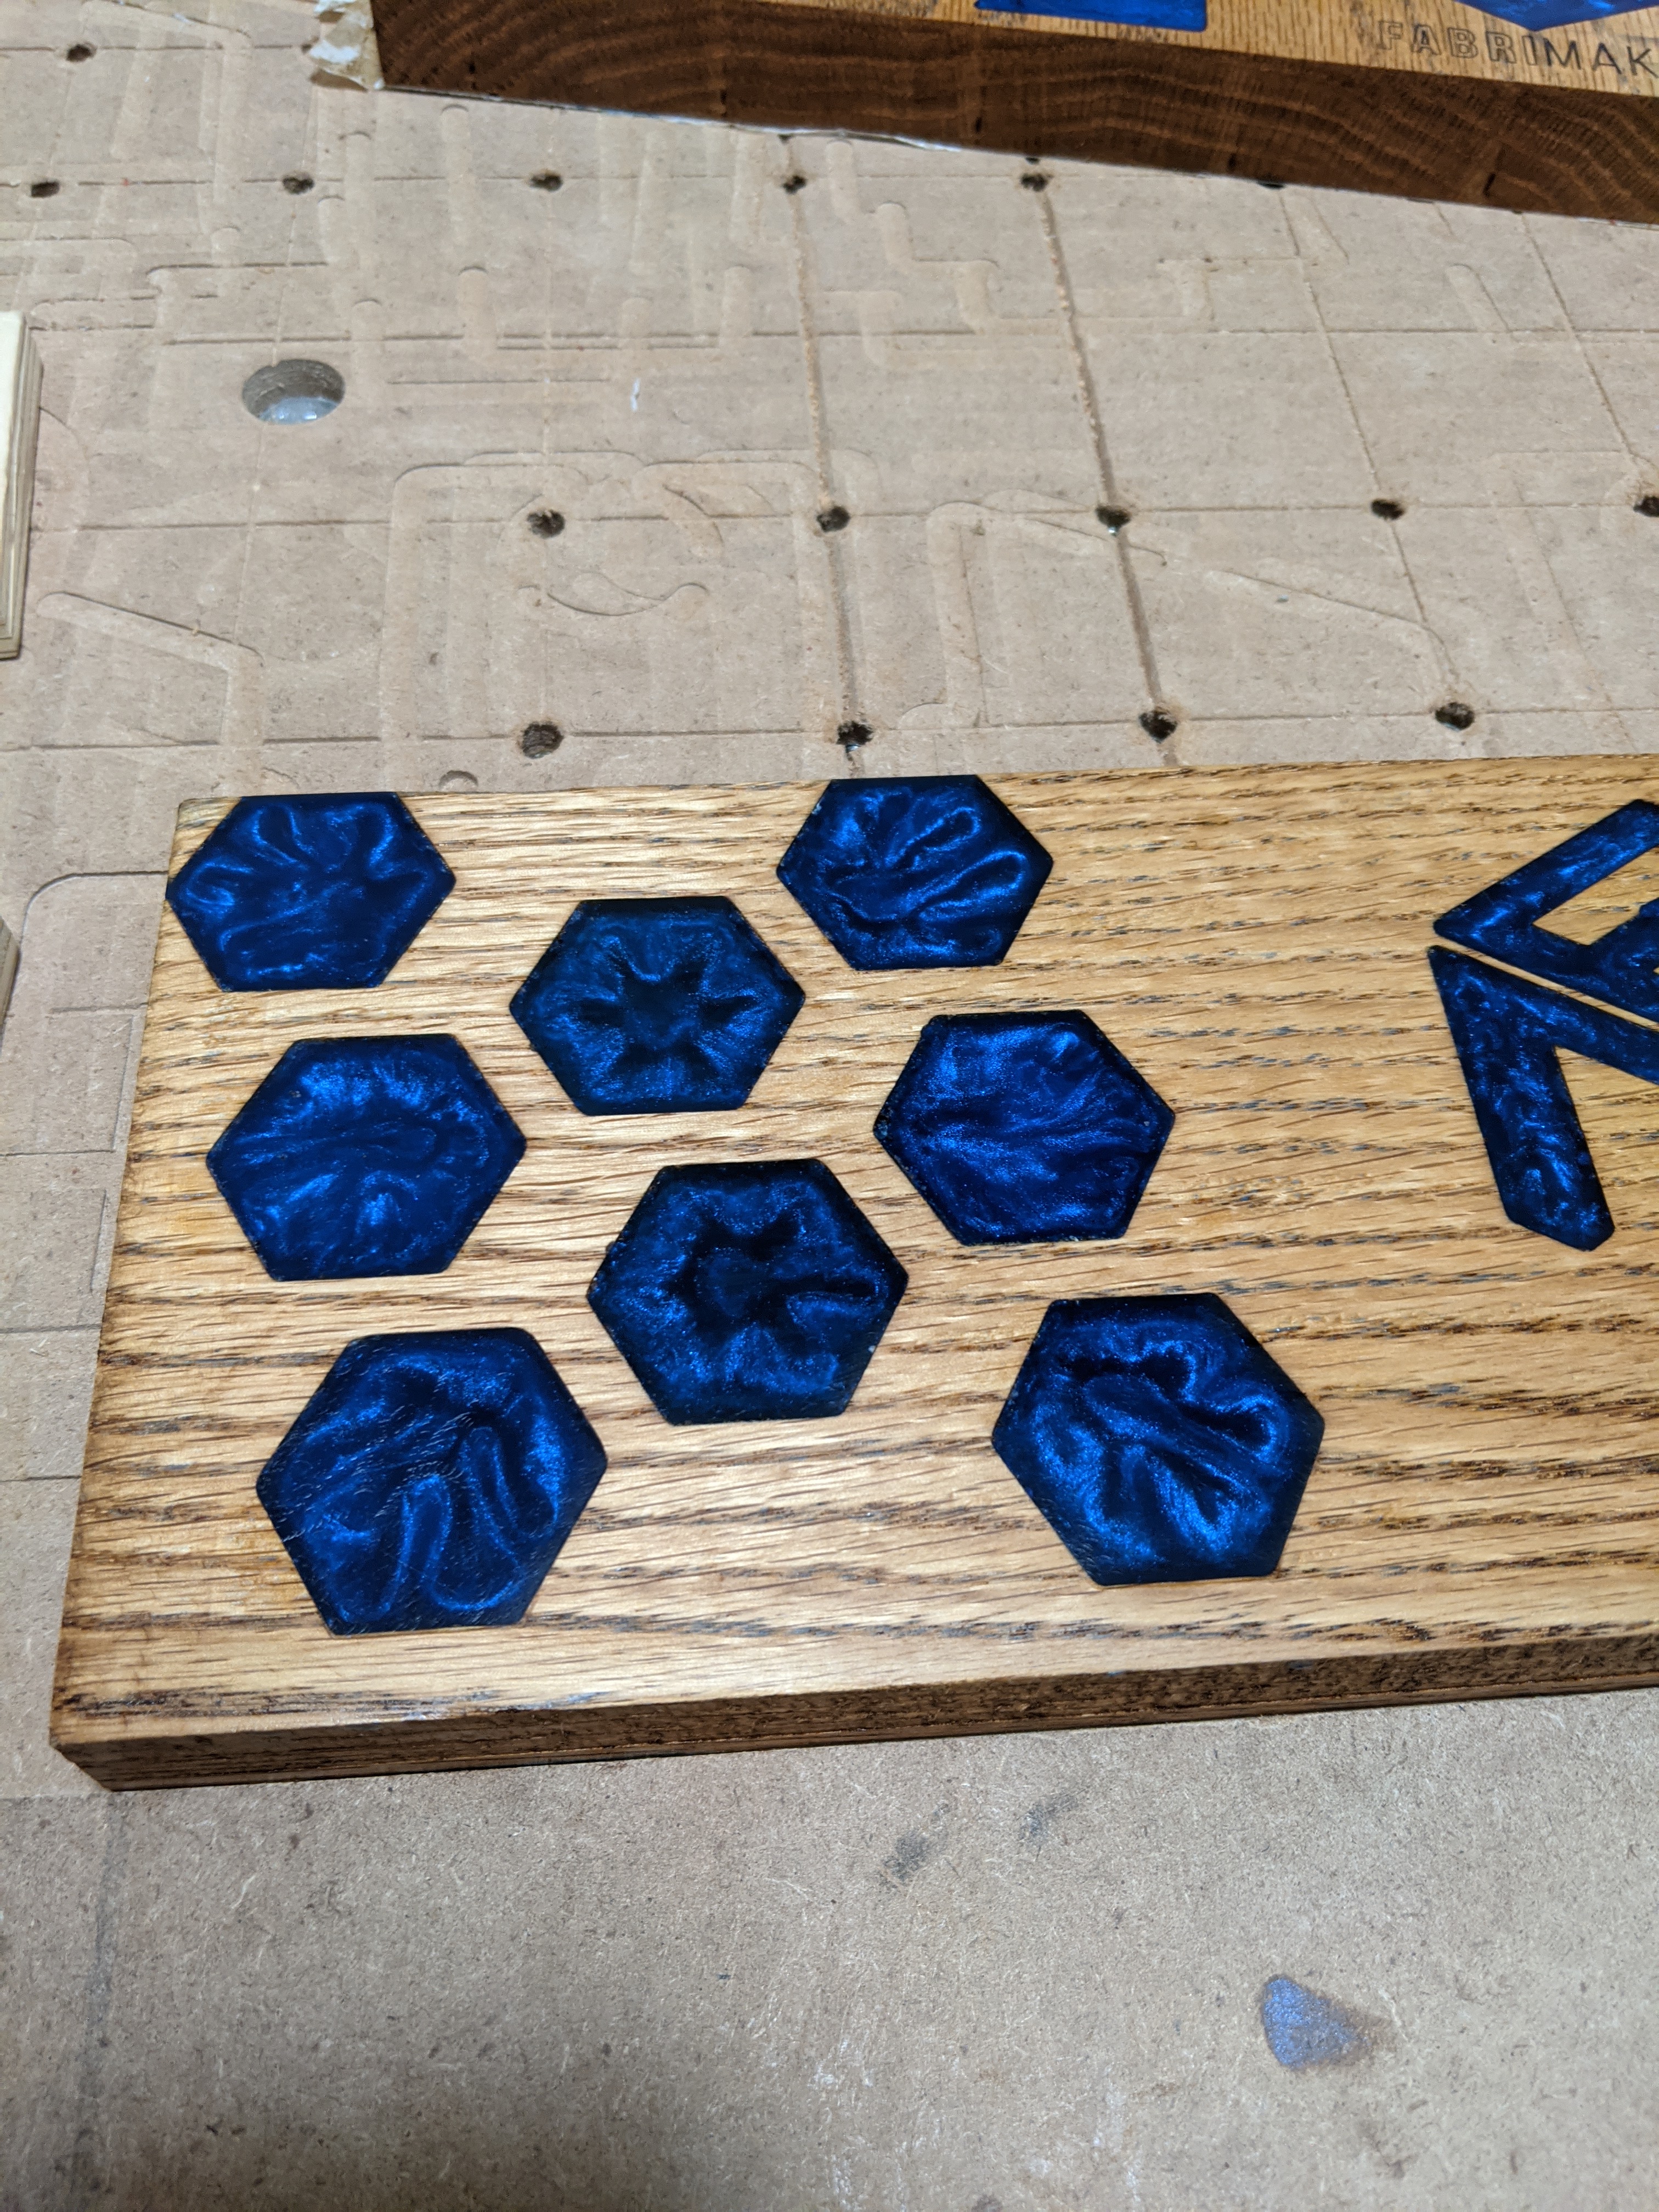
@grinchdubs looks great! How deep did you make the pockets? Did you play with different depths to find a sweet spot between routing time and resin thickness?