I’m a little over two weeks in on my 36x19 inch build. Build size predicated on the 30x60 piece of salvaged solid core door I had on hand to use as a table. Going with a RAMPS 1.4 controller as I already had a Mega laying around. Have a Craftsman rotary tool I will be using, at least to start with. Many thanks to @Bacchus258 for posting the mount he crafted. (And of course to @Ryan!) My Tevo Tornado was running pretty much non-stop for two weeks printing parts. Only printing issue was a slicing problem (operator error) with the Core trying to adjust the infill. Failed on the upper transition, after about 26 hours print time 
Eventually I’ll get some pics taken and posted. But so far I’ve been able to find answers to all of my questions either in the great build docs or here in the forums. Thanks! Looking forward to seeing it come alive soon!
Welcome to the crew and good skills on your build!
Progress made. Today I had it ‘drawing’ the crown in mid-air (“It’s Alive!”). My Z-stepper is running a bit hot. 1.5A motors, Vref set at .7, 8825’s jumpered for 32 steps. Think I need to knock vfref down to .6.
Also had an issue with the gcode generated by ESTLCAM when following the ‘basic instructions’. When pulled into Repetier it had a bunch of large circles. Used the sample gcode zip from the instruction page for now and will walk through the ESTLCAM steps again later.
Still need cable management. Printing drag chain parts for Z is first on the list.
V1 firmware with digipots sets motor current to 900mA so 0.45V Vref. I run my motors at 1100mA ehich would be 0.55V i bumped mine up because I run fast rapids with high accel. Letti g the motors get too hot is bad for printed parts.
That’s a display bug in repetier. IIRC, you can use an old version (2.2.2?) and it won’t be like that. You can check your gcode in ncviewer.com to see that the arcs are drawing the wrong way.
I think there must be a difference in RMS to peak between the TMC numbers and the Vref numbers, because we used to run them at 0.7V all the time.
The key is that the motors need to stay below 50C, as a rule of thumb. That will keep the plastic rigid.
per @SupraGuy suggestion I took my vrefs down to .45. Steppers barely warm now.
per @jeffeb3 I looked at my gcode in ncviewer and it was fine. Pretty sure it had to do with the ‘use arc commands’ selection.
This was a few days ago. Since then added drag chains (I bailed on printing them and bought some off amazon.) Adjusted my endstops by drawing 250x400mm rectangles and checking the diagonals.
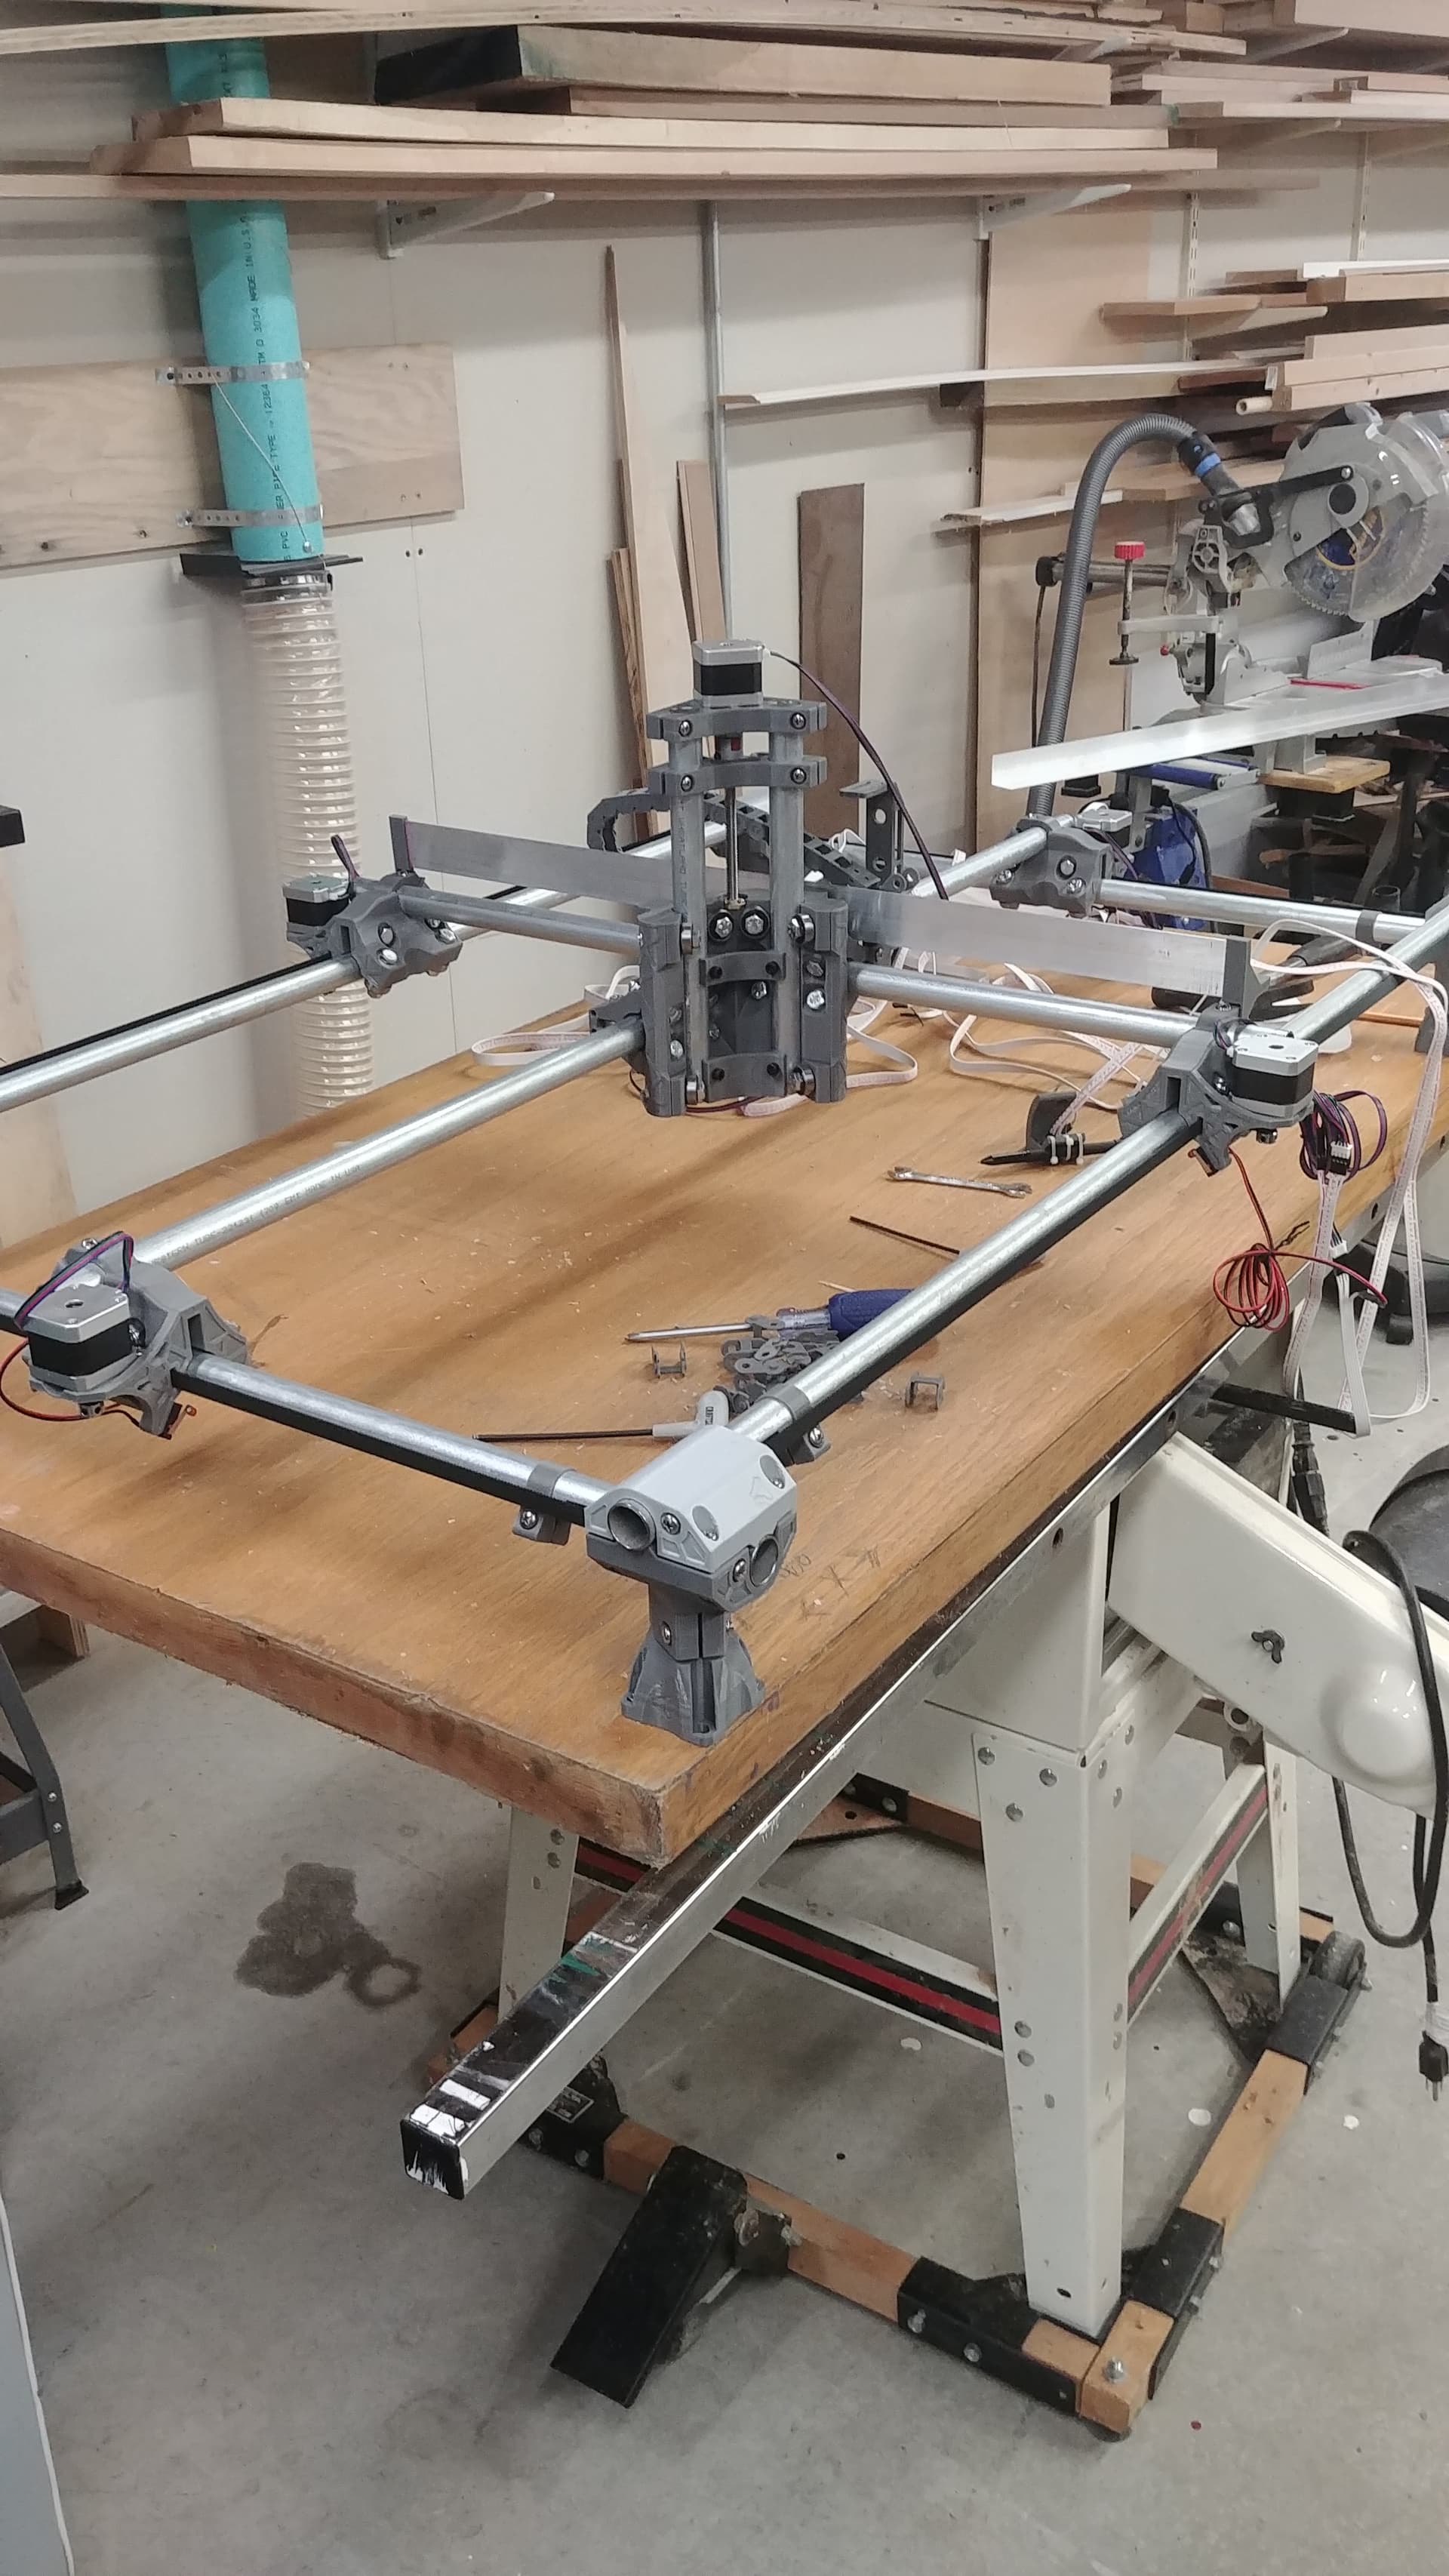
Hindsight: I didn’t leave room for the X drag chain on the table top. Also should have left room on left of frame rather than right to have room for controller - would be easier to set Z with the controller closest to 0,0 location.
Ready to move to the ‘get dirty’ phase. Need to find a few small/simple things to try and cut…
So I haven’t quite gotten to the ‘get dirty’. Decided I needed to do something for an e-stop before I started spinning a cutter at 20K rpm. Went with a latching stop button on the 12V line going to the controller. Then added a relay off D9 to run the AC power to the router through so that would get cut as well if the board power gets cut. Test run last night ‘routing air’ with the crown pattern to get the start/stop gcode for the relay checked. Need a spoil board so have t-slot bars on the way and need to pick up some 3/4 MDF. Since the spoil board isn’t recessed in the top I found I won’t have enough working height, so tonight is replacing the 2.5" legs with 4.5" legs and adjusting level and square again. Not getting there as fast as I would like, but Spring is here and the yard work won’t do itself…
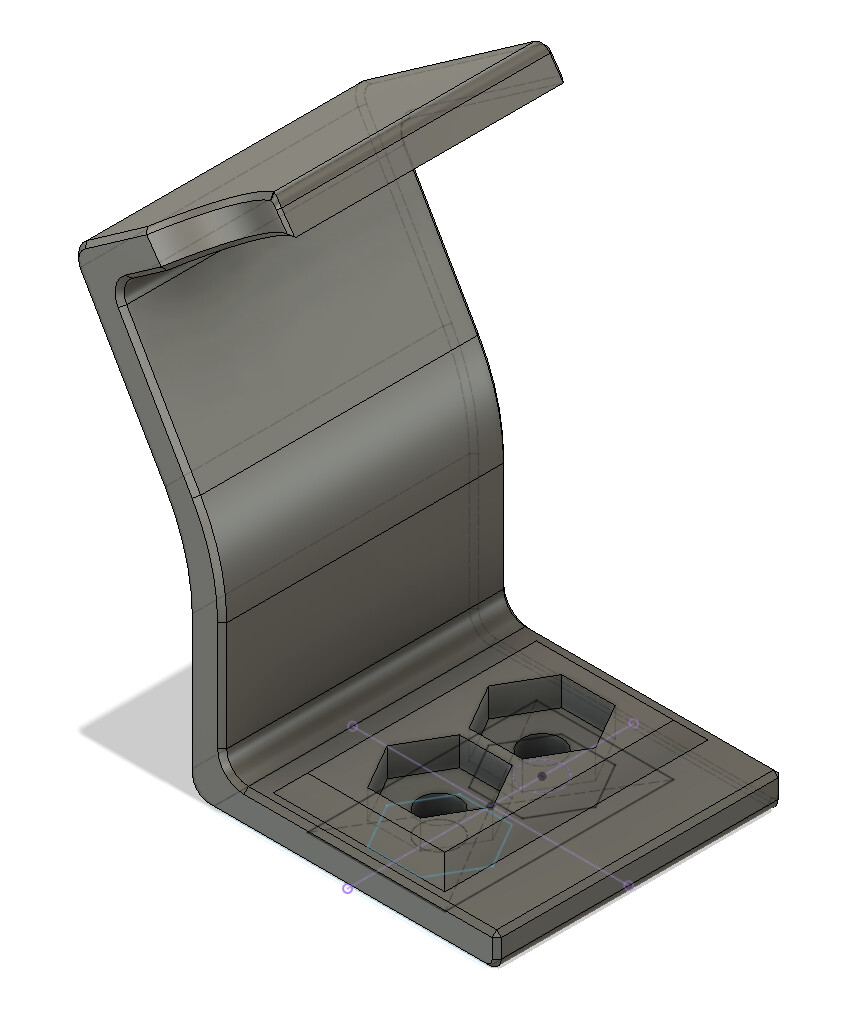
For my Burly, and to a lesser extent for my Primo, I curled the drag chain bracket attached to the trucks so that the drag chain rides under the tubing, and therefore does not require extra table area. Image of my Primo bracket:
Since the spoil board isn’t recessed in the top
If your spoil board is no larger than the working area of your machine, then you will be able to surface the entire top. That prevents the spoil board from having a pit, making it easier to machine oversized stock