Starting this thread to document my journey at making a dust boot for my Primo recently completed.
I’ve been taking bits and pieces from a number of posts, and have a good vision of what I think I’m going to do. I’ve been following this post, though I know I cannot use the Z pipes to suck the dust through. My US electrical conduit is just too narrow with the nut traps inside. But I did like what @victord had as far as a slab of thick acrylic to mount things to.
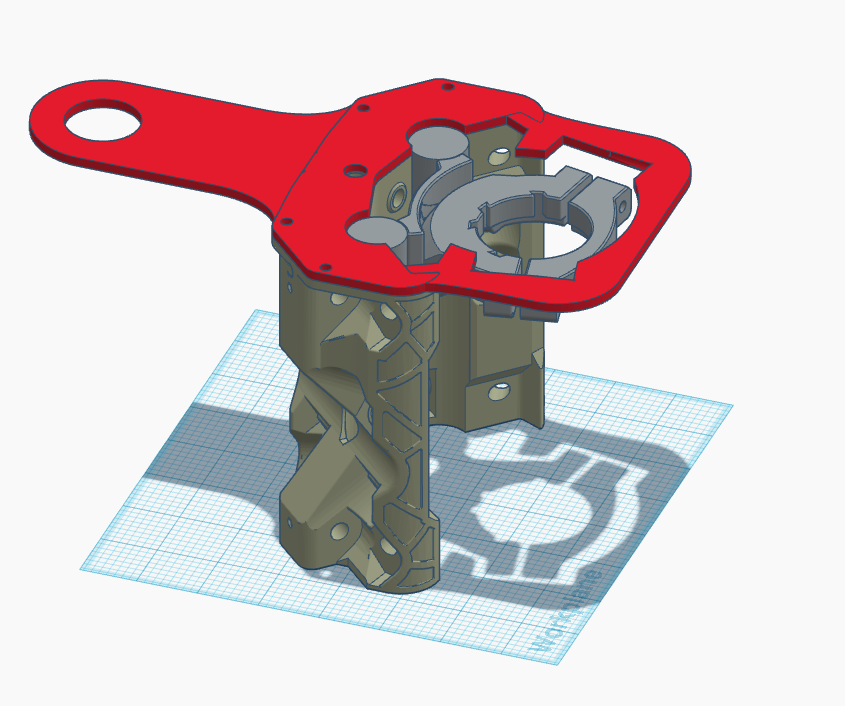
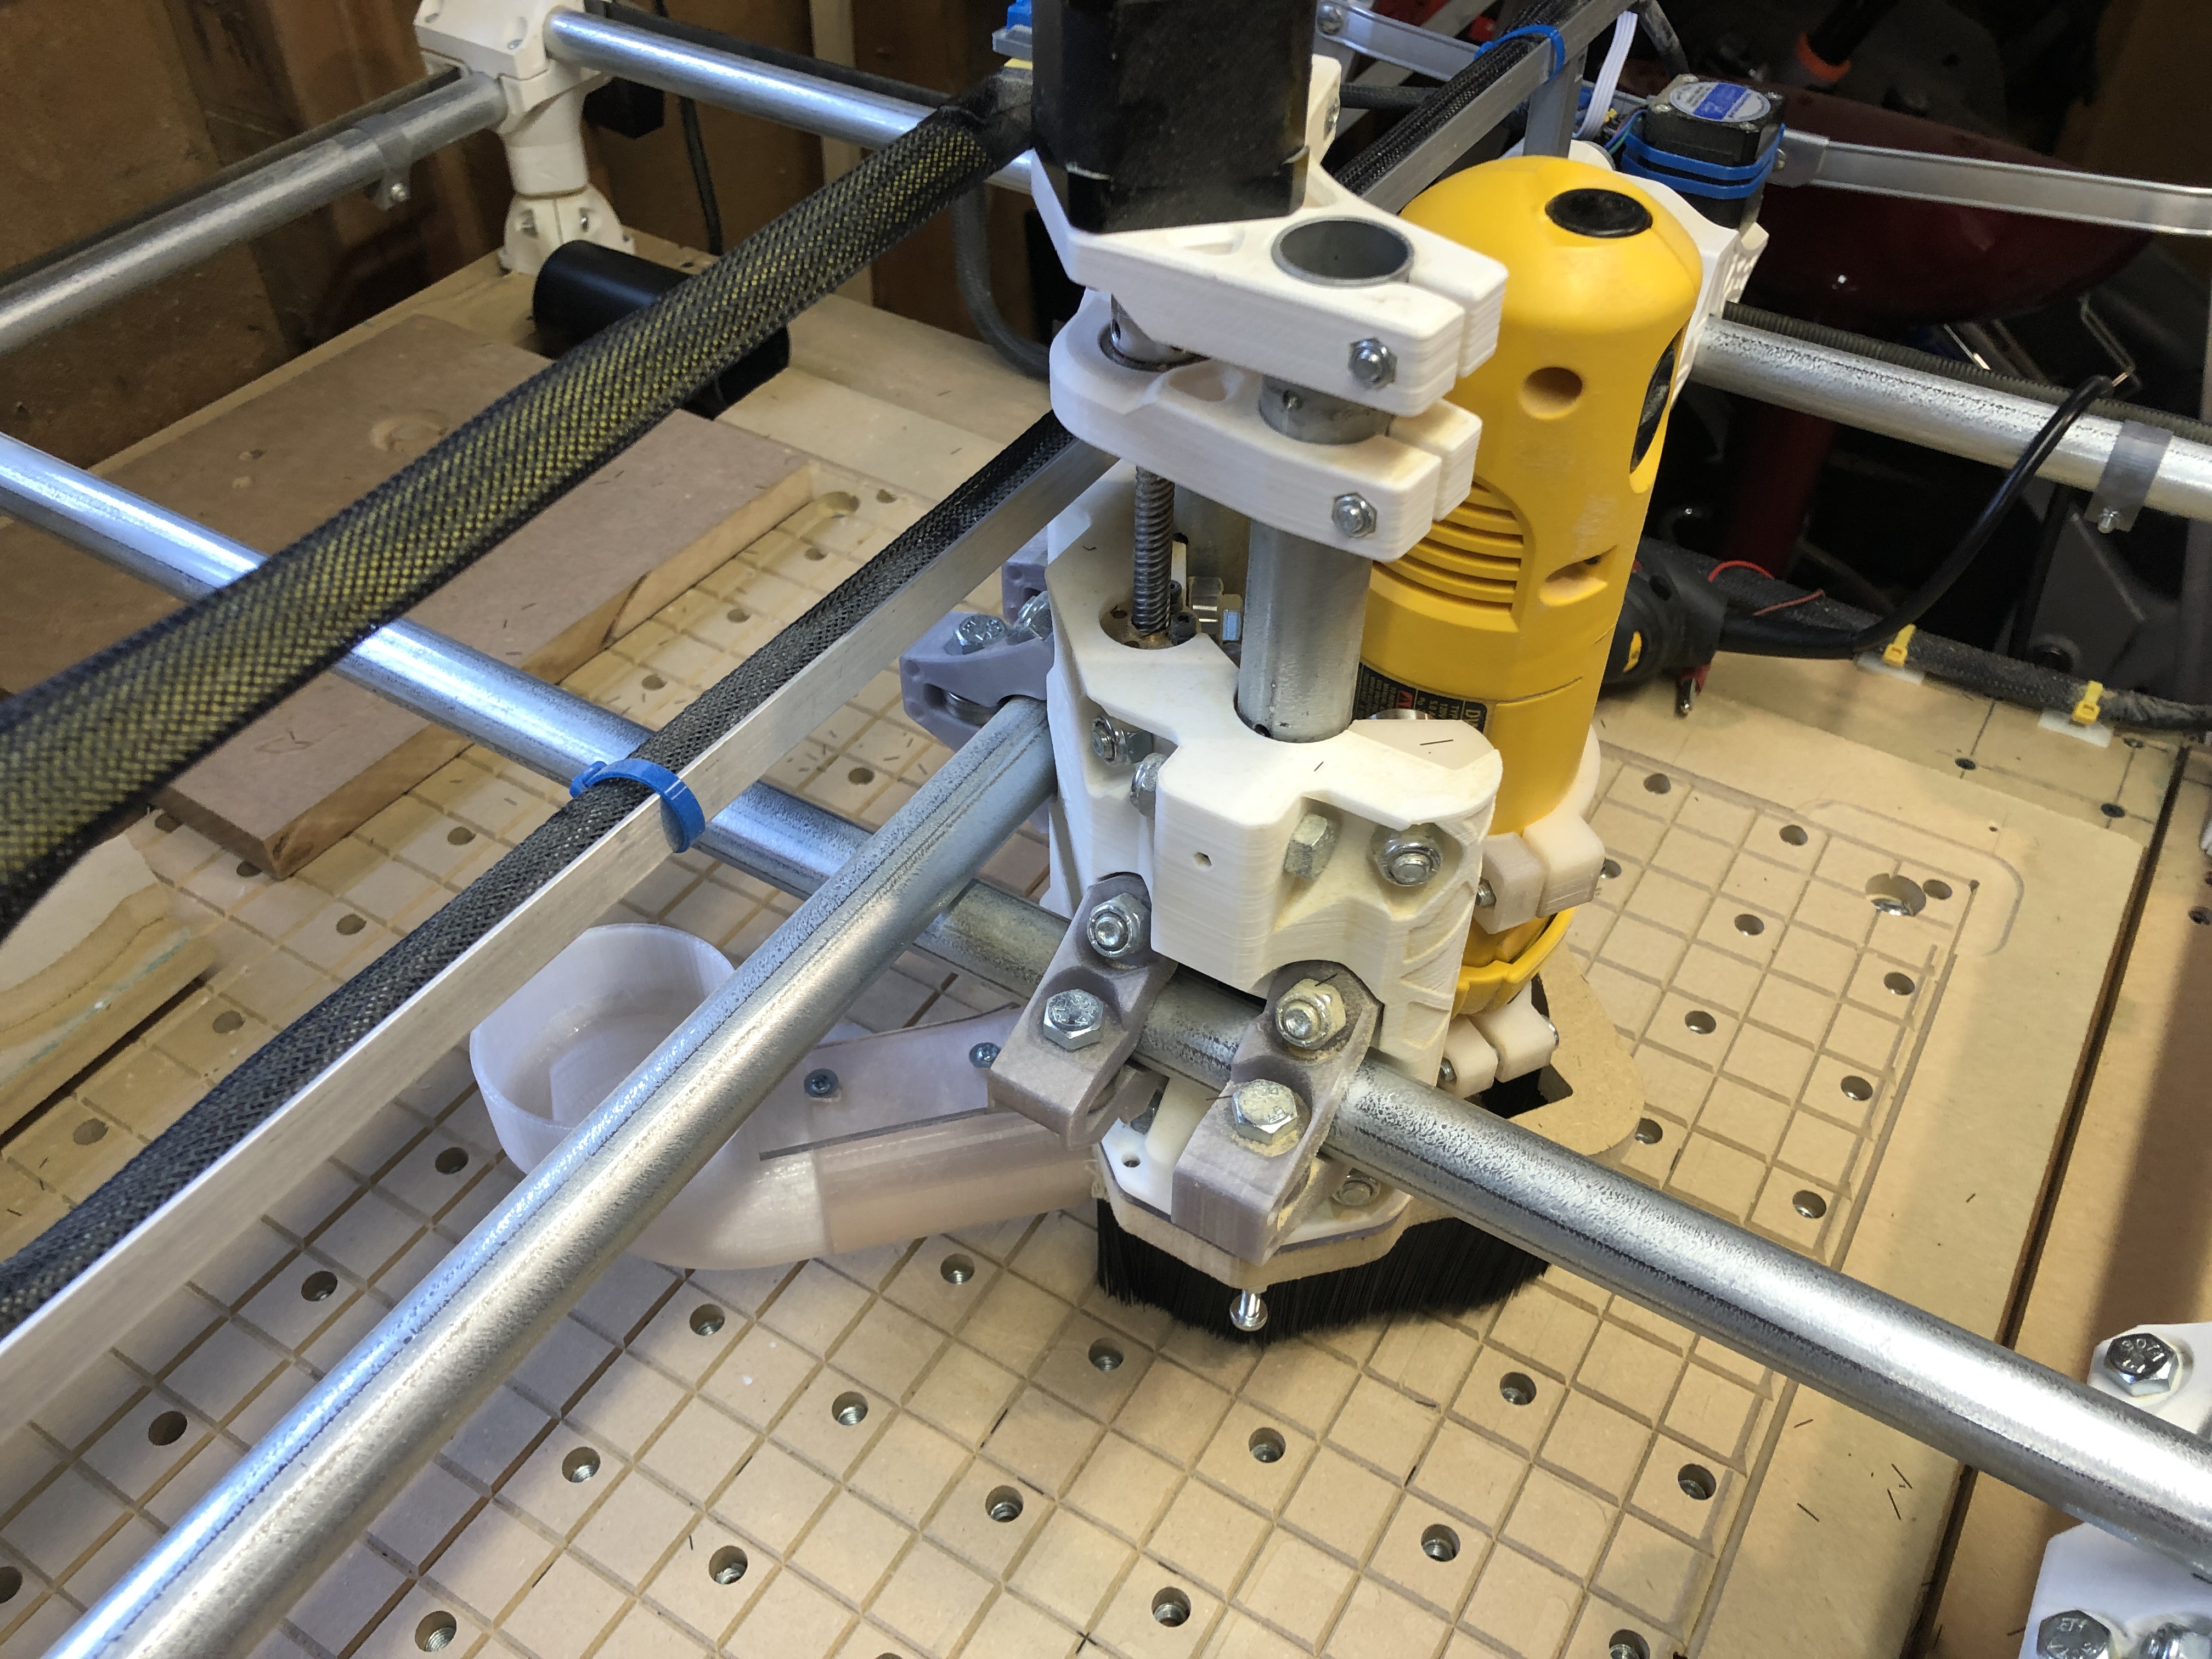
I don’t have any auto cad skills, but I can butcher the hell out of stuff in tinkercad. I imported the Z Gantry, made some pipes, and tool mounts for my Dewalt 660 to act as a guide. I sliced a section of the Z Gantry to be the basis for what the ‘slab’ would be made of.
I wanted to utilize the wasted space opposite my tool mount on the other side of the pipes for the vac hose that will come down from the ceiling. Even at the max x/y move of my table, there is room for the mount and vac hose. There really isn’t much space on the tool side of the axis.
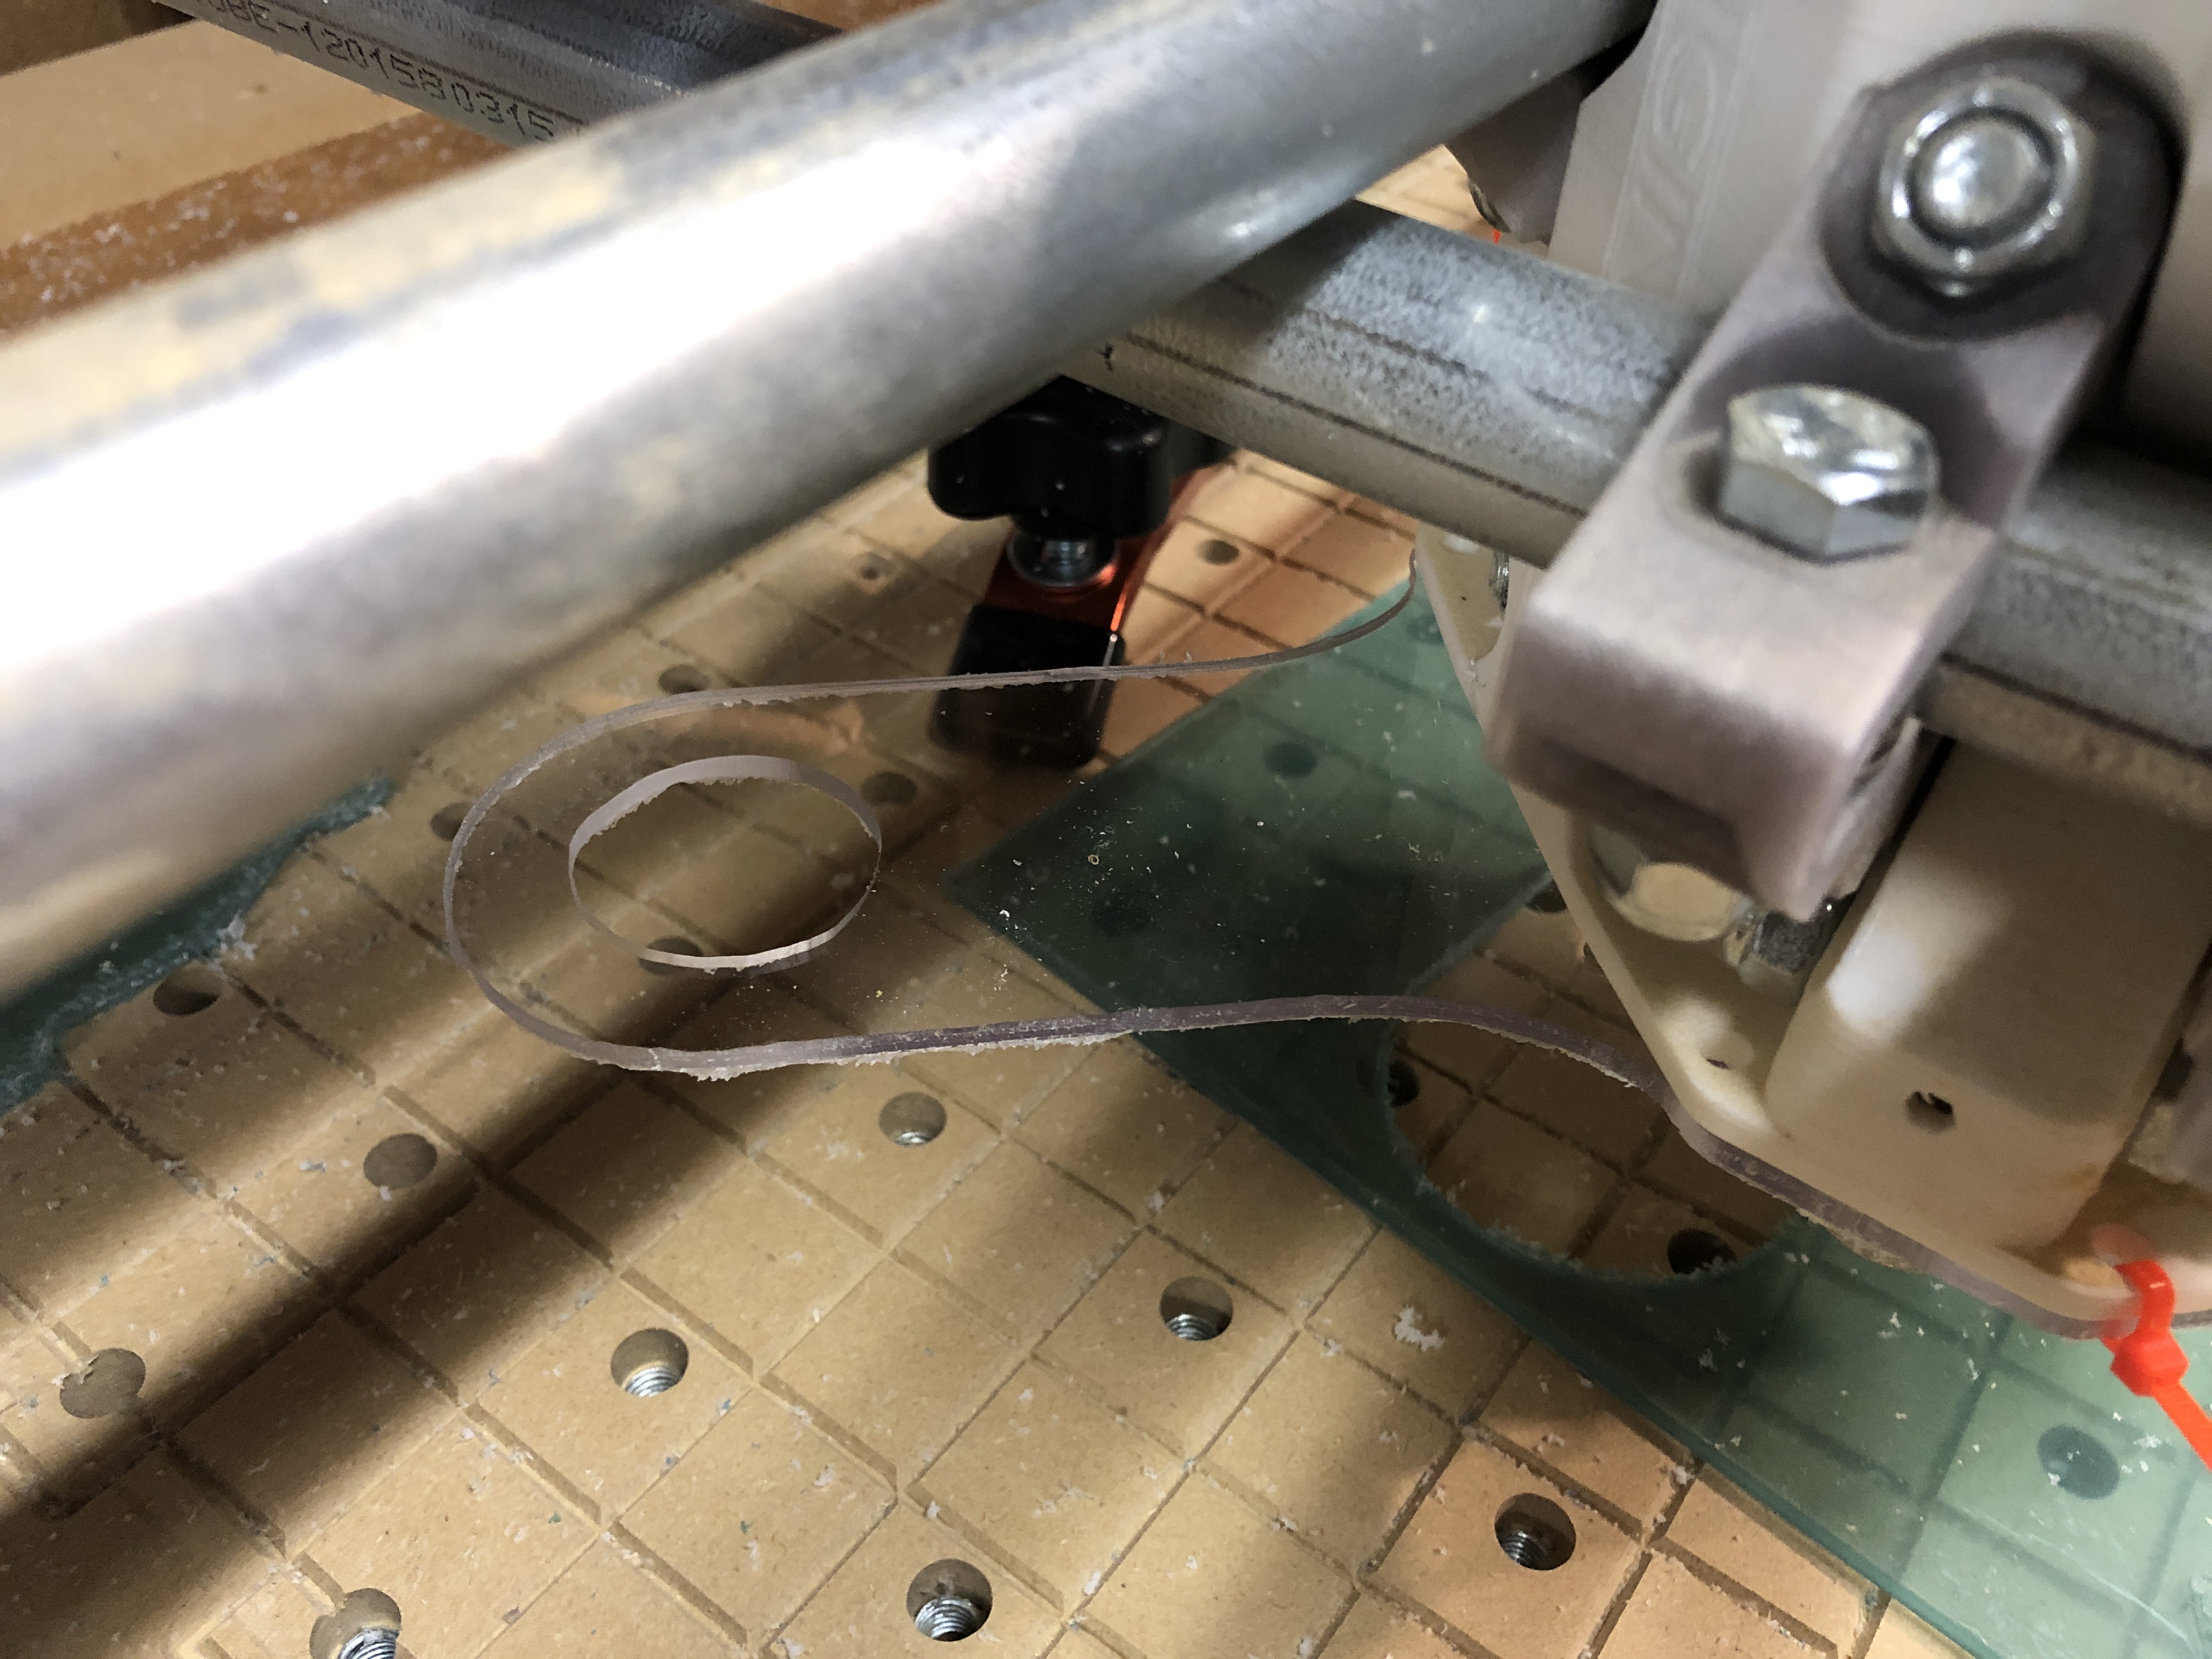
So then I routed out a test piece in some thin acrylic.
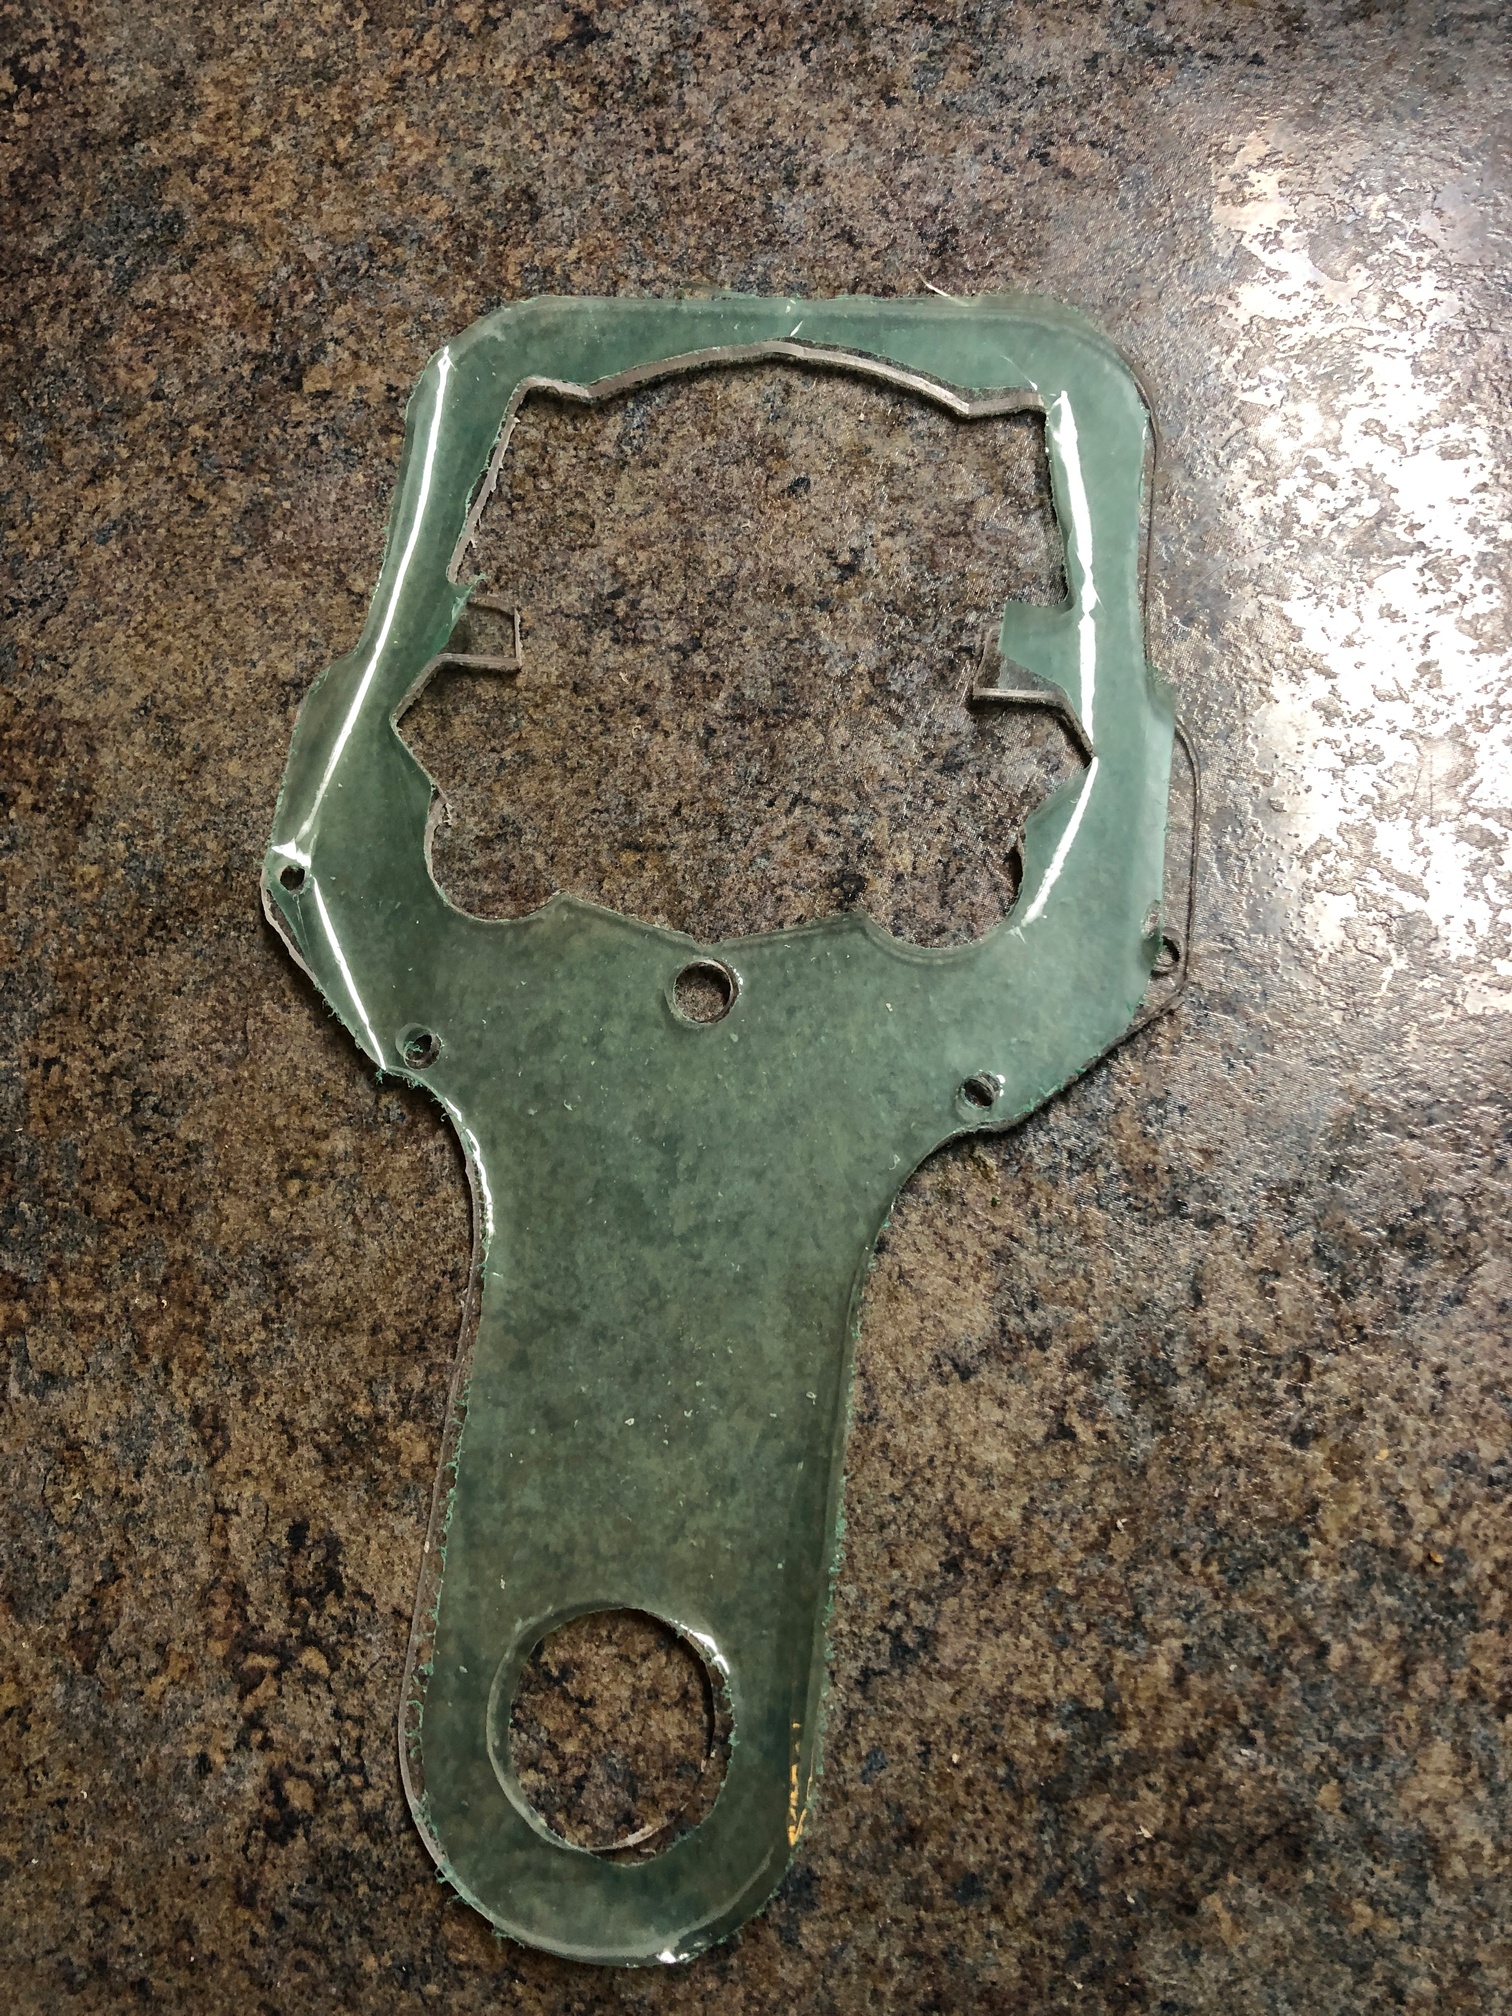
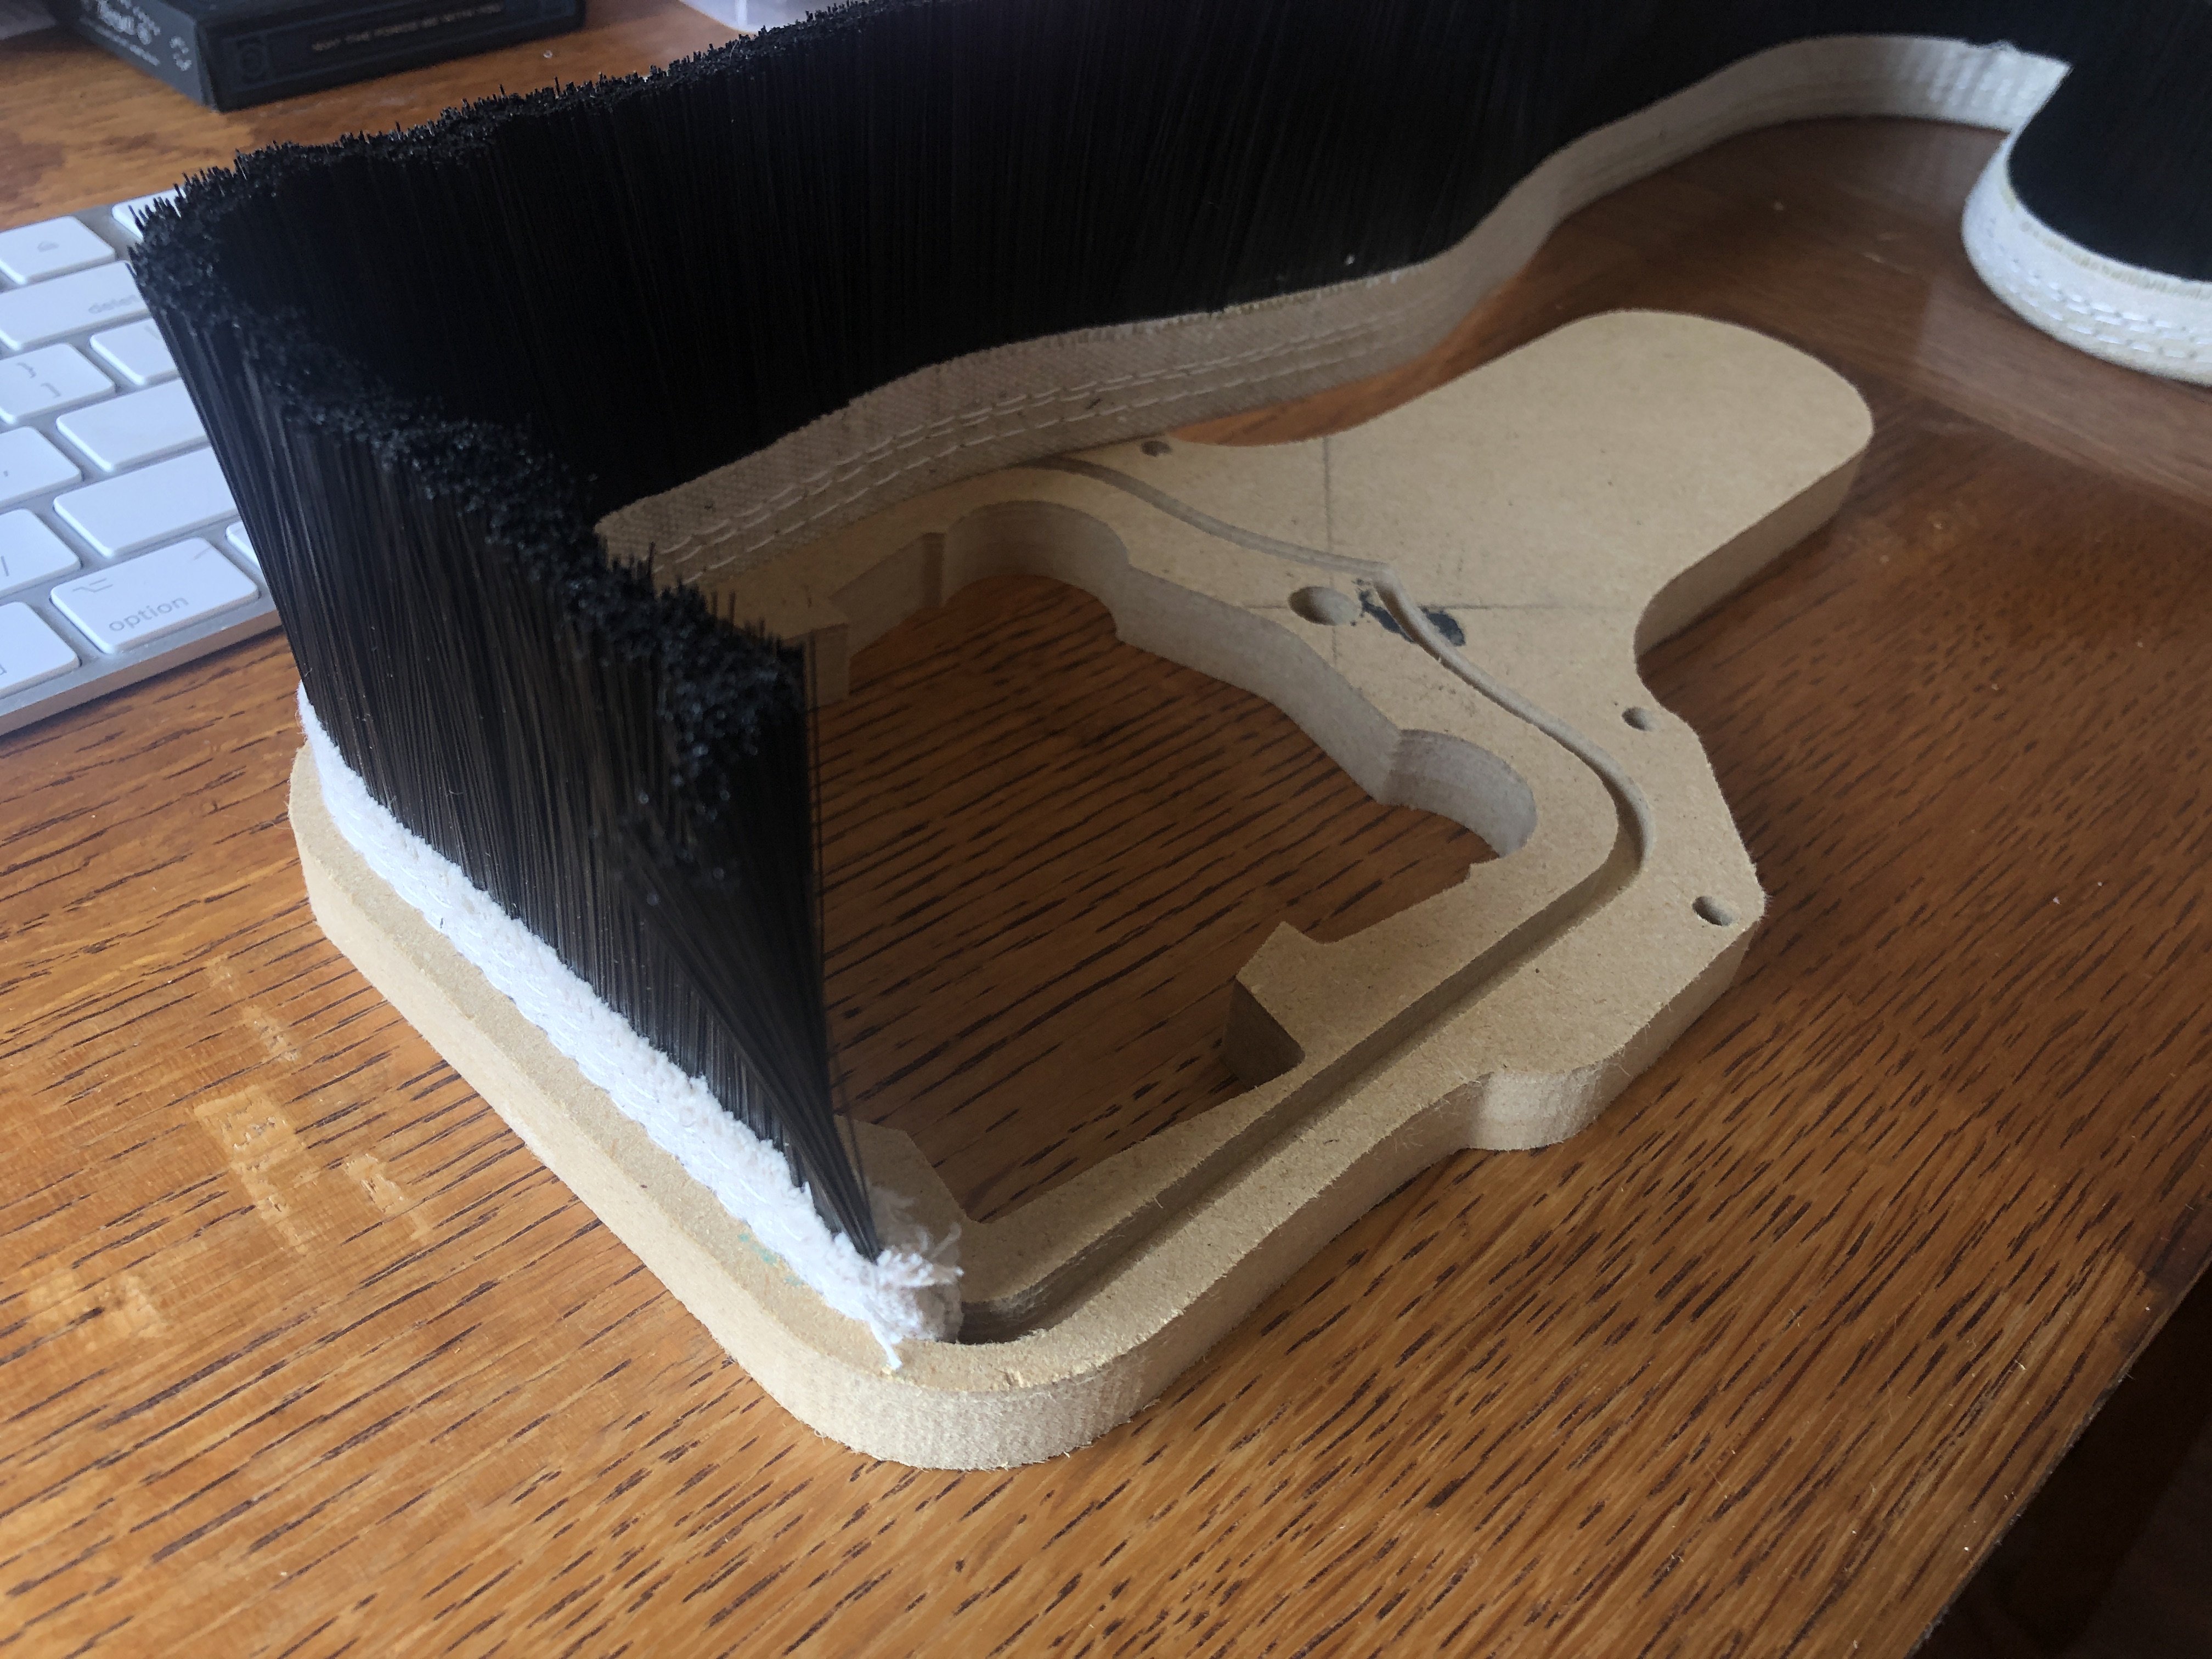
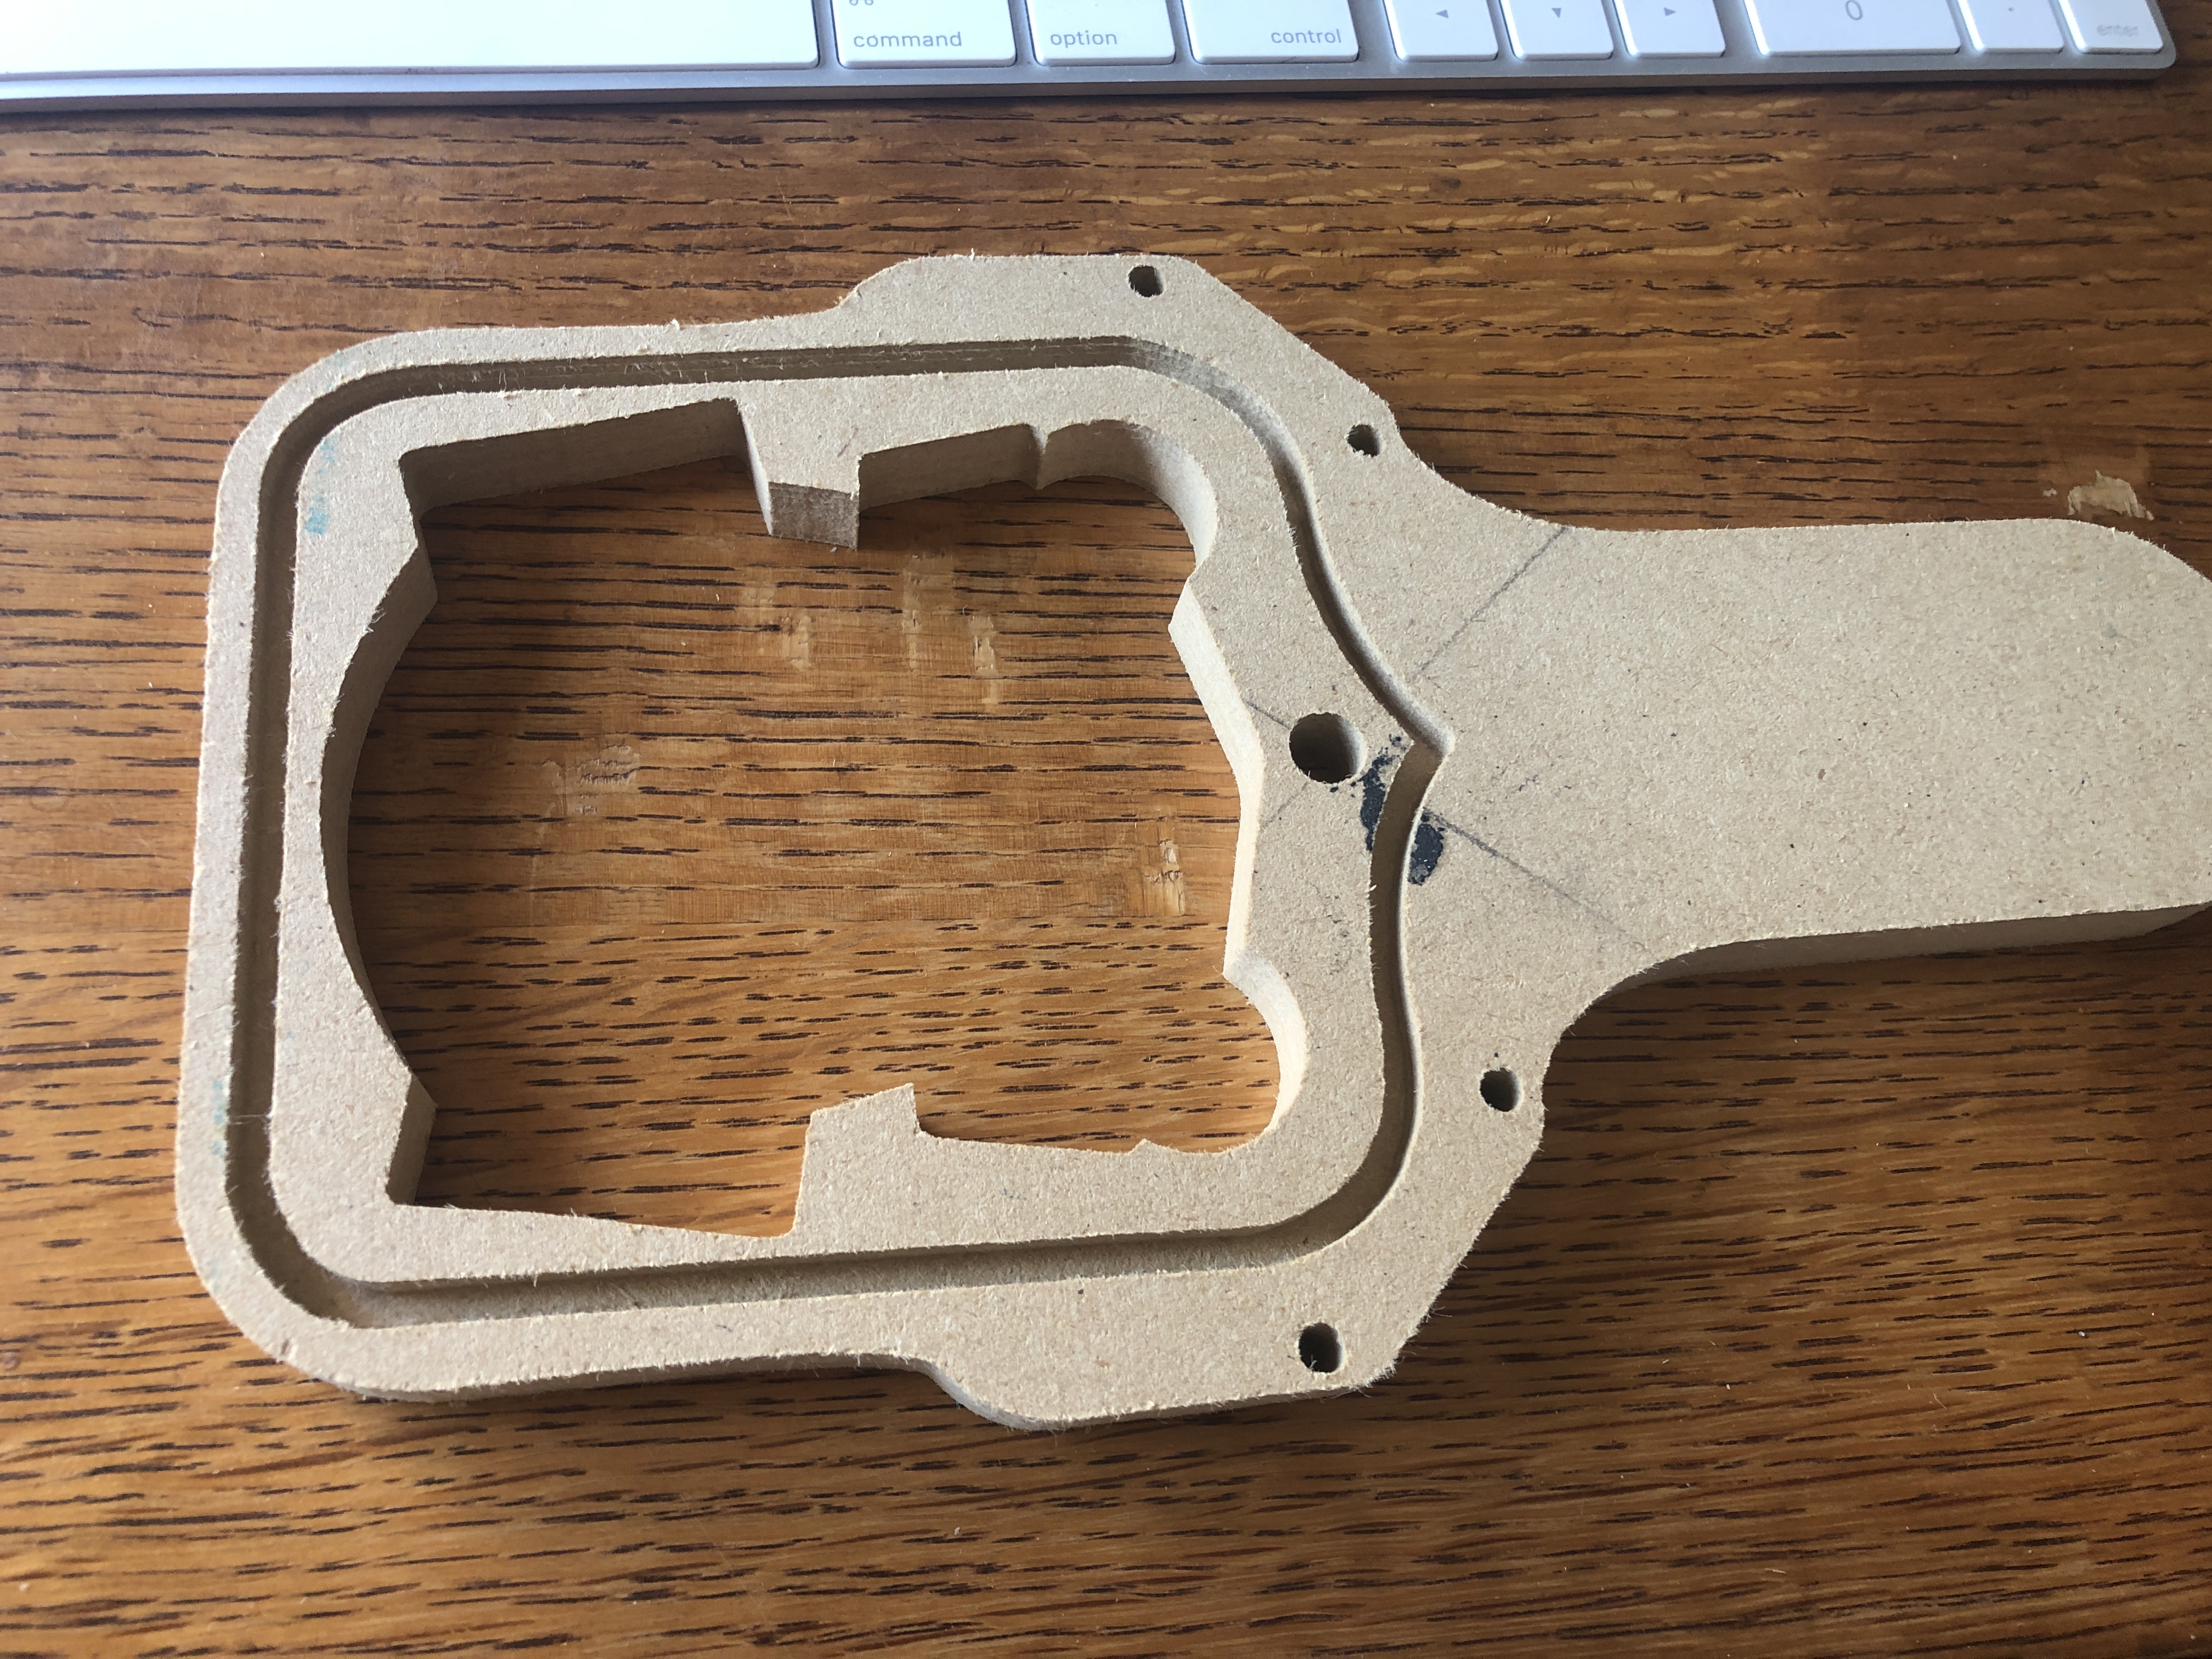
Update #2. No longer going to go with the plexi dustboot base. Me trying to create a 3d printed channel for the dust brush to attach to the plexi dustboot was too complicated for my tinkercad skills. I was over thinking it. I have a perfectly good CNC machine, so I cut the groove out of a piece of 1/2" MDF.
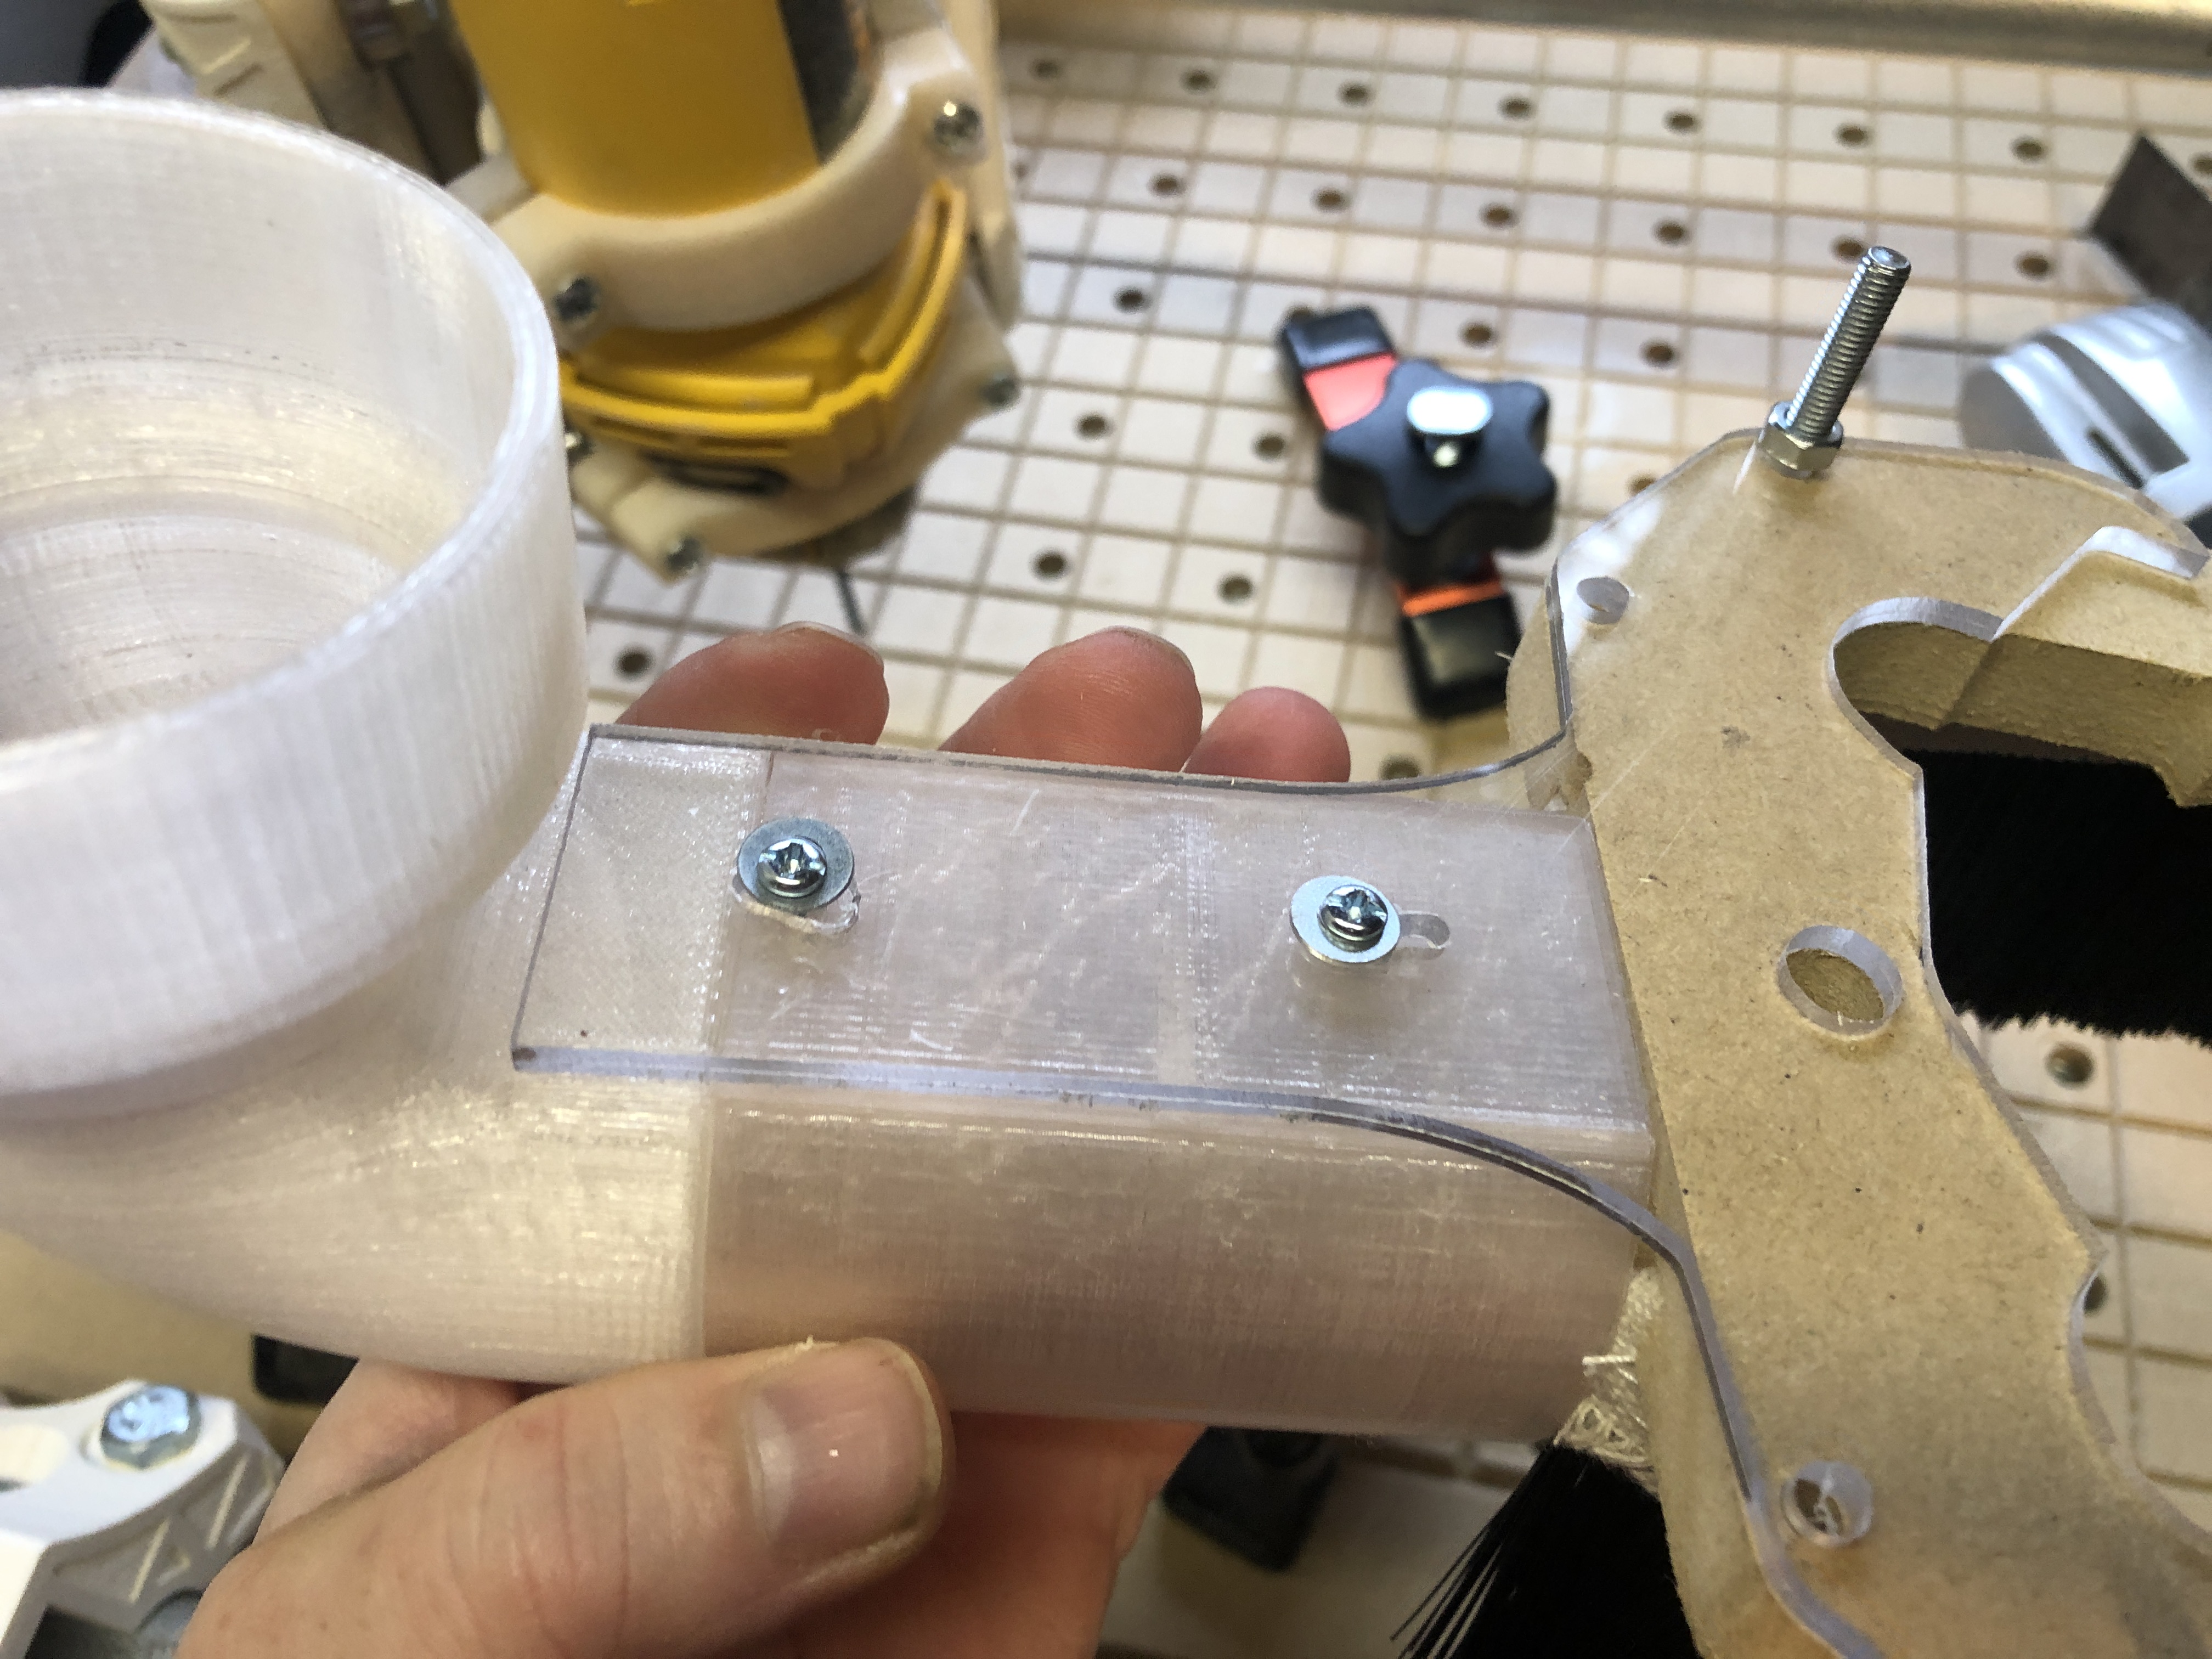
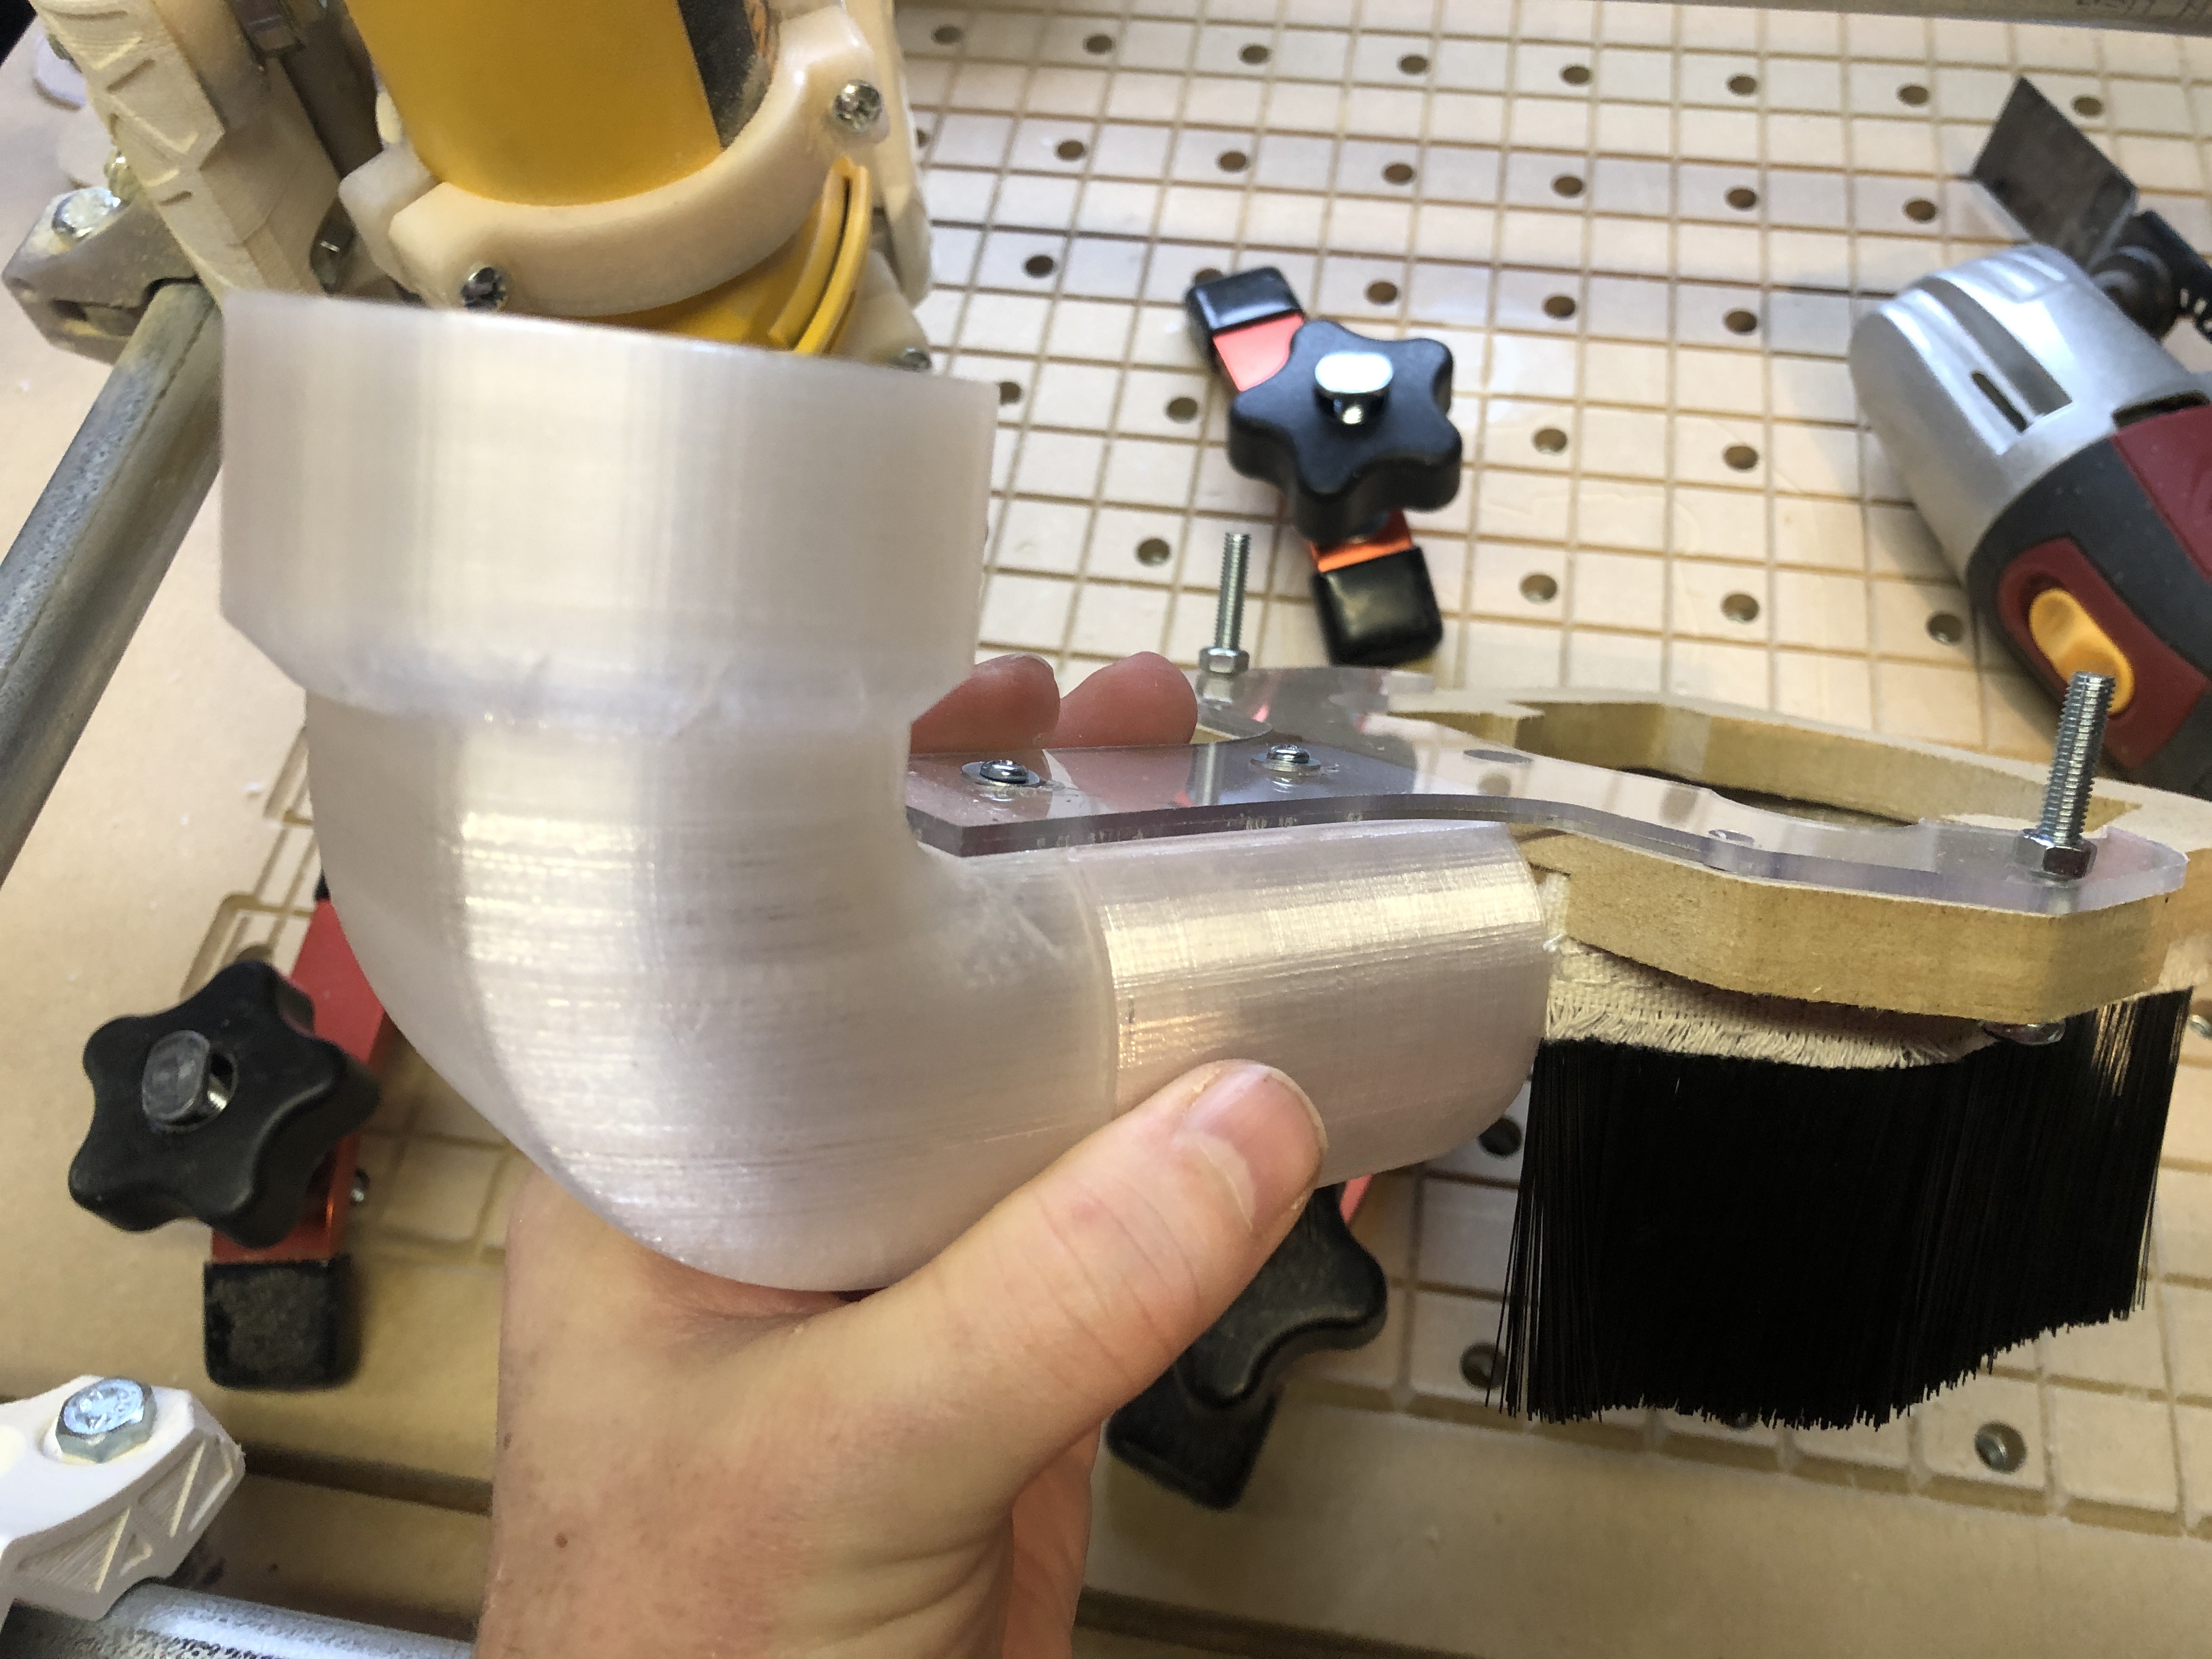
Pictured here, the dust collection portion of things is incomplete. I had intended to use a 1.5" hose, but found that as it reduced down from 2.5" dust piping, the suction dropped way off. I’m printing this dust collection 90 degree elbow from the PwnCNC folks, and adapting it to the dustboot. Just waiting for it to finish printing so I can get proper measurements on my machine.
Thinking I’ll need smaller clamps for my spoil board, as the dust collection tubing may run into one of the corners regularly. Problem for another day.
I ended up keeping a bit of the plexi so I could mount the dust evac pipe. This ended up presenting a number of issues on the z access, and hitting project clamps on that corner if I wasn’t carful. There was very little clearance below the pipe. I could have tapered it.
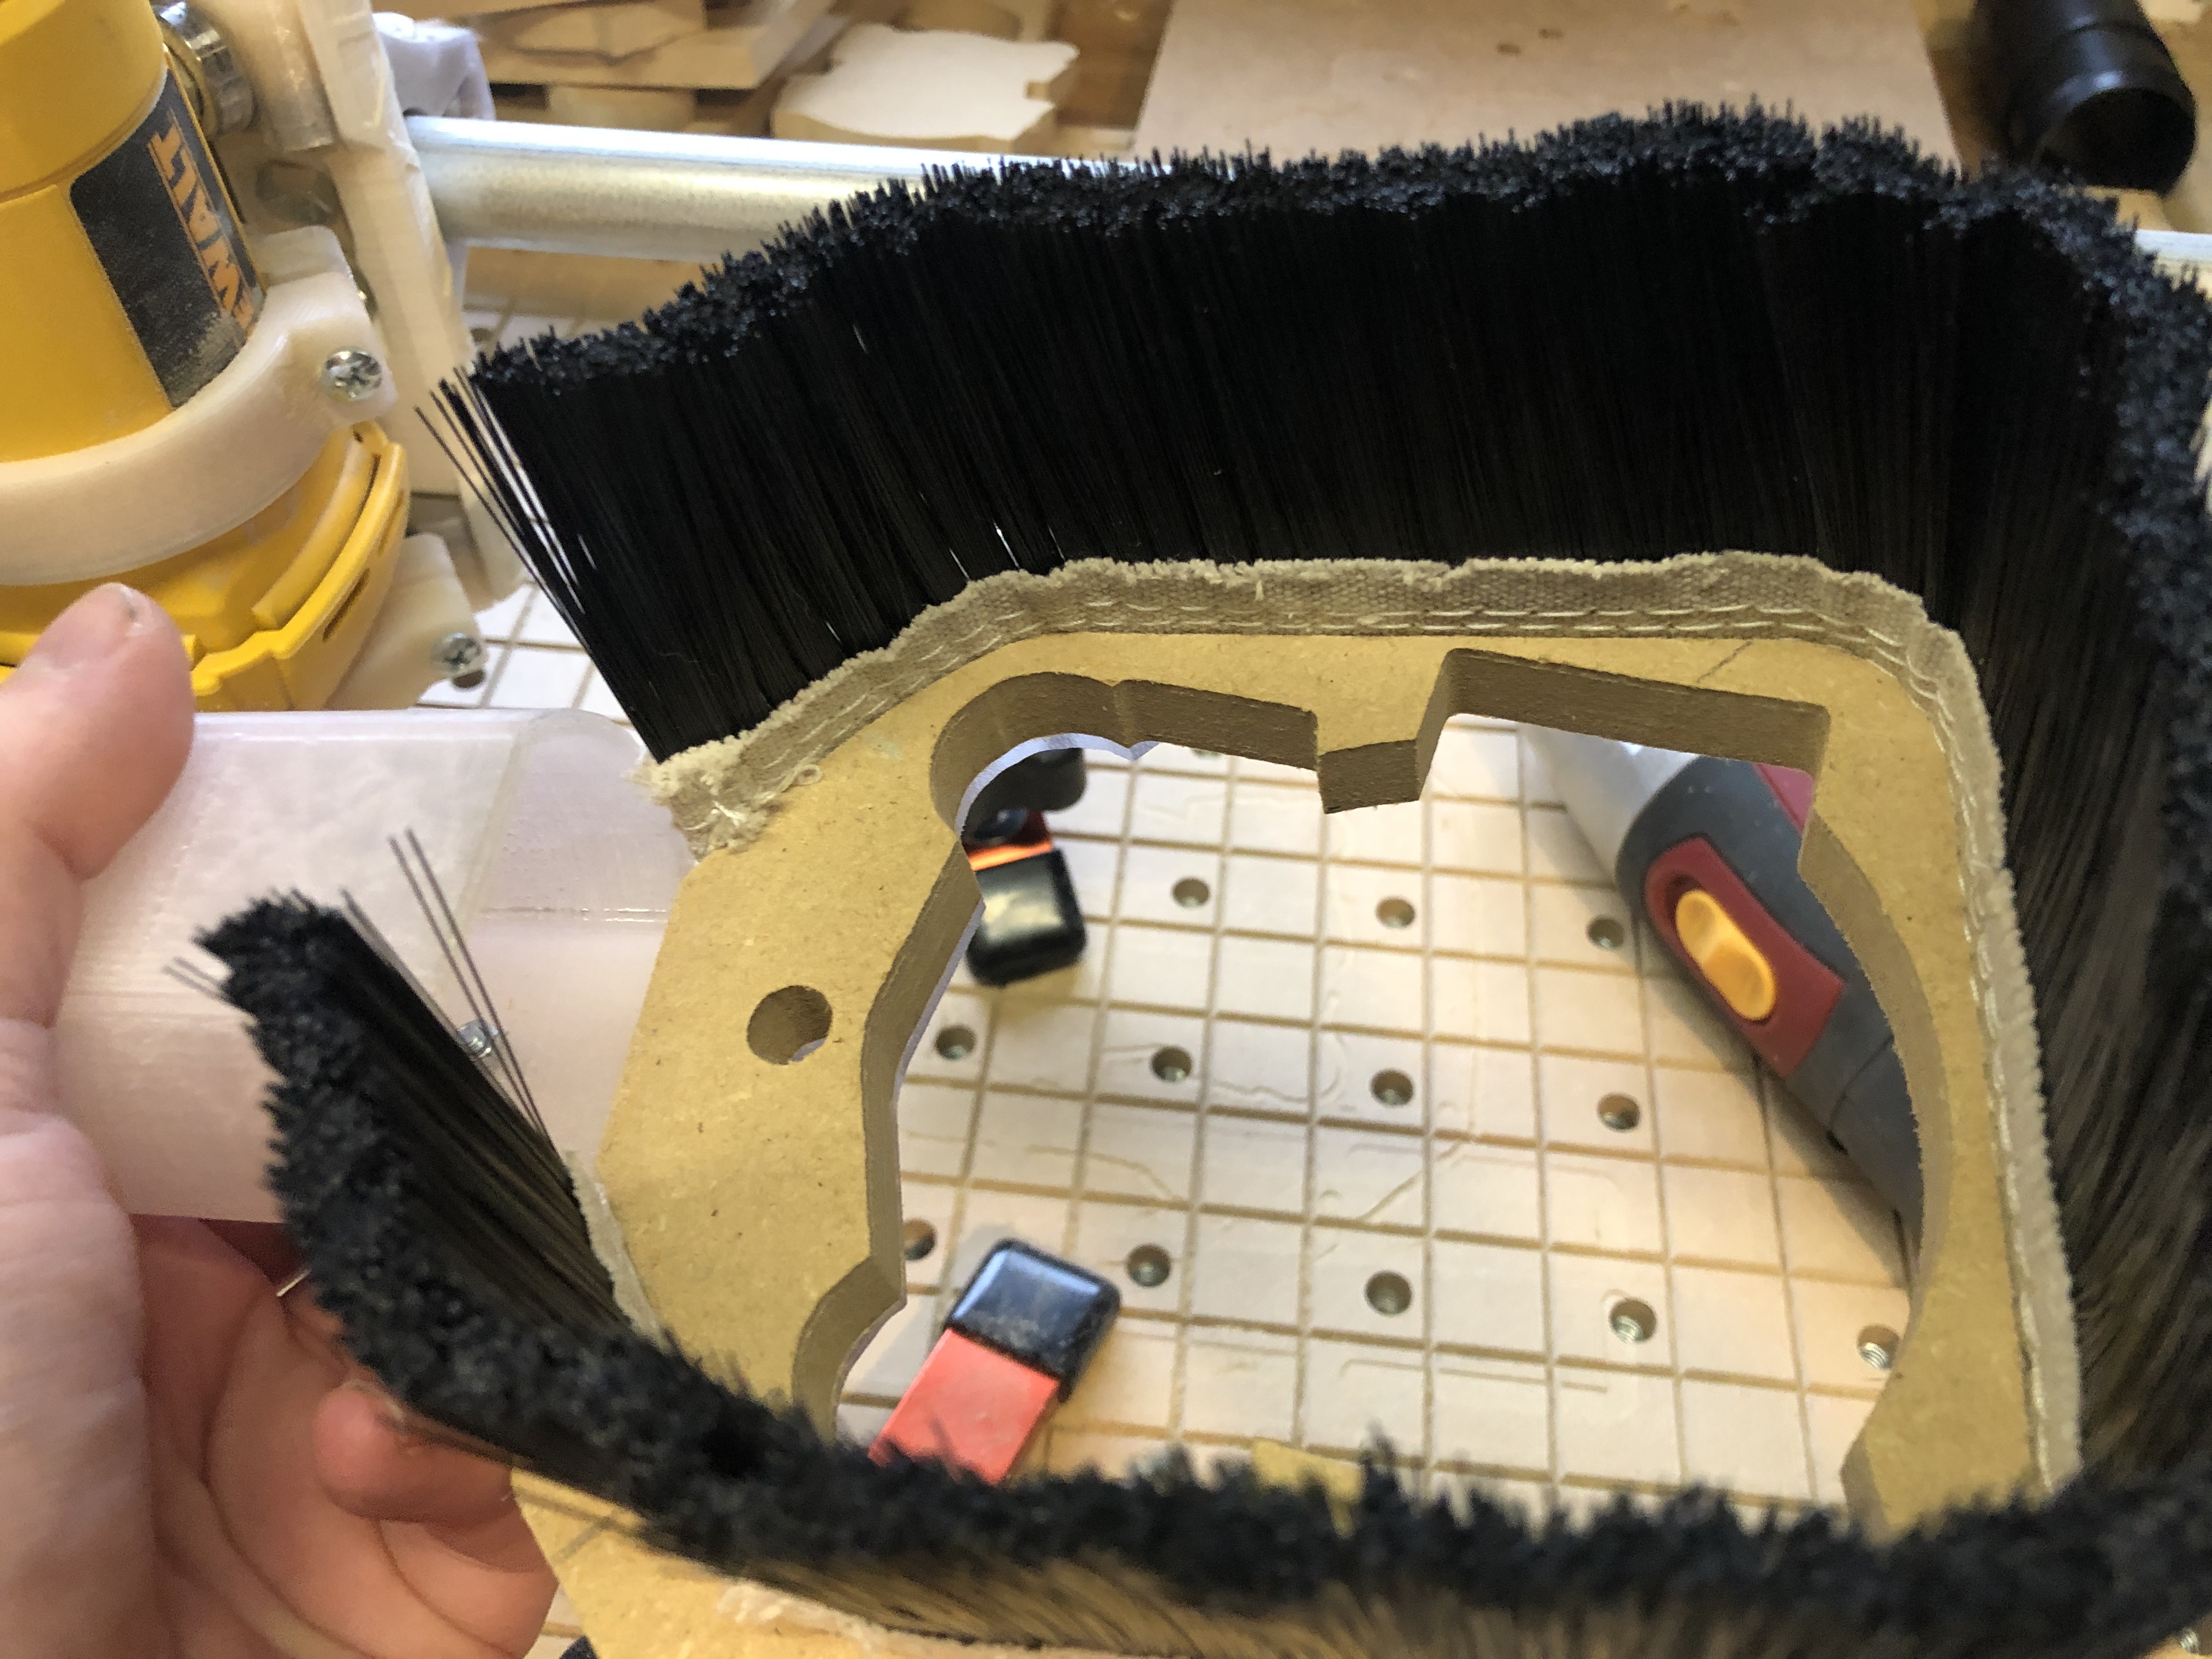
Brush bristles from some amazon purchase. Wedged nicely in the channel I routed in the MDF. In hindsight, I would have made the channel a bit wider. It wedged TOO tightly, and ended up splitting the MDF on the horizontal.
Additionally, the bristles were too stiff. Read somewhere far too late into the project that the bristles are just there to keep the chips from flying all over the table. I had it in my head that the brush/bristles captured everything so the negative pressure of the vacuum would collect ALL the dust. Not necessary.
Too stiff in this case means that when the Z height would bring the bristles against the wood surface being cut/cut through that the bristles would stiffly bend, and make the x/y/z work harder at moving the gantry. This just isn’t necessary.
On my current Makita spindle dust boot I am using some strips of suede. Now this is not stiff enough, as it is sucked up into the vacuum dust collection tub. Still better than too stiff. (and thankfully not long enough to get caught around the rotating spindle. Still need something a bit more stiff)