I’m glad you got communication going! What version of Ubuntu are you using?
I’m no expert on the RAMbo, but that doesn’t sound right.
Can you take a photo of your board and all the wiring?
I’m glad you got communication going! What version of Ubuntu are you using?
I’m no expert on the RAMbo, but that doesn’t sound right.
Can you take a photo of your board and all the wiring?
Me too! Much better when things are working. I’m running Ubuntu 20.04
Just cut off the spades on y1 and stuck the wires through the holes on the limit switch. Works open and triggered. I’ll changes them all out this evening
The v1 firmware expects normally closed on X, Y endstops.
So what should I get back with an m119 command?
Before, there would be no change when activating the switch, now it’s open as is, and triggered when depressed.
That’s correct. Open means not triggered. Cross-wired terminology. Don’t sweat it. The important part is that it’s triggered when the switch is depressed, and not triggered when it’s not depressed. So the board recognizes when the switch hits the stop.
Thanks! So I should be good when I replace the terminals. I’ll be doing that tonight.
Thanks to everyone. I replaced all the spade connectors and now everything works great. The machine homes via lcd and repetier host.
I can’t believe all 4 wires were bad
Glad you got it figured out!
Wiring gremlins like that is why I soldered and used heat shrink tubing on all of my end stop switch connections.
Having a blast playing with this machine. So just a note on the build. I was very impressed with all of the printed parts. I’ve only started with cad/cam and have trouble imagining designing these parts. Especially to have everything fit so well. Very nice job Ryan.
I have my makita router and the mount printed. This will probably move to my shop next week and I’ll continue to work on a table, wire management, and possibly an enclosure. At the moment I’m having fun with just a pen and practicing work flow.
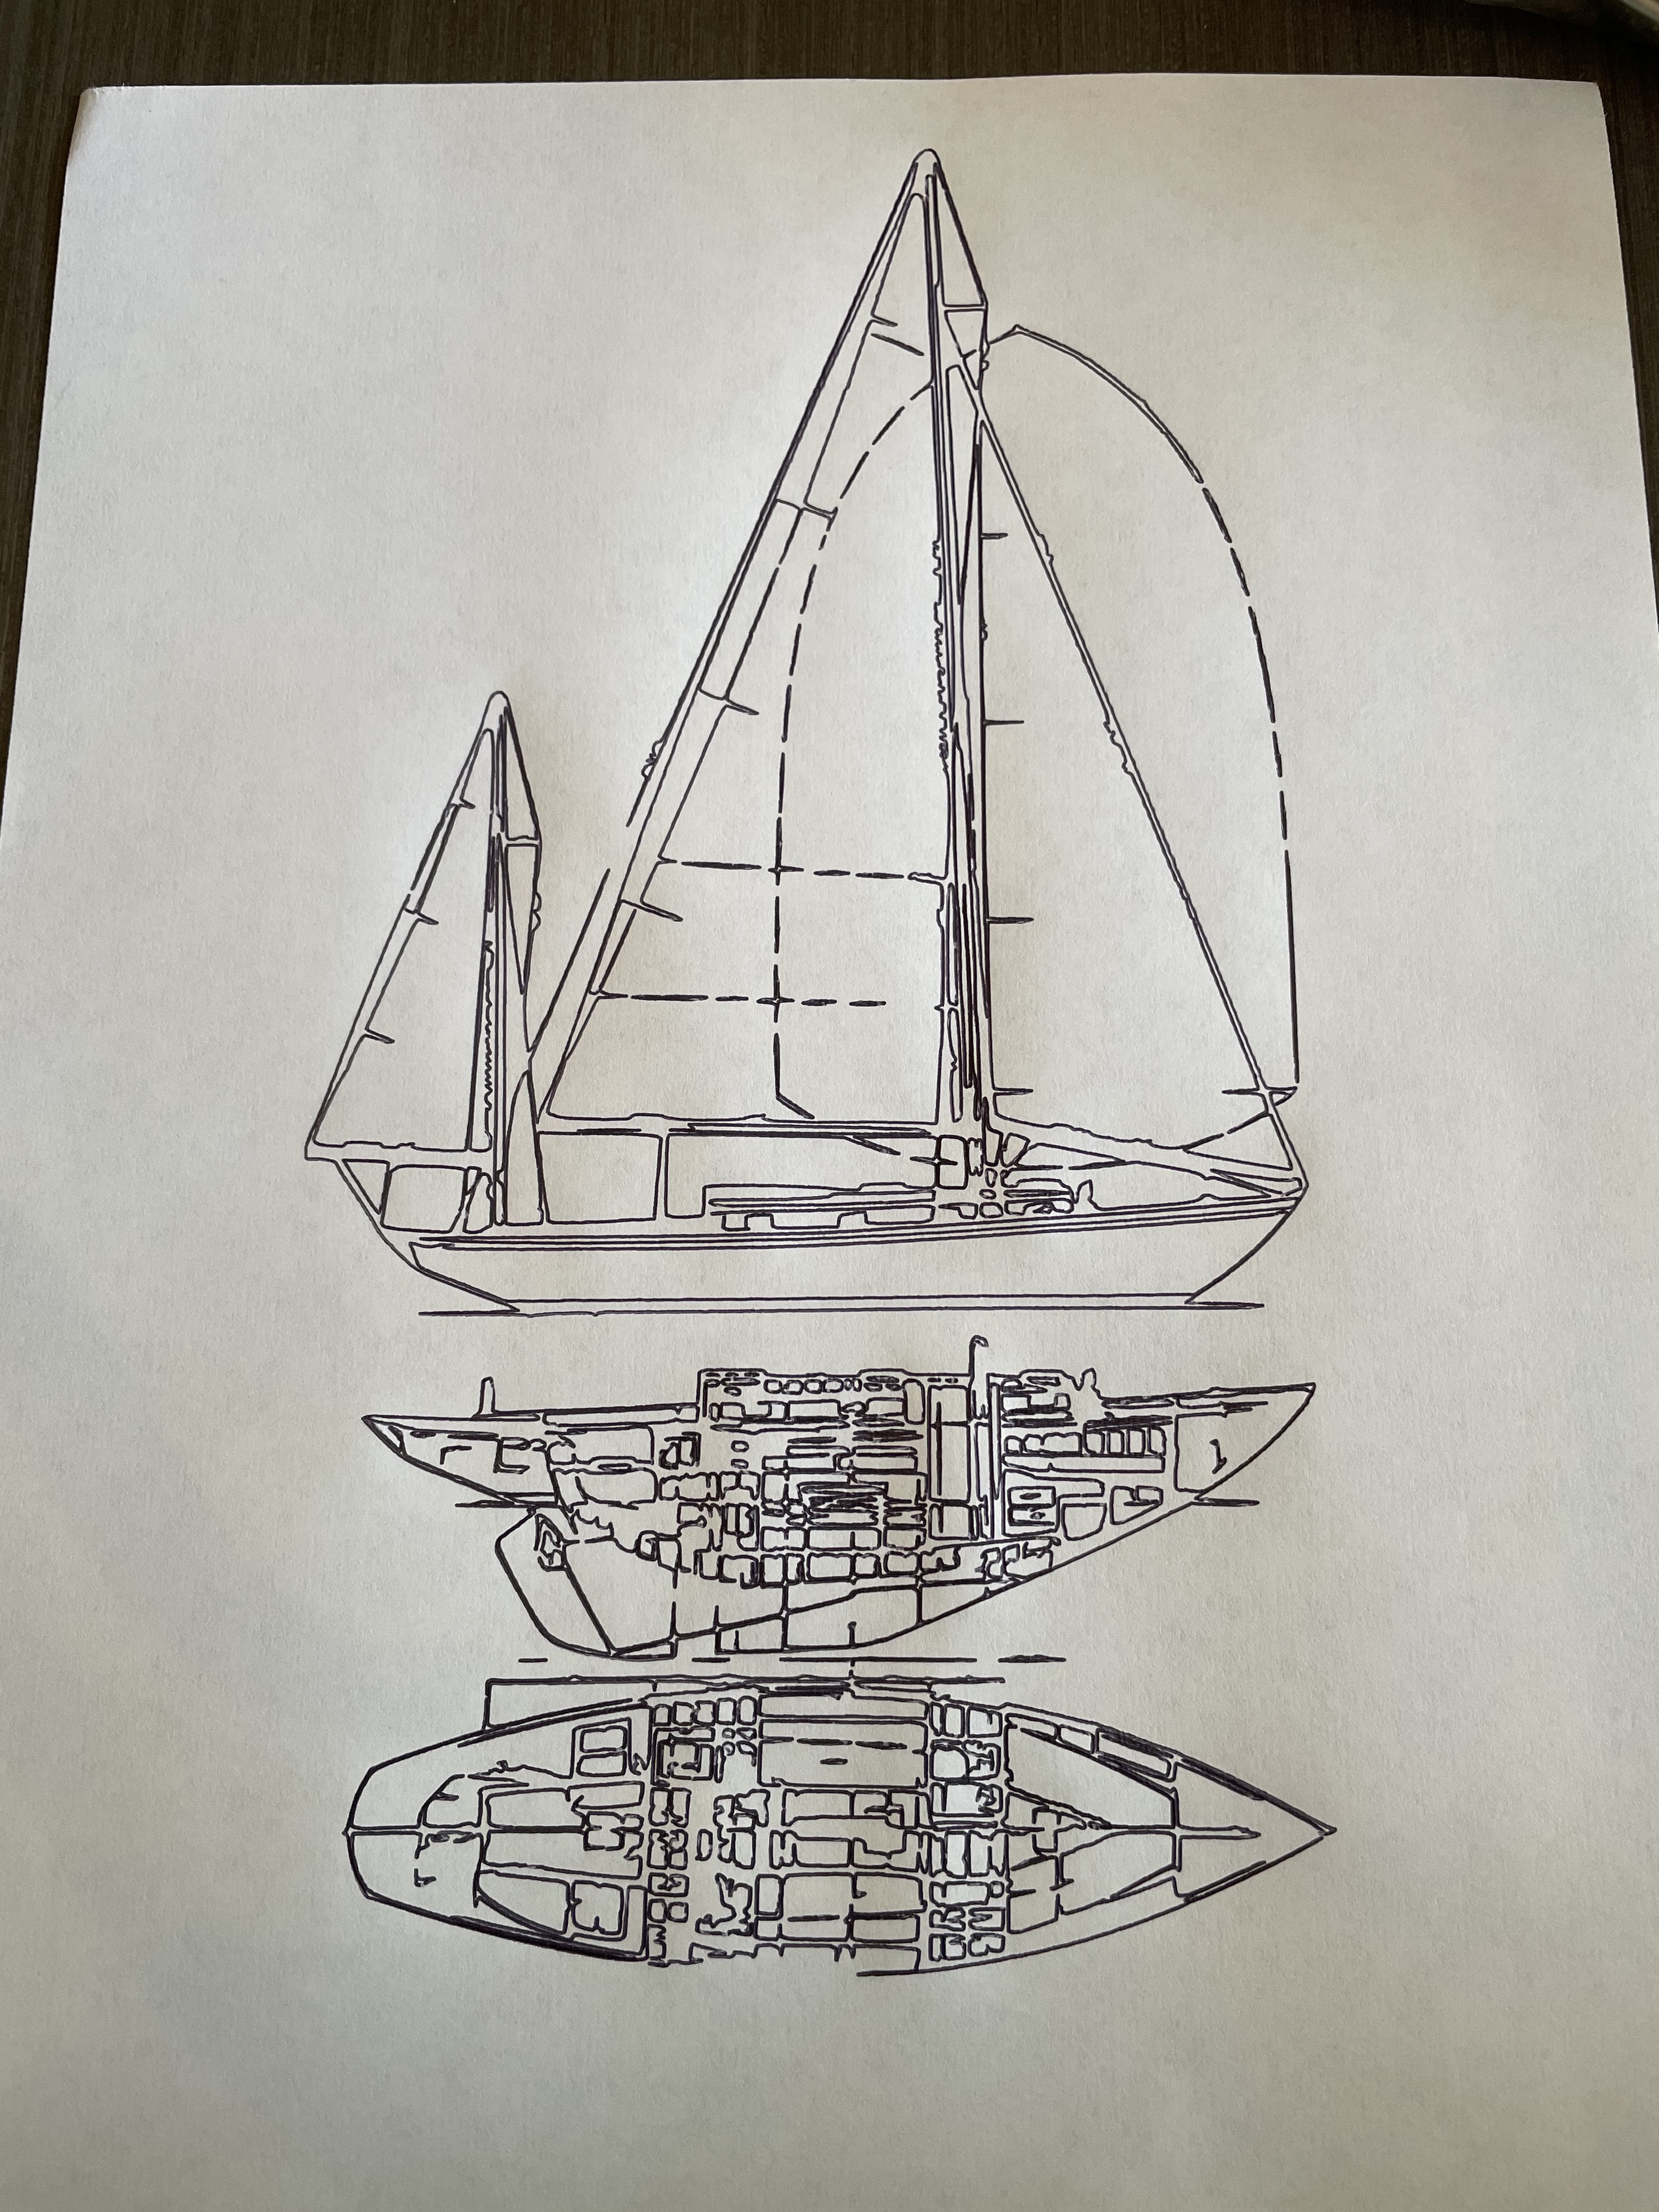
This started as a jpeg of a Ralph Winslow design wooden sailboat. I used inkscape to create the vector file and estlcam to create the gcode for the engrave. I think these will look nice in wood as a carving.
I had been using repetier host and this is the first file run through cncjs which is a nice program.
Thanks! I am working on something right now and it has been a while. I was actually thinking about it and there is a difference between functional, and functional that “looks good”. I can get functional stuff in minutes, it takes days to make them look good and not just be blocks. I highly suggest making functional blocky stuff to learn. As you progress, start with optimizing, then worry about looks. Oh and the trick to being really good at CAD, the stuff they do not teach you…learn to edit it. When you get taught, they always say start over, the real key is fix your mistakes so you do not have to start over.
Very, very low depth. The lines are pretty close together, so I would not go over 0.5mm. Or make it huge. 
Yep, with my old 90 degree v bit it would look horrible. I’ll need some small bits and shallow cuts…
Brought the machine to the shop today, having a blast playing with it while trying to get some work done. Not easy!
Have been carving foam. I don’t have any clamping arrangement yet although I did design a grid and hole pattern for inserts in freecad.
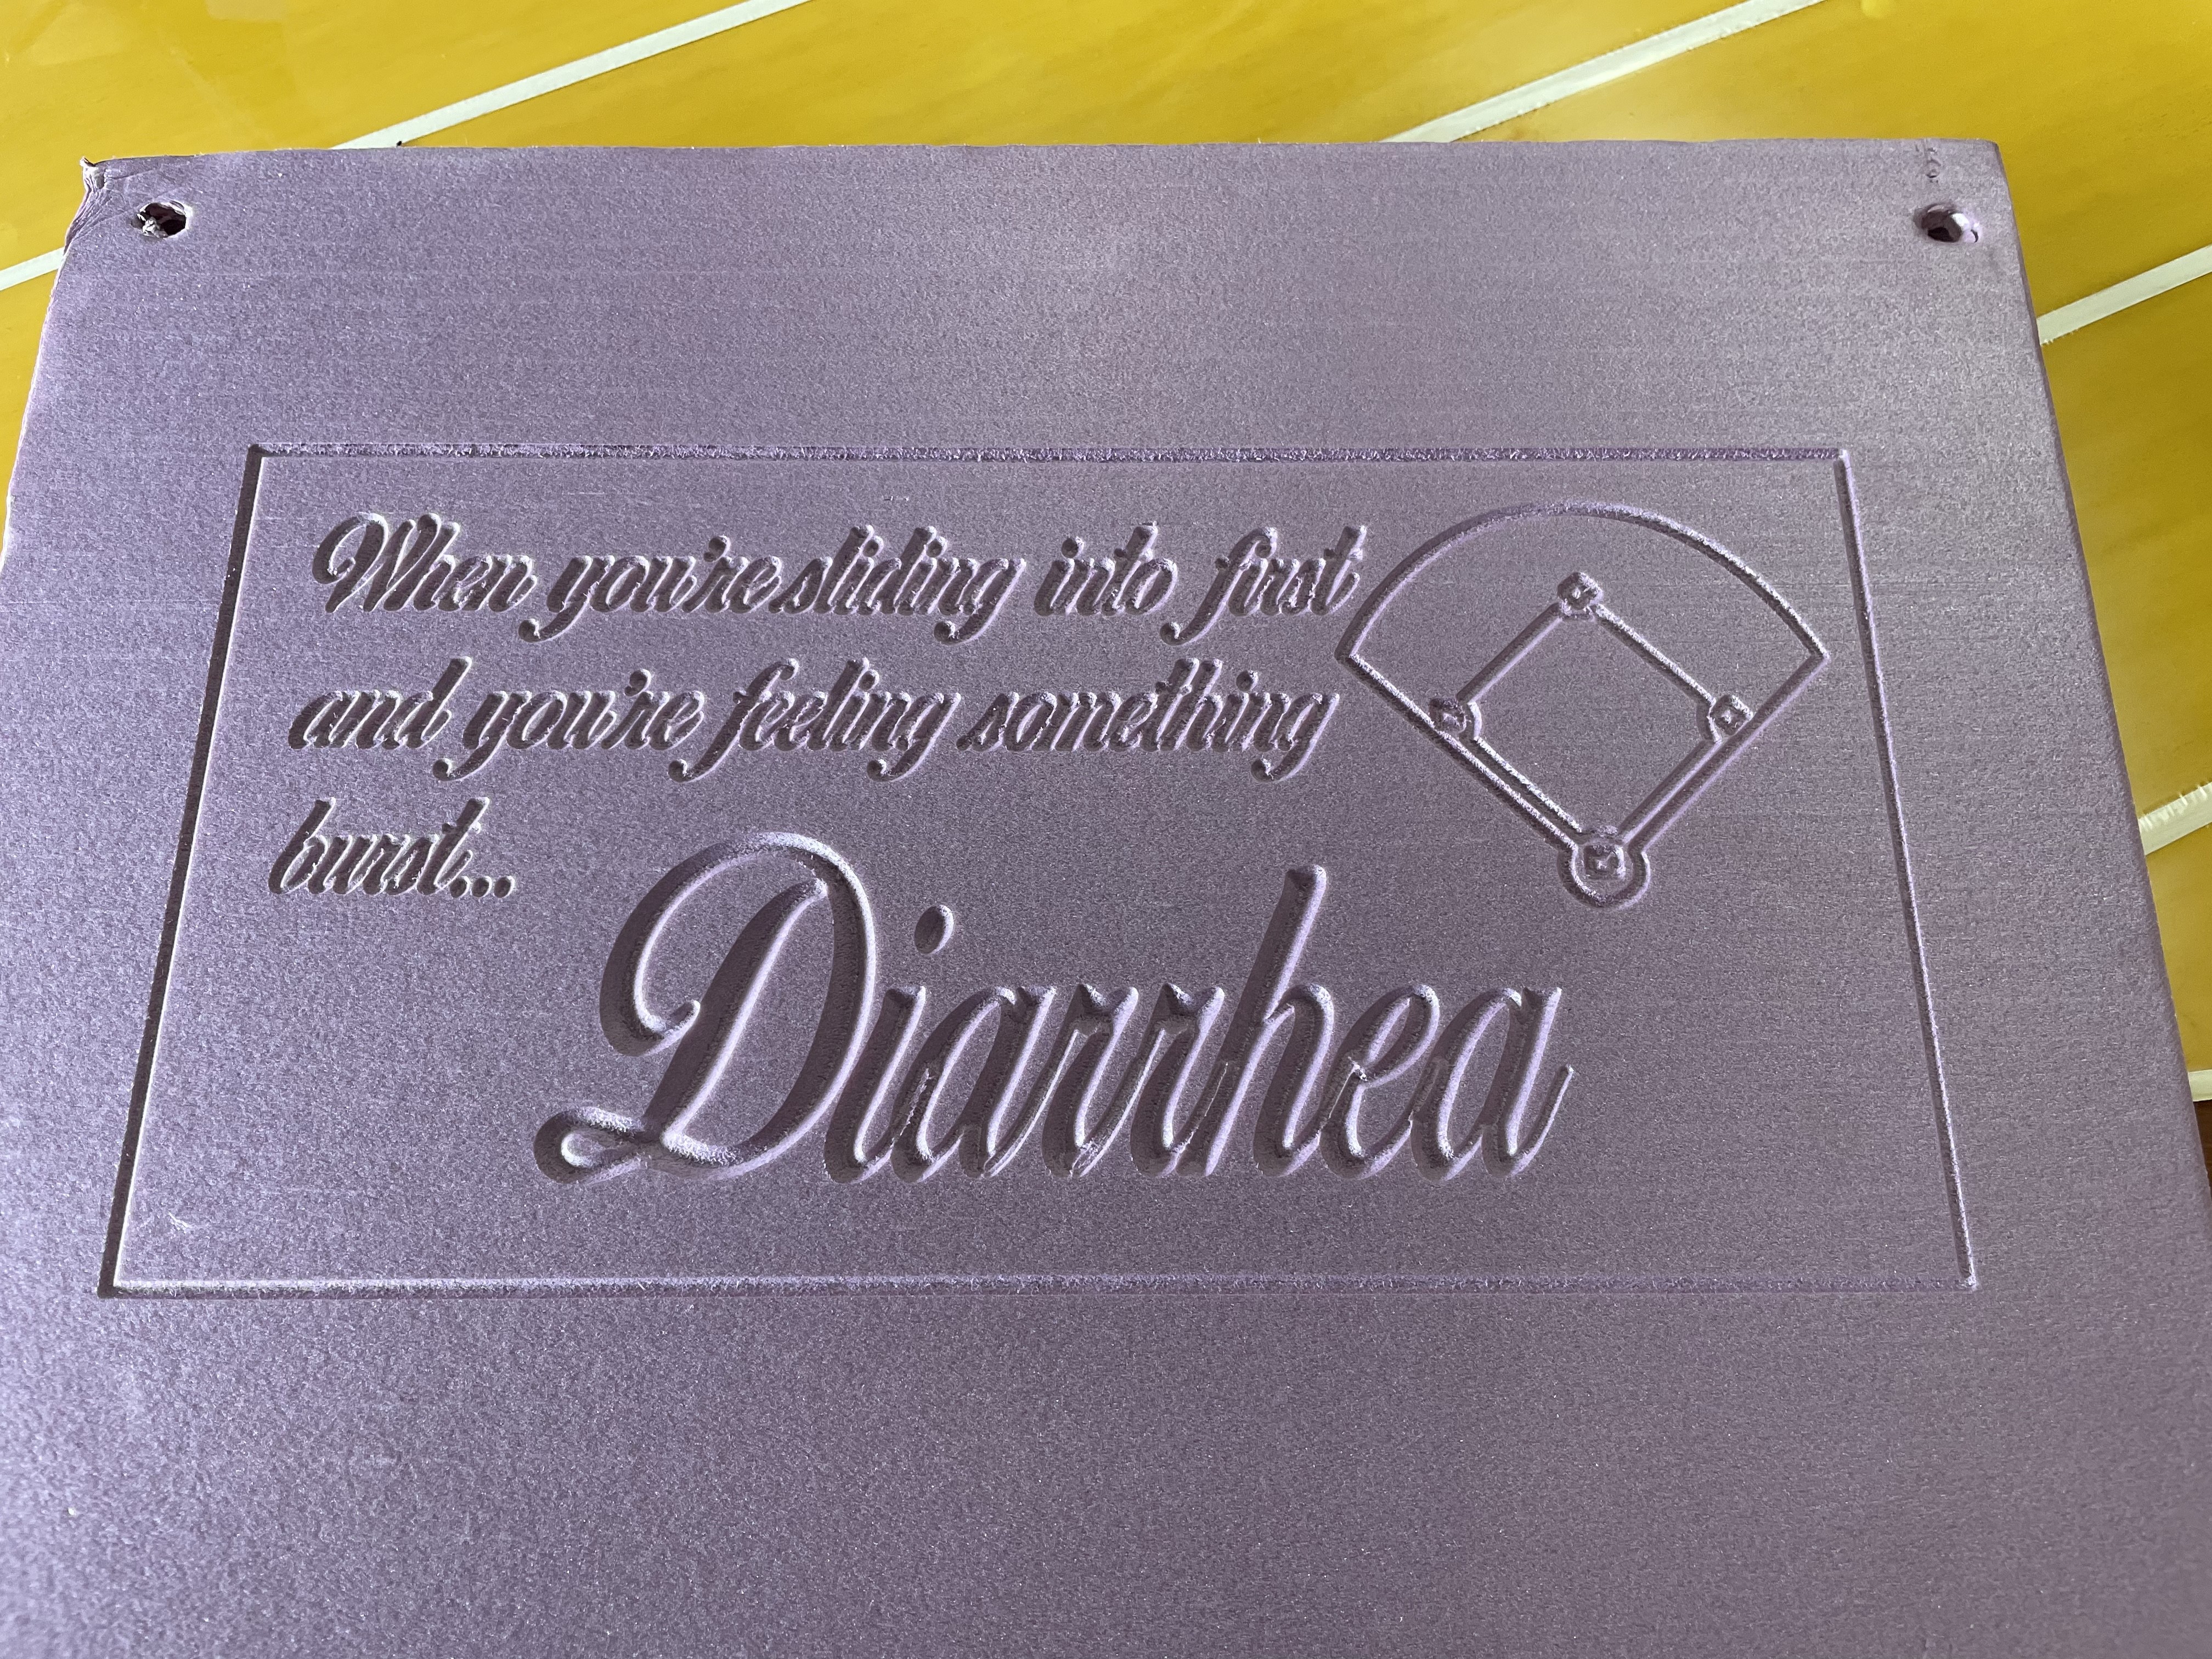
Here’s a taste. Just a funny sign I had designed for my son a while back when first trying inkscape.
That had to be in the gallery for sure!
Still playing with the machine. Things are going well. A couple of screw ups so far. Worst one was starting the router with the z probe still attached. It shredded the clip and a bunch of the wire. Easy fix with a new clip and some butt connectors. I also tried a tool change mid job and screwed it up twice. Forgot to zero out the z and it dove into the part while traversing. The next time I zeroed the z but forgot the 2mm raise up so it didn’t cut through the part. All learning curve stuff.
I now have 3 macros in cncjs. G0 so the machine will respond after connection. G92 c0 y0 z0 so I can set a new origin. Also, G0 x245 y220 so I cN go direct to center of work area which is nice for centering a carve on a board.
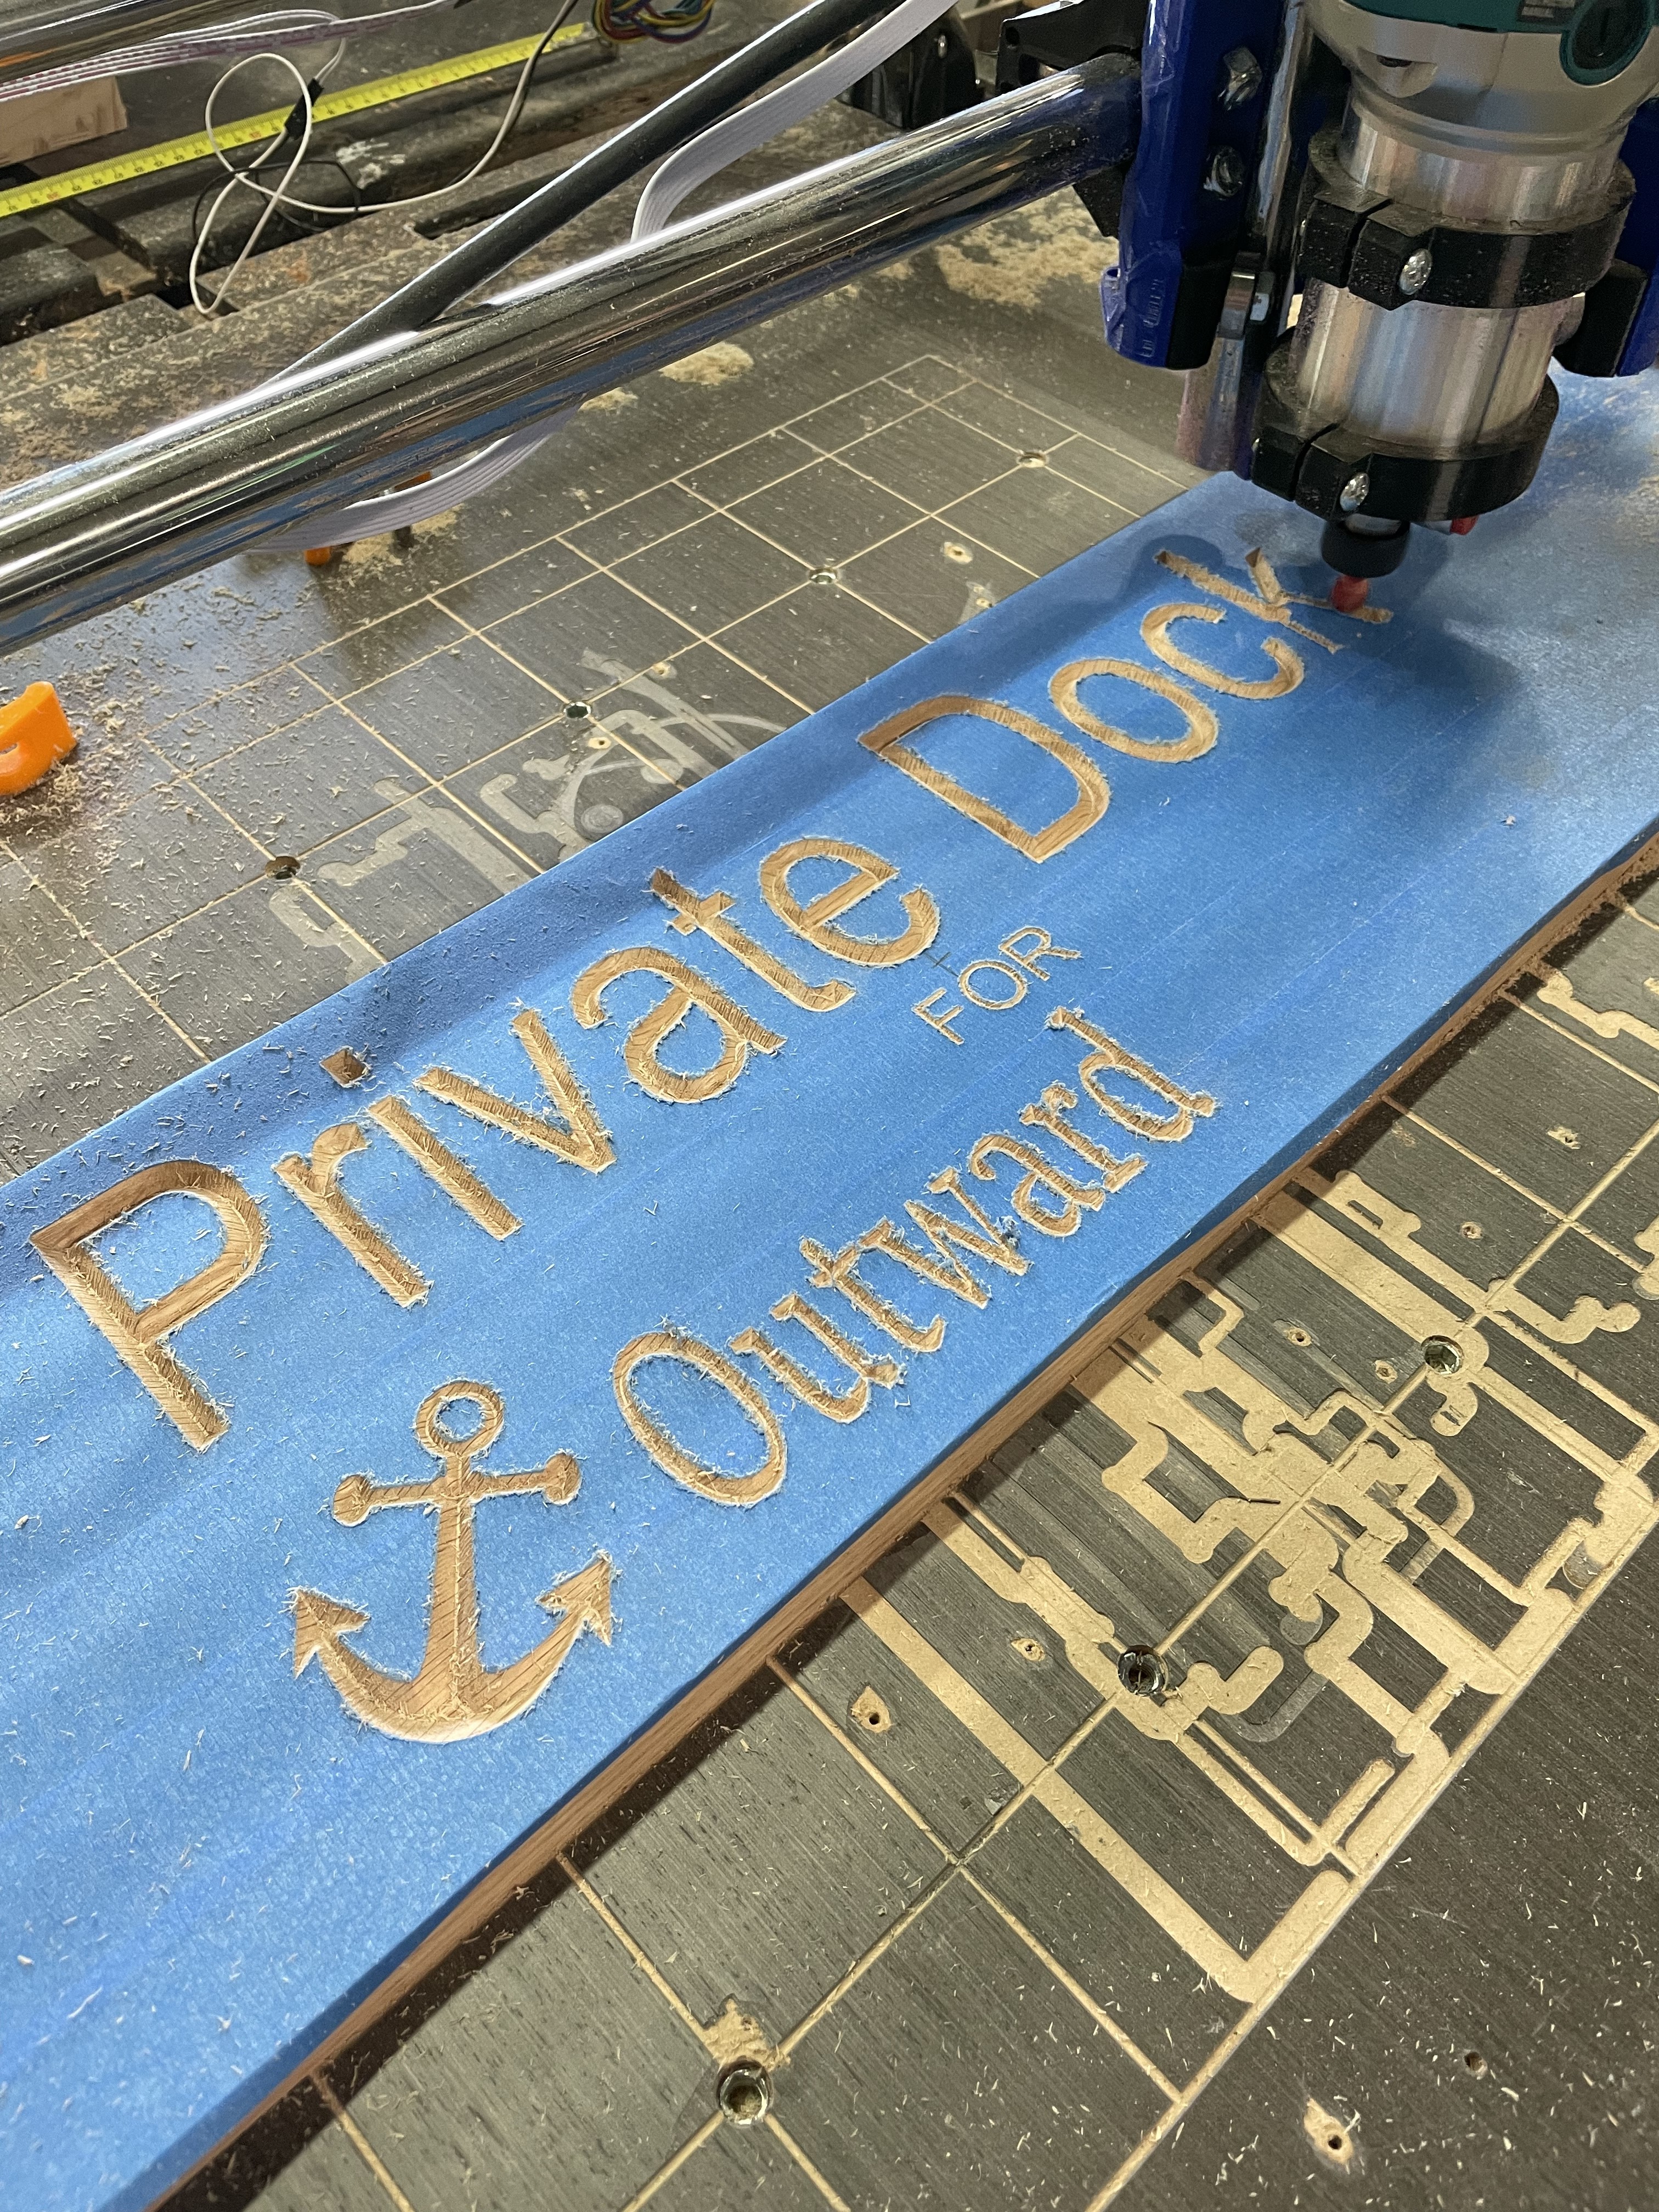
Yesterday I carved a sign for a friend for his mother’s dock. It came out nice. I picked up a new v bit. Feed is 10mm/s plunge 3 mm/s. I used a .2mm finishing offset. Wood is red oak. It cut very nice. He did the finishing.
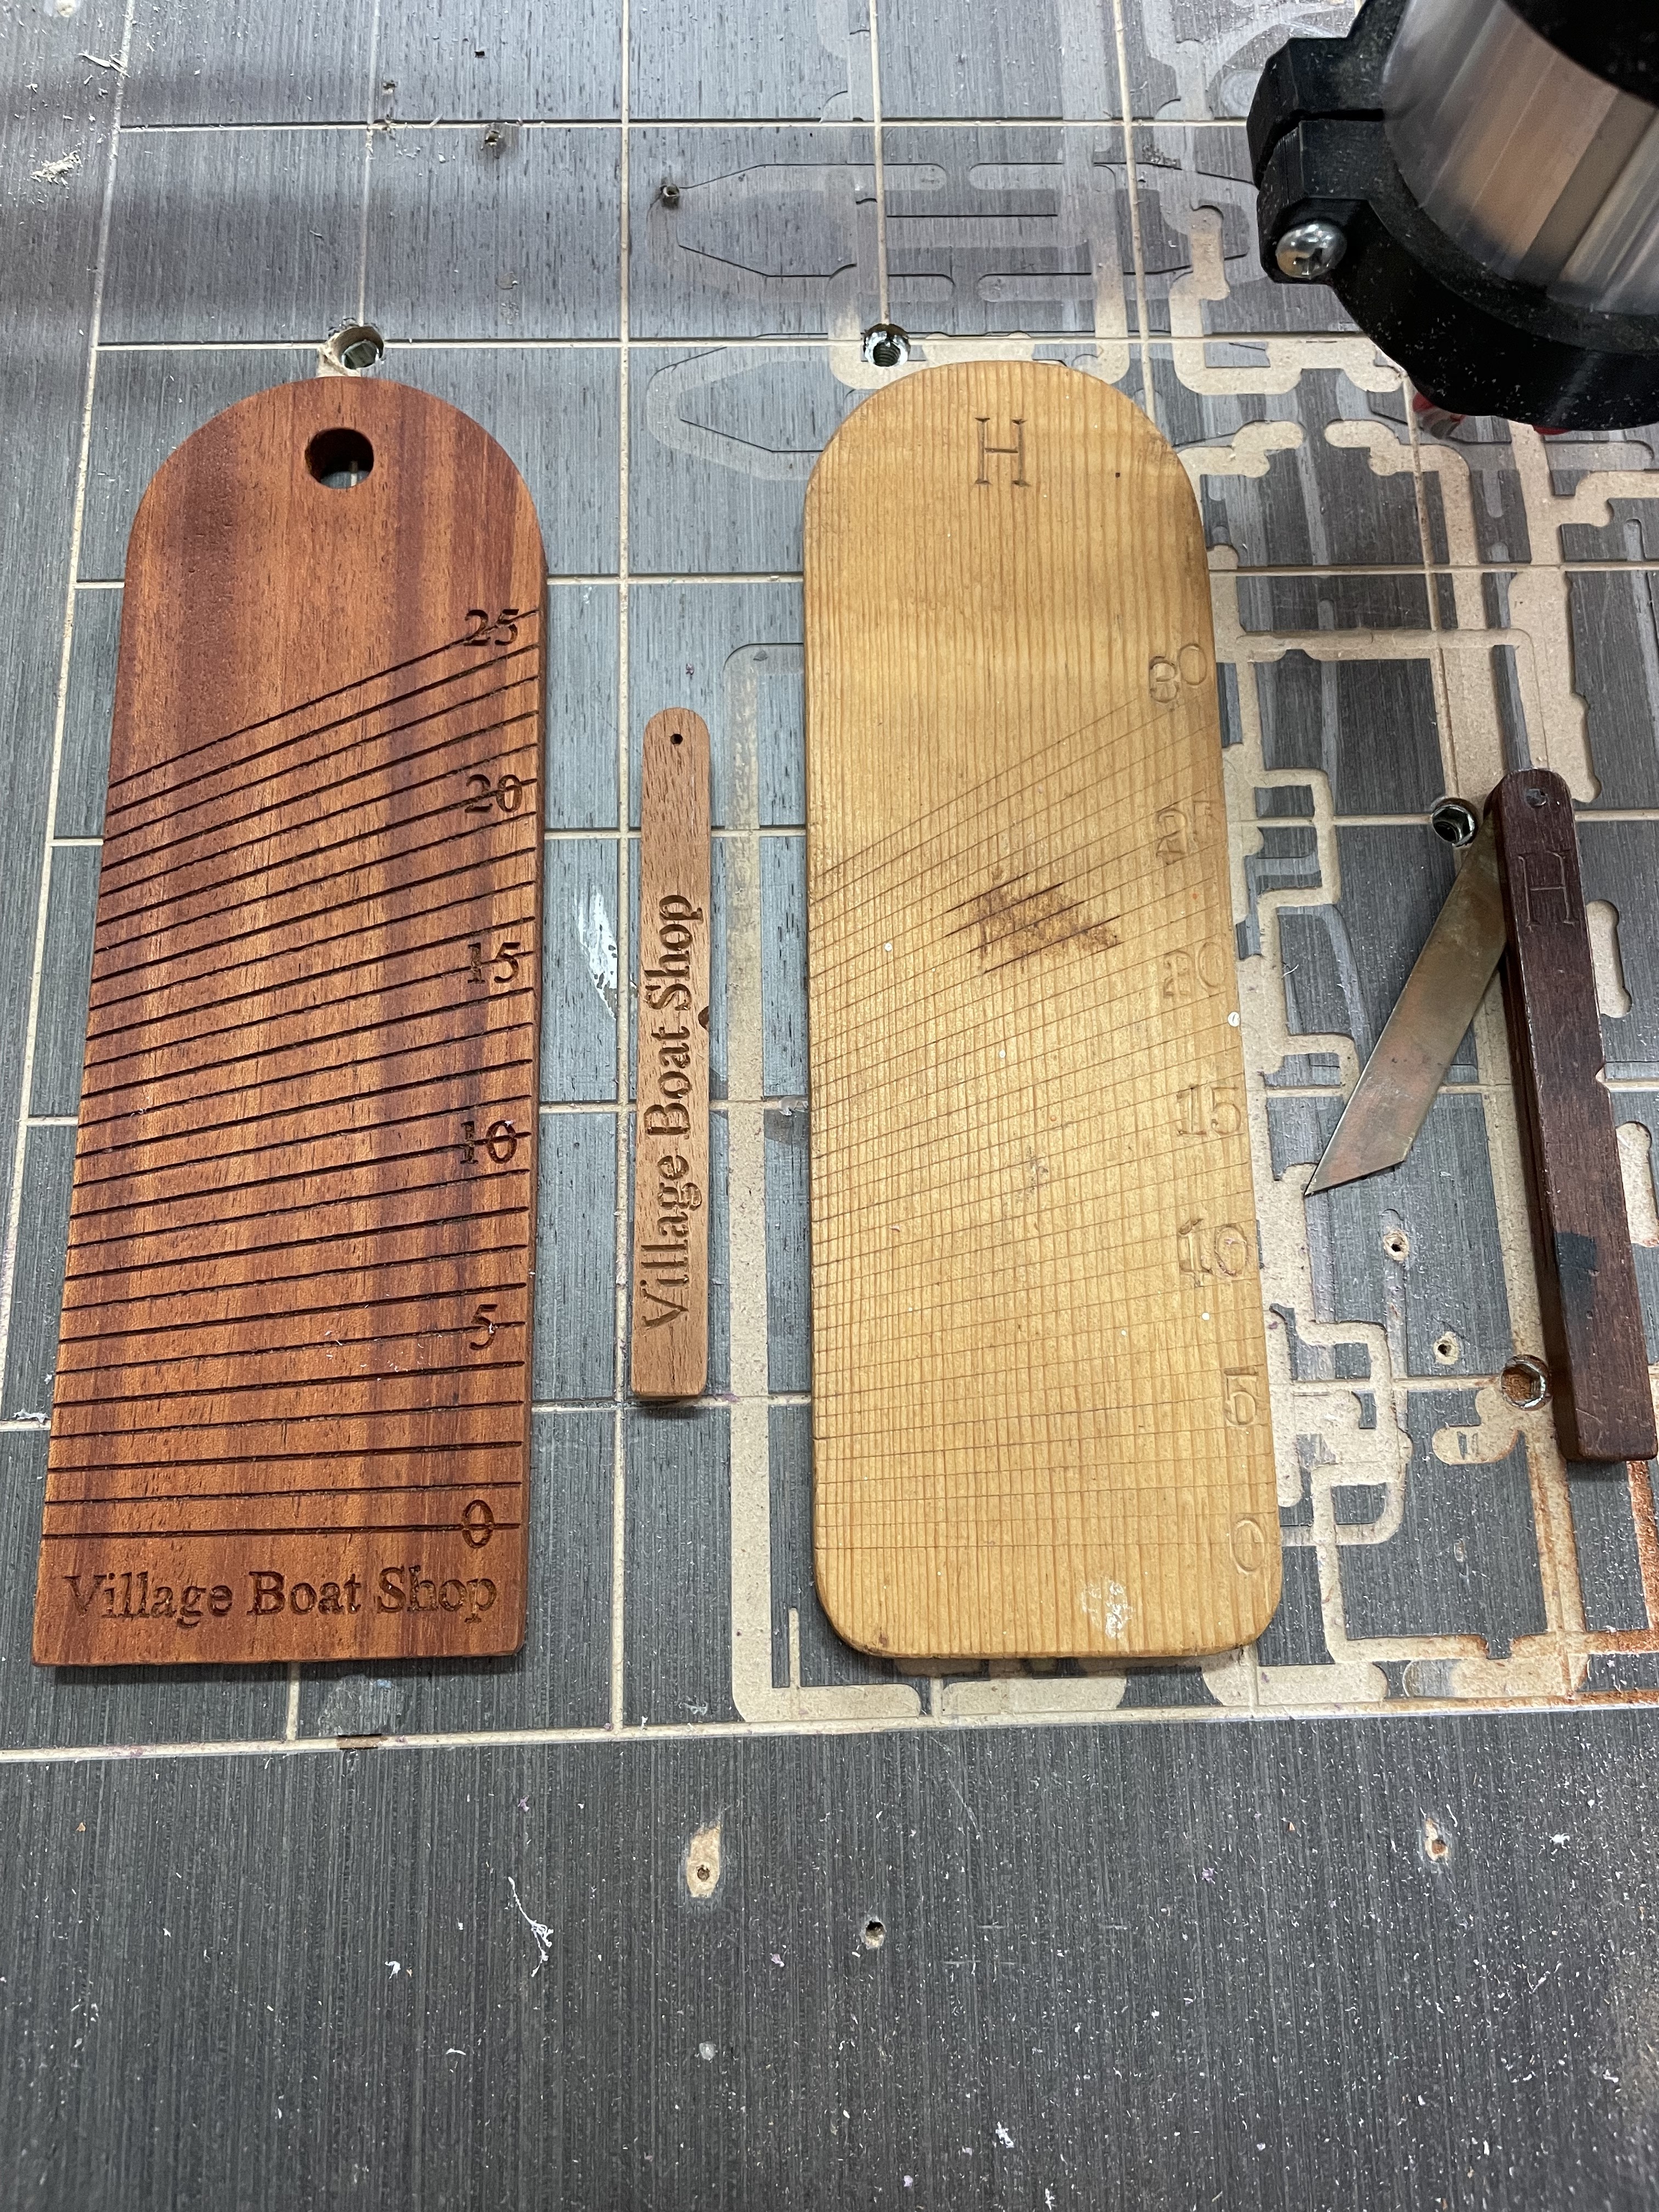
I designed a couple items in freecad. One is a bevel board the other a bevel gauge. The bevel gauge will get a 1/16" brass blade. Here they are next to the originals I handmade years ago. The bevel board is a double sided engrave and came out great. It’s oiled mahogany.
Last one for now… I have a boat in my shop that I’ve restored. I took a picture of the handpainted name on the transom and traced it in inkscape (about 2 hrs). I did a test v carve in foam. This would look good in mahogany with gold lettering and varnish.
Good lord, learning curve? You seem like you’ve been doing this a while, LOL.
What software are you designing in / converting to gcode? I see you used freecad, but anything else?
I’ve yet to really get into different software, but I love the angled surfaces on the anchor and want to learn to do that.
Great job, learning is all part of the fun!
I use one of these for my z-probe on my LowRider. Just attach the alligator clip to this and then touch the magnetic end to the bit.
Thanks. I’ve been on the computer hours a day outside of work it seems, designing or learning or looking up how to do this in software. I use freecad, I’ve modeled in 3d with it and printed things. It’s also great for very specific 2d sketches which is handy. For example I just sketched out some plywood hold downs in a couple minutes. Then just setup in estlcam and cut them out. It has its limitations such as setting text on am arc and basic stuff like that. I also use inkscape which is great for the svg and dxf files (and can do all the text manipulation) for estlcam. Estlcam is a great software. I use that to generate the gcode. I use cncjs for sending gcode. I’ve also used tinkercad, but haven’t used it for cnc, just 3d printing.
Great idea on the magnet