I have been looking (drooling) at the new belt tensioners on the Primo and thinking they look like the correct size for the lowrider, and I hate the zip ties. What say you @vicious1? Any chance there will be official ones, or should I keep Tinkercading my Frankenstein?
Well, yup definitely needs to get ported over, but I think it would be better to do a total rework as well. I have a few more primo sizes to finish first.
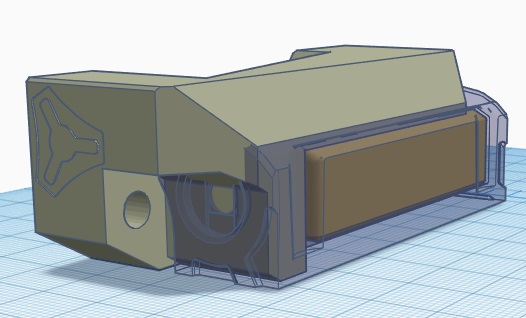
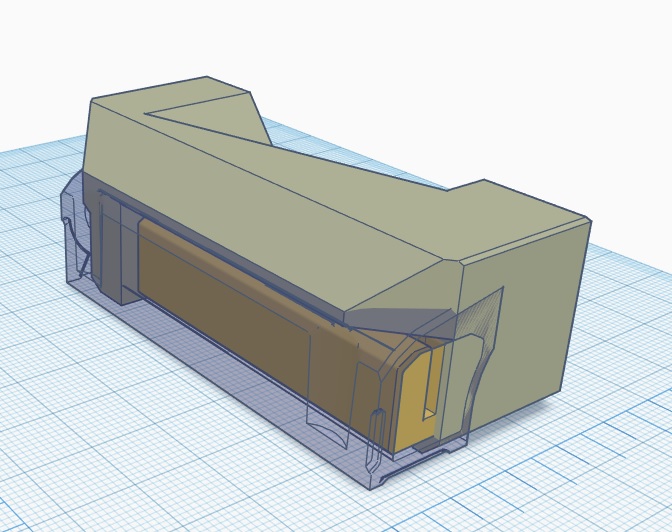
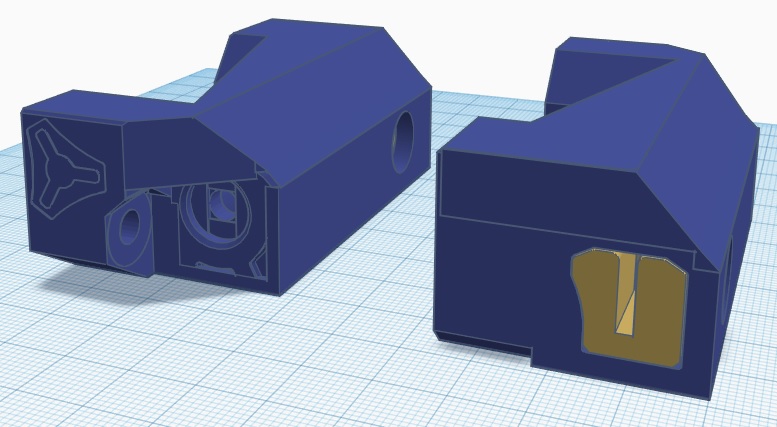
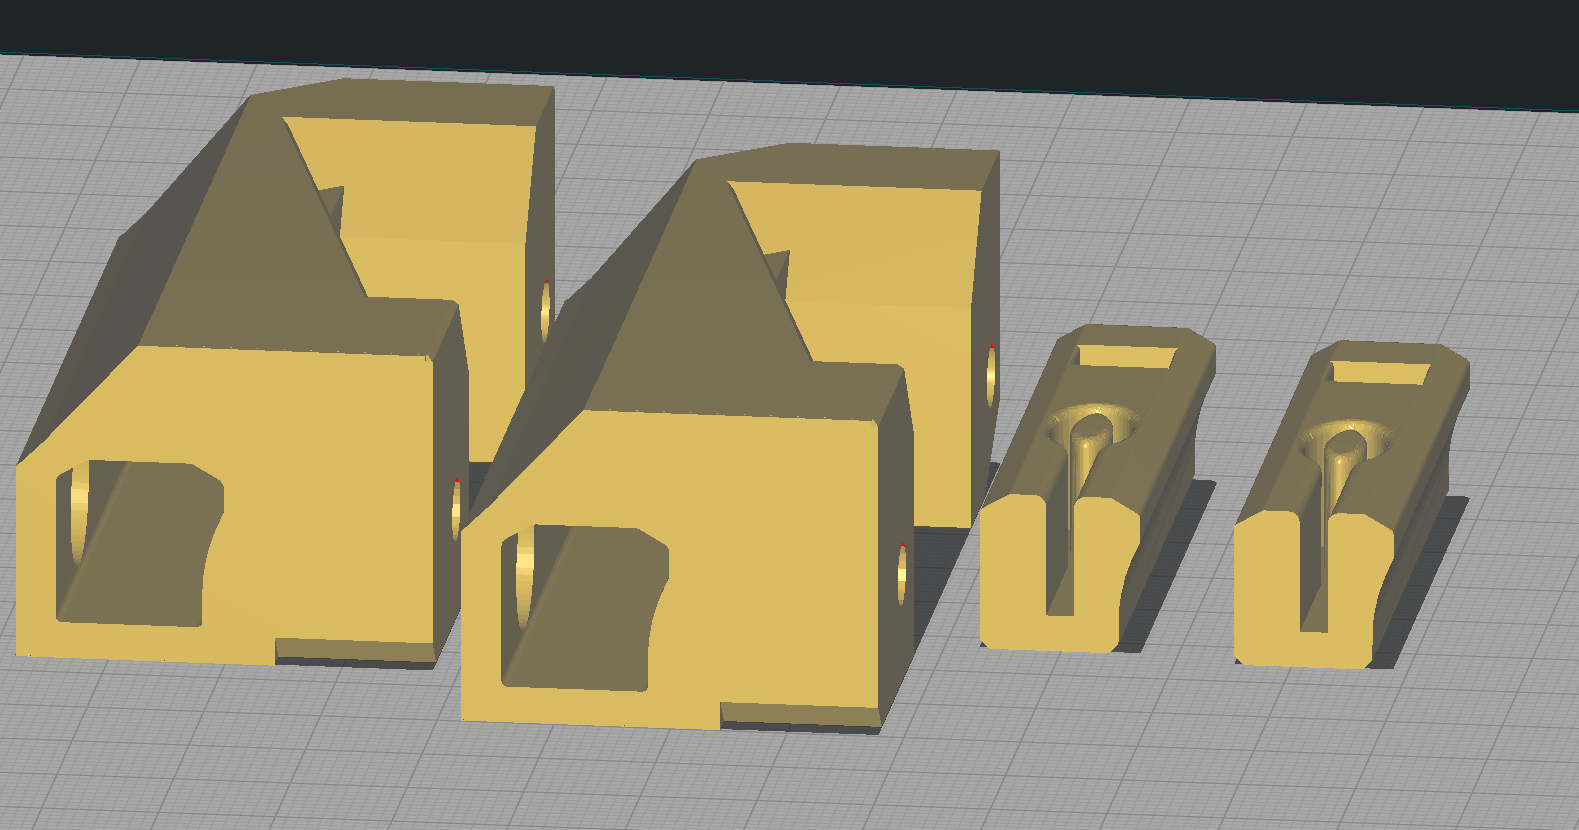
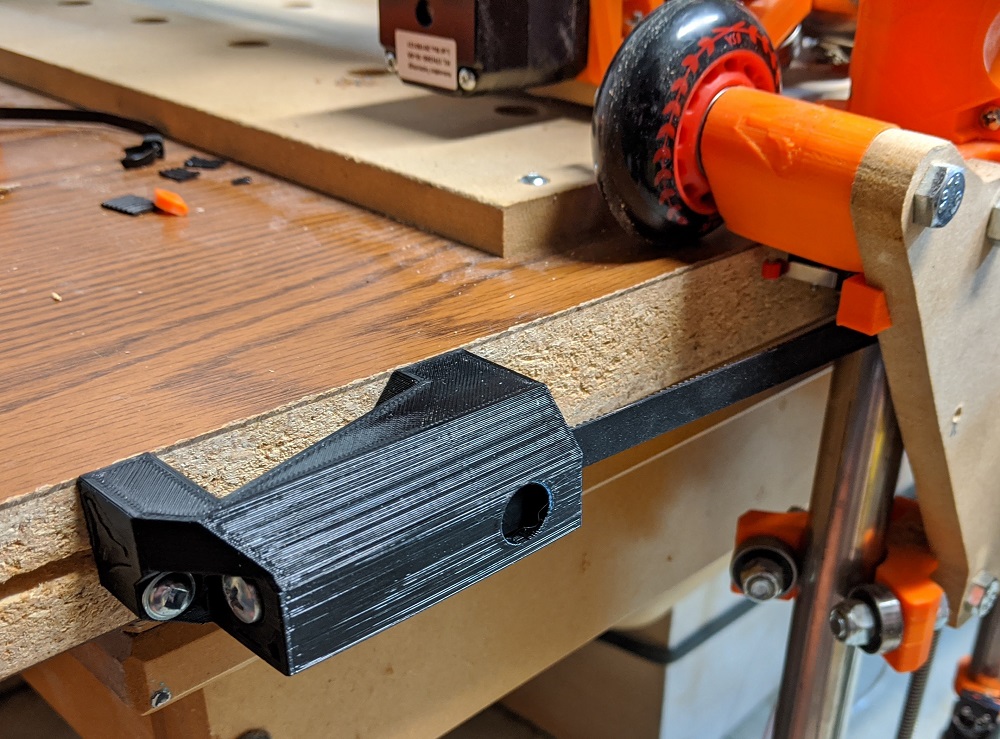
EDITED - Added mirrored parts, cleaned up the finish and fixed overhangs on the part. Print as provided. Each piece needs a M5 Locknut and M5 x 30 screw. Lowrider2 Primo Belt Clamps.zip (213.4 KB)
I installed them tonight and love them. They use the same screw holes as the stock belt ends and it was a super fast swap. So much easier to use then the zip ties.
@cows2computers That’s amazing! Nice work. Direct swap and repeatable tension (counting your turns is my plan). This will be incredibly useful for me because I sometimes need to transition my lowrider to a wider or longer table. This will save me probable 20 minutes every time I do that. Much thanks. And also much thanks to @vicious1 for the brilliant design. Much improved, as usual.
Edit: Mine are coming fresh of the printer now! I’ve not seen this mentioned anywhere but a quick way to remove/ reinstall these belt stop is to use threaded T-nuts (with the barbed washer) with matching thread pitch bolts. I’ve used this method many many times to uninstall/reinstall and I always have the same mounting spot and I’m not weakening the mounting holes like you would if you just used a wood screw. I pre-drilled then epoxied my t-nuts in place for good measure as well.
There’s my contribution of genius to the community…it’s not much, but hope it helps at least one solitary soul one day.
Everyone says to “Just Print It” no matter what I want for my LR2, but I don’t have a 3D Printer, so where can I buy these things?
I would love to support folks in the V1 family but alas there is no go-to links on this site or anywhere else that I can find.
I printed a set of these for my LR2, but since that’s been replaced by the LR3, I no longer need mine. I’m in western Canada, and shipping anything from here tends to get pricey, but someone might be located closer to you and be able to do a custom print for you.
In the Southern End of America in Arizona, it seems there isn’t anyone with an Etsy Shop for these things, not just the tensioners but anything.
Maybe I just need a 3D printer to make stuff, Thanks
It would be best to own a 3D printer but there are a few of us on the forum that live in your area can help you with the printed parts. I live in Arizona as well.
I live near Sierra Vista, so maybe we could do some business, how much for the new tensioners btw? I’m going to see if I can try something I have in mind but I really like the new design, plus I haven’t come up with a cool electronics case either.
What kind of 3d printer are you using and was it fairly simple to get it figured out, key word fairly? It is something I have looked into for years but I am still finishing my Lowrider2, but soon I think one could be a lot of fun and even a side business for retirement.