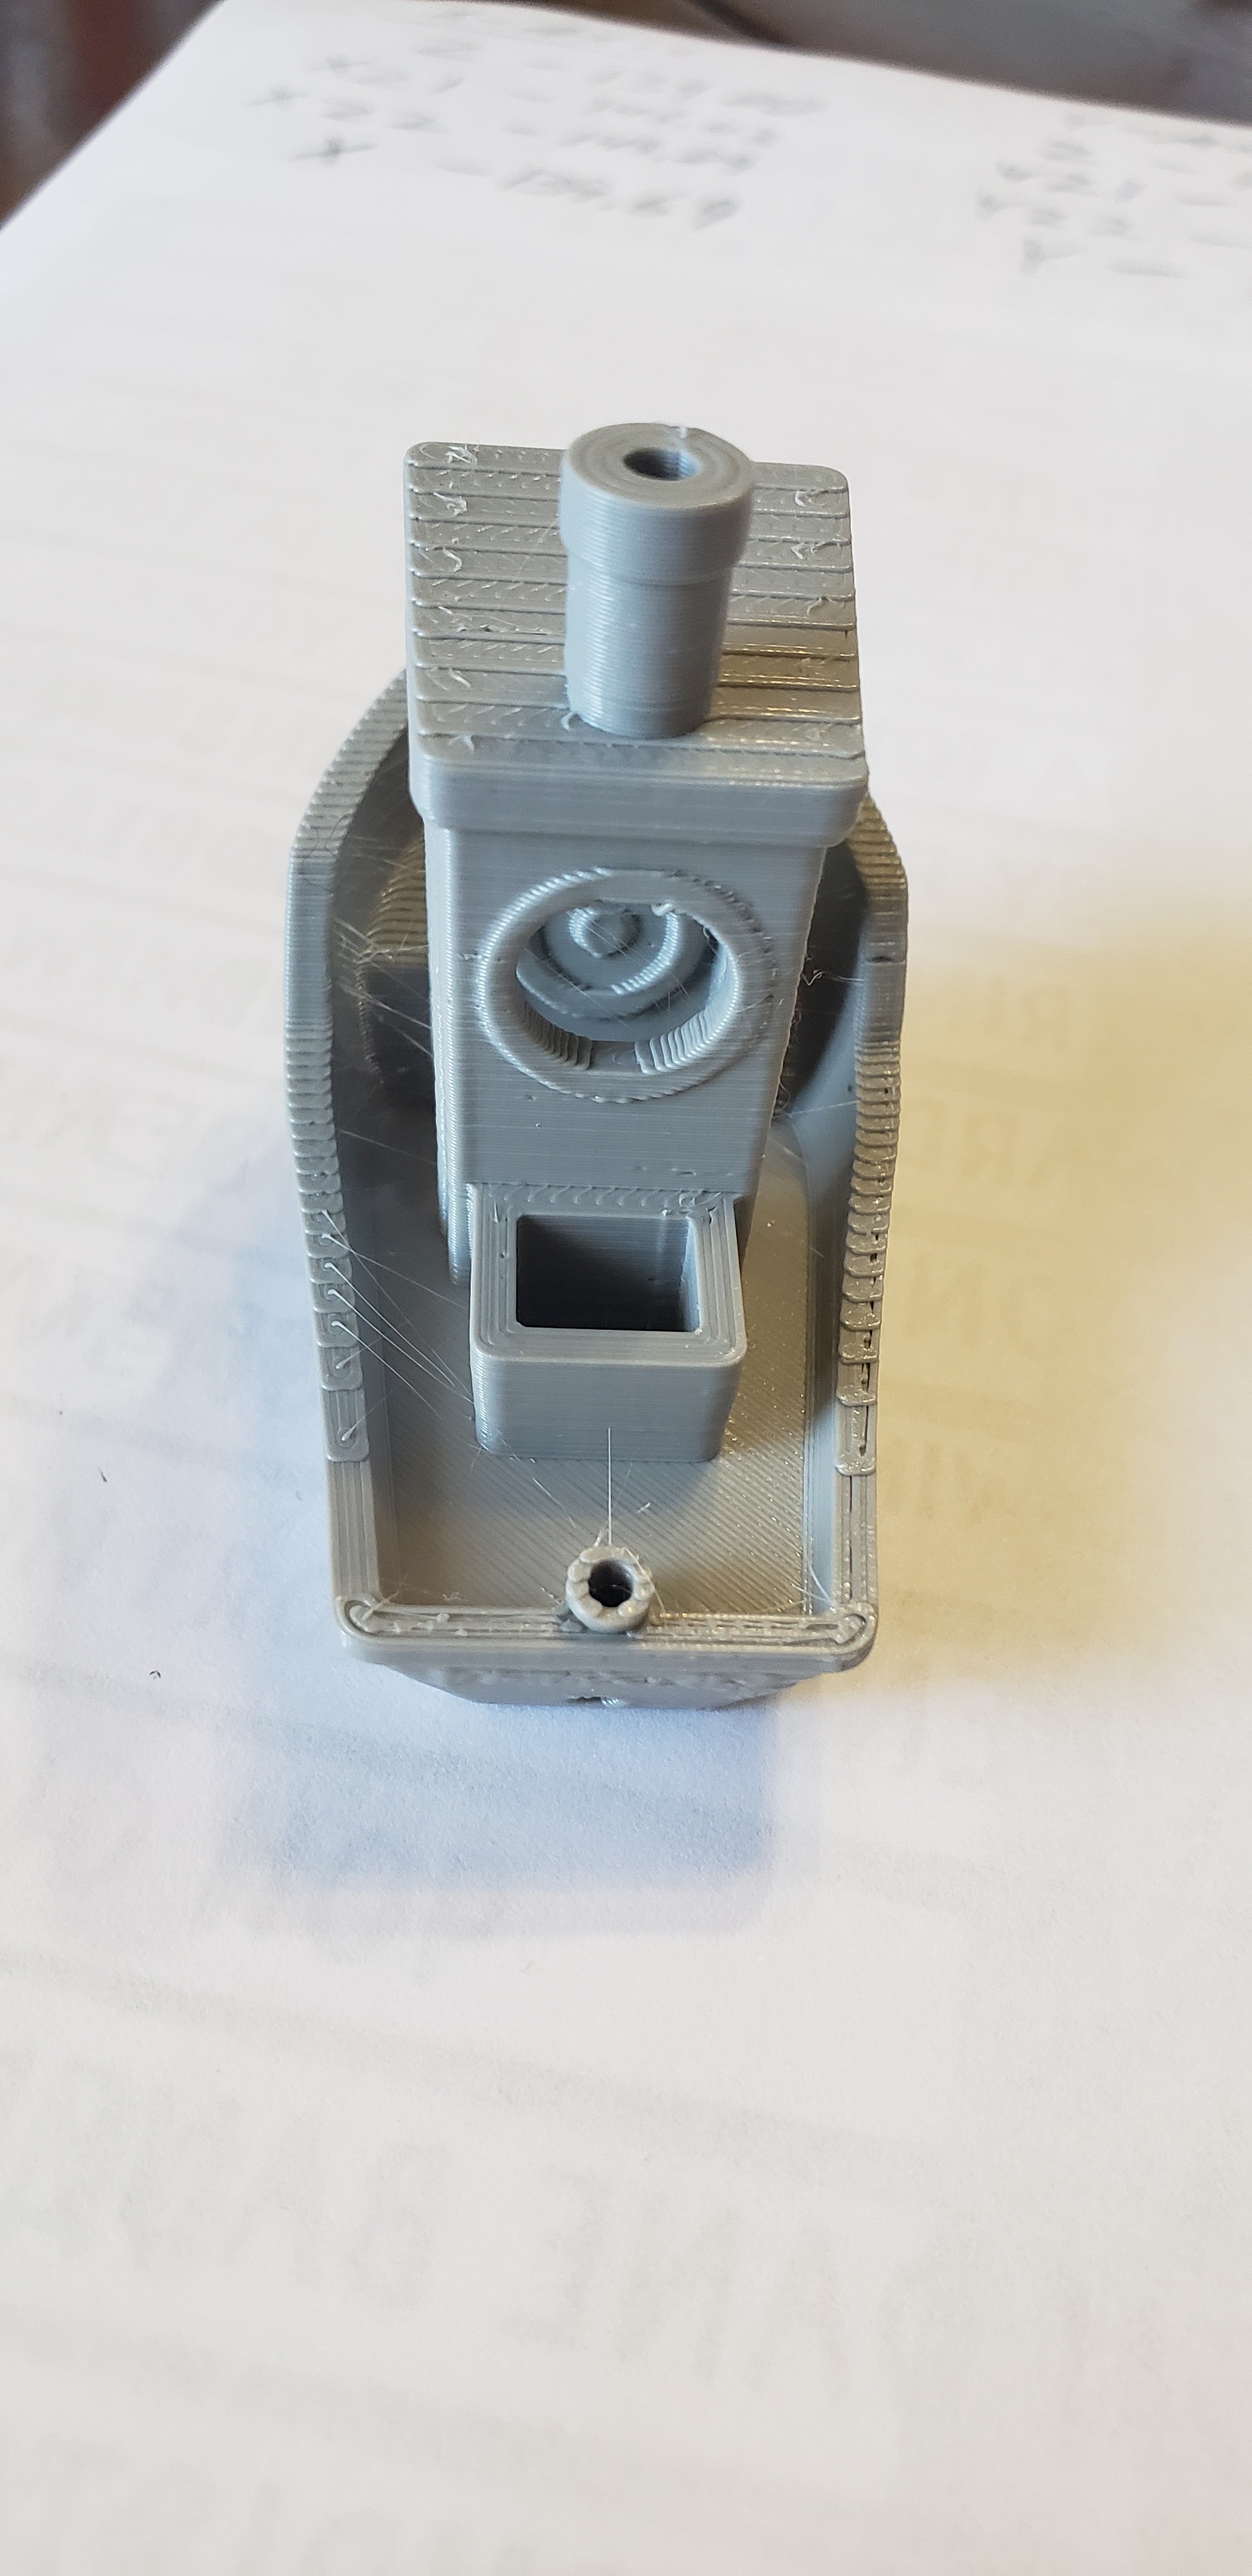
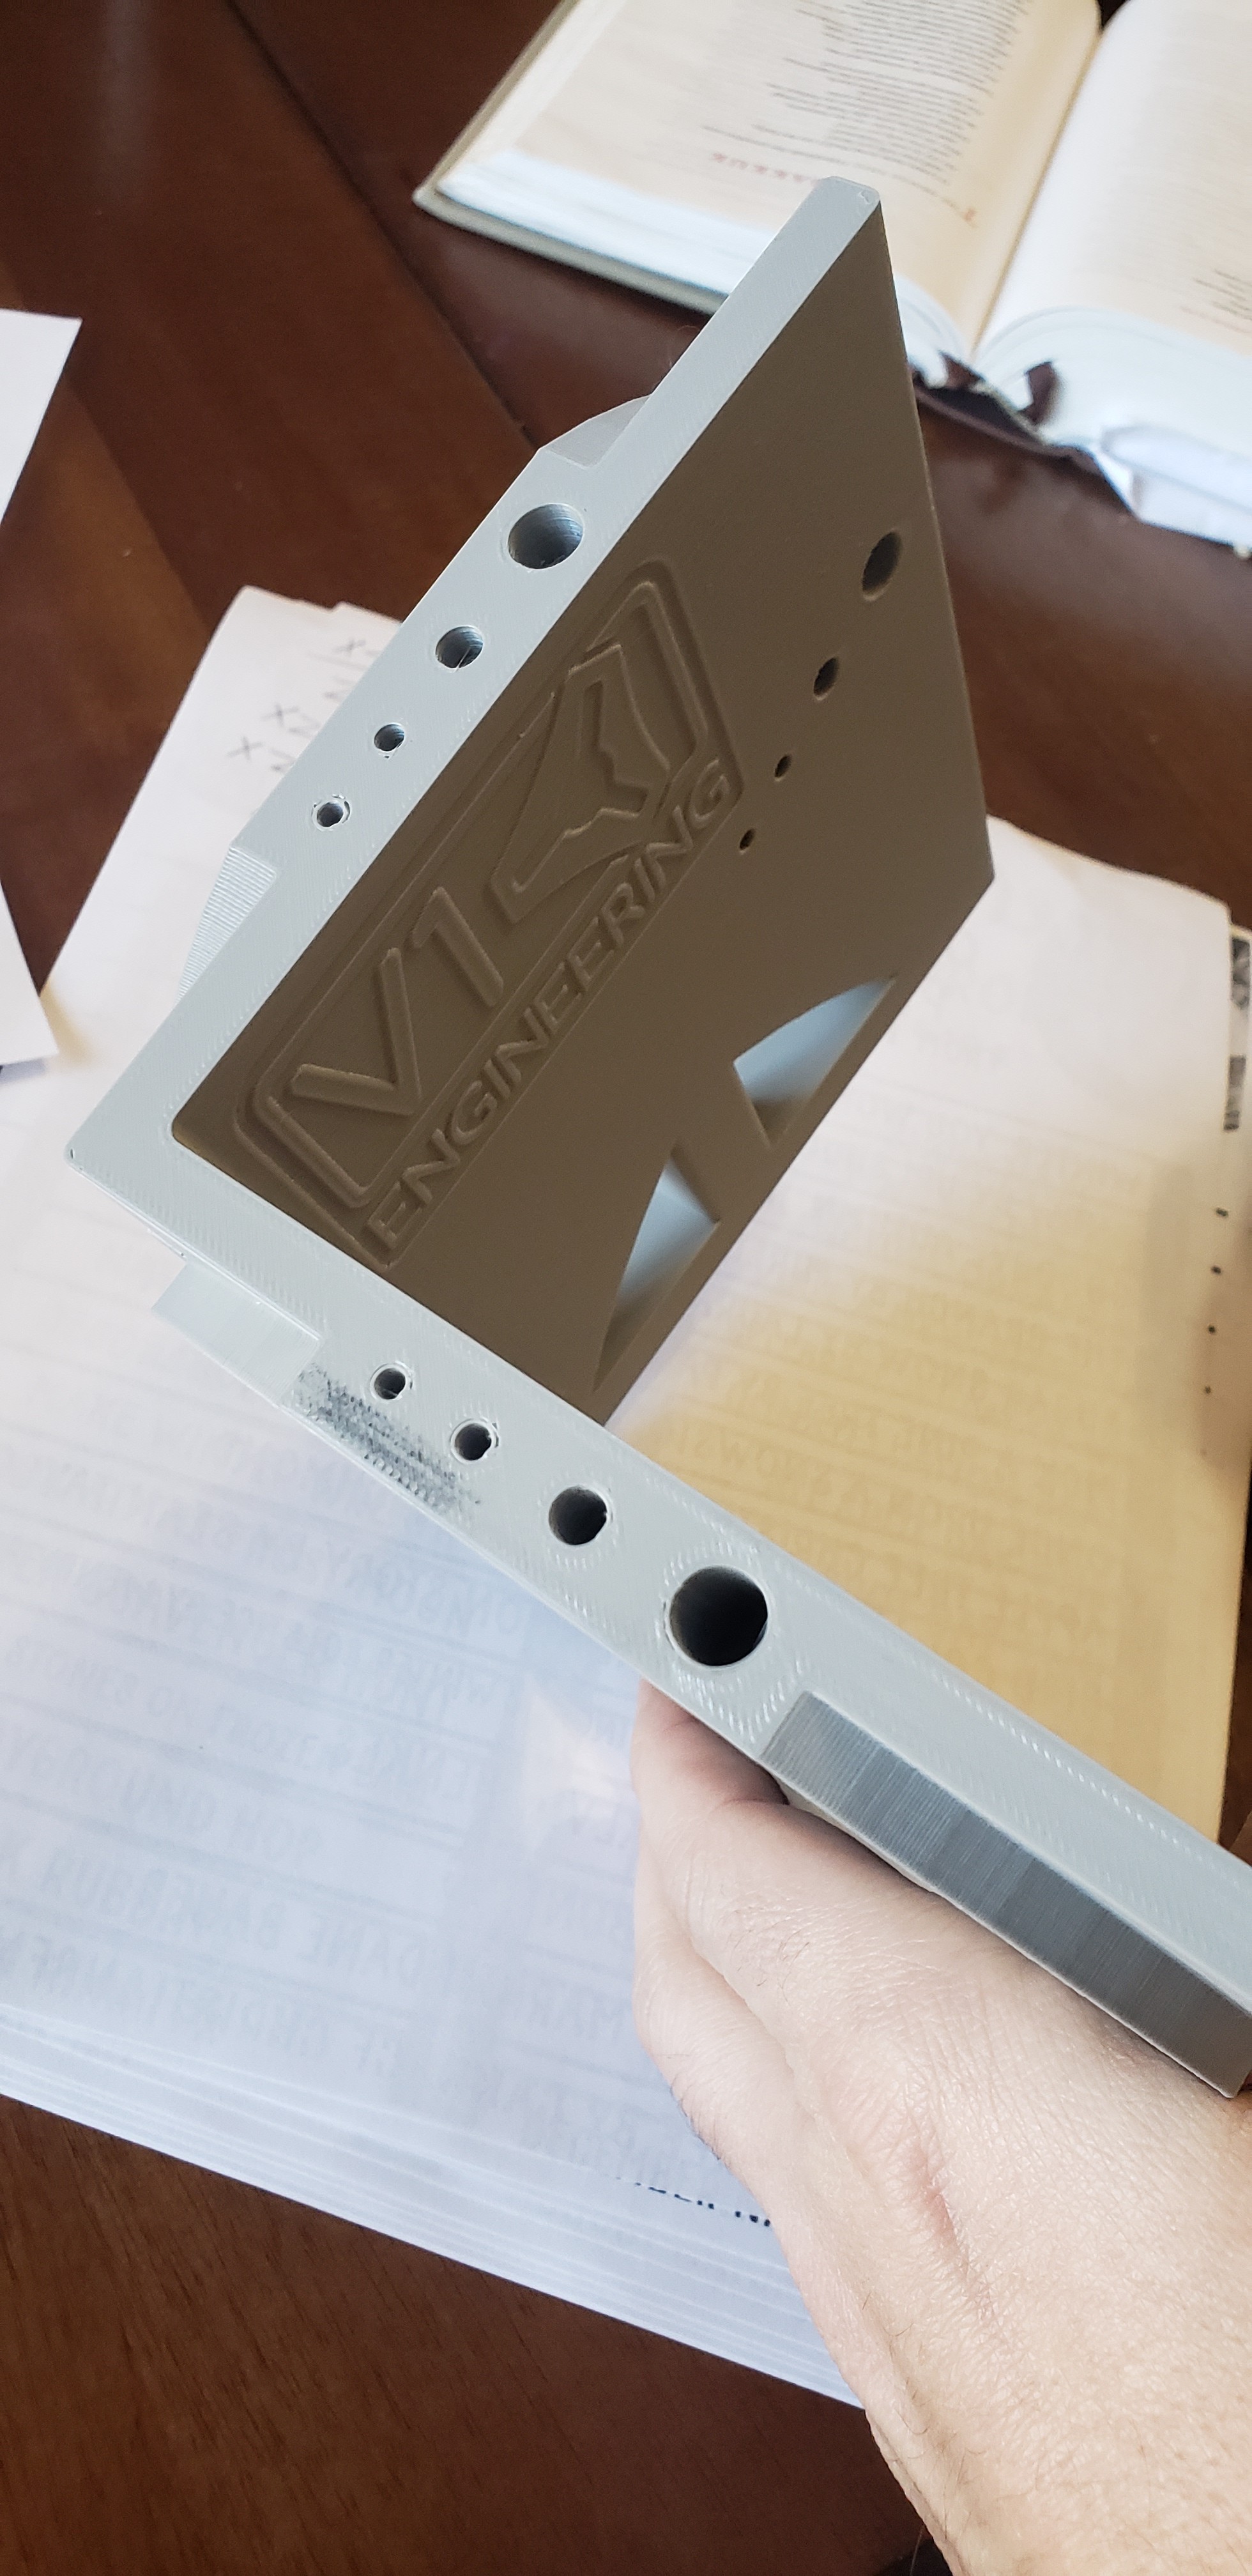
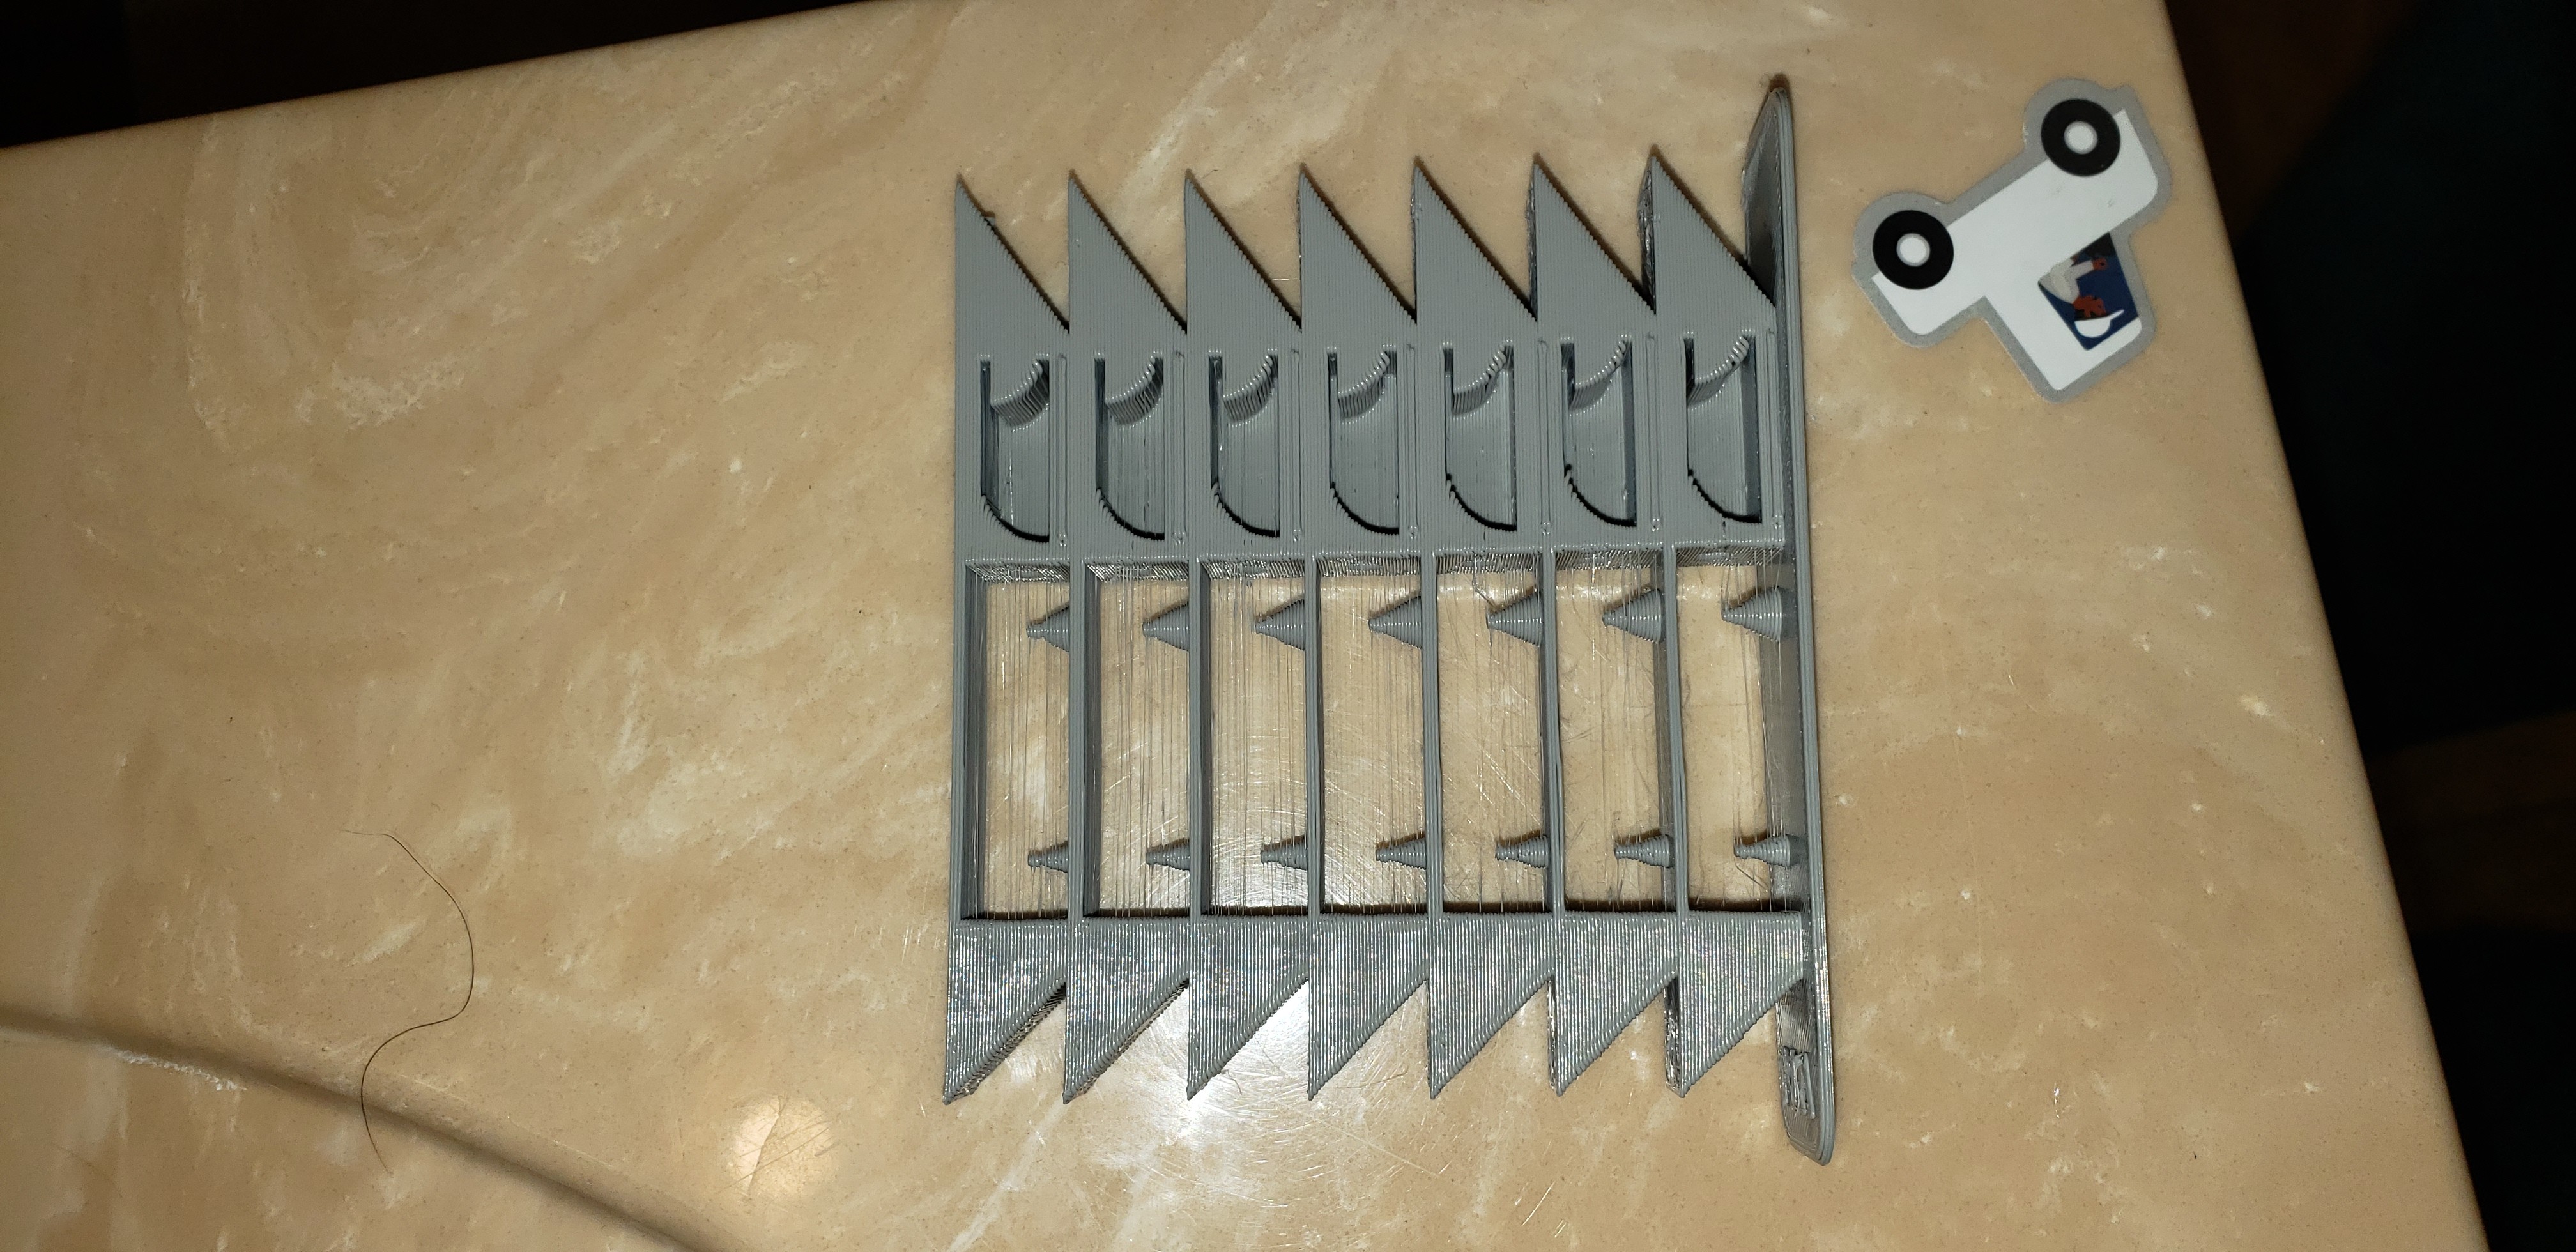
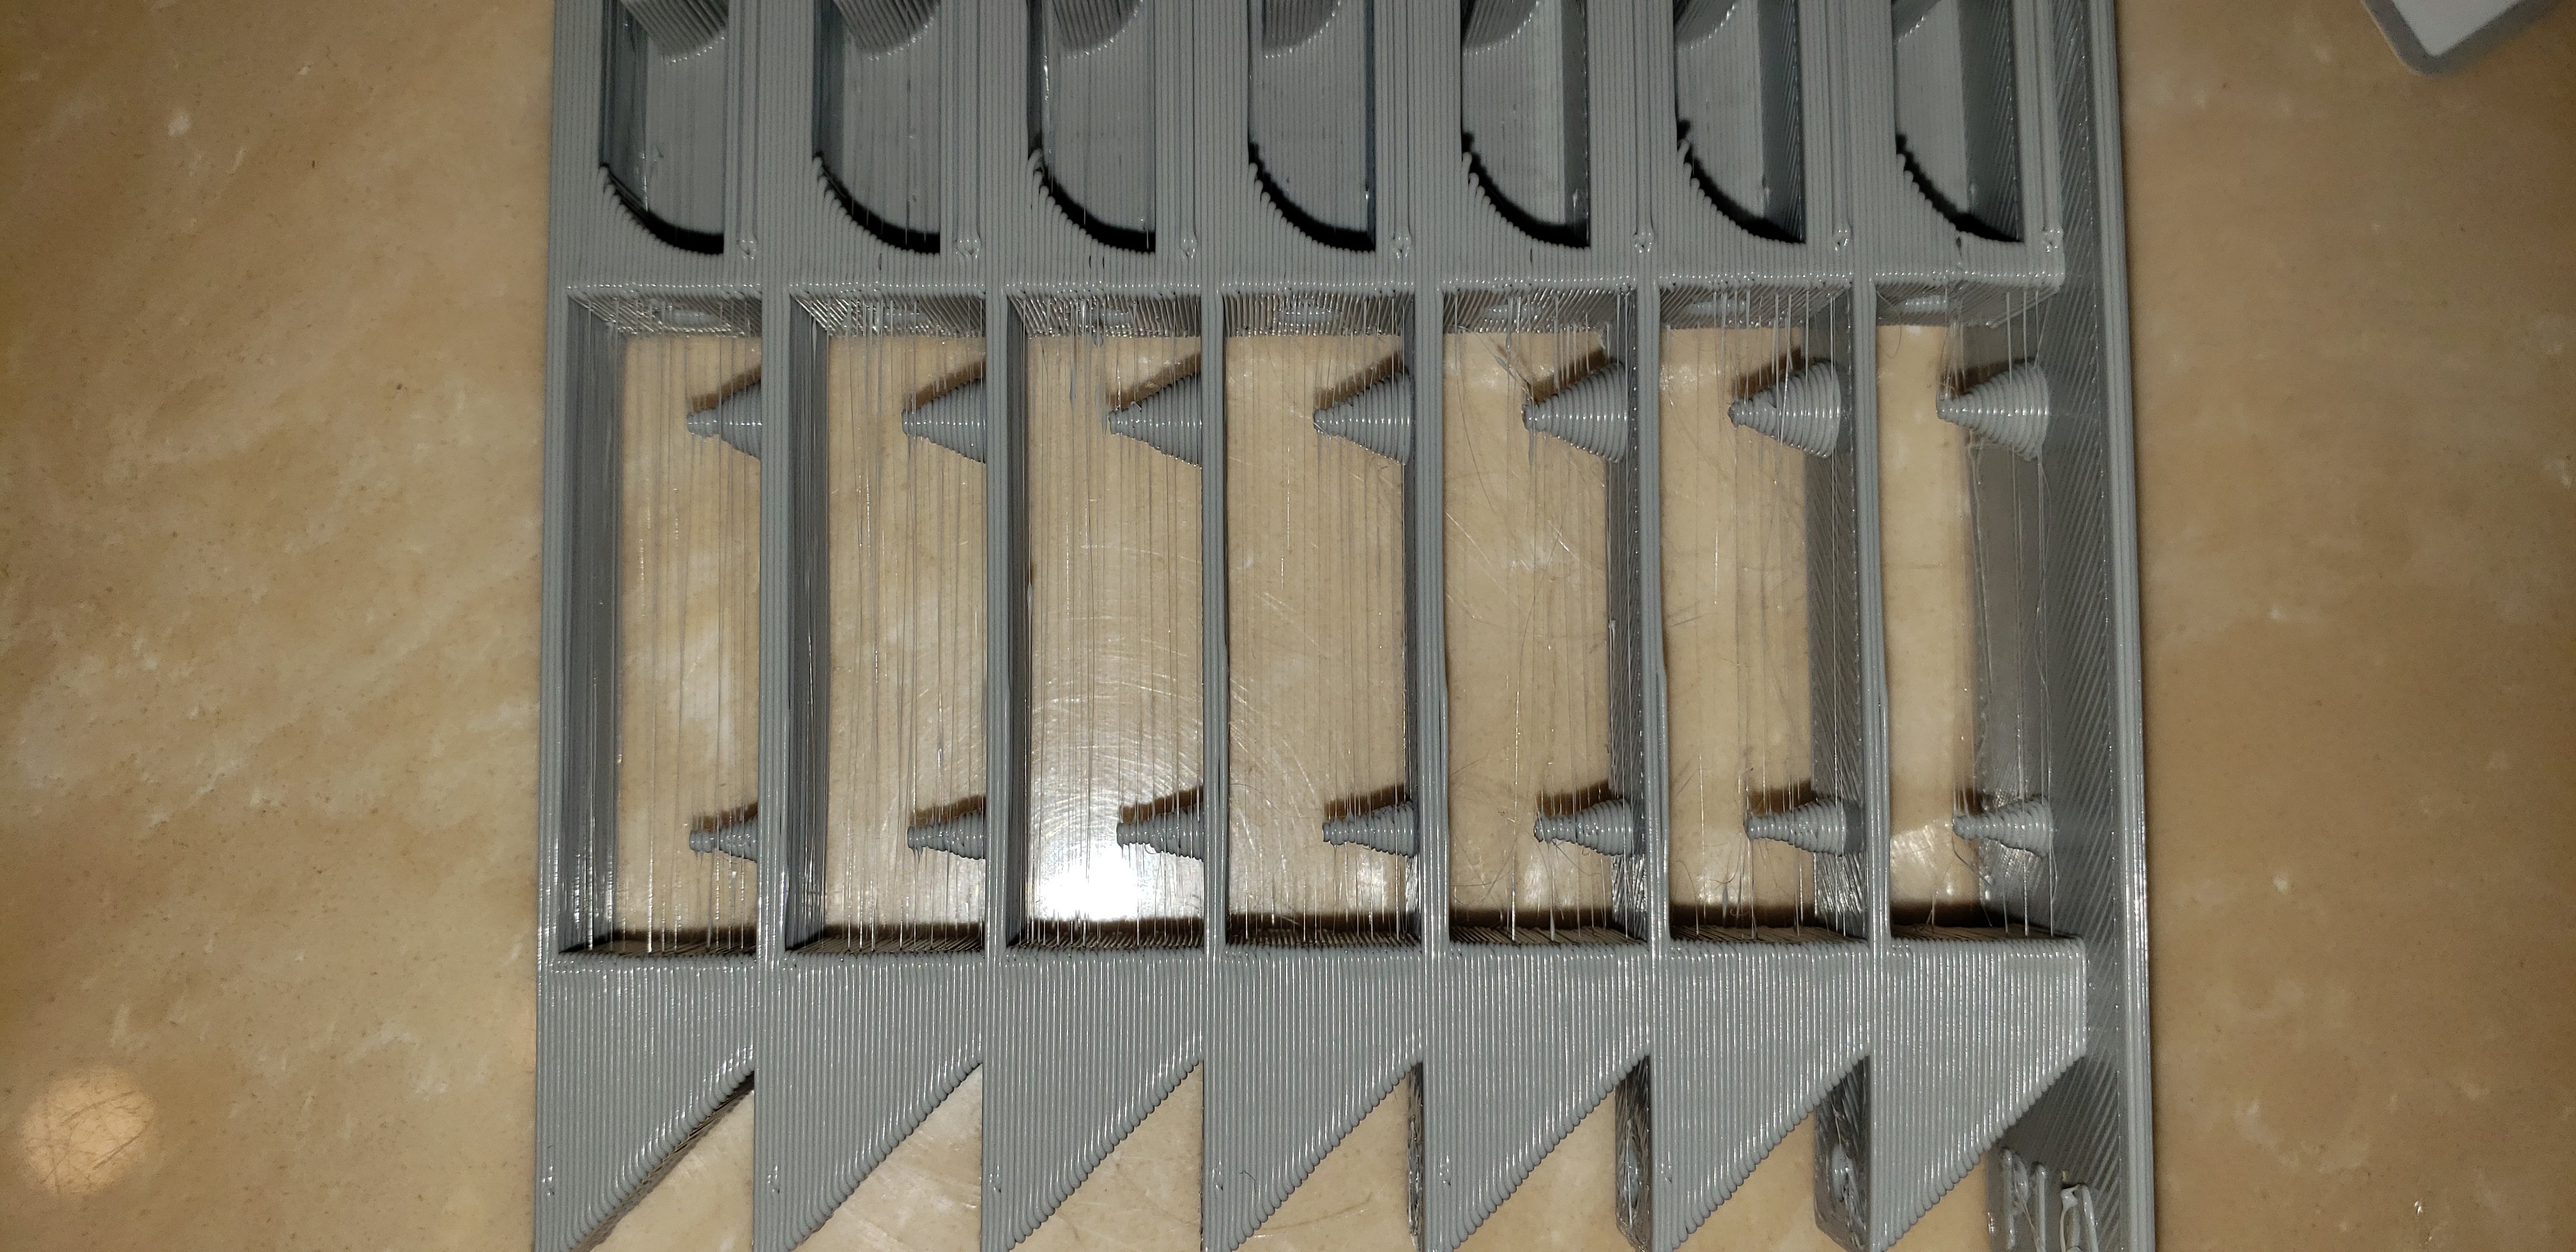
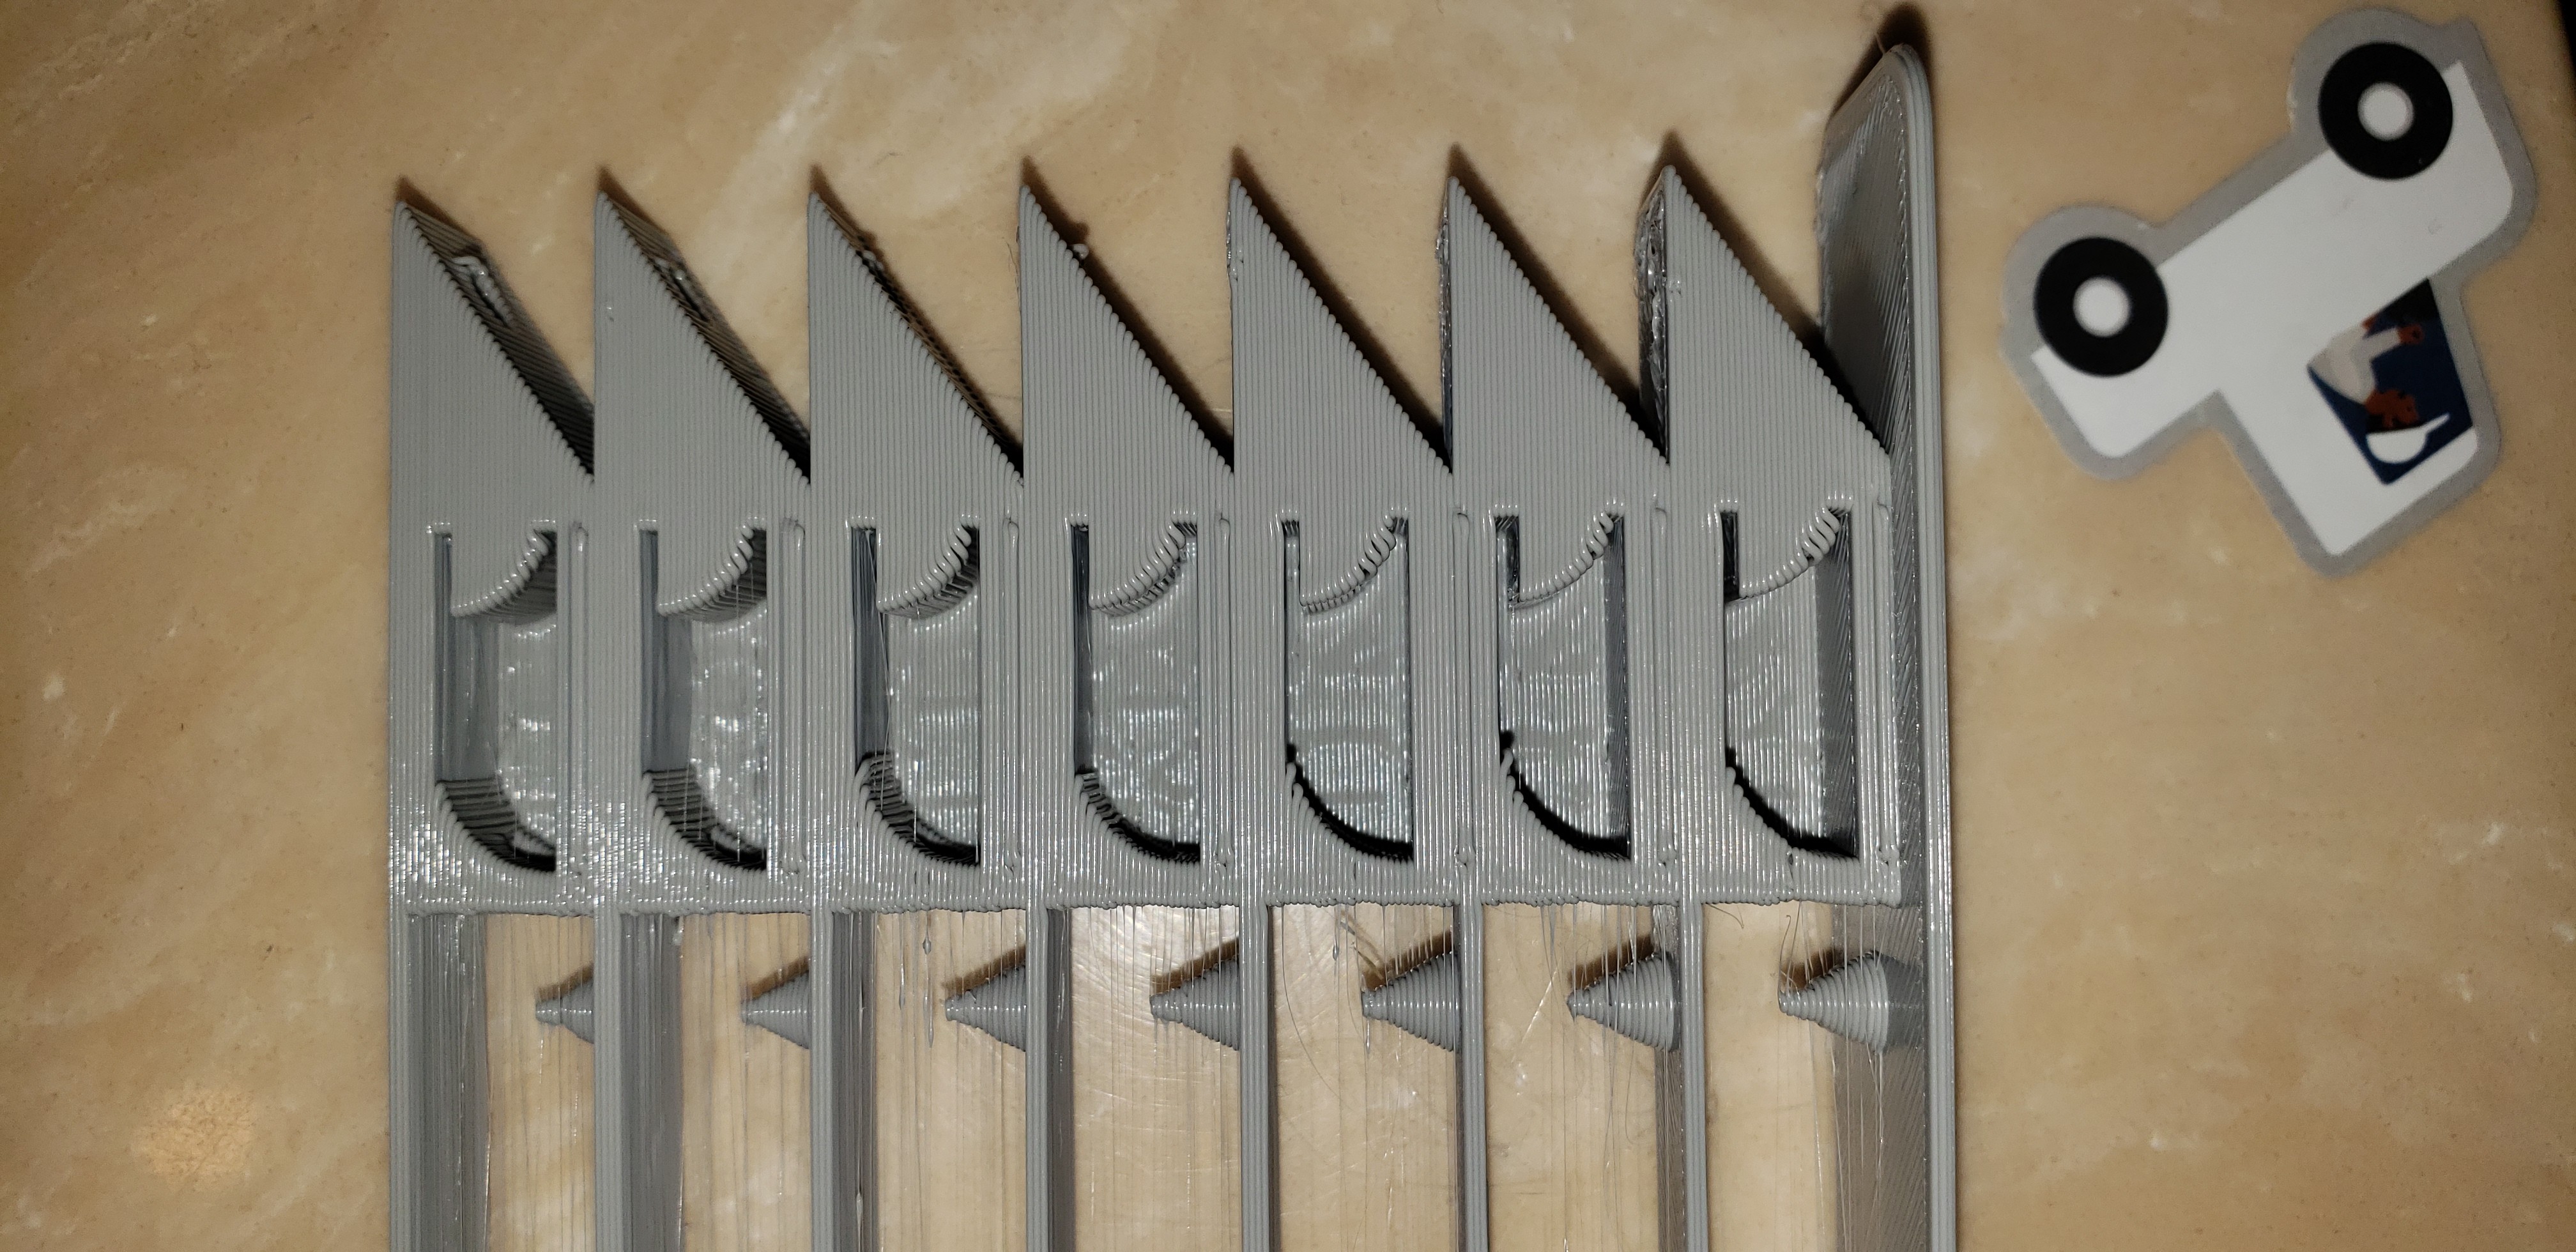
I have printed the frame test print and want to share my results and well as ask for input on how to adjust to improve the quality.
The printer:
–Prusa Mini
–Bondtech extruder clone
–full-metal V6 hotend
–Hatchbox PLA
–0.2mm layers
– 215C nozzle, 60C bed
–Pretty much standard settings in Prusa Slicer (See attached .3mf in zip file)
Results:
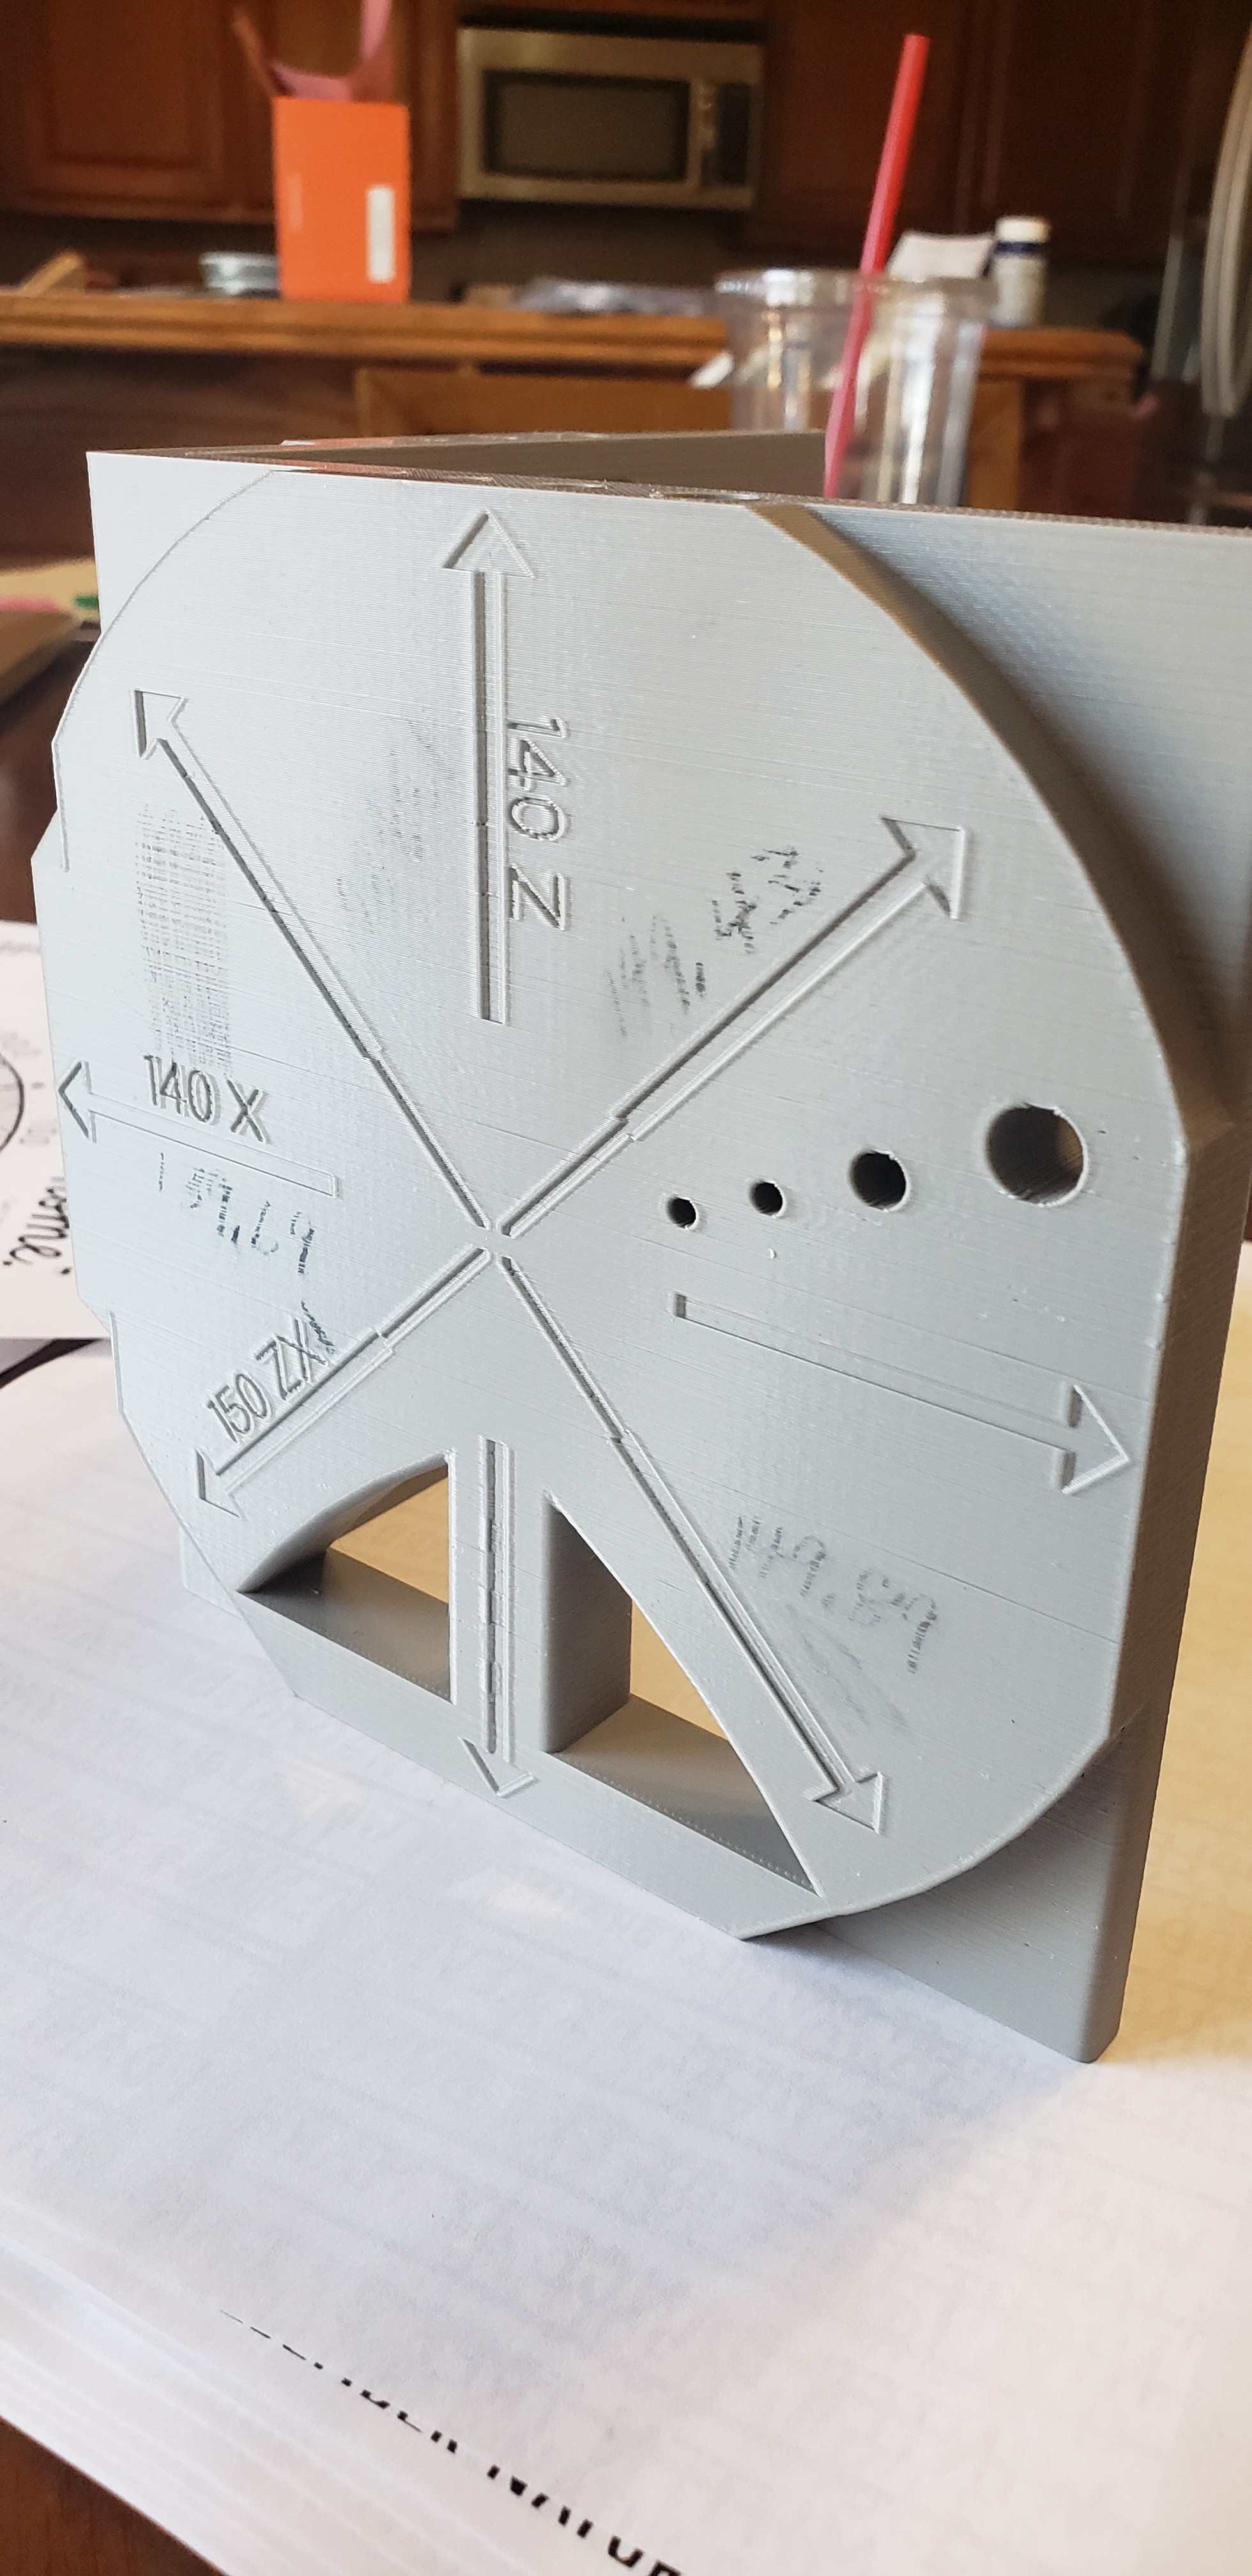
-X-axis
– Z = 139.80mm
– ZX1 = 149.43mm
– ZX2 = 149.89mm
– X = 139.69mm
-Y-axis
– Z = 139.82mm
– ZY1 = 149.60mm
– ZY2 = 149.36mm
– Y = 139.30mm
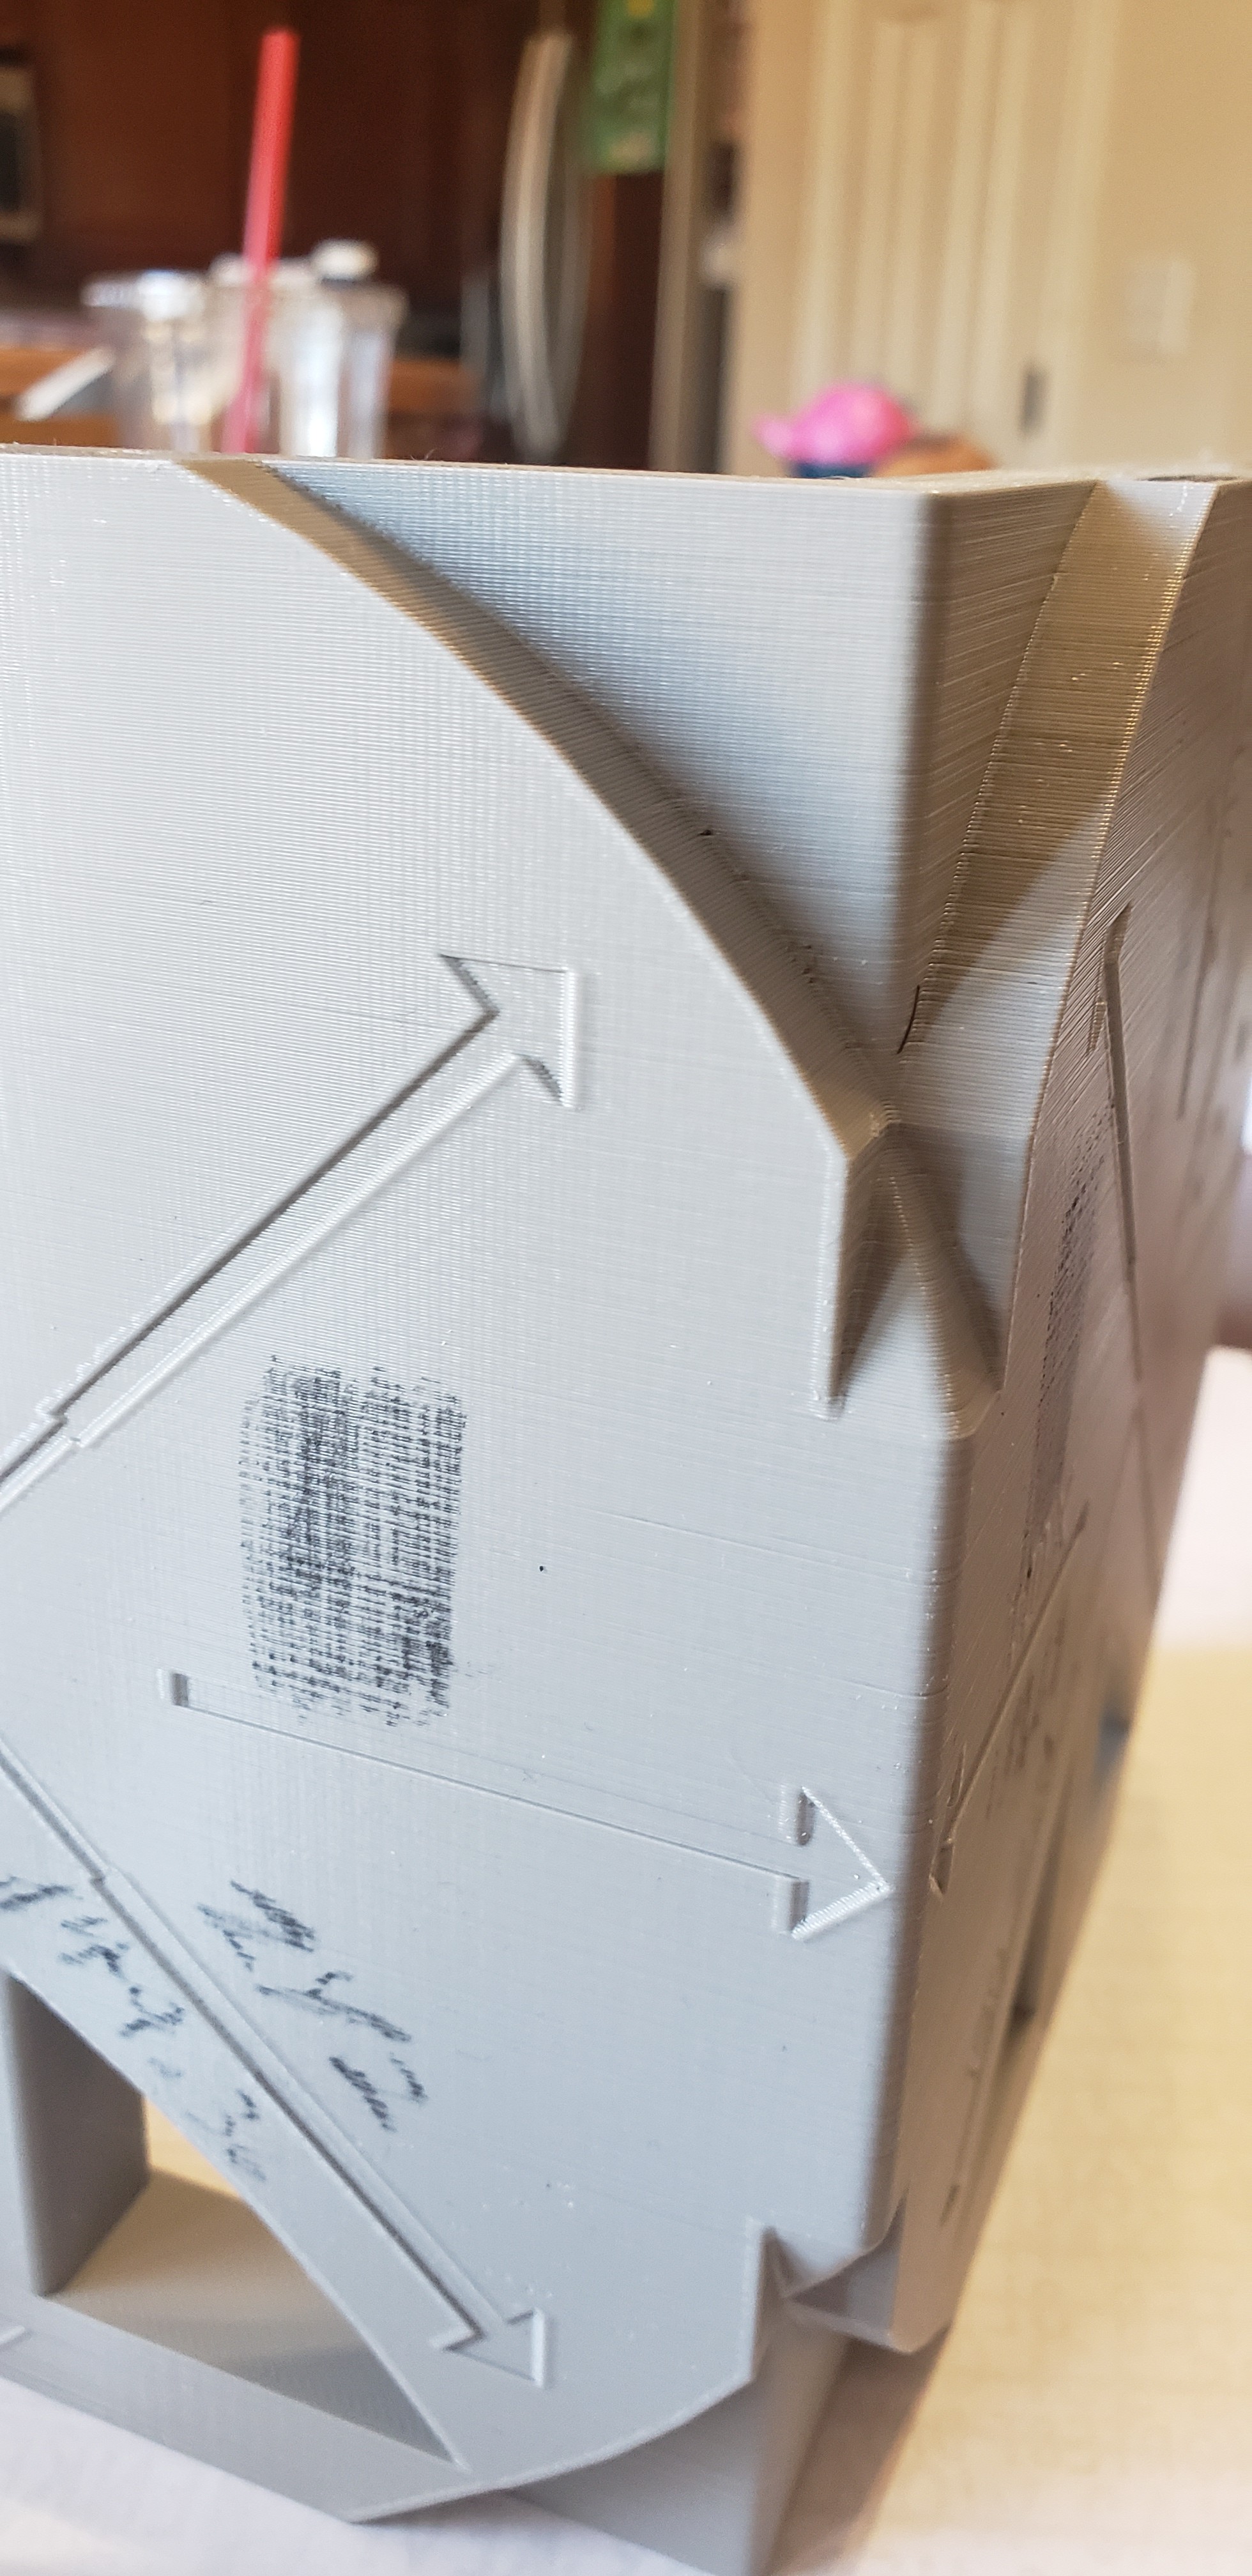
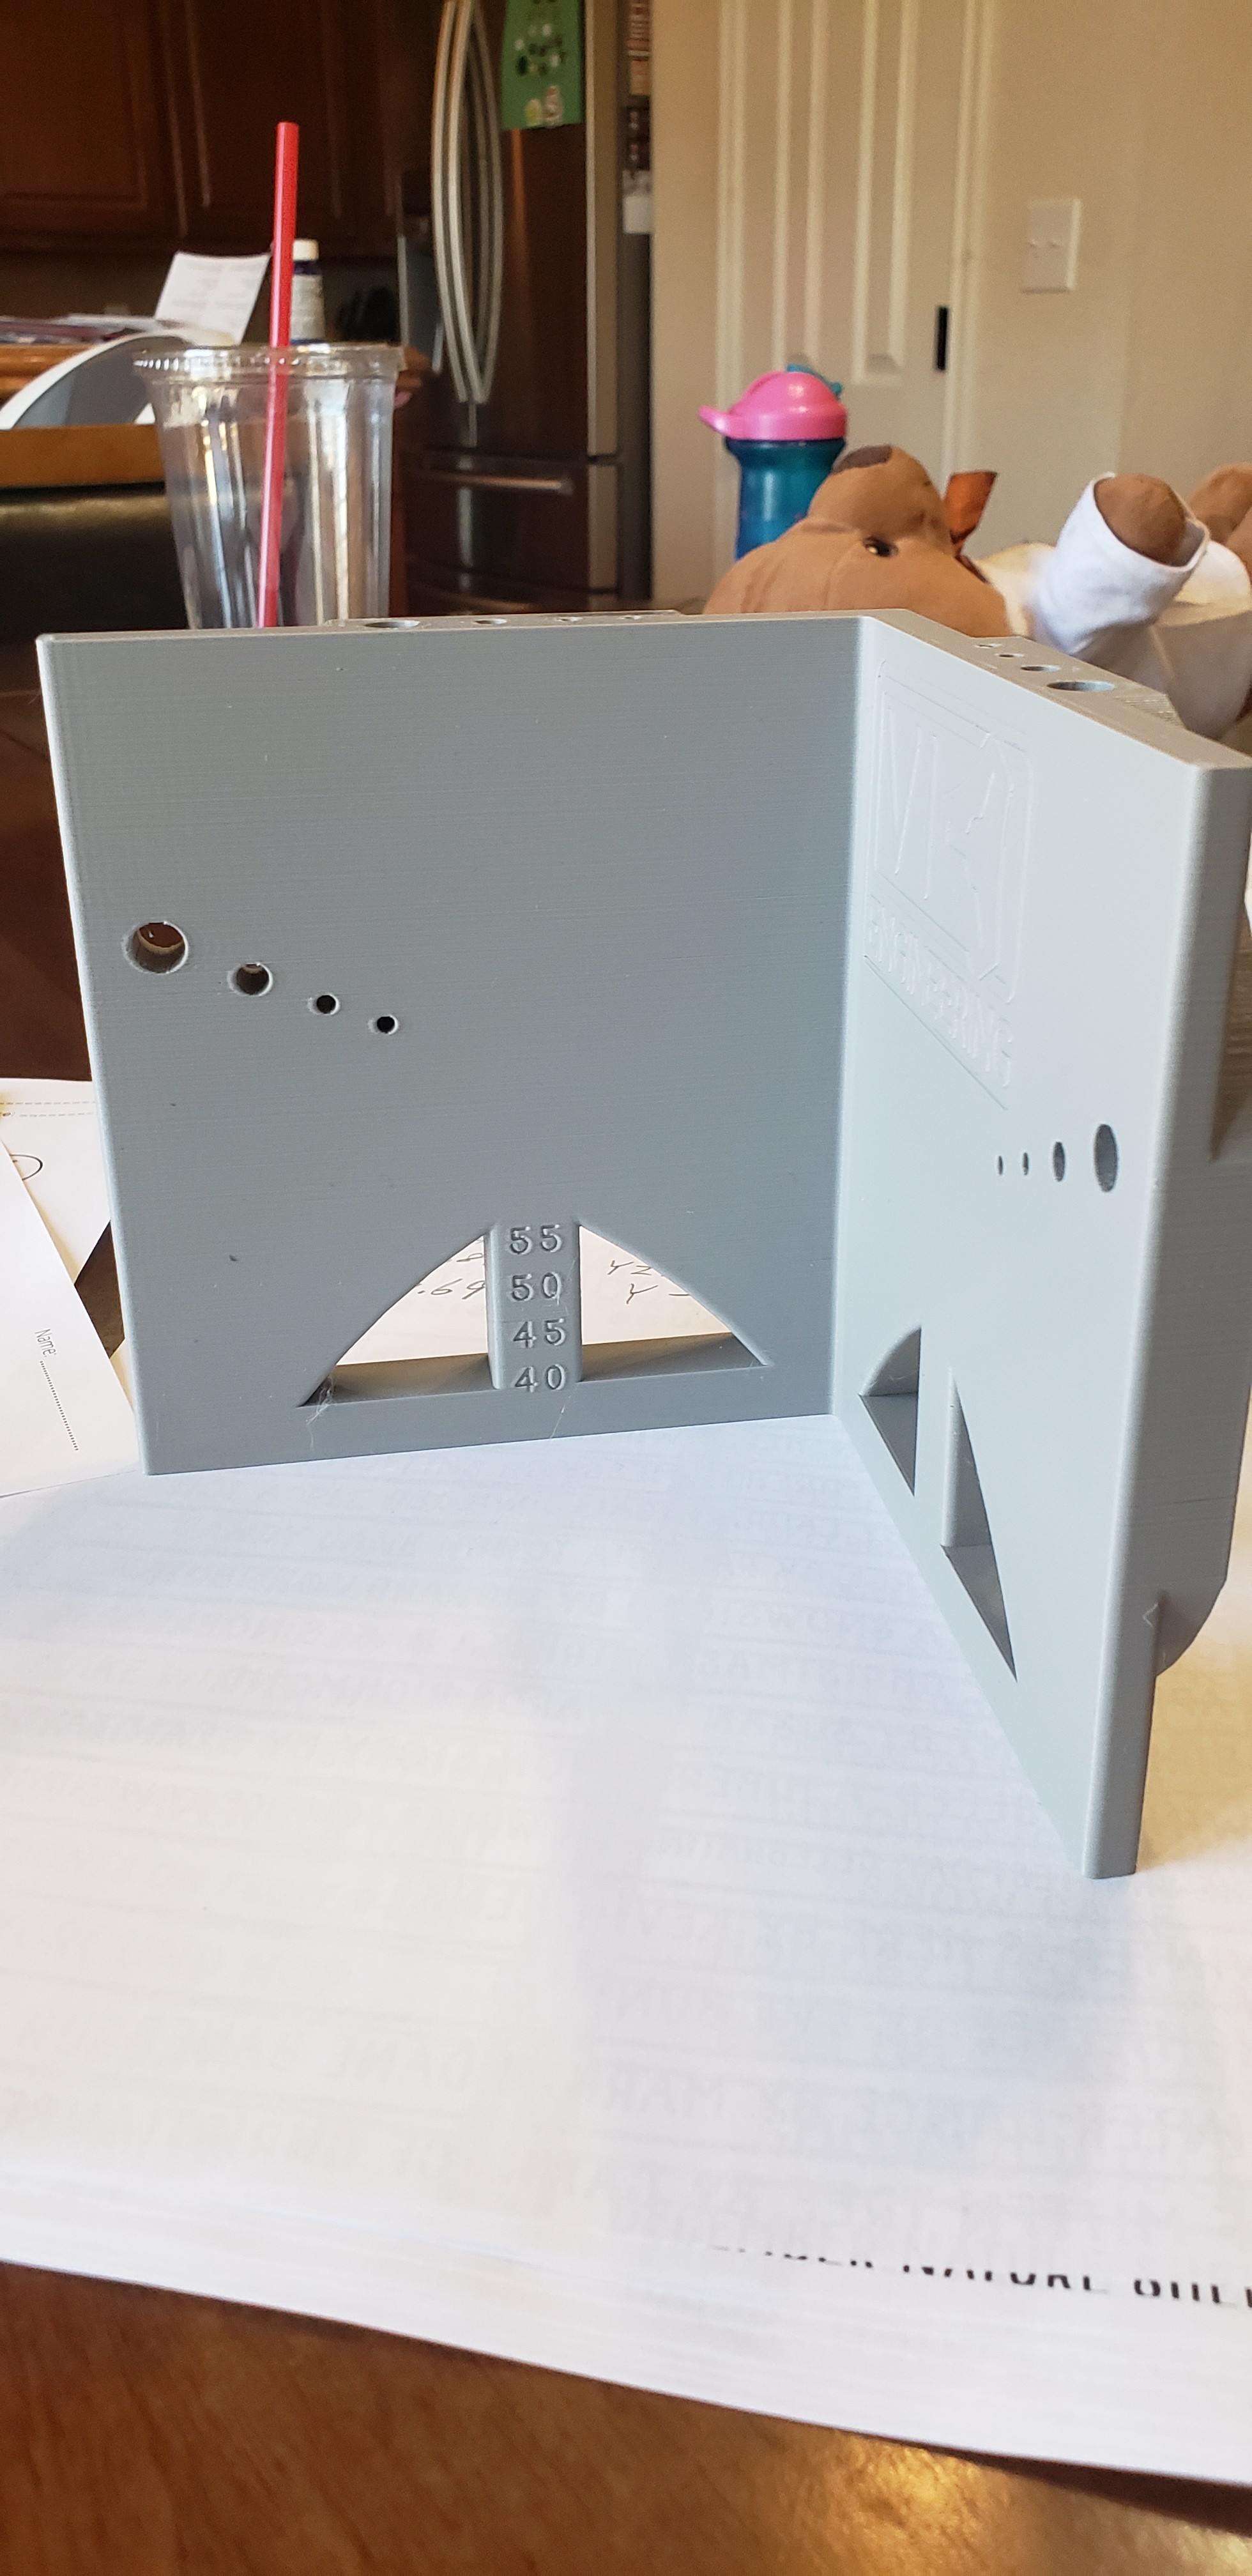
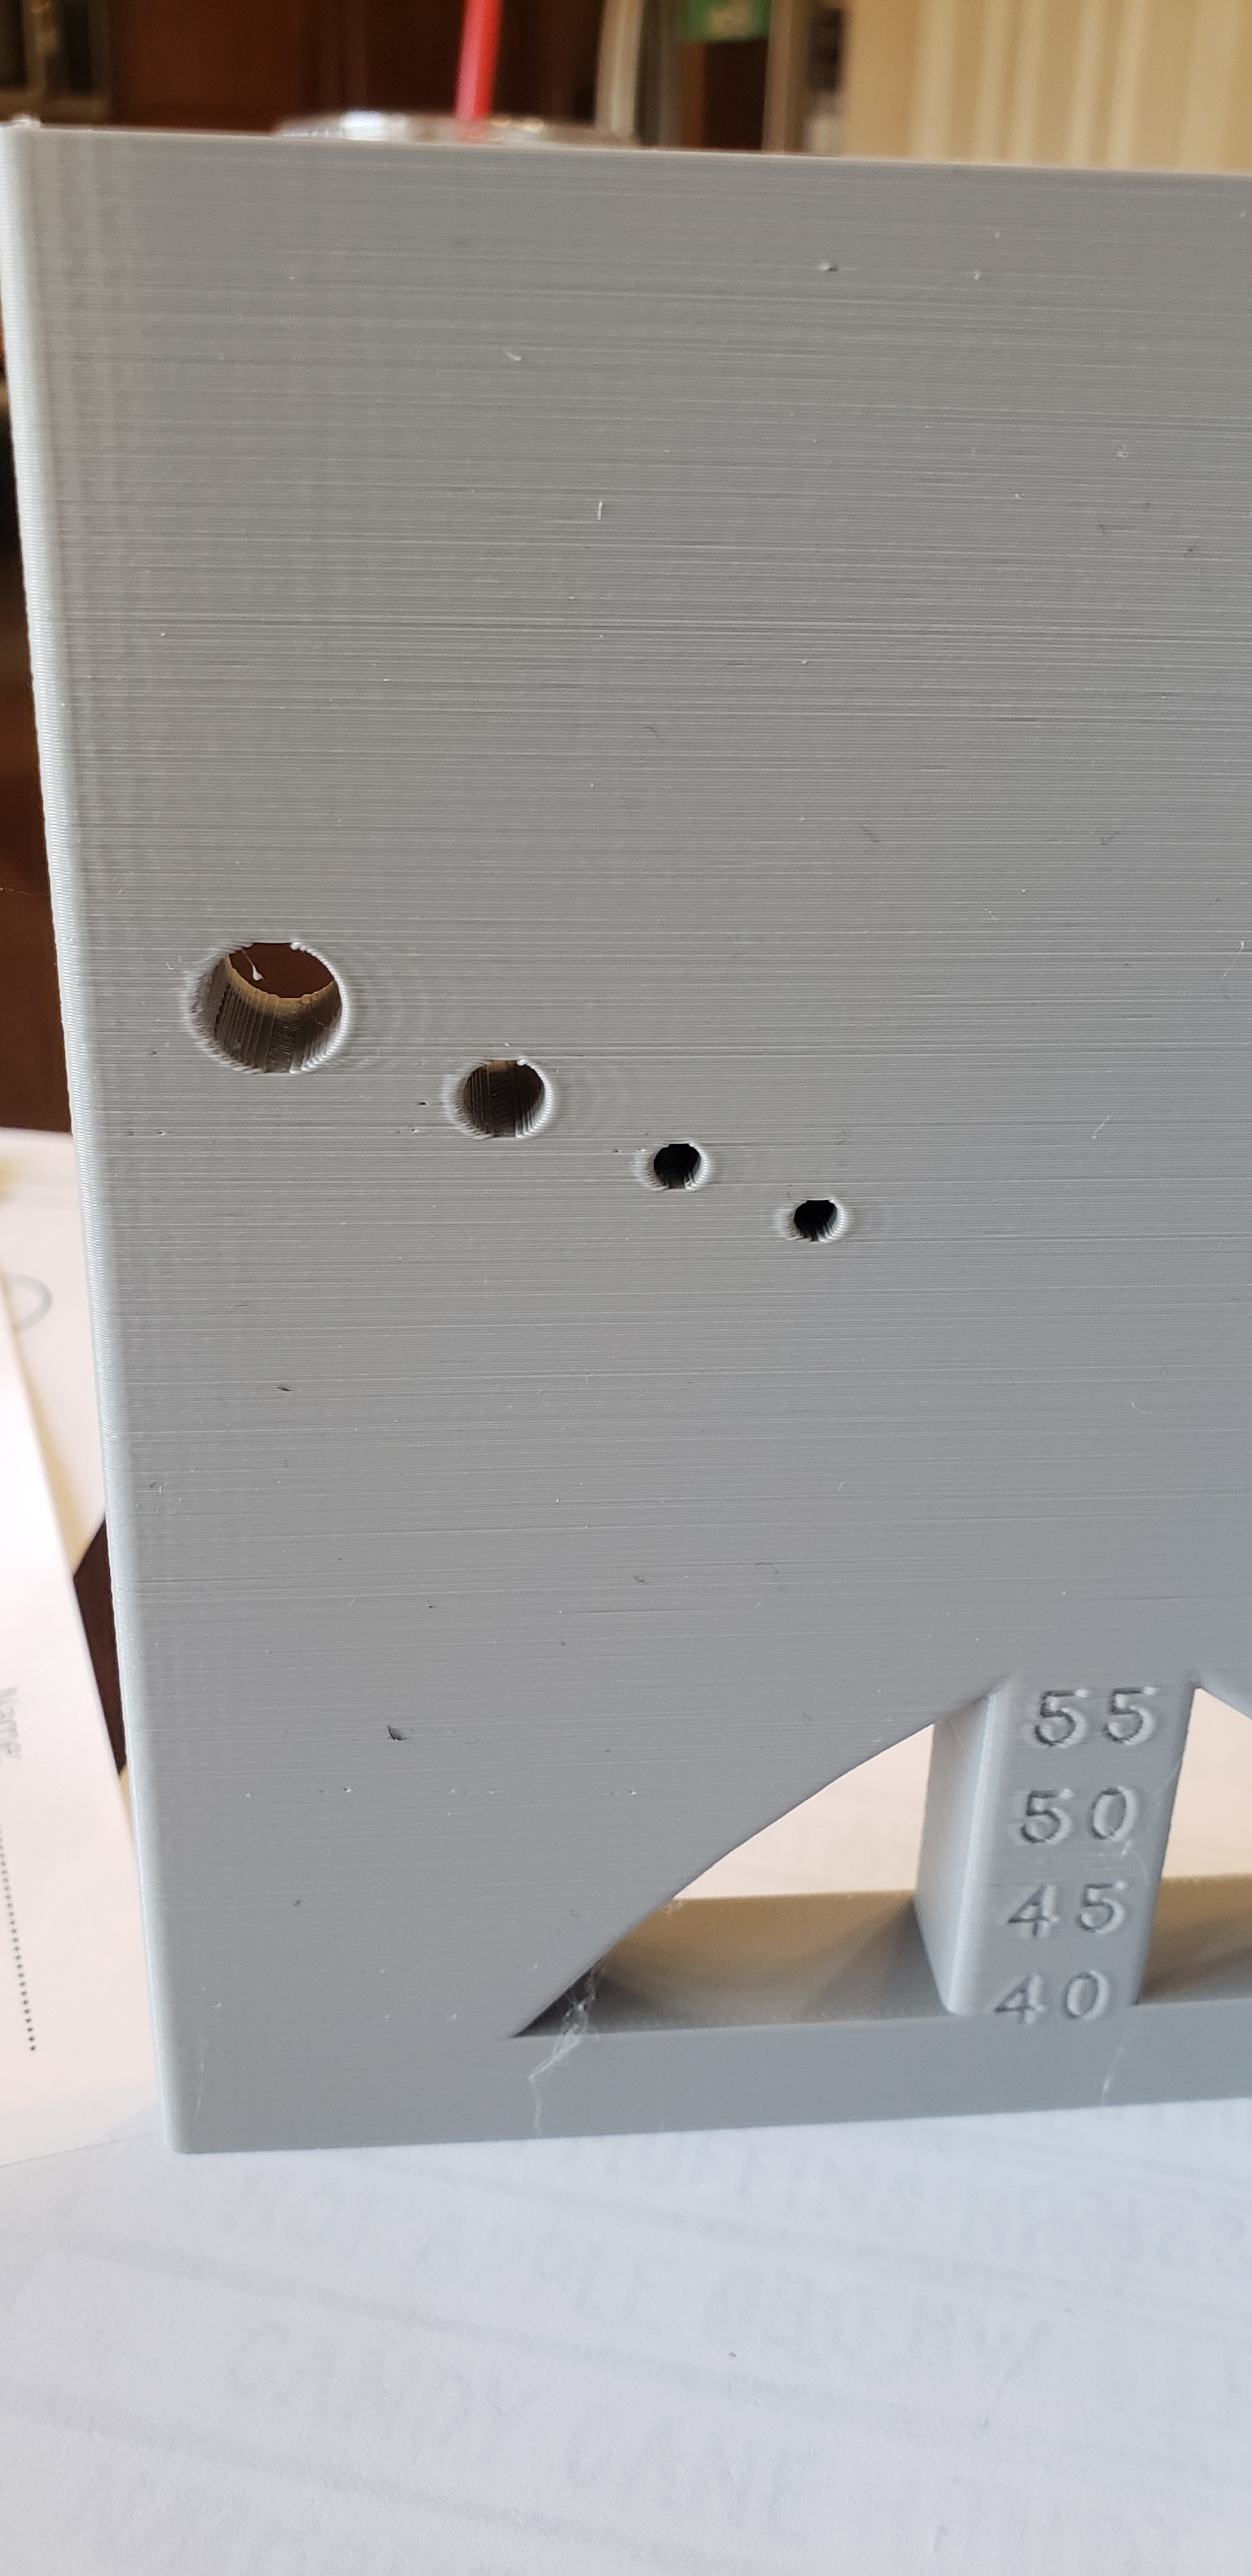
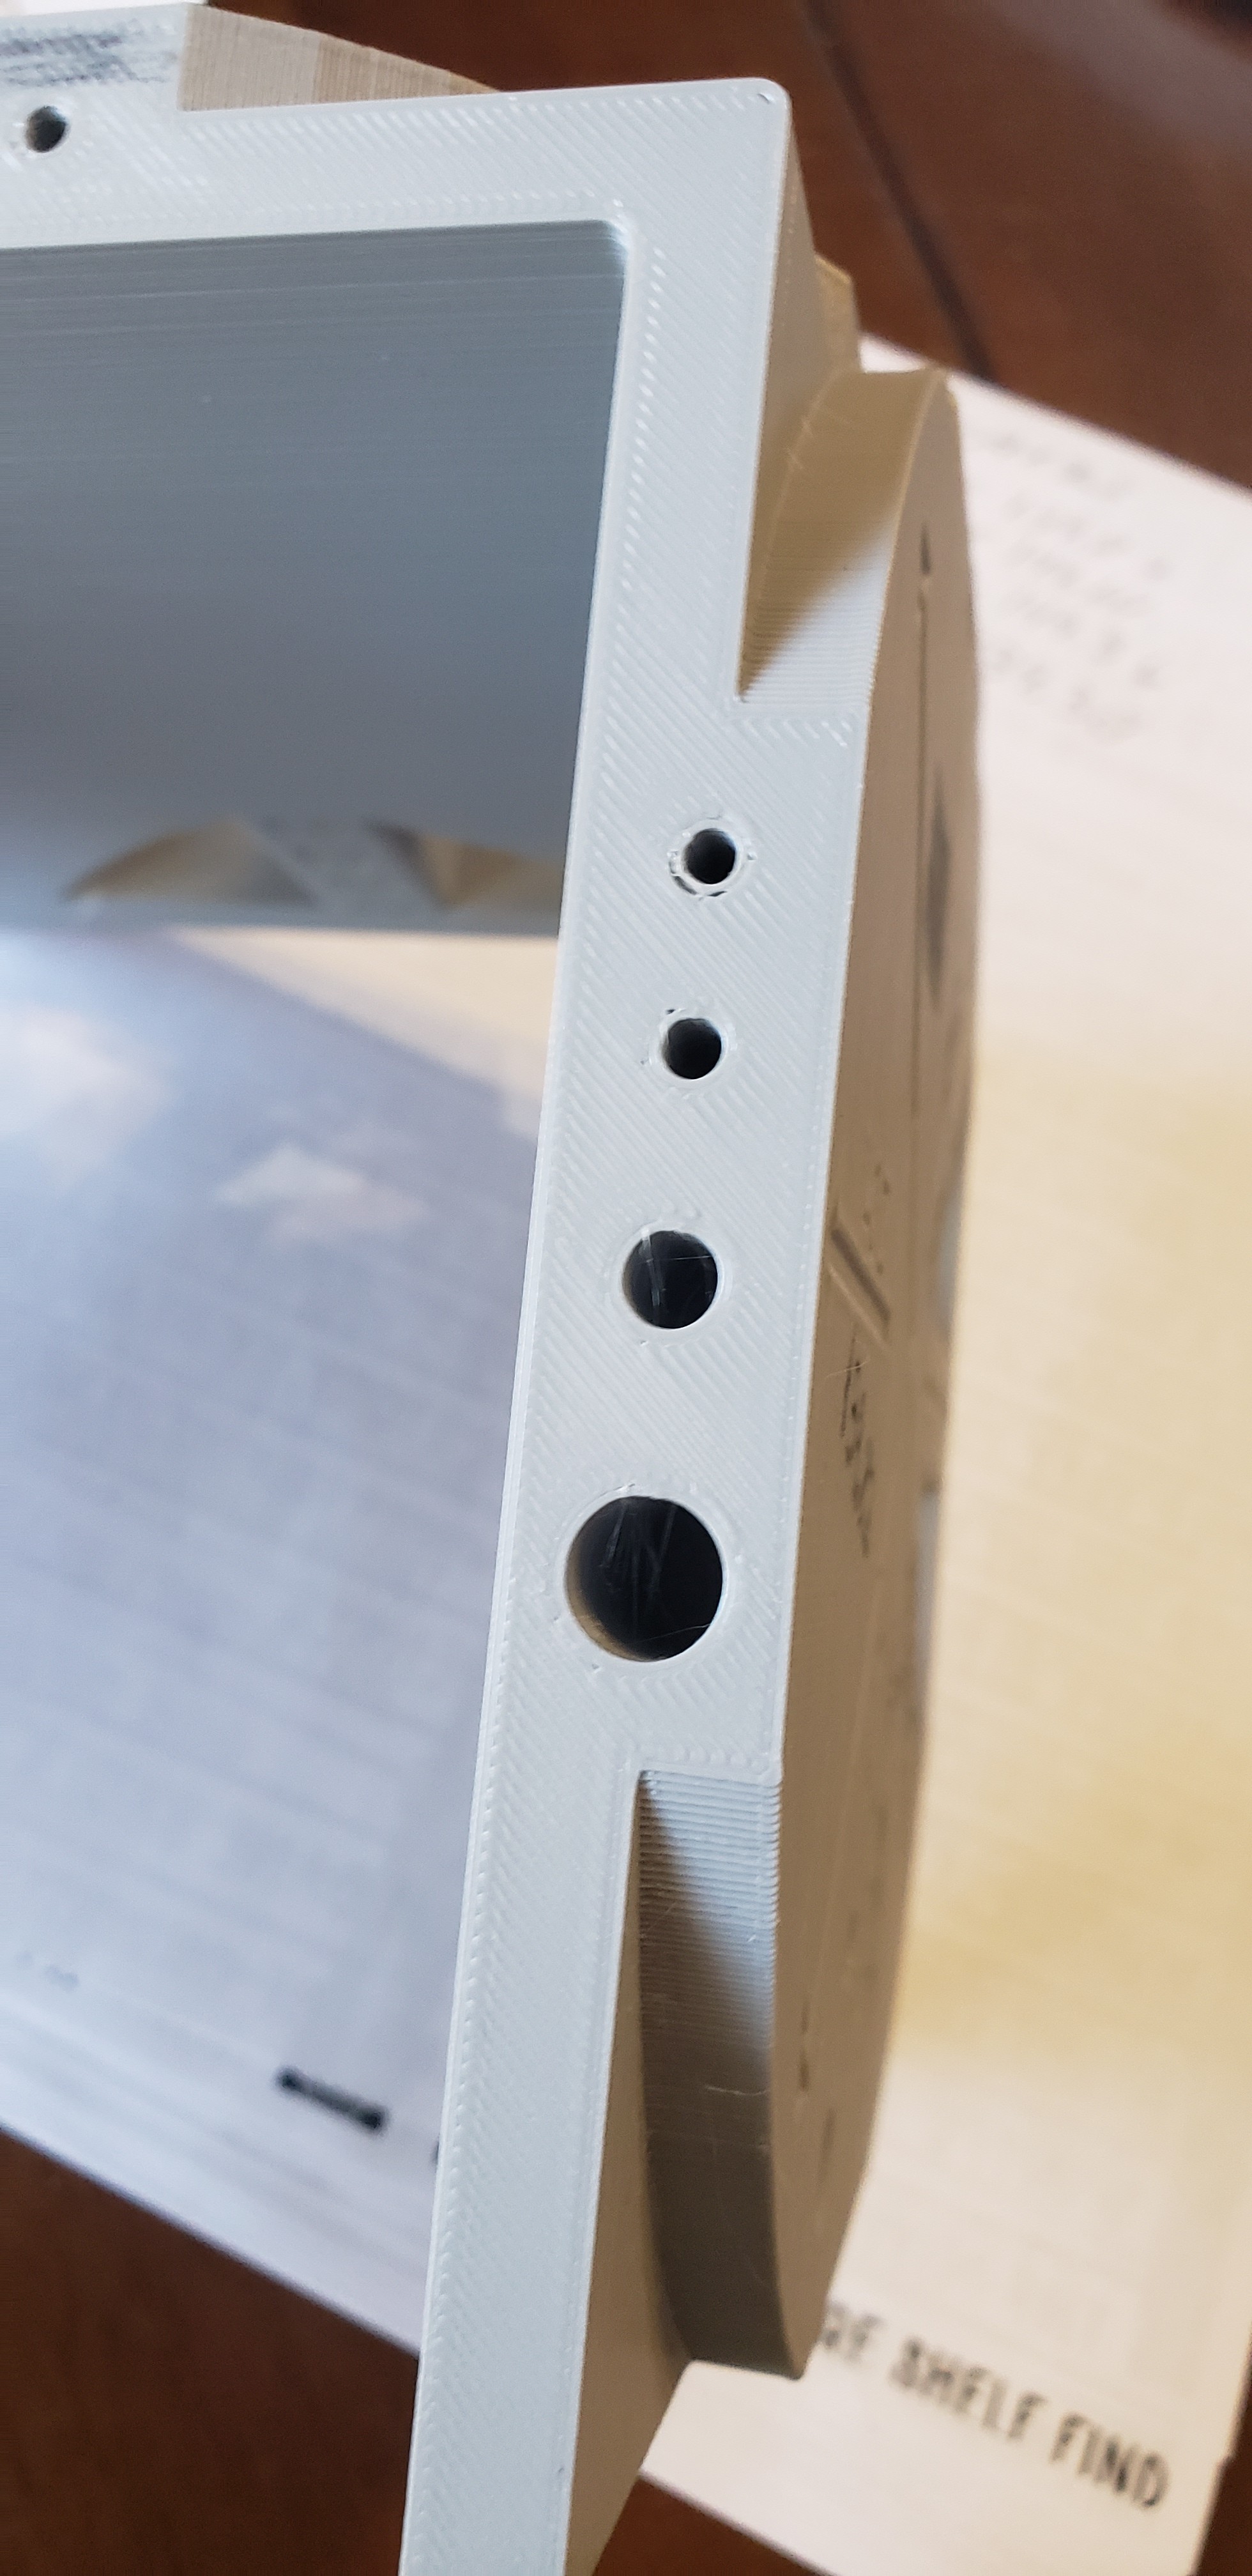
All my measurements were made using calipers. I am not super happy with the accuracy, especially in the X and Y axis (and improving these will improve the ZY and ZX by default), but I am unsure of what I need to do to improve. Is this a belt tension issue? I have my doubts that it is a steps/mm issue considering it is straight from Prusa.
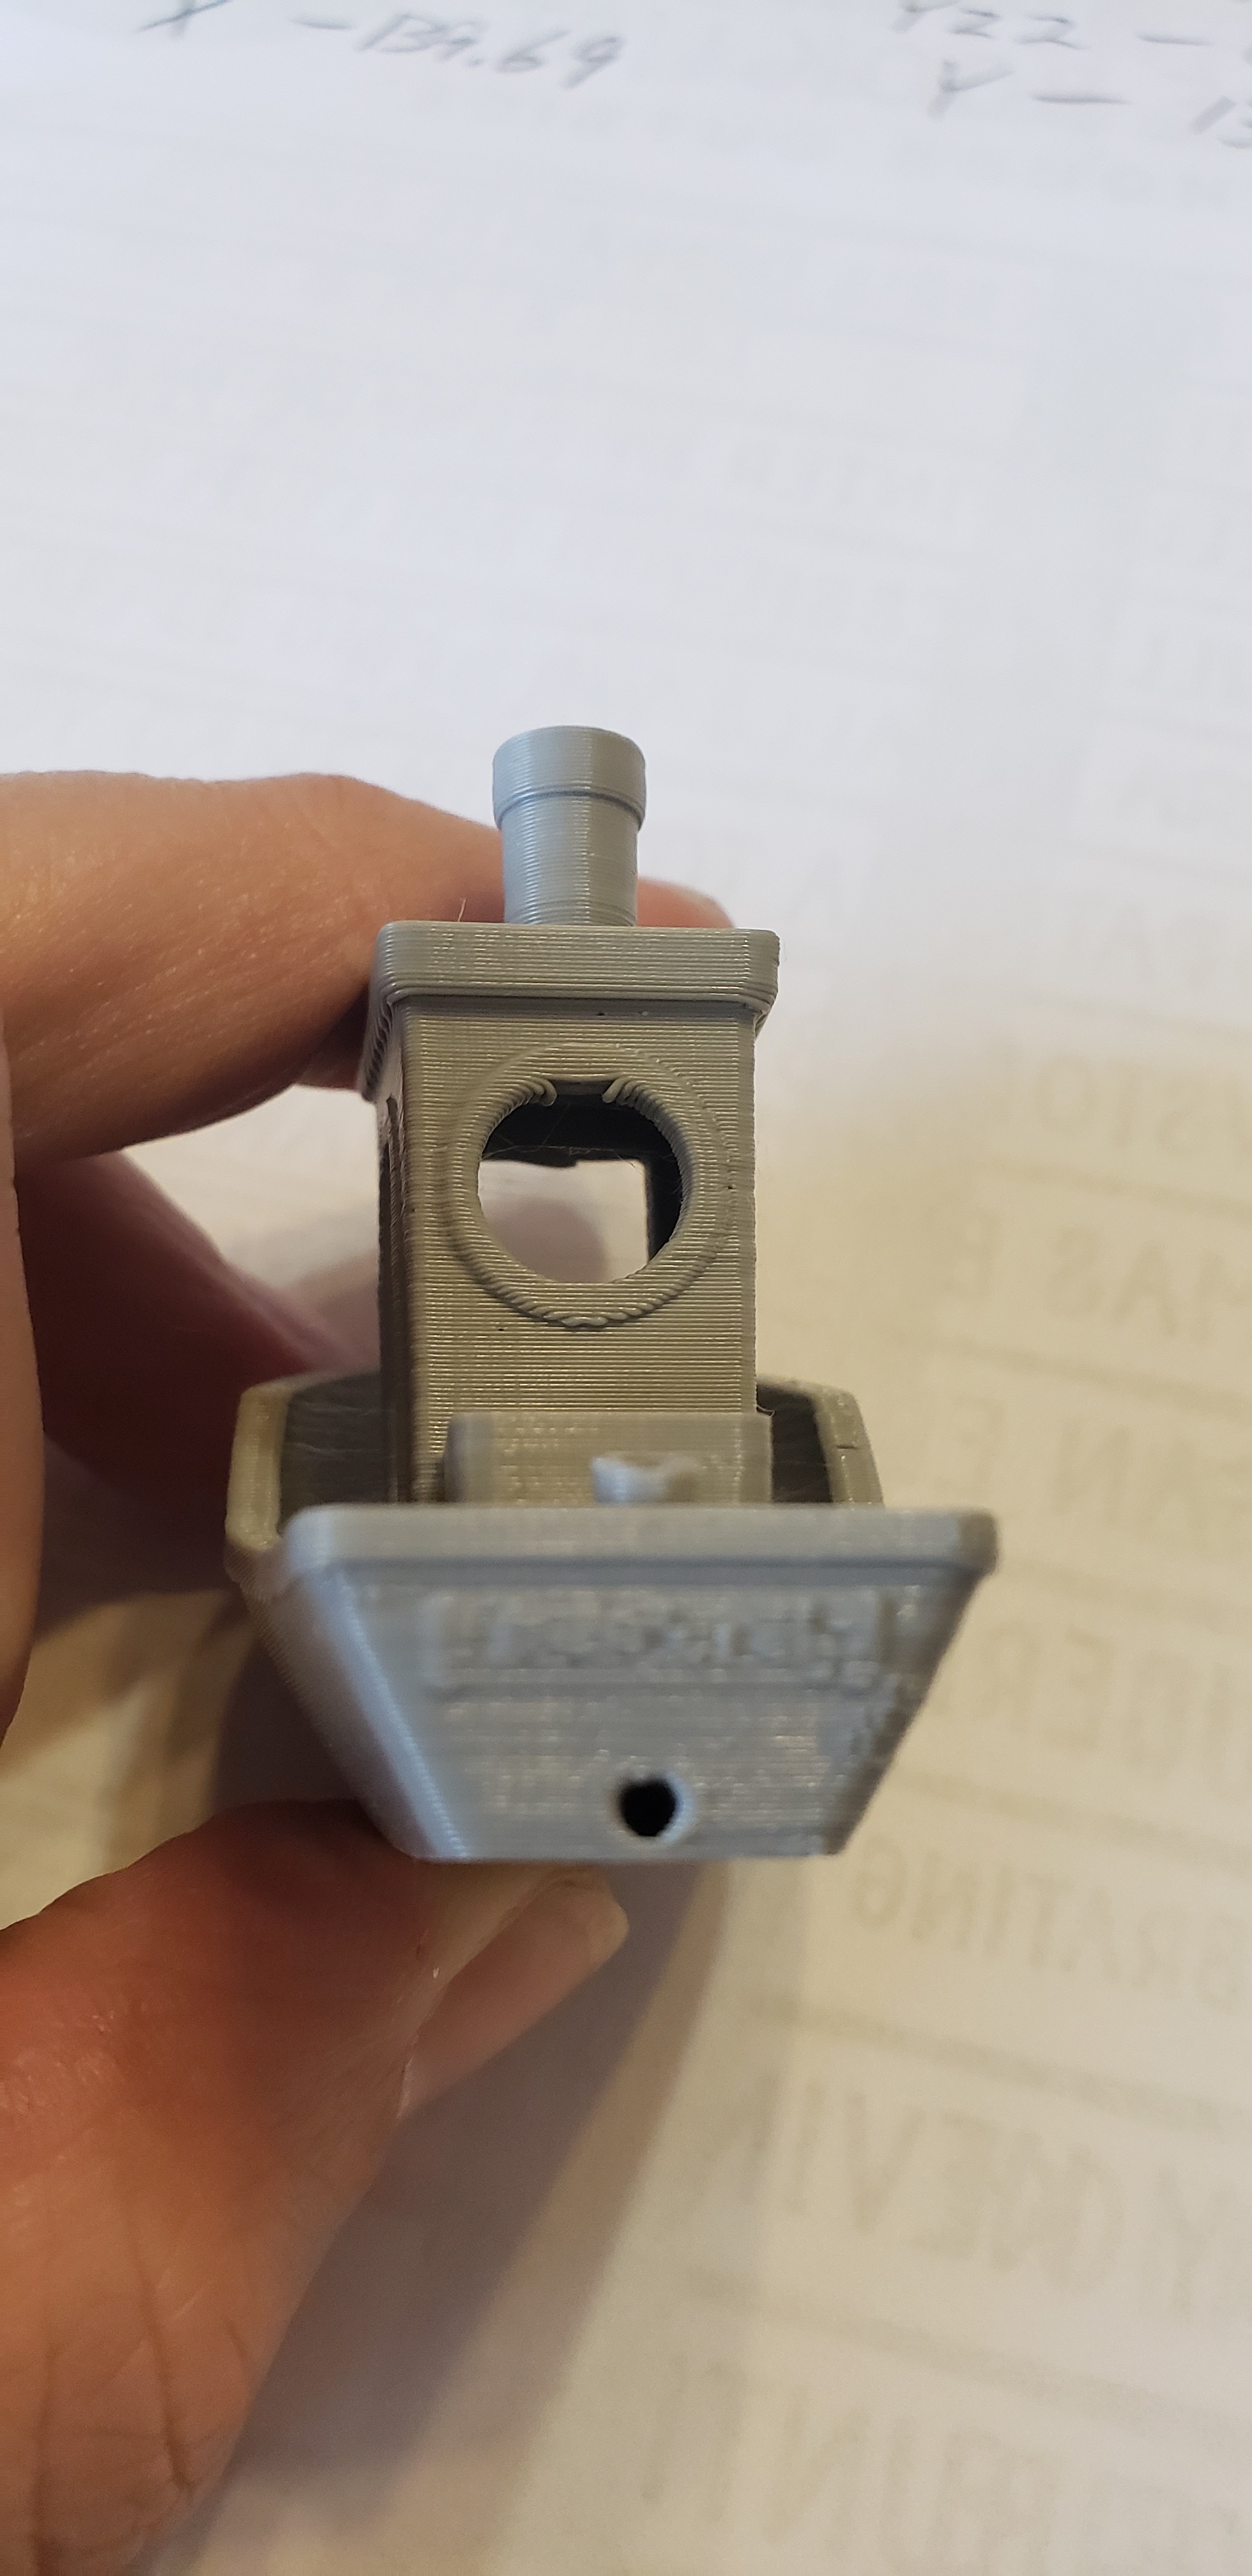
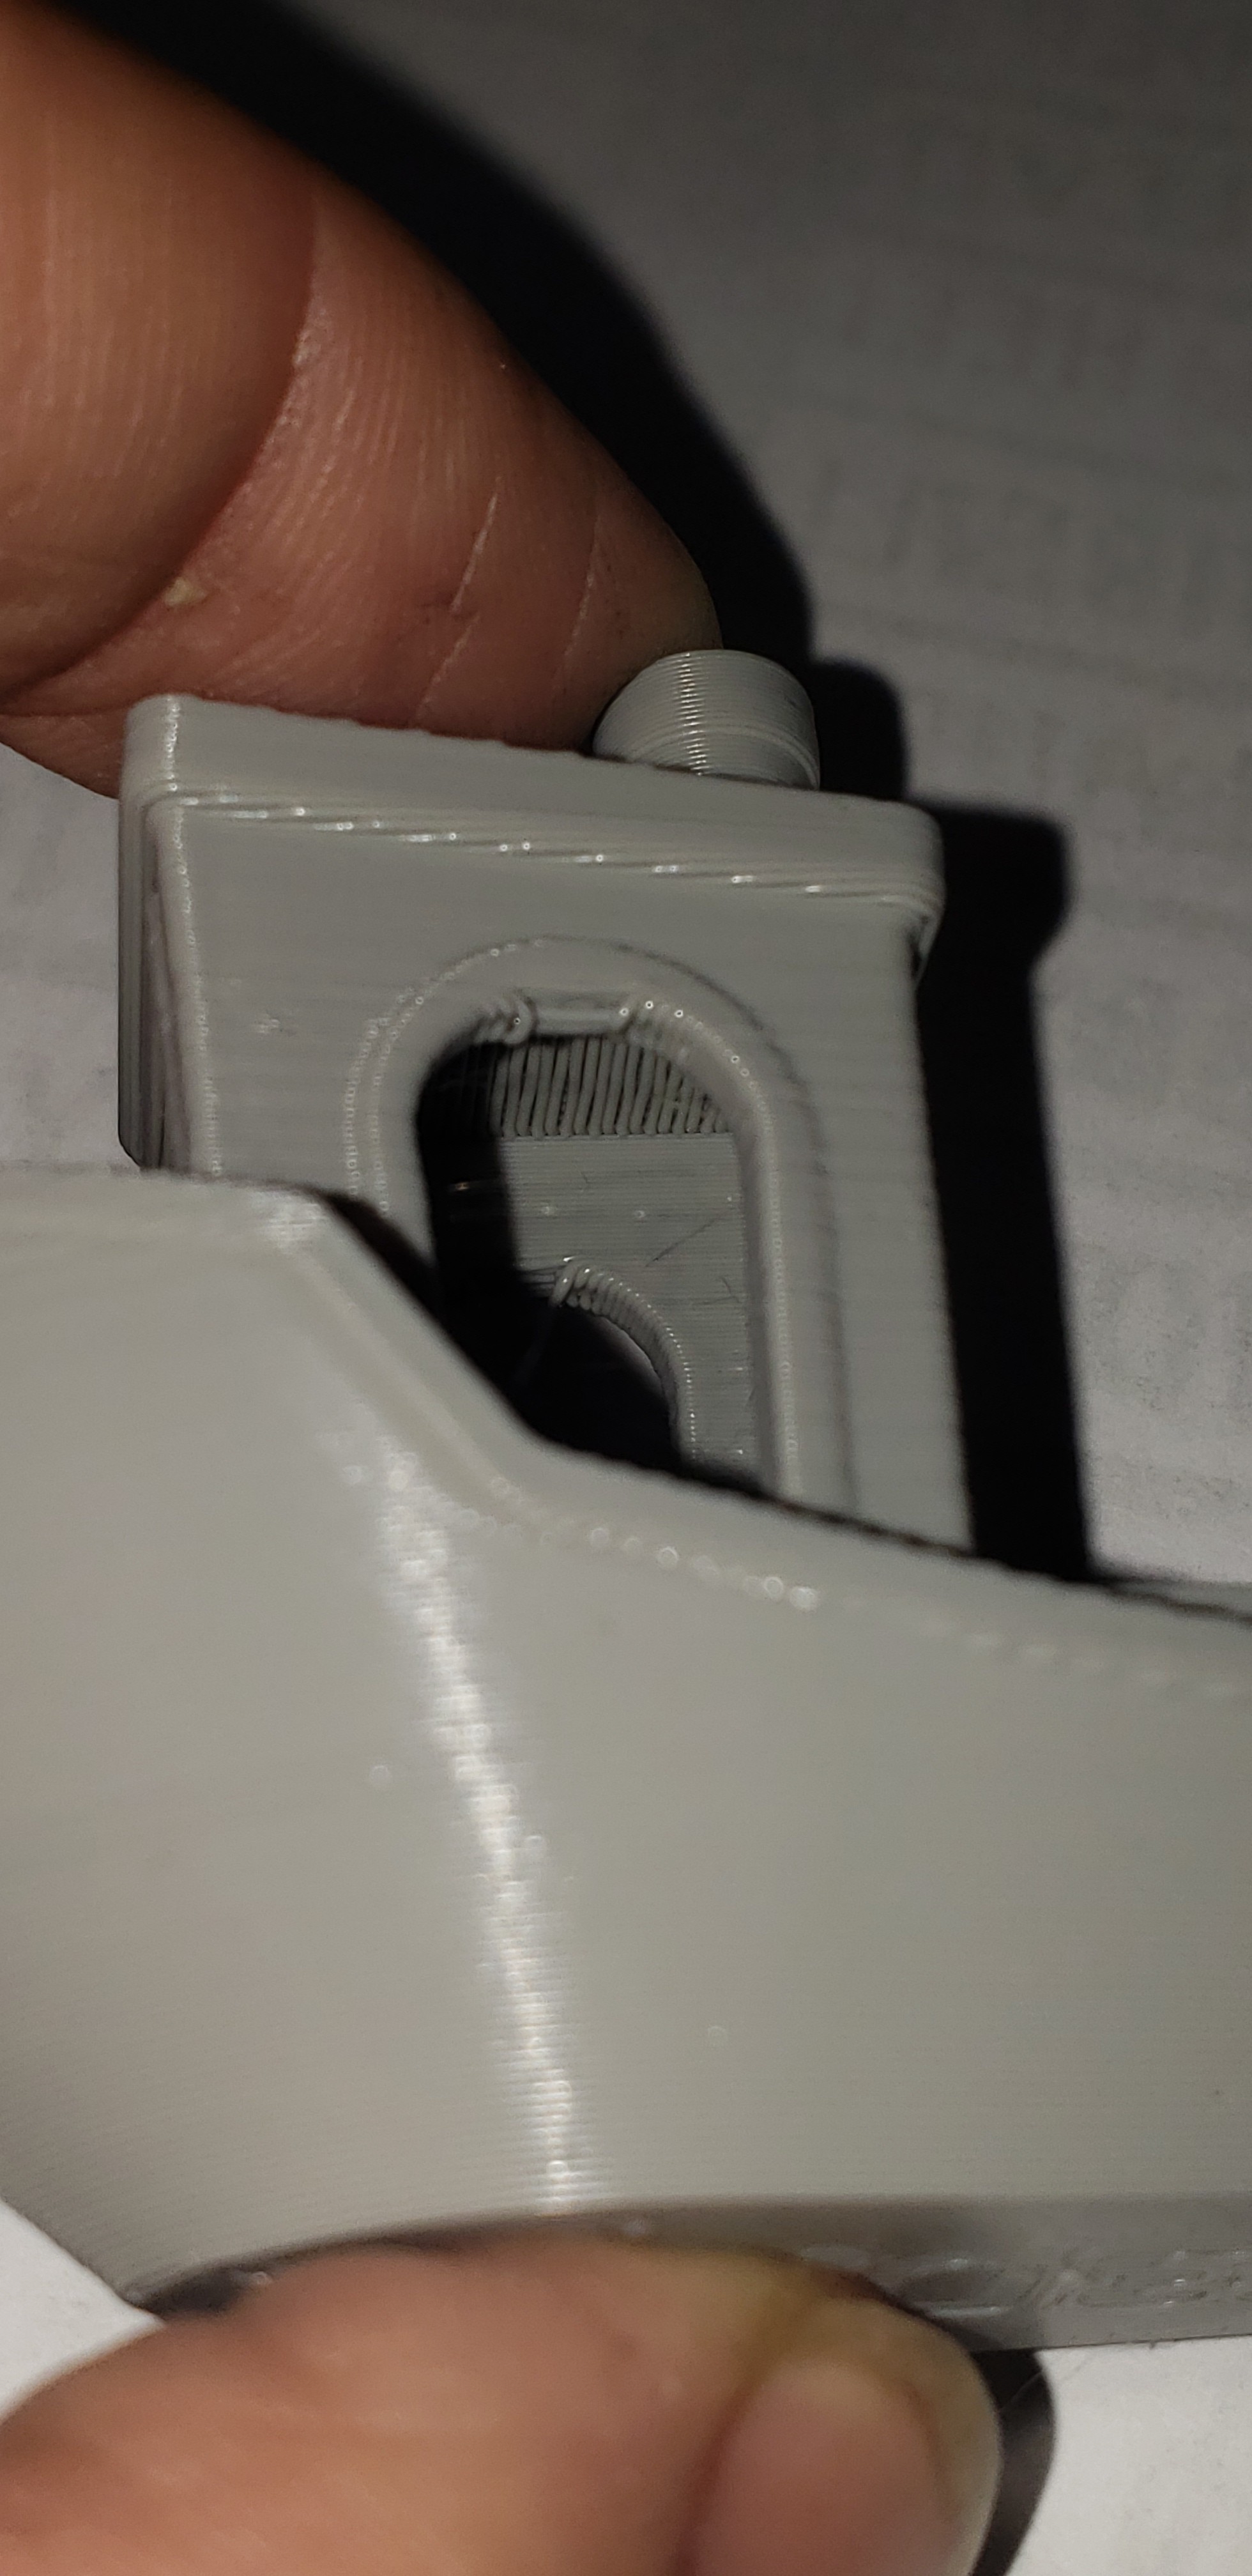
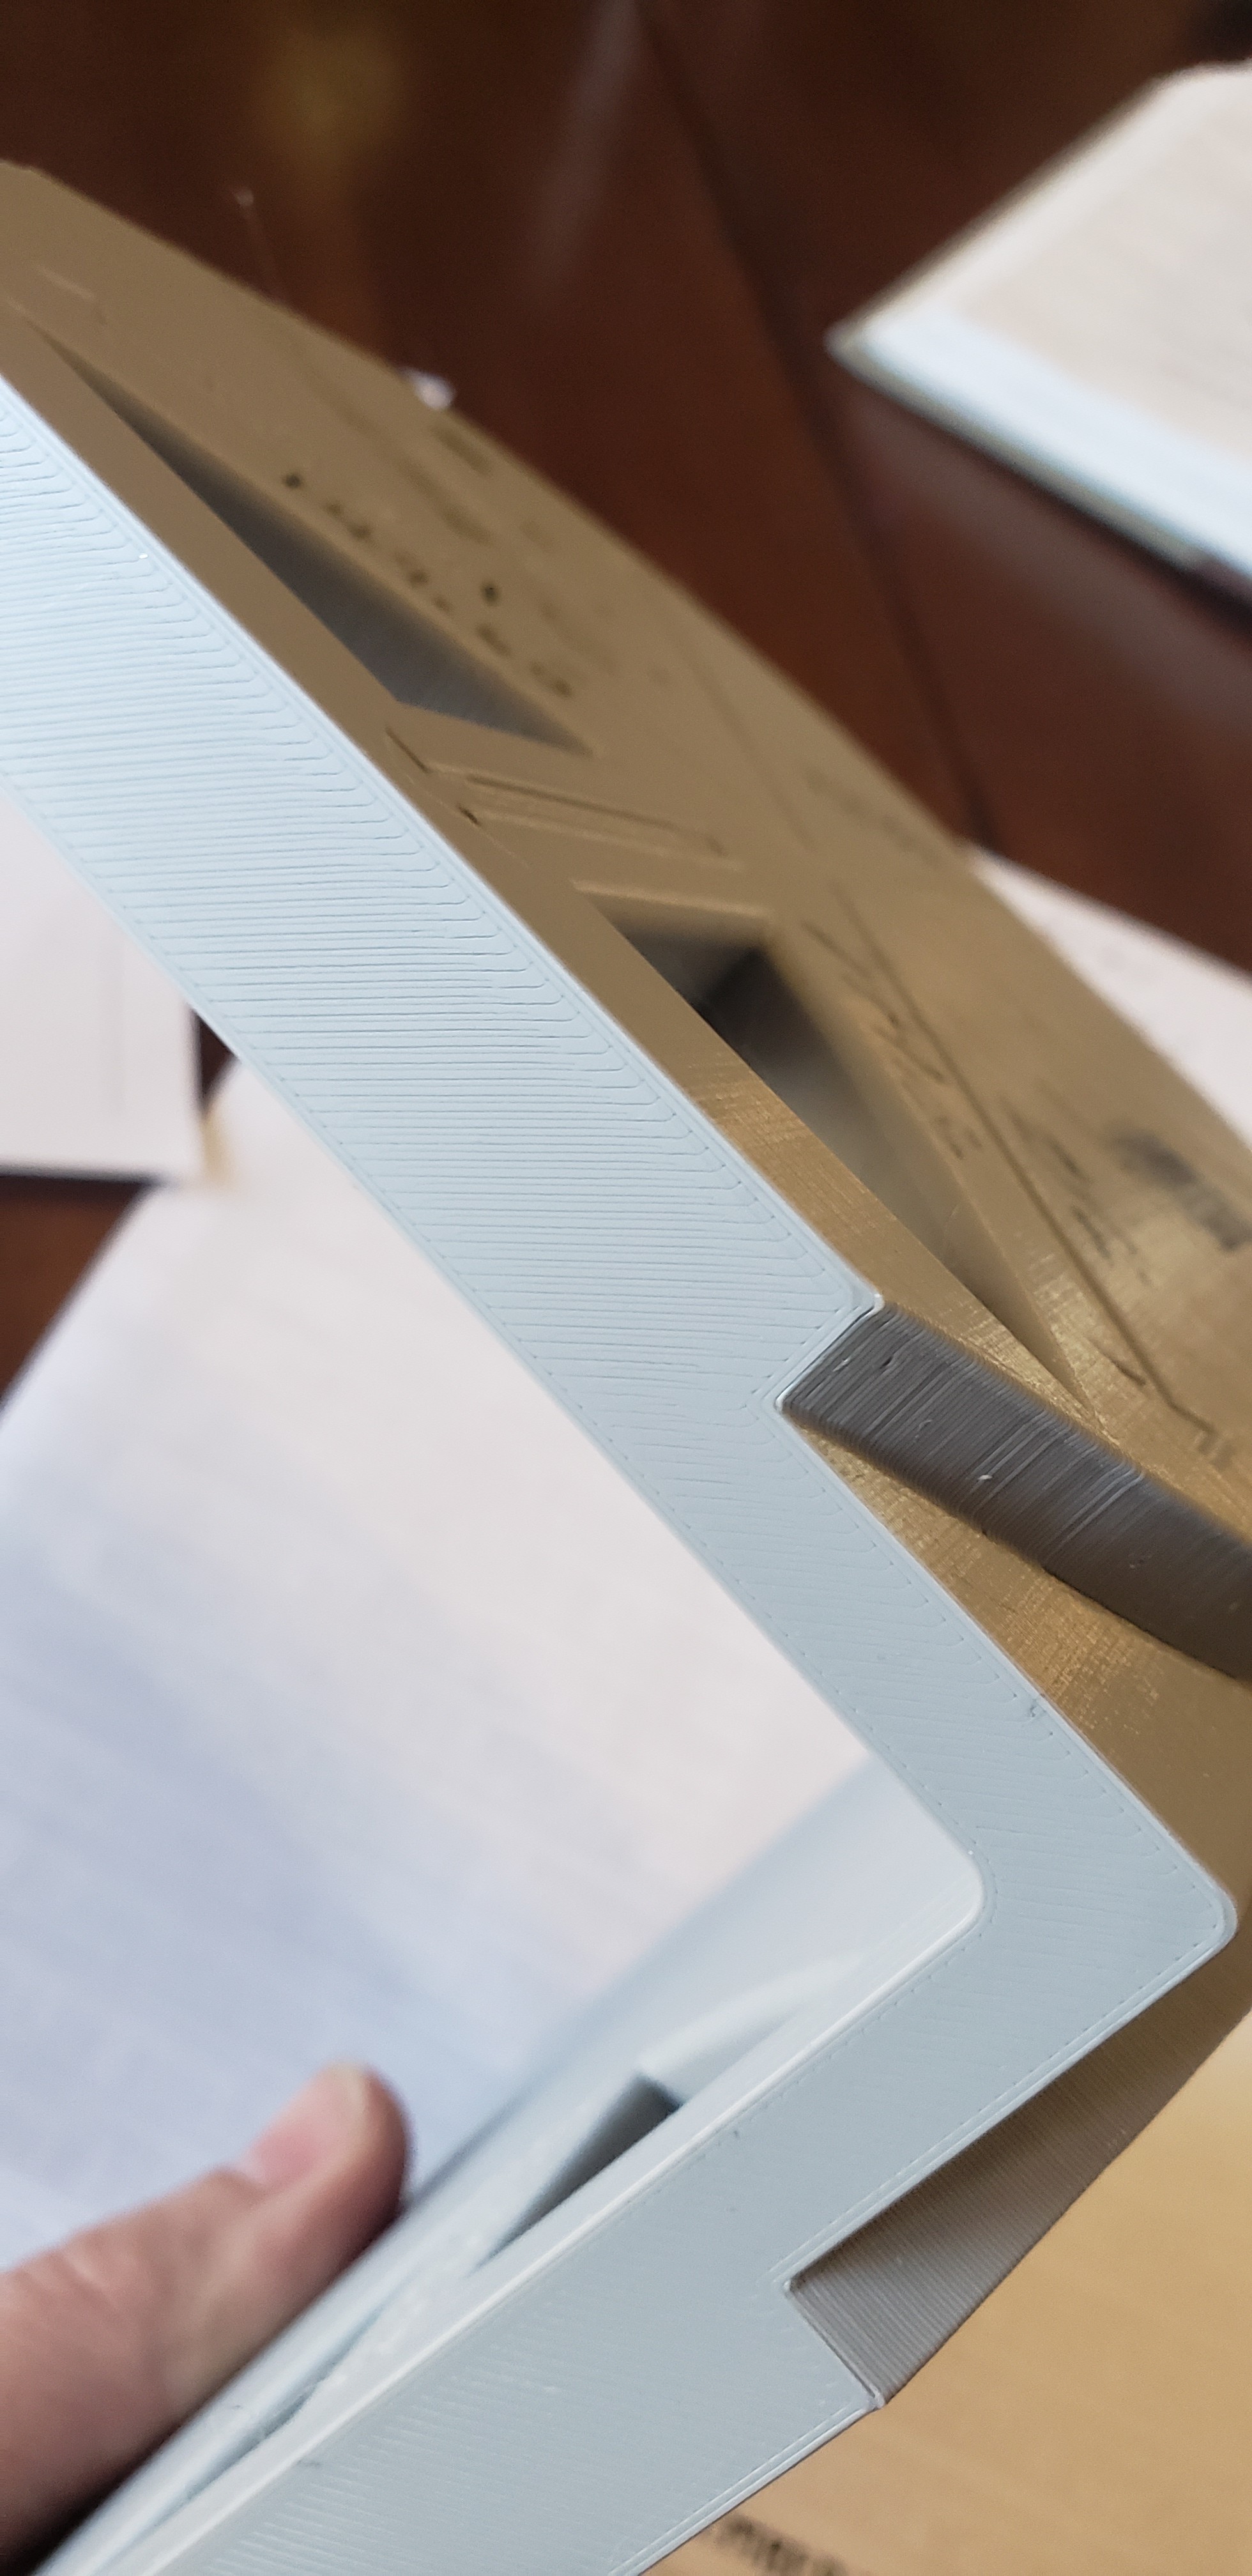
I also am not 100% happy with the quality of the layers, but I have spent a good amount of time dialing in the temperature and extrusion multiplier as well as ensuring the extruder and hotend are clean. The extruder tension may be an issue. I think it is set okay, but not 100% sure how to tell.
I would sincerely appreciate any guidance as I am at a loss on the next steps to improve the quality.
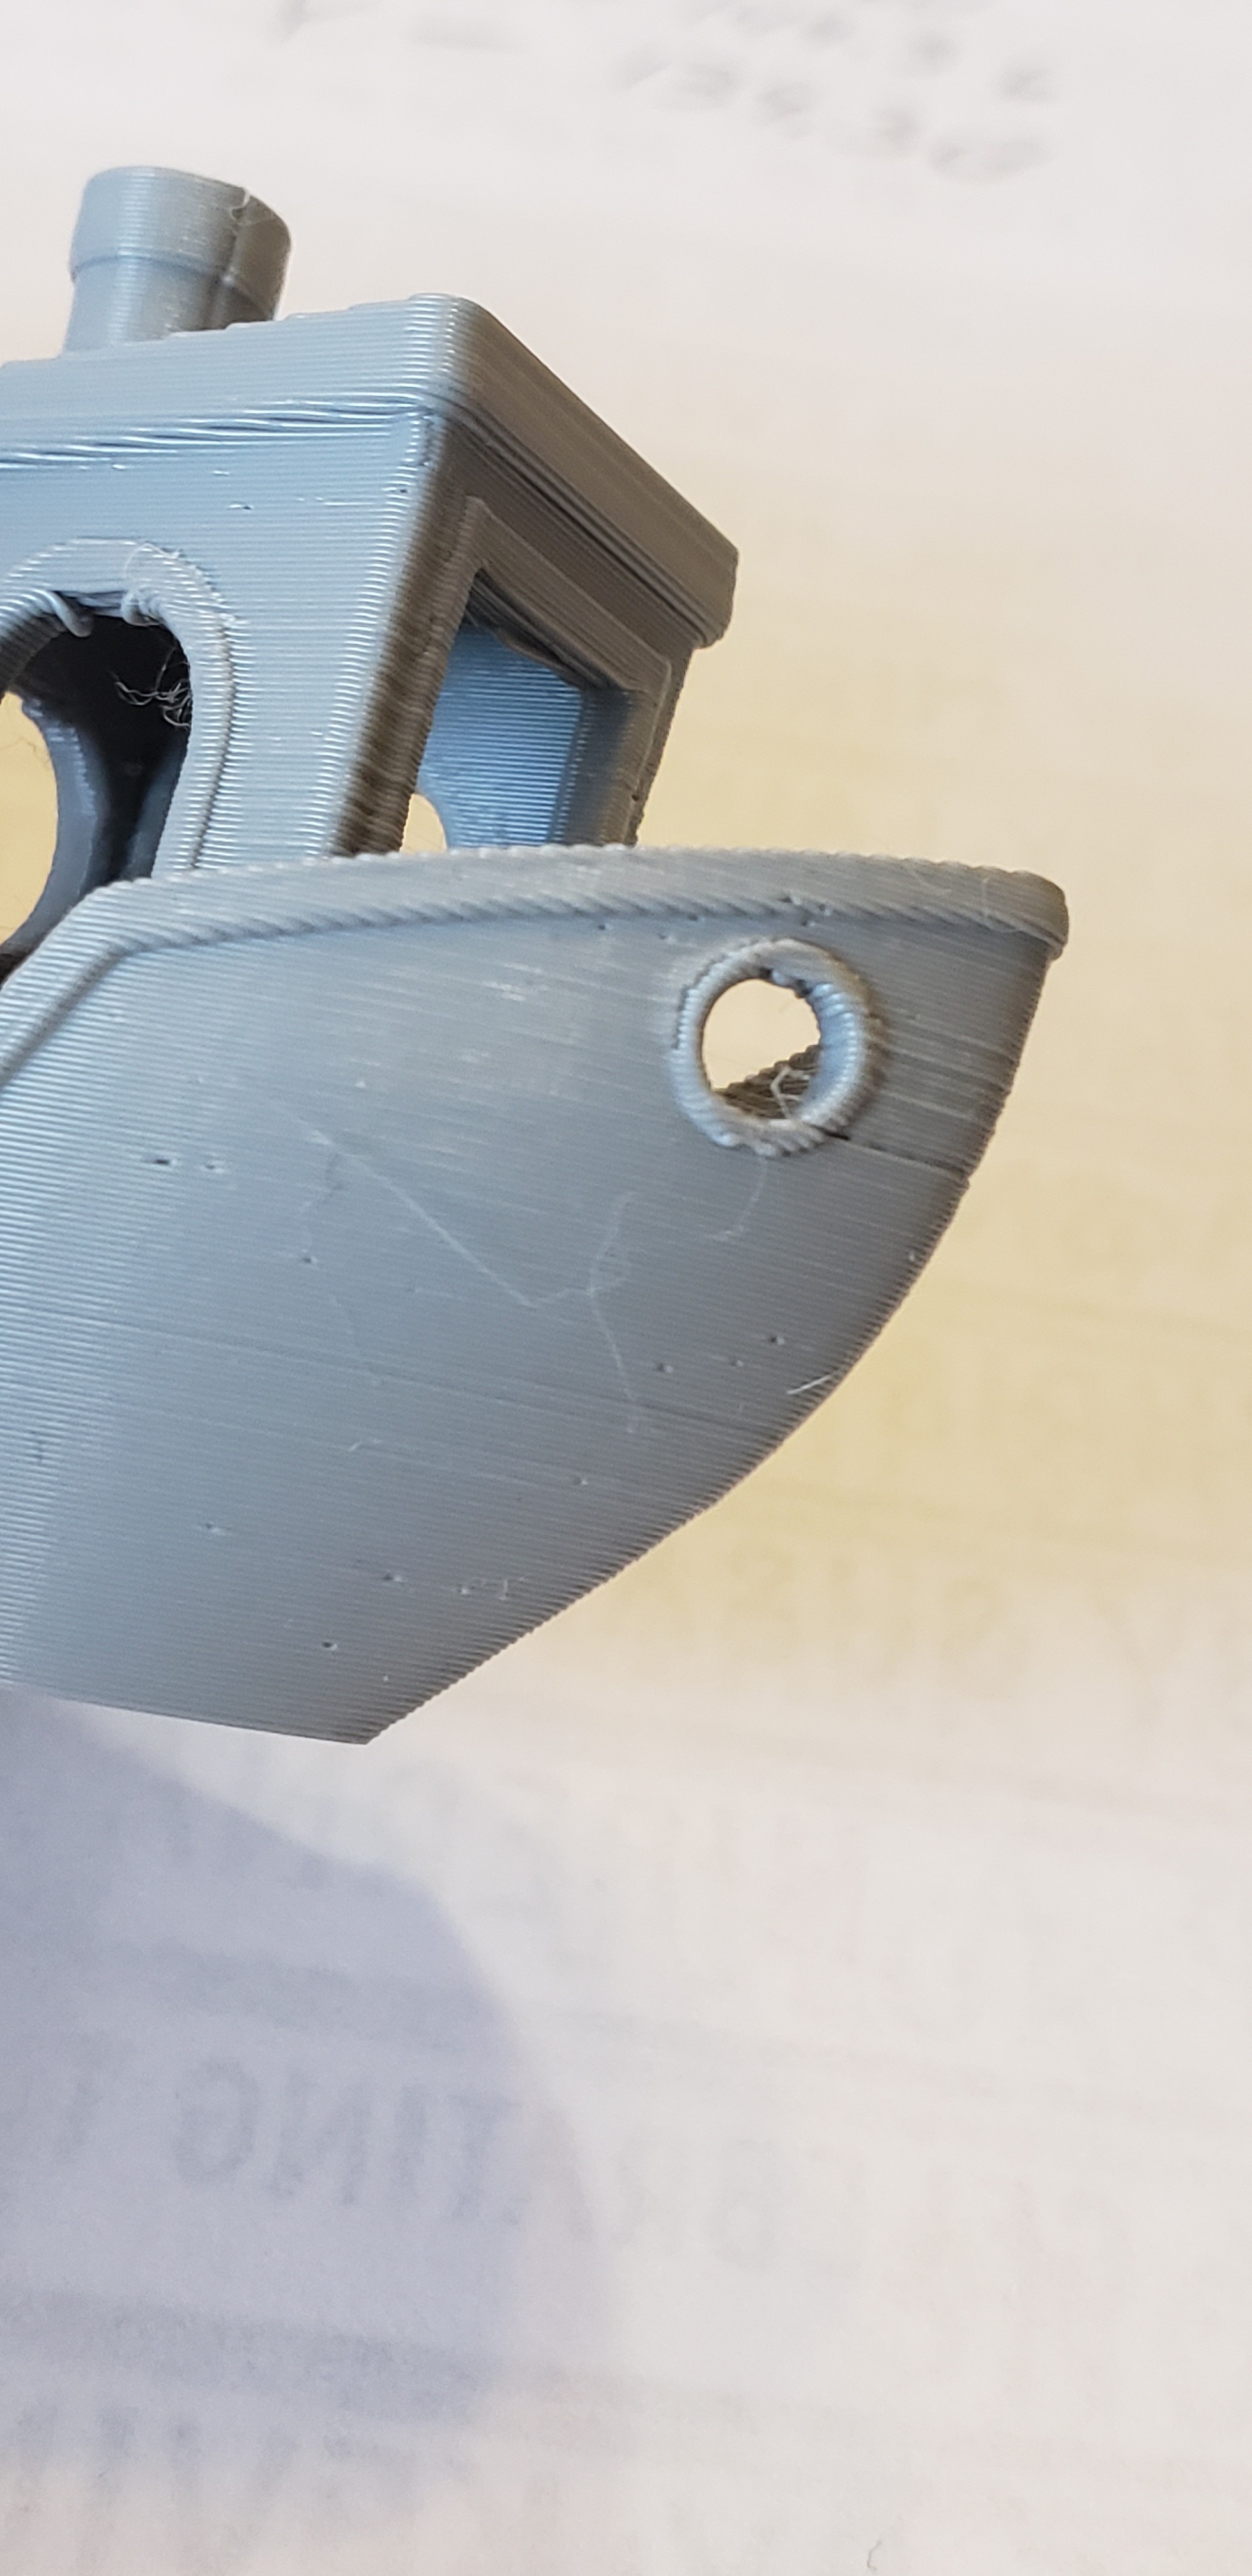
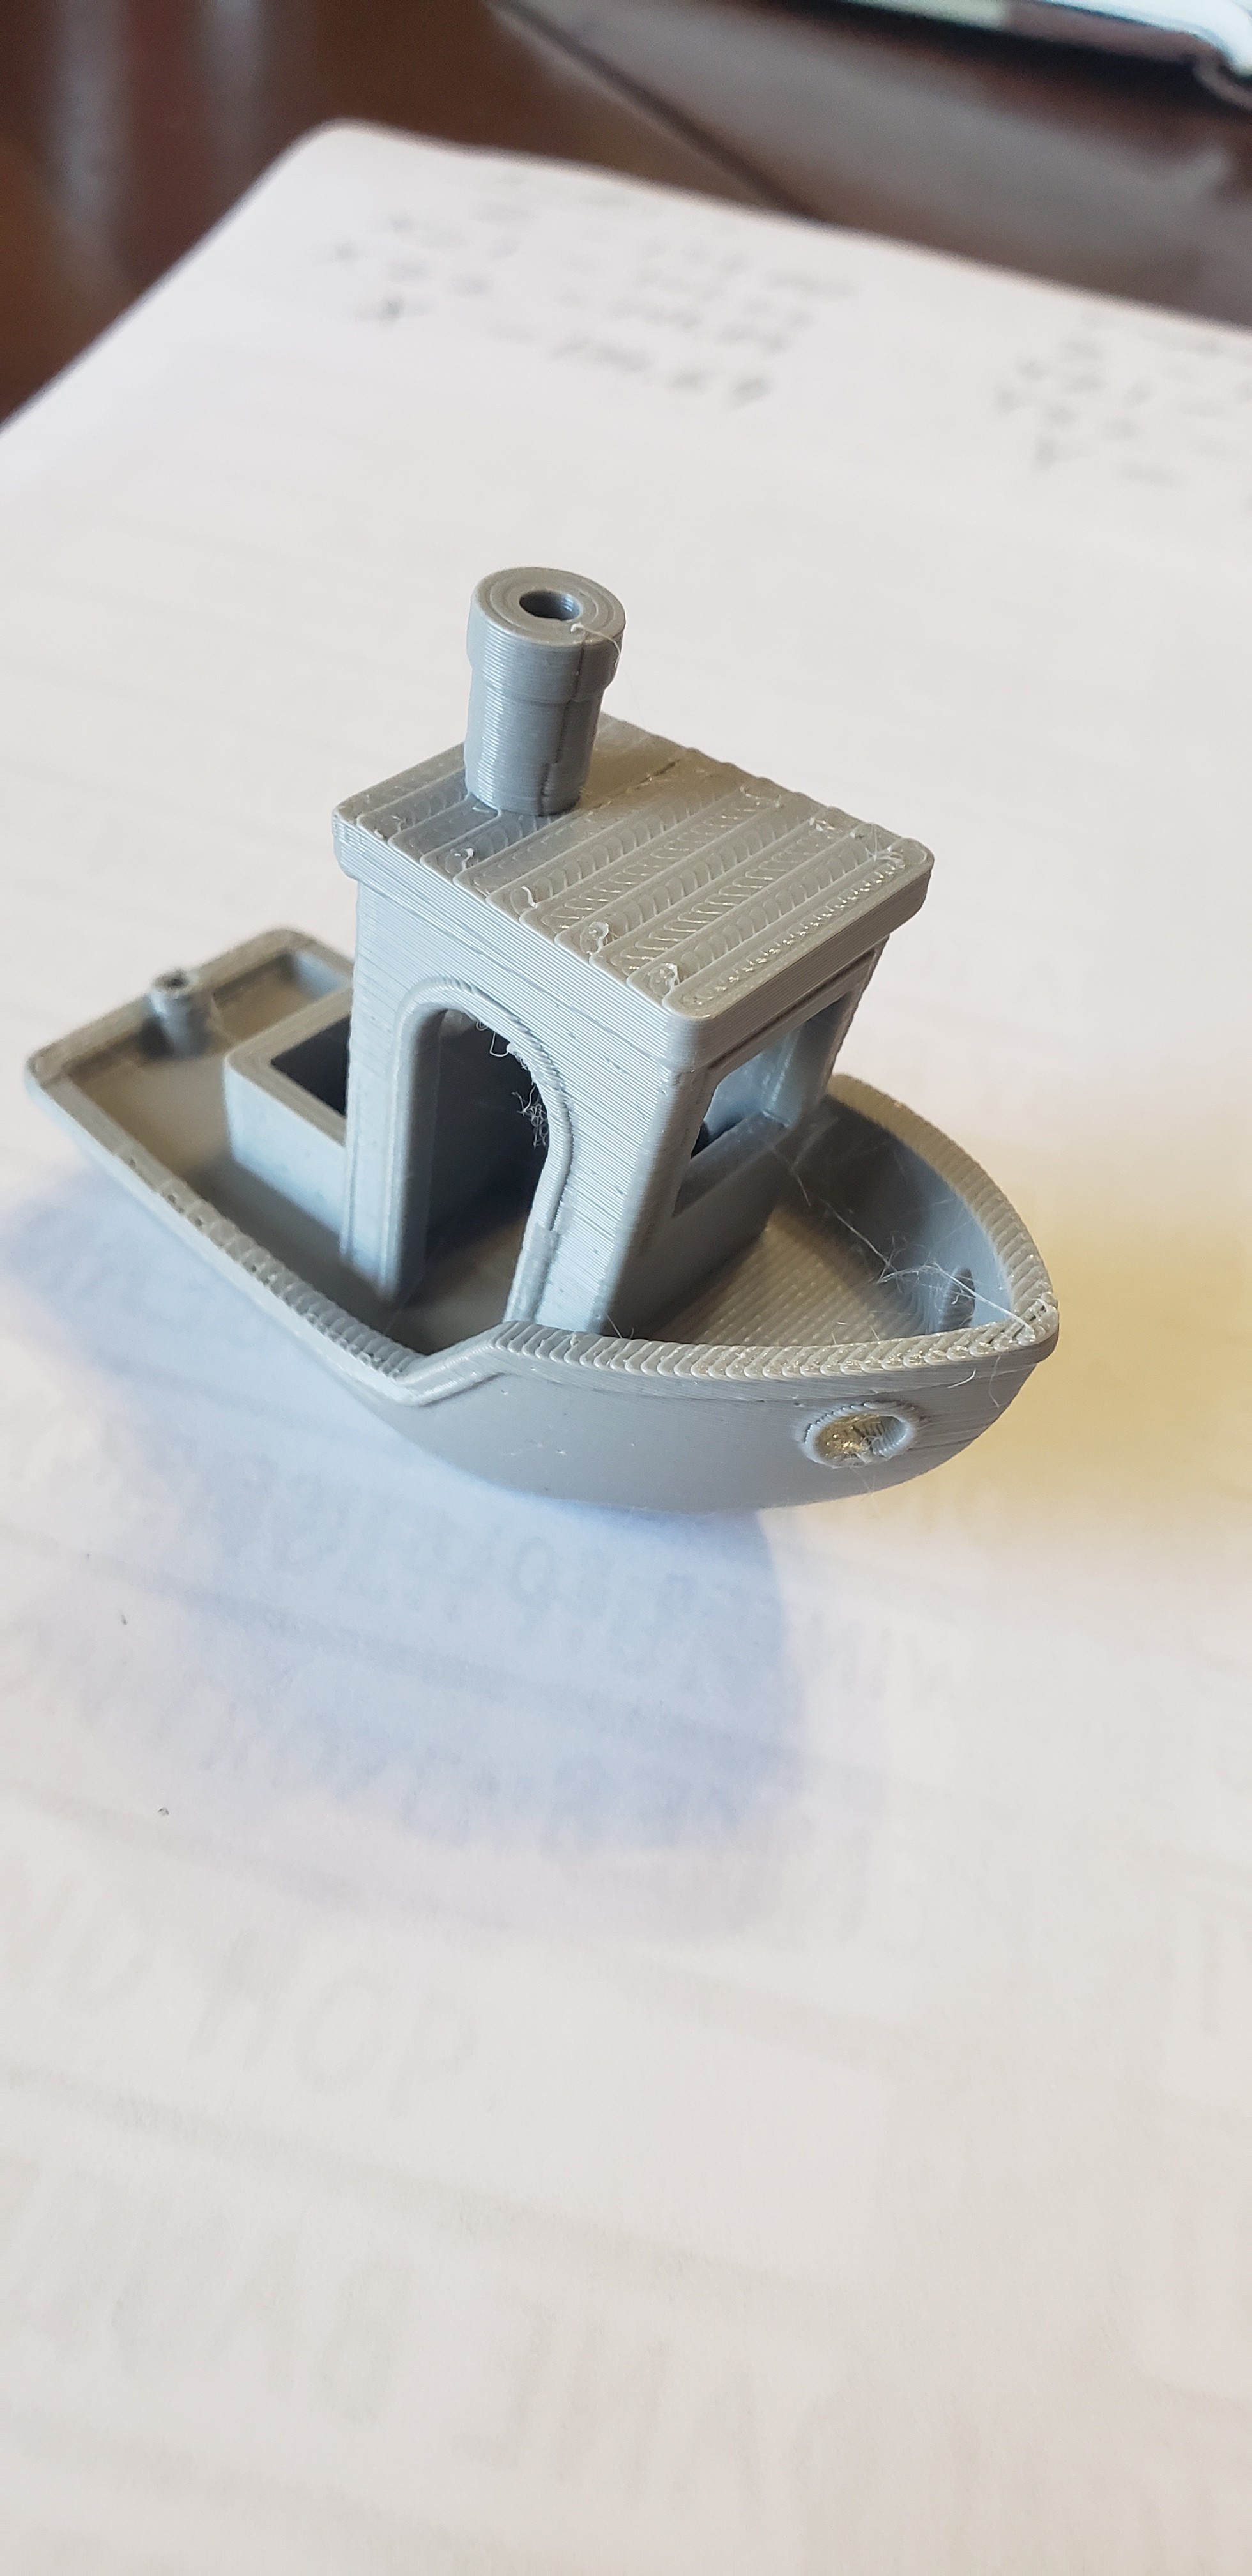
See below for pictures of the print as well as a temperature tower and 3dbenchy that used the same settings.
You are well within spec, or am I missing something. Your prints look great and the numbers are excellent as well.
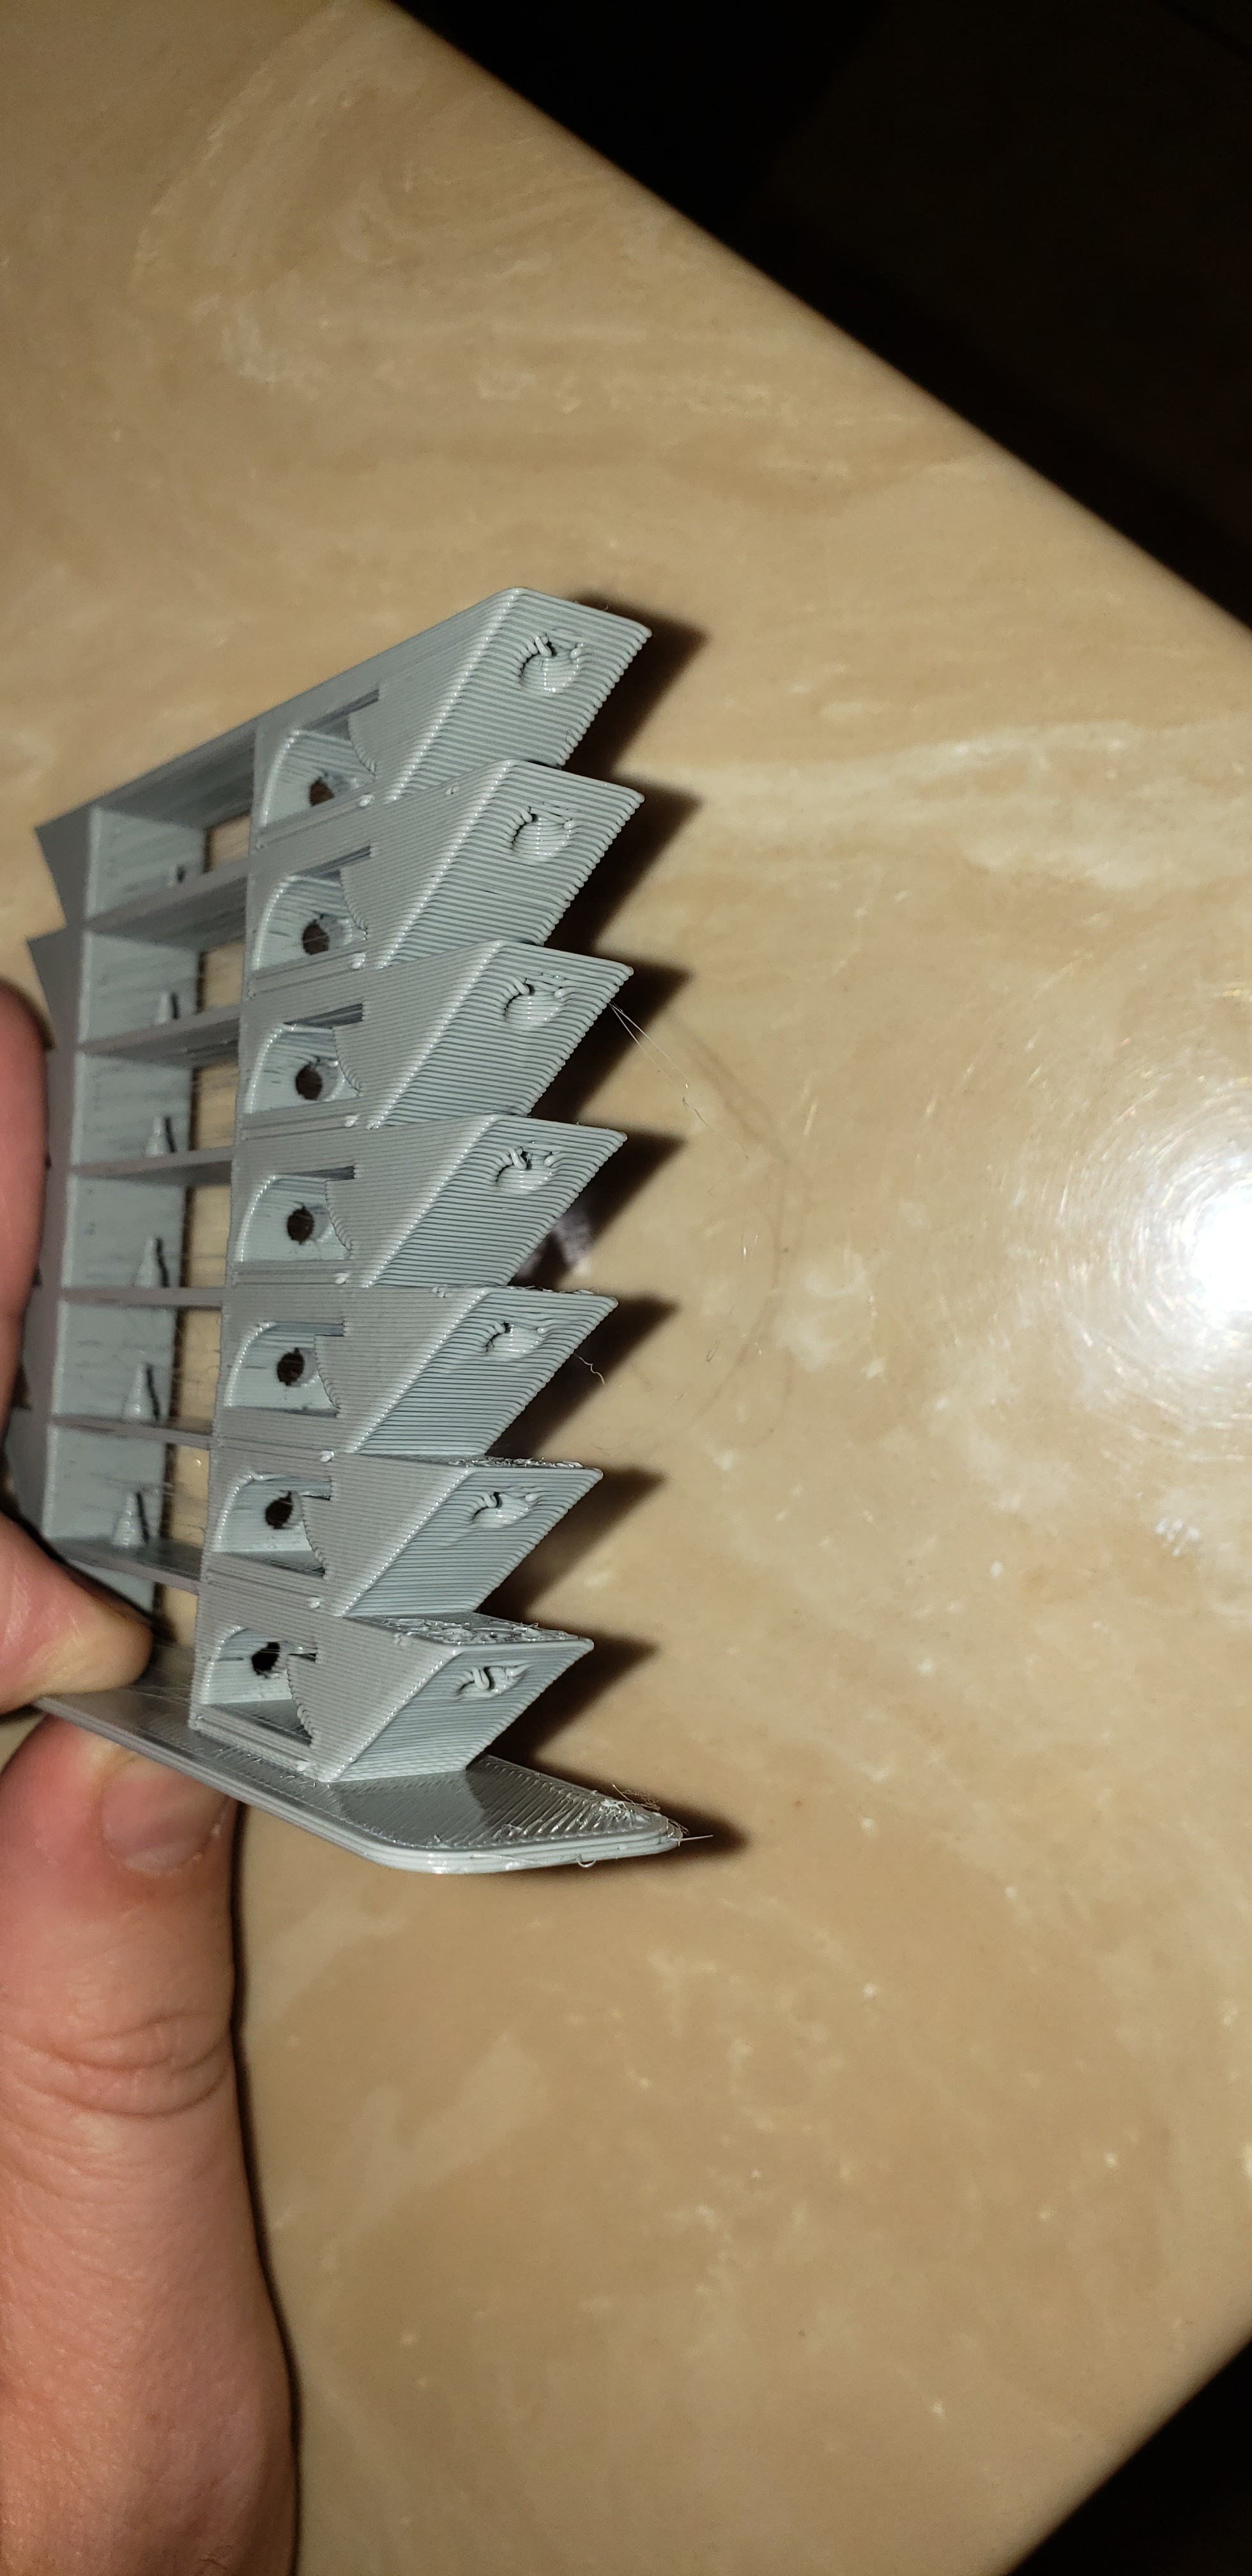
If you want me to find something, I would say print slightly thicker layers at a slower speed. You are getting ghosting and rounded corners in the direction of travel. so you are either printing too fast or have too high of accelerations. Not sure why your Y axis would be .7mm off, loose belt?
Thanks Ryan. Looking back, I realized I misread your guidance on the test print. You mentioned that the accuracy should be within .5mm and ideally less than half my first layer height, but you were only referring to the z-axis. I will look into making the adjustments you mentioned. At the end of the day, I just wanted some confirmation that my mini could handle this project before I bought the tubing and everything else.
As @vicious1 said the ghosting seems to point jerk and acceleration values too high. The slight under extrusion on the front of the test boat might be several things (either extruder slip, too much retraction and an almost filament jam that didn’t happen, or simply printing too fast). The Z ringing can be the effect also of too much speed or some Z-wobbling effect on you Z lead screw.
To print MPCNC parts, my advice is to switch to a 0.6mm nozzle and reduce speed a bit. It will still print a lot faster than with a common 0.4mm nozzle and get better results.
Thanks for the advice. I will look into a 0.6mm nozzle. The trouble I am having dialing in the 0.4mm nozzle has made me cautious about switching to another size, but maybe it is worth it. I imagine going from 0.2mm height with the 0.4mm nozzle to a 0.3mm height with a 0.6mm nozzle would allow me to print substantially slower while maintaining the same print time.
Any tips on how to pinpoint extruder slip or any good test model to dial in retraction?
Yes. about 50% is a safe bet. I actually use about a 60% ratio with excellent results and without any strength loss (at least for me). This helps to reduce printing time a bit too since layer height are slightly higher.
With a 0.6mm nozzle unless you slow down a lot the printing times will still drop. Remember that you’ll be laying down lines 0.6mm wide…that means you will also need less outside/inside shell layers.
Retraction depends if your using bowden or direct drive. Judging by your benchy tests you have head room to reduce extration since no blobs or zits are visible in your print. This can be tested with a simple retraction test print like this one.
For example I have a bowden setup and my current retraction value is about 1mm. I used to run it at 3mm. This highly depends on your hotend and printing material/quality.
All-metal hotends are more sensitive. Those with ptfe insert up to the melting zone are more permissive. Materials have a huge influence. Heat creap on the cold zone and filament with bad diameter specs can lead to catastrophic jams so the lower the retraction value as much as you can without excessive stringing or blobs. A few here and there is perfectly acceptable. Taking care of these 2 points will probably fix your problem.
If you still have slip problems with the filament then most probably the culprit is the cold end. Check is the current from the driver to the motor is set correctly and the motor/driver are not working bellow the rated power. I also bought a BMG clone extruder (in hope to get an extra bit of perfection) but after using it for a couple of times I (and a couple of jams and slips) went back for my previous that worked a lot better. It’s not suited for flexible filaments but I have hundreds of hours on this one and I love it… but then again…I designed it…so I suspicious in that matter
Also read this (old) amazing troubleshoot. It has tones of information on common printing problems.
That makes a lot of sense. Should be able to do two perimeters instead of three.
Did you possible hyperlink the wrong address? I do not see a retraction test print.
I do have a bowden and an all-metal hotend. I am going to work on dialing in my retraction and such. It actually is still set at default for the mini which probably doesn’t make much sense considering I have changed the extruder and hot end. My filament should be pretty accurate. I have never measured a concerning deviation in diameter with hatchbox.
I will try 0.3mm with my 0.4mm once I get things dialed in with the 0.2mm… Baby steps I guess. I have time I suppose as I try to figure out how I am going to fit the MPCNC in my garage.
Thanks Ryan and Paciente8159. I think I have corrected some of my issues because of your advice. I am planning to try out a leg support at 0.3mm and see how it goes. Any recommendation on best infill pattern?
Rectilinear seems to be the fastest. I design my parts to typically only be loaded in the XY direction (as printed, not assembled). Because of that I also believe it to be the strongest for these parts, second would maybe be triangular.
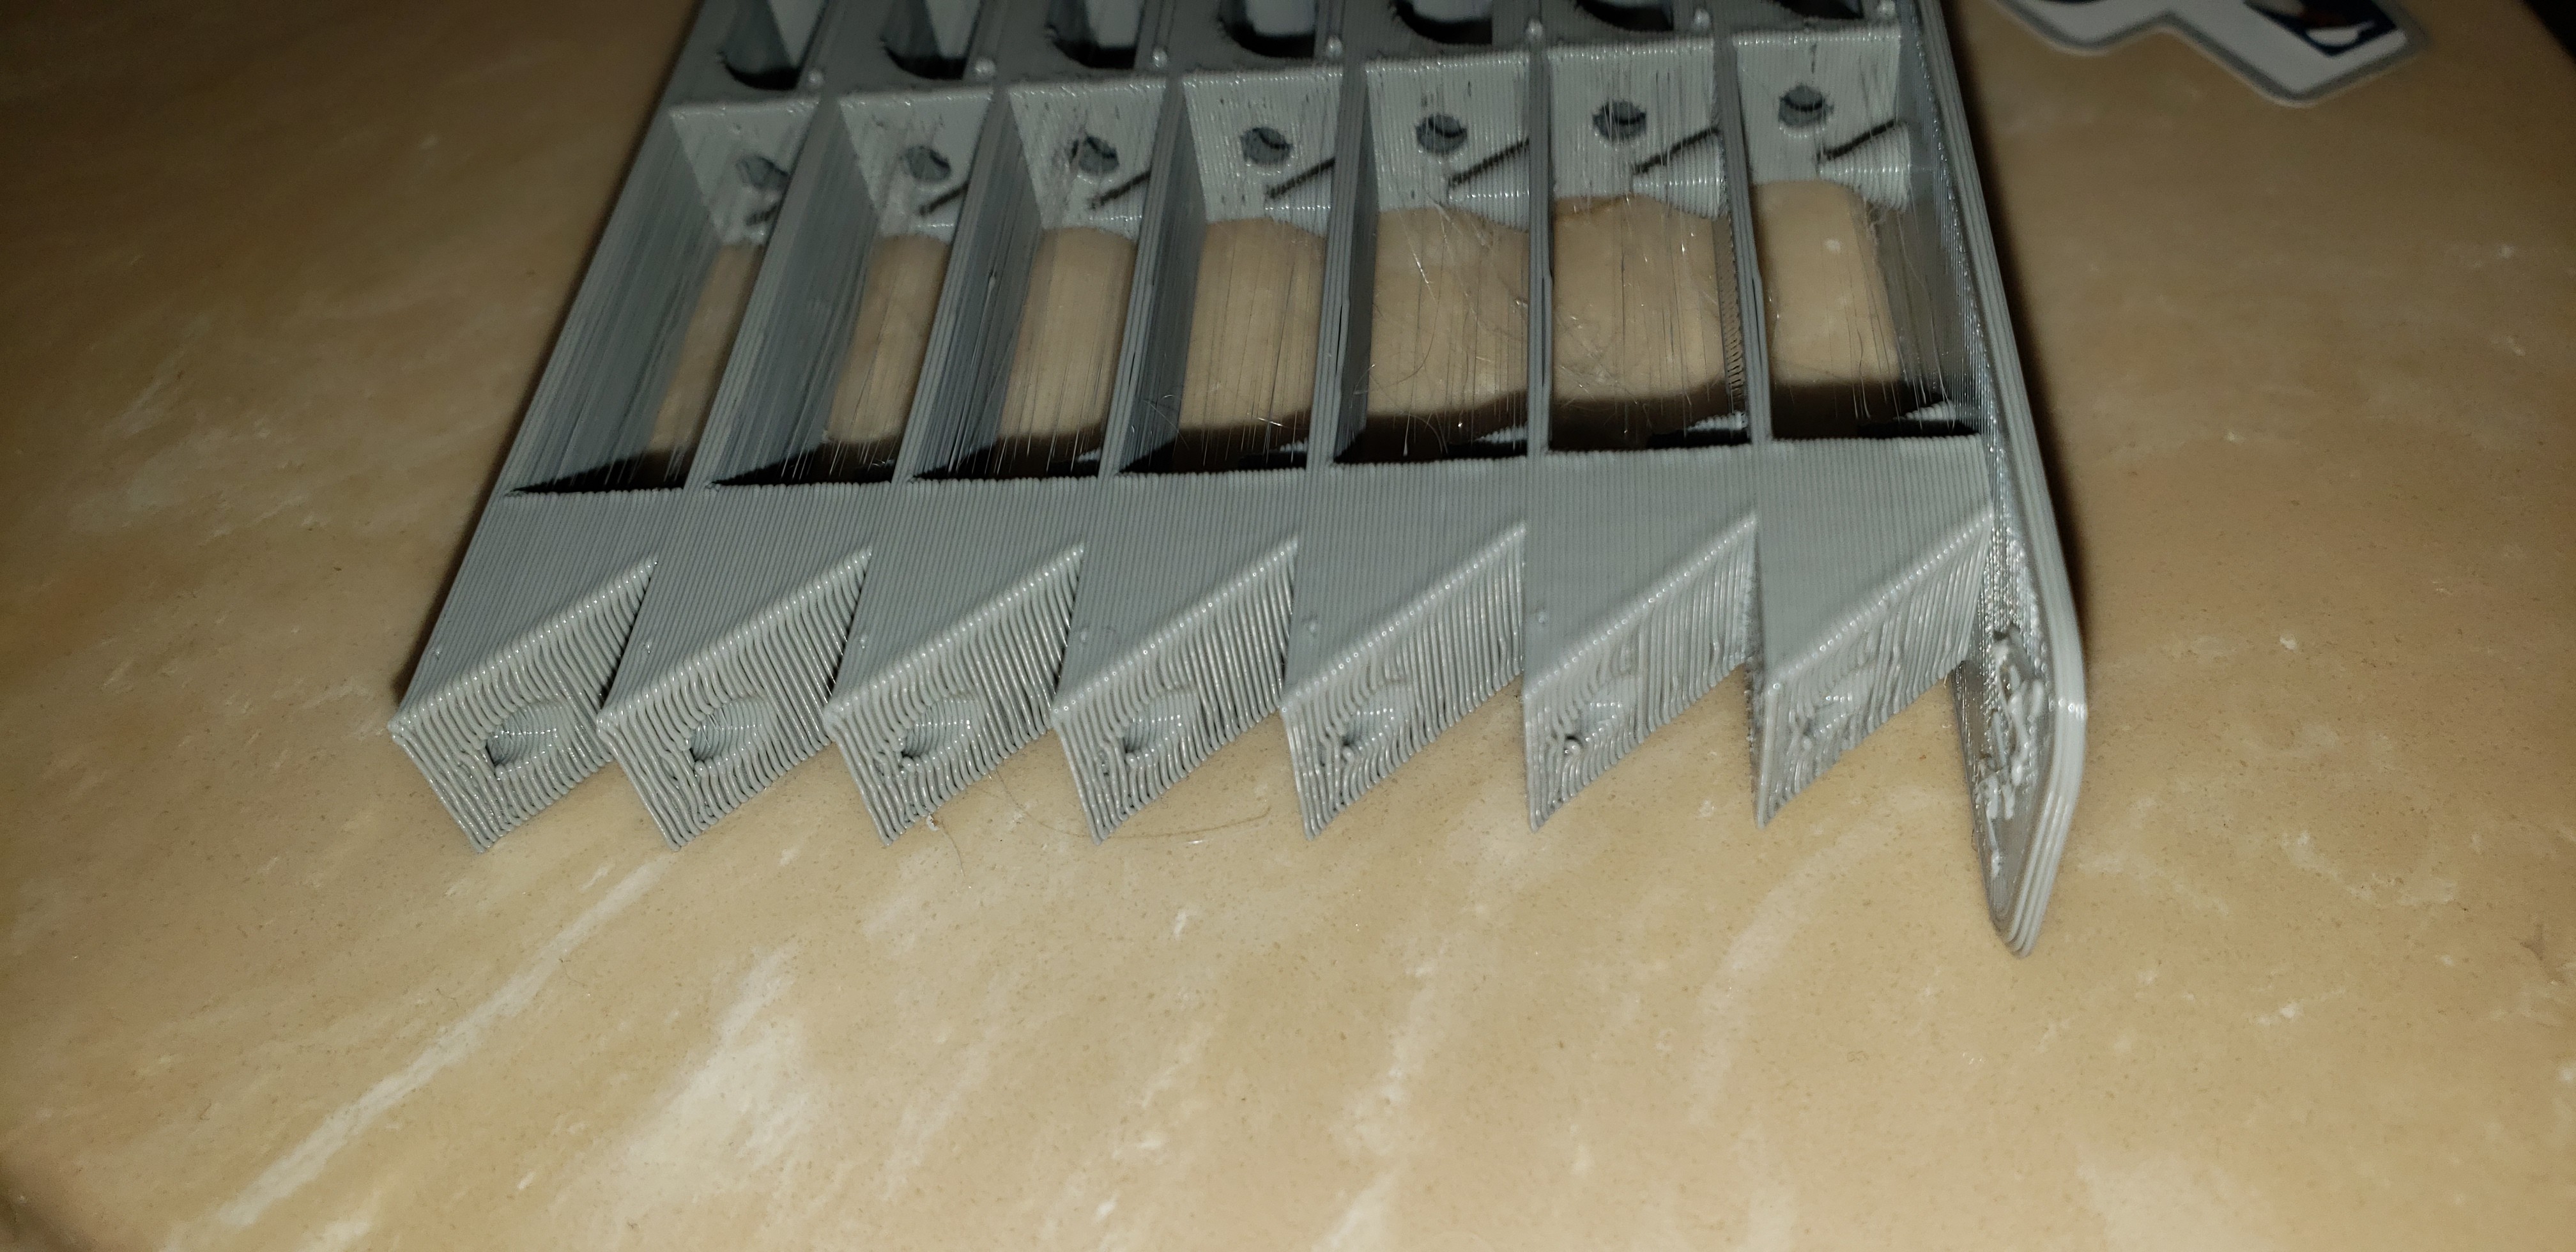
Thanks. I will probably switch to rectilinear then. The test part I am currently printing (feet-j) is 5hr8min using 0.3mm, three perimeters and 50% gyroid infill. Switching to rectilinear looks like would save me about 25% on time.
Print complete. Looks pretty good. I had a little bed adhesion issue which is strange. Will increase the bed temp a little for the next print. A little stringing, but adjusting my retraction eliminated the random voids.
I went ahead and pulled the trigger on tubing and filament for the build.
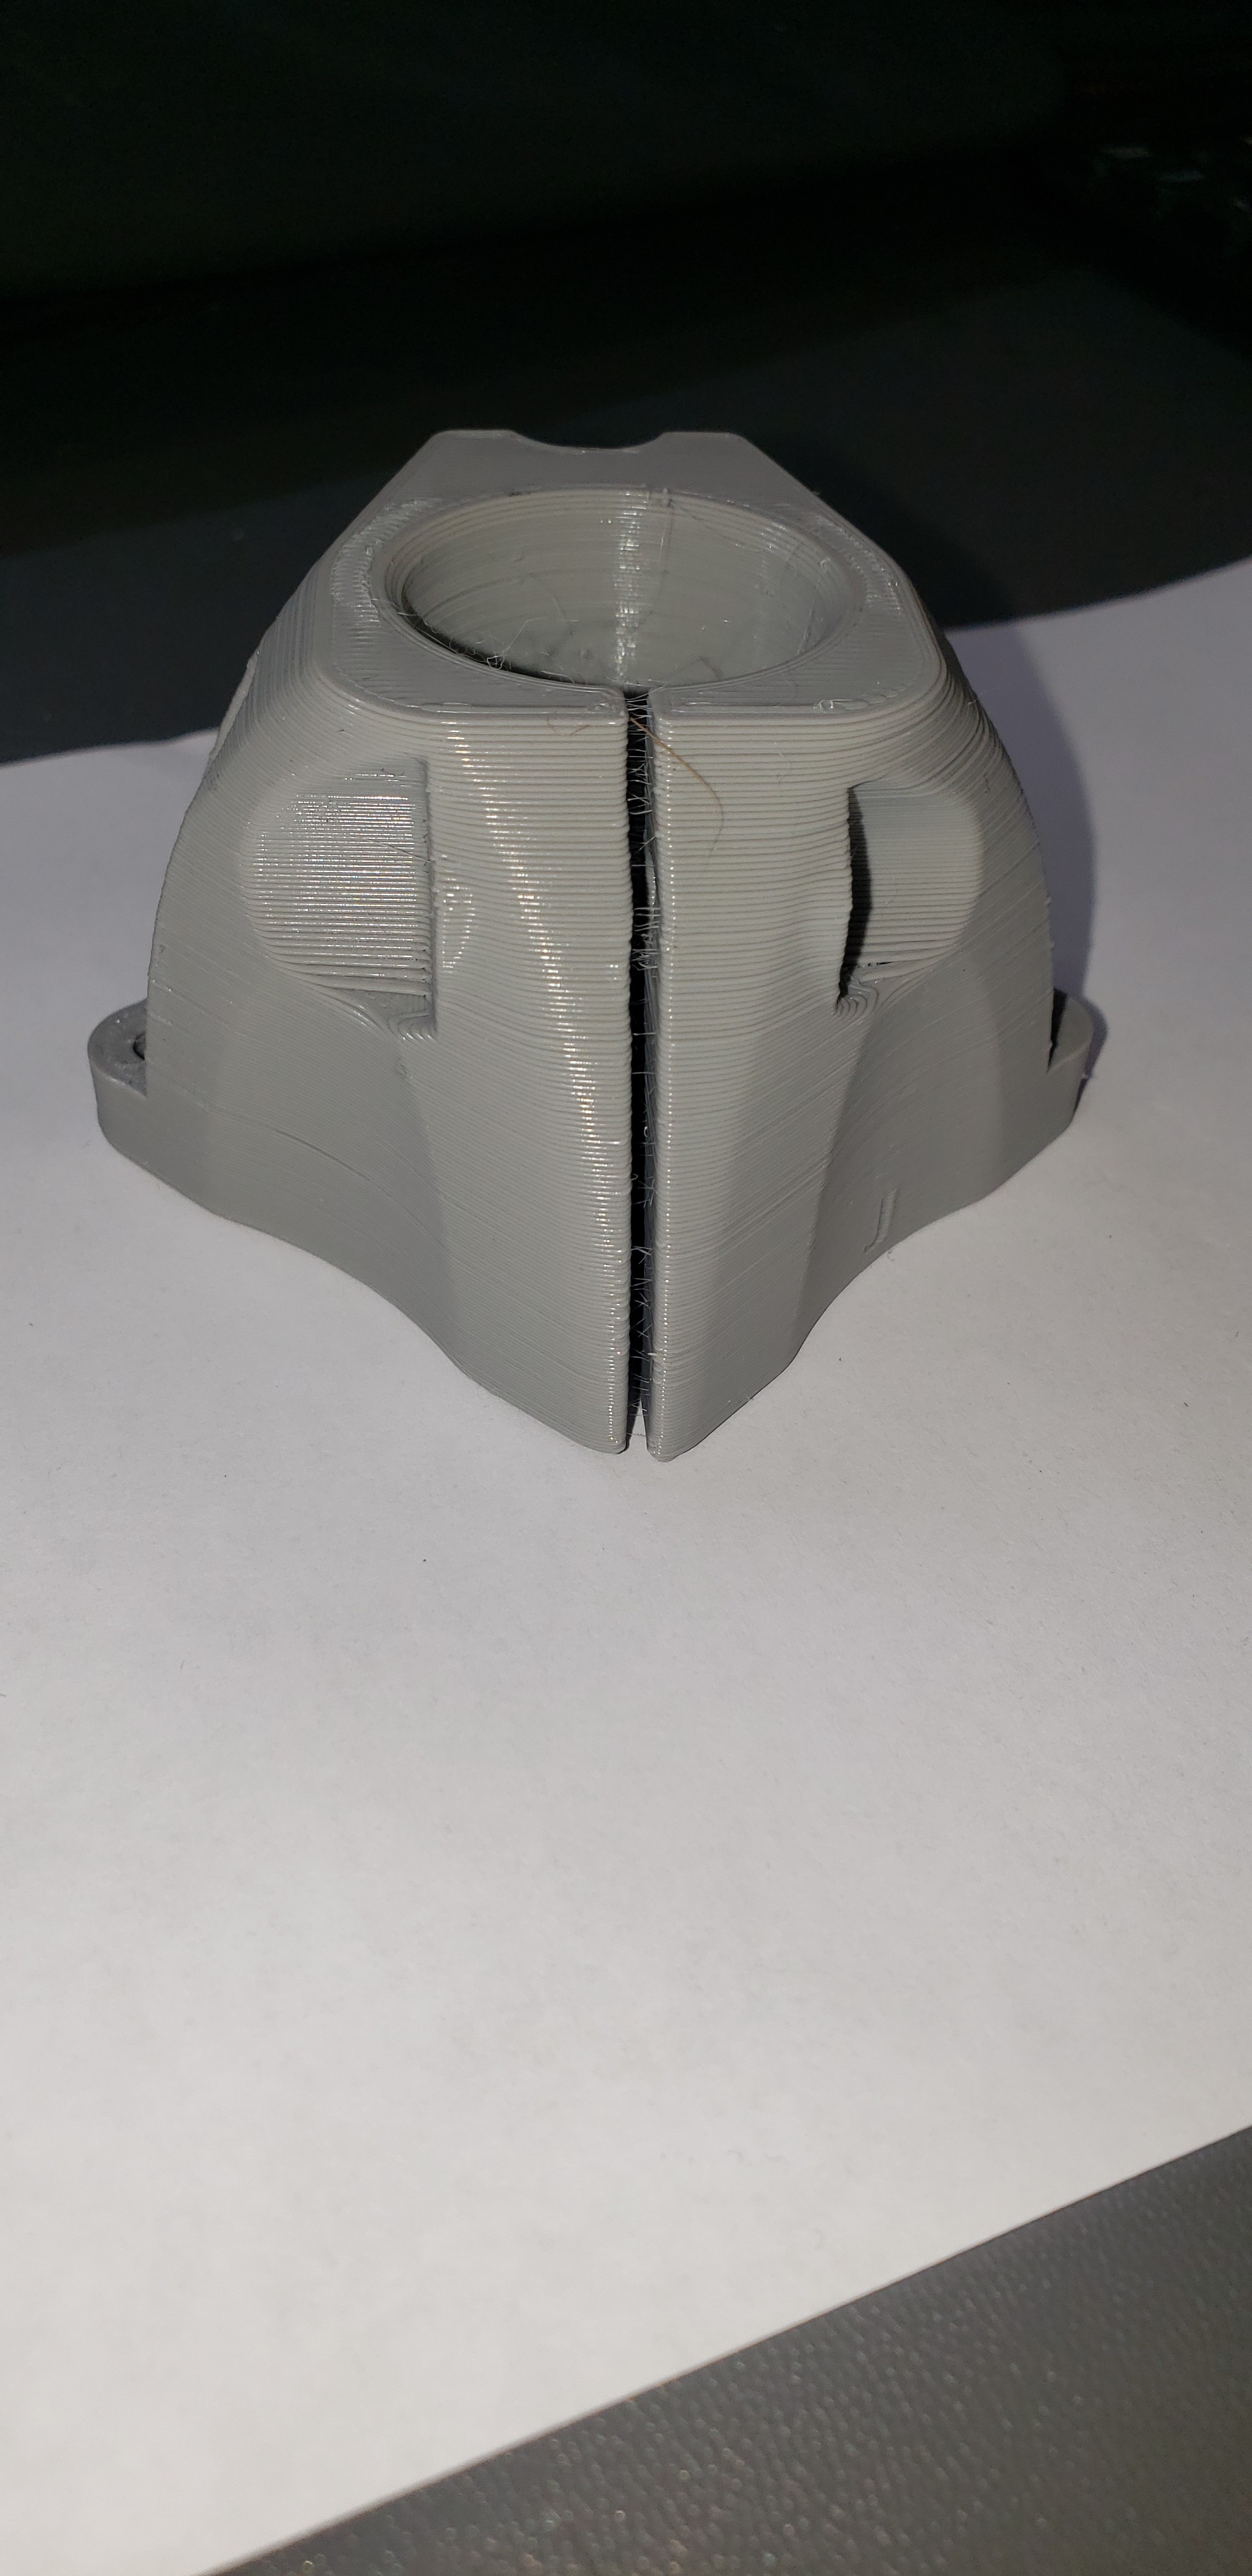
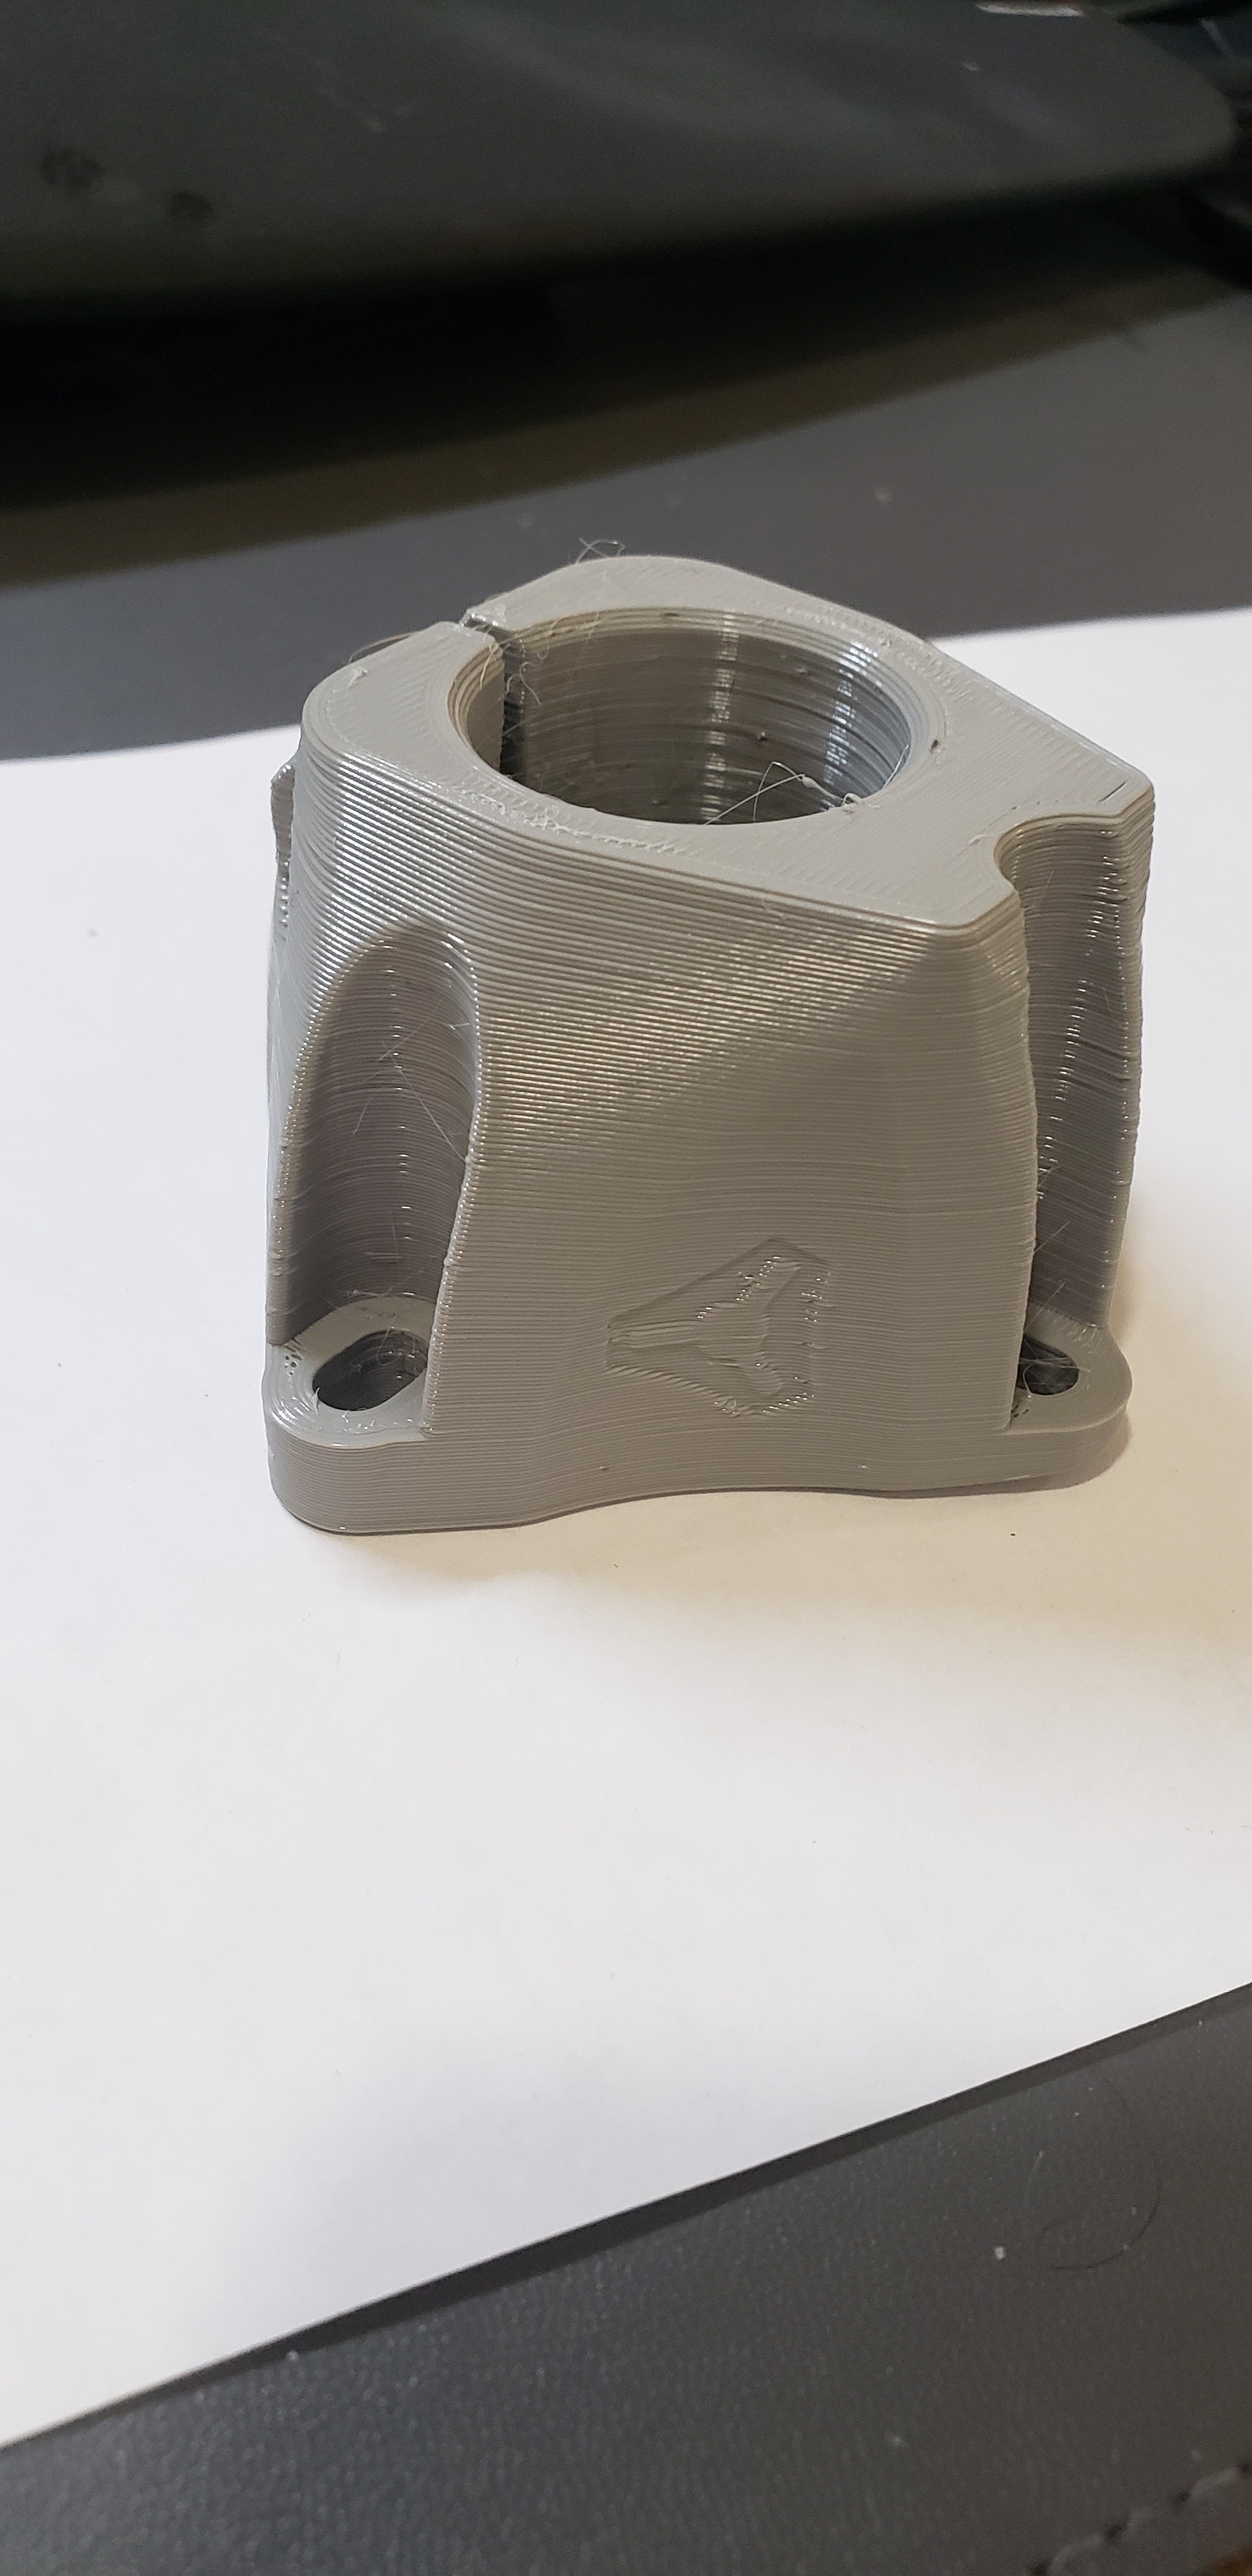
No ringing at all , you can probably go a touch faster. The layers are stacked a bit odd, have you tried a temp tower test print? You might be too hot or cold.
Yeah. I did external perimeters at 15mm/s and other perimeters at 20mm/s, so pretty slow. I haven’t tried a temp tower for the 0.3mm. I will go ahead and test one. I think I am still having a little vibration/mechanical issue. I am not sure if it is belts, bearings, extruder or something else though. I am hesitant to adjust those anymore as I have finally got it to this point and wasn’t able to see much improvement with any further adjustments.
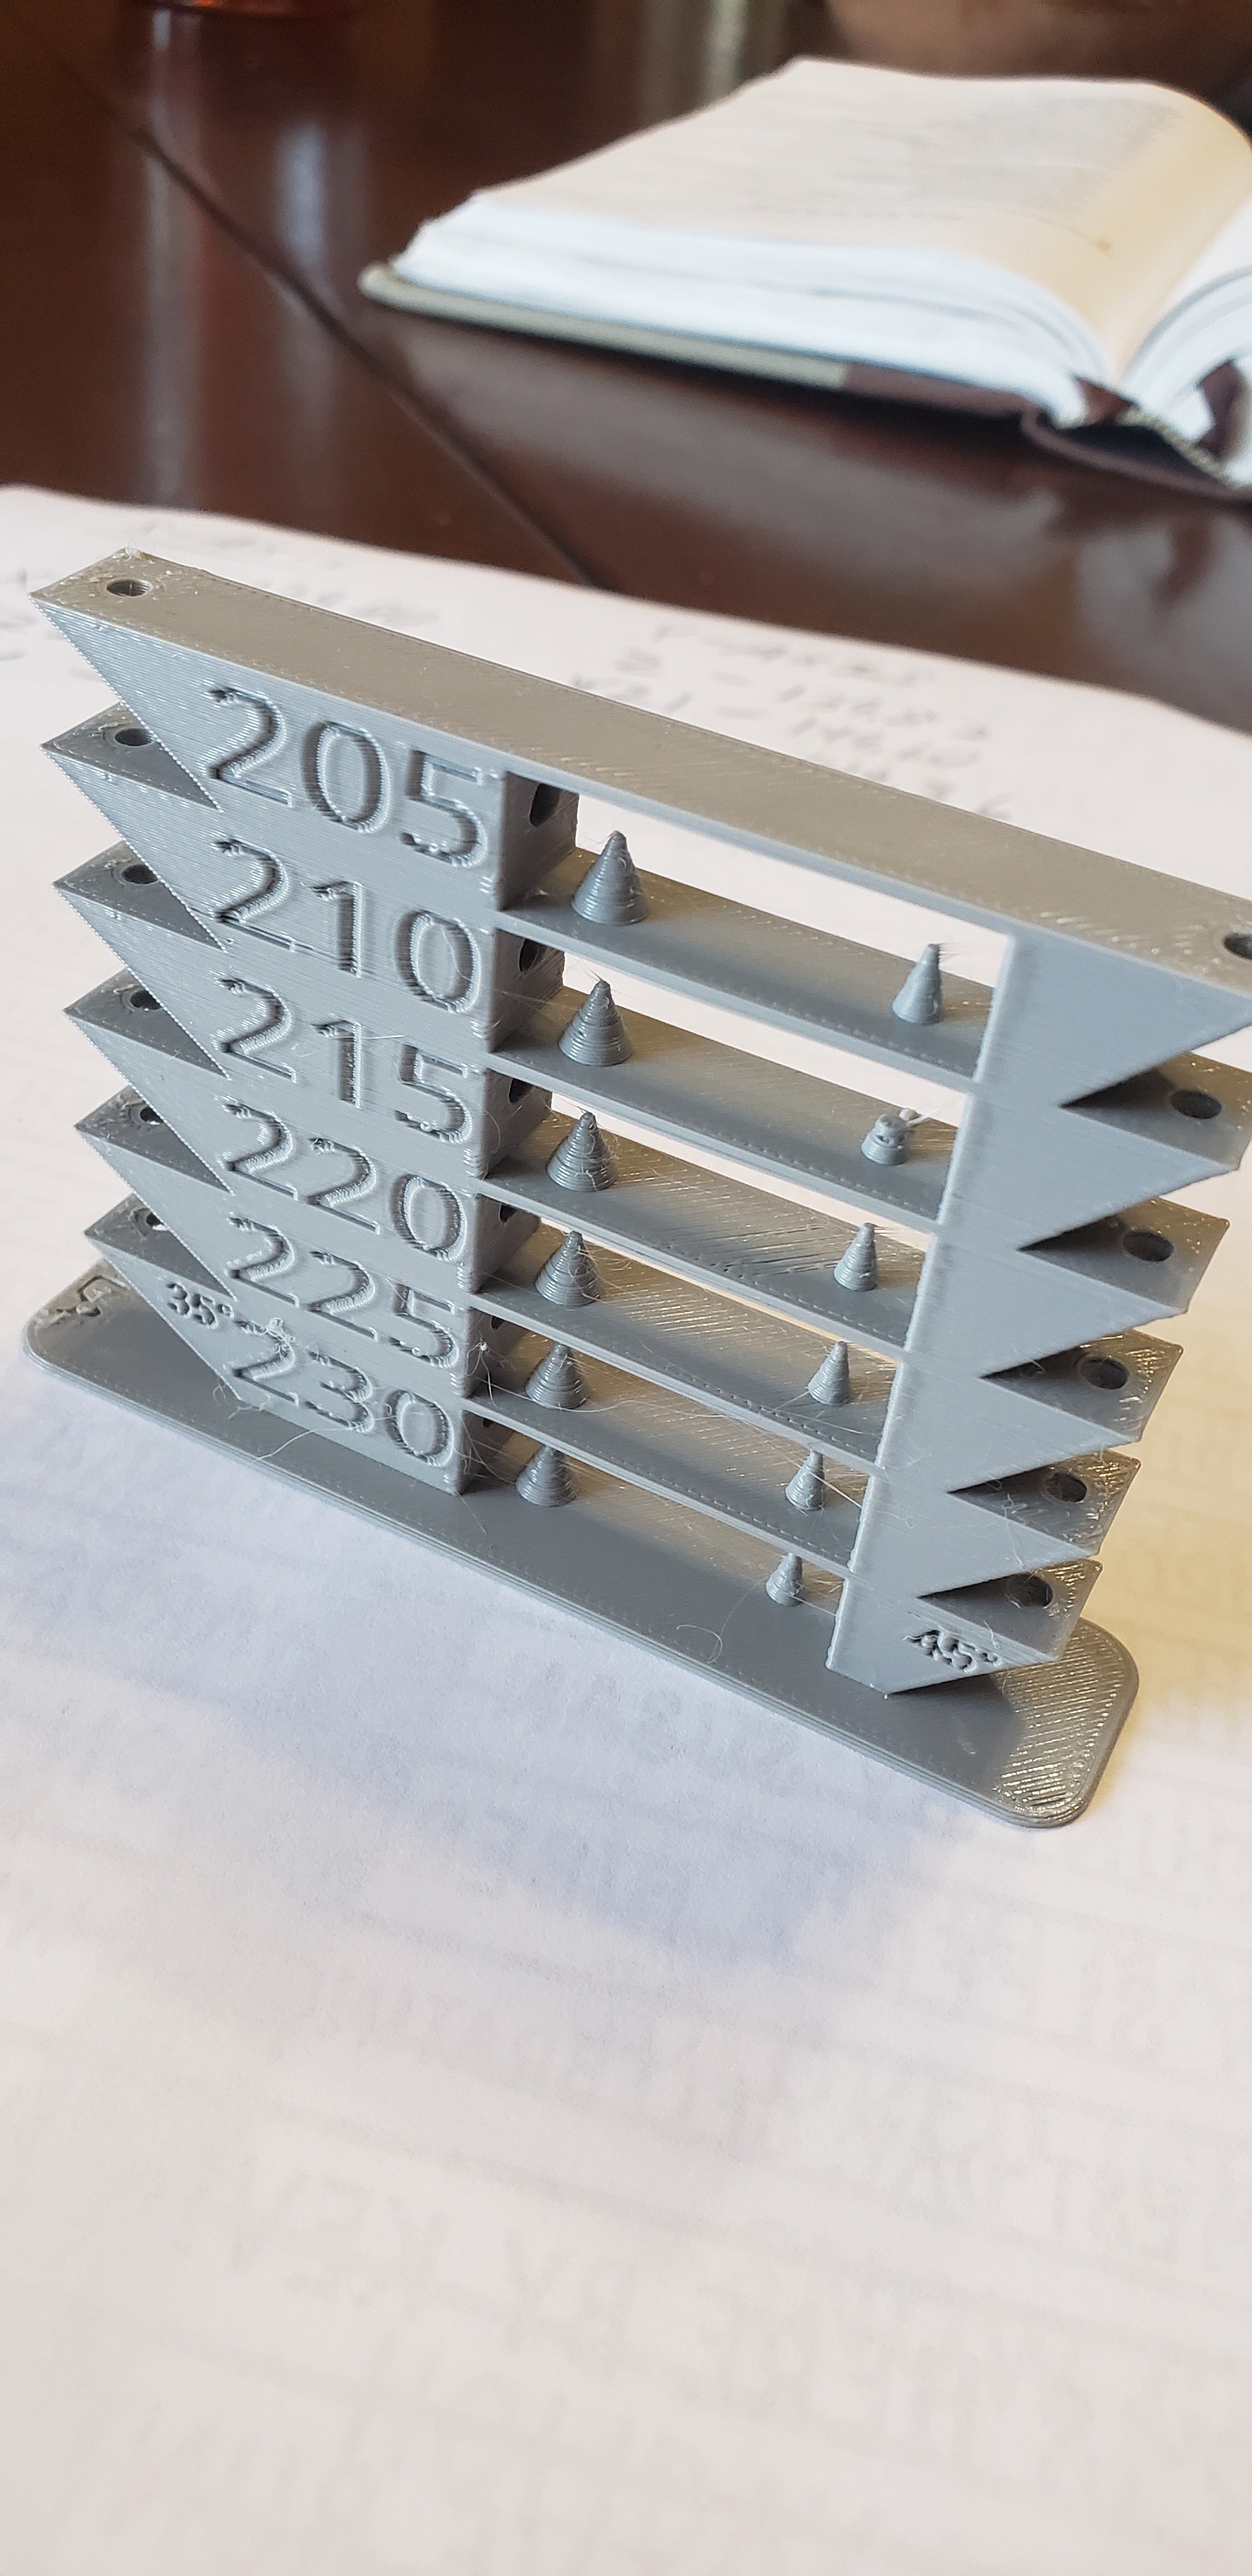
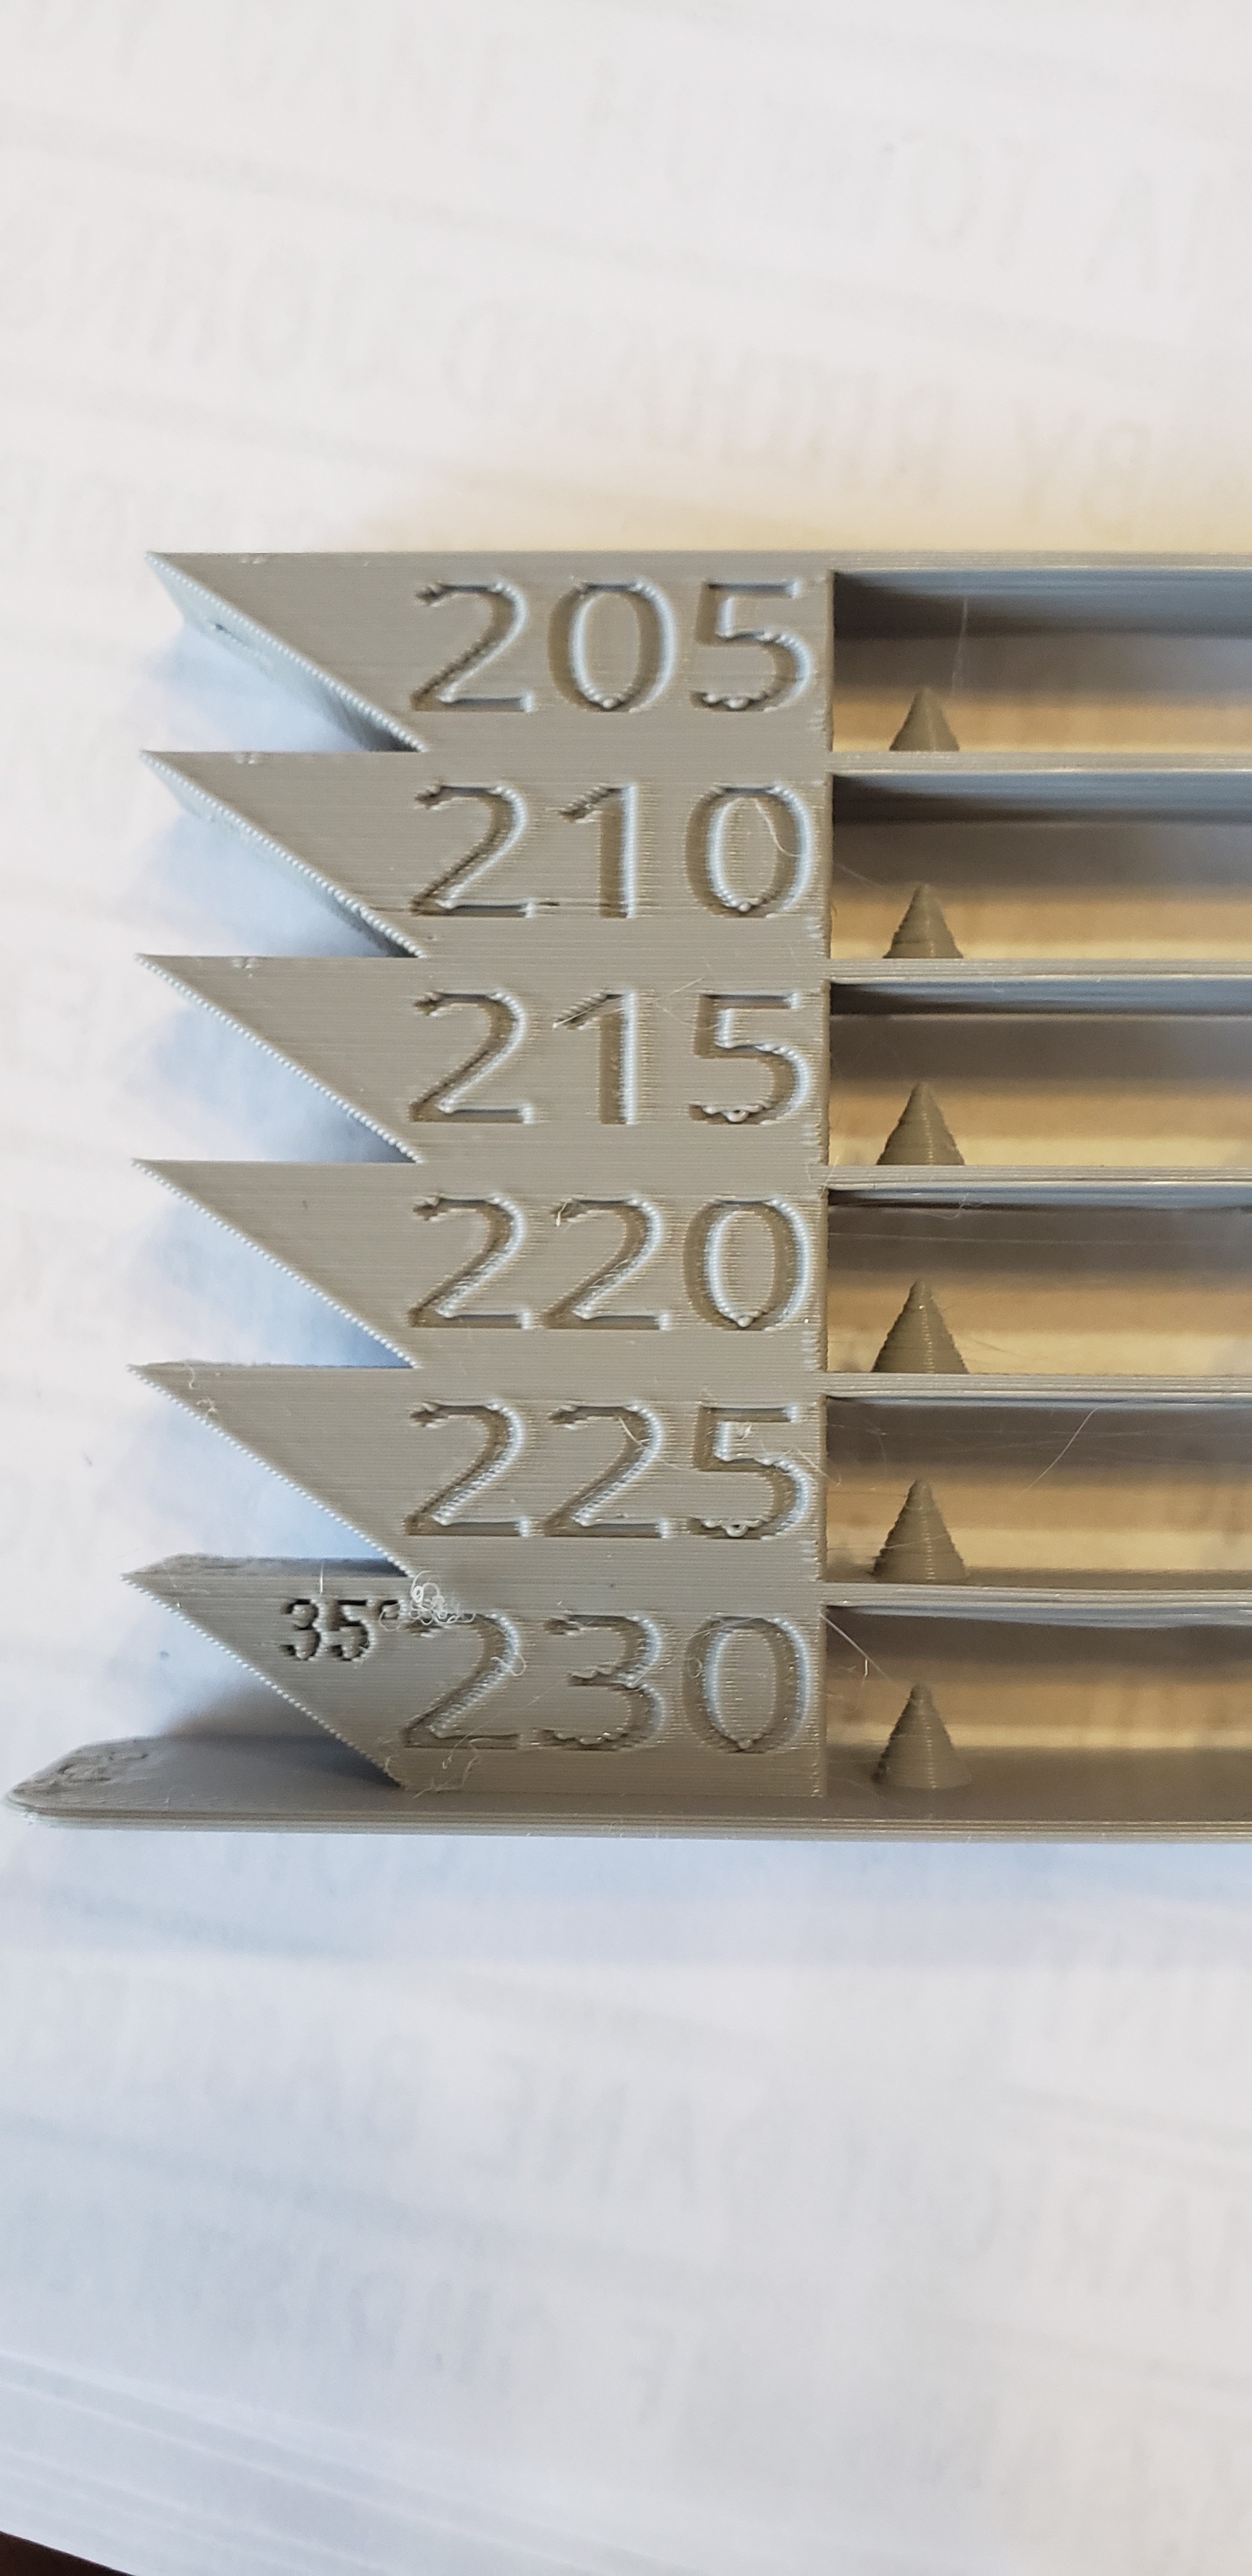
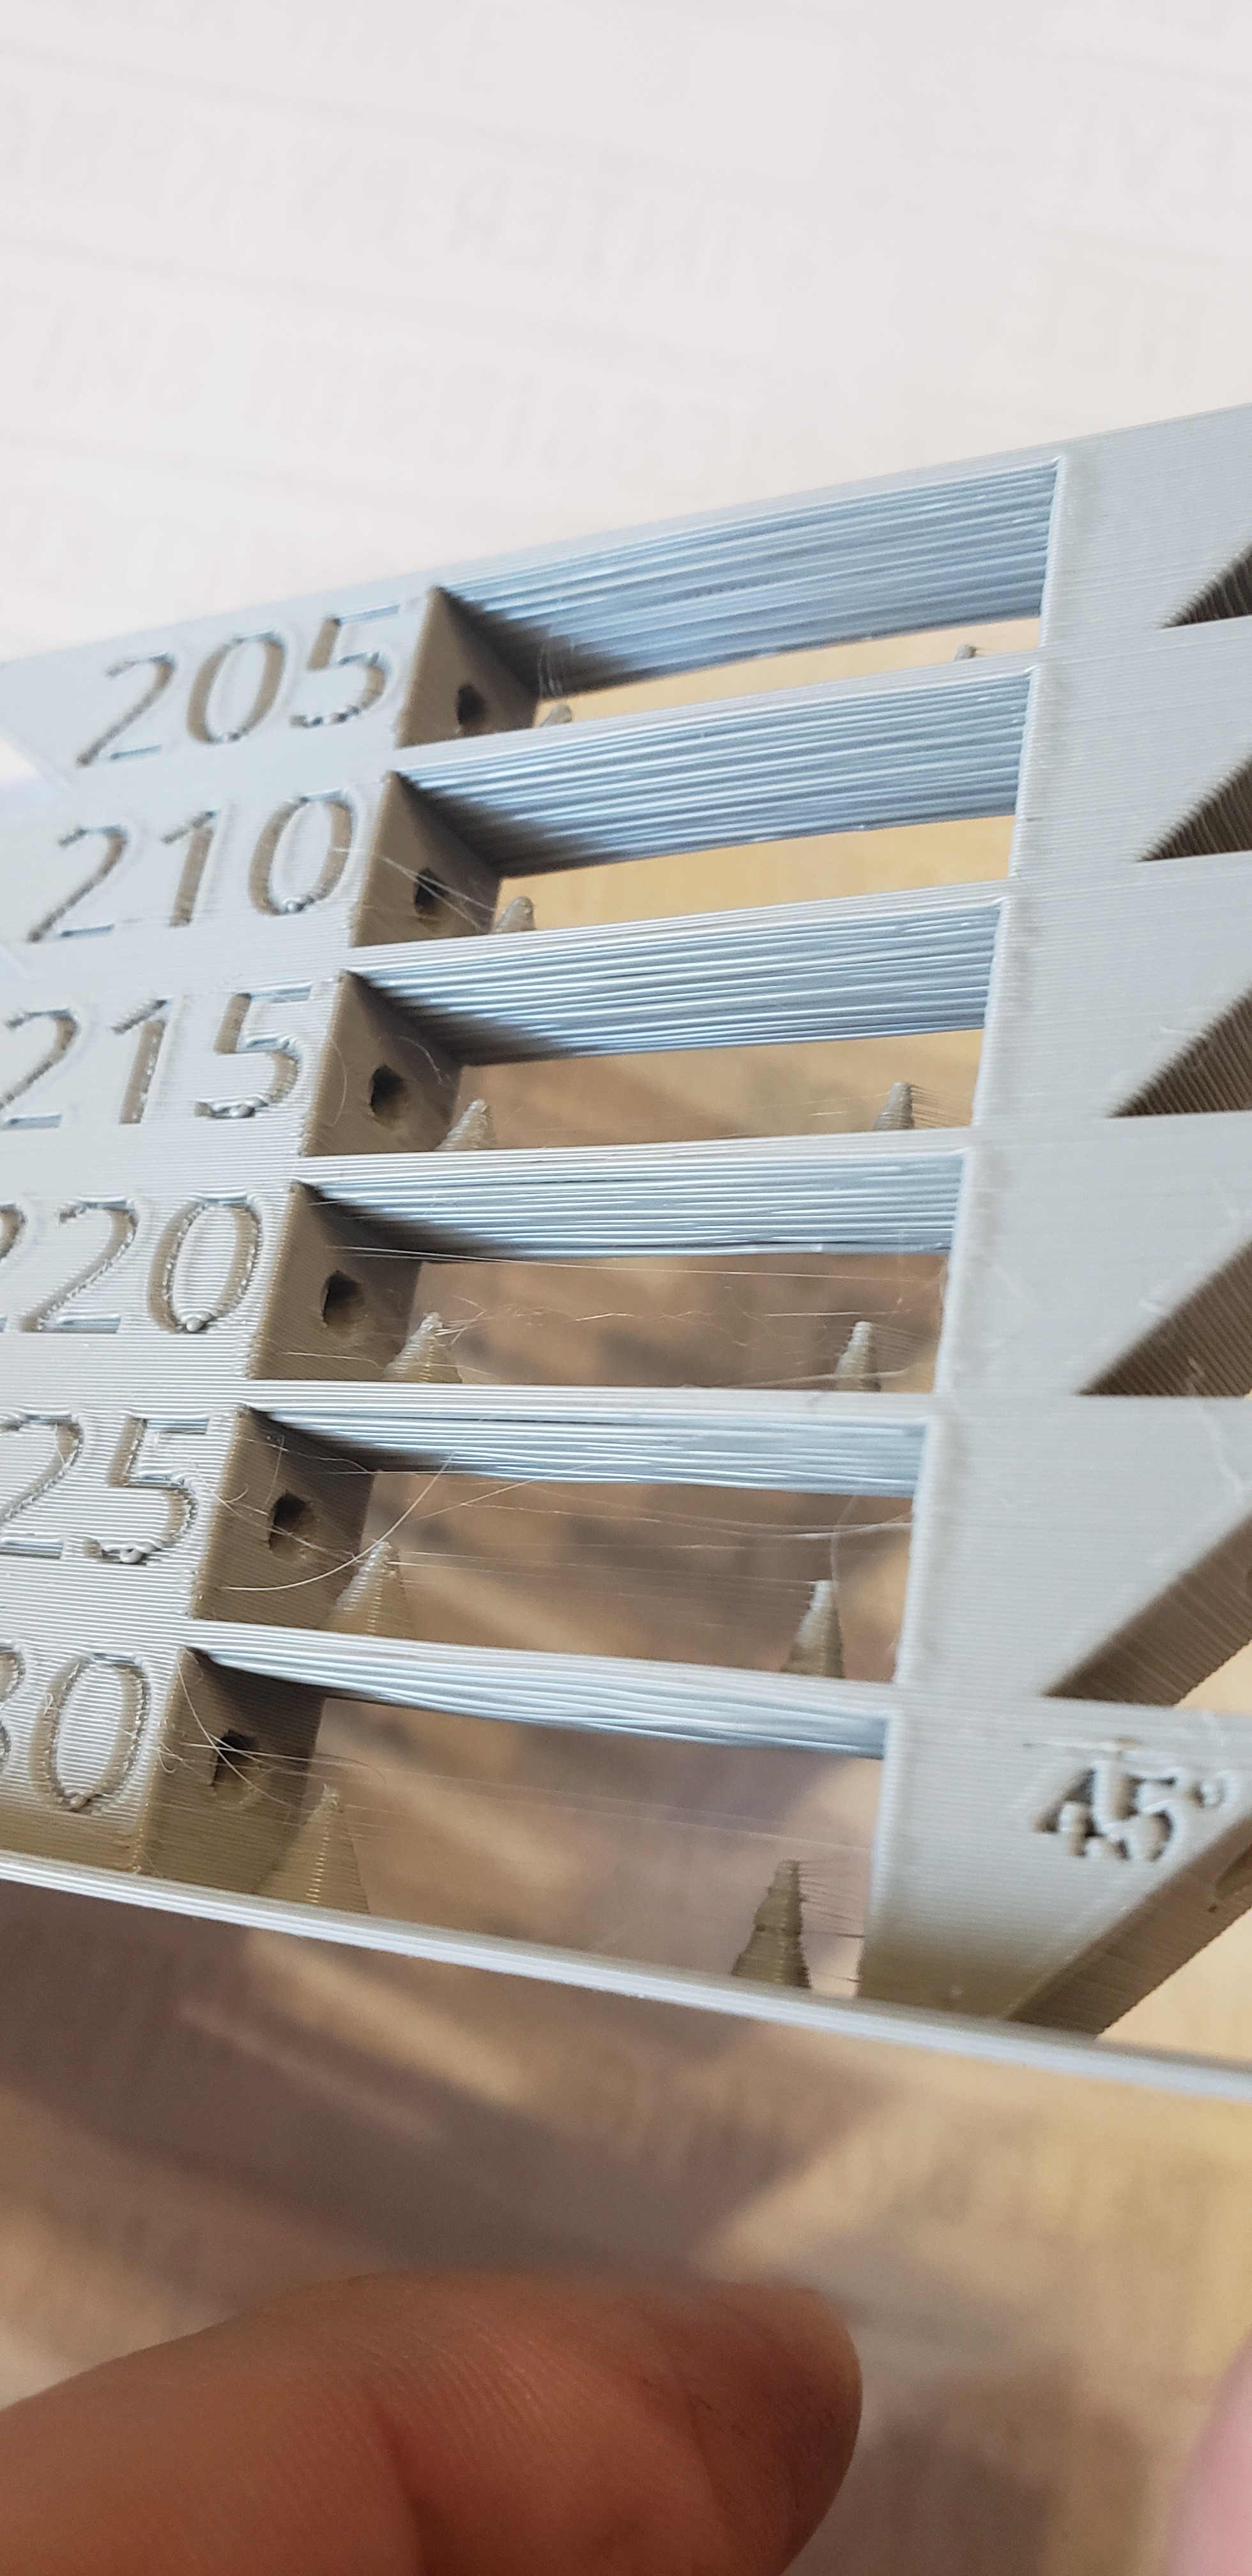
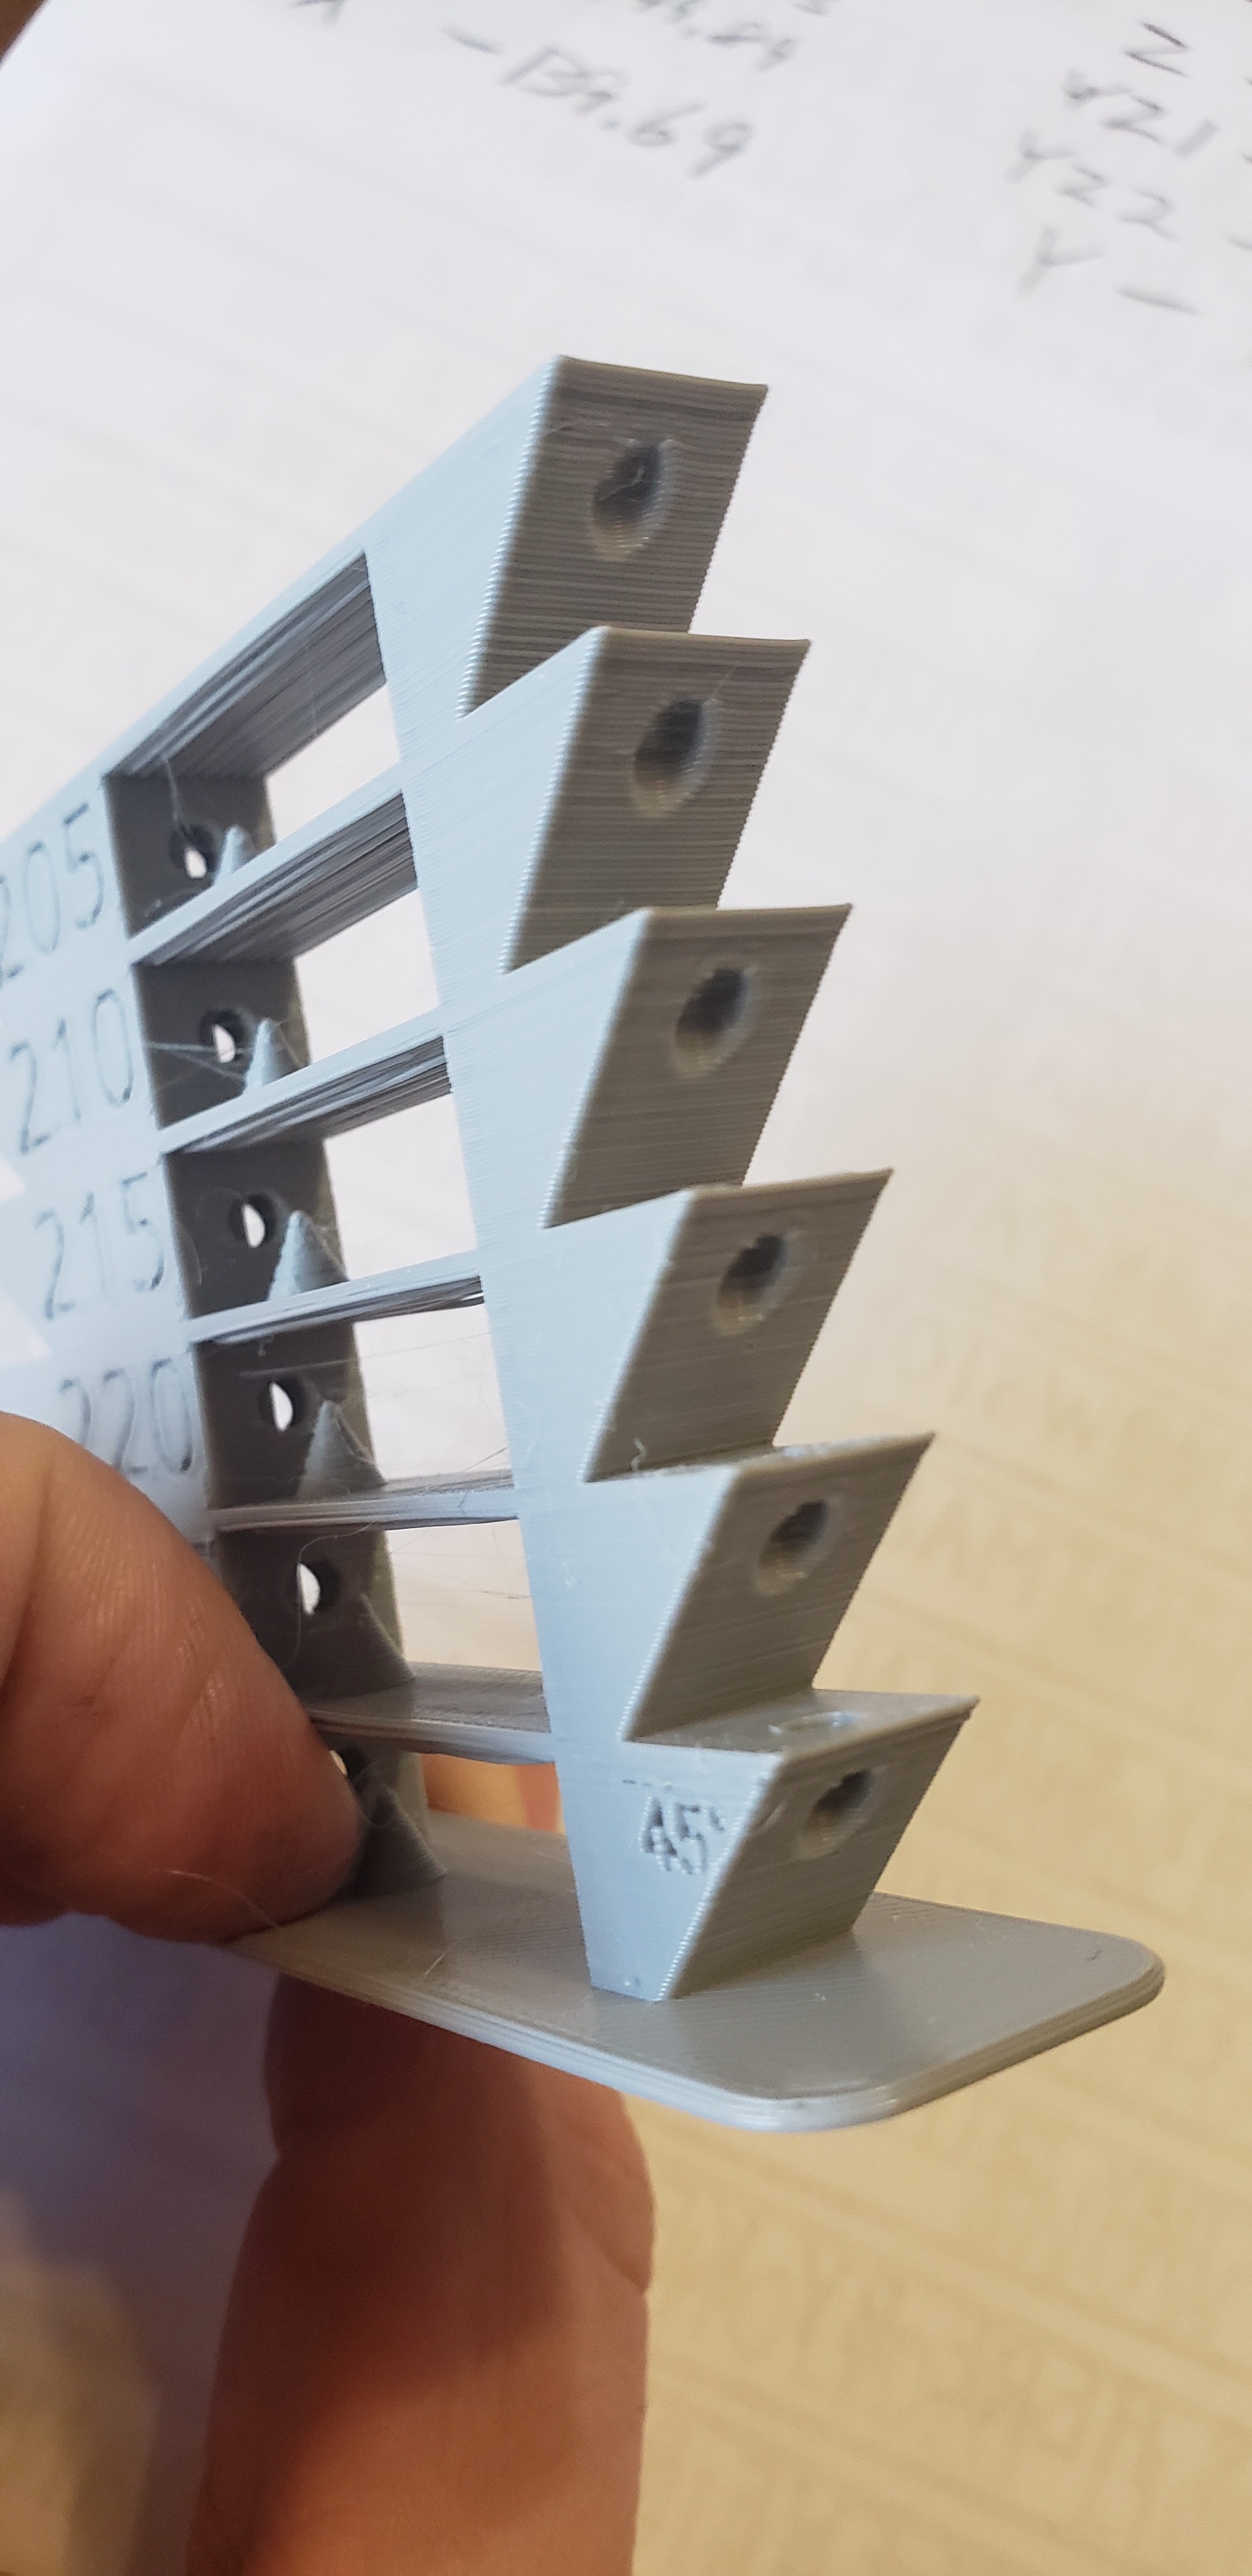
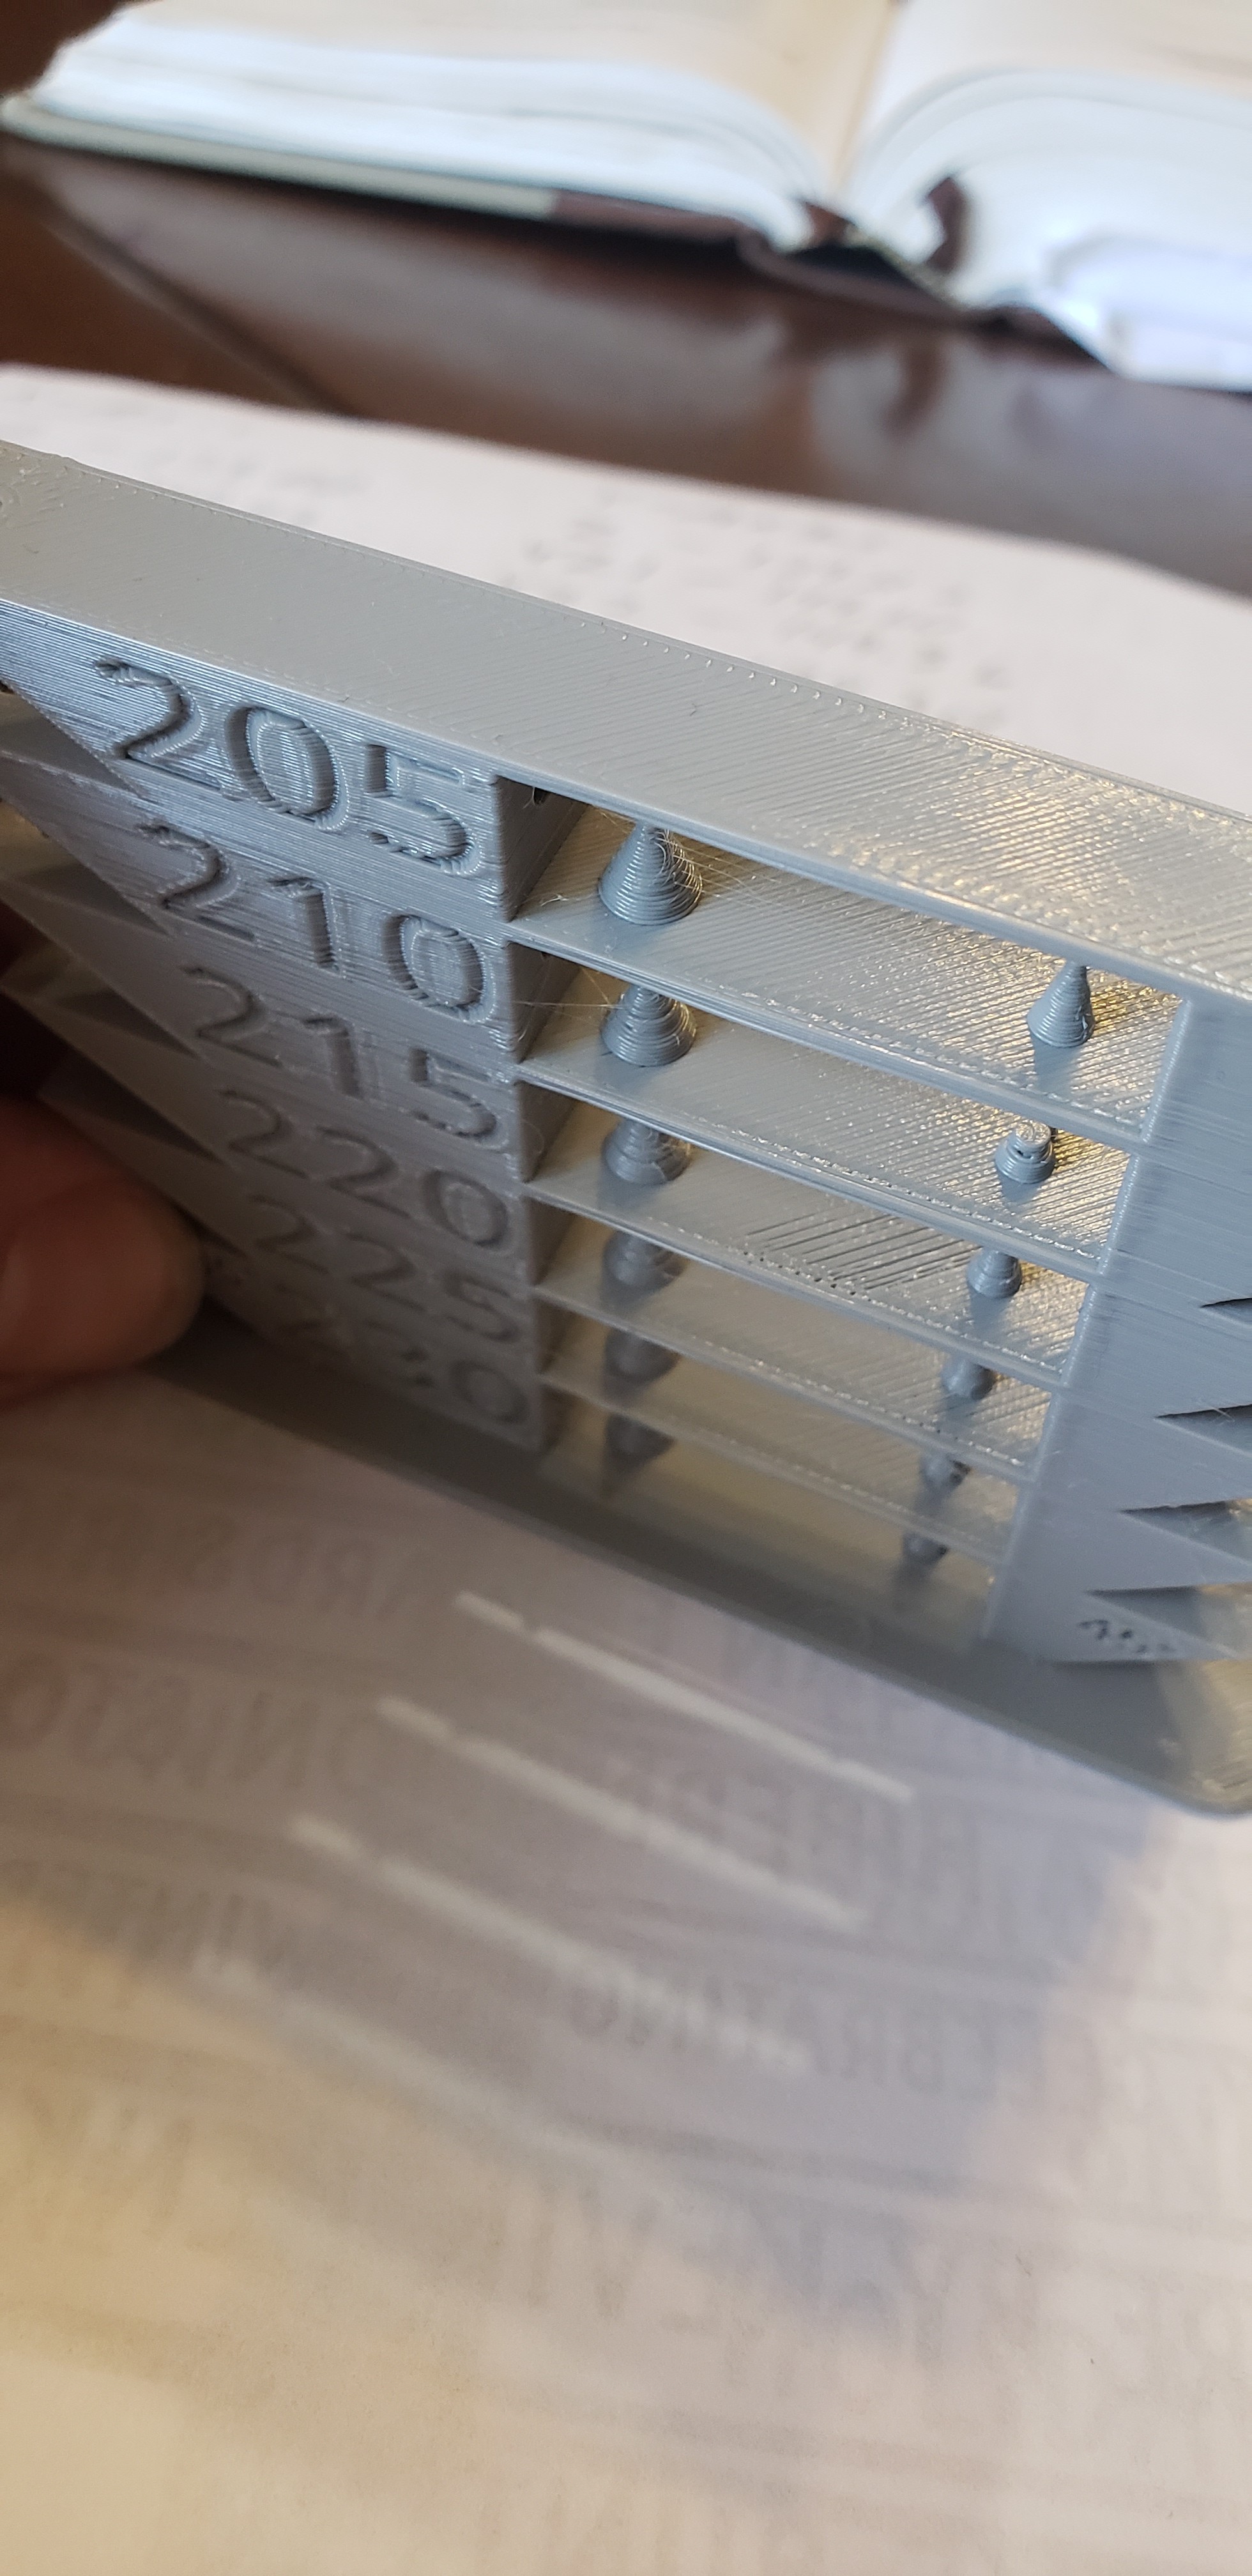
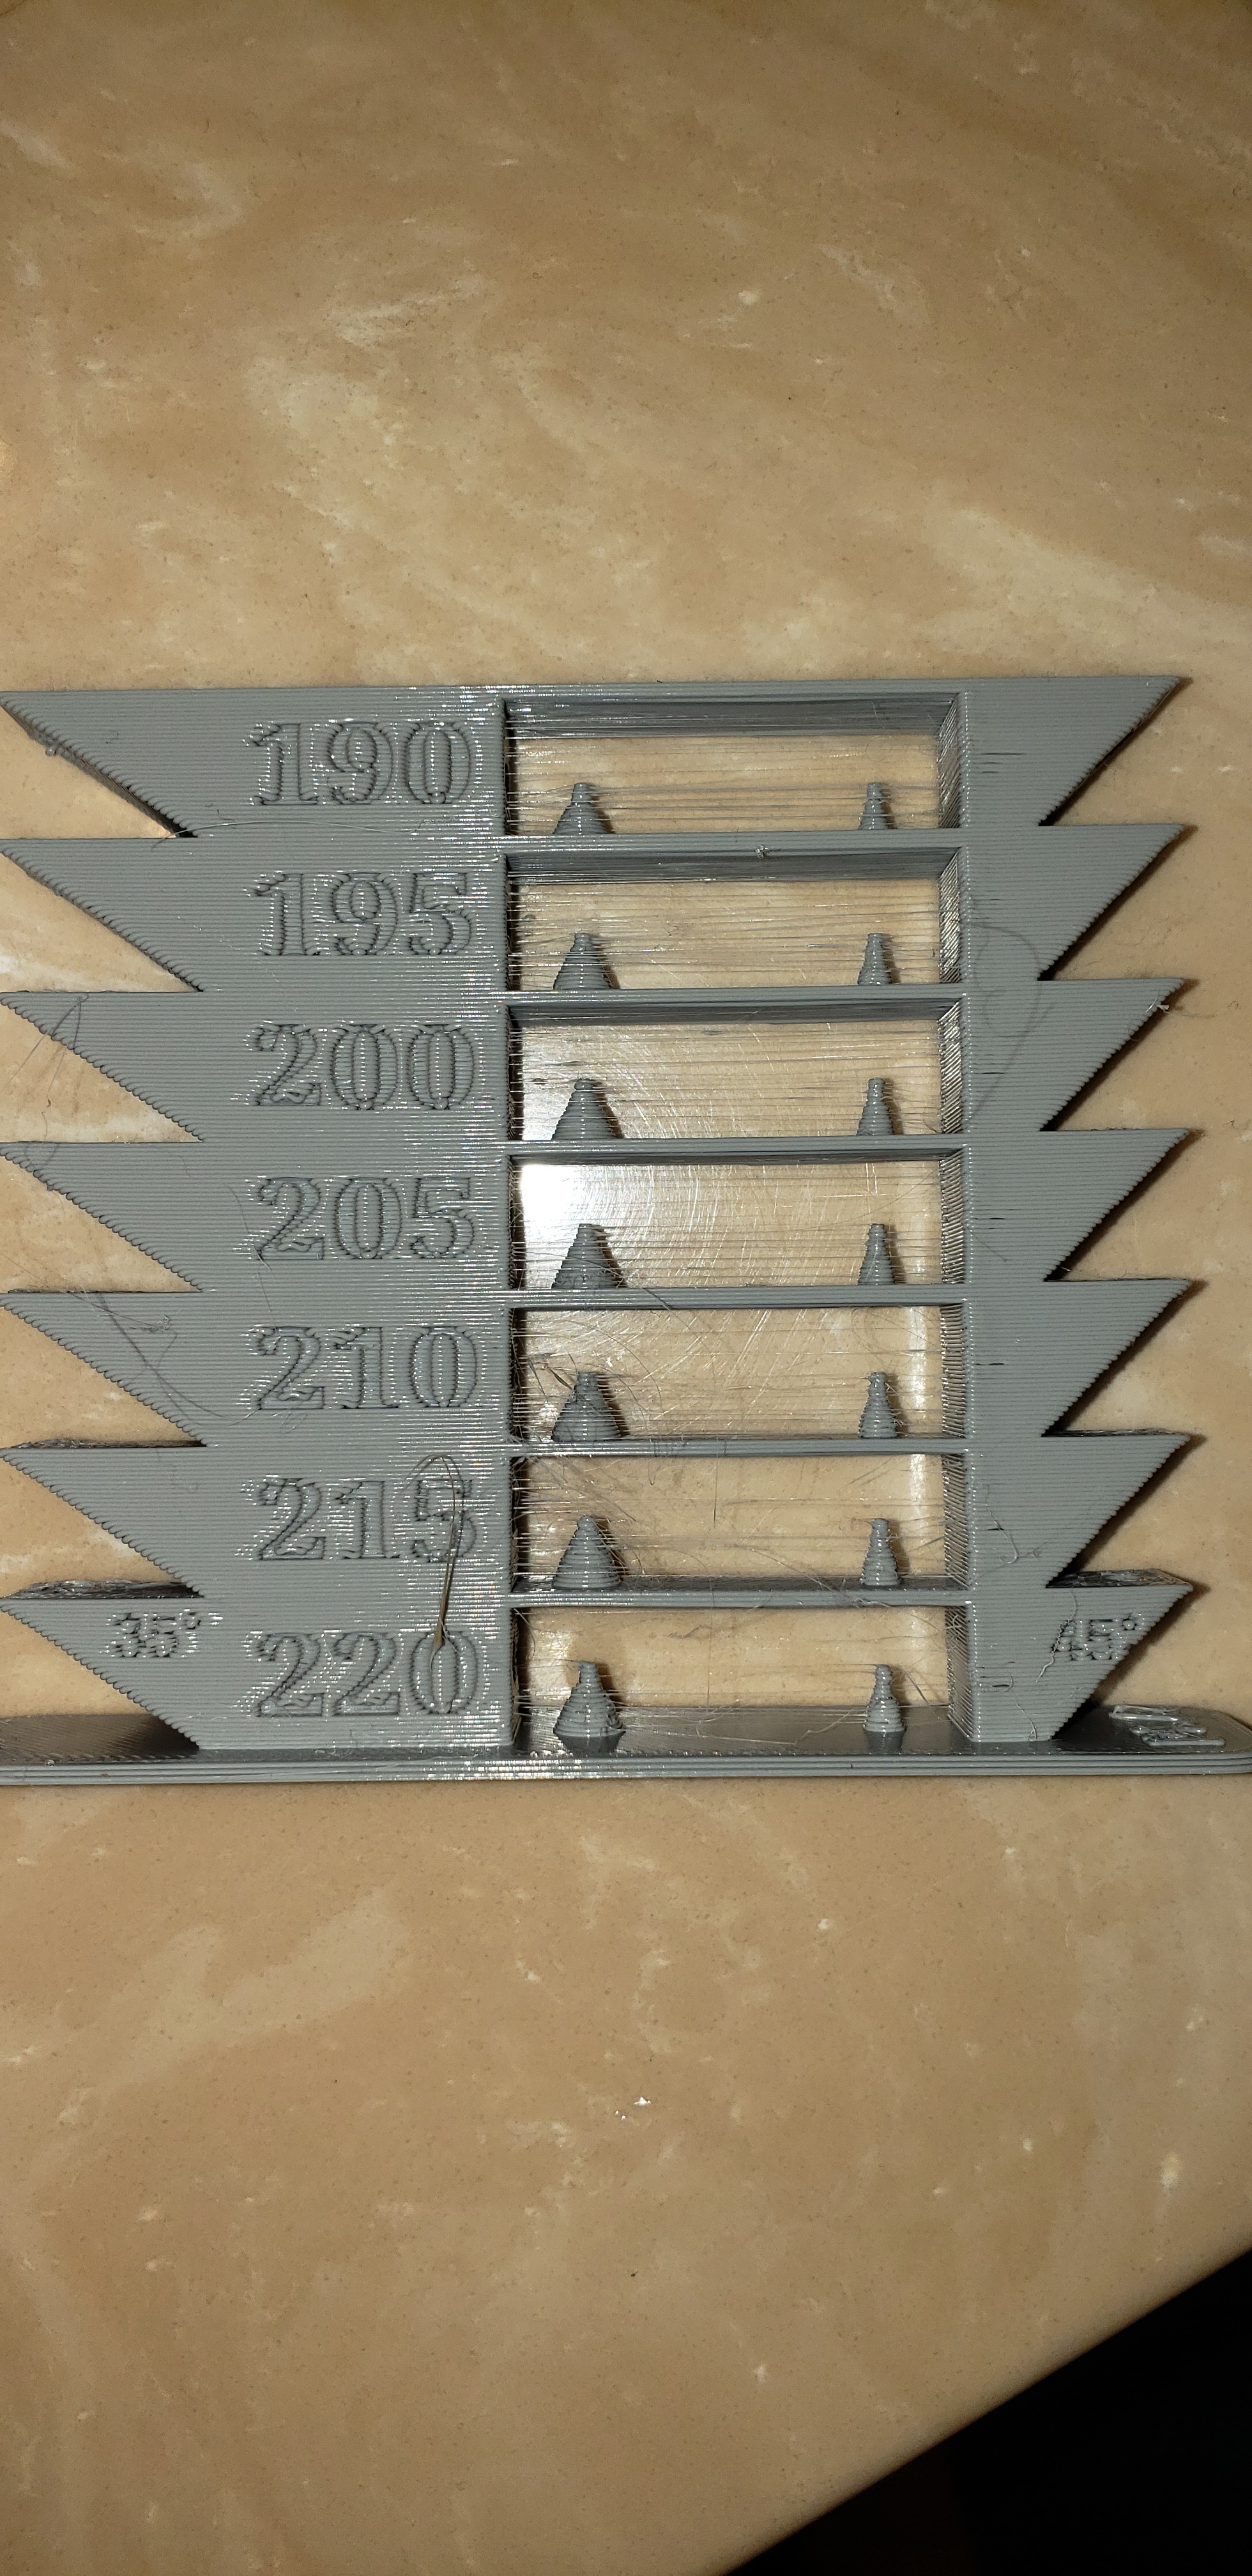
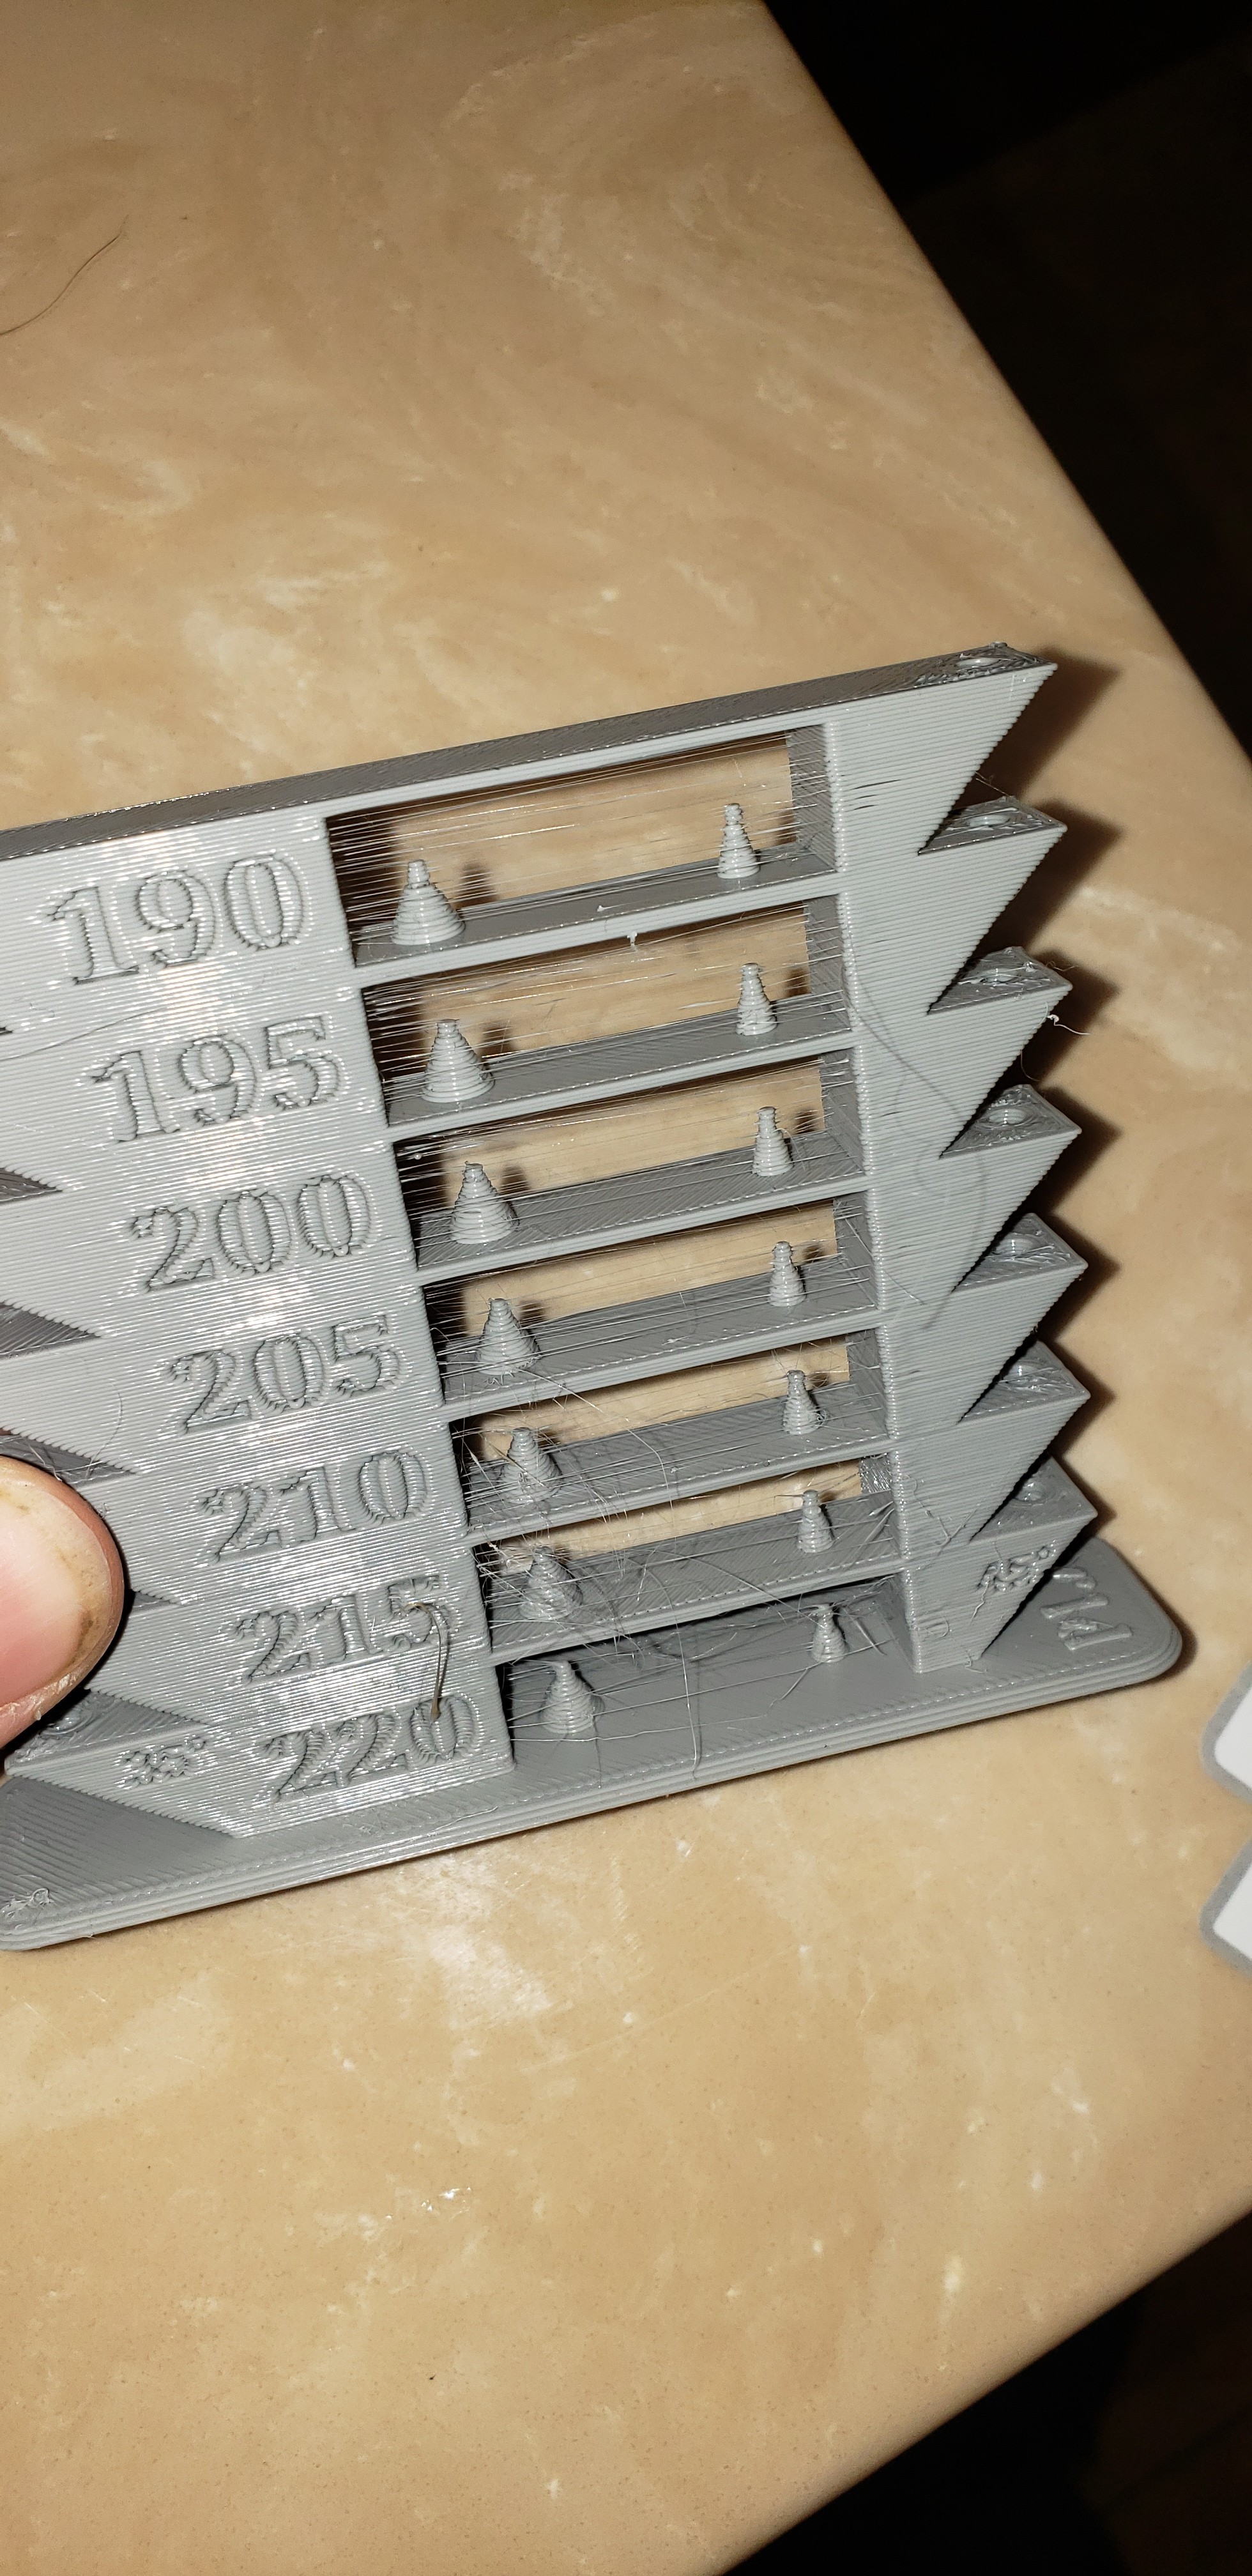
So I am perplexed. I did a temp tower and really cannot tell much difference between any of the segments. Ignore the temp numbers. The bottom is actually 230C working down at 5C increments to 200C.
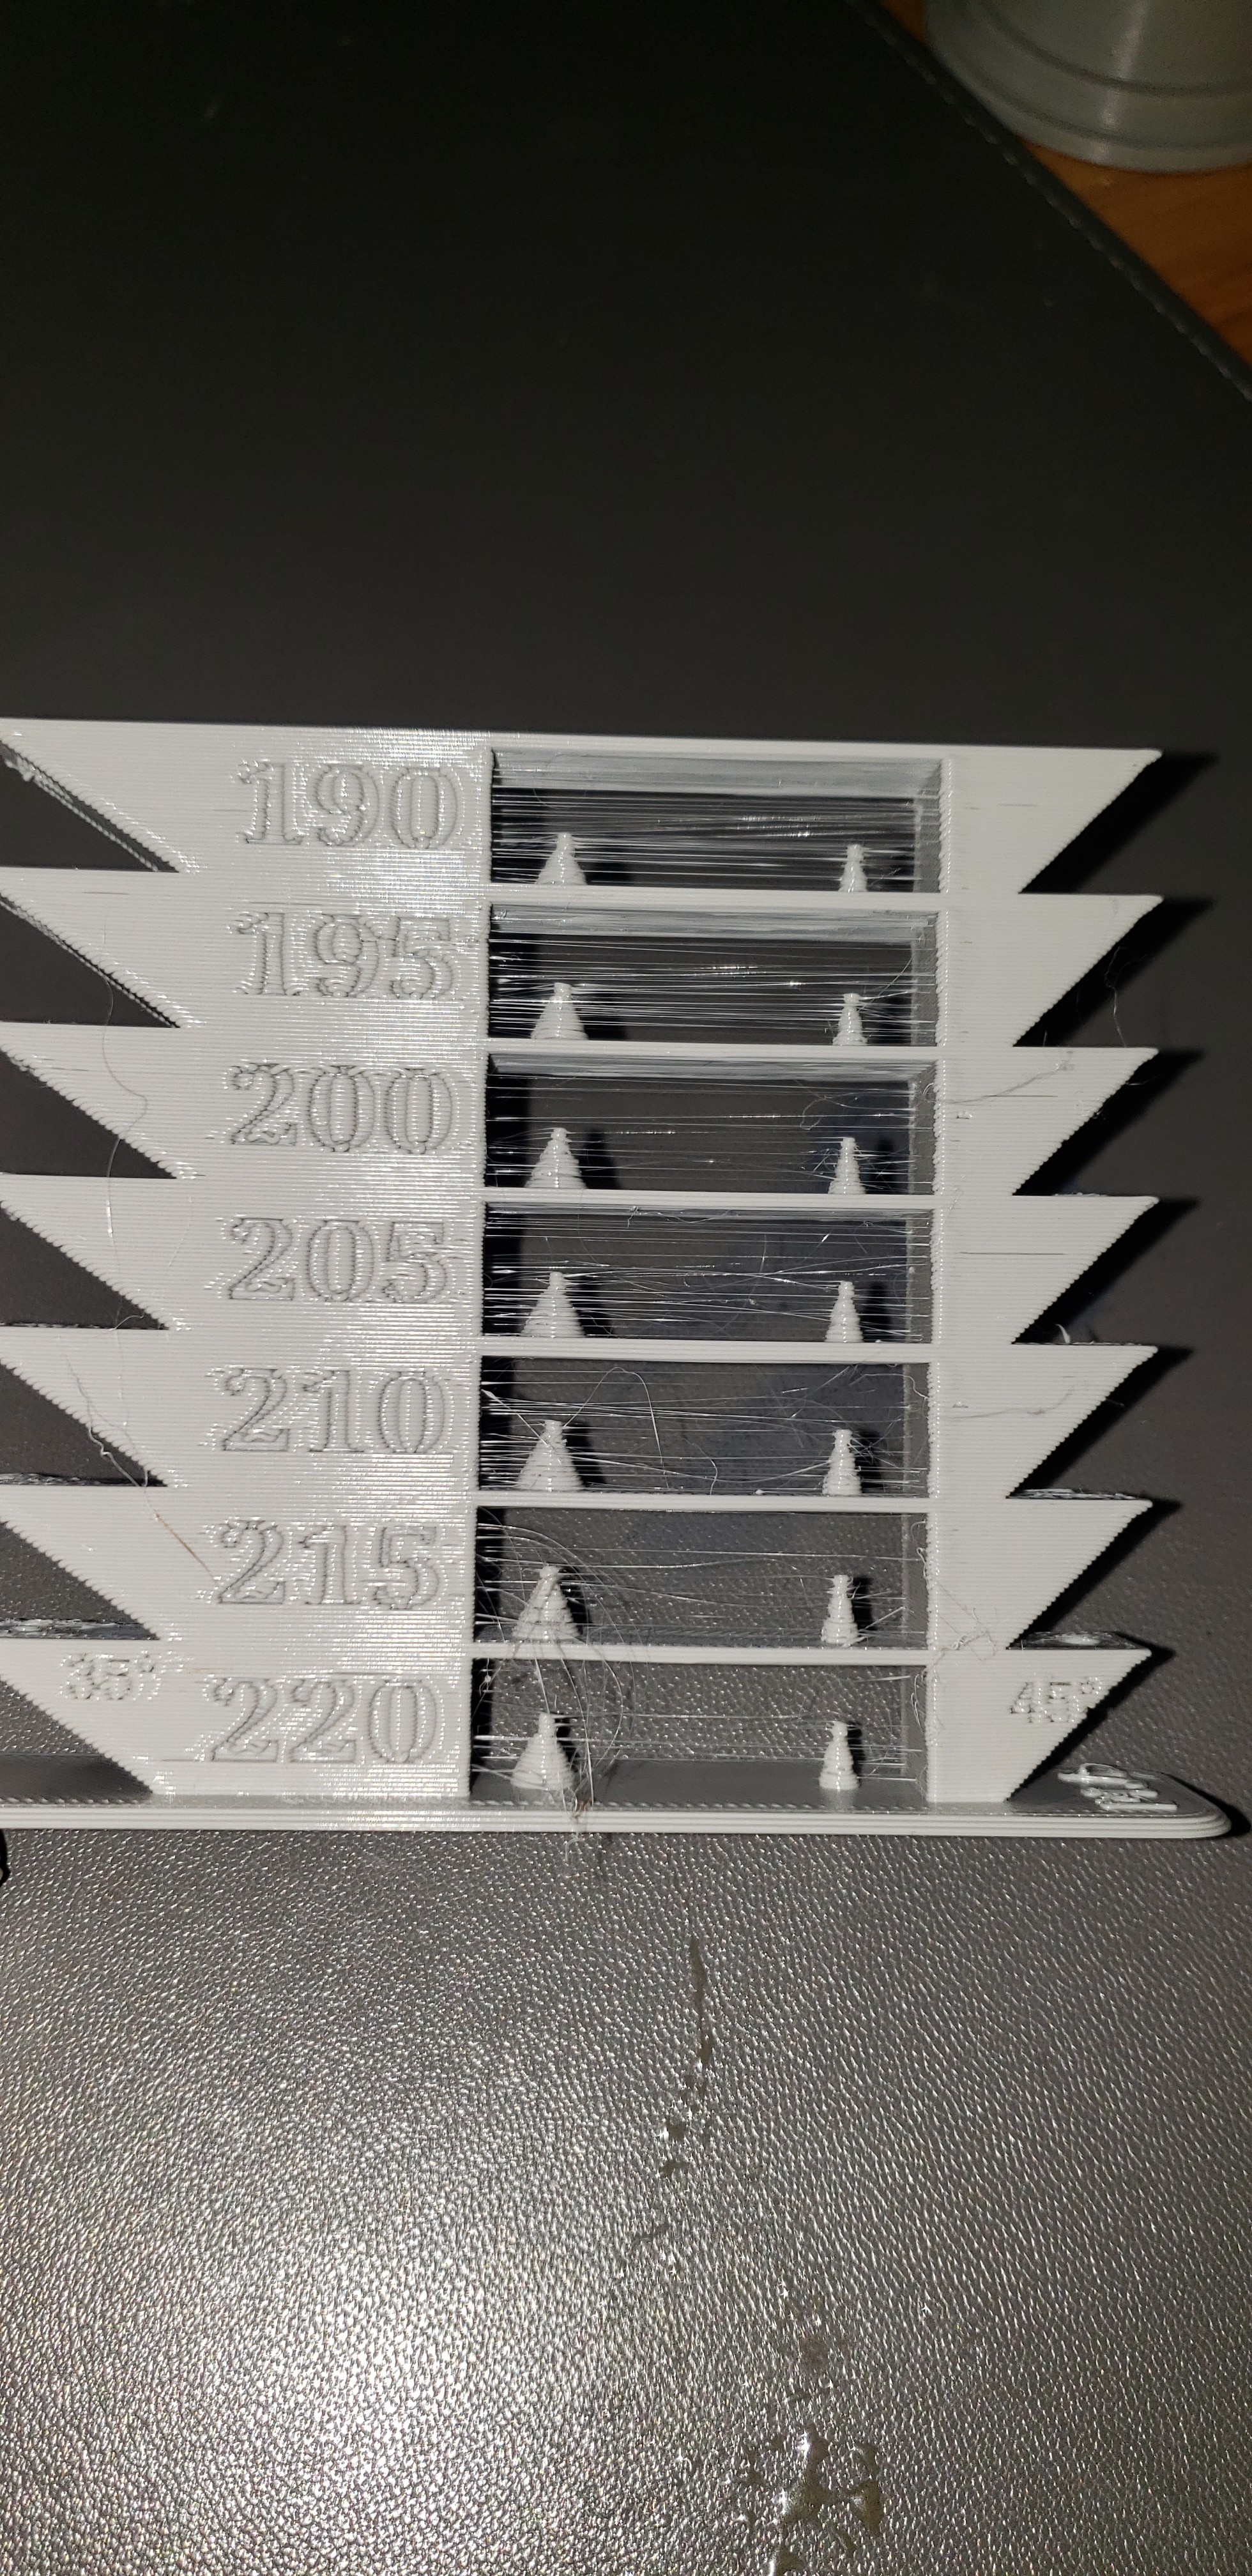
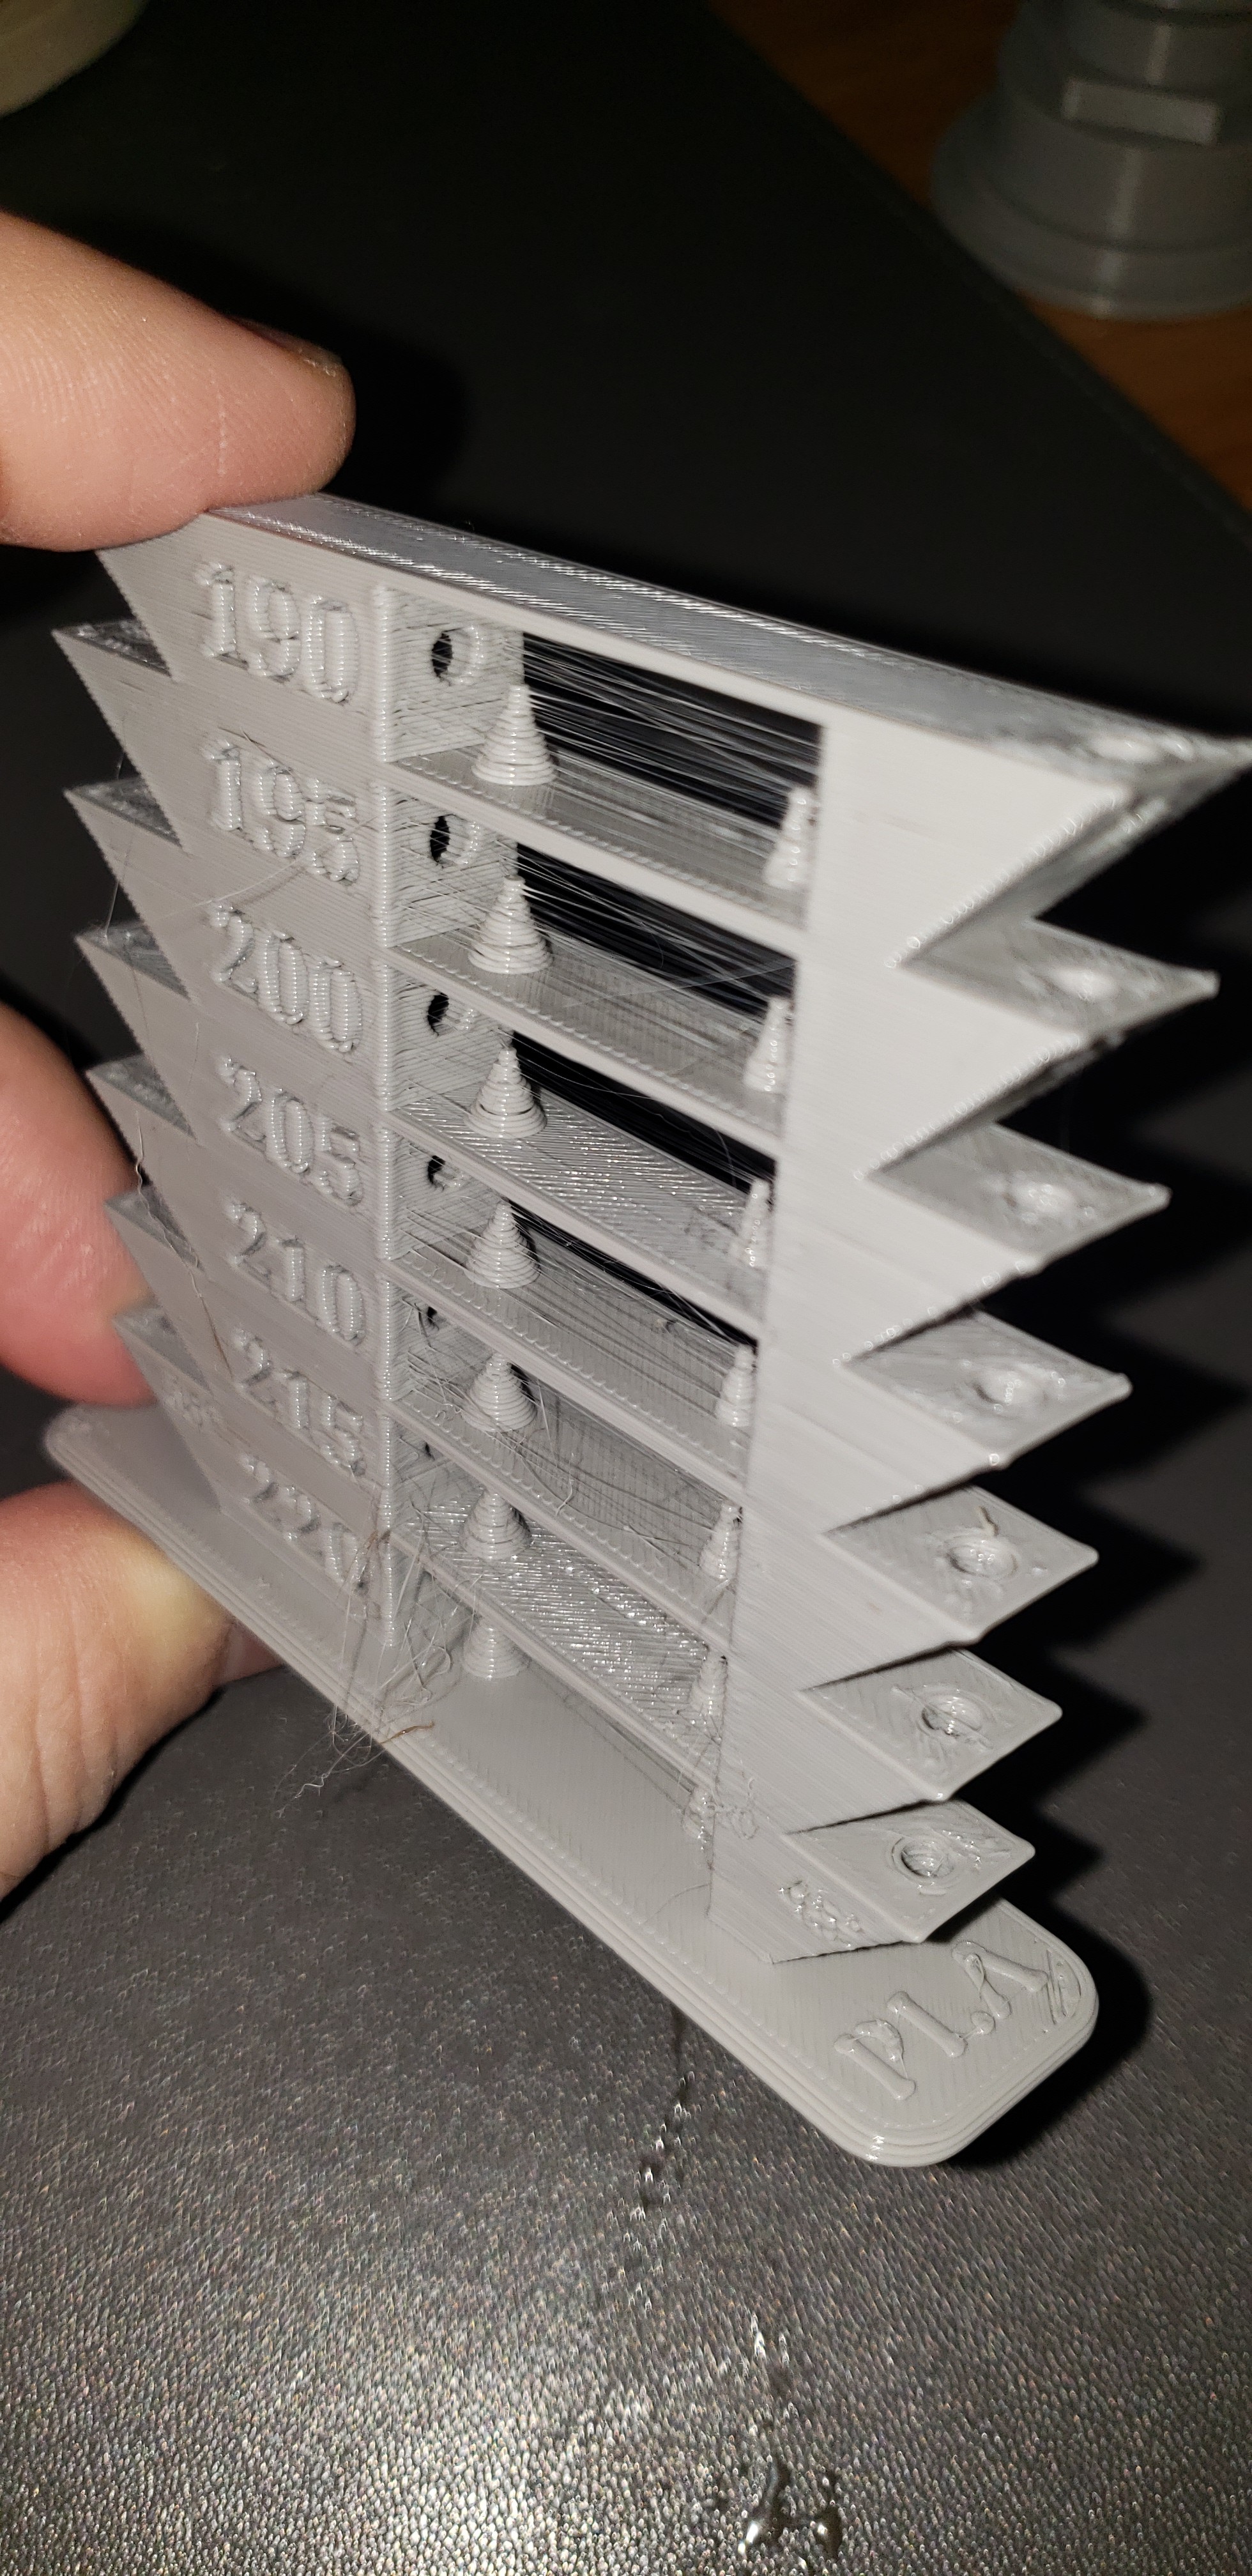
I increased the speed and printed. Overall, it looks much worse, but here are the results. I would say 205 or 210 looks the best (which is really 215 and 220C).
Speed is as fast as possible but too fast and it will not retract. My Titan could only do 24mm/s my hemera can do 35-40, the mk8s can do even faster.
I thought the prusa’s were all dialed in. I have never seen a prusa print like this. Maybe start fresh with the prusaslicer and make sure none of your profiles have been messed up. If it still prints like this I am thinking something is wrong.
I have a love/hate relationship with the Mini. It started out fantastic, but then the extruder started slipping. The Mini extruder design was poor in my opinion, but what was really happening is that the short PTFE tube used in the hot end would shrink and cause clogs. I didn’t realize this at first and many people were attributing the issue to extruder slippage. So I replaced the extruder to the bondtech knock-off which helped, but then started having the same issue. I got tired of the hot end issue, so I replaced it with a e3d v6. This solved my problem for awhile, but then I started having trouble dialing in my printer and would have prints fail.
I am unsure exactly how tight my belts need to be. Unlike the MK3S, the Mini doesn’t have a measurable range and it is supposed to be tightened by feel. This is all fine, except since I am a novice at this, it is hard for me to tell if it is a belt tension issue or a print setting issue.
As of today, I reset every setting (except esteps which need to be custom for the bondtech). I then printed a calibration cube. It is showing a lot of layer shift issues where both X and Y have quite a bit of waviness. I am going ahead a printing a speed test, but I think I am to the point where I need to completely rebuild the printer. I want to check all the belts, pulleys, and bearings. I know the frame is square, but I want to check everything else then I will rebuild per Prusa instructions (except I plan to keep the hotend and extruder mod). UNFORTUNATELY, teardown and build will take several hours so I will have to find some time to dedicate. Maybe tomorrow. I will post some pictures when the speed test print is complete.