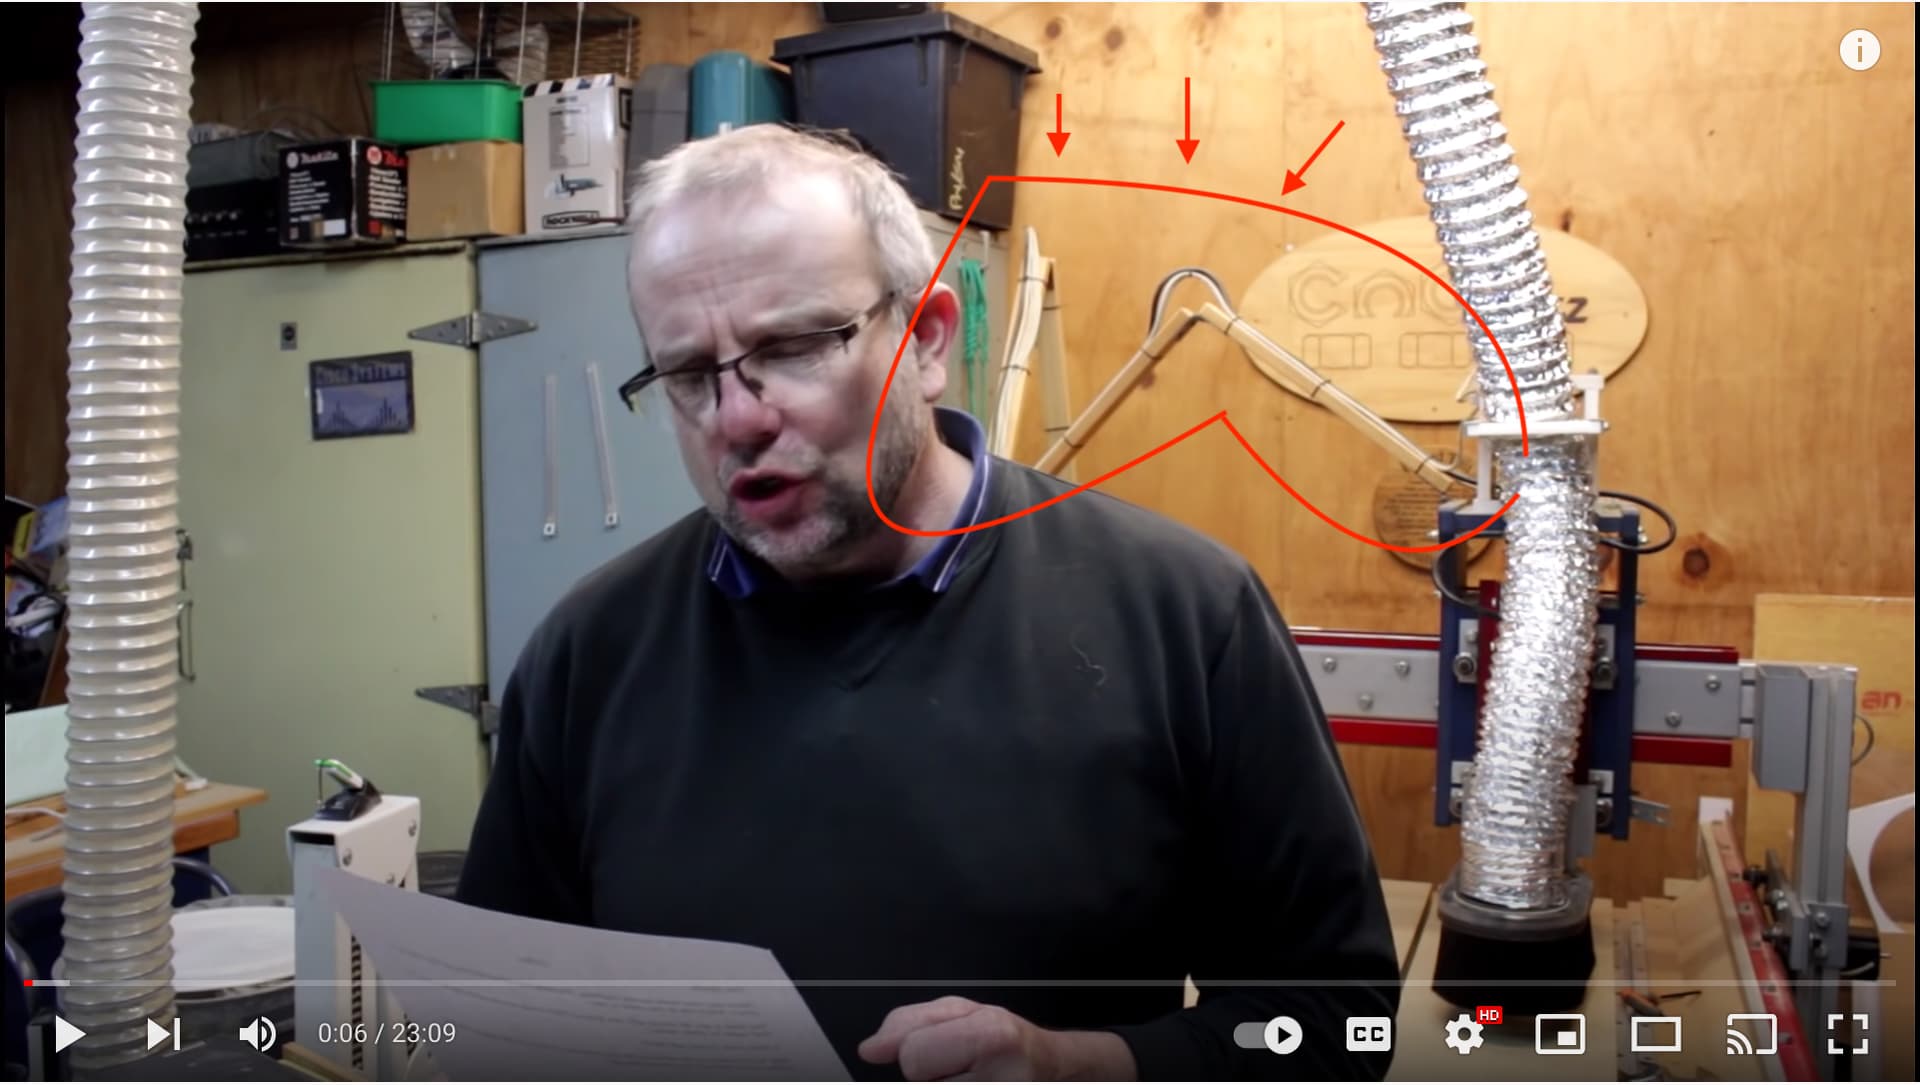
in which I noticed the guy not only does not use drag chain for his cables, he used a “two sticks on hinges plus some zip ties” approach that probably anyone could do, if they had the needed height available.
The approach is visible from the first seconds of the video:
In case you haven’t seen it, the tape measure trick is pretty good too. Tape measures are pretty cheap, especially if you are willing to sacrifice your worst one.
There are lots of good budget methods to do this. I have plenty of printed drag chain for odd sizes around, but given the price of the filament plus an arbitrary usage cost for the 3D printer, the cost savings are minimal, I think. Maybe it’s different in Australia, but drag chains are pretty cheap here.
Still, I’ve used other solutions where I wanted to save money. There is a very distinct time vs money for products ordered. Most 3D printer stuff can be had quickly from Amazon or similar pretty quickly, but if I want it cheaply, I wait for the shipping from China.
Quick update: Today I added new bits to the Printables.com download page for this design:
I provided additional choices so that the fronts and backs can have wires/cords exit “above” or “below.” I renamed the design to version 1.12. All added new parts are compatible with the previous versions of this design.
As pledged, I have made the remix. Caveat: I am still printing it, so consider it a work in progress for now. Here’s a local link, which contains an external link to the downloadable STL files:
PS: Here’s a rough first glimpse of my LR3 plasma CNC table. There is not to be a control box like on my LR3 router table, because this plasma table is to be controlled by a laptop with touchscreen.
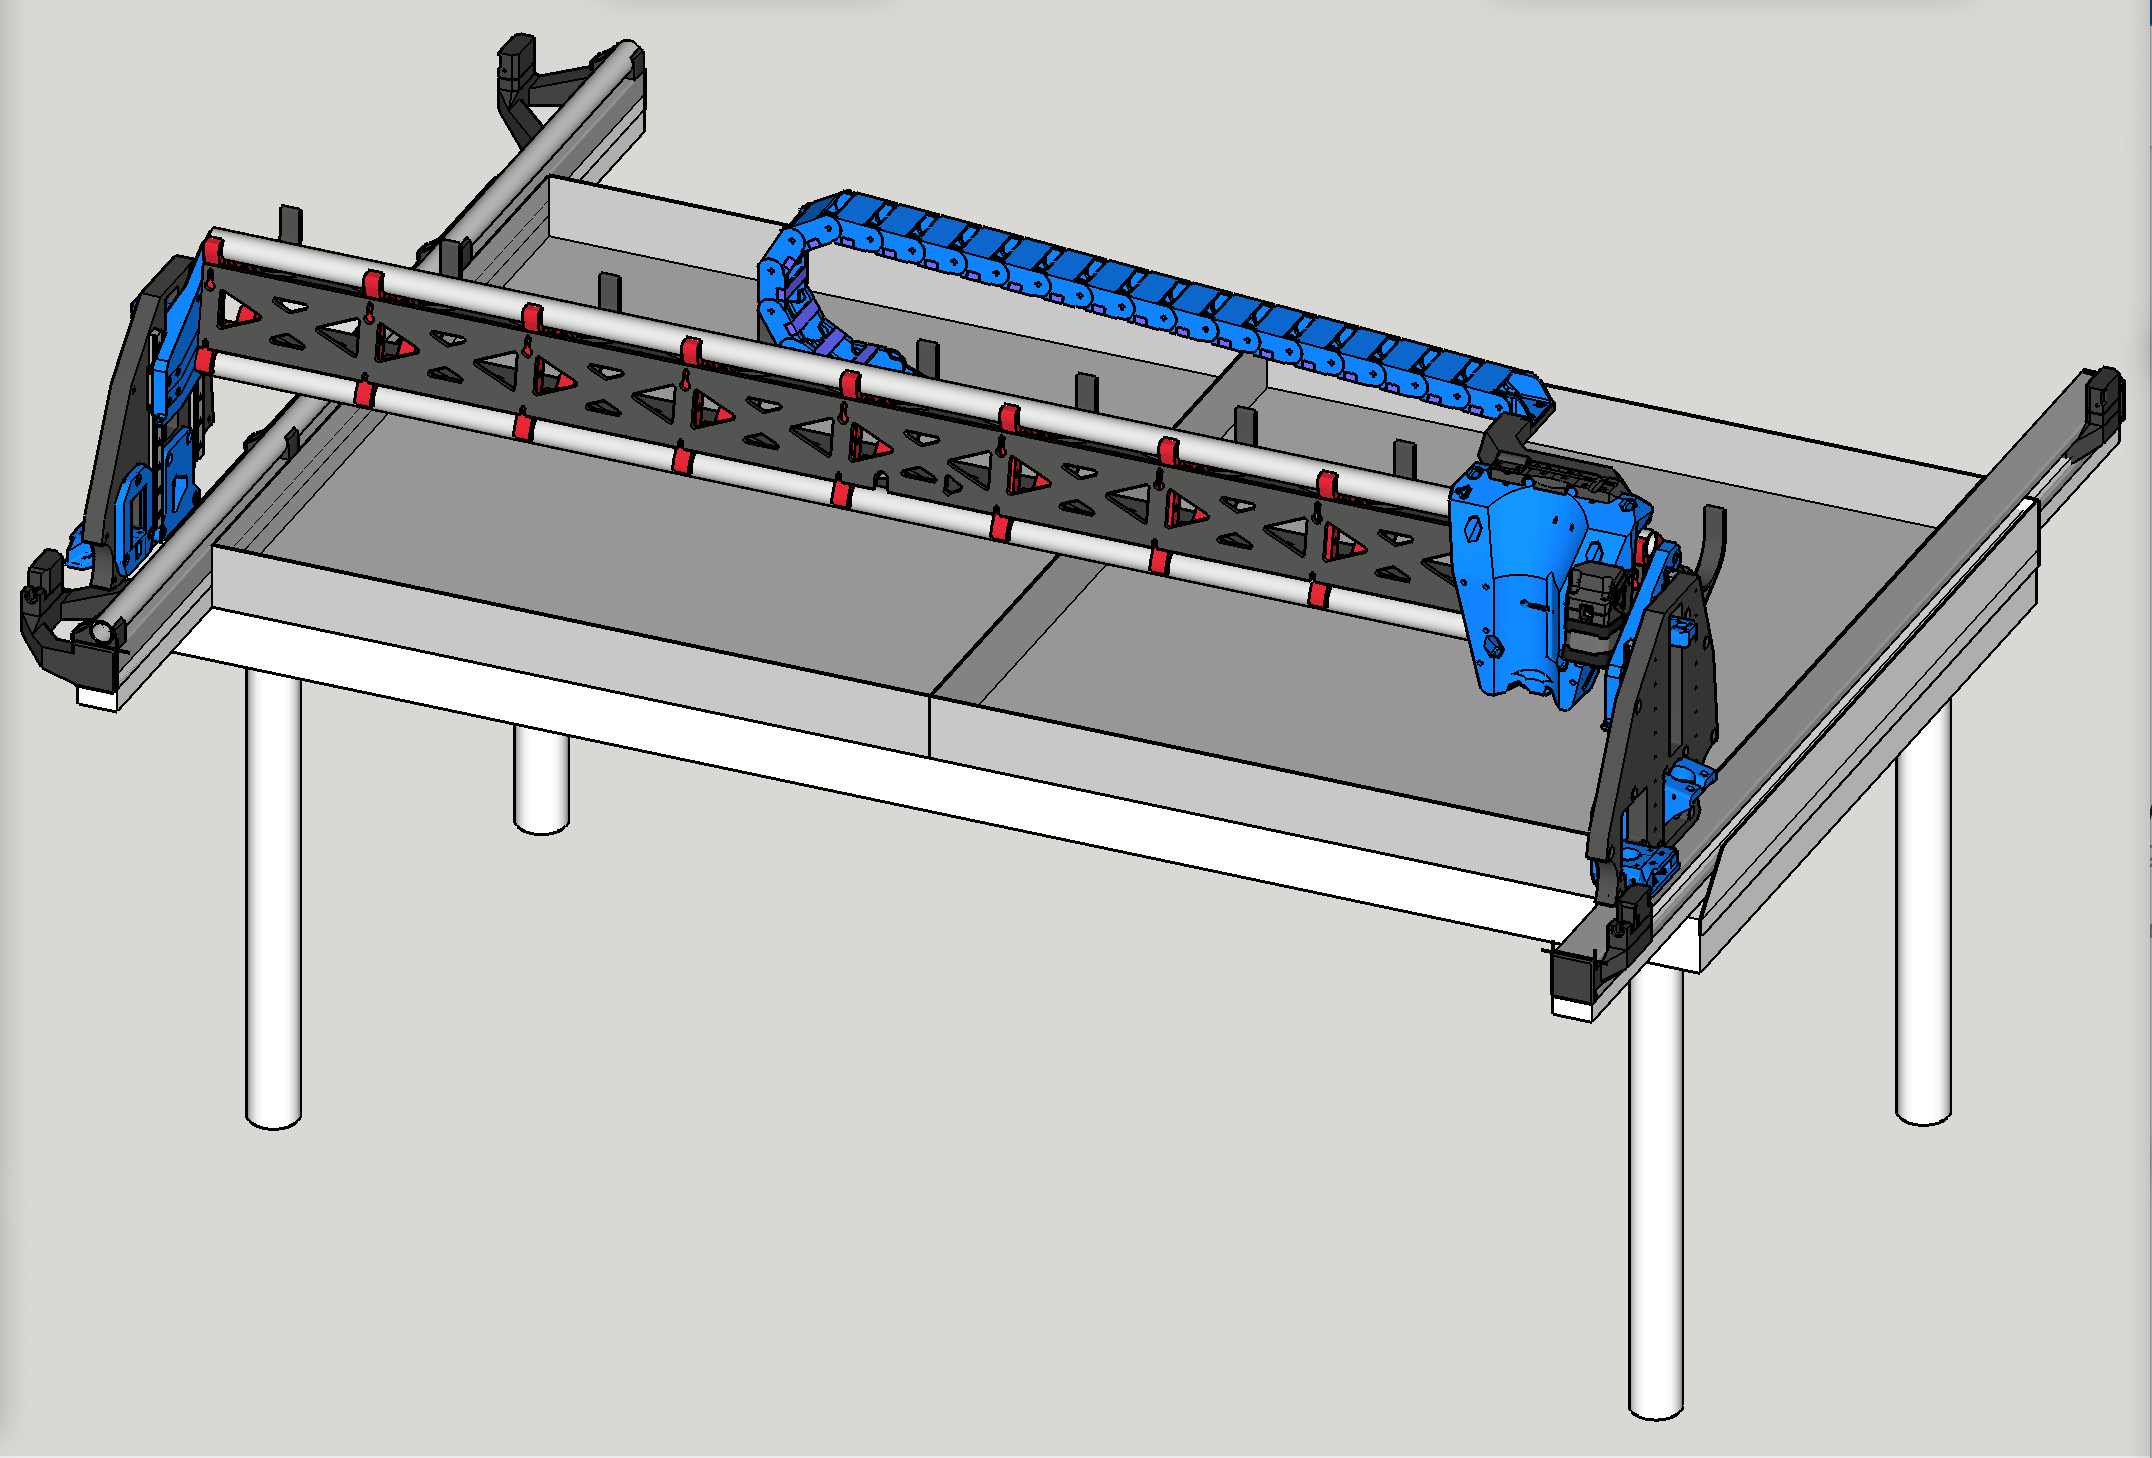
Figuring if/how to mount vac hose and gratuitous drag chain together along the gantry.
Or, come up with solution that keeps vac hose floating overhead (e.g articulating 1/2" EMT based contraption with vac hose zip tied, possibly using MakerPipe connectors if 3D print won’t be up to the task), to help limit additional increase to gantry weight. Maybe gantry weight isn’t a concern?
@DougJoseph, thanks for creating and sharing yet another useful LR3 mod.
Are the “4a” mounts (that stack on existing vac hose mounts) intended to be used by folks that are assembling both the drag chain AND Vac hose onto the gantry?
If your hose is coming from below, and you’re using the vac hose hangers to hold and guide the hose to the router, it’s probably best to attach your cords to the hose itself. If the hose is coming from above, and you are not using the vac hose holders, you can attach the mounts for the drag chain and use it to guide your cords. I now offer two variations of mounts: one that rests on top of unused hose holder, and one that completely replaces the hose holders.
@DougJoseph, thanks for clarifying intended usage for the mounts. Drag chain looks too good to not use, so looks like my vac will be suspended overhead, somehow… Digging around forum posts for examples…
@DougJoseph need some guidance on what’s my left and right
Please confirm/correct my understanding about which drag chain upper chain mount folks should use for a typical oriented LR3 build.
The printable images show, and the text describe mounts for a LR3 model mirrored about the X axis. The image show the Upper B - Left option was used on the mirrored LR3, but the text discusses how a Right version was added recently to help keep the chain from being proud of the YZ plates (also helping to reduce required wiring and chain lengths too).
So, for my regular oriented LR3, to minimize wiring and chain length, I should use the Left upper mount? Cheers!
Great question. I recorded a short video to try to address it.
Couple additional thoughts after making the video:
“Upper mount A“ is bidirectional, and therefore should work either way.
In addition to the need to add a “long version” of Upper Mount B to the remix named “LowRider 3 plasma CNC - Drag Chain Mount revised for large 20x40 drag chain (v1.1)” I also now see the need for bidirectional hole patterns, i.e. either two or four holes arranged in “tandem” so they work no matter whether flipped right or left. I am pondering on whether to change the remix named above (and the matching drag chain posting) to the new hole pattern, versus add the new pattern as an option. I am concerned about adding it as an option because the number of parts to choose from becomes overwhelming pretty quickly.
… it looks to me that you would need a “long” version of “Upper Mount B” and you would need it set (mirrored if need be) to head out to the right side of your core.
Awesome! @DougJoseph, thank you so much for taking the time to upload a detailed video covering different things to consider. Perfect timing as well, my printer was laying down brim for the wrong upper B part. Am halting after laying couple of layers and will flip over and use as a template to better understand clearances/collision(s) I’ll face. Thanks again!
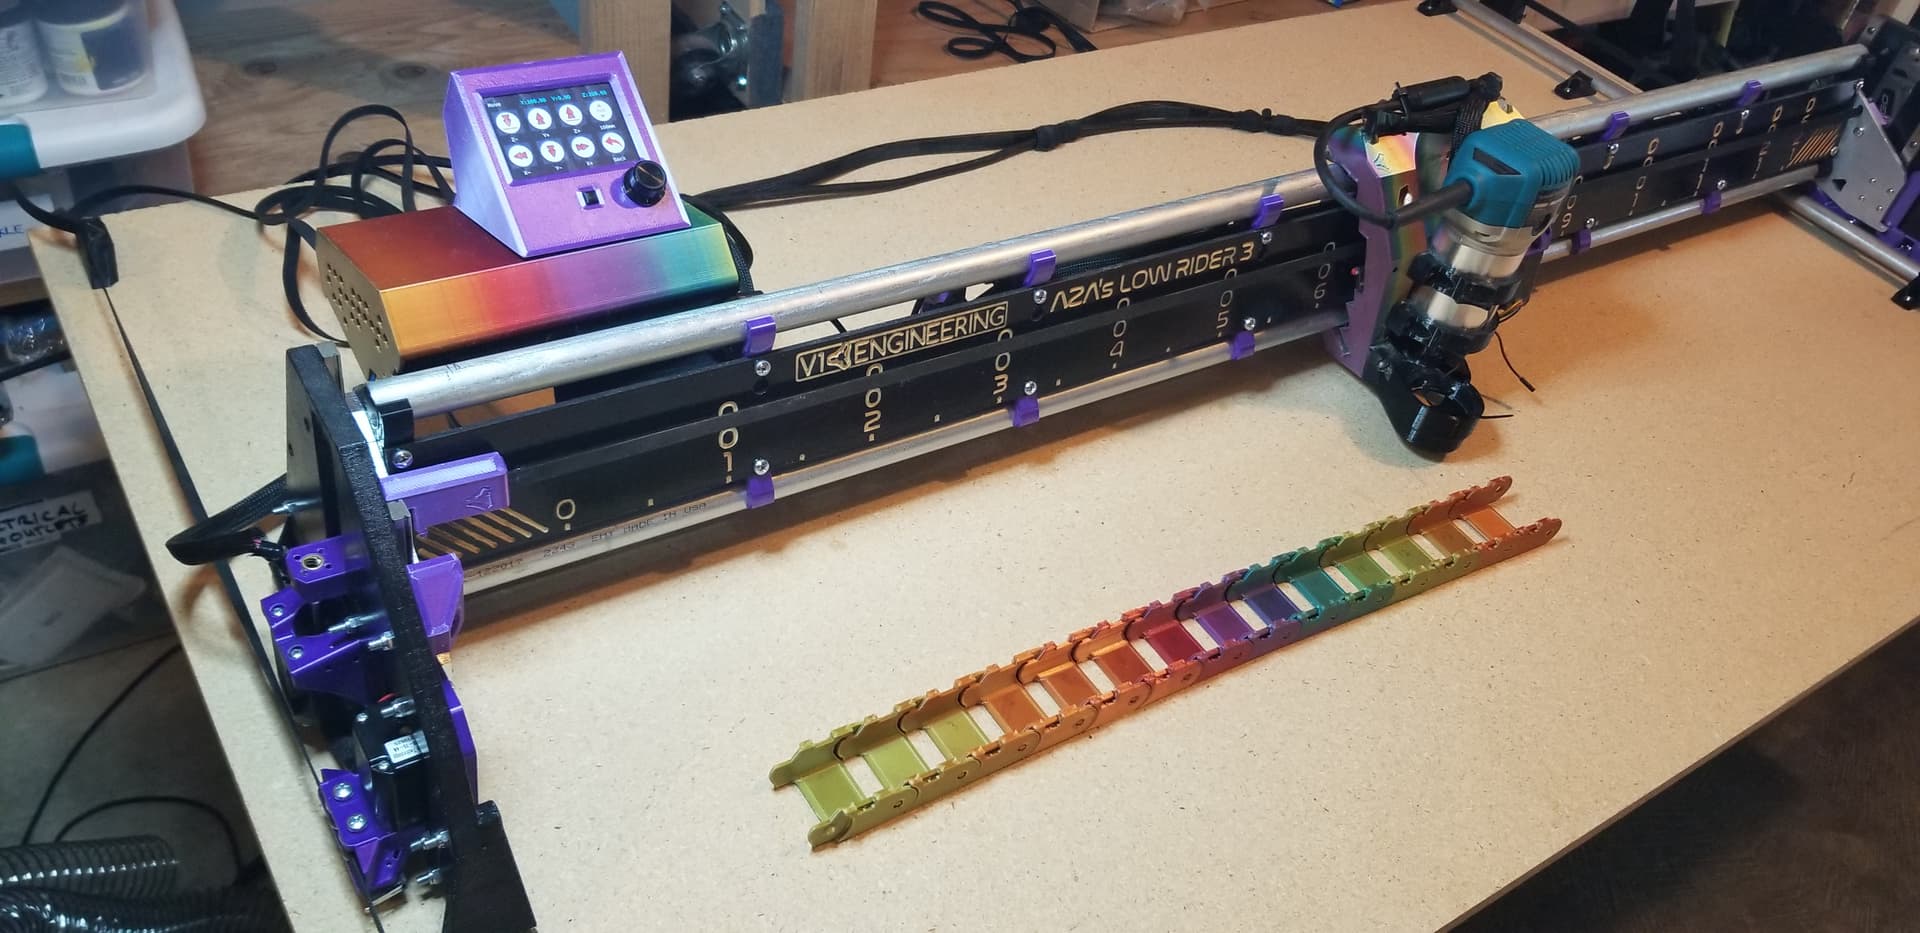
Have ~60" of ridiculous looking rainbow drag chain
Are your cords coming in from the opposite side from where your control box is located? If so, I think you will face issues on that. This is not so much related to my remix designs or even drag chain in general. It would also be the case for vac hose too.
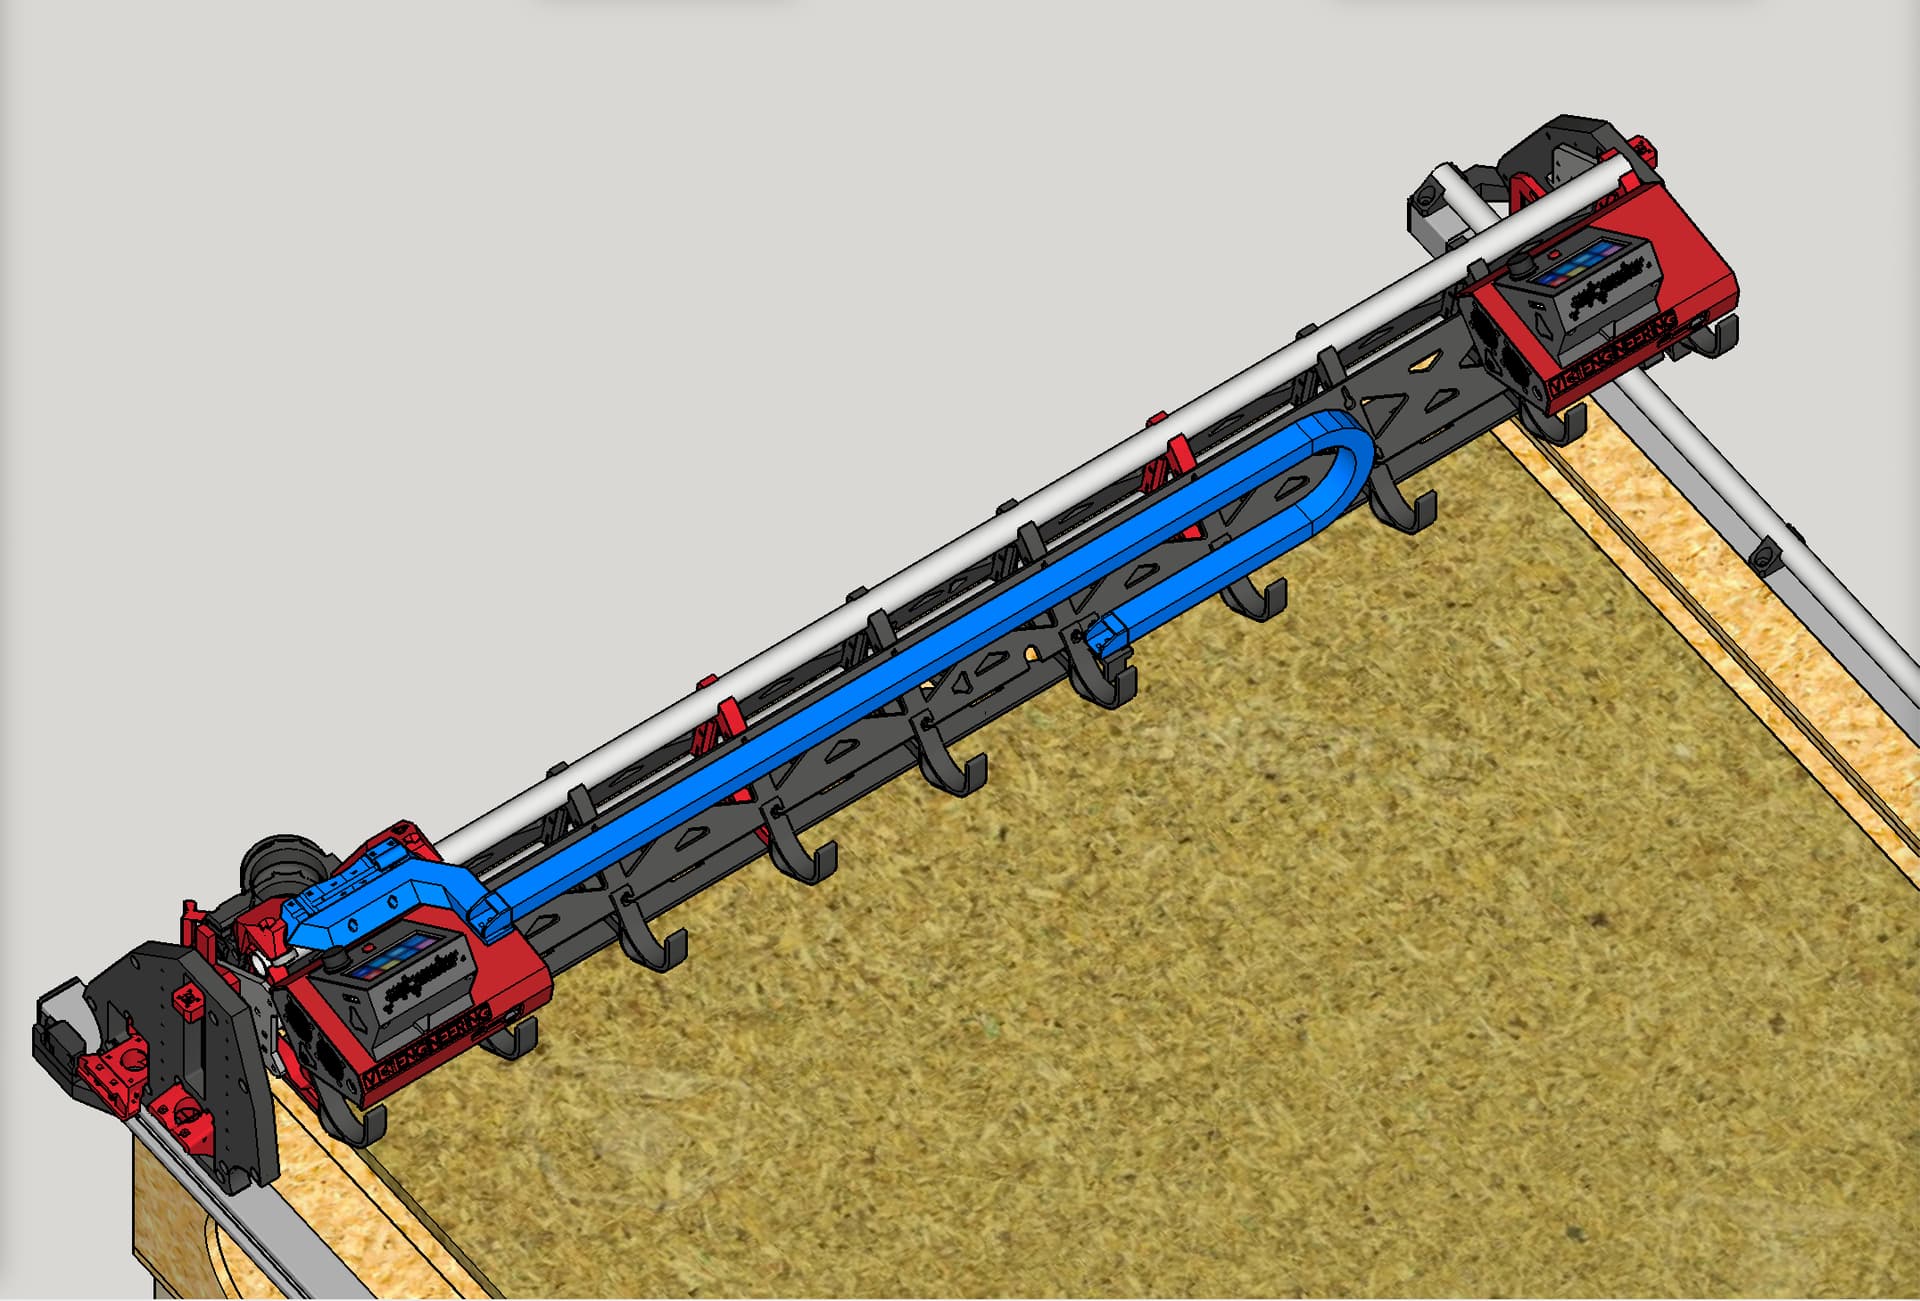
The more I look at it, the more I am thinking that cords from the right with control box on left, is a no go. See illustration below, in which the cable chain is mocked up in blue, and control box is duplicated to be shown in both possible side positions. Notice how as the core moves toward home (X-min) the drag chain itself will hit the control box located on X-min side, and then the mount for it would also collide with the control box. Only way I see this working for control box on X-min side is to have cords enter from that side too. If I am misreading this, I’d be thrilled to be proved wrong. Again, I think the same issue is also present when vac hose is guiding the cords.