Hi, I was referred by a friend to V1 Engineering for my first cnc build. I’m planning to build the Lowrider3. I have most parts printed but I’m having issues printing with several of the files due to part orientation.
1.Bearing wheel bracket front
2.Front rail roller
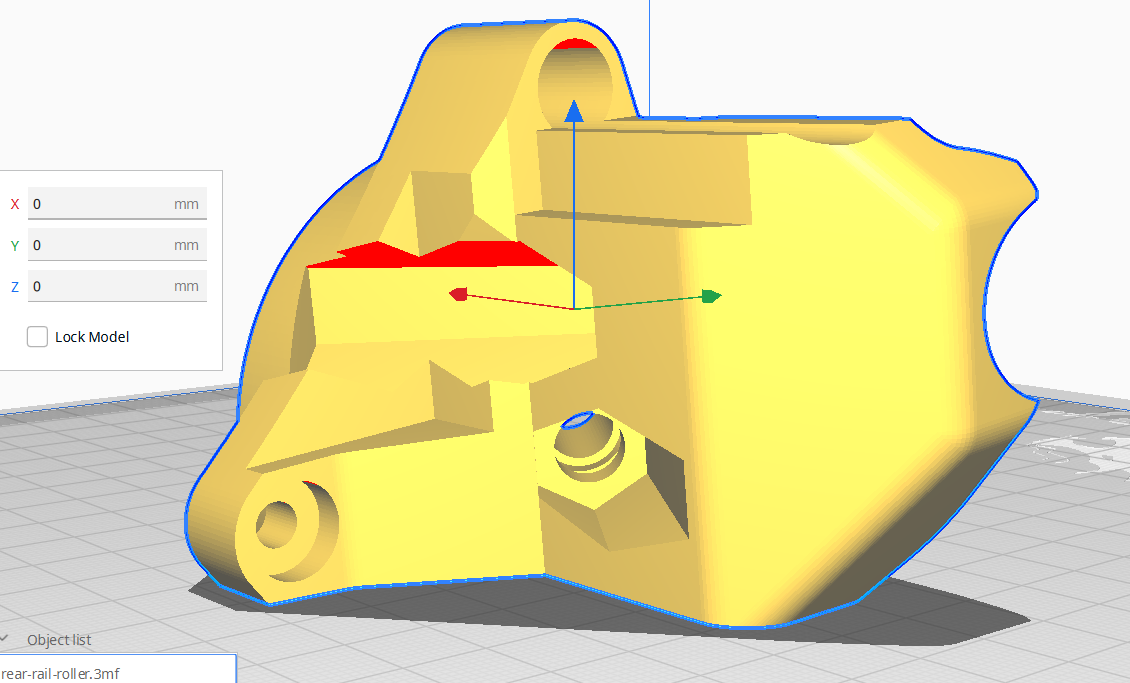
3.rear rail roller
4.X tensioner
These parts are oriented with very little contact with the printing bed.
I will be using the Makita 700 but the mount and dust collection shoe file once downloaded says the file is empty.
I’m not familiar with the controllers so I could use some advice on the selection of the Rambo 1.4 ( I assume the Rambo is a driver shield that attaches to the arduino 2560 mega) or use the SKR setup (no arduino required?) I would like to have auto squaring X and Y axis and auto Z leveling.
I have more question but would like to finish the prints first.
I can’t help you with the print issues, but I can help with the Rambo question:
The Rambo is a complete controller, with the “Arduino” device included on the board. If you have a Ramps board, that is a daughter board that connects to a 2560 Mega. The Rambo Board provides the auto-squaring and Z sensor you’re looking to use.
The V1E store sell SKR (pre-flashed) and Rambo (pre-flashed), they’re reasonably priced. Grateful they came with V1E firmware pre-installed, saved me some time and hassle. Buying from V1E also helps support the project creator/maintainer.
If you download the models from Printables.com they should be in a good orientation for printing. I had no trouble with any of the .3MF files downloaded from there.
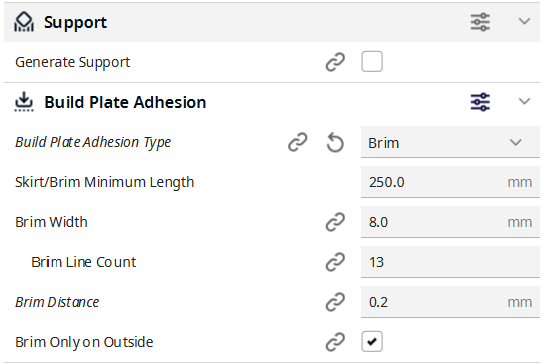
Aaron, I have an almost 10 year old MakerFarm 12” Prusa i3v with a .4 nozzle Hexagon hotend direct drive extruder and heated bed. I tried a raft and failed. Will try the brim and see.
Did you have any files fail to load and say, file empty. The Makita mount and associated files did that for me. The adjustable Y tension base Lt or Rt, can’t remember which, did that as well but it was a mirror image of the other side so I use Sli3r mirror function to print that part.
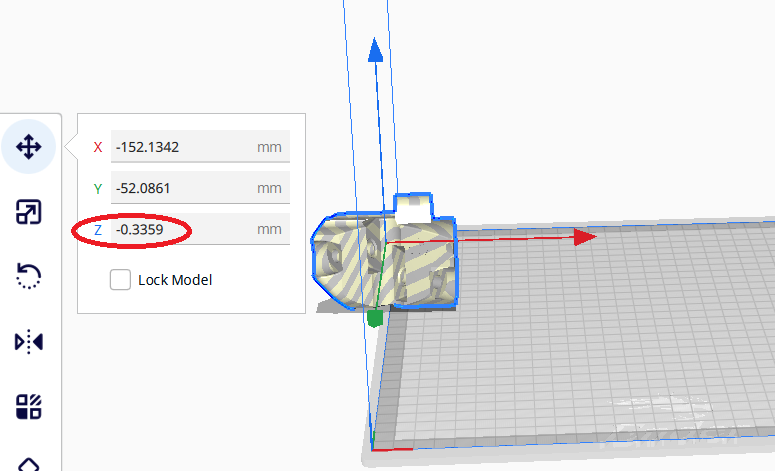
Didn’t encounter load error in Cura 5.0 used for my Ender 3 Max (stock glass bed, 0.6mm nozzle, dual gear extruder, bowden, stock hotend). However, opening some .3mf files would result in the model’s X Y Z coords being way way off, sometimes model coords would be negative, i.e. below the bed build plate , to fix I just set X Y Z coords to 0 after loading. Cura’s smart enough to ignore me and make sure model is entirely above the build plate. Recommend checking models are not partially submerged. The models are orientated for printed without needing support structures, awesome right? Paranoid me brims everything that’s >1hr print time. Appreciate my cheap swivel head deburring/reamer tool, wish we’d met years ago.
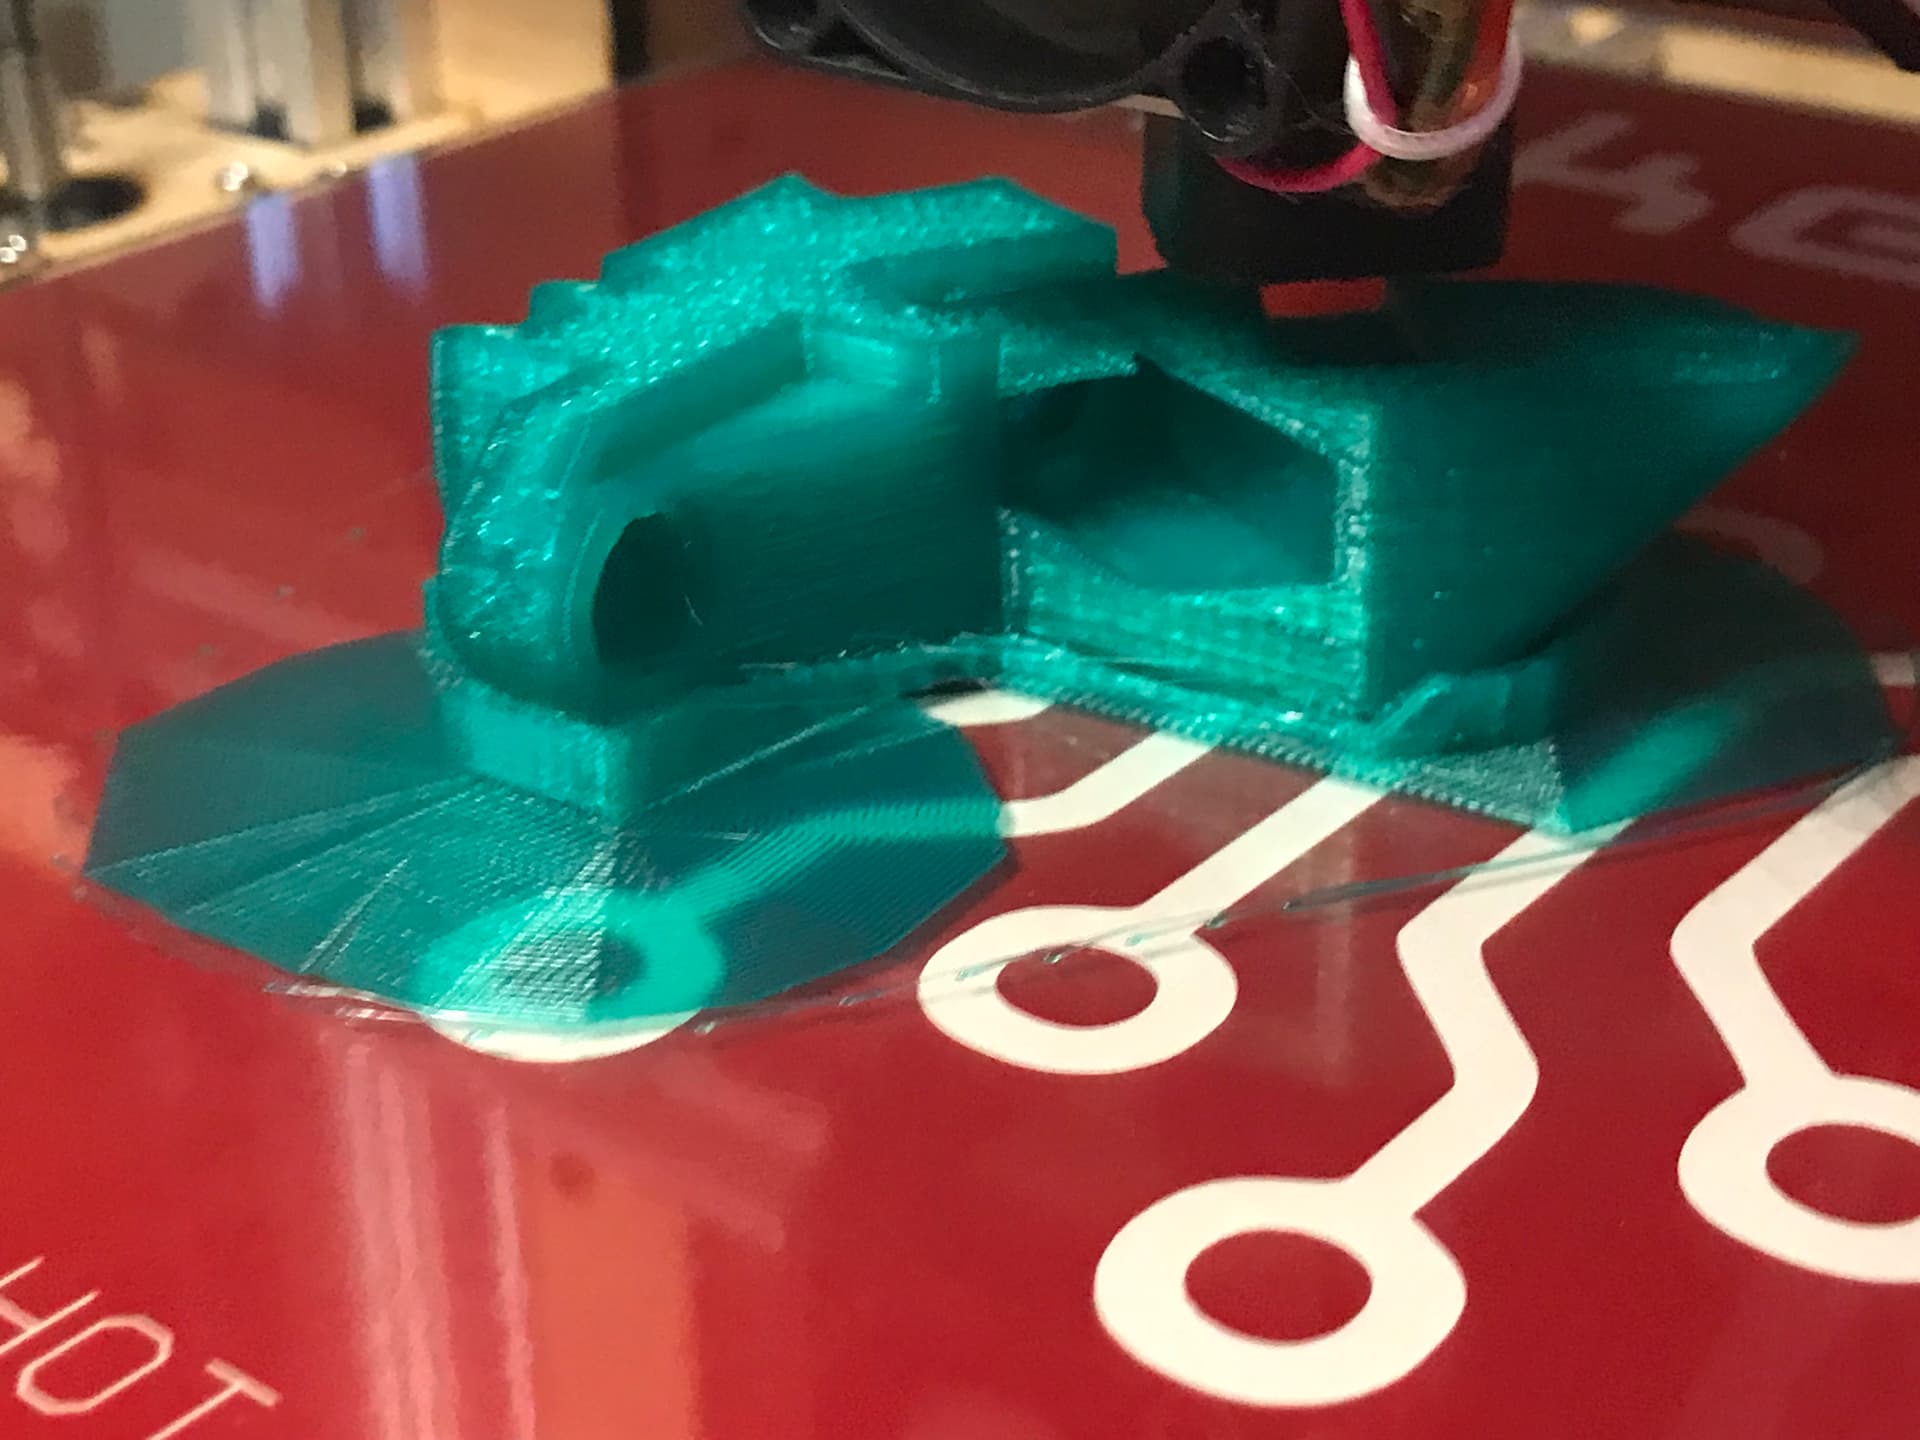
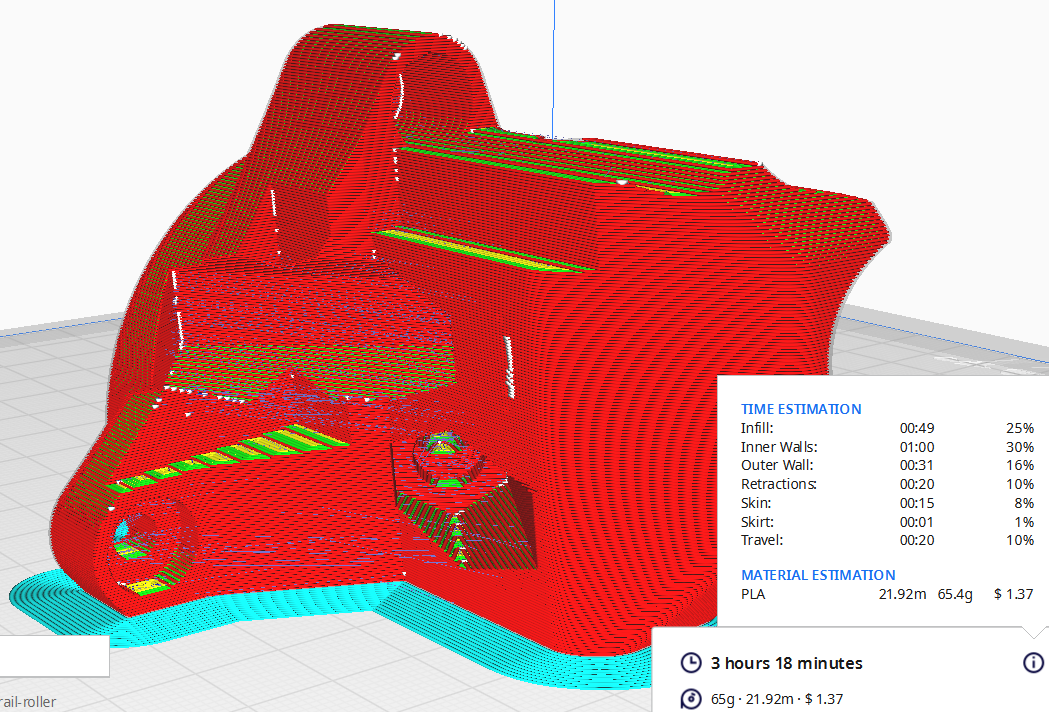
The rear rail print starts printing the object approx 5 degree angle off the print bed. This is printing into the air. Support is required for my printer.
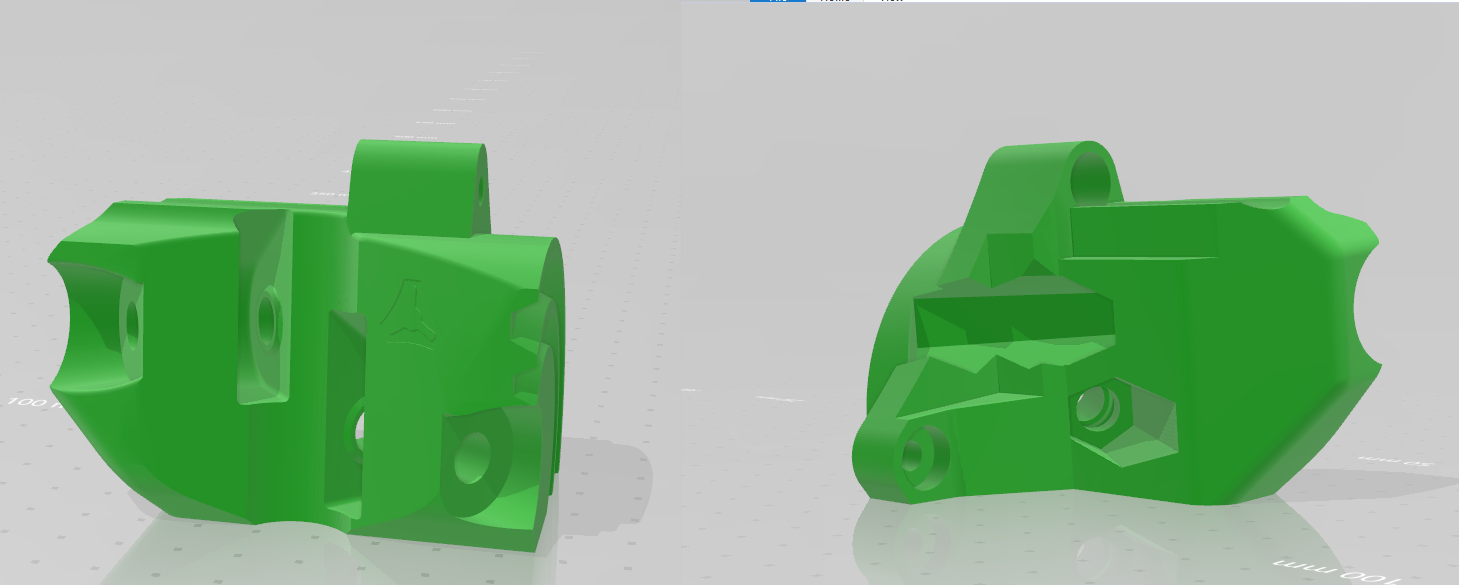
Sweet color! Looks like you have unrequired support enabled. But the model is printing in the correct orientation right (it matches the loaded model in my pic below)?
Yes, some models depend on settings being tuned to enable decent bridging distances. Did bunch of Cura bridging tests prior to printing parts.
Bunch of settings impact bridging, lots of good info out there that can explain better than me. e.g. Wall ordering = Inside to outside, helps with bridging, but outer skin may not look so good if issues with settings impact inner wall flow/dimensions.
In Cura 5.0.0, the model opens in the right orientation, but in a non printable X Y Z position.
The .3MF file looks fine to me when I preview it. Your picture looks like it’s a completely different orientation. You should be able to adjust it in your slicer so that it sits flat.
I was beginning to believe that my printer was the only one that can’t print in the air I’m using Sli3r but can’t find a tool to place a flat face on the bed. All I can find is rotate 45 degrees LT or RT and a manual X Y Z Adjustment for degrees but you can only eye ball it and cannot tell for sure if indeed is sitting flat on the bed. I’ve spent untold hrs trying to reorient these things.
I’m using PrusaSlicer, which is basically Slic3r, but better. I did think that Slic3r did have a function to fit a piece flat to the bed though… Hmmm. Apparently not the case. In which case, I advise upgrading to PrusaSlicer…
If not, you can import the .3MF into Fusion, and export a .STL file which should be flat. I think this can be done in FreeCAD as well. I don’t know what you’re using to convert the files, but it seems to be not doing you any favours.
I was able to manually orient the parts with Slic3r (eyeball it on the screen). My design software is Autodesk 123D and you can select a face and place to the grid. I exported the file out of Slic3r to 123D as an .stl but 123D would not allow me to interact with it like normal and could only eyeball the orientation as well. the prints are now looking good though.
You can also just look at the pictures of the part on orintables, that is the right orientation to sit on the bed.
Even if there’s only a little touching the bed, you can get a big part. Once I printed a trex skull that started with probably 1 square inch total surface area on bed, and it just grows up from there.
Brim is going to help a lot with bed adhesion, other you can use is a raft.
Personally I’ve been using 3dlac on simple glass bed for about 6 months and haven’t needed a brim or raft since. That stuff is magical. Even with PCCF which I’ve seen people have a terrible time getting to stick - sticks great.
 I’m using Sli3r but can’t find a tool to place a flat face on the bed. All I can find is rotate 45 degrees LT or RT and a manual X Y Z Adjustment for degrees but you can only eye ball it and cannot tell for sure if indeed is sitting flat on the bed. I’ve spent untold hrs trying to reorient these things.