First of all, thank you very much for this forum with the very rich informations and your effort you do by supporting! I have checked a lot of post until I created this one and I would be very thankful if you can help me to configure my new lowrider 2:
I was still not able to understand the reason for my issues and get a clean cut. Drawings of the crown and others where done successfully.
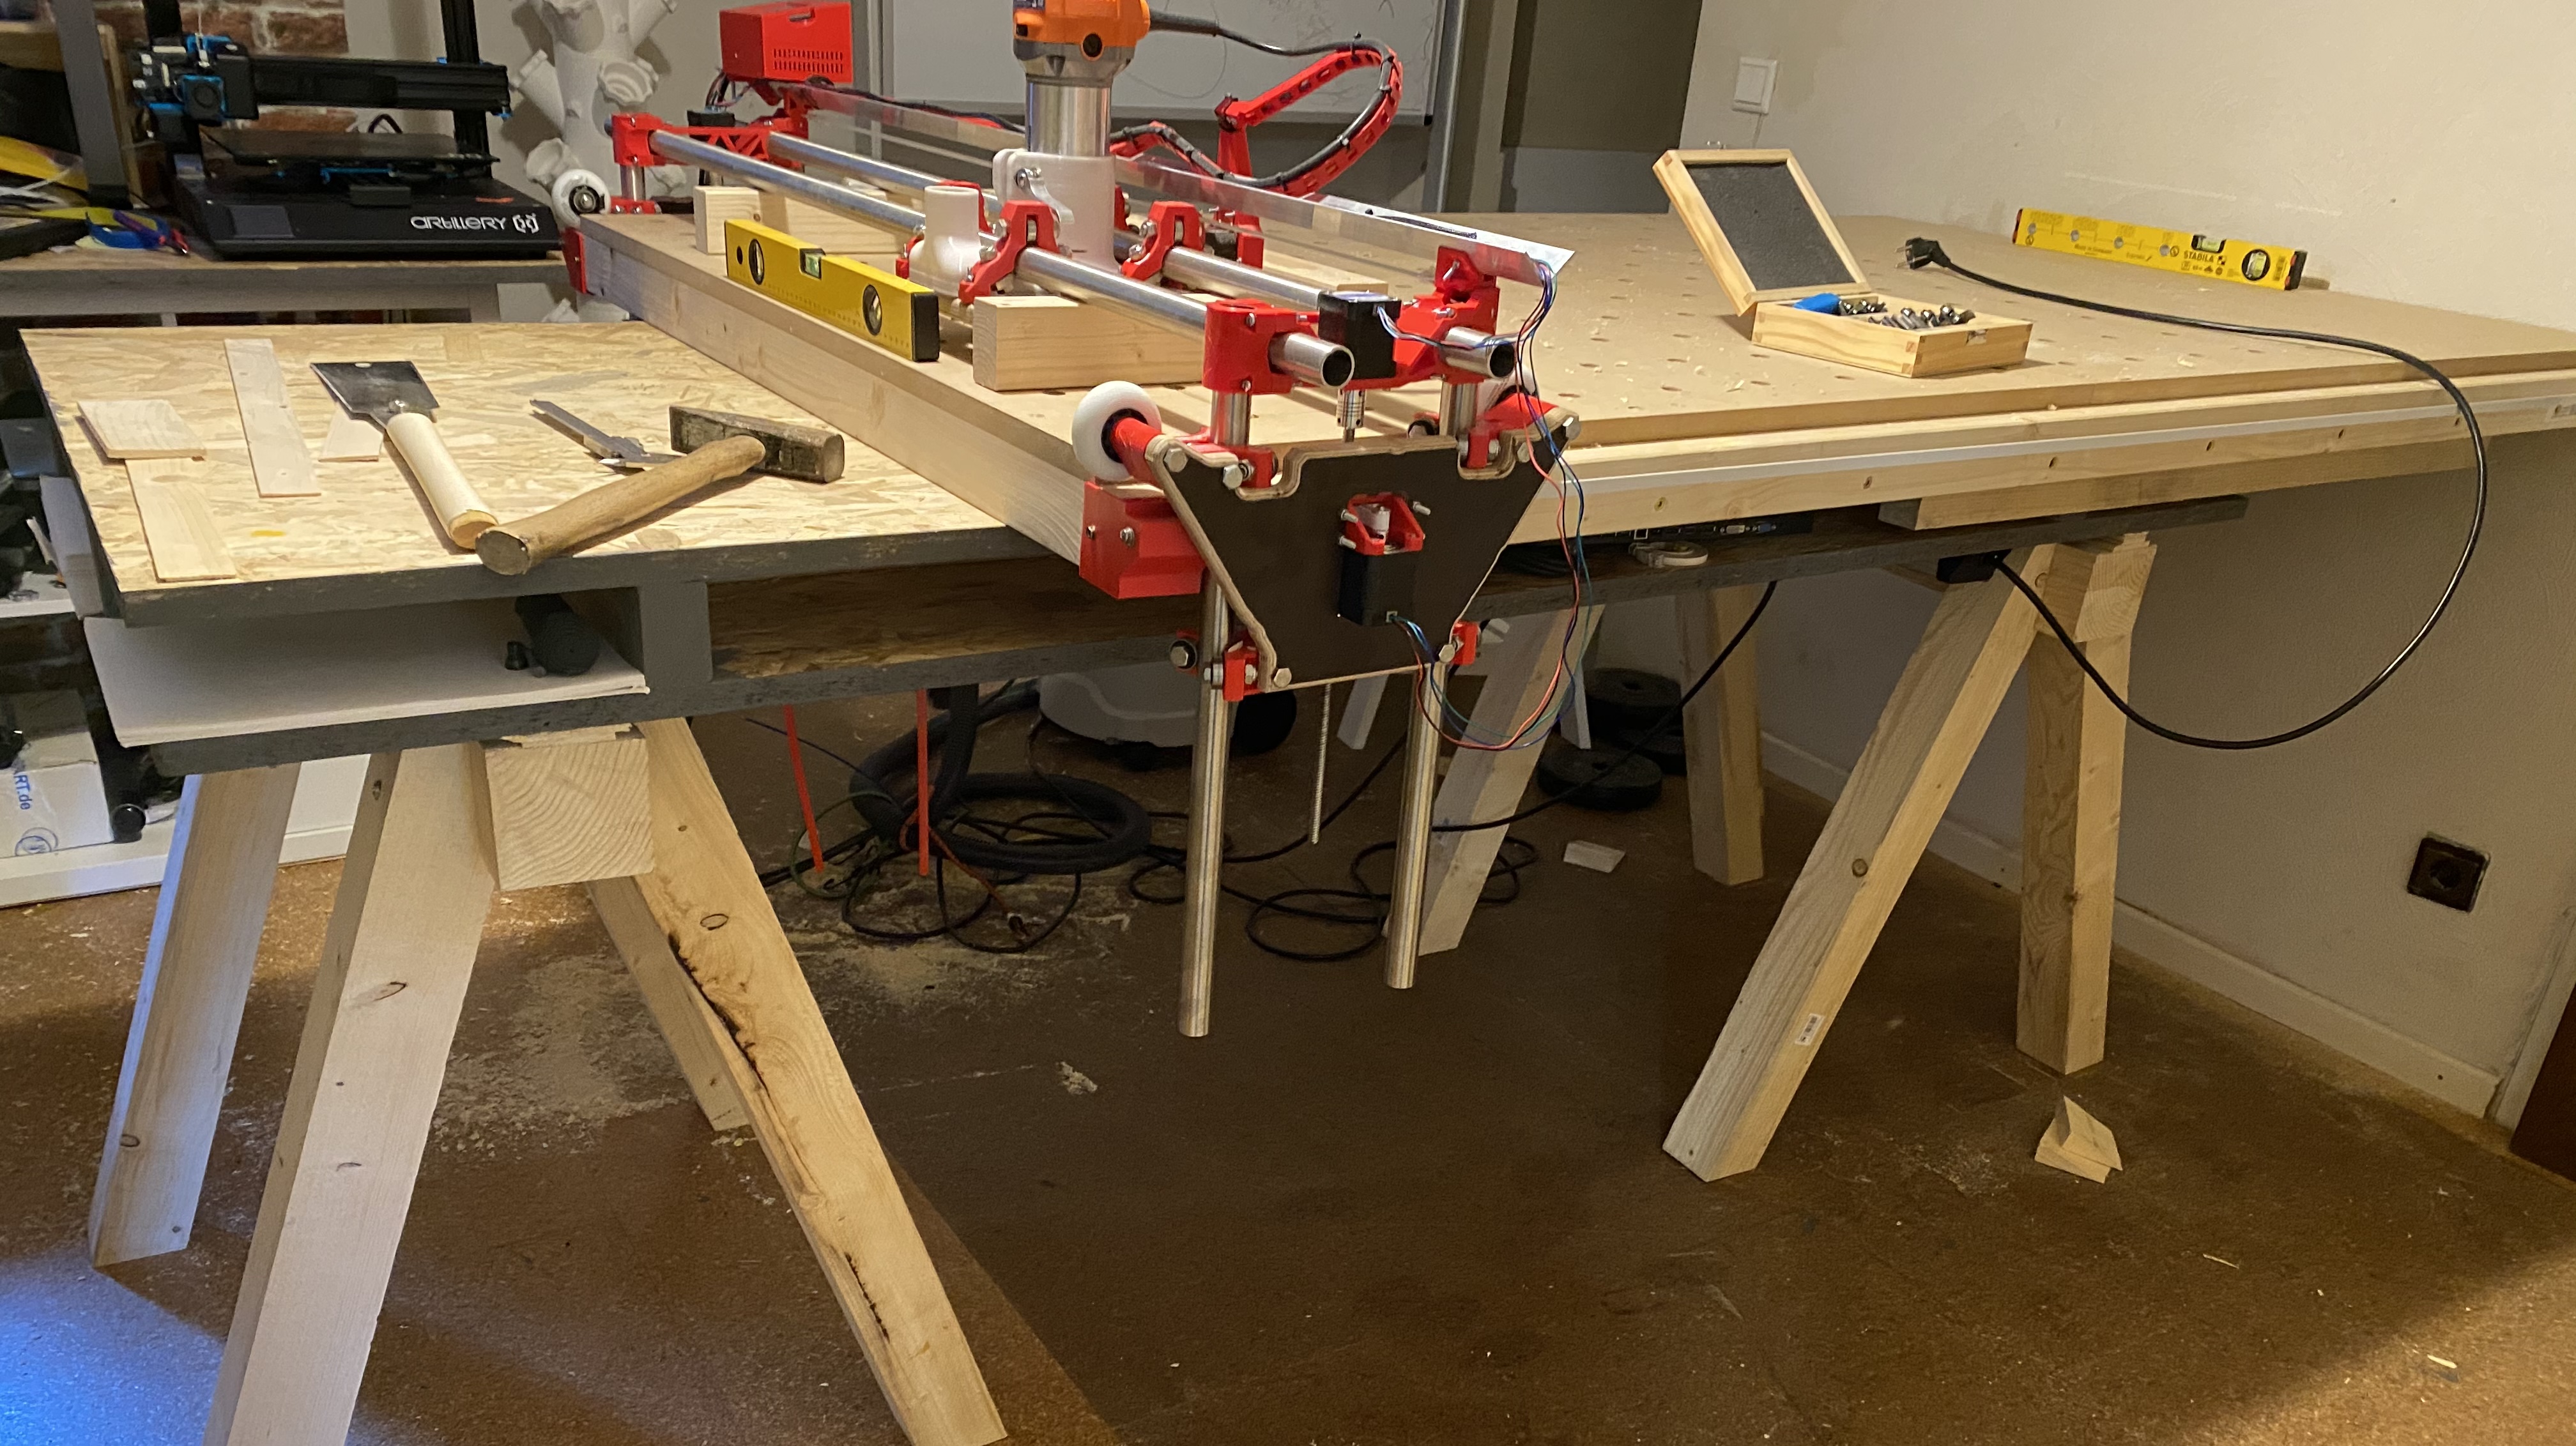
I have the following configuration:
BTT SKR1.4 Turbo
TMC5160 1.2
5 x Nema 17 2.0A 59Ncm
No Endstops.
Marlin_V1CNC_Skr1p3_2209_2.0.7.2_510-src which I modified for work with the hardware above and for sensorless homing: Configuration.zip (75.2 KB)
I’m not sure if it is one or two different issues.
When I try to Auto Home the Z axis, the axis drops. Please check this video: https://youtube.com/shorts/gy8-sdkkAKw?feature=share. In this case it were just few millimeters, but it’s also happening that the axis is dropping for few centimeters. This behavior is just on one side. It’s also happening if I change the slot on the SKR. On the other side it’s homing very well. I already have ordered a new stepper, but I hope that it’s about my bad configuration and not a hardware issue.
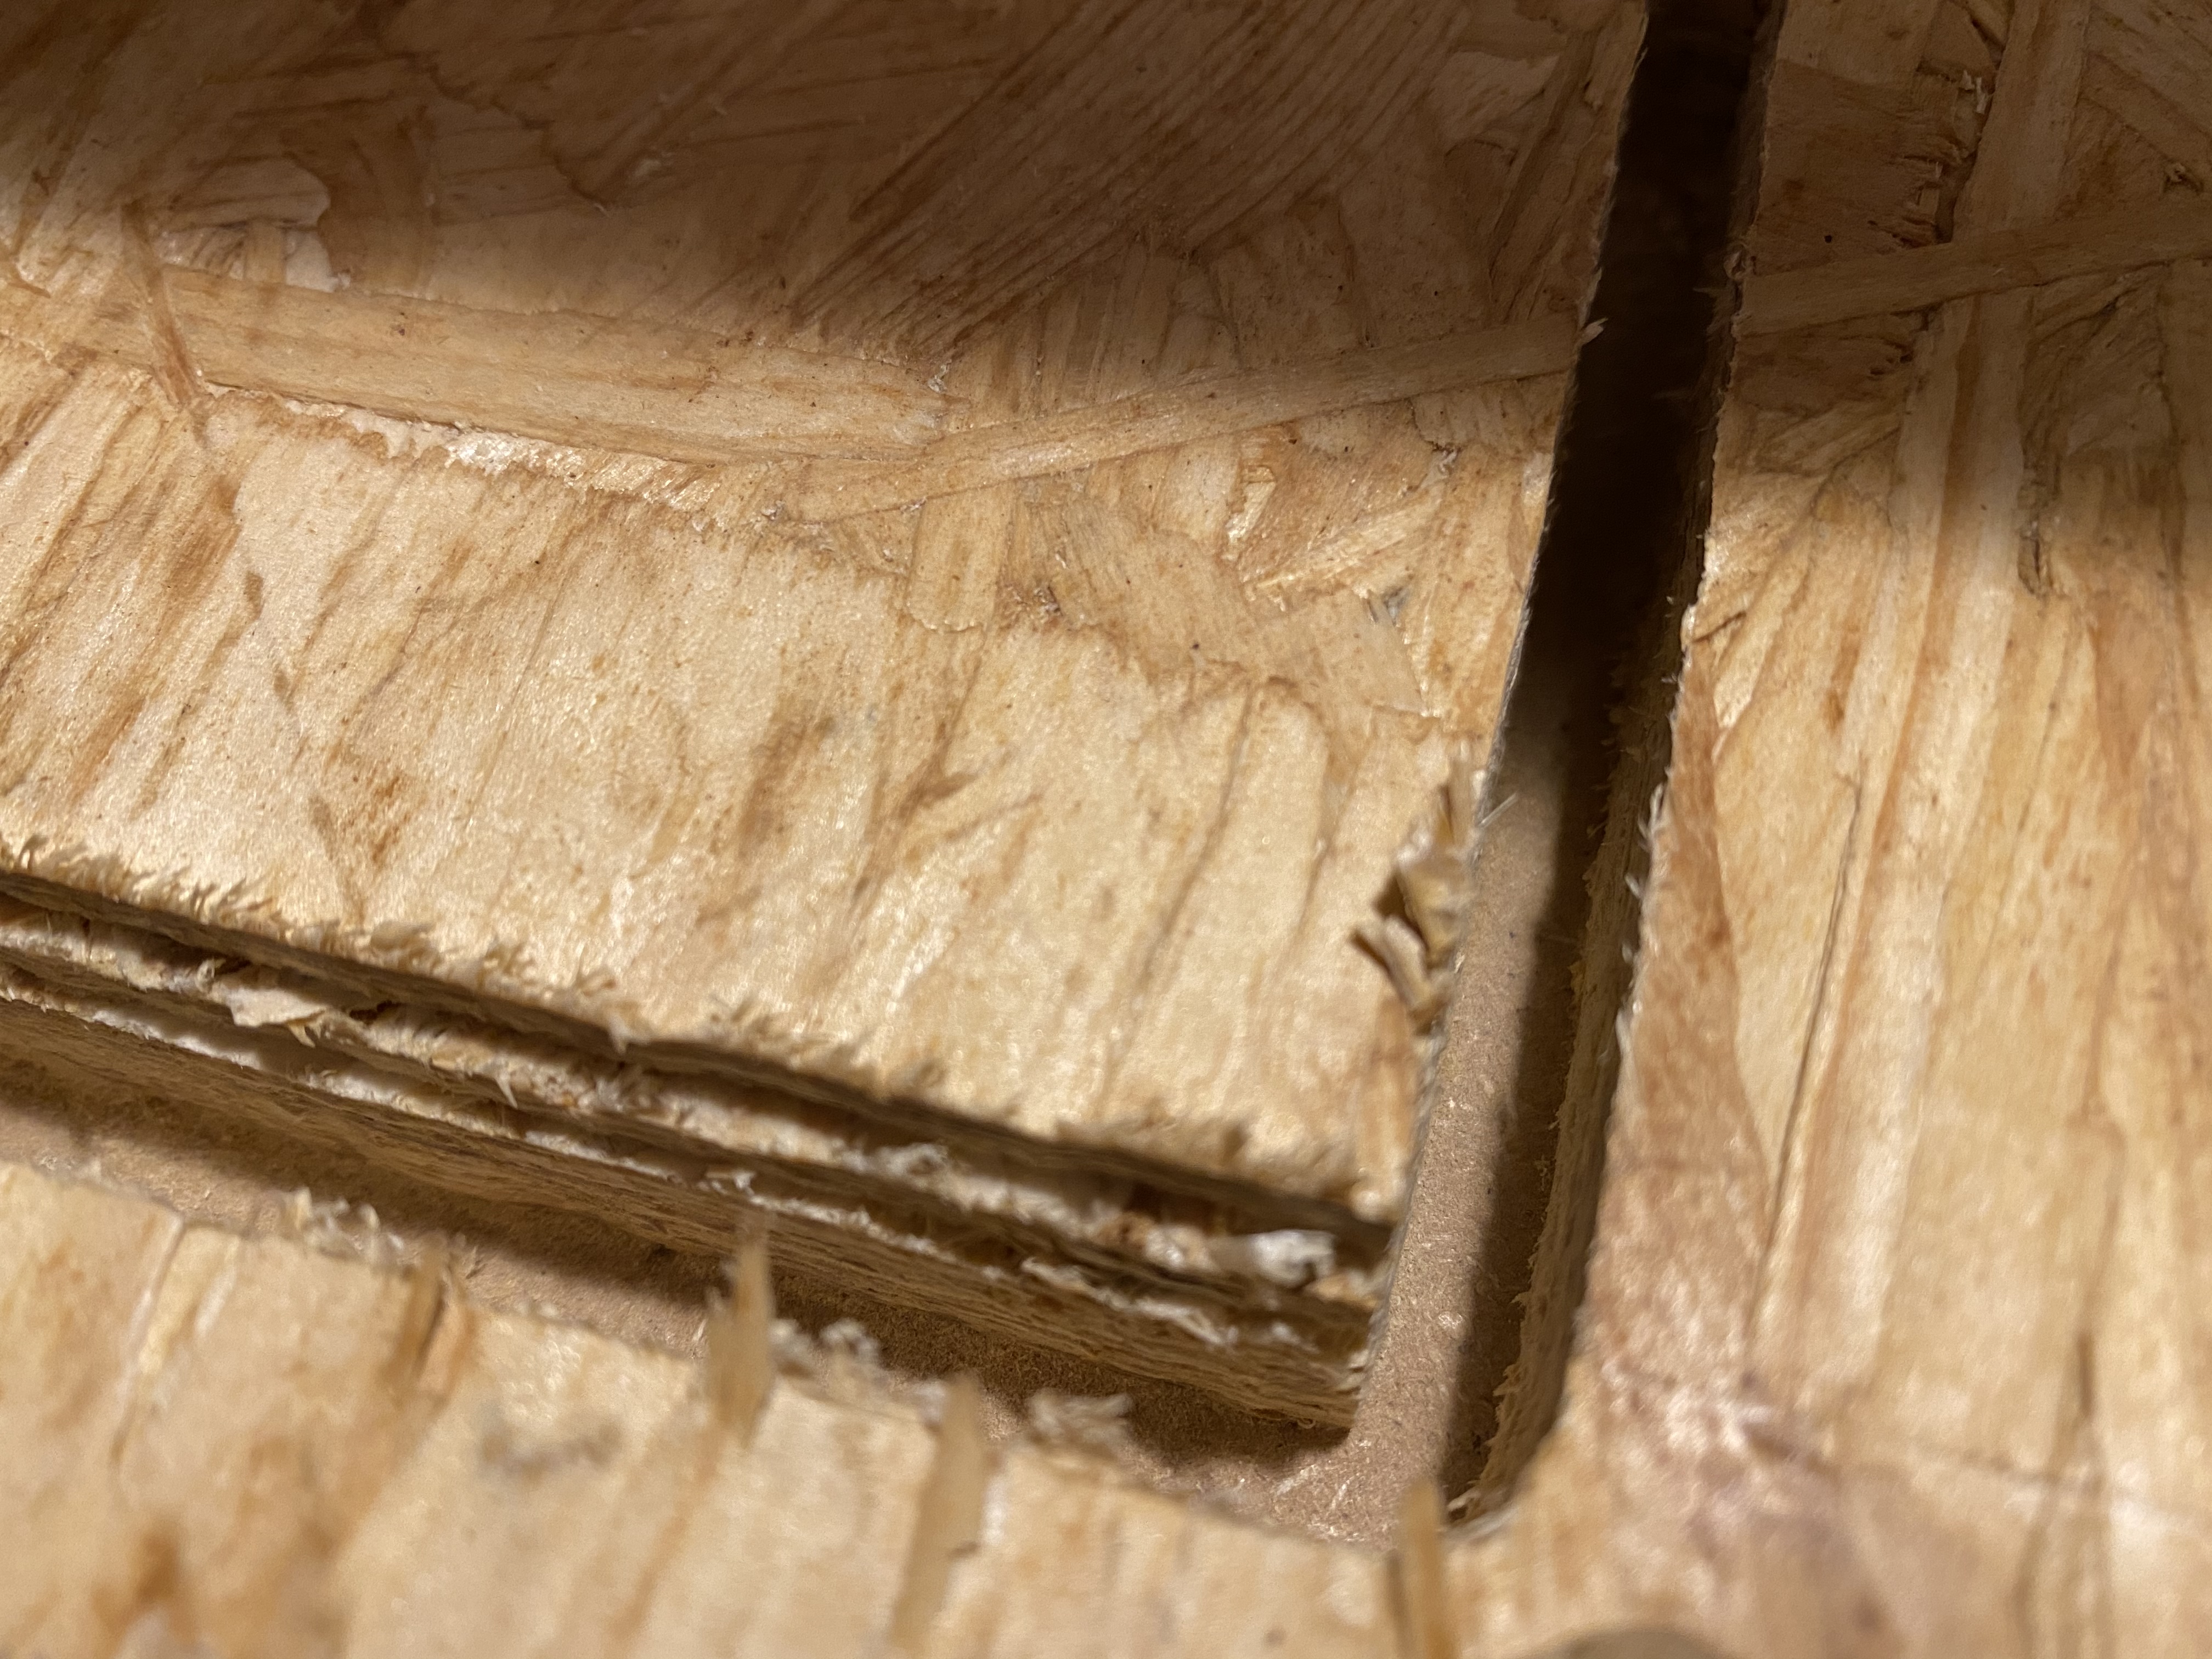
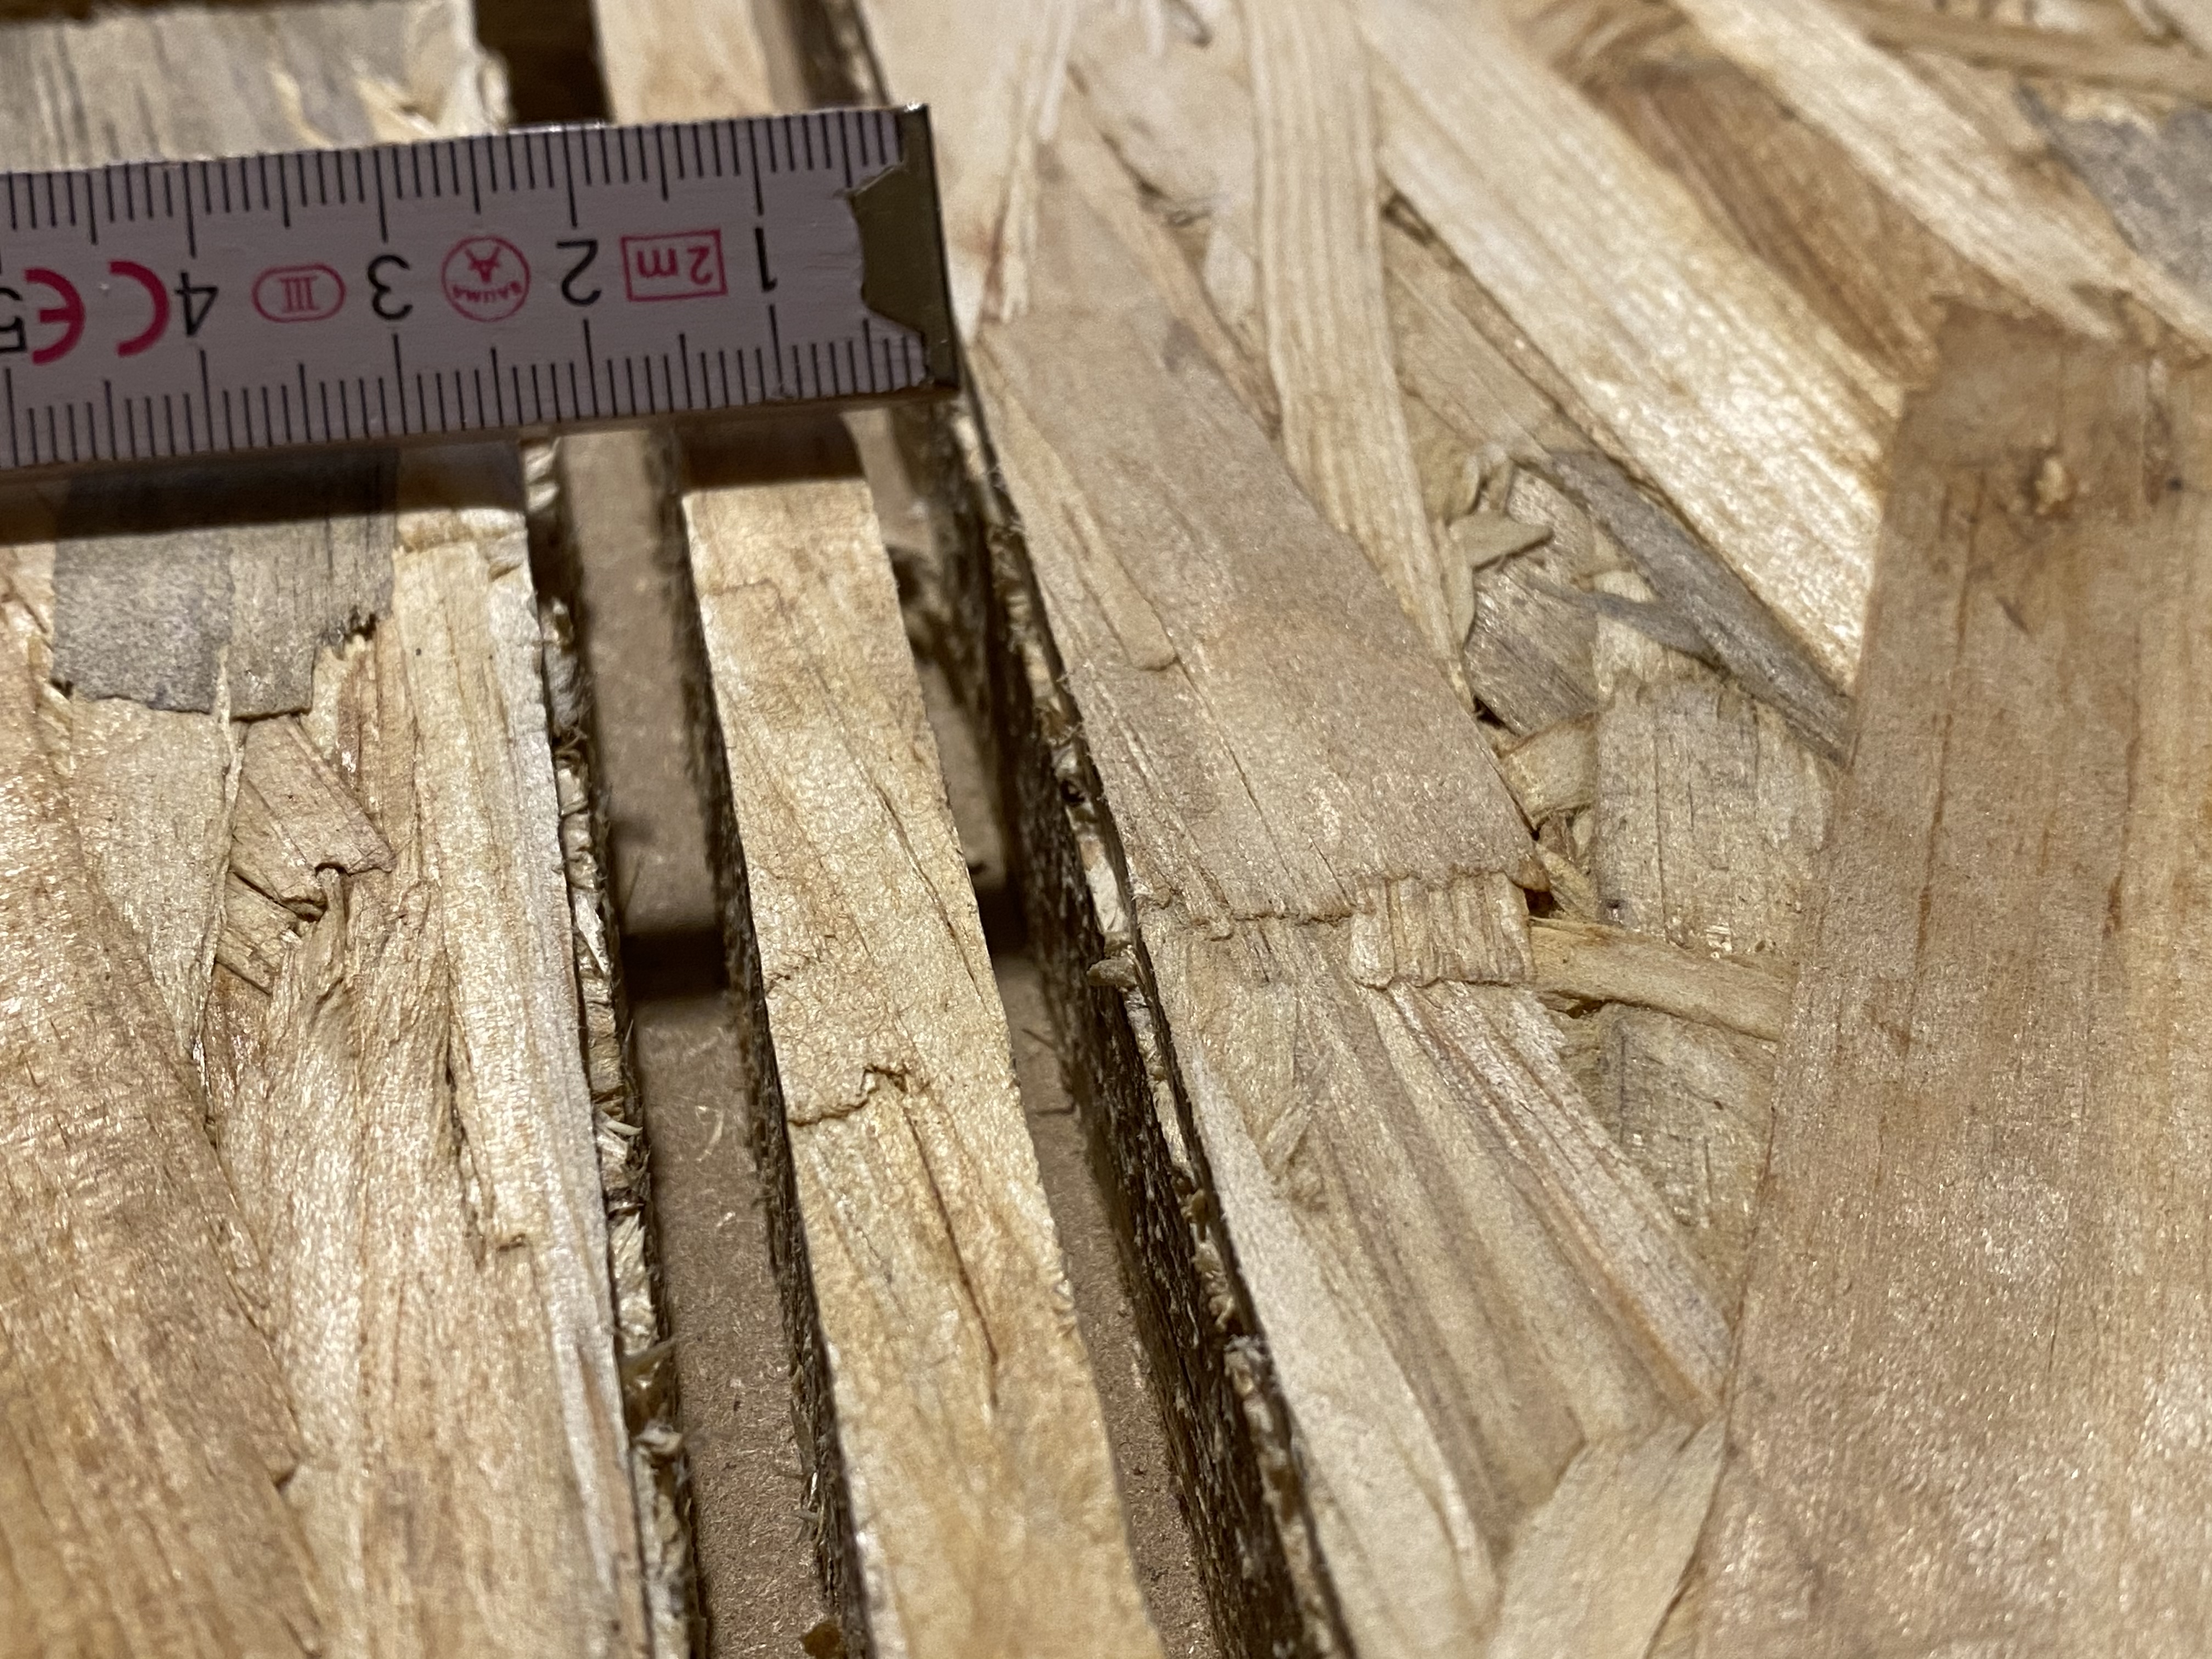
On the Y Axis I think I loose some steps. I have tried to mill with a 6mm bit with estlecam.
Z+: 4mm
F(xy): 20mm/s
F(z): 20mm/s
You can see that it’s created huge steps by every new level. In the gcode it’s a cut.
What I already checked:
all lead screws
Threaded rod greased
Increased and decreased the current from 800 to 1400mA and back to 1200, because they got hot
I’m not sure if I had the problem on the x & y axis from beginning, but I had the problem with the dropping Z axis all the time. Two times the axis dropped while milling.
You said you don’t have endstops. How are your homing Z? Do you have a prose or a touch-plate? Or are you attempting to use sensor less homing for Z? Long story short, the letter is a bad idea. It won’t work.
Can you hear or see when the machine seems to lose steps?
If you do a dry run of the GCode (not cutting wood) does it still happen?
Just watched the video of the dropping z. Looks to me like you are going so high up that the lead screws are coming out of the t8 nut and falling back down into the next set of threads.
For homing Z you will probably want to reverse the direction so it homes going down and then add something like a touch plate for it to hit. I’ll let others chime in here because I am not sure how they home the low rider. For me on my machines I have made it so when I hit the Home Z command it just locked into place where it is and assumes that is 0. So I will manually jog to the top of my work piece then do that so it knows where the top is. Not perfect but it’s cheap.
I have printed four rings which I mounted on the 25mm pipes.You can see them in the video.
The idea was to home at z-max. I think I have seen some similar approaches which are working. In addition I will buy a probe to be able find the z-min without a lot of effort.
About the dry run of the gcode: how would I register the small differences?
After the failed attempt, I have made a second run on same piece of OSB without to move it before and at the second time it were on the right direction without that skipped steps.
I’m not sure what you’re trying to do with the Z homing up like that, without dual endstops. The motors can definitely pull apart the couplers. I haven’t ever homed my low rider. I just start it square and reset the zero with G92 once I set up my workpiece. Sensorless homing can be done, but it is really fickle, especially on a leadscrew.
On the cut, try it in some purple HD foam. If you see those kind of steps in your foam, it is something wrong with the machine. If not, then it might be something wrong with the machine, or something wrong with you CAM.
20mm/s on a 6mm bit seems pretty fast, at least for an initial test. You should start with the (conservative, but for 1/8" (3.1mm) bits) in estlcam basics. If you are seeing those problems with the conservative settings, then we know something is wrong with the machine.
Steppers almost never are the problem. They are much simpler than they look. Wiring is more common and the trickiest is the little grub screws coming loose on the pulleys and couplers.
I’d follow Jeff’s advice on slowing down especially on you z axis as that will effect your torque which could explain your z issues.
I home up on z (more accurately I square z up) using sensorless homing but I do have coupler protectors. It’s finicky to set up the homing sensitivity and each axis will be different but works great once you get it tuned.
The way I do it is to use a macro in cnc.js
home x and y first,
square z up
Move xy to corner of spoil board
Reset xy
Do a relative z move to predetermined height.
Reset z
If you want to continue to home at z max then How will it know it has hit the limit? Sensorless homing? Like they said that is very difficult to tune and it is like chasing a rabbit. Once you tune it other variables like motor temp can throw off your fine tuning. For Z I strongly suggest an end switch, probe or touch plate.
If you are not pulling out of the t8 nut then the next most likely situation is like Jeffe suggested. The coupler is slipping. Careful you might break it.
When other printers are trying to square themselves they sometimes crash into the z top on both sides but they only do this after they reduce the motor current down with GCode to make it so they don’t damage the machine. Then they crash to the top so they know they are square. But that doesn’t help them know where z “home” is. On a cnc machine square is relative to the table top so the tops of your Z might not be a good indication of square.
I will reduce the speed, check the grub screws again and install some endstops on the z-axis and try it again. May be I will also solder the steppers with JST connectors to be 100% sure that the wiring is not the problem.
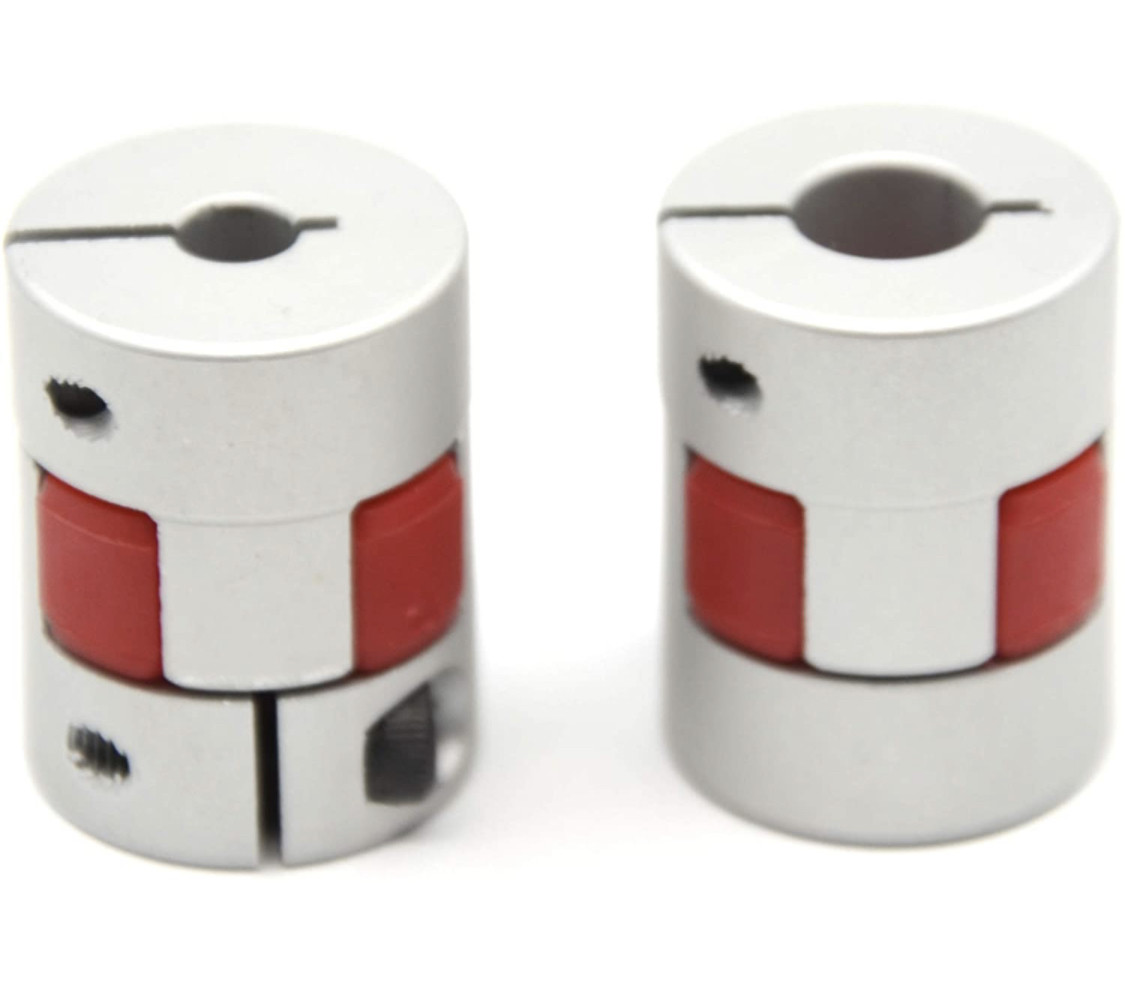
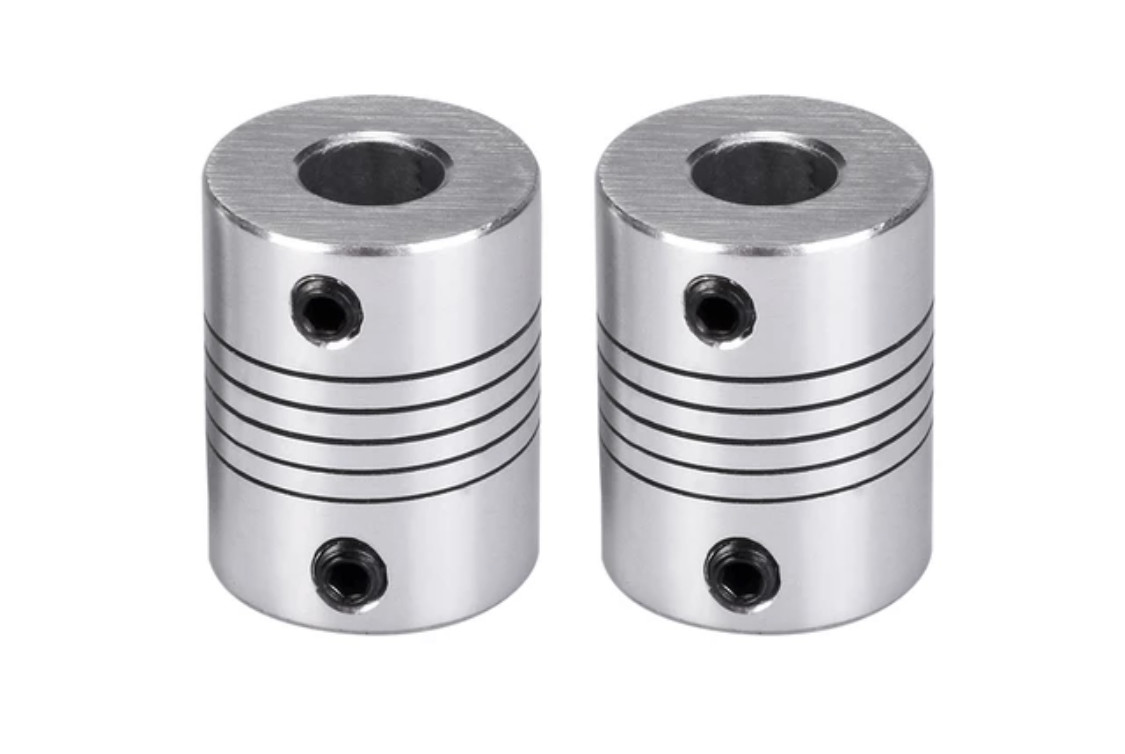
Do you think it make sense to change them? I have the feeling that the current one are different stretched. The one seems to be weaker than the other. In the moment I use these here:
@jeffeb3 how do you start squared? If I start my machine and make a move on the z axis from a squared parking position the one side is always few mm higher than the other. It’s always the same side which is lower, which also drops.
I‘ll check if the one start moving earlier or this behavior is because the coupler is weaker. Still not sure how to do this…
I’m not able to use smaller bits than 6mm, because I have the Makita router which just have a mount for 6 & 8mm. I did not found a adapter for smaller ones. Which speed would you suggest for that test?
I have the spring looking couplers in your photo. The motor shaft is touching the leadscrew inside, so they are always the same length, unless they get pulled (which I try to avoid and the weight of the router helps).
Before I start I move the factory to one end of the table. I made sure the table was square. If it wasn’t, I would have to add some blocks of something. I reach under each end and give the leadscrew a small twist. That end rides a few mm and rests back at zero. Then I engage the motors and move away from zero.
The settings in estlcam basics are 15mm/s xy, 3mm/s z and 1mm step down. For a 6mm bit, start with a slower xy, like 8mm/s. Those are conservative settings. You should have no trouble and then you can test going deeper first and then speed up the xy and then the Z, but that’s not much help.
After a lot of work and sweating I’m able to home and square my lowrider and the accuracy got a little better.
I have installed two Endstops for the z axis and a touch plate. The y and the x axis I still would like to use sensorless homing.
But it’s still not as well as I would expect:
If I use G38.2 F50 Z-50 the axis moves different lengths. One time it is 2mm one 20mm. Never 50mm. I have to repeat this command about 20 to 30 times until it touched the plate. But than it’s done:). I didn’t found such behavior in the forum or somewhere else. Does anyone have an idea?
If I home the y axis, it works sensorless very well. But if I try to home the x axis I got nearly all the time this error: Printer halted. kill() called!
The z axis is still dropping from time to time. I have changed the connectors and increase the current to 1200mA. I’ll track the axis on repetier host log for the next time and post the log here as it happens.
After reducing the feed rates the accuracy got better but my workplaces have still steps.
It’s all about setting the sensorless homing sensitivity tuned. It can be set via gcodes so I just set it up as a macro and kept tuning it for each axis till it’s repeatable. There are huge differences in sensitivity between axis.
When it goes a bit then stops that’s too sensitive when it bangs against your stops and keeps going until error it’s not enough.
I finally got mine right just before I was about to give up ands it’s been working well since but I do have to tweak it if I change my current. I have a 900ma and a 1200ma profile macro.
This happens sometimes if it has to travel farther than the X_BED_SIZE to get to the endstops. The latest firmware has it set to 600mm, I think. It also happens if it triggers and then backs away and can’t clear the trigger. Eith sensorless homing, set the home bump to 0. Then it won’t try to back away and bump again.
Did you check the grub screws on the couplers? Those can wiggle loose. Also, do you have a standard screw? Is the steps/mm on Z 400? If you have one start leadscrews, which have 1600 steps/mm, you need to really slow down the Z.
F50 is really slow, and I haven’t seen that used on the G38.2 command. I usually see G38.2 Z0. But I am not very experienced with using it.
One of the Y steppers is not working any more and the whole Y axis is warping…
What is wrong here? I think this is the same what happens to the Z axis. I have repeated that job and this error occurred again on a different position with same behaviour of that stepper in the debuger.
Does anyone have a description for the flags which are used in that states? I have searched for it but didn’t found valuable information for them.
I haven’t seen that printout before. From looking at the output of M122, it looks like the current is set pretty high (1200mA?). I would be worried that the stepper drivers are overheating, which is causing them to turn off while they cool down.
I could cry , again and again and again and again different axis are dropping in the process and my new waste-board looks like I have worked for years…
Today I opened the case while the work and checked the temperature continuously at the heatsink and near to it. It was never over 62C°. I think that’s ok, or?
I left my case open while working → still dropping!
Also I have changed all connectors, again. → still dropping!
Just now I have checkt the code to understand the flags which are reported while the debugging mode. Here is the code which is responsible for the flags:
tmc_util.cpp, line 233 - 262:
void report_polled_driver_data(TMC &st, const TMC_driver_data &data) {
    const uint32_t pwm_scale = get_pwm_scale(st);
    st.printLabel();
    SERIAL_CHAR(':'); SERIAL_PRINT(pwm_scale, DEC);
    #if ENABLED(TMC_DEBUG)
      #if HAS_TMCX1X0 || HAS_TMC220x
        SERIAL_CHAR('/'); SERIAL_PRINT(data.cs_actual, DEC);
      #endif
      #if HAS_STALLGUARD
        SERIAL_CHAR('/');
        if (data.sg_result_reasonable)
          SERIAL_ECHO(data.sg_result);
        else
          SERIAL_CHAR('-');
      #endif
    #endif
    SERIAL_CHAR('|');
    if (st.error_count)       SERIAL_CHAR('E'); // Error
    if (data.is_ot)           SERIAL_CHAR('O'); // Over-temperature
    if (data.is_otpw)         SERIAL_CHAR('W'); // over-temperature pre-Warning
    #if ENABLED(TMC_DEBUG)
      if (data.is_stall)      SERIAL_CHAR('G'); // stallGuard
      if (data.is_stealth)    SERIAL_CHAR('T'); // stealthChop
      if (data.is_standstill) SERIAL_CHAR('I'); // standstIll
    #endif
    if (st.flag_otpw)         SERIAL_CHAR('F'); // otpw Flag
    SERIAL_CHAR('|');
    if (st.otpw_count > 0) SERIAL_PRINT(st.otpw_count, DEC);
    SERIAL_CHAR('\t');
  }
So there is a change in the stealthChop mode after/before the axis is dropping. In all my logs you see that at the moment the axis is dropping the T is away.
I’m not sure if it is the reason or a side effect but I think that it is the only trail to follow.
What is this stealthChop mode and do I need that? I disabled them in the config.h now by
//#define STEALTHCHOP_XY
//#define STEALTHCHOP_Z
//#define STEALTHCHOP_E
and will check if it have some effect on the axis.

 , again and again and again and again different axis are dropping in the process and my new waste-board looks like I have worked for years…