Luckily it’s easier than that. The data line is already split where the second controller is wired in.
I just ordered a small 12A 5V power supply and water-proof enclosure. I should be able to fit a small wifi switch in there for turning it on/off the same time the other power supply is turned on/off. I can use my home assistant to turn them both on at the same time. I think the enclosure is small enough I can mount it under the eave next to the controller. Then I just have to run an AC line to it, which there’s an outlet on the front porch.
Yeah, running 12V and using a buck converter to get 5V where you need it would have worked. They are cheap on Amazon, and can work on anything slightly above output. So 5.5V would be ok. They usually have a little trim out to adjust the output in case 5.5 or 6V would work better. The truck would be to get enough amperage rating and to get one that is dust and water proof.
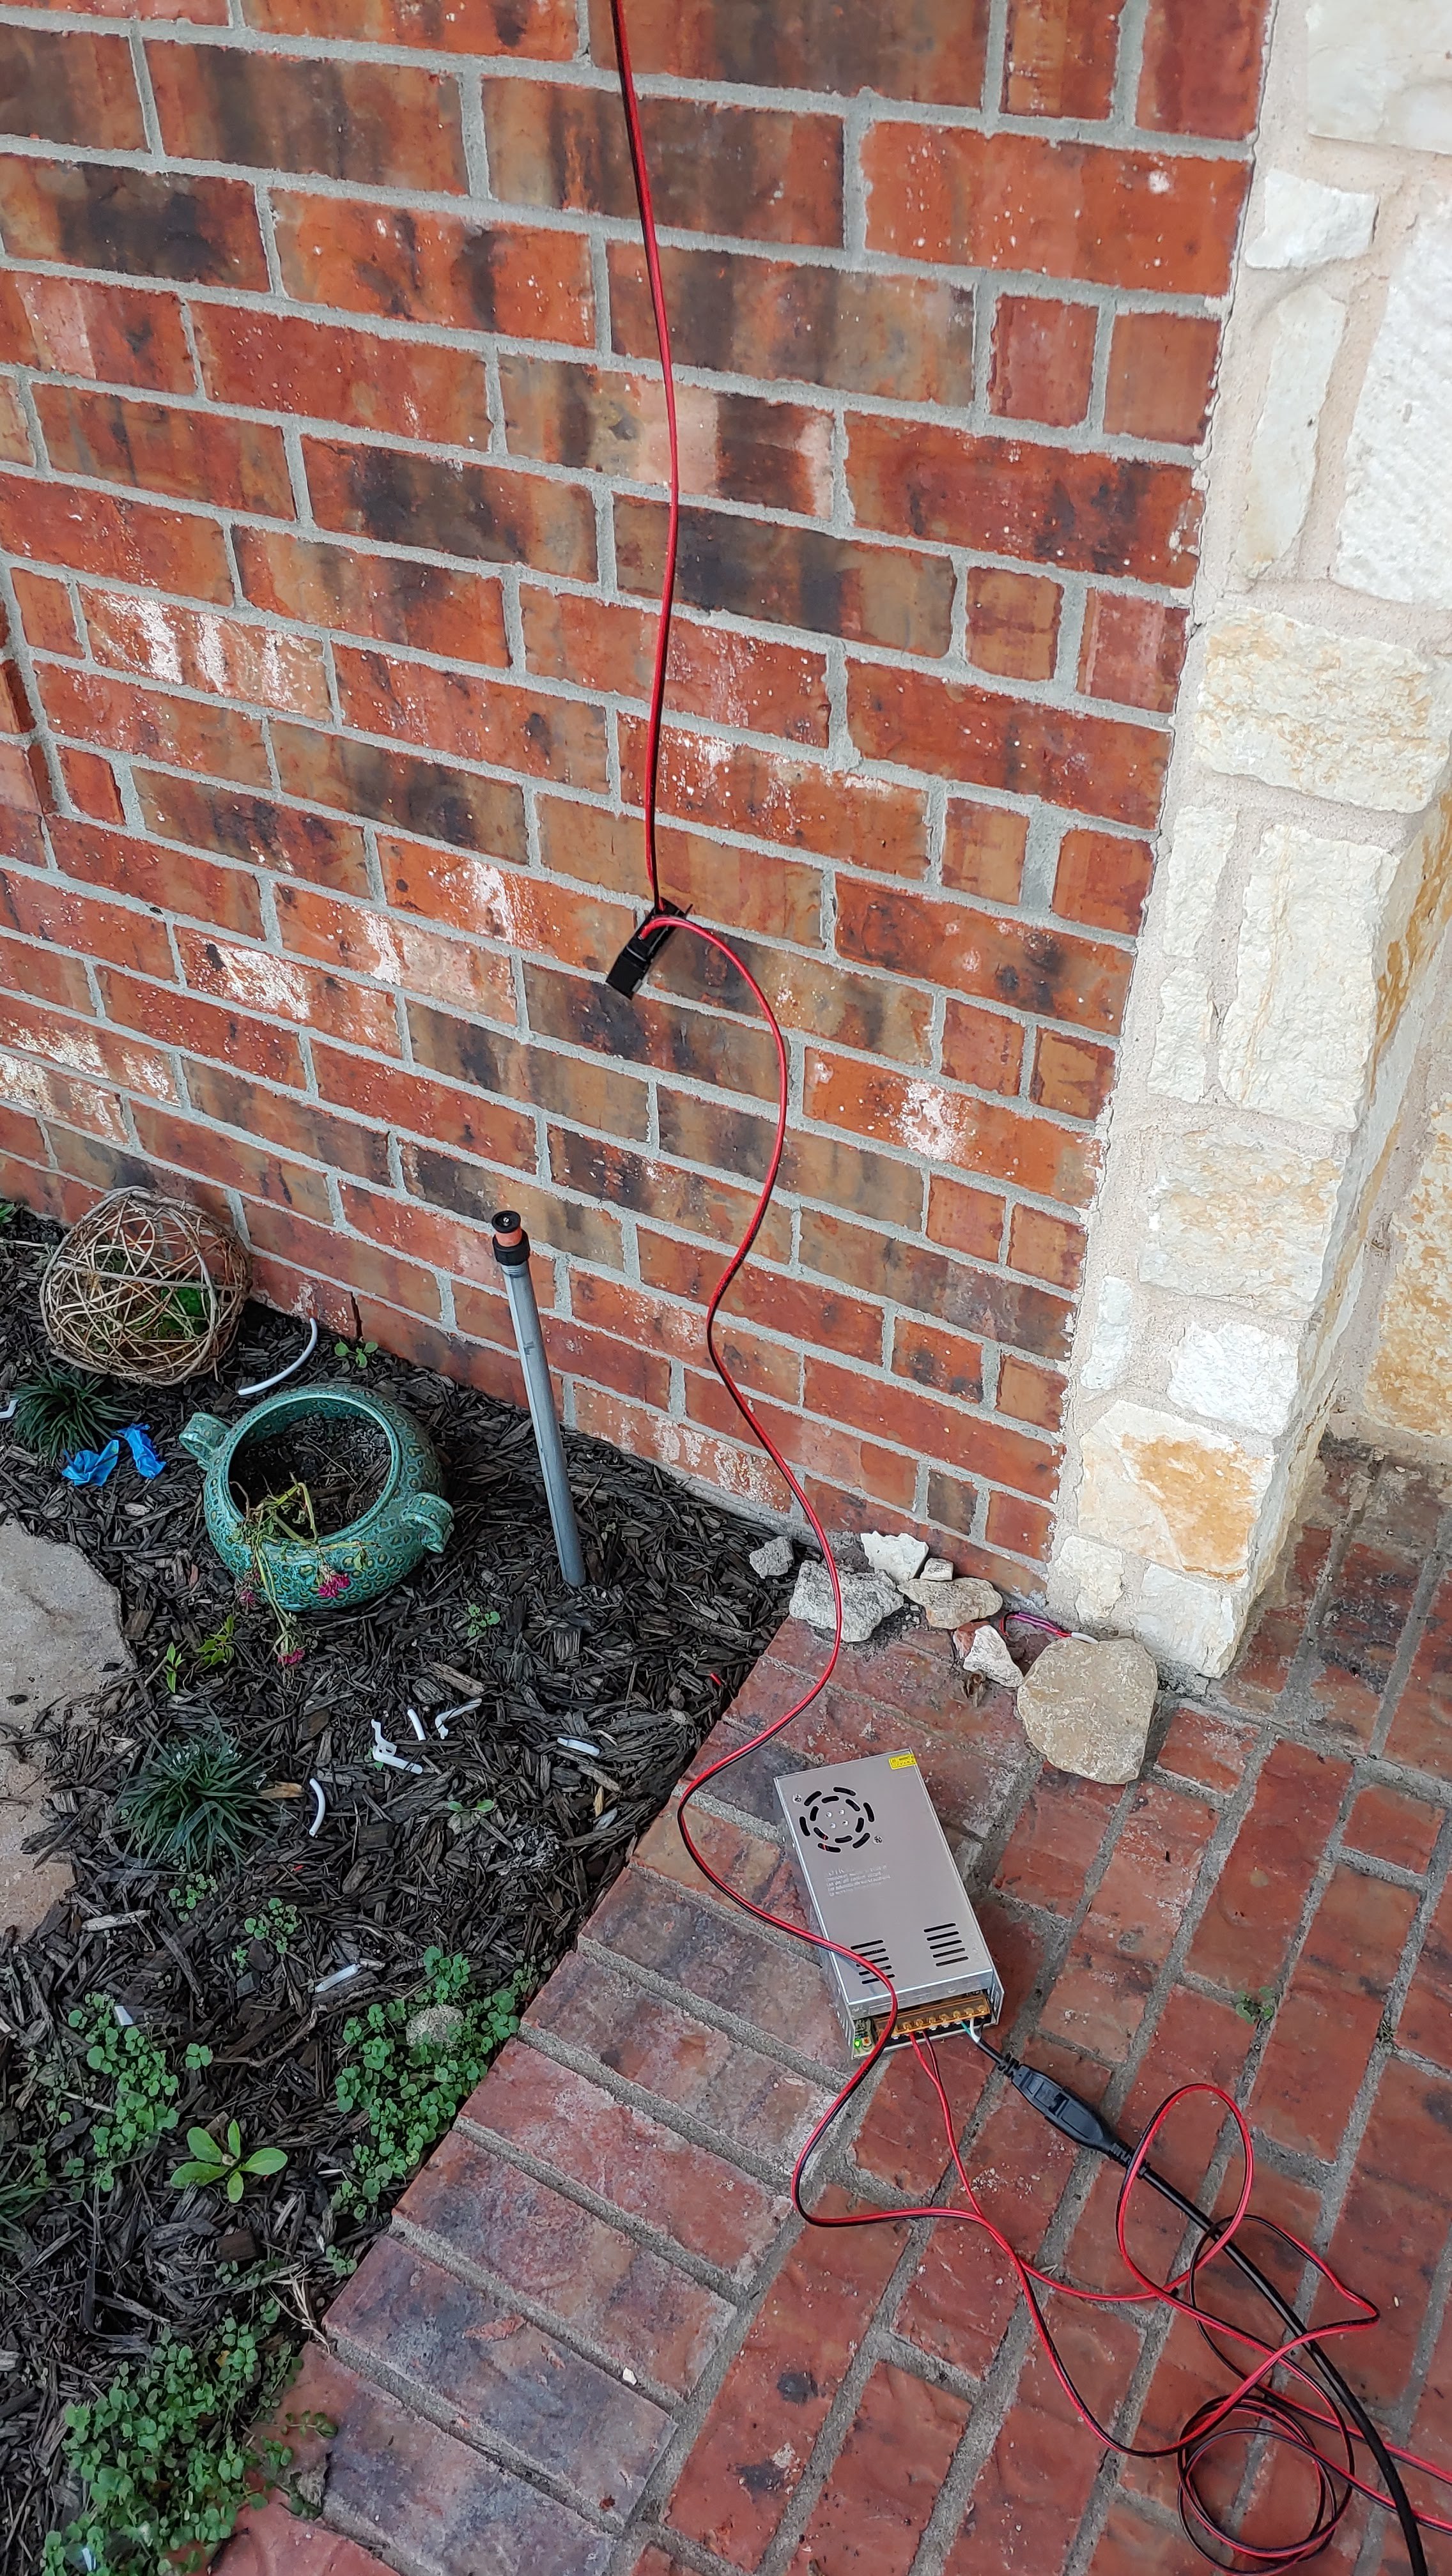
I’ve been thinking about this more. I’m thinking I can move the big power supply to the porch. Then I can feed 5v in between the 3rd and 4th string. I think there should be enough voltage on the far right to still power the first controller. Then I can power the second controller from a separate line. I have enough extra wire in the system to try and see.
Played with power a bit this morning. Looks like I’m going to end up with 2 power supplies.
I moved the big power supply over to the front porch. I measured out enough power wire to get from the second controller to the other side of the front porch. with the 16 gauge wire, it was still just enough voltage drop to keep the controller from running.
So I moved the power supply closer to the controller, cut the wires shorter, and wired it up there. It ran perfect.
Unfortunately, with this test, I also ruled out being able to put the PS on the porch for the first controller. There’d be way too much power drop for the first controller to boot. I wish I had calculated this out a little better before doing the install. I could have ran the LEDs on the right half of the house the opposite way and had both controllers under the front porch roof.
The sequencer would have taken care of the strips running in opposite directions.
After doing my test, I went back and measured the voltage at controller one. It sits at 4.7v idle.
Thinking about this a bit more, I guess I ‘could’ have gotten a variable voltage power supply and just kept adjusting the V up until it was a stable 5v at the controller going through the attic. Not sure I want that much current running through the attic, though… and I’ve already pulled most of the wire back out of the attic to use elsewhere. I left some up there I might be able to use as a pull string.
Alright. Did more research. Did more math. Learned more stuff. Ordered more toys…
In addition to the additional 5v power supply, I also went ahead and picked up some 12g wire, a 24v PS and a 5v 15a buck converter. One of the forums I’ve been reading says that a lot of people will run 12/24PS and then smaller buck converters at each controller.
It’ll be fun running the larger wire through the attic, but we’ll see if this works. If the 24v power supply doesn’t work, then I’ll still have the separate 5v supply I can hook up.
The real reason for trying to run the power all the way back to the garage is to keep visible wires to a minimum. A dedicated PS on the porch means I’ll have an extension cord running to it across the porch. Even shoving it against the edge of the wall will reduce the WAF of the install. To small of a WAF means adding more to the house in the future will be less likely. It also means I can go back to using 1 wifi switch to turn the entire display on/off.
We’ll see how this plays out. I’ll let ya’ll know what works.
Hopefully, you will try to wire it up before installing it in the attic.
I think you should be able to get by with an even smaller gauge wire if you’re bumping up the voltage. Because the voltage drop won’t be as big of a deal, and the current should be less.
Oh absolutely. I’ll wire it up on the front porch just like I did when I tested the 5V power supply.
I’m only using the larger wire to help keep it from warming up. If I’m running full-tilt on the buck converter, I’ll be pulling 75w through the wire, 24v @ 4a.
16g would probably still be plenty, but I was having to order new wire as I ran out anyways. Might as well get slightly bigger wire.
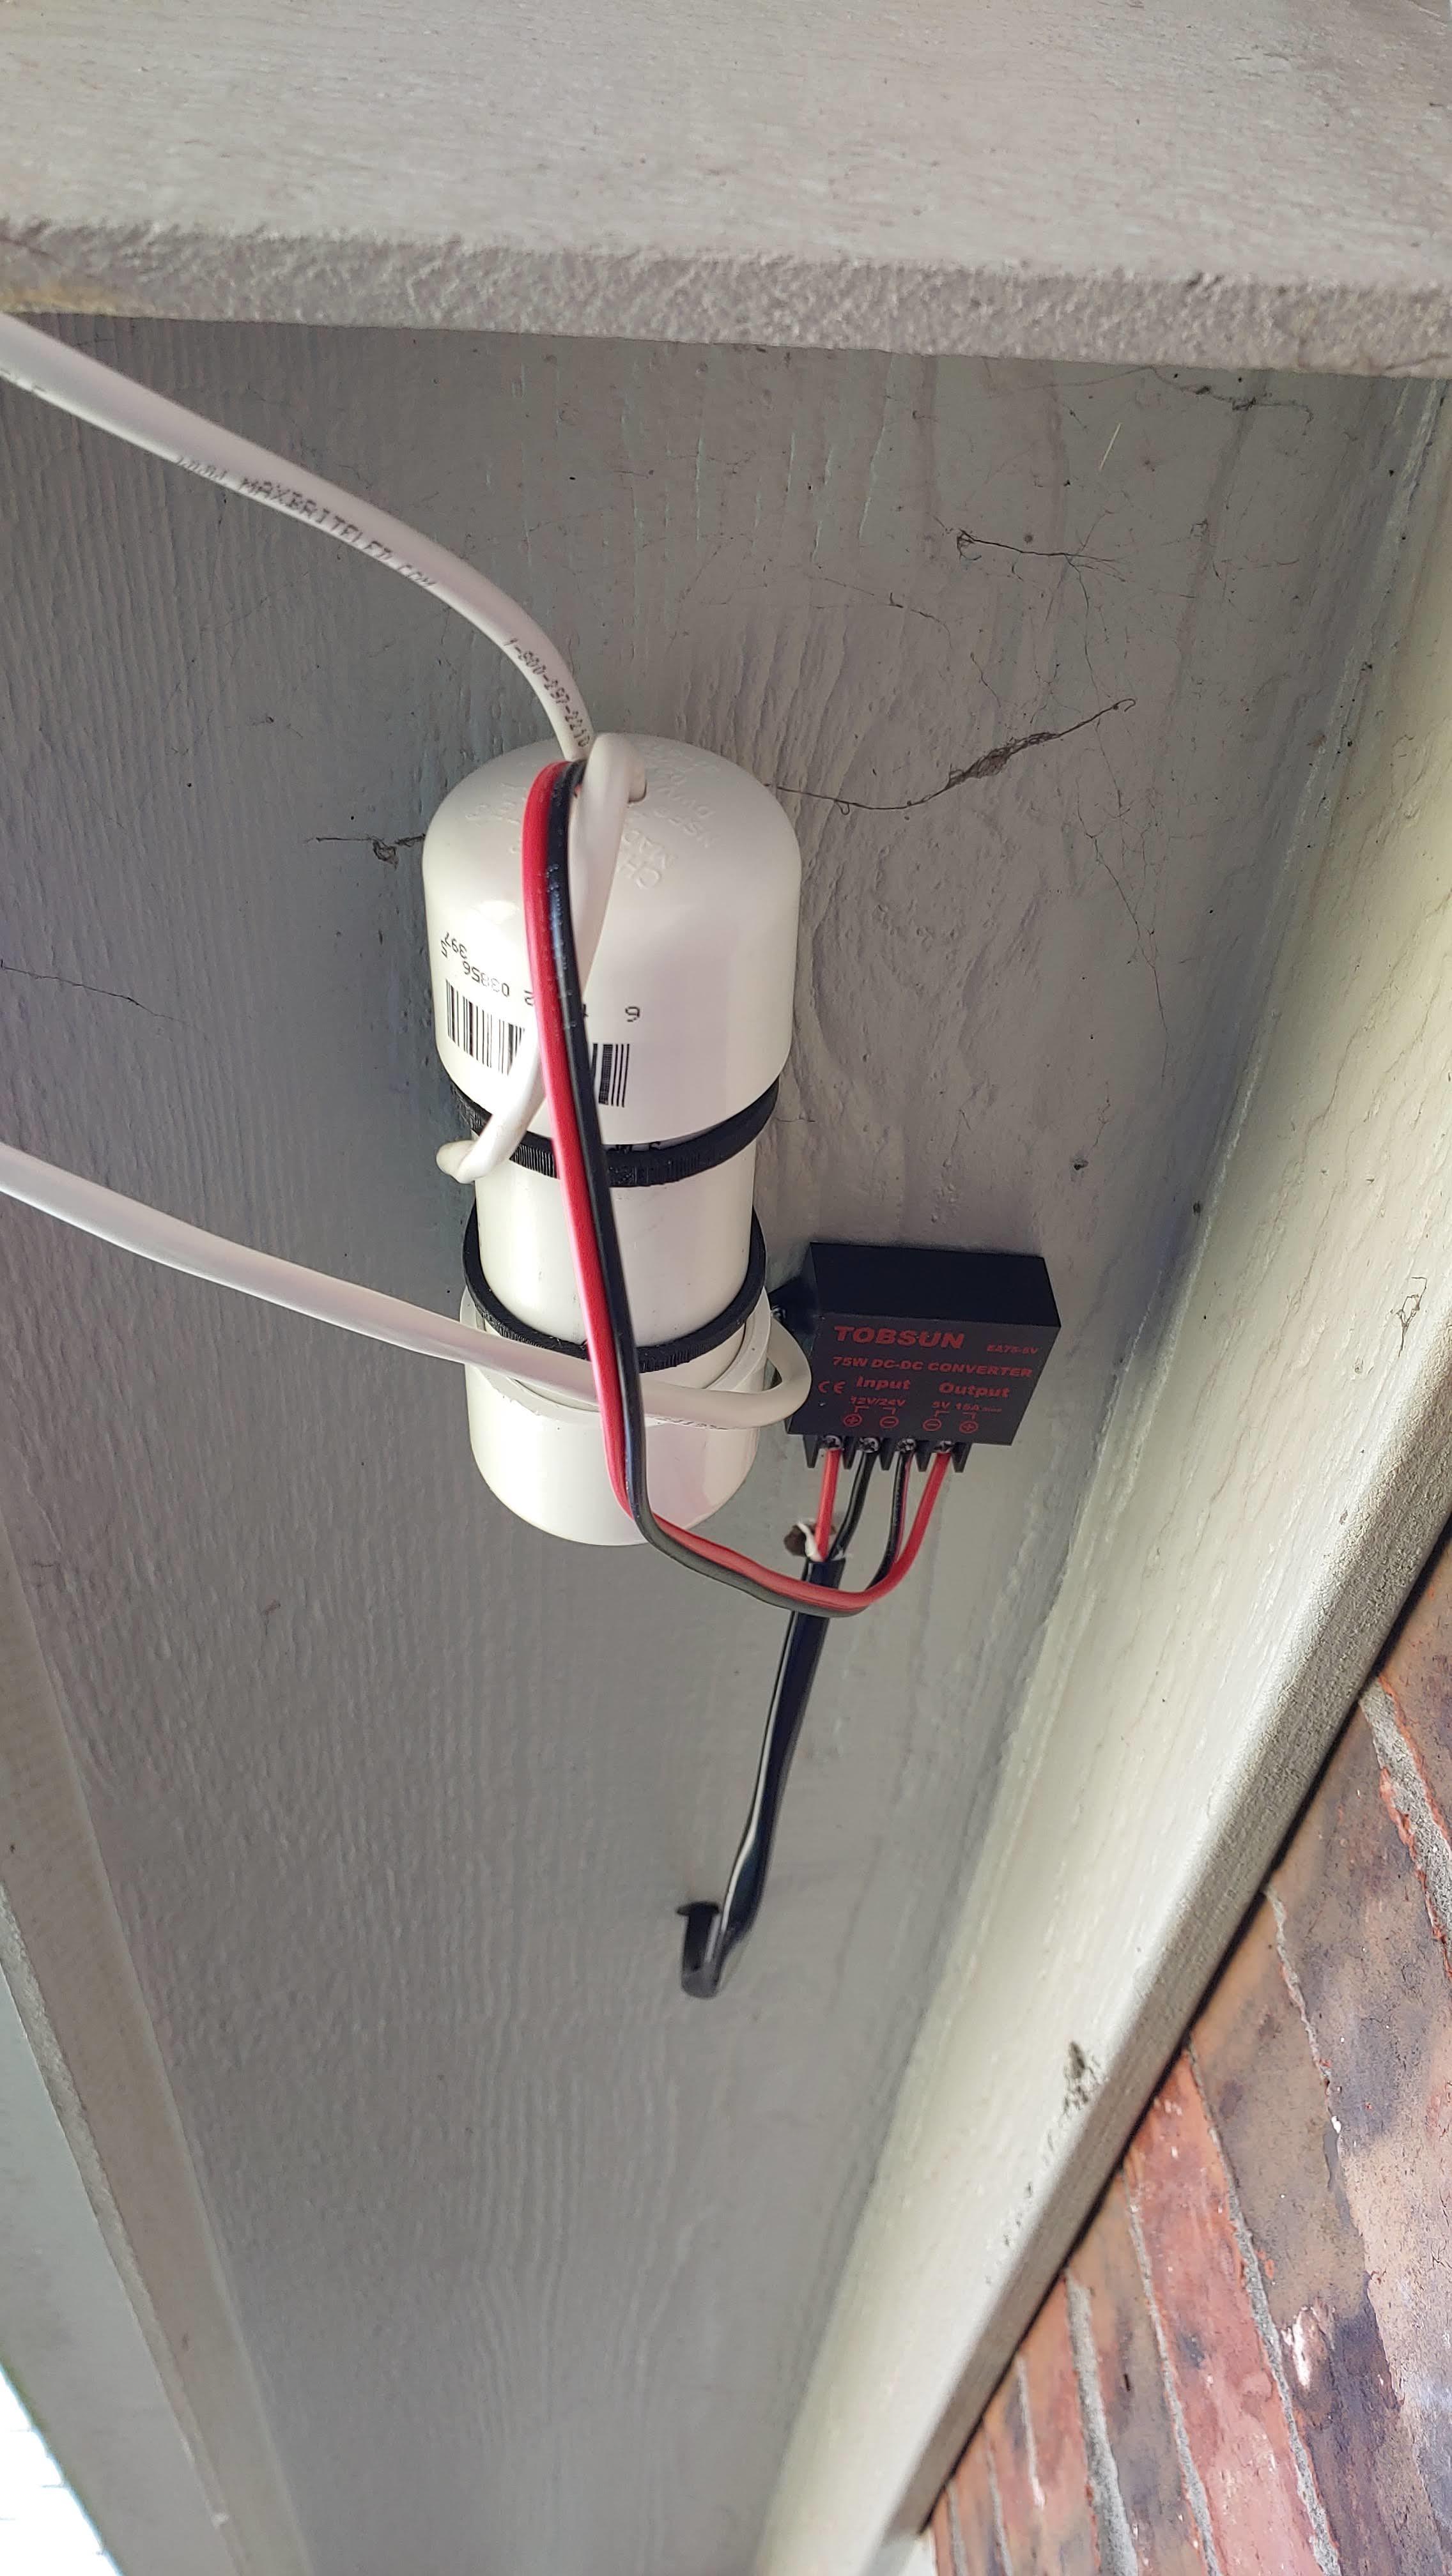
Hot diggity. Looks like this might work after all.
What you see in the picture below is a 24v power supply going through about 15’ of 16/2 wire to a 5v@15a buck converter. ESPixelStick lit up and I was able to do the rainbow effect at full LED power. Previously, it would freeze shortly after starting.
I still need to do a full white, full power test just to check, but that shouldn’t matter much. The plan will be to run the LEDs at 5-60% power most of the time. Full power lights up the entire front yard
I’ll do the full power test after running the 12/2 wire through the attic and setting everything up in the permanent setup. I also picked up some inline fuses to put on all the power lines going around the house… although 24v@12a would help my mouse problem.
Just to be clear, rhe current going through the 24V line should be a lot less (5/24 less) than the current going to the leds. The buck converter will drop the voltage and proportionally increase the current. So if you are pulling 2.4A of 5V, the 24V side will pull just 0.5A. It isn’t quite that low because of losses, but using 24V should let you use smaller wire, not require larger wire.
I don’t really care what wire you use. 12/2 just feels like a huge wire for this.
Yes. I understand that. Worst case, I should only be pulling about 4-5A through the wire.
There are enough Pixels on the strips that at full white, full brightness, I could run as high as 13a@5v. This is also running close to 90% power draw through the buck converter, which we all know is above the efficiency of most power conditioners. I’m going to try to not go above 80%, which is part of why I’ll be lowering the brightness.
Regarding the 12/2 … I ran out of all my smaller wire and I had already ordered the larger wire, so… use what you have
No better kill than over-kill.
Also… hindsight is 20/20 . I document all of this so if someone else heads down this rabbit hole, they can learn from my mistakes. If I had to do over, I would have started with a 24v or 12v power supply and used the buck converters more often. I’ll probably do this for future props as I add to the display.
@niget2002 Looks great! can you share your parts list /BOM when you get a chance? I’d like to try it out this year but don’t want to miss the window because I’m down the researching components rabbit hole. I can easily burn a few weeks on that.
Not sure what else I can provide. You’ll need to measure out the lengths on your house and calculate how many ft of the c-channel and pixels you’ll need. Also, you can probably save some money by going with just the 12v or 24v power supply and individual buck converts for the power injection.
This also doesn’t include the raspberry pi3 I’m using for running FPP for the sequences.