Been awhile since I posted! Here’s a Live Stream of a laser burn I’m doing right now… I’ll post a picture of the finished product tomorrow. Enjoy!
3 Likes
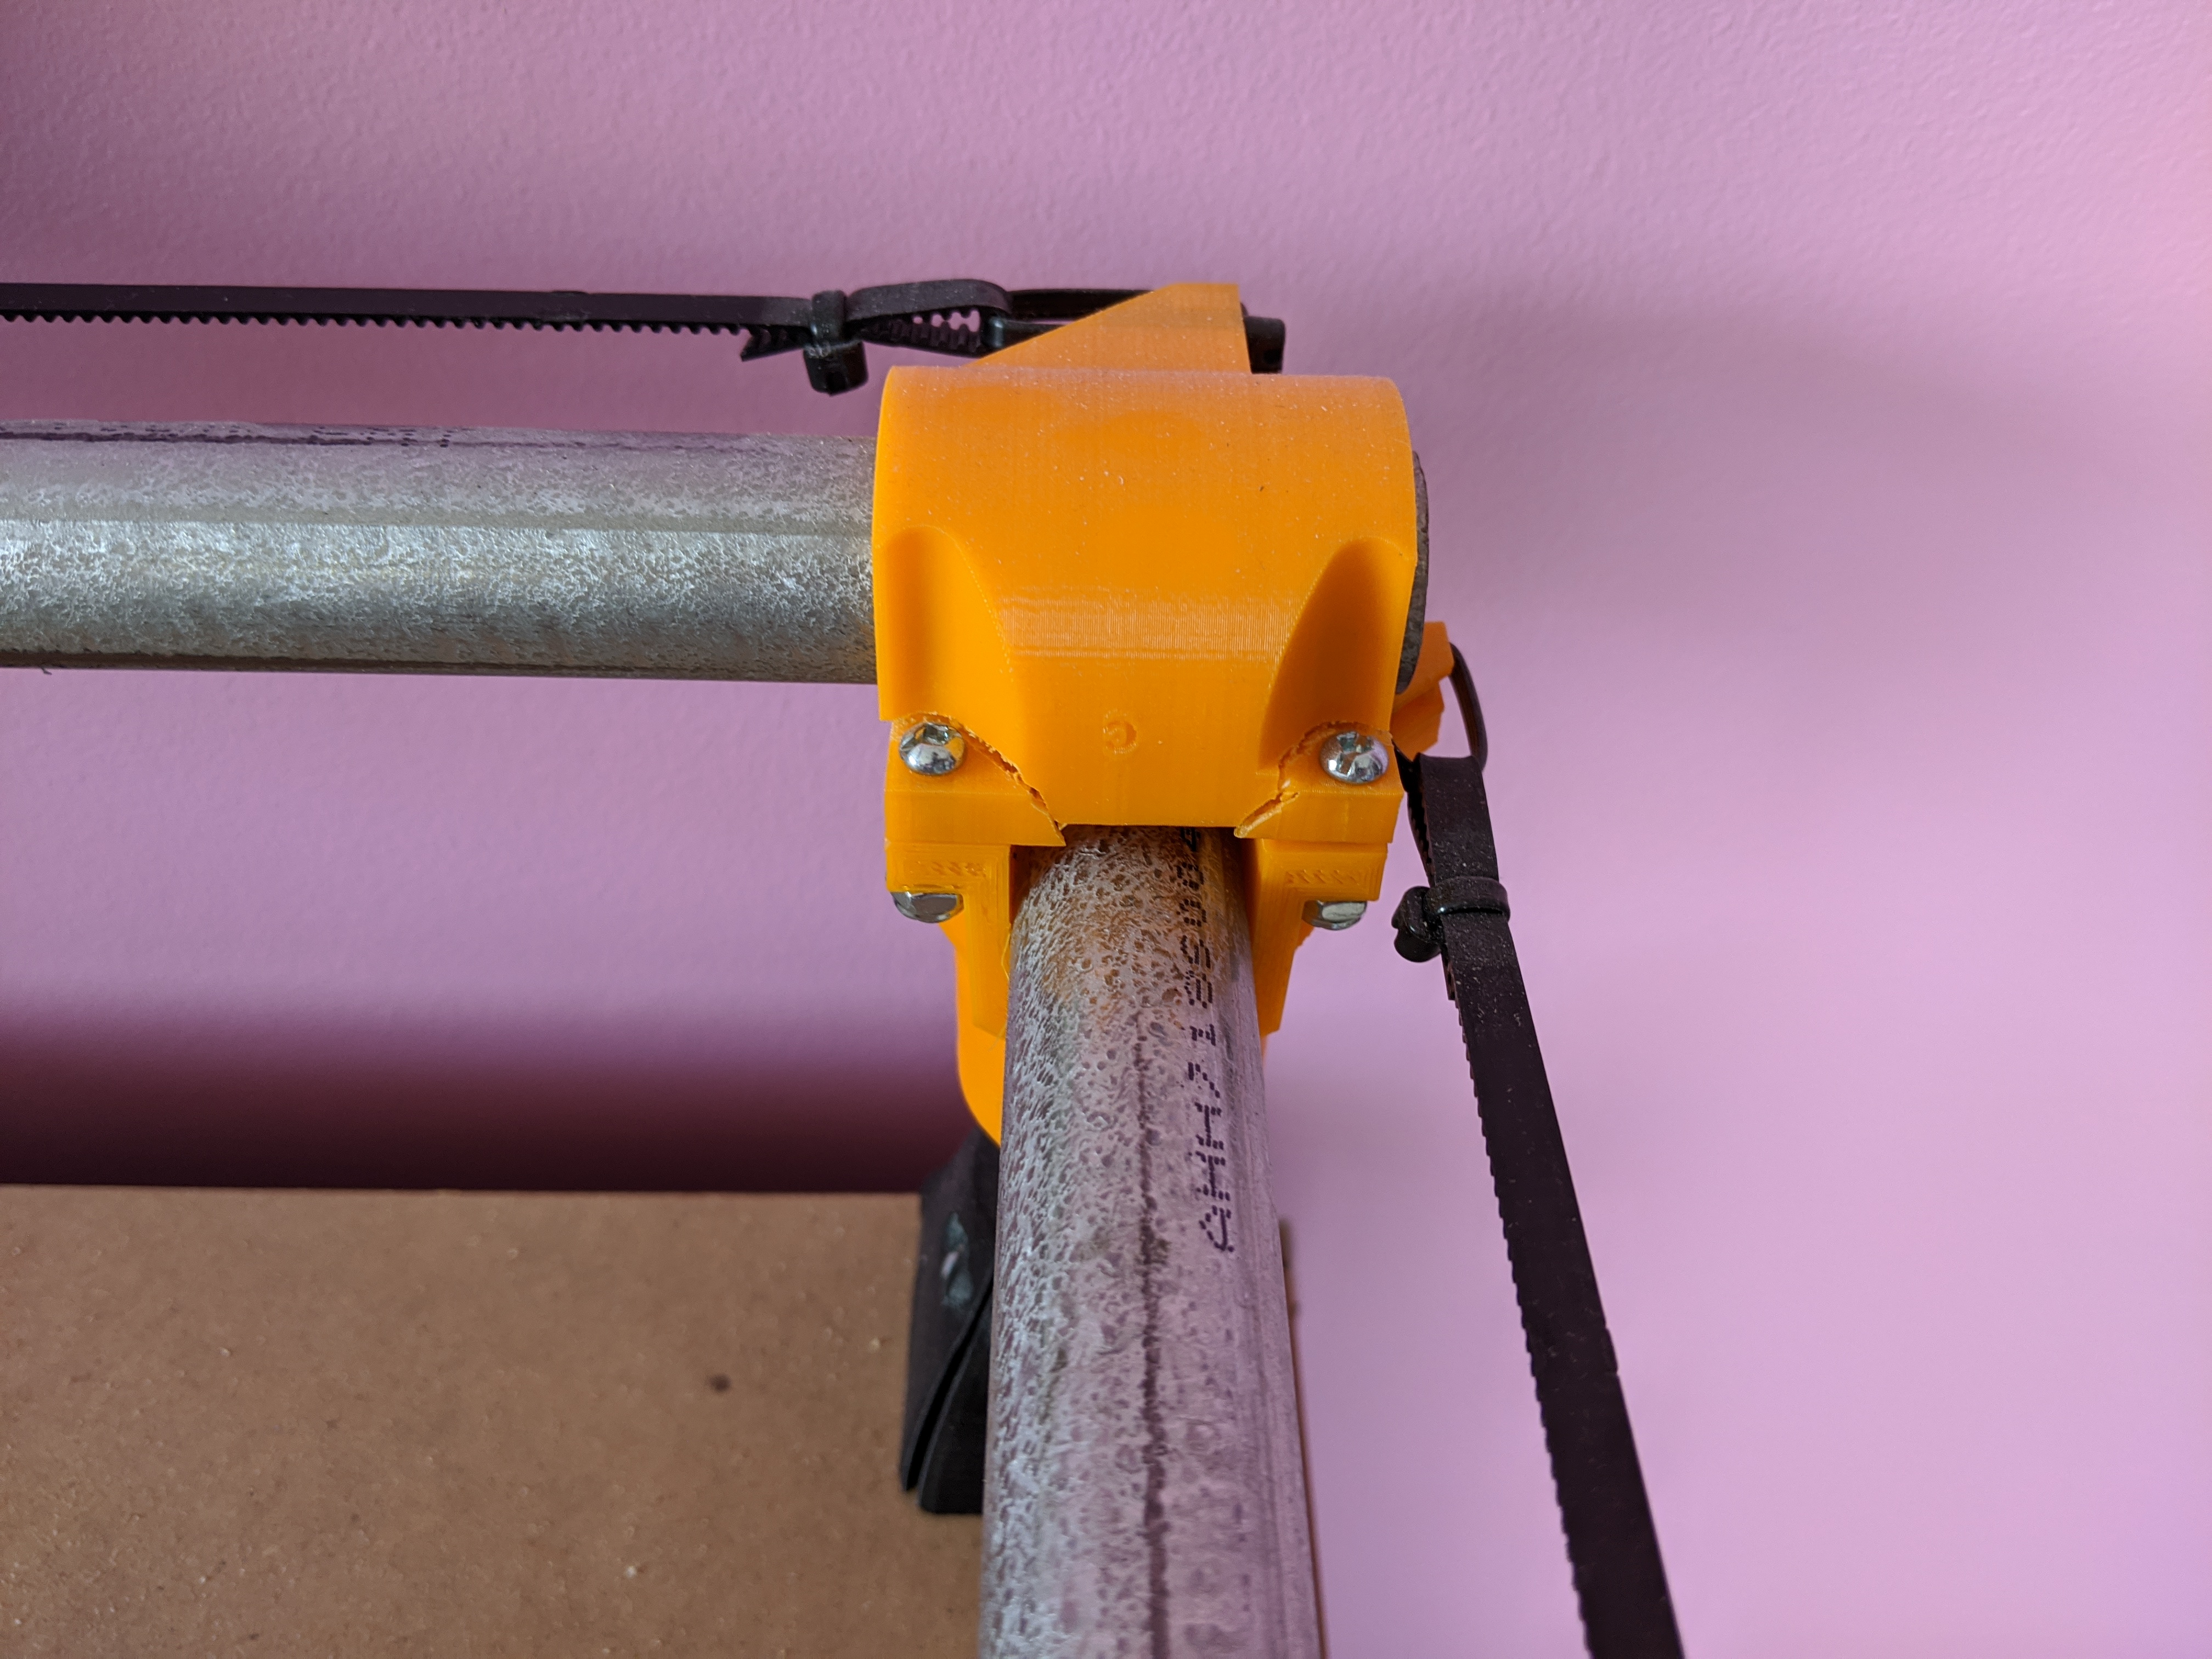
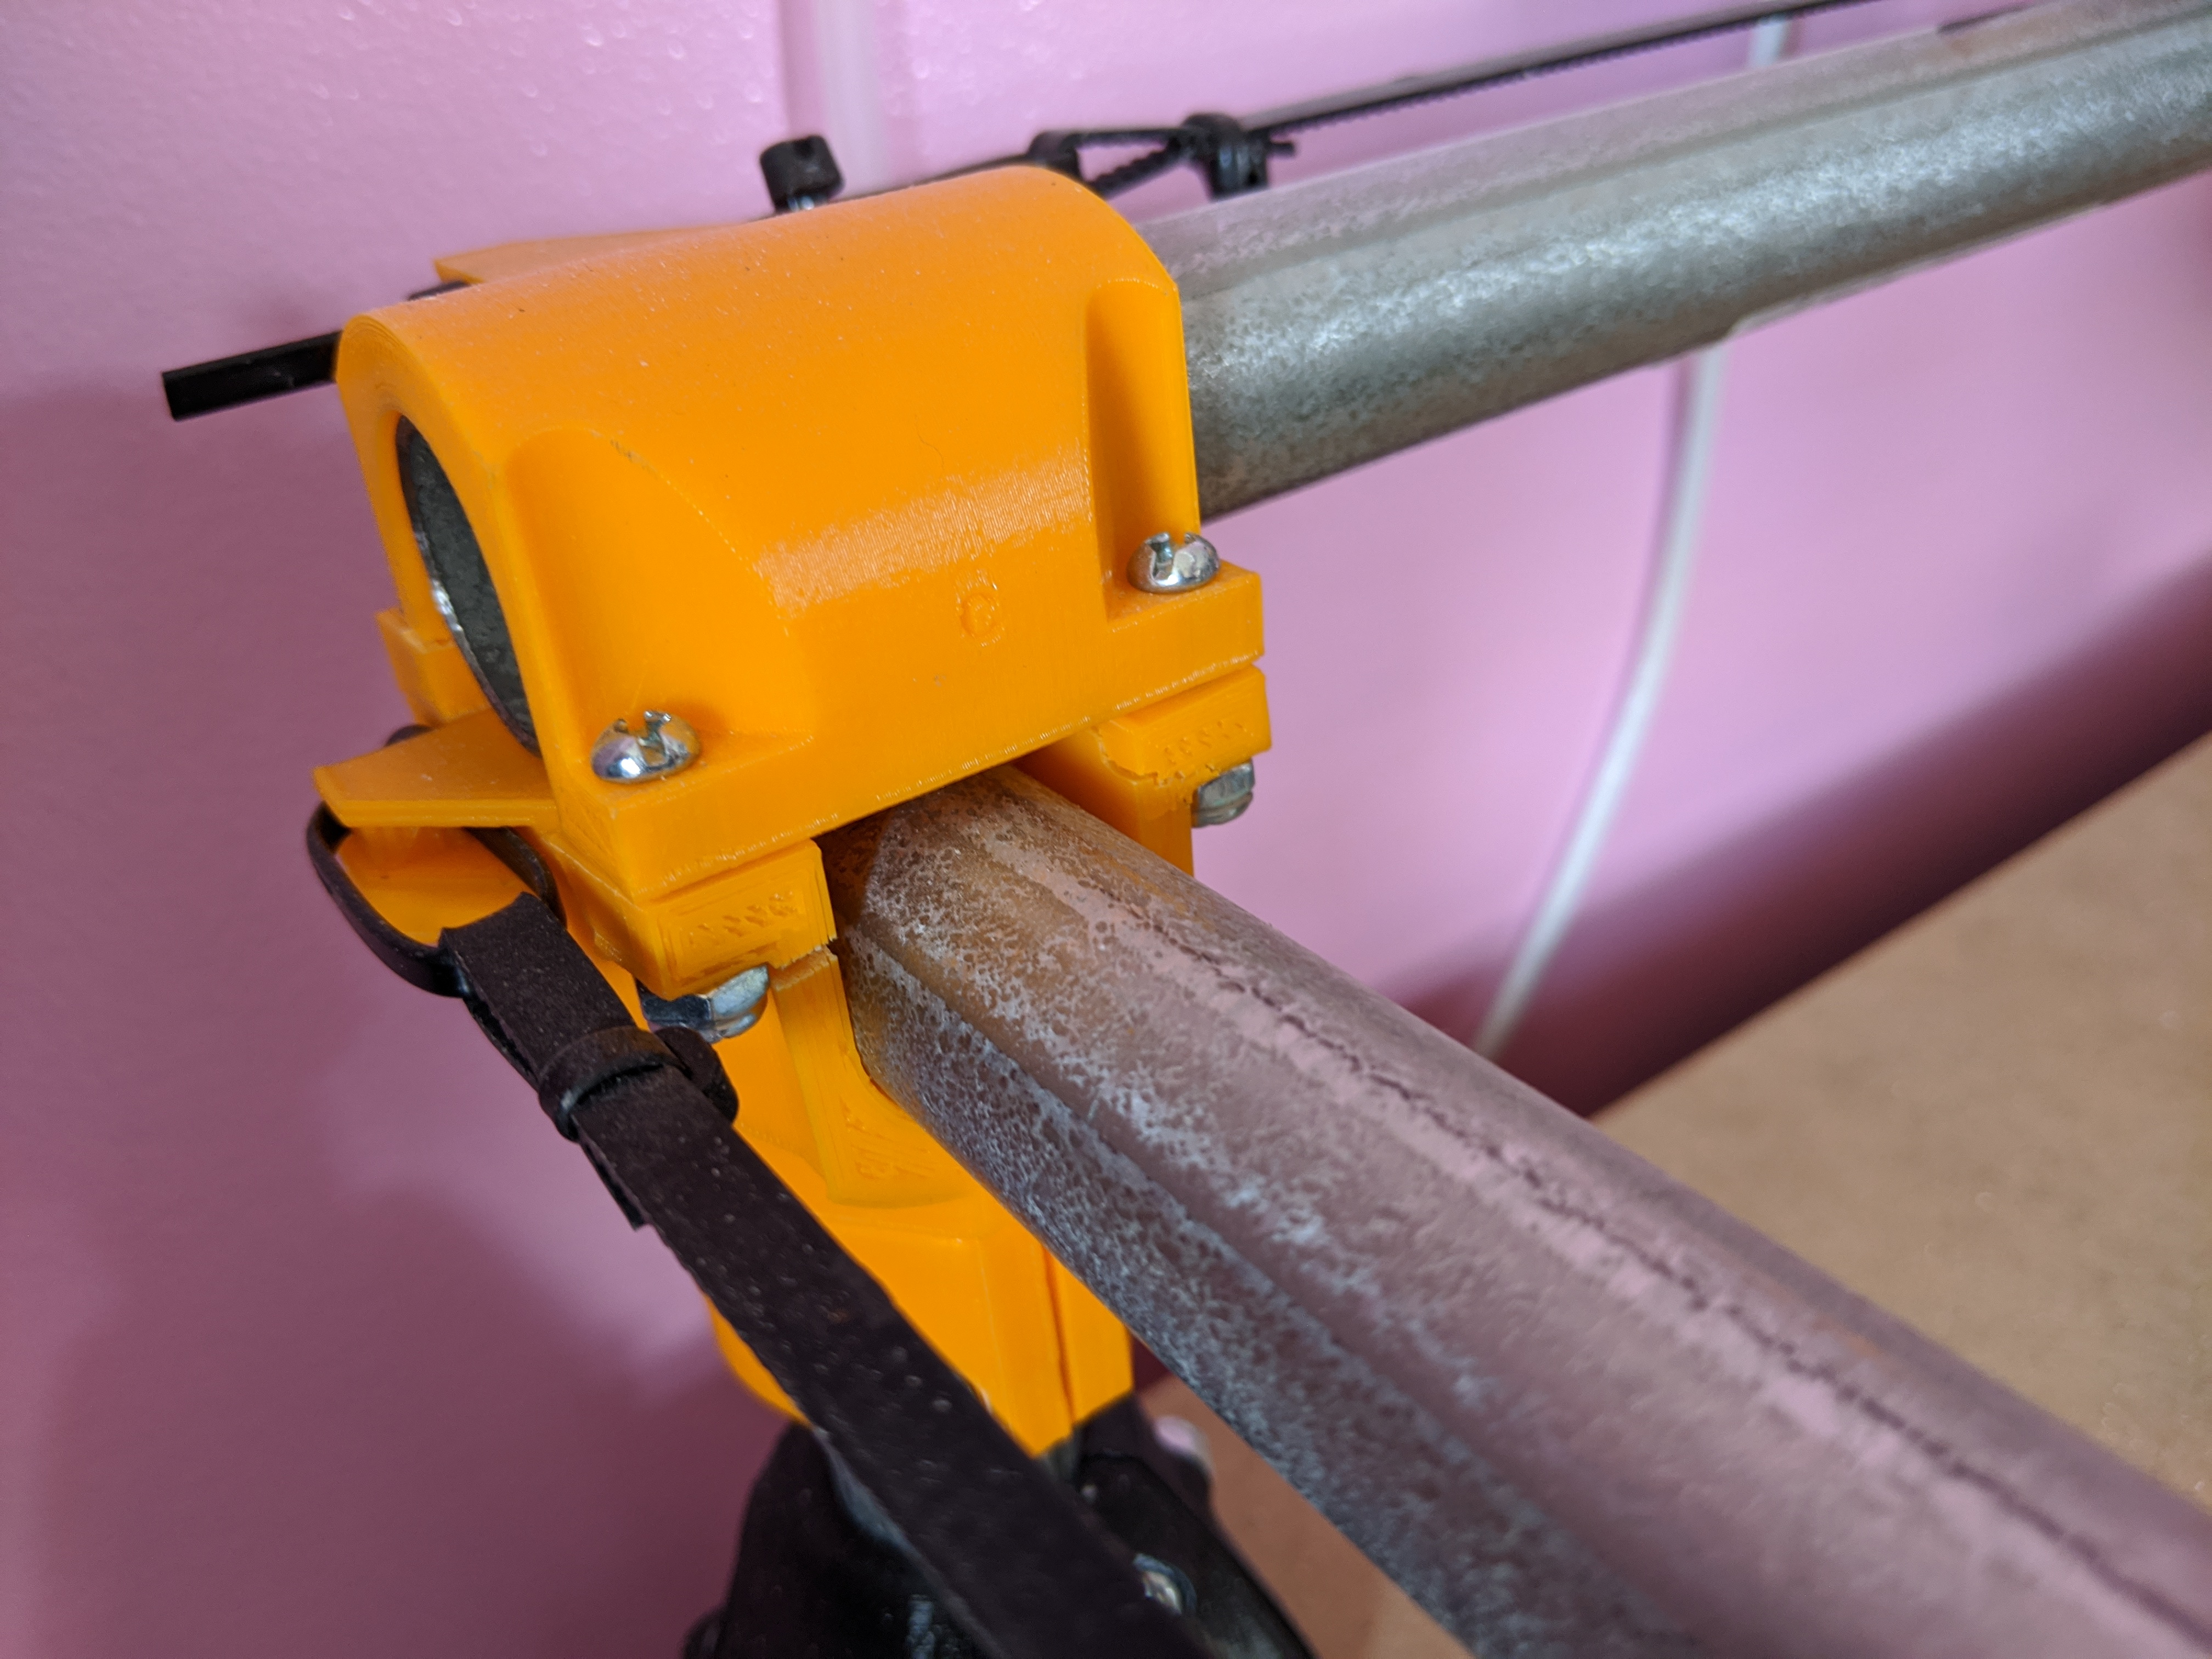
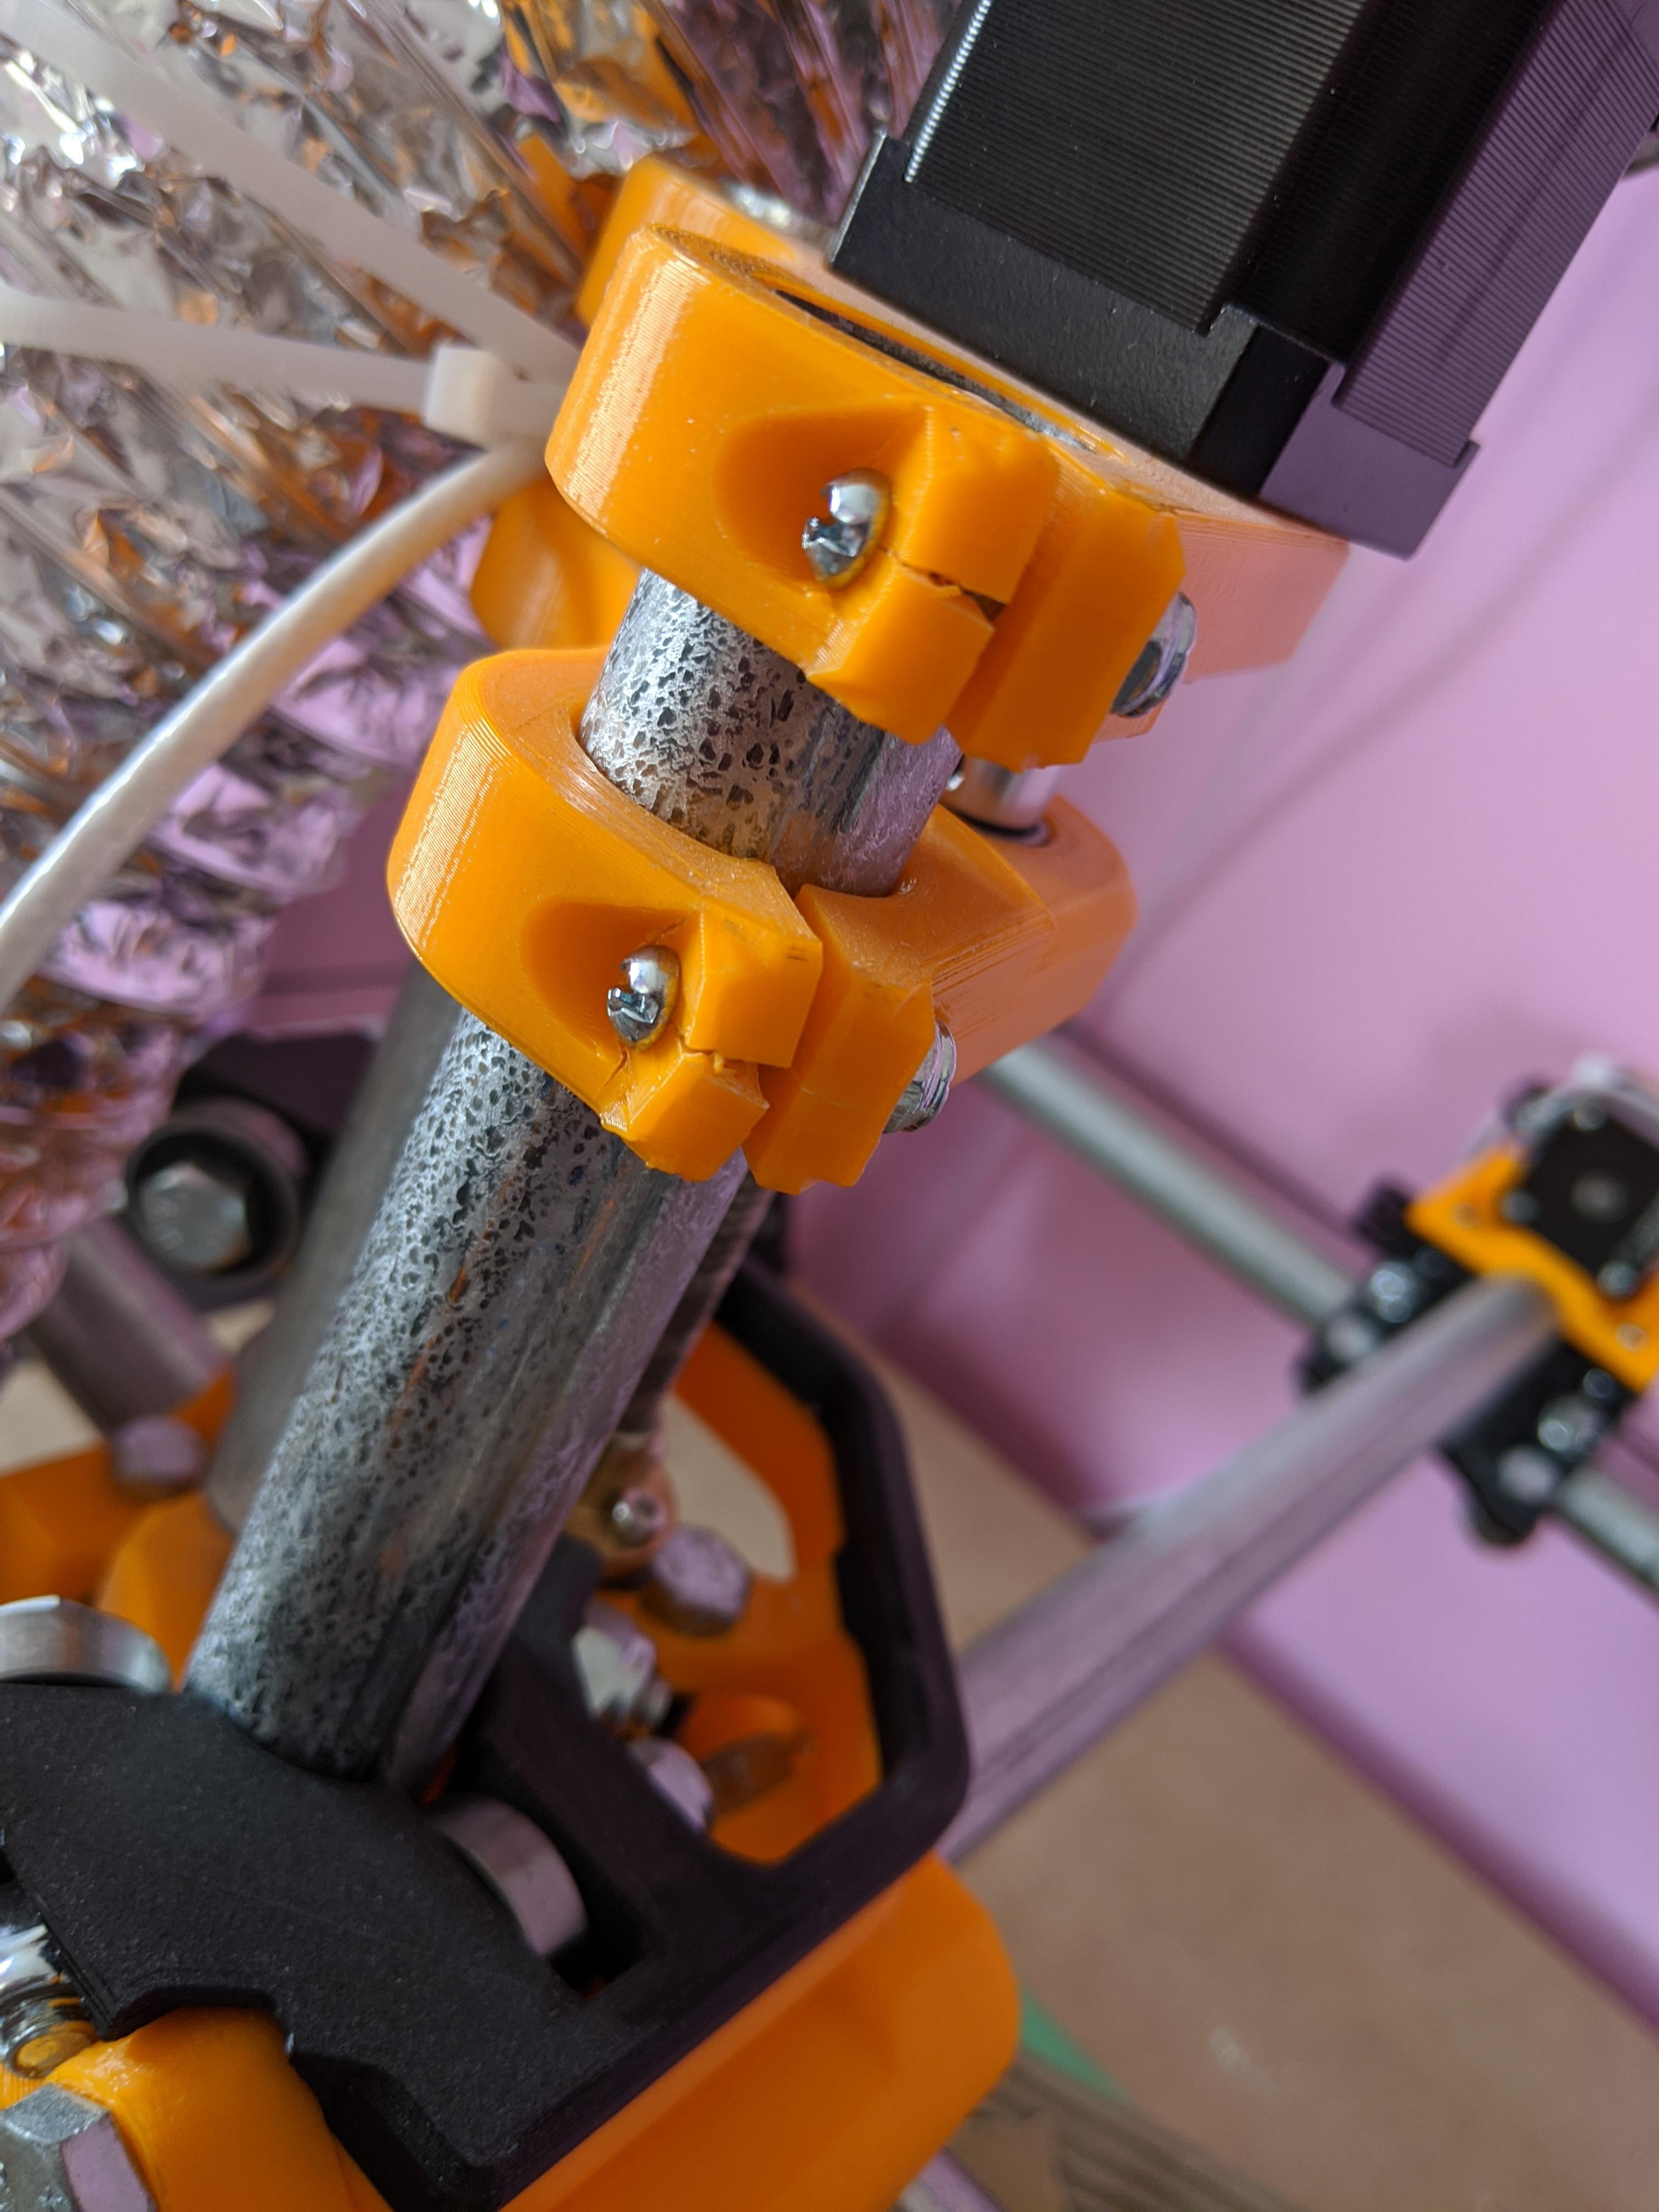
little over a year after completing my build, looked it over today because I wanted to try out the router again, I mostly use it with the laser… found a few failures from overtightening during the initial assembly. still works perfectly with the laser, but I’ll be re-printing these parts before I hook the router up to it.
Was that done in PLA?
Looks like it. Petg fails different. It generally just warps.
Yeah it was PLA. I only had my printer for a month when I started building the MPCNC, print settings were probably not ideal (and I overtightened it anyway). replacement parts are printing as I type this
1 Like
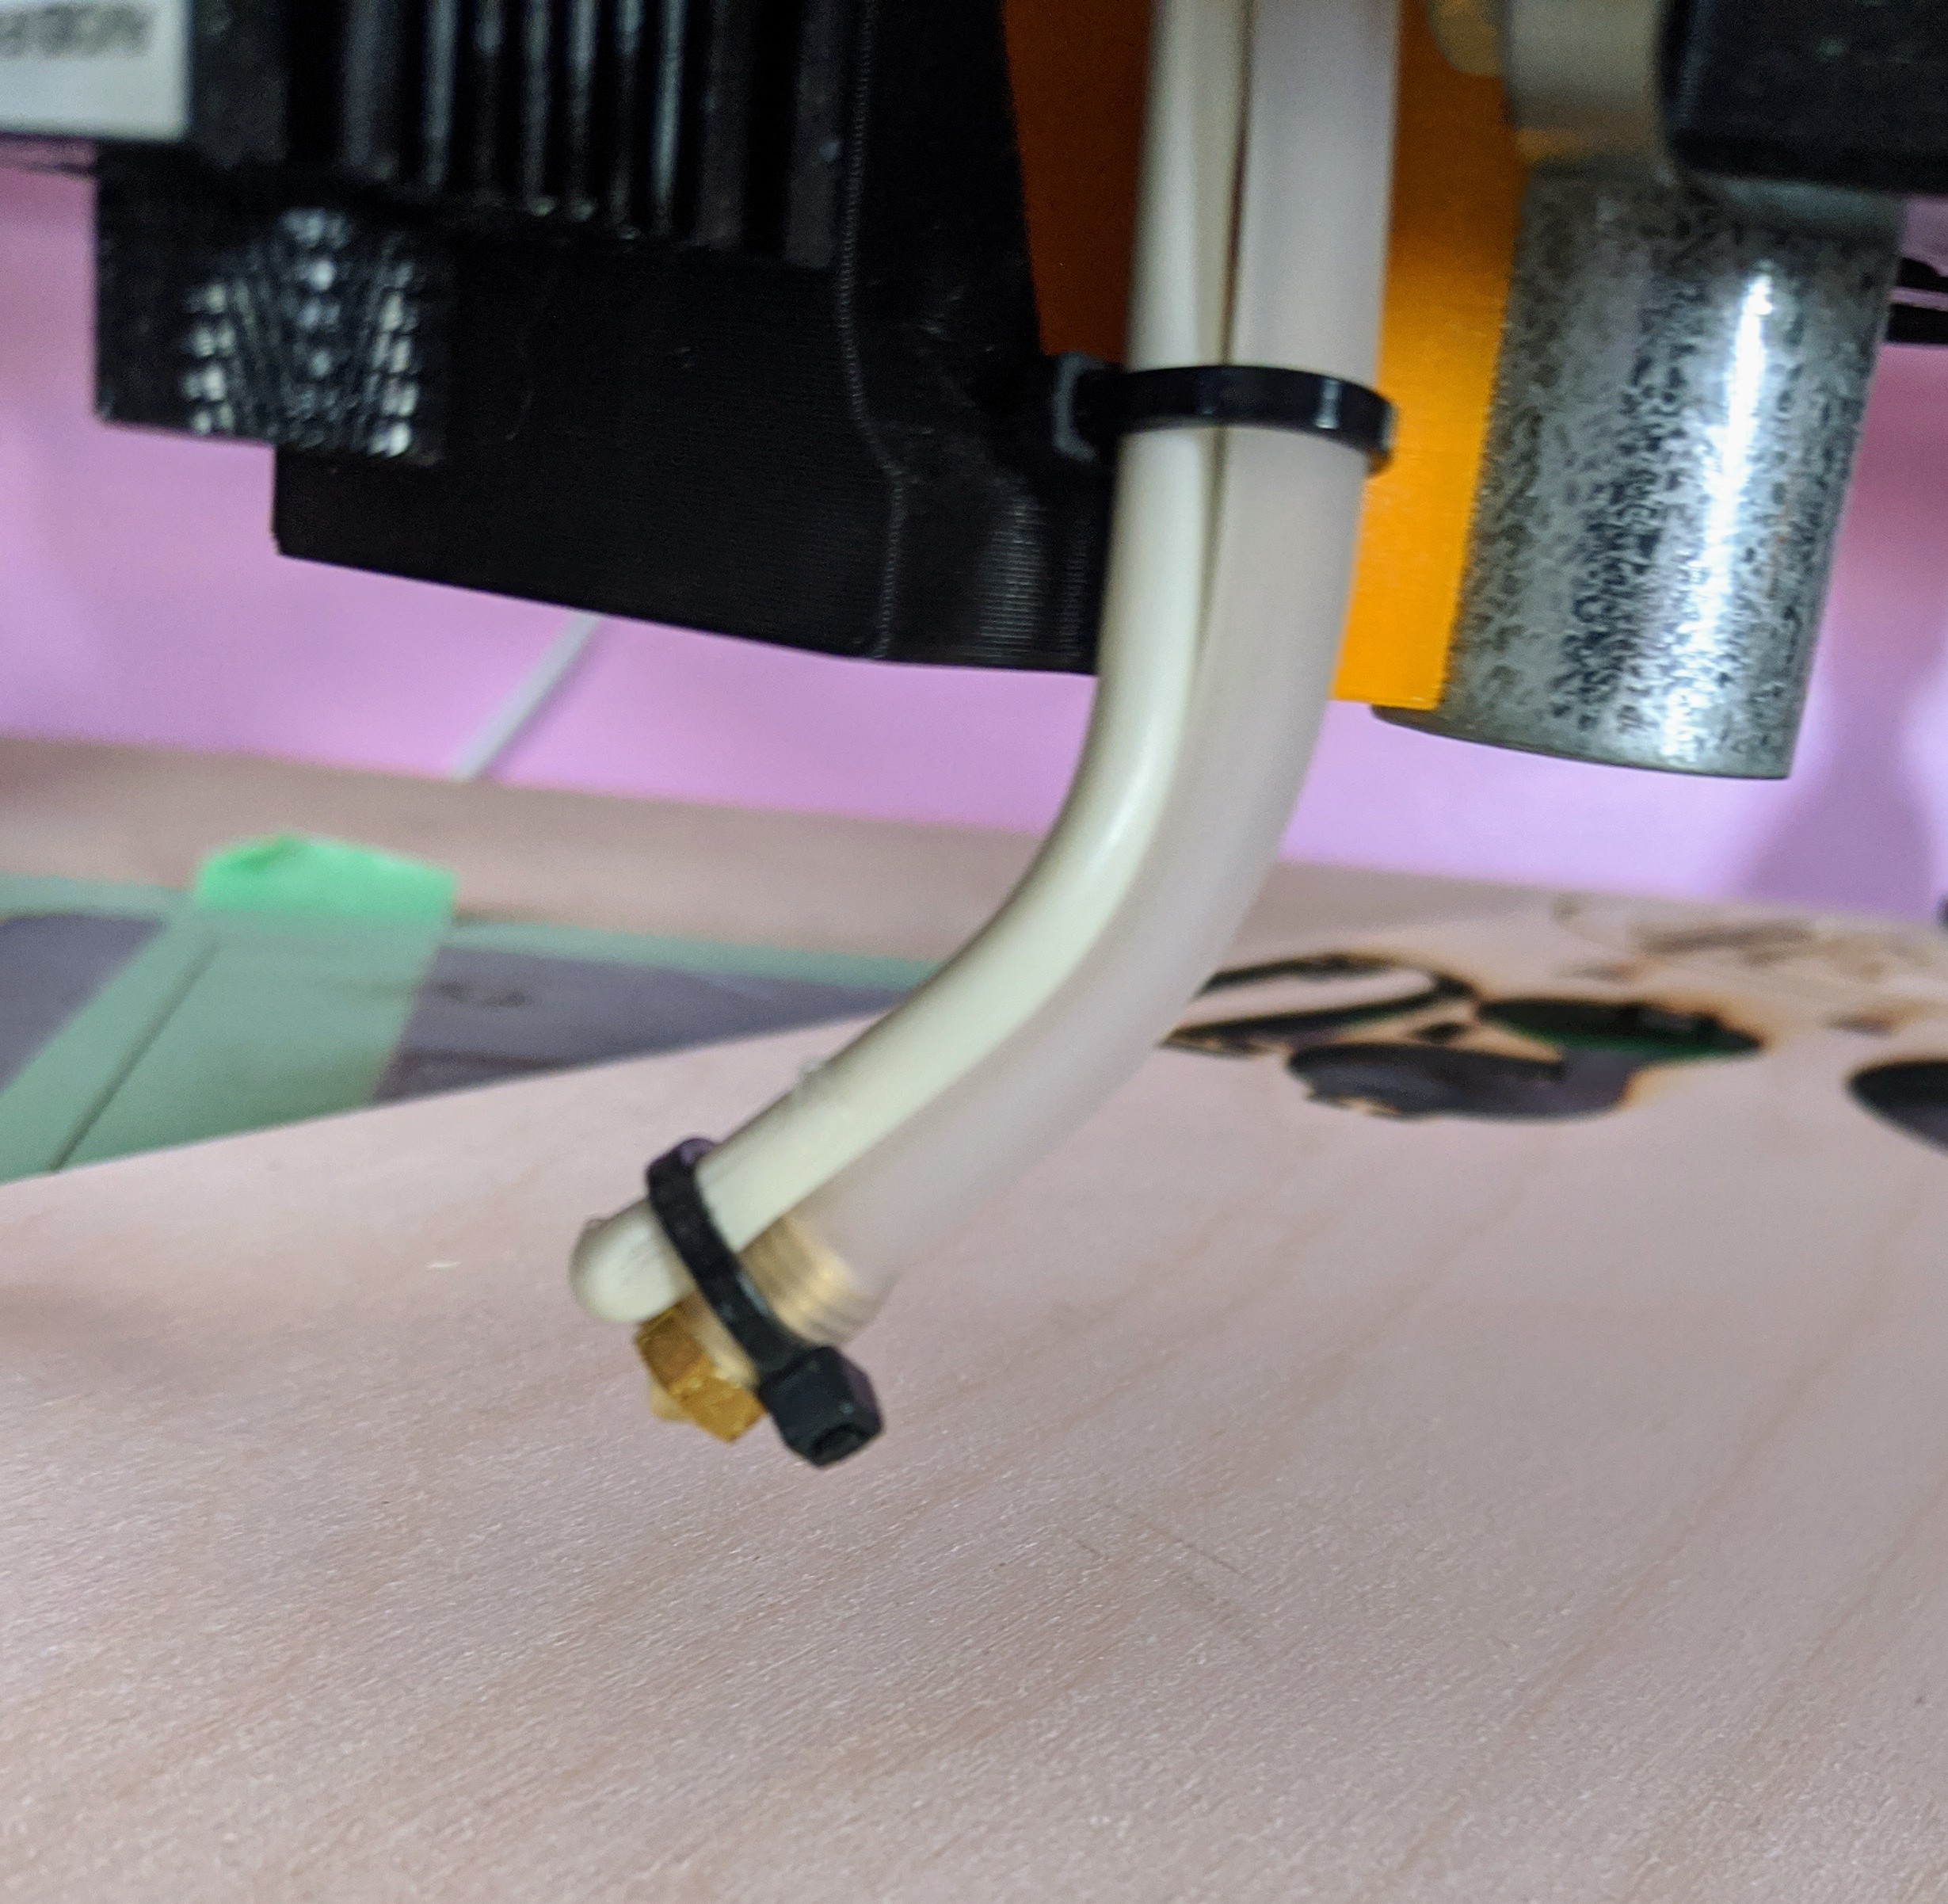
So, I have a question about laser cutting. I recently added a 40 watt aquarium air compressor to my 2.3 watt laser setup. using some silicone tubing with an 0.8mm 3d printing nozzle on the end, and it’s seemed to make a big difference in my cutting, I still seem to struggle with small sections that arent cutting.
pic of underside
7 passes, 0.43mm per step, 3.5mm/s , laser is 70mm from material surface, focused.
there is a steel plate below the work material, resting directly against it. would this negatively affect the cut?
should there be space below the material? I’m wondering if the steel plate is ‘sinking’ the heat somehow?
here’s a pic of my air output. it’s zip tied to a bent 10awg copper wire which is scewed to the universal mount, aimed directly where the laser is
2 Likes
That is a clever mount for the air blast 
The steel is a heat sink, but the wood isn’t that conductive (and the steel isn’t either). The heat gets there very fast and is very focused. I would be money it isn’t the steel.
Does it just need one more pass or a little less speed? What size material is that? Cutting through it at all with a diode is impressive.
1 Like
Try it out a 1/8 in spacer under it and Try again
1 Like
3mm. it does cut through with enough passes… it seems to need multiple extra passes for those last few bits for whatever reason. I just need to spend more time with it I think. either way I might add some space underneath because I imagine it’d help with staining.
…it can actually make it through 7mm with enough passes!

1 Like
Firmware update time.
Looks like there have been quite a few improvements since I last flashed a year ago.
Was running 302, updating to 414 (Marlin-MPCNC_Ramps_T8_16T_LCD_32step )
recording changes I need to make between builds during the update, or start from scratch for whatever reason. (mostly for myself to remember).
- 10hz trick --comment out 5 lines in Marlin.cpp to remove 10hz delay from laser output on fan pin
Marlin.cpp
// Limit check_axes_activity frequency to 10Hz
//static millis_t next_check_axes_ms = 0;
//if (ELAPSED(ms, next_check_axes_ms)) {
planner.check_axes_activity();
// next_check_axes_ms = ms + 100UL;
//}
- Steps per mm for 16 step driver instead of 32
Configuration.h
//#define DEFAULT_AXIS_STEPS_PER_UNIT { 200, 200, 800, 200 }
#define DEFAULT_AXIS_STEPS_PER_UNIT { 100, 100, 400, 100 } // X, Y, Z, EO 16 steps
- Remap pin 9 to 44 for 5v laser PWM
pins_RAMPS.h
#define RAMPS_D9_PIN 44 //REMAPPED 9 to 44 for 5v laser PWM output
1 Like
might have shrunk this down a bit too small for the tool size, still impressed. I’m about to upsize my MPCNC, I already have the conduit – just waiting for the belts. I also have a K40 showing up tuesday, and an MKS SBASE 1.3 to replace the controller it comes with. I was thinking about eventually using the MPCNC as an upgrade to the size of the CO2 but after reading a bit on the forum I think I’ll probably end up making another corexy system using 2020/2040 for the size upgrade when it happens eventually/inevitably.
I’ve realized lately there’s a lot of great free wood to find on kijiji in my area, people giving away headboards, tables or dressers made from real wood. doesn’t take too long to break them down. makes it easier to experiment when you don’t think every cut will cost $$
3 Likes
my MPCNC has been relocated! It used to live in the office, where it was used mostly with a 2.1w laser attachment which wasn’t very messy but made it hard to use the router.
I’ve since moved it to the shed, in the interest of making chips fly!
I remember seeing a post of a melted MPCNC and wanted to avoid that at all costs… I know the shed gets pretty hot but I wasn’t quite sure how hot.
I 3d printed a few vents to add to the shed, and I’ve leaving the window cracked… but still had no idea how hot it’ll get in the heat of the summer.
So, I whipped something up with some old arduino stuff I had laying around.
…an Ethernet Shield, Uno, RTC (clock) and temperature probe.
I have an old router setup as a wireless bridge so I have internet access for the laptop/ip camera/arduino.
I setup the arduino to automatically log the temperature data to a Google Sheet spreadsheet. this makes viewing/analyzing everything soo easy.
I had to use Pushingbox because my arduino device doesnt support SSL or HTTPS, which limits me to 100 transactions a day, or every 15 minutes (which is more than enough resolution for this purpose).
If you used an SSL capable device there are alternate workflows which eliminate third party software so you can go straight from the device to Google Sheets.
https://www.hackster.io/detox/send-mkr1000-data-to-google-sheets-1175ca -this is using pushingbox for non SSL devices (100 transaction limit per day for free plan)
https://www.reddit.com/r/arduino/comments/9zsmlv/super_easy_cloud_data_logging_with_google_sheets/ -this is for direct to google sheets for SSL capable devices
To take things a step further, I added a relay controlled 12v fan which is mounted on one of the vents, programmed to automatically push air out of the shed if it reaches a certain temperature (or if I hit the manual over-ride).
…I should be receiving my K40 today too, just picked up a bunch of distilled water

1 Like
I did something similar with smart things in our sun room. If it get above 80 in there I have a fan on a controllable plug turn on.
No more trips to the drugstore for greeting cards!
insanely thin wrapping paper required 15% power and 50mm/sec to prevent cutting through, it burns all the colour off so backlit looks fantastic.


on a more depressing note, I suspect the flyback transformer or tube on my freshly delivered K40 is DOA. test button on the PSU doesn’t fire the laser
6 Likes
That is a great idea. I think I could do something similar with a marker. Probably not as nice, but this is an excellent idea.
1 Like
Hello, I’m from Toronto as well and also looking to build the MPCNC. I have a few questions I hope you can answer them whenever you have the time:
- What kind of EMT are you using and where did you get it?
- Did you pay any duties or fees when having your bundle parts delivered? If so, do you remember the amount?
I found some 3/4" (0.992" OD) EMT at Lowe’s for $30/20ft but I’m wondering if there is anything better I haven’t heard about around Toronto. I was also looking for SS, but the quotes were way too pricey.
Thanks!
Exciting! Nothing beats seeing it move for the first time. I just got my EMT at Home Depot… careful with the 20ft lengths I’d imagine they’ll be in worse shape than the 10ft lengths.
Anything I didn’t already have I sourced locally, so I can’t help you with #2… I’d definitely order from Ryan if you can though, especially with the current state of things, sourcing elsewhere would be a nightmare.
Be sure to start a build thread! I’d love to follow along and help out if I can, although there are plenty of other experts who are great at helping everyone out (including Ryan himself)
2 Likes
MPCNC size upgrade is well on its way. table is made, new longer conduit in place and the frame is all squared up. I’m going to run dual endstops this time.
Also I got my new K40 working today, the connector on the flyback transformer (inside the PSU) was loose! I replaced the M2 Nano with a MKS SBASE 1.3 running smoothieware too.
Too many projects on the go!
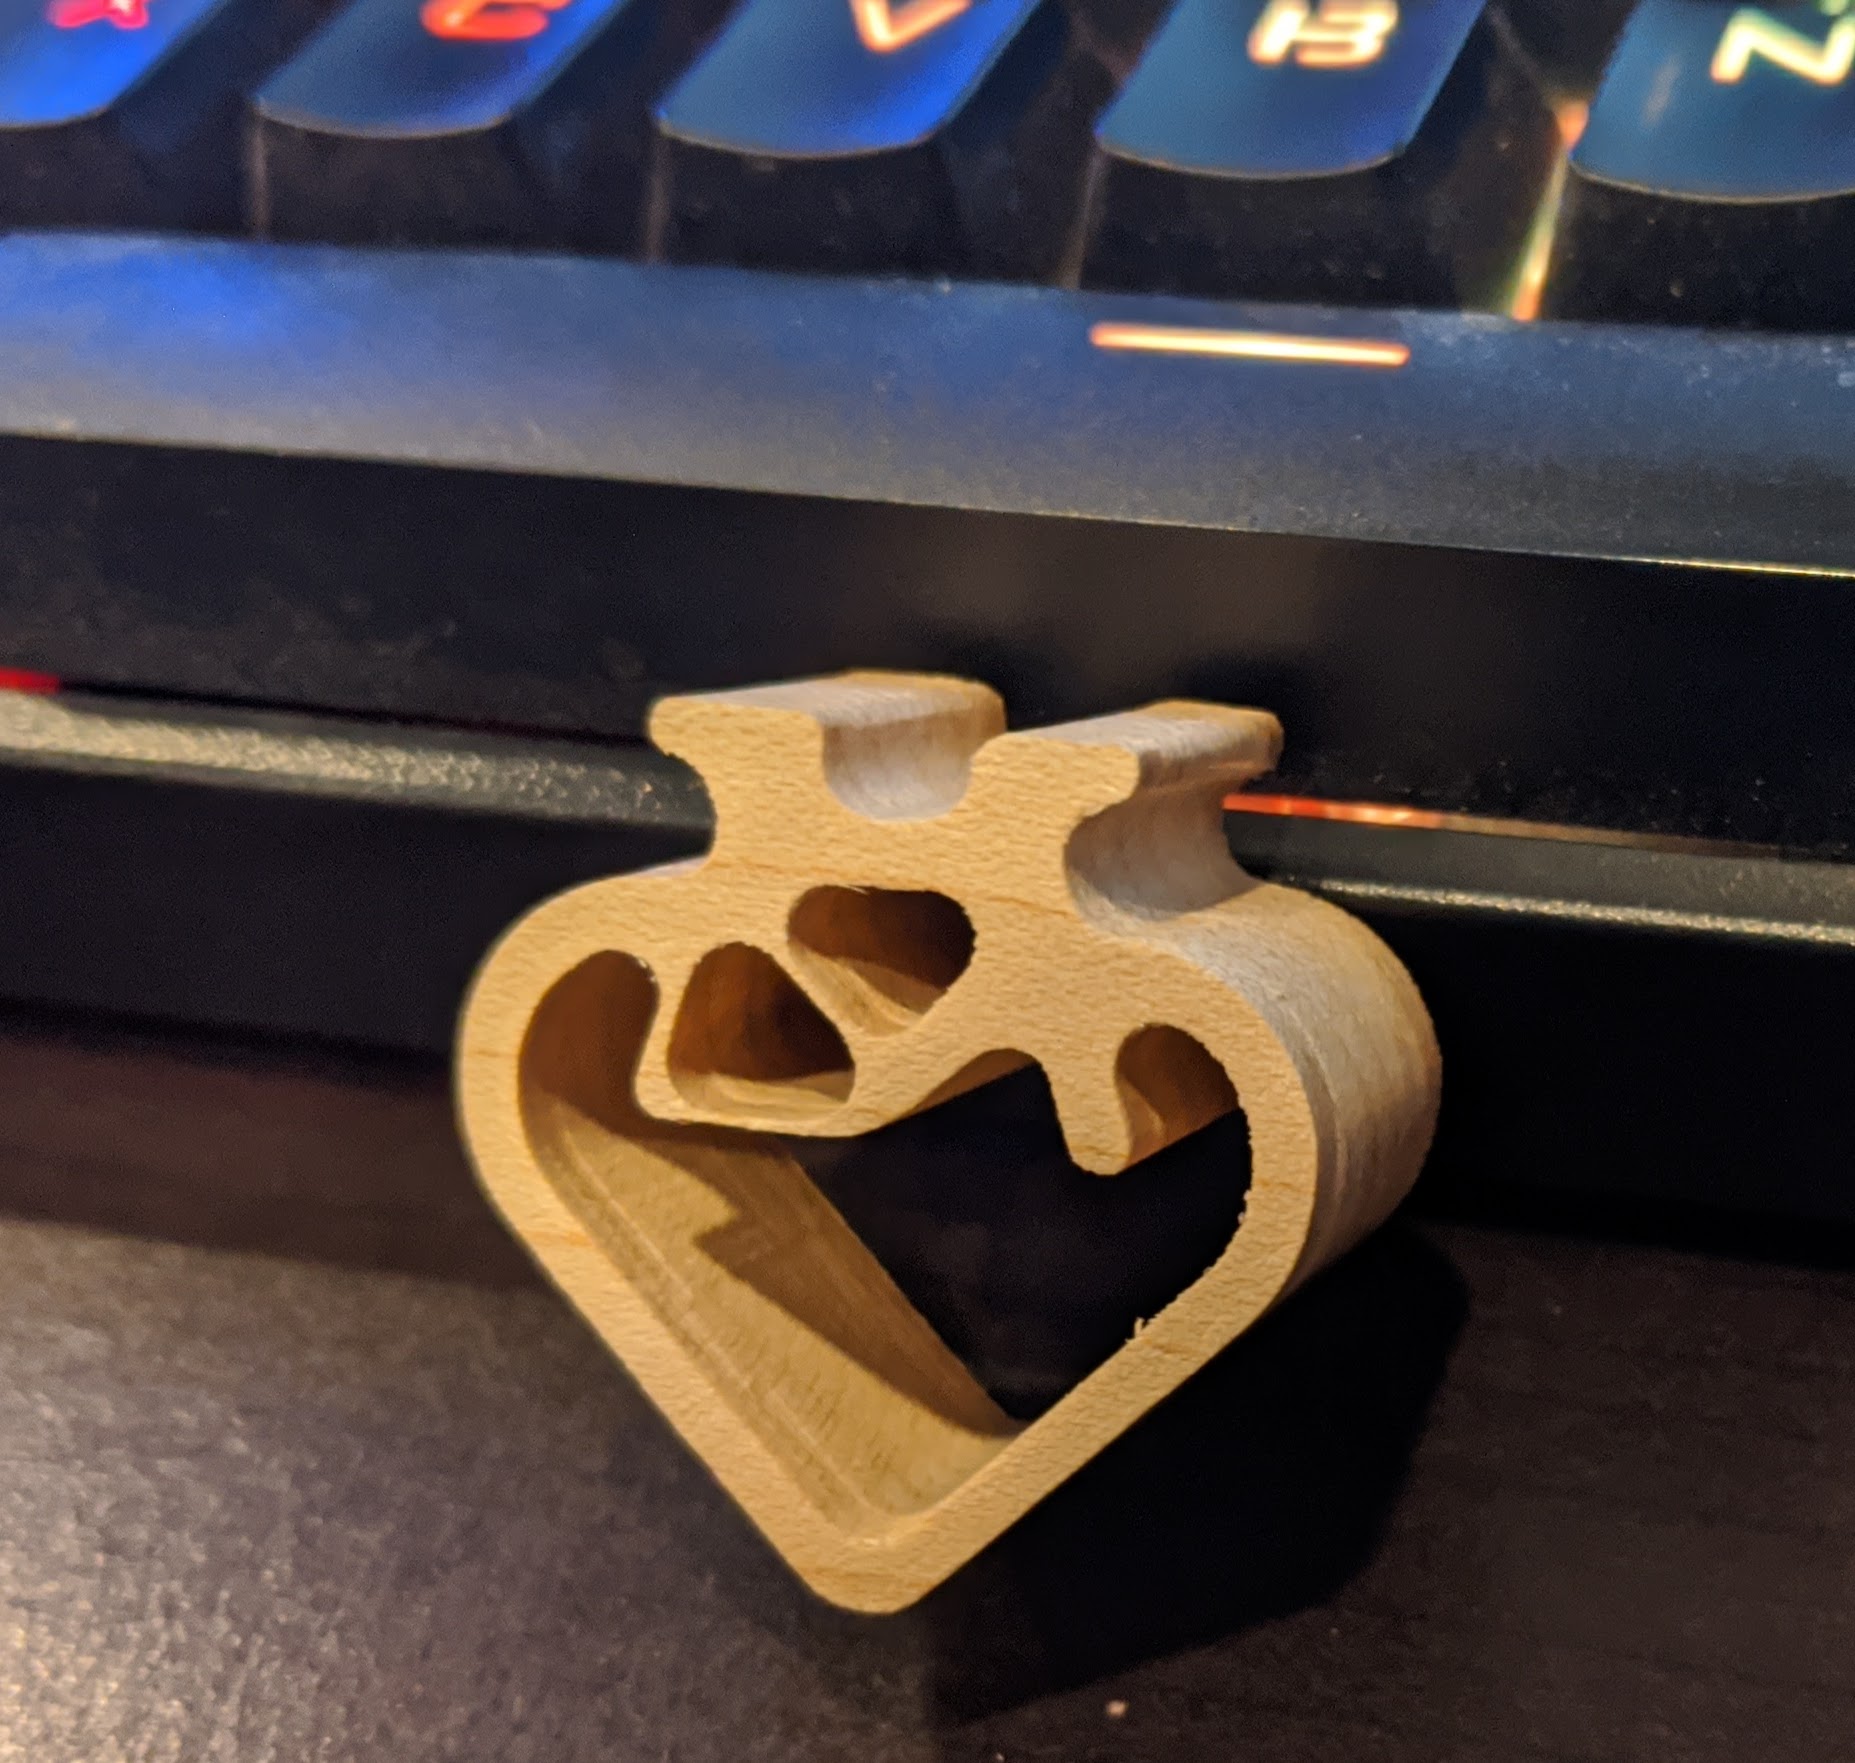
Latest creation. made with the new table(new MPCNC size) 3ft x 4 ft. not setup properly yet – rushed together as I needed/wanted to make this
This is the hardest wood I’ve ever cut. reclaimed from a table. laser was done with my new K40. edges rounded with handheld router.
it didn’t cut as smooth as my 2x2 but it was really rushed together, and way harder wood than I’ve cut… I’m inexperienced still honestly. I’ll spend some time getting dual endstops setup and square it off a bit better and get some pics posted of the new size.
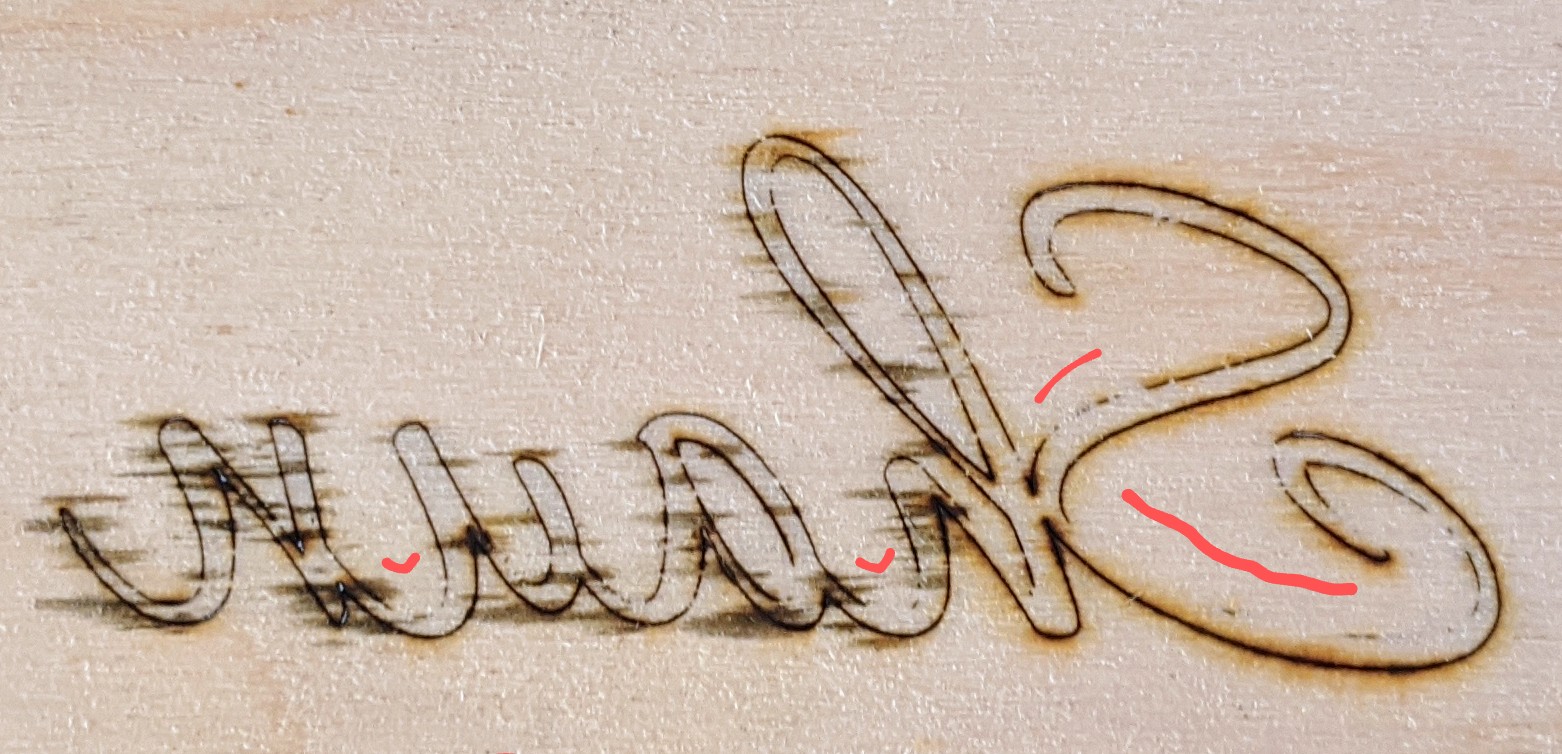
in the meantime, here’s a post of the latest project (etched with k40, cnc with MPCNC)
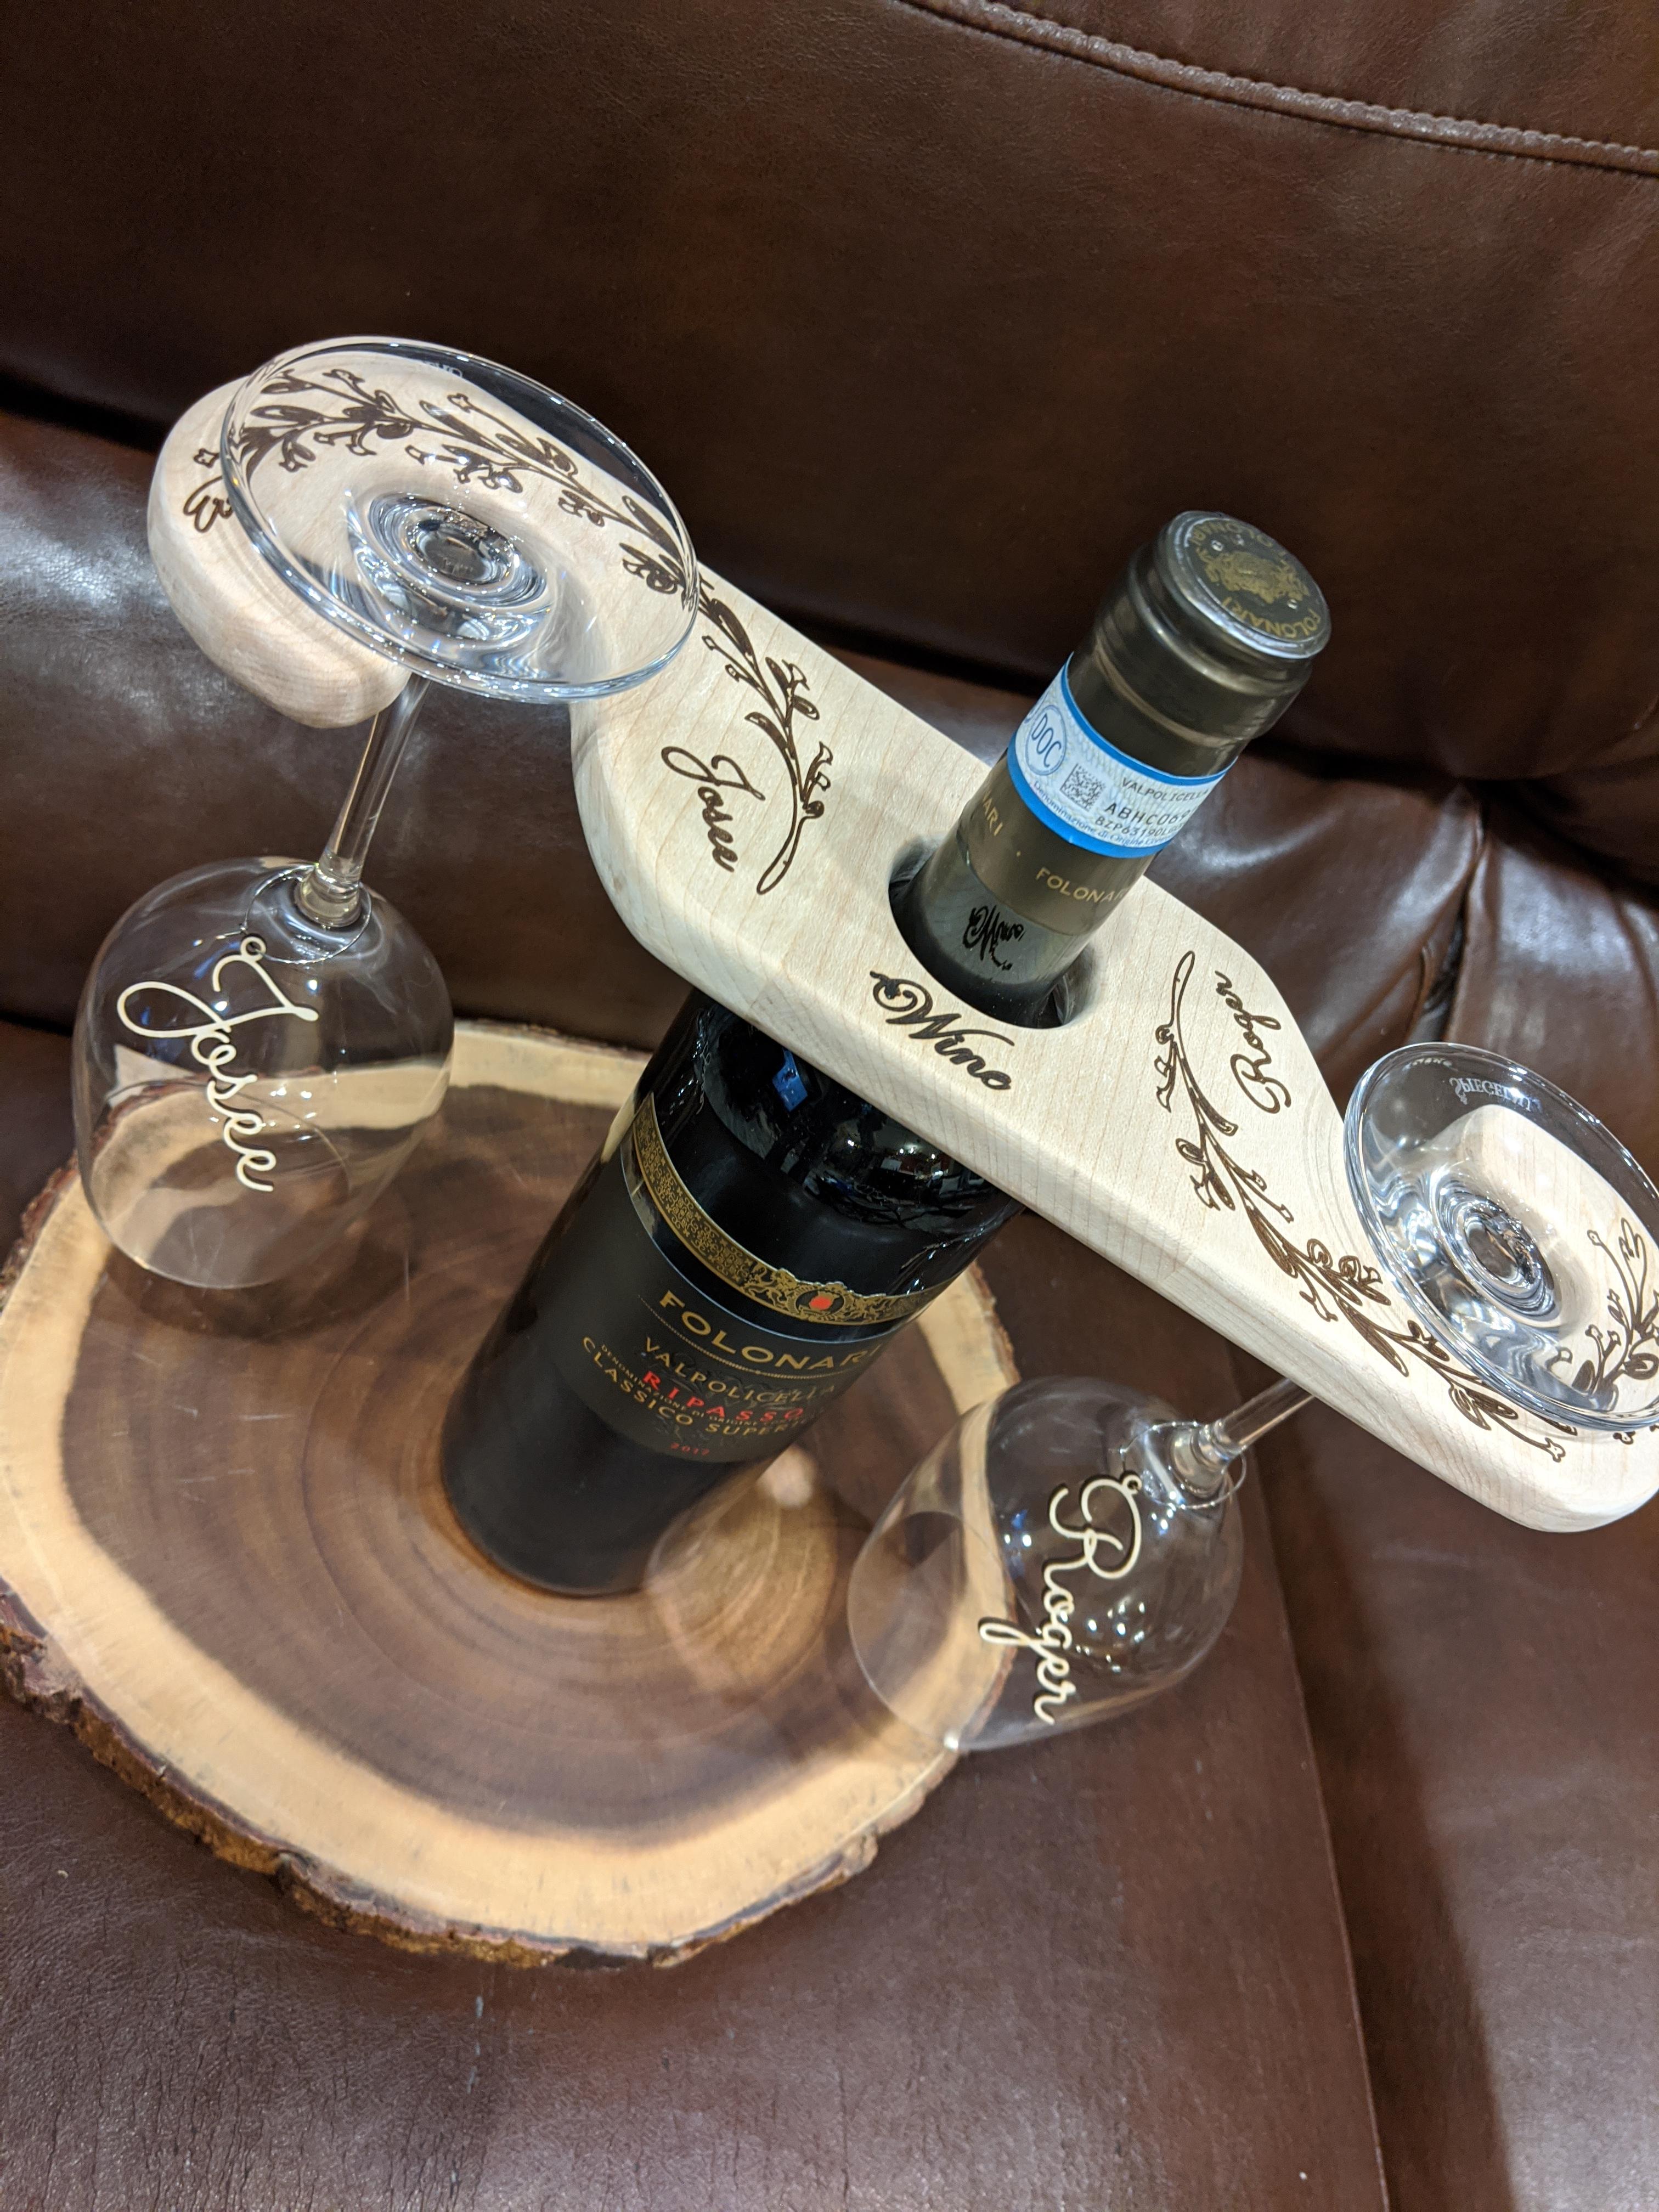
7 Likes
Love it, really love it!
1 Like