I have my MPCNC up and running, and have been using it a lot. One problem that I don’t think I’ve resolved well yet is maintaining alignment when I want to cut on both sides of a work-piece (currently, just wood.)
I have rails on the left and lower sides of the workspace that are lined up with horizontal (X axis) and vertical (Y axis) cut paths. But, I’m finding that it’s easy to “miss” by a millimeter or two that way.
I’m currently experimenting by using a “0 x 0” point on both sides of the wood, and keeping a common side up against the horizontal rail. Then, I center the bit over the “0 x 0” point (instead of auto-zeroing it using endstops) and start the cut.
That works, but I’m not convinced that it’s the best way to do this. I’m wondering if anybody has a better/different method to achieve this. Ideas, please?!?
Make a line right in the center of the workpiece. Put holes for inserting dowels through the workpiece into the spoil board. When you go to the second side, flip the workpiece and align the dowels i to the holes on the top.
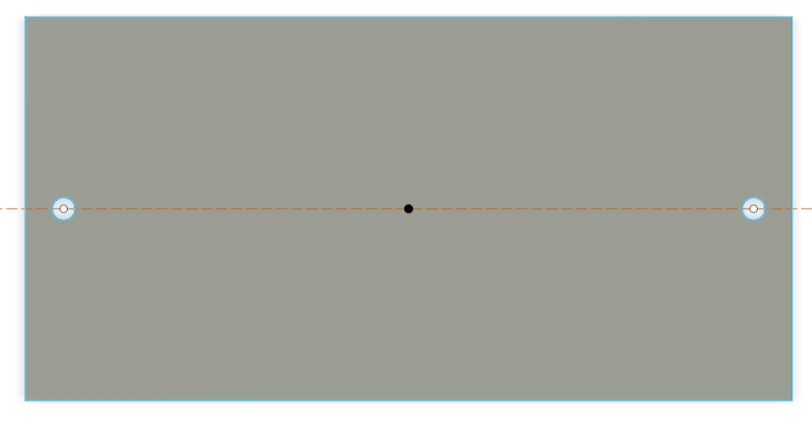
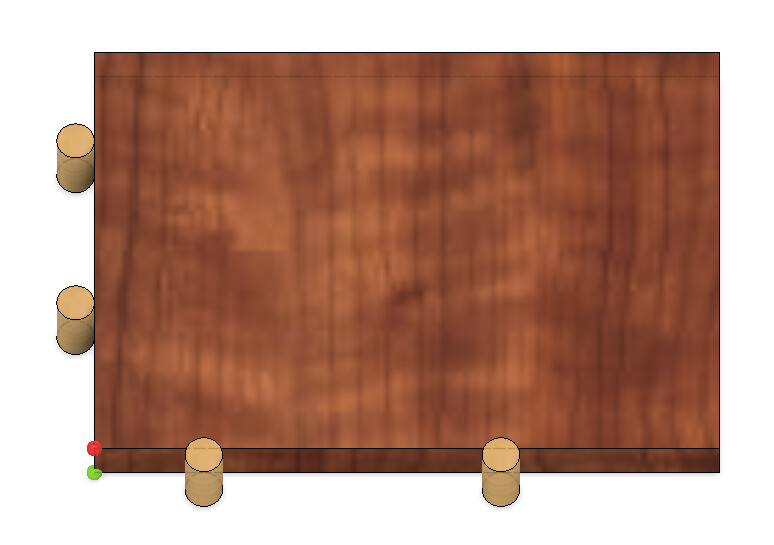
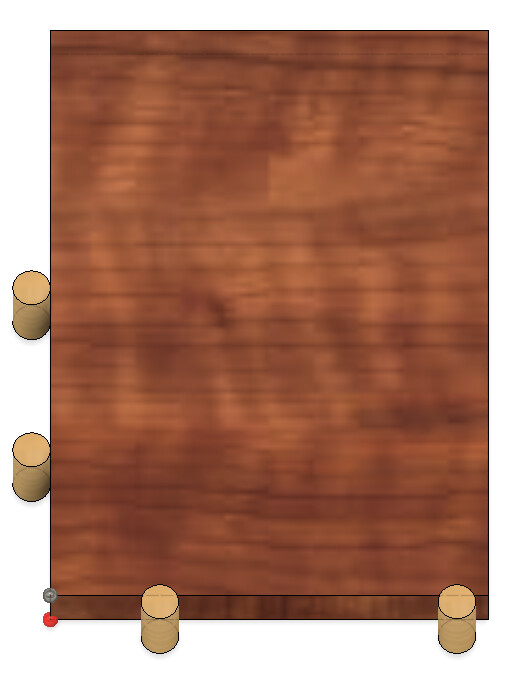
I’ve always used the pin method that Jeff describes. The stock can be flipped on either the vertical or horizontal axis. I’ve always flipped it horizontally. I use the center-top of my stock as my origin point (black point) because this point will remain at the same position for both the top and the bottom jobs. The holes for the pins are placed on the horizontal axis. The further apart the pins, the greater the potential accuracy, and the stock is flipped across the axis line. When milling the top side, the holes are cut through the stock and into the spoil board. I have 3/4" MDF for my spoil board and would go around 1/2" into the board for the pins.
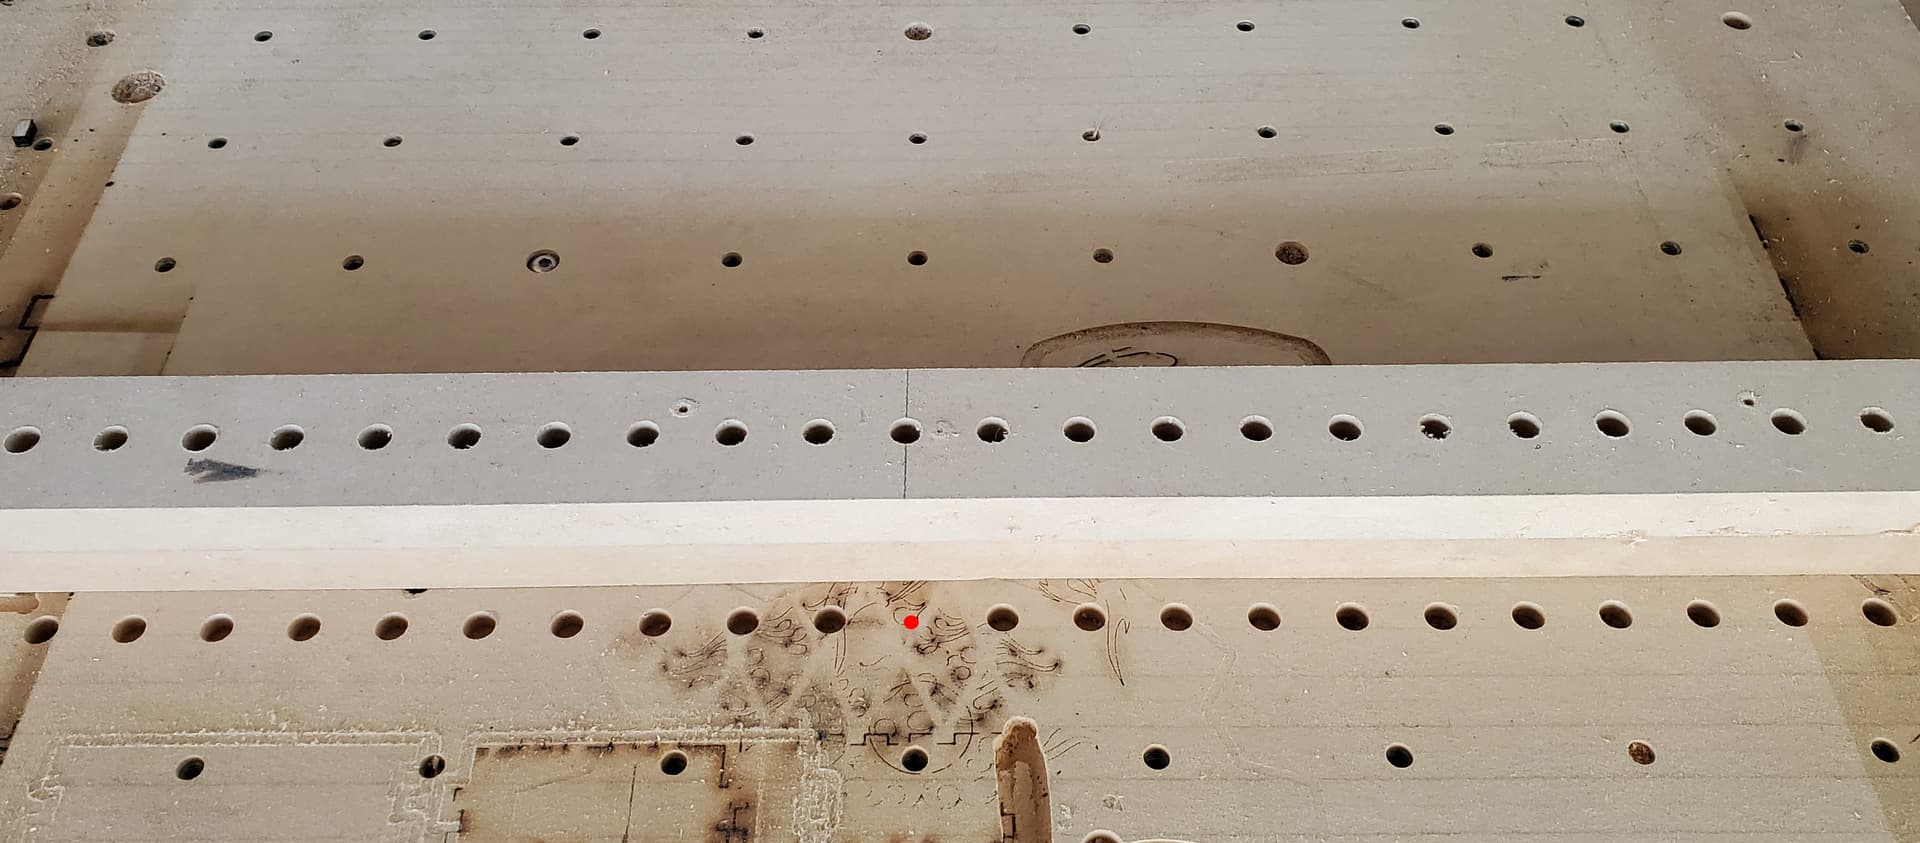
I’ve done relatively little double-sided milling, but I did have an occasion where I had to do a number of pieces in foam for a cosplay prop. Rather than turn my spoil board into Swiss cheese, I created a jig with row of holes and a matching row in my spoil board. The center point (marked in red) in the row in my spoil board is a known offset from my home position. I would use the jig and a hand drill to place holes in the stock. Then I would use pins and the row of pre-drilled holes to place the stock on the spoil board. This worked well, though it has the potential to be less accurate. But, the one strong positive of this method is that it reduces the amount of vertical working space required by 1/2".
Another method that has been mentioned on the forum is to flip and rotate the stock. Rules (or just some aligned pins) are used to position stock so that it is square and a corner is known.
The corner remains the same, and, as long as the stock has square corners, the stock remains aligned. This is easy to author in Fusion 360, but I’m not sure how difficult it might be to do a rotated setup for the back side in other CAM tools.
For all my double-sided milling, I leave the stepper engaged when flipping the stock. Sometimes I also recorded the offset from the machine home to the stock home in case I needed to power down.
When I have to cut two sided I usually cut all the pieces I need first one side and then I put some scrap piece in and cut an mirrored outline of the pieces, inside of the line instead of outside so that the pieces I need to flip fits snuggly inside. Usually half the shape is enough, makes it easier to clamp the pieces aswell