Redemption build - Finland

Hi all!

I’ve been lurking around the forum without participating for a year now. I actually did print and assemble a MPCNC, which failed. Or actually I failed. I made it for a 600mm by 600mm (by 50 mm) work area, but only got it to run well for a really short while during the summer. For that few runs that I got out of it - it was magnificent. Then I took some slack out of the connections and the belts, got some cheap Chinese carbide bits, possibly broke some plastic parts - and as you could guess - it didn’t work at all afterwards. At that point I discovered that there actually were some actual instructions for the assembly, which I never saw before due to mostly reading on my phone screen. But at that point the damage was already done, and I think the parts that I printed weren’t too great of a success to begin with (practically the first true prints I ever made).

Also halfway through that failed build I also started to ogle over that fence, to the next garden with the greener grass and full stack of features known as LowRider. And just when the MPCNC build was failing the harders, the LR2 came out. At that point I made my decision and sweep the remnants of my motivation off the floor, wait for some more to accumulate and start again later.

And now’s the time. I think you already understand the name of the build. I want to redeem myself, as the failed build doesn’t exactly sit well with my appropriate educational background, if you know what I mean…

So I started to print the parts on my Creality CR-10, with a 1mm nozzle to see what it yields, and also to deliver some substance to the build from the get go (although I know that there is some heavy weight printing experimentation done on the forums already).

Print durations come to be very reasonable with the 1mm nozzle, but I’m still more after the rigidity and the strength of parts. (Print setting for the curious: 0.25 layer, 2 shells, 45% infill, speed 2400mm/s, retraction 7,5mm and extra restart distance -0.1mm, wipe 4 mm, coasting around 1mm, eSun PLA, 215 deg-C, values are as I recall them and can’t check atm.)

Most of the hardware has been ordered from all over Europe and Asia due to the lovely logistics when shipping to Finland. I’m going to go with Ramps 1.6 (MPCNC was GRBL) and Makita RT0700 router.

So far I have only one question/note. Is it really so, that the new design doesn’t get “clamped” to the table with the wheels like the first gen? So the router is only held down by its own weight?


EDIT: Forgot the obvious! Thank you Ryan for some awesome designs! Even if my first build was a failure, It was a valuable lesson and I got to learn very much while making it.

5 Likes

Hey,

Glad to see you’re back on the forums and about to give it another go. I also built the MPCNC and it’s a great machine. I’m about a couple days away from firing my LR2 (weekend), I only need to put the belts on and the electronics so really excited.

Yes only the 2 top wheels, nothing holding it down from underneath. I am also eager to get it working to see it in action. Although I’ve watched youtube videos of it, it’s nothing like seeing your own machine working away.

Good luck with your build!! Just take it slow and ask lots of questions if you get stuck. Awesome people in here who are more than happy to help out.

Have you seen my post on my Makita RT0700C mod here?

Hi Frederik! Yes I have, and I’m very much planning on using it, so thank you as well in advance!

Those prints are looking awesome. Thanks for sharing. I’m looking forward to the redemption.

Dang that is a big nozzle! Second time around is always better with these builds.

You could easily increase that layer height to something like 0.6mm and get stronger parts with less time spent.

Hi Bill! Theoretically and with some testing I could do that, but I just went the easy way. Now I don’t have to worry about how the layer height would affect the holes which are printer horizontally. And my CR-10 performs better with a relatively low layer height anyway - 0.2mm is way better than 0.25 on a 0.4mm nozzle. Not sure if it’s the bowden setup, the very weak parts cooling fan or the print head assembly (or combination of all of those) but anyways. I just rather take the printing slowly than get hung up on optimizing my printer (yet again :D).

Of course the ratio for a .4mm nozzle at .25 layer height matches .625 layers with a 1mm nozzle, so the match to .2 would be .5mm layers…

So I’ve been continuing the project slowly even though I haven’t updated this thread. I’ve got almost all the parts printed and also most of the bought parts have arrived, just waiting for the idlers for the belts. But now I’m wondering if somethings off with my prints. I just put together one of the parts that I showed earlier with the bearings and tried it on the steel tubing (mine is not stainless, but plain structural steel). It fits quite tightly, but the middle bearing wiggles. So it seems like the place for the bearing is too wide (tried to mark it in the picture attached). The bearing has enough play for the outer race to touch the printed part itself. Tightening the bolt obviously helps, but it also makes the whole fitting too tight and the assembly wont roll on the tubing anymore. So is it a problem? I don’t see why the bearing would ever wiggle around when the whole assembly is in place, but I also can see how it could lead to binding or bad rolling action if something did forced it out of position.

Perfect! Nothing changes if the top bearing moves side to side. It is made that way so you can add tension later if needed.

That’s great! In that case the Lowrider is quite close to the assembly and table build. I’m trying to go with the folding workbench design that was already seen in “Cramer’s LowRider Build”-thread. Though it might take longer than expected, as the weather has been quite extraordinary and now my trailer is buried under some 60 - 100 cm of snow. So no full-sheet / full-length material for me it seems.

It also seems that I’ve been a complete idiot about the feeds and speeds on the MPCNC and it is working as well as it could - for being almost torn apart a few times. I even managed to mangle my makesift 1/8th adapter before reading the milling basics again. Doing so I realized that I must have caught some record-breaking values from some forum post and then added a few conversion errors to land on almost 20mm/s and 5mm depth of cut on a film faced plywood. But finally, seeing that freak-show of an milling attempt go down, made me realize that the problem isn’t with the force output of the MPCNC but in the parameters. My earlier attempts with the original Makita bit holder and larger bits were far less dramatic, just lost steps.

So sometimes it does take proper fail to see the problem and as I said, an idiot. Too many parameter changes at once. I seem to repeat that pattern with the 3d-printer as well, so maybe now’s the time to change that.

No reason to be that hard on yourself. Learn, then iterate. I hate changing only one thing at a time as well but in the end it really does work. The best part is you have a machine that can easily and cheaply be repaired if you do manage to mess something up. Have fun with it…next time try to film the failures!

Ok, so it’s been awhile. First couple of the parts got poor layer adhesion but I fixed it. Then the kitchen makeover was due - then the smaller bathroom…

Finally I built the Lowrider during the summer of 19 and was gonna take some pictures to attach to this post but the garage was in awful shape… so I took down a dividing wall, remodelled all the shelving, epoxy coated the floor and extended the storage possibilities to the attic.

And then I got to lowriding again. Well for some reason the X axis was always struggling and I got tired of it, si I ordered a 0.71Nm stepper for it. It runs with much lower amps so I was afraid for what would happen to the speed. Basically the torque de-rating starts right away from zero-speed as the nominal current/voltage is around 700mA at 12V. But it’s definitely holding up well at 15mm/s. Actually it seems like a good match for the drv8825 as the nominal torque is achieved at fairly low current = cool drivers.

Well after that the Lowrider has been functional and I’ve got at least some things done with it. Plan is to get to use it more from now on, as I got the basics figured out and setting everything up is way faster.

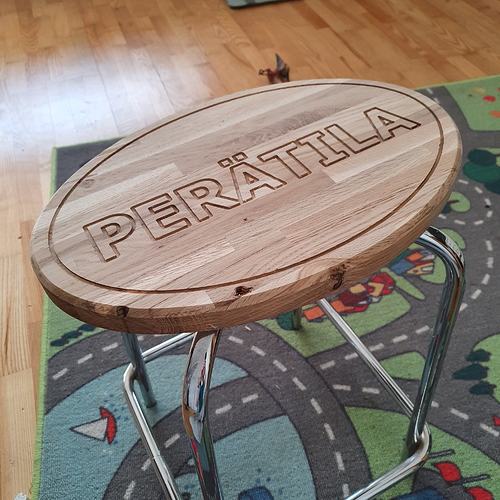
I tried to attach couple of pictures. The stool cover is made for the workshop. It says “Perätila” which I used to call the small storage space at the back of the garage (and after taking down the wall became part of the garage). All my projects are in there. The funny part is that in Finnish it’s a homonym and means basically “the backroom” and “the breech position” - and my projects usually end up so that both hold true.

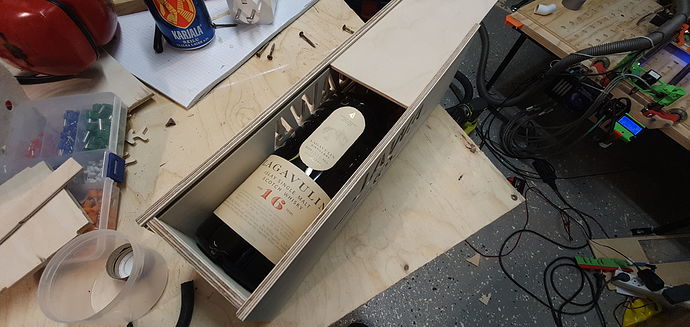
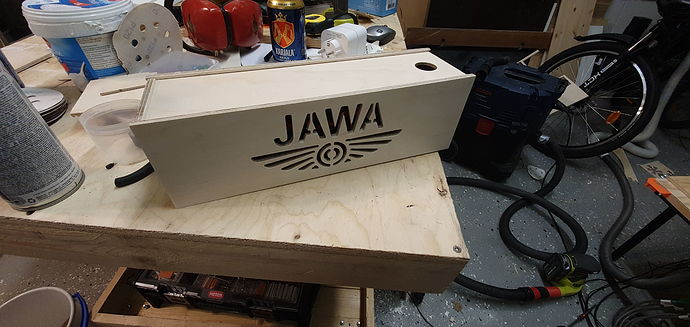
Jawa bottle box is for a relative in exchange for an actual Jawa motorbike.

I also did some christmas ornaments with the mill and with a laser. But I have no pictures of those right now.

7 Likes

Awesome, glad you came back to completion and working.

Nice work! And good choice on the Laguvulin to fill that box :slightly_smiling_face:

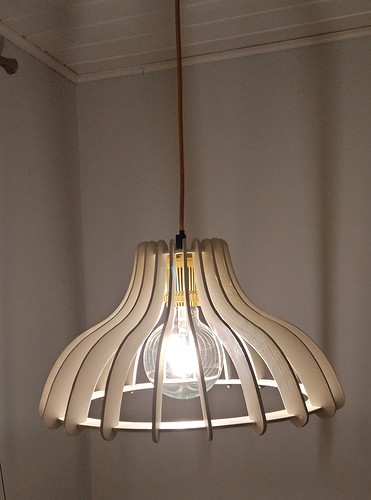
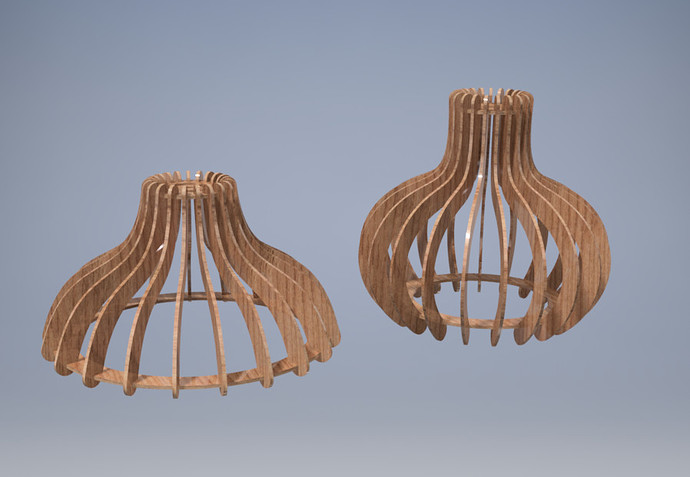
I made a lamp fixture. Material is 4mm Birch plywood. After some fine tuning it came out quite nice. I coated it with some semi transparent white lacquer which for some reason left it really spotty - so I had to fix it with some spray can white. End result is less than perfect but at least I got to test the shape. It could be a bit more round and rev. 2 is already drawn. For the rev. 2 manufacturing I’d like to try some carpet tape to eliminate the micros and for the surface treatment I’m thinking just some matte lacquer.

3 Likes

Superb. Do you plan to share the file? :smiley:

Thing files for Lamp 0 by Taaapani - Thingiverse

Finally! Only took 5 months. I have also the second version ready but haven’t tried it myself, nor uploaded to Thingiverse yet. I’ll try to make the second version available today still. Second version is on the right in the picture below.

4 Likes

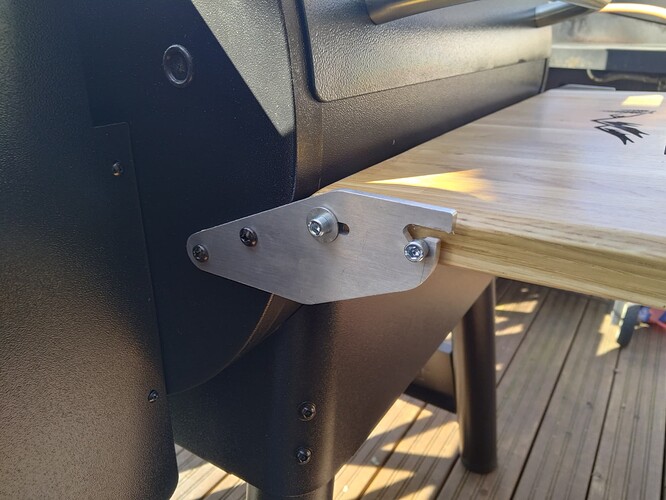
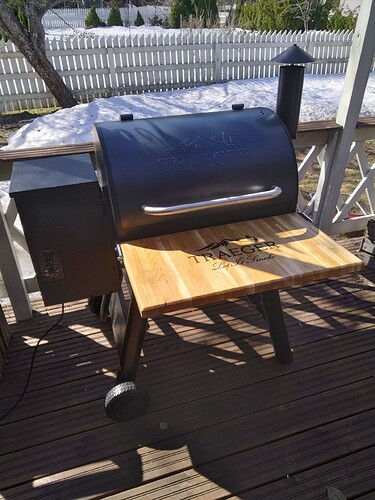
Some parts out of the Primo. Made custom hinge-mechanism + table for my new Traeger BBQ. Did take a couple of tries due to a dimensioning mistake (luckily, as it made me realize that the table should fold) and due to dull chinese carbide.

With a sharp bit and air assist for chip removal the Primo cuts aluminum really well. Though 1/8th slotting is a bit** as many others have stated already.

I think the measured part height was 42.45mm against the designed 42.5mm - I’d say the tolerances are tolerable :wink:

Laser engraving was done on an Ortur machine. Blasphemy - I know.

5 Likes