How is the build going? I just started my Primo build but work has been to crazy to get it done.
Thanks for the inquiry.
It is going even slower than I anticipated for multiple reasons, but it looks like it is going to turn out well.
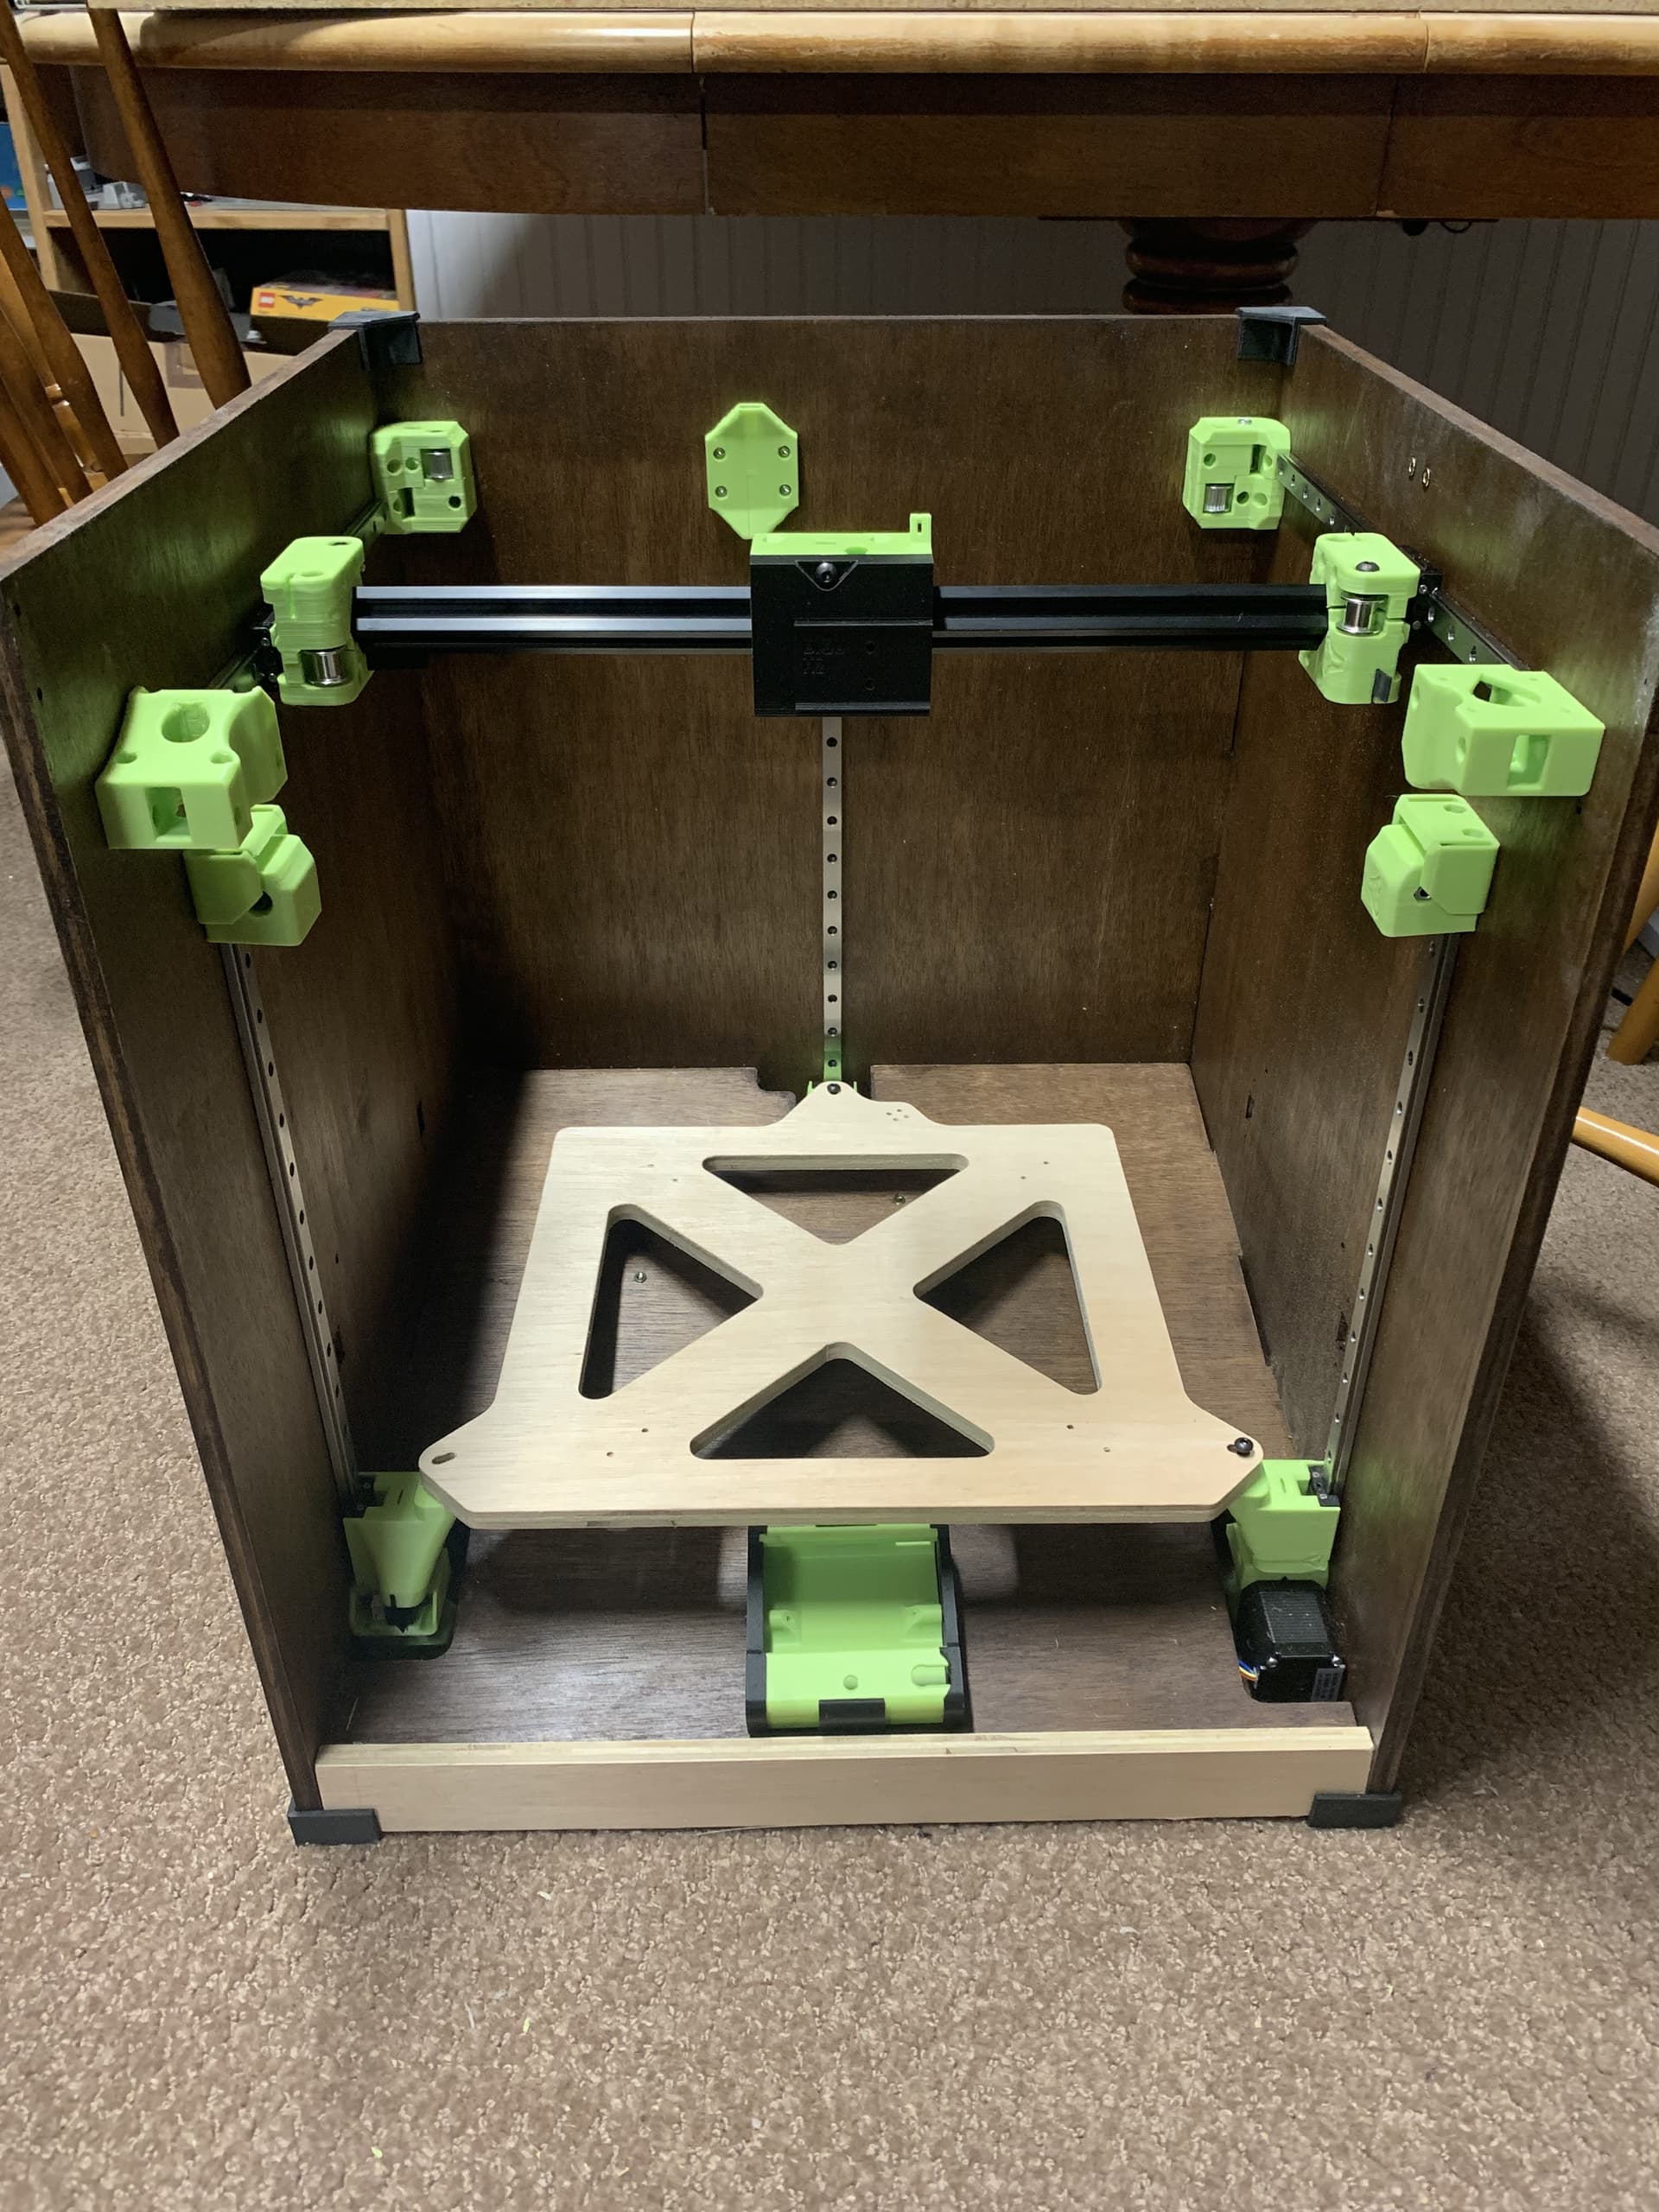
The biggest issue I found in my physical fitment of everything was I didn’t leave enough clearance for the rear Z slider in the window on the wedge - nothing a little rework can’t handle (material safe error). I also had a couple holes that were too small that I had to open up and a few that are a little too big that will require a washer.
All of Ryan’s printed parts were perfect. I had remixed the Hub (x slider) to work with a 2020 V-Slot rail and introduced an error where the clamp bolt screw was interfering with belt tugger mount. I have updated this part and reprinted, but didn’t install it yet.
Otherwise I am very impressed with kit as it stands.
My extruder has not only not shown up, I don’t think it has shipped yet, so I am probably a few weeks out from finishing unless I re-task one - which I may end up doing. I don’t have a control board yet either - I am hoping they stay in stock in the V1 shop. The only reason I haven’t ordered is that I plan to update my Burly to a Primo at some point and I know there are a variety of bits to order for that too so I was hoping to consolidate into one purchase.
As for building on the ping-pong table in my Rec room - I got kicked out for taking too long 
But, I am open to the idea of a build party to get this done! The fridge in the background of an earlier picture has an assortment of beverages (most, but not all, of which are intended for adults) and the freezer has a variety of frozen pizzas to feed the pizza oven. The popcorn maker (far right side of bar) is almost as old as the 1986 Arachnid dart board, but fully functional. The dart board is in working order, but a few of the target wedges need to be replaced. Someone can work on that too - I have the parts just haven’t put them in yet. I have been asked to rebuild an arcade machine cabinet for a friend, so we can throw someone on that too 
3 Likes
I love that finish. Looks classy.
I have a bunch of CAD for a MAME style cabinet, 2 players, 8 buttons each.
Thanks! I got the green filament cheep - I figured it was because it was ugly / undesirable overstock, but I think it is fine.
I’m likely interested in a MAME cabinet that someone has positive experience with. The junk cabinet hasn’t shown up yet. I was planning on reverse engineering it and pretty much rebuilding as it was, but it likely had some structural issue - or maybe it was just dropped hard in a move…
One of the reasons I agreed to do it was I have been considering making one anyway and this is an excuse to build mine with minimal extra effort - the request came through my wife, so the first one has her blessing already 
2 Likes
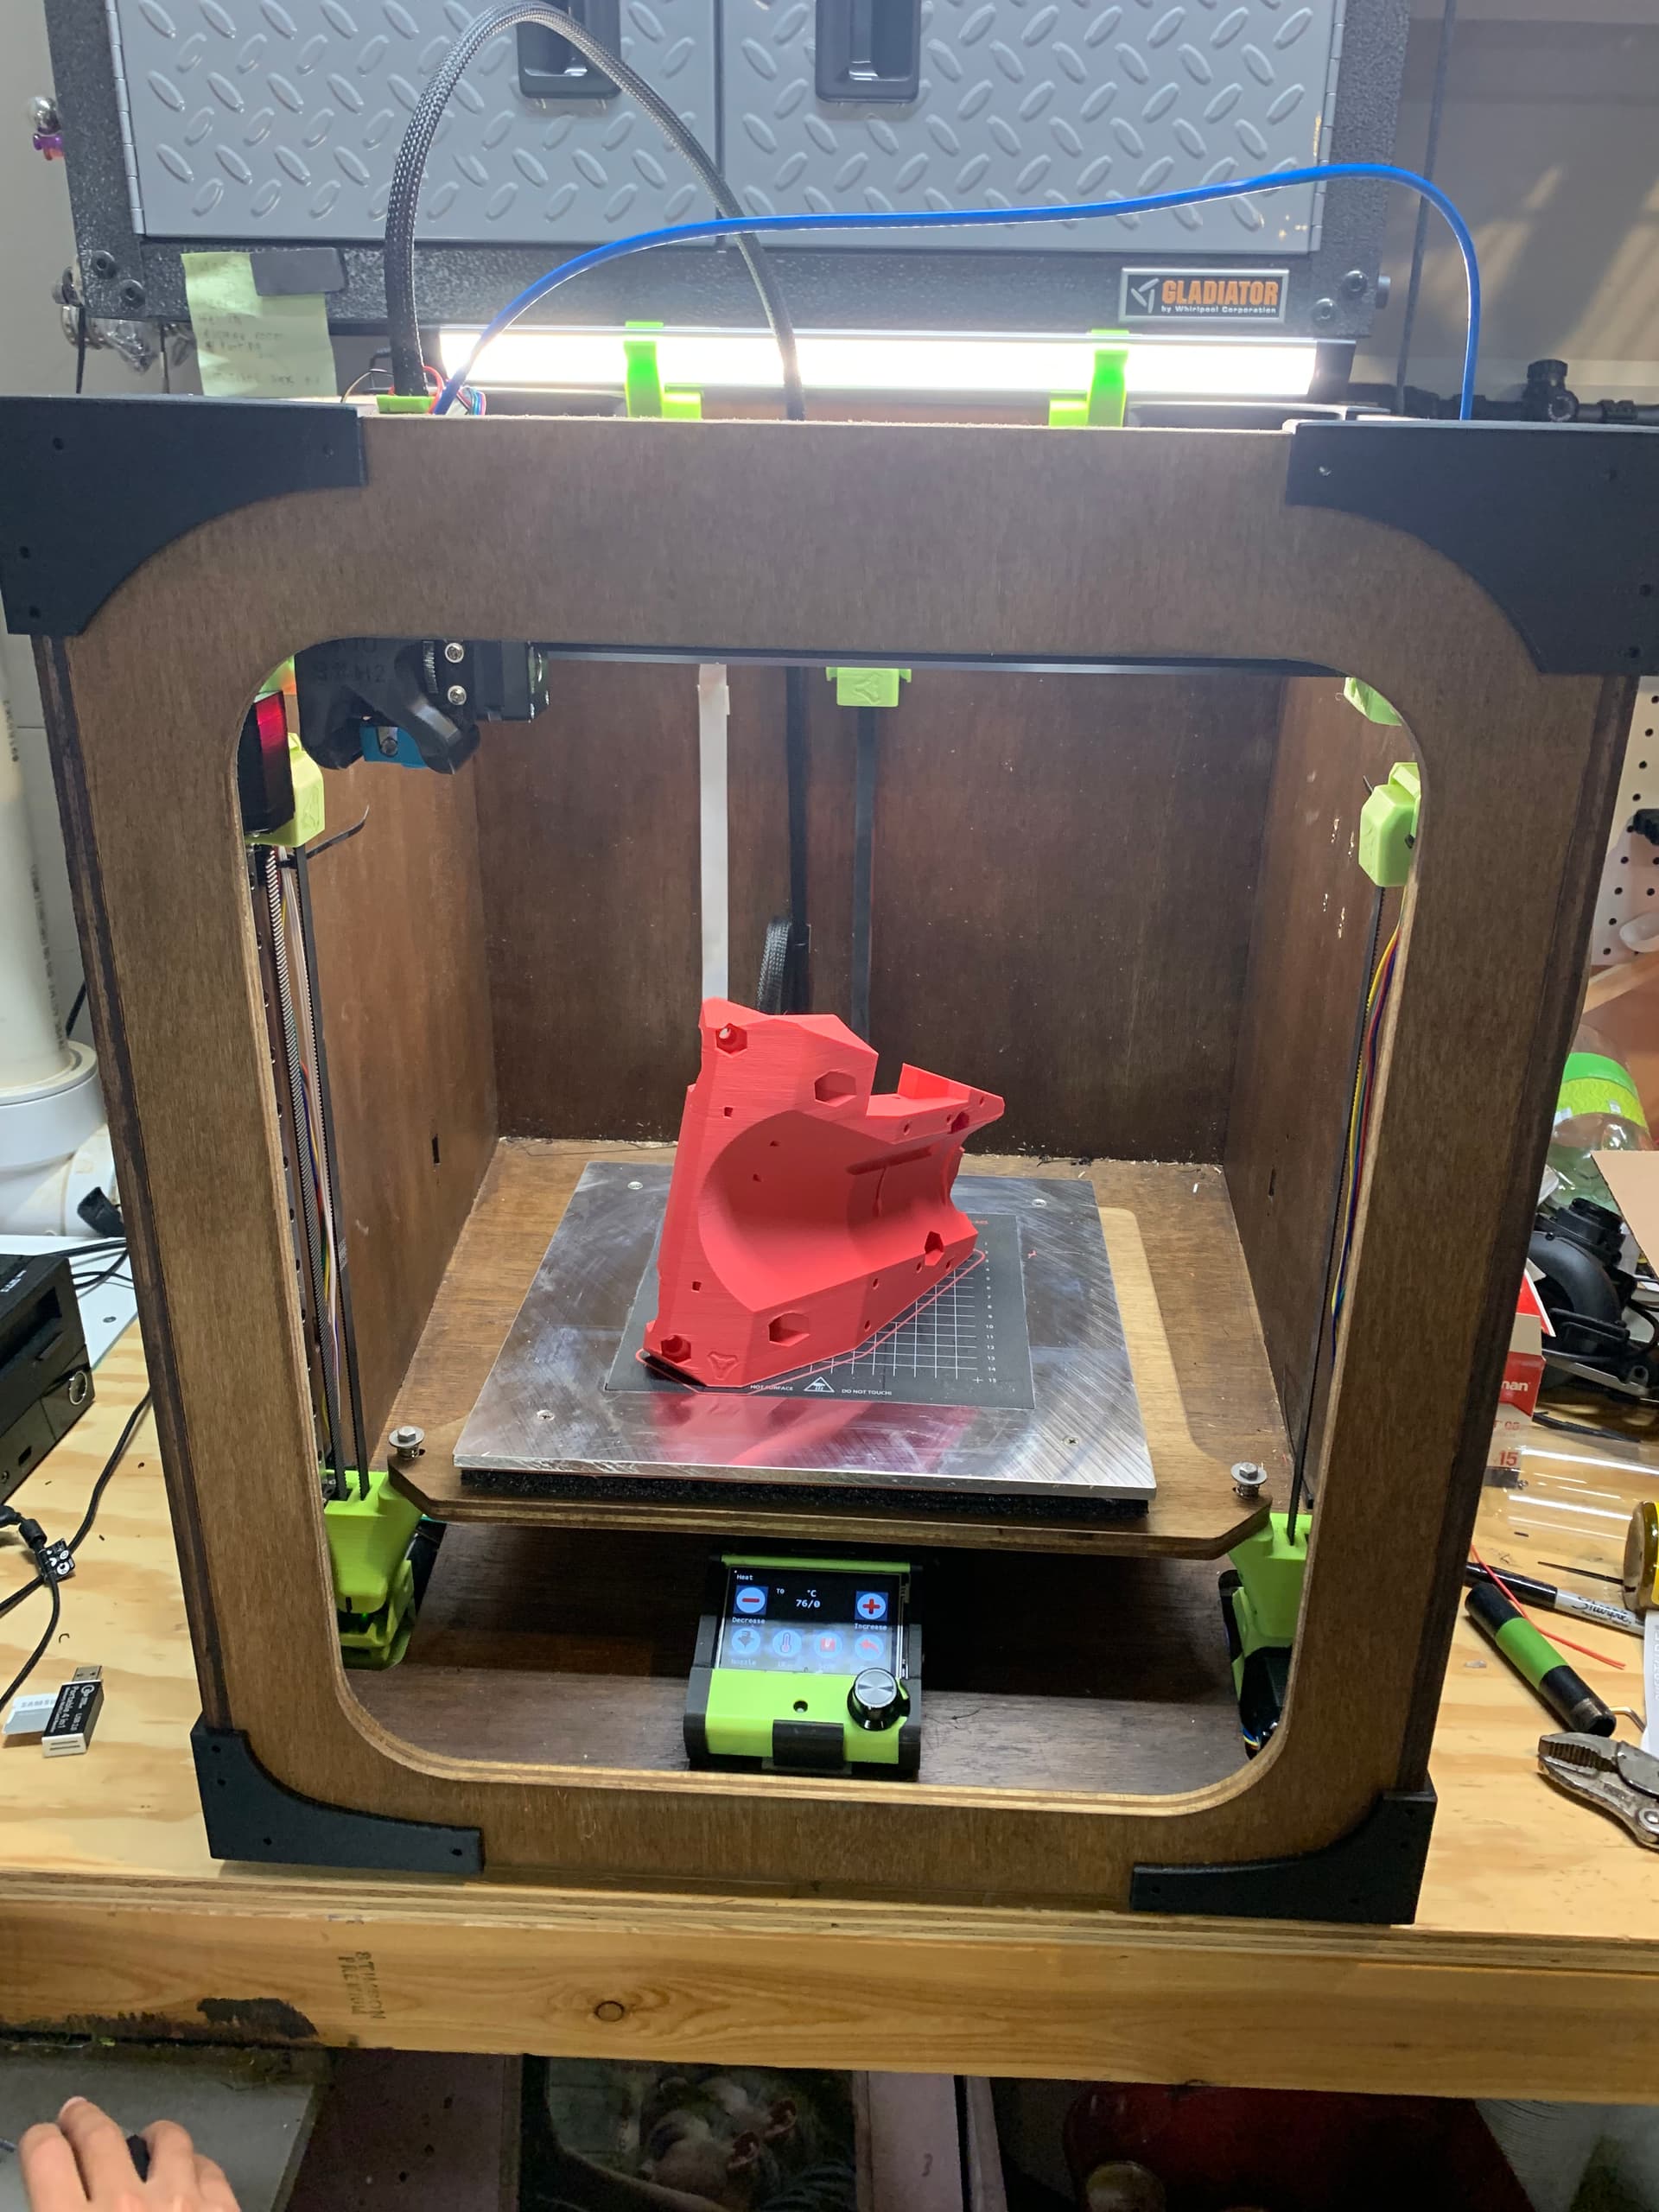
It took a full 6 month for me to “complete” my build. There are a couple finishing touches and some tuning I’d like to do, but I’m calling it good enough - for now. Don’t let the time it took me scare anyone off - it is hard to make progress on anything when you only have 10-15 minutes at a crack once a week. It just let me spread the joy out for a nice long time…
It was actually functional 6+ weeks ago when I made my best benchy ever, but I was not at all happy with my bedplate. I was using a cheap 1/16 aluminum sheet that was far from flat. Bilinear bed leveling was a far cry from being good enough to deal with the distortion and although I started fighting through UBL mesh bed leveling, I found out I could use my company discount to by metal at our corporate rate. Consequently I ended up with a 1/4" aluminum cast tooling plate that is flatter than my BLTouch is consistent. In hindsight it would have been worth every penny even at the public cost.
However, once I had a flat plate I realized my Y-Rails were not particularly parallel. I now understand what Ryan was eluding to when he said the extruded frame is easier to tweak to square, but I was able to get mine matched within measurement error using existing clearance in the frame holes.
While I was getting the bed level in two iterations using G34 (3-Z auto level), I went through the trouble of manually adjusting the bed level enough using the z end-stops that G34 is probably unnecessary, but I left it on just as a sanity check each time. I feel like it will probably help compensate for any thermal expansion variation due to temperature changes and/or moisture changes in my plywood frame over time.
My first attempt at the umbilical wiring and a PCB connector near the tool head looked and functioned okay, but lacked adequate strain relief. In my jostling I broke a wire. A PITA to repair, It appeared it was going to be an ongoing issue, so I reworked the PCB, changed my connector strategy and added a strain relief. I also changed a few of the wires to higher strand conductors with more flexible insulation and was more diligent in cable management overall. I feel pretty good about my current connections, but did order a CAN HUVUD board from Luke’s lab just in case I ever have to mess with it again. It’s on pre-order and I won’t see it for at least another month, but when it shows up I’ll mess with it and Klipper on another platform to figure it out. So far Marlin 2 is working fine on the SKR Pro V1.2 with the BTT 3.5TFT display served by Ocotopi running on a Pi 3B+.
The flat plate gave me confidence to bigger that the standard benchy so I went straight on to LR3 parts. I was going to upgrade my MPCNC Burly to a Primo, but my desired envelope is big enough I figure I’ll give a low-rider a try - but that will be another story.
Thanks to all for the support in the forums! Direct and indirect through answers to others that has similar questions. And of course special thanks to Ryan. I know he is gracious in his acknowledgement of contribution to the Repeat development, but I suspect his part is not only understated even if it accurate it wouldn’t have happened without him.
Once I have my LR3 completed I will likely do a Zen-XY V2. By the time I get that done the next Core-XY printer (or it’s successor) will likely be field tested so I look forward to that too. For now though, I think it’s time to request my MP3DP Repeat serial number and have a beer. Cheers!
5 Likes
Nice!!
So no heated bed?
Just the sticker that comes with the filament?
I’ll get my V1 sticker on it and take a couple more pictures, but yeah, its awesome!
My 300mm build surface is on hold with my Lukes Lab HUVUD order, but 220x220 has been big enough for years and I do have 295mm height already.
Thanks again.
1 Like
There is a silicone heater bonded to the bottom of the aluminum plate - full 300x300mm.
Contrary to good advice it is 120VAC on an SSR. It heats incredibly fast and appears to be very uniform. So, it works well, but I would probably stick to 24V DC if I did it again. I do like the silicone mats though.
I stuck a freebie Overature build surface to it. They come off pretty easily when needed and work quite well all things considered.
2 Likes
My heater is 120ac on a ssr. It’s fine. Though I keep looking at thermal fuses, just haven’t picked one up yet. As long as you use a quality ssr. I wouldn’t trust the ali lotto.
1 Like
I’m using a previously (lightly) used crydom that was salvaged. Typically considered a high quality/reliable component they claim MTBF of > 7 million hours.
If I didn’t have it on hand already I probably would have never gone this way to begin with. A high quality SSR is worth the price for safety if you need to use one, but a bit hard to justify when they can be avoided.
My other printers have external MOSFETs for the 24VDC bed heaters. They are known to typically fail “open” (unlike an SSR), plus even if they do fail closed I don’t think a 24VDC bed would get nearly as hot as a 120VAC running away.
I’m not scared enough to make an unprovoked change, but like I said; if I were to do it again I would probably run at 24V. When I spec’d my power supply I sized it big enough for the bed anyway so I didn’t really save anything on cost or space there…
A thermal fuse is a good idea regardless - no matter what or how you are driving a large heater. Let me know if you come up with a good recommendation.
It would appear that I have one of the few V3 ever built and its probably on a very short list of still active ones 18 months later.
When V4 came out shortly after I finished my build it offered a significant upgrade to the x-axis rail / bearing, but it had enough other subtle differences that would have driven a lot of rework that I didn’t ever really consider converting - especially since I built mine with a v-slot X rail and POM rollers that mitigated many of the issues associated with the carbon fiber square tube. It has been trouble free and still running very well.
However, a V5 upgrade is almost too tempting to pass up, especially since I could probably re-use nearly everything from this V3 and only purchase 1 linear rail and extrusions for the frame.
But, time being the scarcest resource, I am tempted to just try a Klipper conversion.
I had pre-planned for Klipper when I built and have foundational electronic support:
- SKR Pro V1.2 (Marlin firmware)
- Pi 3B “built in” running octoprint
- ADXL pre-purchased with mounting features incorporated into the v-slot print carriage re-mix.
For heating it has:
- Biqu H2 500℃ extruder - I don’t run >250C but wanted the copper heat block.
- Mains powered heater on very flat 300x300 1/4" cast aluminum tool plate.
My V3 wood frame is pretty square and rigid. I have since added doors and a cover for a 95ish% sealed enclosure.
So, I am looking for advice / recommendations. Should I:
a) Install Klipper, (+ CHT nozzle & Z-Brake) and hope/expect to get most of the V5 benefits with minimum effort.
b) Tear down V3 and convert to get maximum performance from the rigidity and motion design improvements. I do have a fully functional MP3DP V2 for the interim, and LR3 to cut the plates.
Simply adding a V5 to the current farm has obvious appeal but isn’t practical from a cost or shop space perspective.
A- For two reasons. You will learn Klipper, lots to learn and play with. At that point you will see how far you can push it and compare to our numbers. If there is a significant difference, the upgrade will not take nearly as long. I feel that klipper is good at smoothing out deficiencies in the frame. To me the worst part was that CF rail died, if that has not died then the printer is solid. I am confident you will gain a lot of speed. If not, rebuild and rerun the calibrations (a lot easier than rebuilding, learning, and then calibrating).
2 Likes
Thanks for the prompt and thoughtful reply. It’s how I was leaning but appreciate the wisdom of this forum and yours especially.
1 Like