Yea, a 5 by 9 foot table is freaking huge!
Yea, a 5 by 9 foot table is freaking huge!
Thanks for the link and photos! That’s great for reference!
Heck if you design it right your Low Rider is just an alternate top for your 6x12 snooker table. 
Nah… I’d do it your way if I didn’t have complex requirements. Be glad that you have something working. :).
I spent most of the morning out buying wood and starting on the table. Lots of detail work.
[attachment file=116845]
[attachment file=116846]
[attachment file=116847]
[attachment file=116848]
I figured out that I can’t cut a straight line in a table saw, at least with my little rig moving through line pieces of plywood. Won’t be a problem soon though! I’m just hoping that this thing isn’t so warped that it is unusable when it’s done! ![]()

Slowly coming together. Have had the printer going most of the last few days.
[attachment file=116946]
Probably will have time tomorrow to finish up the base of the table. I’m looking forward to using the CNC to cut the holes in the top and not having to do that manually!
[attachment file=116947]
I think I’ll get a flat surface out of this thing!
Make sure it’s flat before putting the top skin on! I found out the hard way that if it droops a bit, once you get both skins glued on, it will droop a bit forever after.
Been lurking on the site for a while now. Planning to build a lowrider in the coming months and this table build is what I’ve been looking for. I have a small garage and don’t think I can spare all the floor space, but if it could fold up that would be awesome. Keep up the good work! Looking forward to copying some of what you’re doing
Cool, Brandon. Hope this is helpful! I’m looking forward to seeing what you come up with.
Will do! I have a 6’ level and will check the assembled base carefully and then glue the top on. My plan is to set each half of hte top down and use a pneumatic stapler to secure it while the glue dries. I’d like to let the plywood keep itself flat so going easier on the fasteners for the top, letting gravity and glue do most of the work.
Most of the hardware is assembled now. I’ll install the belts and stuff once I finish the table and am able to move everything into the garage.
[attachment file=117431]
I can’t wait to power-on and start testing the motors and stuff!
Well just let me know when you want to schedule your final inspection and I will come out and verify it for you…
Oh yeah, you’re down in Tracey, aren’t you? I was pretty impressed when the kit arrived at my doorstep less than 18 hours after my order was submitted!
Little bit of a drive, but not bad. You’re welcome out if you’d like to see hands-on what it looks like when some dope from the internet tries to put together one of your kits. ![]()
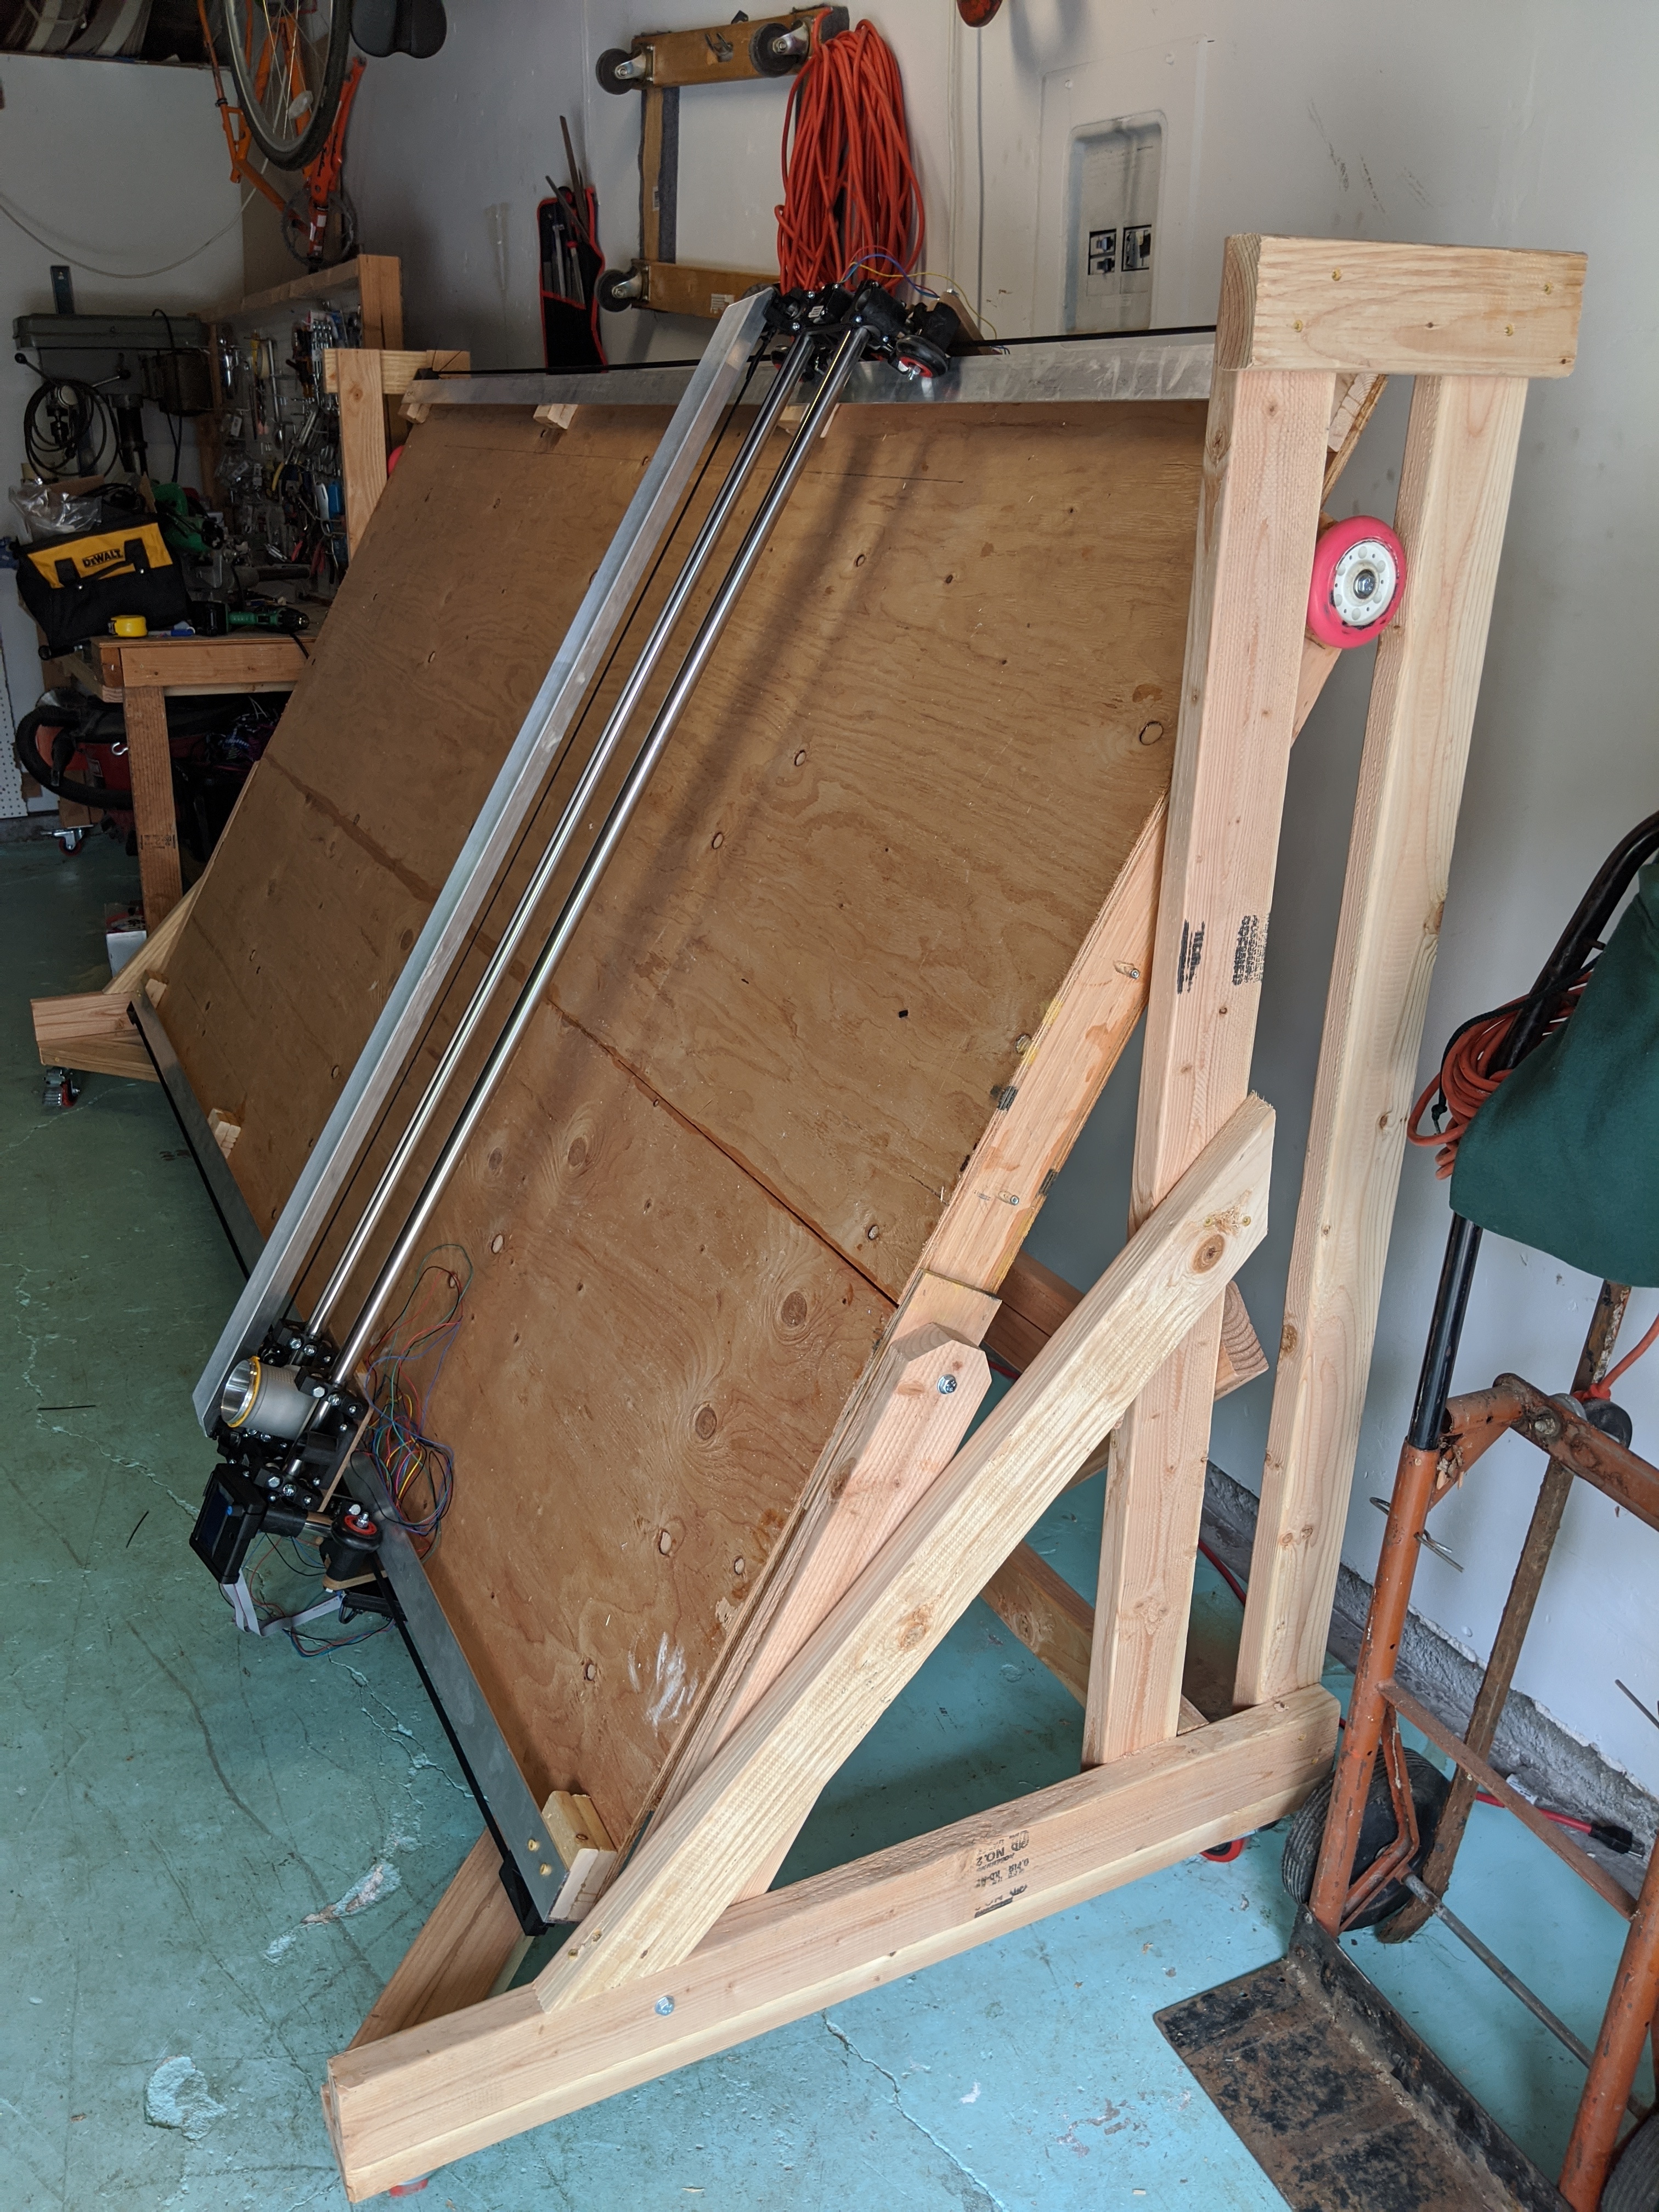
Alright, I had some time today to put the rest of the bench together! This works better that I hoped. I can tilt it up it back down flat with one hand and hardly any force required.
[attachment file=118416][attachment file=118417]
Looking good sir!
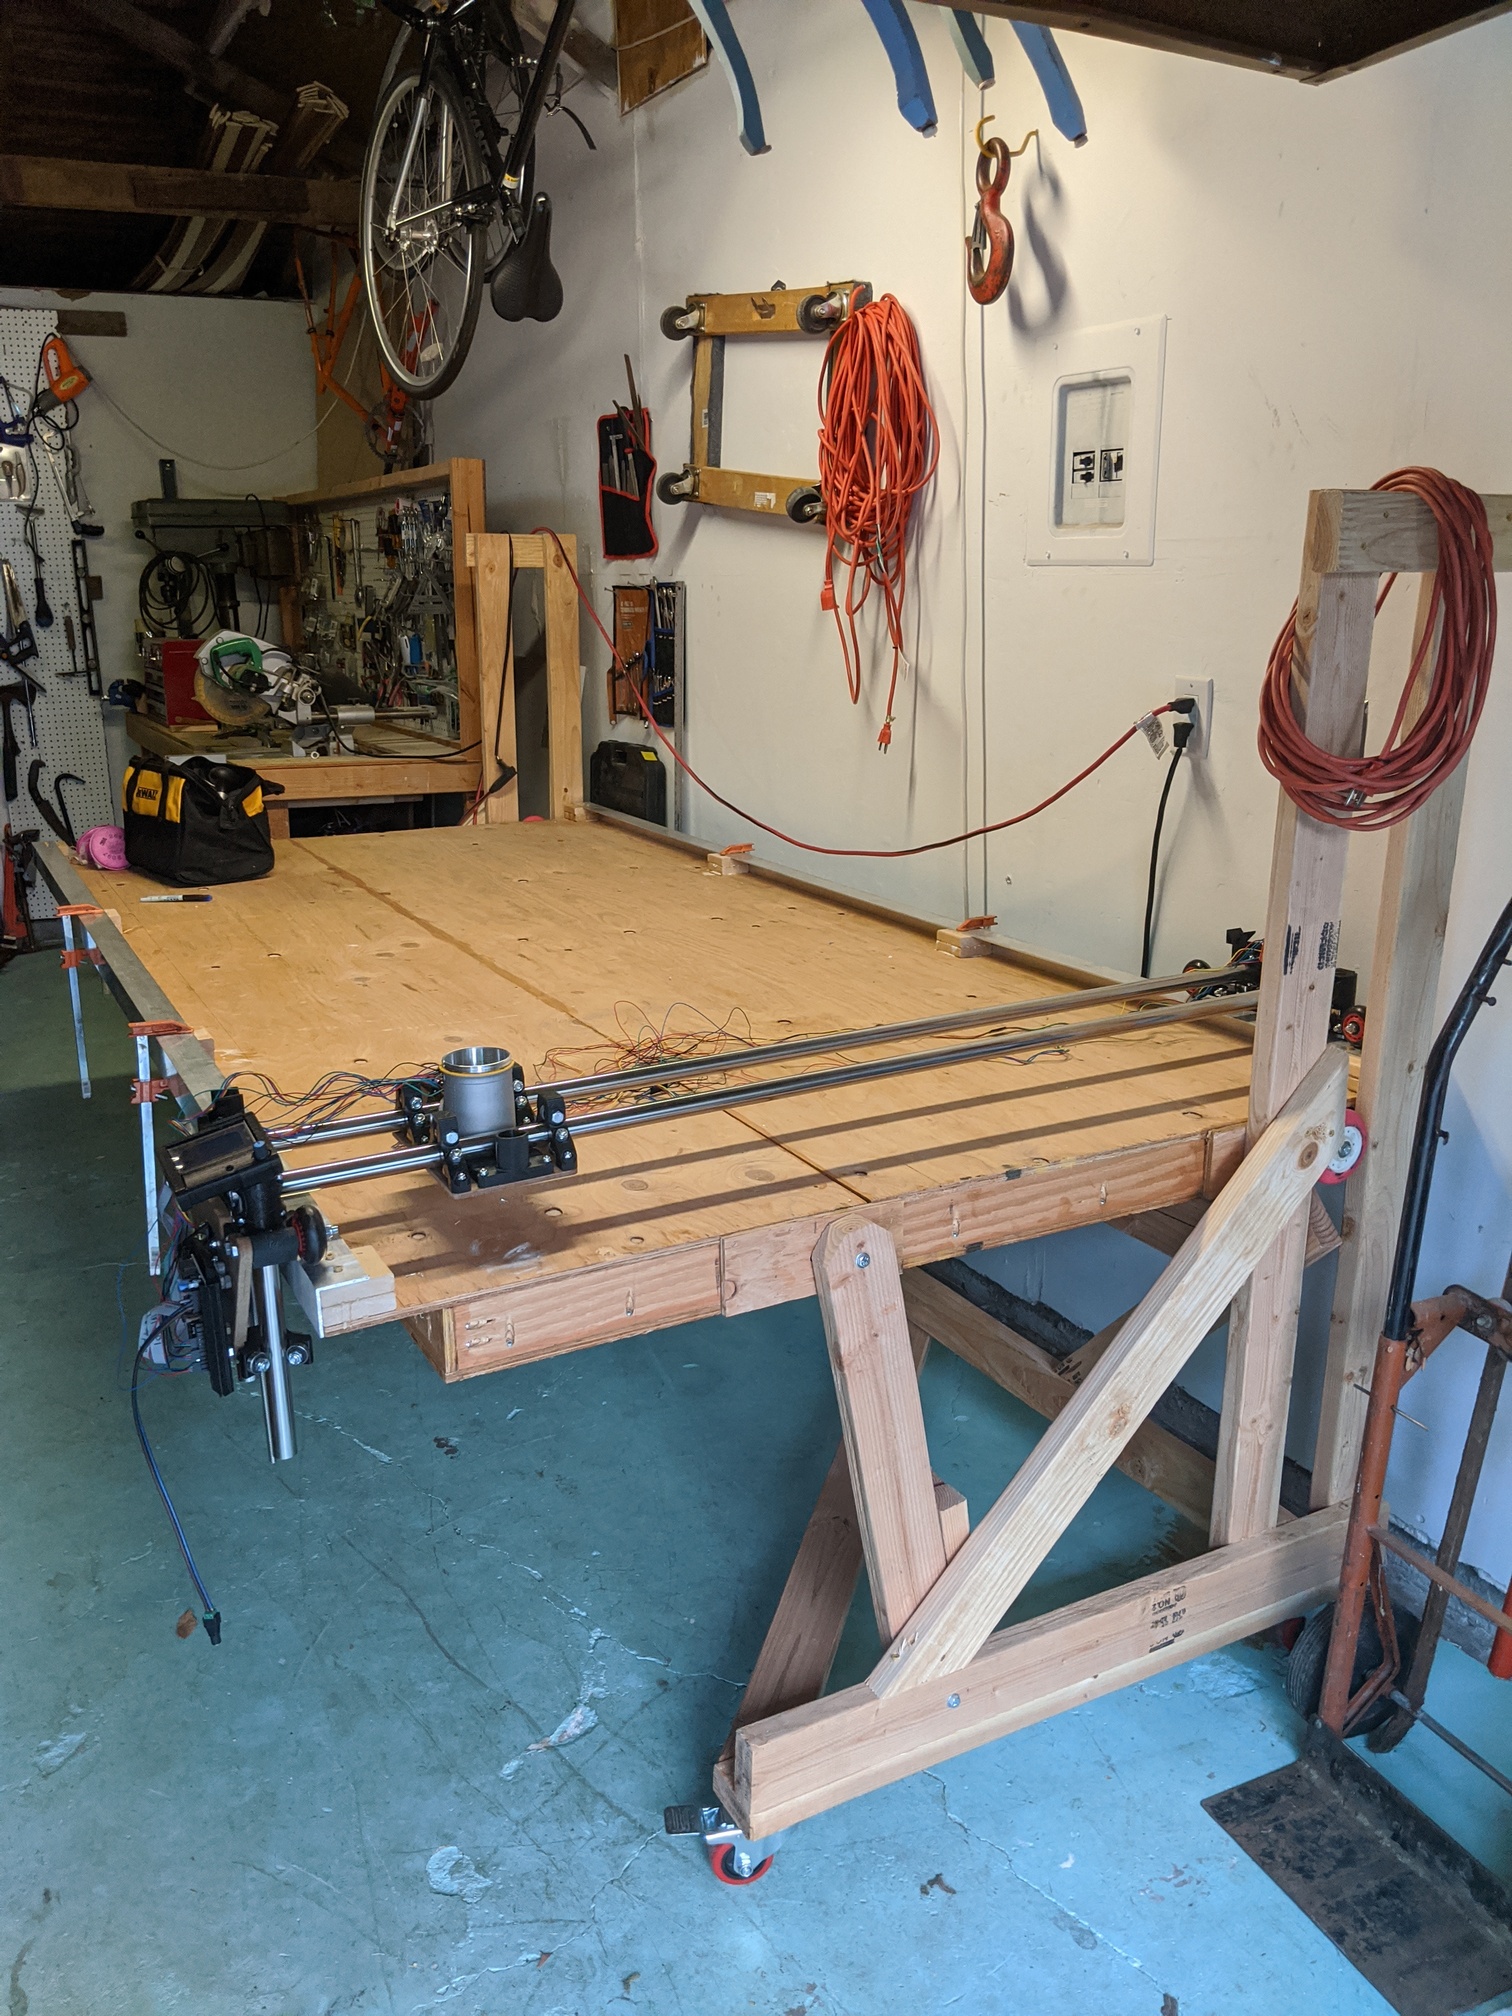
It’s been slow-going here for a couple of weeks, but there is progress. I got a couple 9 ft lengths of 2" aluminum angle to use for the edges of the table so I’d have a guaranteed flat rolling surface. You can kind of see them in the photo here. I figure I’ll get the rig set up and working, plane down my table and cut out some squares from the top to reduce weight and make it flat, and then shim up the aluminum angle with a couple strips of ply and add my spoil board. That should be the working setup.
[attachment file=120981]
I had to go through and clean my garage… this was my big roadblock to making progress on the lowrider. I added casters to my workbench and built in a drill press and miter station. I feel like a pro now.  You can tell from the size of the garage that I do most of my construction in the driveway.
And tonight I finally got the motors all wired up and working for the first time on the kitchen floor! The pre-loaded firmware on the rambo board makes this feel very plug and play.
[attachment file=120980]
Next steps:
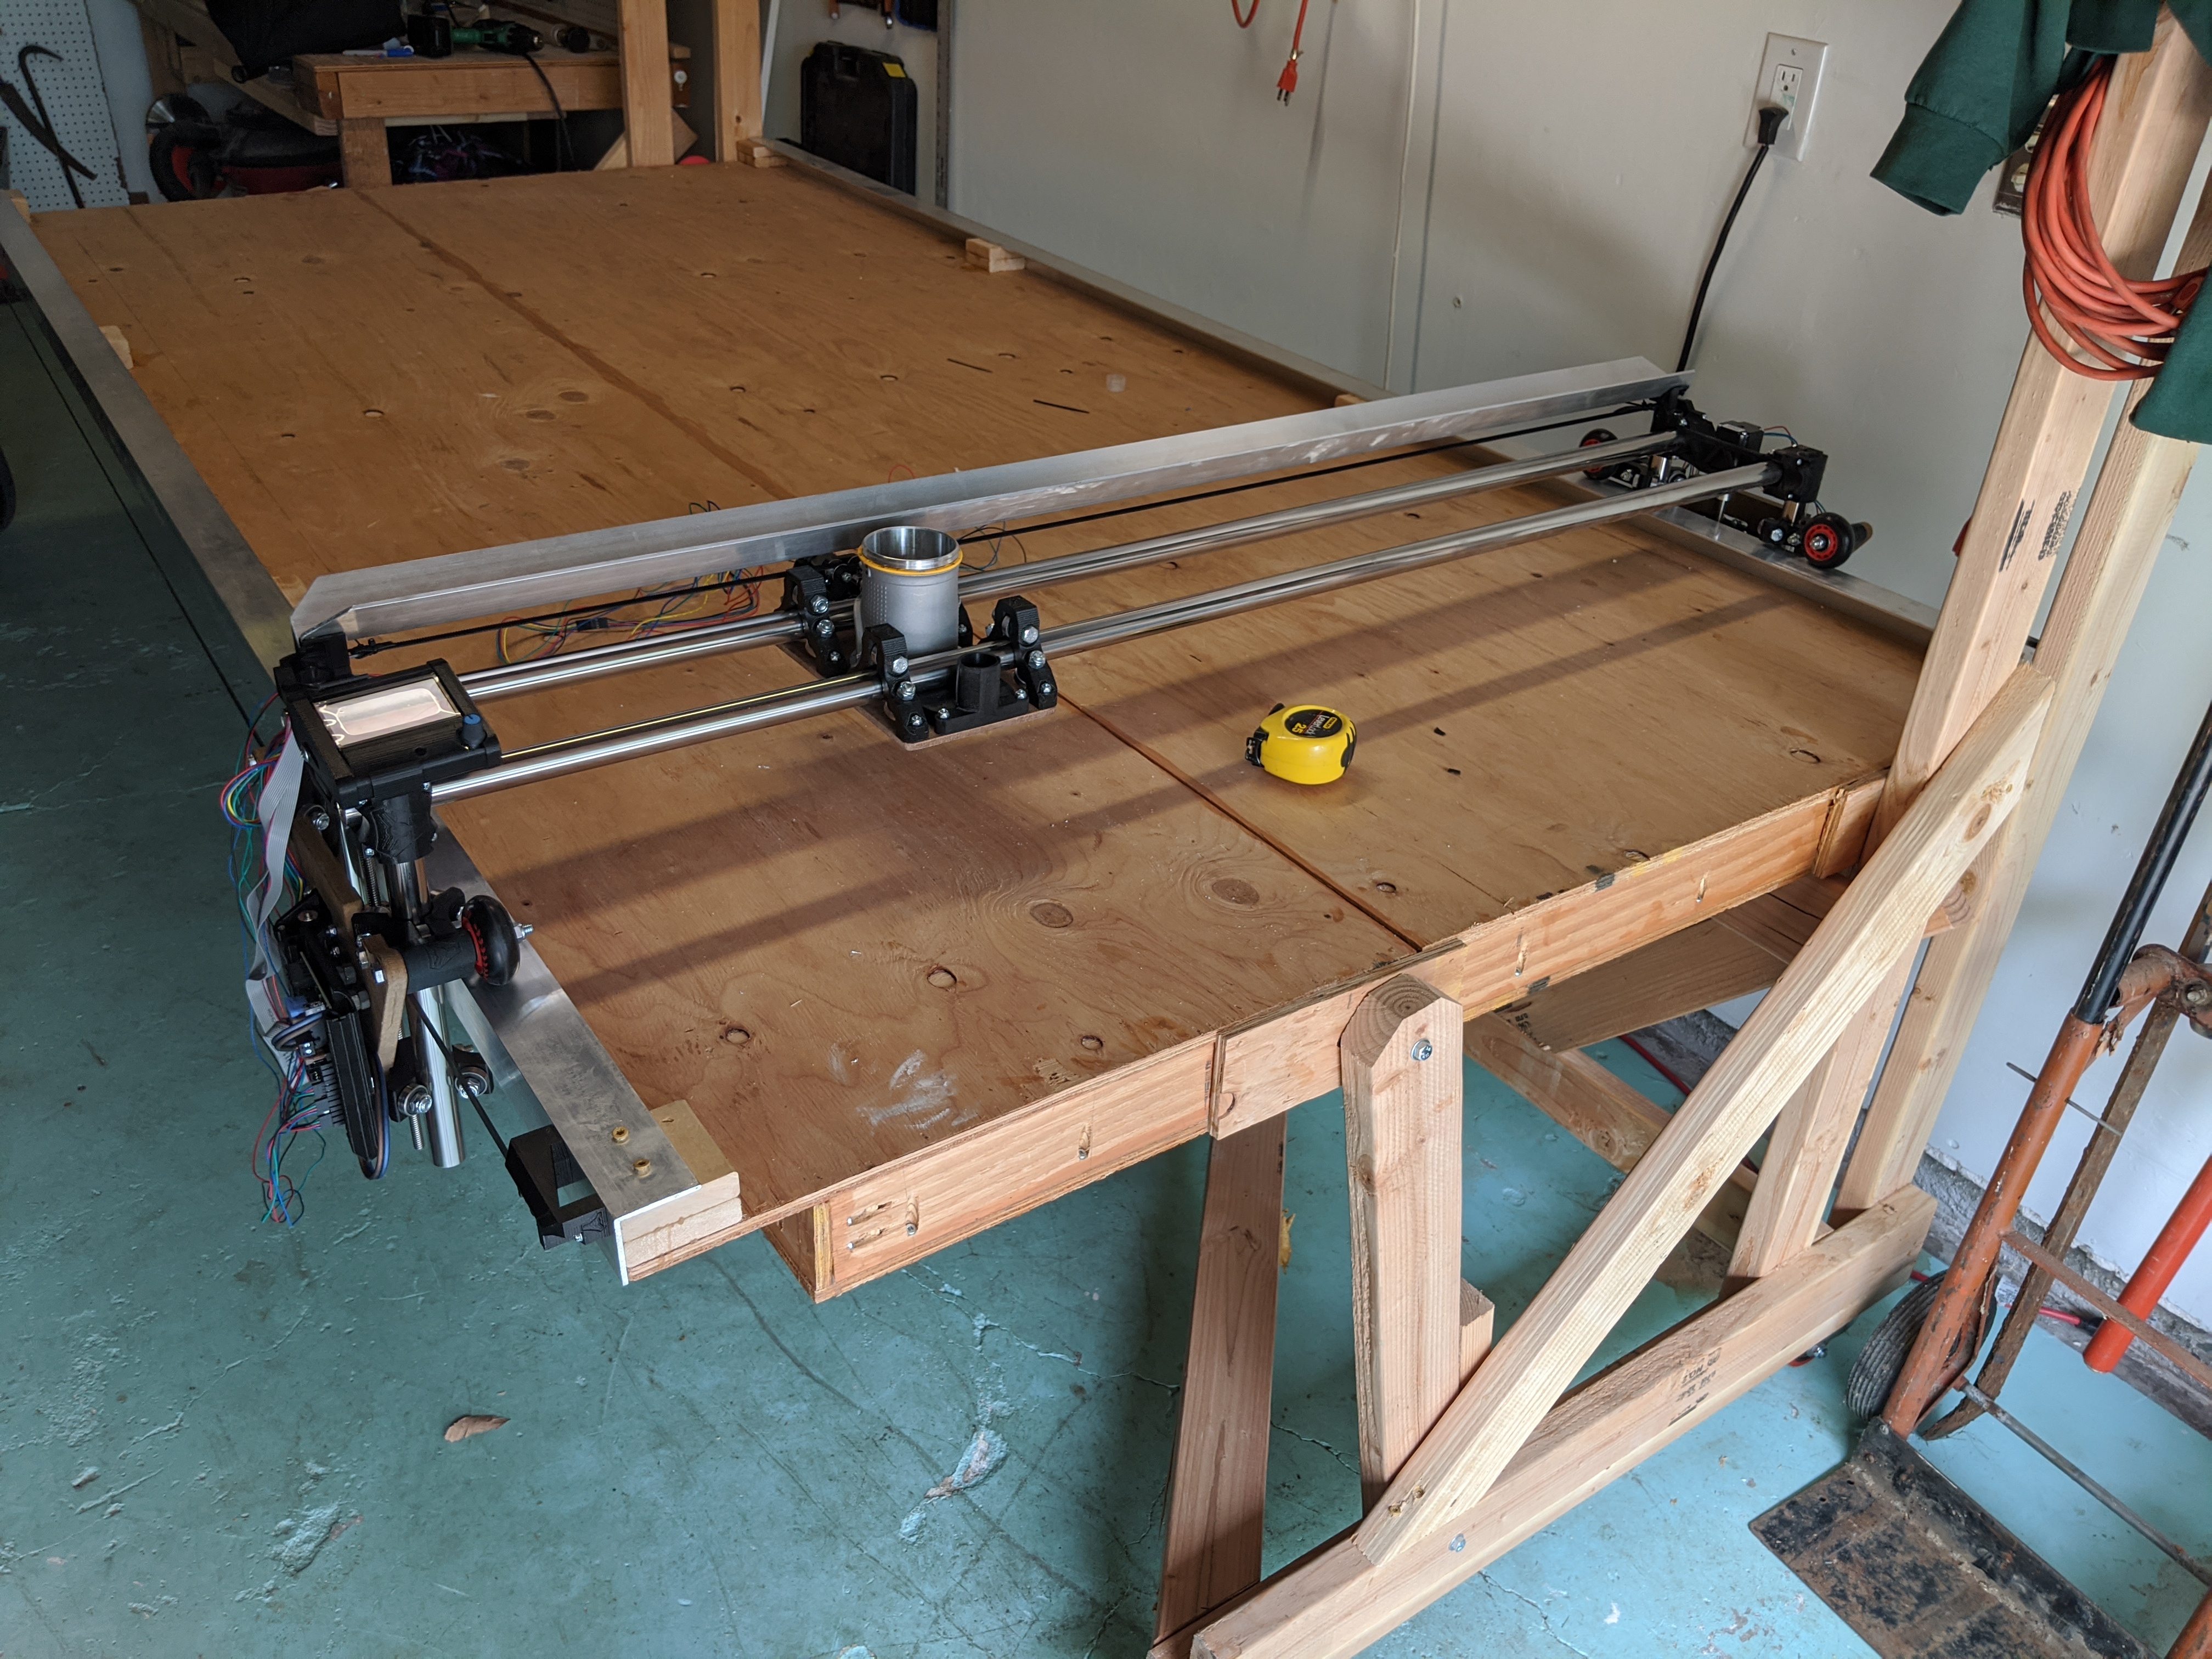
It’s been a long winter, and there have been many projects, but it’s time to get back at this build. My goal for today was to get the suffer rails mounted so I could more properly fit the rig on top and start working on the belts and cable routing.
It’s an ambitious idea, one that a few people have been able to make work. I do miss the ability of my big table but not the space it occupied. I’ll always check-in on these smart stow away ideas though so best of luck with it.
Little more progress today. All of the belts are installed. Getting wires routed, did a motor test. Confirmed the fold up up actually works with everything attached!
Slow and steady, right? I added a wire tray along one side of the table for the power cord, started putting wrap on the stepper wires, and strapped the pi and the power adapters to one end of the gantry.
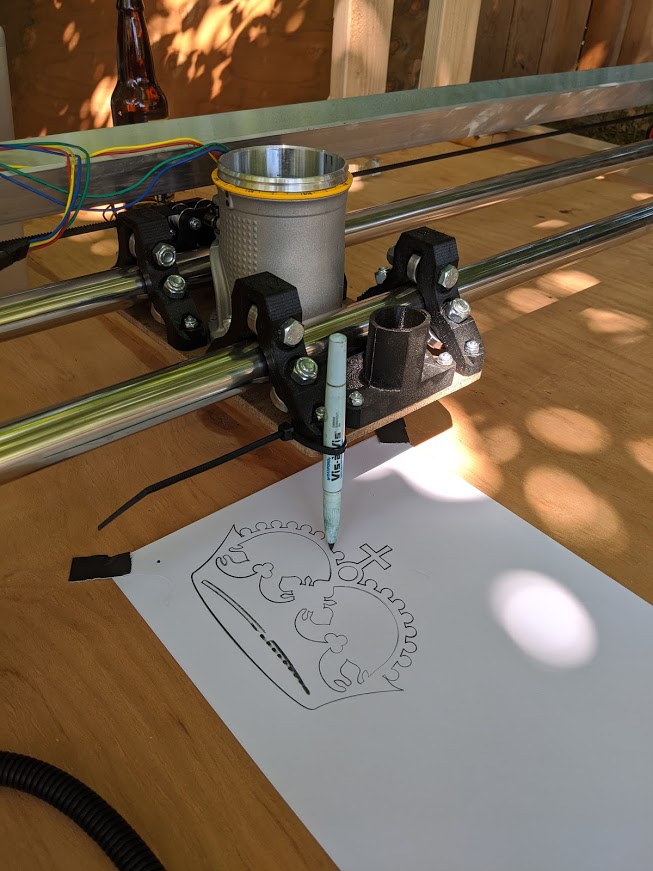
And did a first run with the crown gcode!
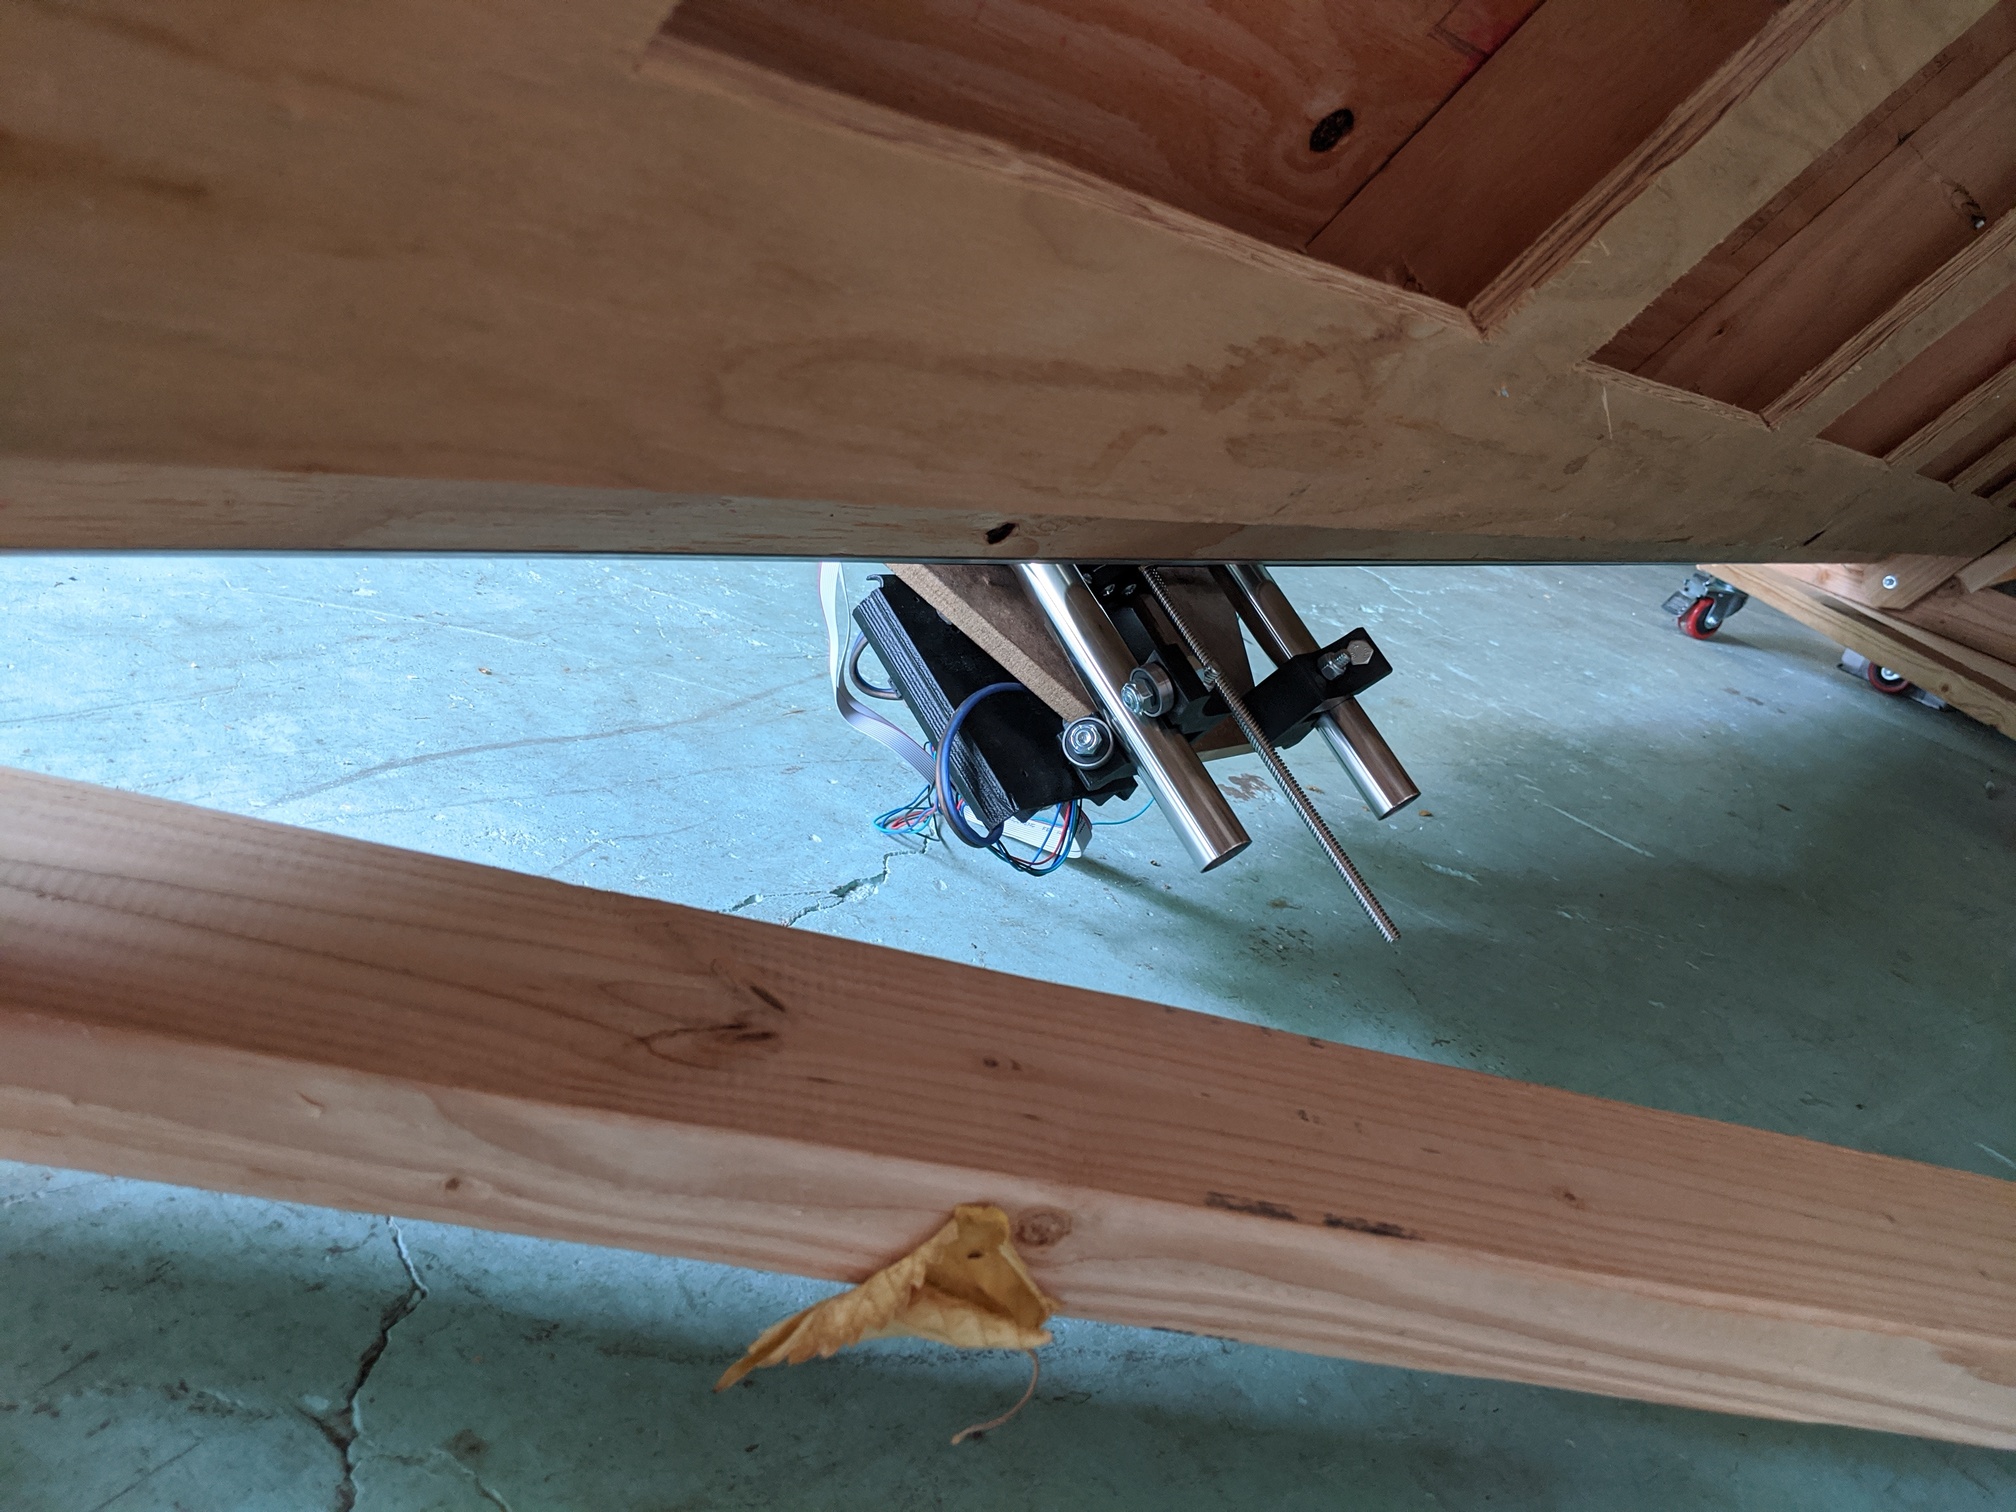
I think I can mount the shop vac and dust separator under the table, so that’s next on the list. Along with routing wires along with the vacuum hose… need to find some vacuum hose, too!
Side note… The wire tray in the top picture is metal drywall stud, from lowes. They’re cheap, lightweight, and easy to cut and work with. They’d probably make a nice lightweight table with several rows of them strapped between layers of plywood. https://www.lowes.com/pd/3-625-in-W-x-120-in-L-x-1-25-in-D-ProTRAK-Galvanized-Steel-Track/3369242
Barry did not have good luck with building a LR table from metal studs. Seems like a good fit for a wire caddy though.
Yea, they’re too floppy.
It’s been a long while, but I’m finally getting back to this thing. I moved and have finally settled down enough on house work to have some time. Small update - I got a MKS TinyBee board flashed with FluidNC and am getting rdy to install it for separate control of the x-axis motors and endstops…