I’m ignoring the good advice of waiting for kits to be released. I accept responsibility for my actions.
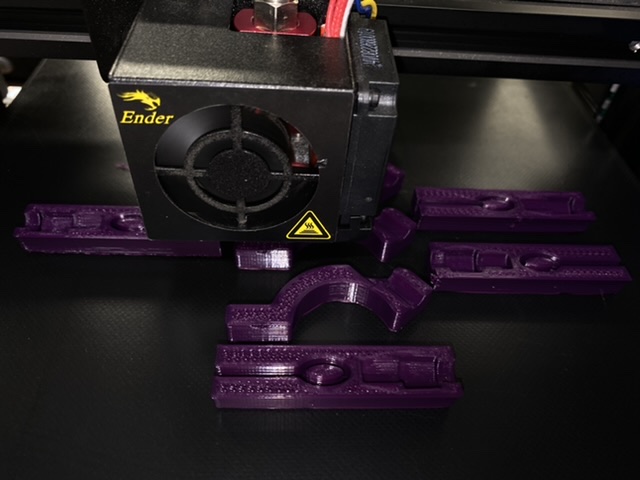
First ever time printing was last night with a second-hand craigslist ender 3 pro. I have a Prusa on order, but my impatience got the better of me. I can already see that having three machines is better than one, just like 2d printers! Anyway, I started with the smallest parts after getting familiar with the printer.
Printing 0.4mm nozzle, 3 walls, 60mm, 50% infill, gyroid(?), with coex plum and inferno orange pla.
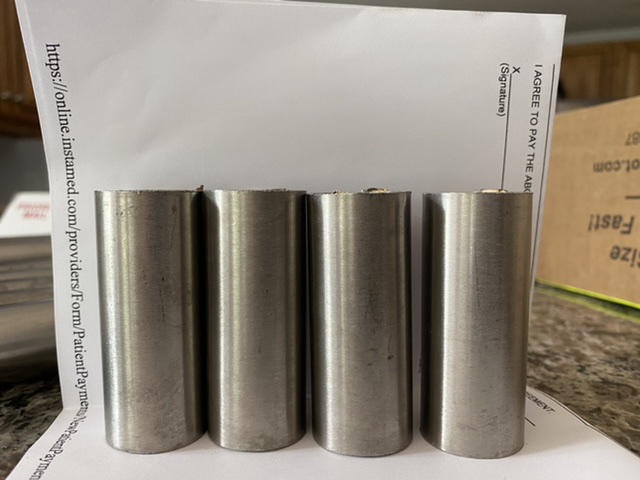
Metal tubes from Metals Depot arrived yesterday. Going to need some finishing work and some sanding / shimming. Roughly $130 for the stainless cut this way. It wasn’t looking much, if any, cheaper to buy and cut it myself. Welded SS tube seems perfectly fine. I was concerned about that, but shouldn’t have been.
I forgot to get a 5-8mm coupler, so I’ll be placing another order soon, probably with an lcd just in case I want to see what that can do.
My ultimate goal is to design and build a 3d capable wire-bending cnc machine for 1mm diameter soft wire. I have fairly narrow needs, so it probably won’t be useful as-is for others, but should be adaptable if there ends up being interest. This is a long term project and I’m sometimes bad at those… I’m looking at you 800ft backyard fence…
I screwed up my shoulder between hauling the real fence posts, digging holes, and climbing a utility pole at work. These will do for now… I want to get through physical therapy before I start on my next injury.
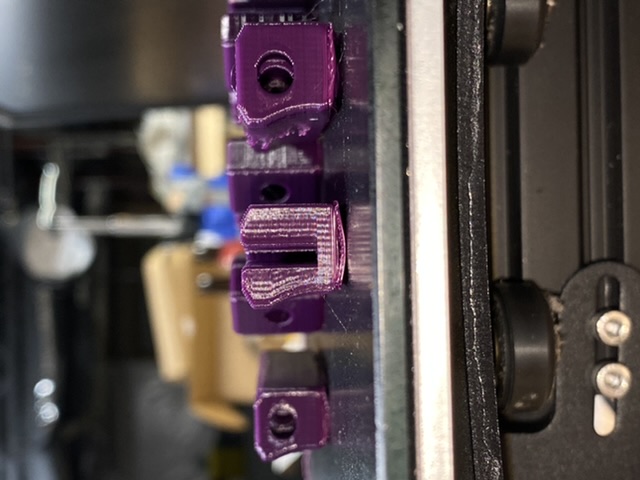
After some really good ‘corner bottom’ prints, the ‘belt holder’ prints had some problems with adhesion of the outside of the first layer or two. https://m.all3dp.com/2/ender-3-cura-settings-best-ender-3-cura-profile/ So, I made some adjustments based largely on this article. Most of the changes regard the first layers, but I am also trying a shorter layer height. 0.12mm in the main part of the print. If this one goes well, I will print the next one at 0.20mm and leave everything else the same. I bet the additional 2.75hrs for one corner leg lock is unnecessary.
I am learning lots. Tried only heating the bed for the first layer(s) as I read that might help with warping. No dice. Still a bit of warping on the bottom.
I moved the UPS so the printer is running through it. I’m not sure what causes spaghetti, but I do have a pressure tank motor that runs in the middle of the night and it can make the lights flicker a bit. If it is the file that is the problem, well… this monster will soon have a sibling.
Yep. I tried again and it failed again, but quicker this time! Then I remembered that I changed the bed temp to only heat while printing the first layers. It must have cooled enough that it no longer adhered to the glass.
Wow, this is going to be a learning experience the whole way through!! Outstanding!
If anyone has a tip on PLA warping, I’m open to trying new things. The warping I’m experiencing is pretty minor though, so if it’s just a necessary part of printing PLA I will move on. I’m trying a print with a raft to see if it helps with warping. I also turned the bed temperature back to 50c.
What I ended up doing for these prints was to smear a thing layer of PVA glue (aka glue stick) on the bed. This made the prints stick much better. For me it only took one application at the beginning. There was enough residual on the bed to keep every other print sticking without needing to reapply. On my old printer, I also used extra hold hair spray to get prints to stick solidly.
My son has an ender 3 and I have a cr10S. We both have the same bed material as you. I printed all my Primo parts on these two machines and had no problems at all. I used a bed temperature of 60 degrees and hotend temp of 210 degrees with .4 mm nozzle and .2 layer height. I got a little stringing when I changed to a different color filament and reduced nozzle temp to 205 degree for that spool. I did not change the temperature for first layers, and did not need any special bed adhesion treatment. Thought this might help you since our machine are nearly identical.
I’m pretty sure it just lost adhesion because the bed cooled and my basement is pretty chilly. I was trying to reduce warping, but didn’t realize bed adhesion was so dependent upon temperature.
I’ll see how the current print goes. I went back to the last known-good settings and added a brim.
Coex recommends 215-235 nozzle temp for their PLA. I’m printing at 220 and it seems to work great. Bed is at 50c. Bed is 1 post-it note below nozzle at the four corners and center.
My basement is cold enough that I have to put up cardboard sides on my printer to keep the printing area warm and draft-free. I’m printing on a little Qidi X-One with an after-market glass bed. I’ve found that between stopping the air movement and actually cleaning the glass w/ alcohol, I’m getting really good adhesion on my initial layers.
Warping happens 100% of the time, but if your plastic sticks to the bed well enough, it will keep it in place.
It is very important that you get good adhesion, and even adhesion across the whole print area.
You really need to get a good squish on the first layer of filament put down. If you print a small test cube and watch the bottom layer as it fills in, it should fill up the square and you’ll see an elephant foot when it is done, which means the bottom couple of layers are wider. If you get a very level bed, and perfect adhesion, you can get raise the bed enough to get rid of the elephant foot.
Heat and a clean surface help (clean with isopropal alcohol). But once it is warm and clean, warmer and cleaner don’t help.
Another “cheap trick” (but effective) is a brim. 5mm should be enough. You can safely print Ryan’s parts with a brim or elephant foot.
Or if nothing else works, add a raft, it will hold your piece 100% of the time, bad part is, uses much more filament and print time goes up with at least an hour for the raft itself.
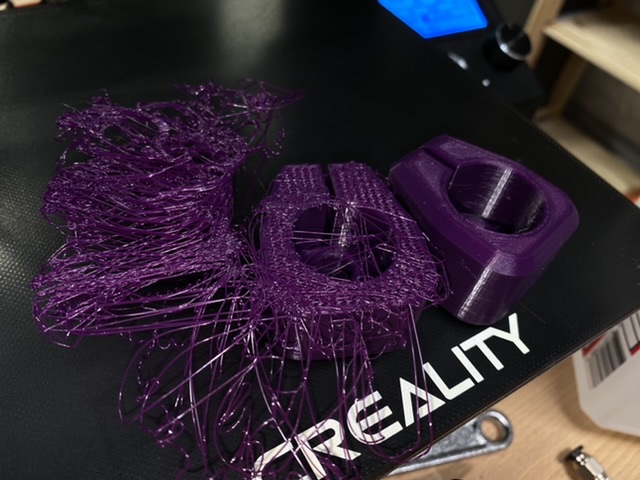
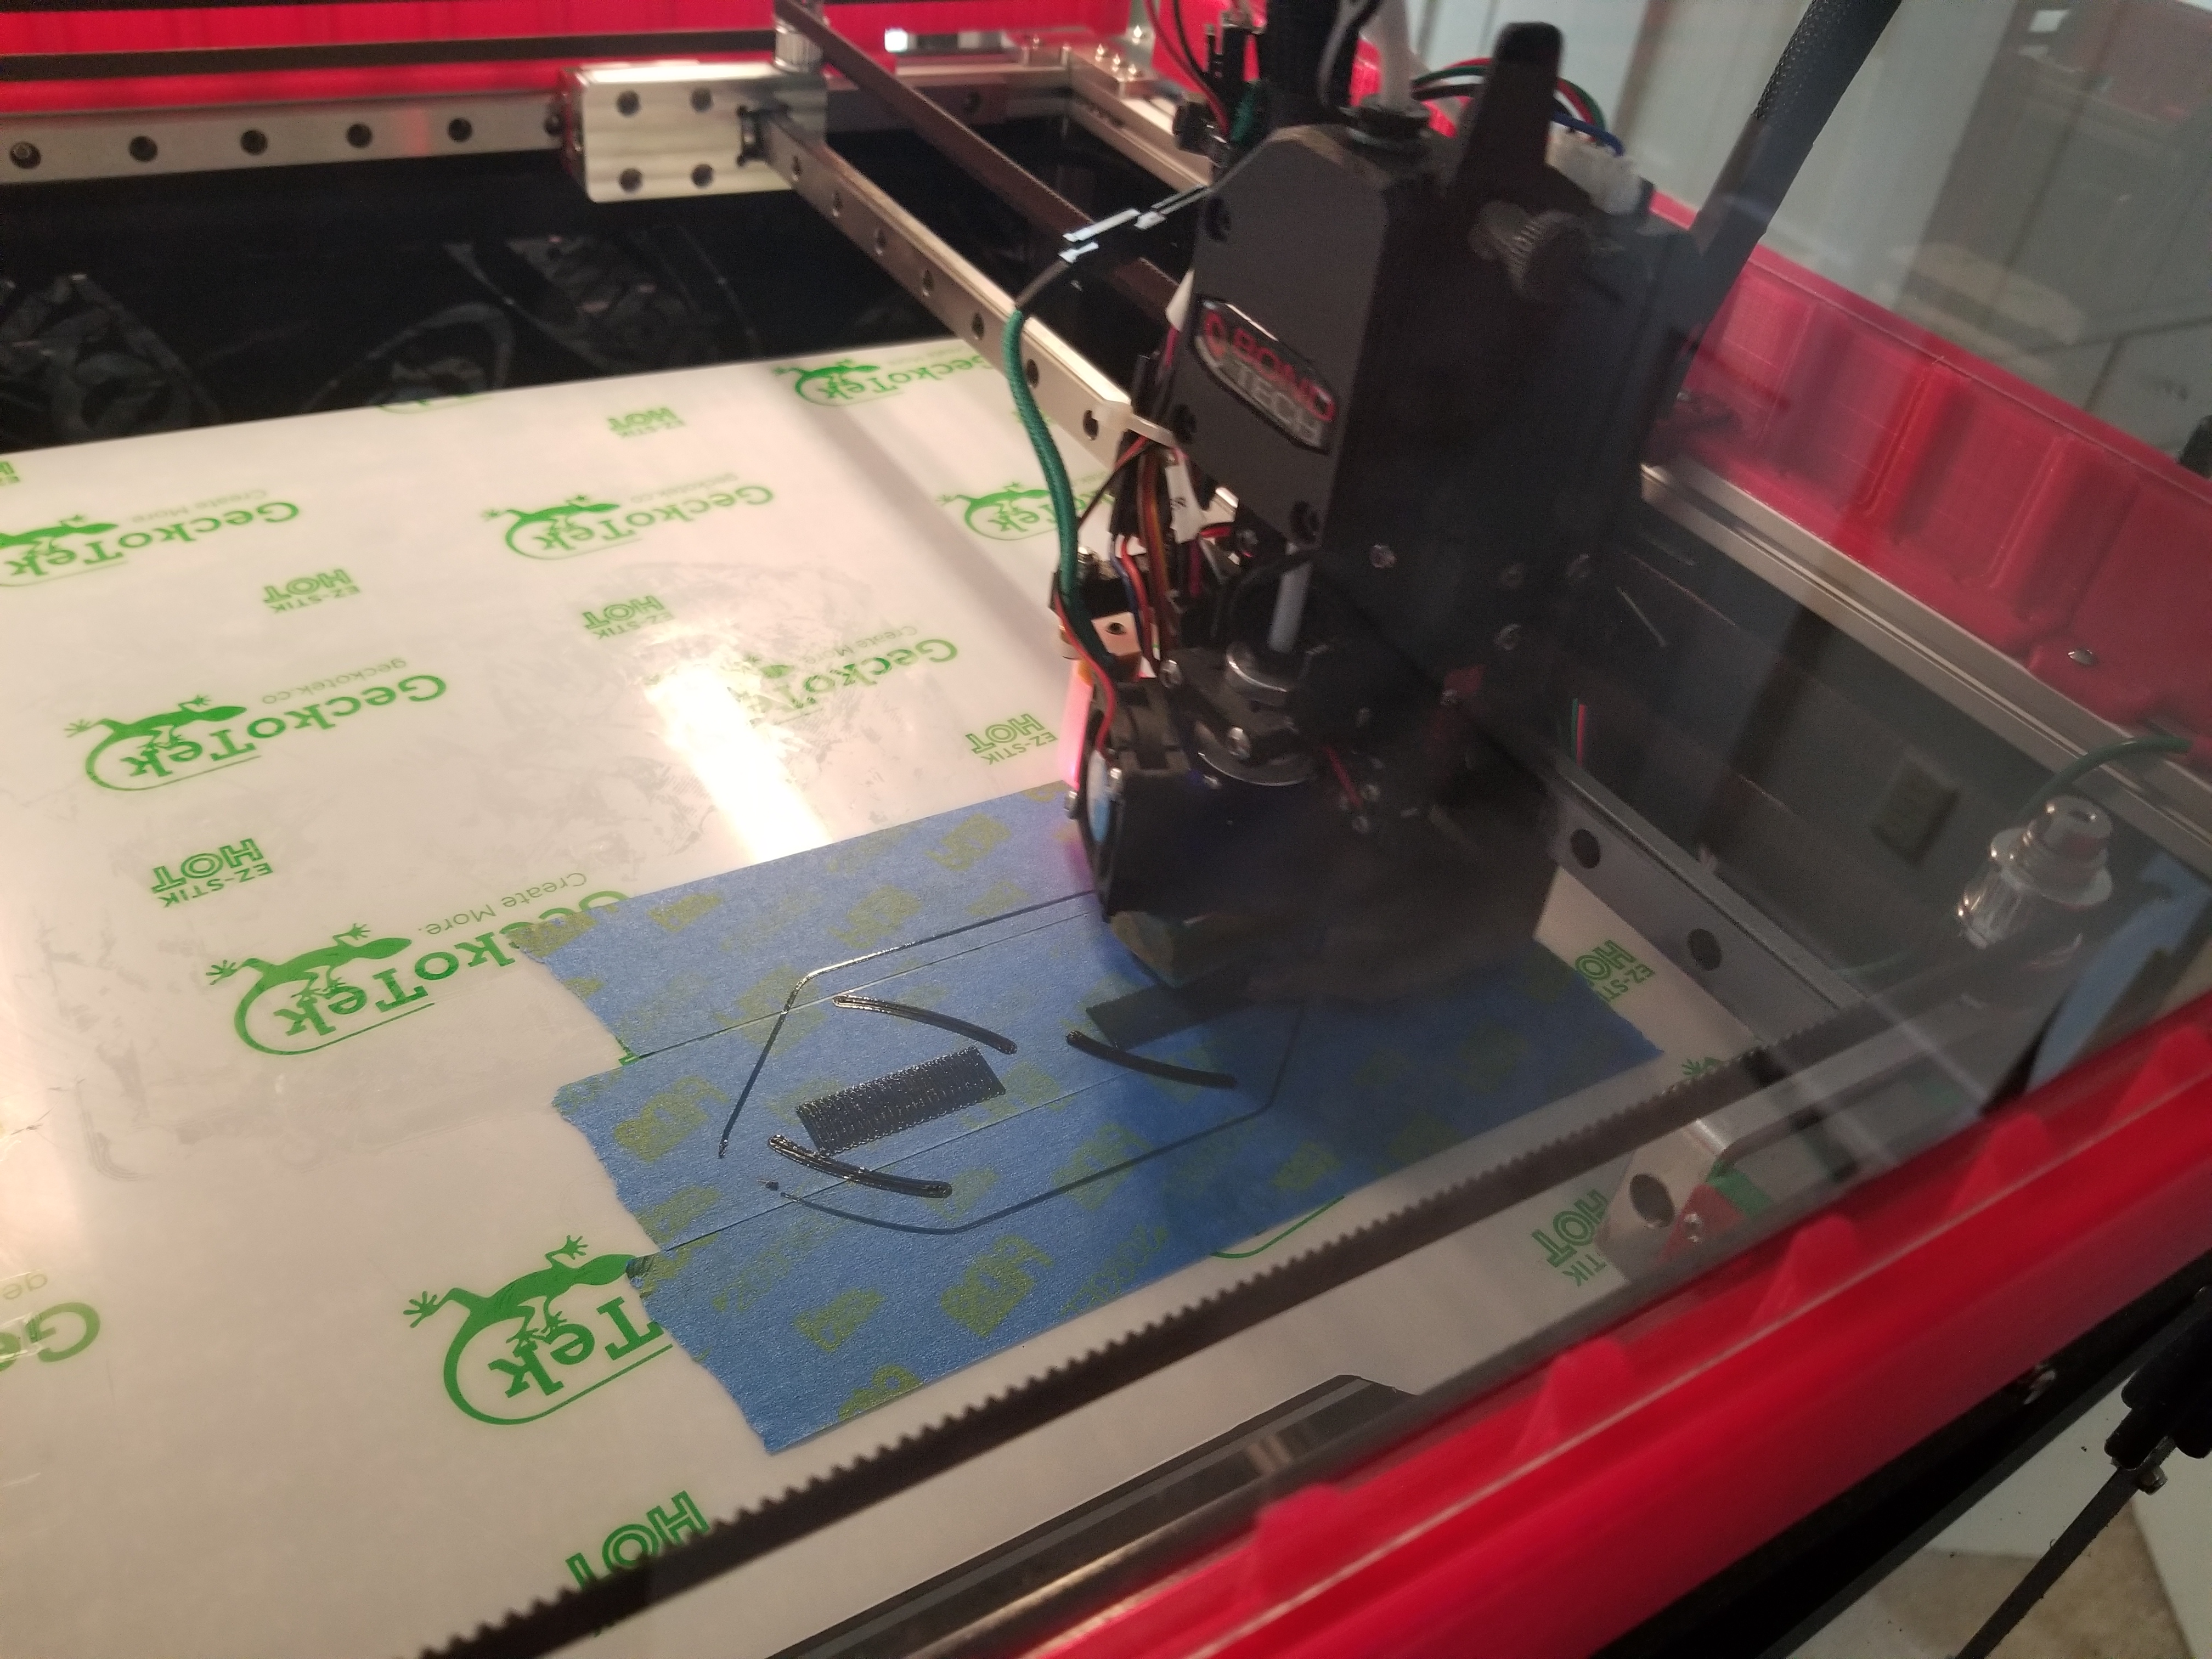
On this print the 4 skinny lines were the actual part, the blocks are support rafts and only one layer. The skinny parts would start to peel from the ends. Tape kept them down. Apply tape edge to edge and wipe with a paper towel with some iso alcohol on it.
I see this is your first time 3d printing. What I would recommend (have 3 ender3s) would be getting your settings dialed in and not changing your nozzle just yet. If you do decide to change your nozzle remember to change your nozzle size in your slicer as well.
I printed all my parts with a brim also make sure your surface is really clean. I have my bed set at 60c sometimes even go up to 65 (it’s summer here and have the ac going). I print on a mirror and just rub down with isopropyl alcohol to make sure no oils are on it and that is it.
Instead of guessing the temperature I would print a temperature tower that will help you find the optimal temperature and that way you aren’t guessing.
Yeah, I’m not going to rush the CNC project since there is clearly a lot of beginner learnings to be had regarding 3d printing.
It’s crazy - I did search for and watch videos and articles about getting started with 3d printing. In hindsight, I should have looked
for a book!
Elephant feet - Lowest layer(s) compress out when downward pressure exceeds the material’s ability to maintain its shape. Generally, bed is too hot as the part gets taller. Correction is reduce bed temp as part is printed.
Warping - lowest layers lose adhesion to the bed and are pulled up because they adhere more strongly to the material above and beside them or the top of successive print layers is cooling and constricting more rapidly than the layer bottoms. Correction is slower, more consistent temps throughout the model and increase in bed adhesion.
I’m going back to 0.4mm nozzle. I have now tested prints at 0.6mm and 0.8mm and while the 0.6mm print was exceptional in that it had no observable warping against my straight edge, it was courser overall and may complicate solving future print issues given that most resources for troubleshooting reflect use of the 0.4 nozzle.
I’ll seek and print a temperature test. I didn’t know about this and would not have though to seek one.
I’ll review other posts and incorporate or test other suggestions. I’m on mobile, so it is difficult to review as I’m writing.
I disassembled and reassembled the ender 3 after experiencing difficulties running test prints. It was loose all over. I also learned a lot about the hot end, particularly how the various parts should fit together and why clogs form. Unfortunately, I broke wires to the heating element. I do have lead free solder, but at 220c, it’ll be soft, if not liquid, so replacement is the best option.
On the bright side, I have lots of things to work on while I wait for a replacement part. Clean the workshop, work on a new website, build that 800ft fence… fix the tractor… fix other stuff…
I’m still following other builds and am excited to post again once I am confident about my 3d printing!
The heater wires (at least at the start) are nichrome, which doesn’t like solder.
I broke a 1/4" heater and found a reasonably priced replacement at microcenter locally. It is one of the few parts that I have been able to do that with.