i think US vs UK boilers are electrically different, it seems we have 230v not 24v ac coming out of the 2 wire heating systems, anyway back to MPCNC related matters.
I’ve found just enough polystyrene 50mm thick board to make an enclosure (except for the underside) basically about one and a half boards 2400x1200m
Did a quick sketchup in old sketchup 8 to double check my cuts as i dont have much chance of easily getting more at the moment. I am going with the incremental approach of build this box with 50mm, if that is not enough clad it in another 50mm, maybe use some of those acoustic pads on the insider too.
I think i will install a web cam and avoid having a window the dust will also be funneled out of the lid. I would make it taller but i only really have enough material for about 60cm internally for the height. If the height is an issue i will extend it and make it taller when i can buy more polystyrene board and if it needs it double the thickness.
Will get a decibel measuring phone app and report back with before and after when i’ve done which should be by the end of the long weekend. Celebrating 75th anniversary of VE day tomorrow so a nice long weekend with amazing weather.
After i have a sensible noise level to do prolonged cut i shall be looking at cutting my spoilboard and making some clamps to hold material. this far both my cuts have used big g clamps either side of the table but the new (soon to be) enclosure wont allow for this.
In preparation for this i had to move my whole office around, desk now looks out the south window. If i had left the mpcnc where it was and put an enclosure on it i would have blocked all my natural light. Glad i did it, made it possible to get to the floor and clean since last years heavy rains which flooded the office prior to my guttering work which should mean that doesn’t happen again. Floors now mopped and cleaned. Tip opens again in a weeks time so should be able to clear a load more junk out. slowly but surely getting there.
idea for fixing the panels together.
make a jig to drill long screws at 90 degrees
cut panels (sides) with hot knife to have sharp clean edges
make access panel (side) a press fit rather than hinged. I dont really have space for a hinge mechanism
i have a load of long screws left over from a job my builders did on my house, I want the thing to be light as possible but easy to dismantle as i am not 100% that it will be good enough and thus the final product. thin batons of wood to support the heads of the screws should provide some good clamping pressure to seal the edges tight.
Just measured the current unloaded noise (not cutting but full voltage) 82.5 db this was with the android sound meter app.
I look forward to hearing of your results. I’m most likely going to want an enclosure myself and would be happy to hear a lightweight foam box can be effective.
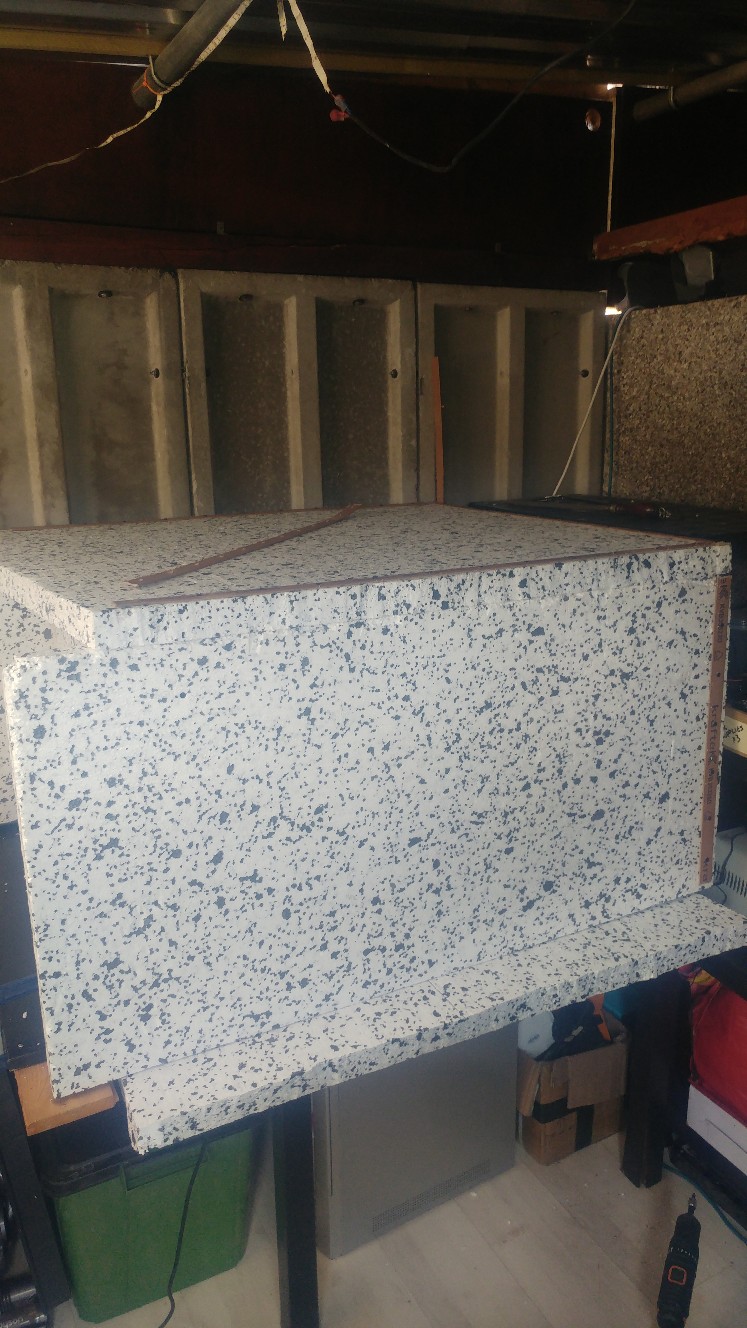
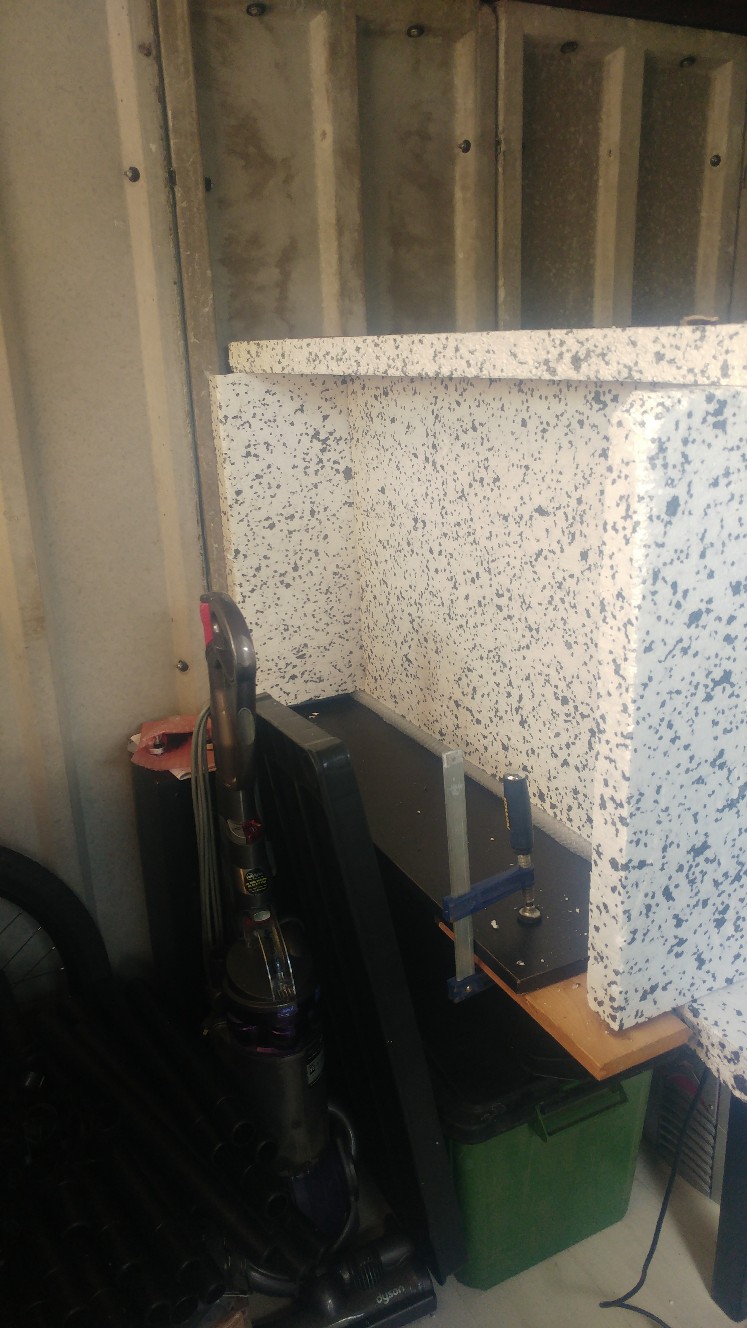
So this is my crude enclosure attempt. I miscalculated the dimensions and had to make it a touch wider to ensure i wasnt hitting the stepper wiring on the x and y.
It takes me down to 77 db in the room but that still seems far too loud and i can still hear it from in the house through the double glazing.
It is crudely cut using a old unserated kitchen knife with the blade heated using a blowtorch.
Better than getting bits of polystyrene everywhere but i made sure to do most of the cutting in the open air as i think the gases are pretty toxic.
The sides are fixed using long screws every 8cm or so. Maybe need double skinning to 100mm but it also doesnt have an insulated floor. So sound could easily be coming through the floor of it.
Sadly ive also snapped another corner piece moving the cnc as ive not got enough space to work with in a very cluttered room so access is a bit crap.
It is light so maybe i will avoid creating a door and just hoist from the roof between each setup.
Another option is to move the cnc to my garage. Slightly nearer the house but more space if i clear it out better. Then i can build a better enclosure with much thicker sides.
Sorry if I missed it above but down from what? If I build an enclosure I’m debating between foam or something sheathed with 1/4" ply with several layers of old towels inside, according to some they’re quite effective at noise reduction.
At about 82.5db at it loudest to 77db with the enclosure. Tbh not enough for me so i am having a big rethink to put the cnc fully inside something
Using really thick insulation like 150mm and making the edges absolutely airtight.
I’m surely no acoustics whizbang but I wonder about the necessity of making it absolutely airtight. There’s a lake near my house with a nice walking path around it. The lake has two fountains and their sound is quite noticeable, but there’s two pump houses around the lake used for flood control and it used to amaze me when a pump house was between myself and the fountains you could barely hear the fountains. IIRC it’s the higher frequencies that tend to b e the most directional.
To be honest it just has to be much better than this first attempt. I think building a more substantial thing will pay dividends and make it more pleasing to use. My mistake is trying to do this on such a hot day and rushing. Lockdown is not helping due to not having good access to materials.
Consider lining the inside of the enclosure with something to scatter the sound. Big flat surfaces will reflect rather than absorb. I’ve seen people have really good luck with the pressed recycled paper egg crates used in the US, as they both scatter and absorb the sound. Don’t know if they’re common in the UK.
Sound absorbing acoustical foam/sponge panels would work too, but I’d guess dust would be a huge pain to deal with.
I don’t know how effective it would be in a small enclosure but it’s common when designing a room you wish to quiet to make both sets of walls as well the floor/ceiling a bit out of parallel in order to avoid creating standing waves.
Decided i will make a taller enclosure made from mdf. The one ive made works a little but no where near sufficient for my environment. Also i have found a home for the 3cubic metres of hdpe milk bottles ive collected for precious plastic projects. With that gone in a couple of weeks time i will have space in my garage for the larger enclosure and cnc.
I also need to fix a corner that snapped but wonder whether to upgrade it to burly and whether i can mix and match a corner from burly with the original 3 i have.
Wife wants a card for her birthday. She says she wants it hand made but i think a cnc one would be cooler and last longer.
Anyway another mini hiatus till i can get space to continue.
Tried to engrave an outline of my husky on hwr back paws in the air.
My losing steps issue was more obvious when using the mpcnc today.
Had a wierd issue where if i went 50mm left jogging the x axis with repetier host it was smooth but going right it would jerk and grind and lose a ton of steps. Read up about calibrating the drv8825 and my x was 1.68v so i have that down to 0.7v now and problem has gone away. Failed three times to cut a respectable husky outline but either the laminate it too hard, i should maybe put up the x and y drv8825 to 1.4v (since those motors are sharing the driver) and put some fans on the ramps board to keep them happier.
Still learning but feels like i start to get something and bam another issue become obvious that was hiding behind ones id just solved. Anyway thanks for those listening and commenting even if it is about thermostats.
Burnt my endmill and snapped it. Luckily i have a few others but they are shorter.
I found a crocadile clip which made setting the voltage on my 8225 drivers alot quicker. Now i have the x and y on 1v and the z on 0.7v this is for paralleled motors 2 on each x and y driver.
Changed the bit. Double checked everything in estlcam. Removed arcs checkbox and went into the feed and speeds menu deeper as the tutorial pics might be out of date with current estlcam. Changed the flutes from 1 to 2 and double checked every thing else. Then i tried another husky cut.
This is the same gcode run twice. My setup isnt entirely level so the second run i padded on side to raise it but unfortunately by too much as it lost a few steps and dug into the material more than it should have.
I happy now that i have the drivers set correct. I just need to level the bed and look at making some proper fixing clamps as i am just drilling screws at edges near the rails to hold the material.
Still yet to build enclosure but wife said she didnt hear it in the bedroom but that is on the far side of the house so the boys can probably still hear it in theirs and of course the neighbours.
The attempt below my wife says looks like a
But that was the run that burnt the end mill.
This is my cheap chinese 2000w scr to turn down the power on the mill. The reason it has a stepper motor is i was making pcbs using reflow techinique and a halogen oven and had a pid loop running on an arduino controlling the power of the oven. It is tempting to make it do similar for the cnc but that requires maybe a laser tachometer attached to the z pointed at the spinning part and i dont know what the hysterisis would be either with such a heath robinson system. Could do a simple post processor of the gcode so that it ramps up and down between cuts.
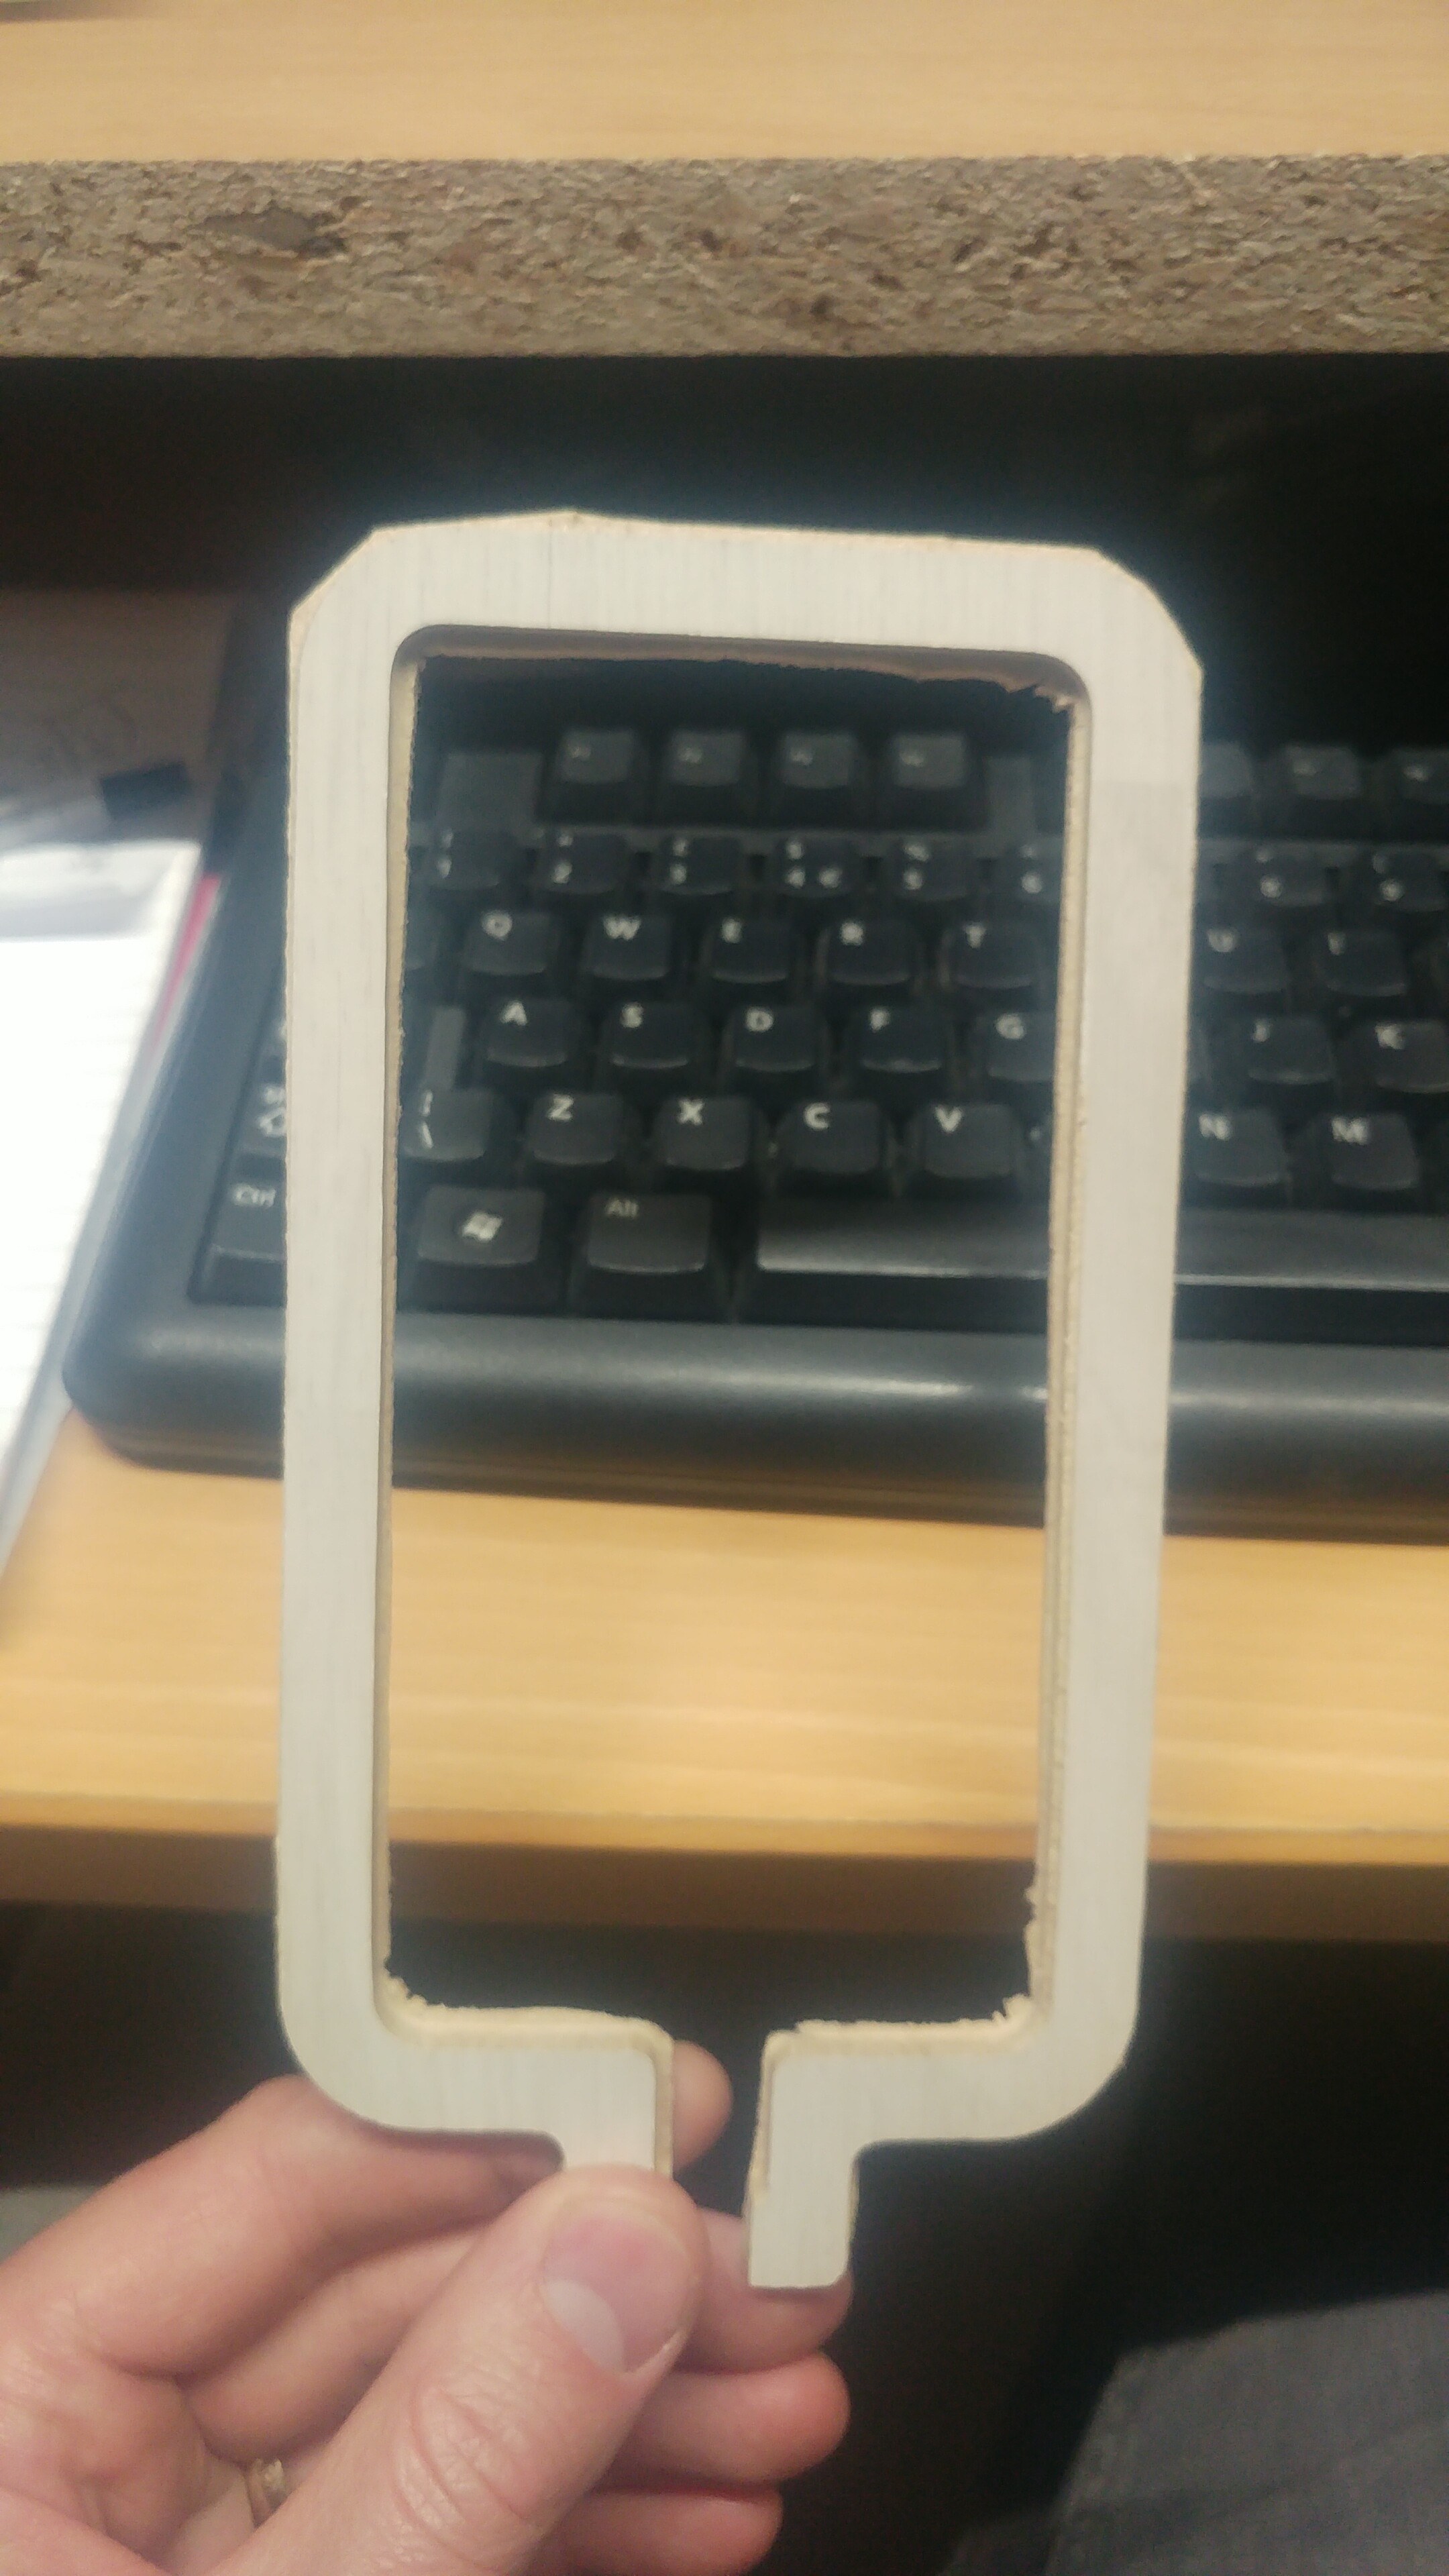
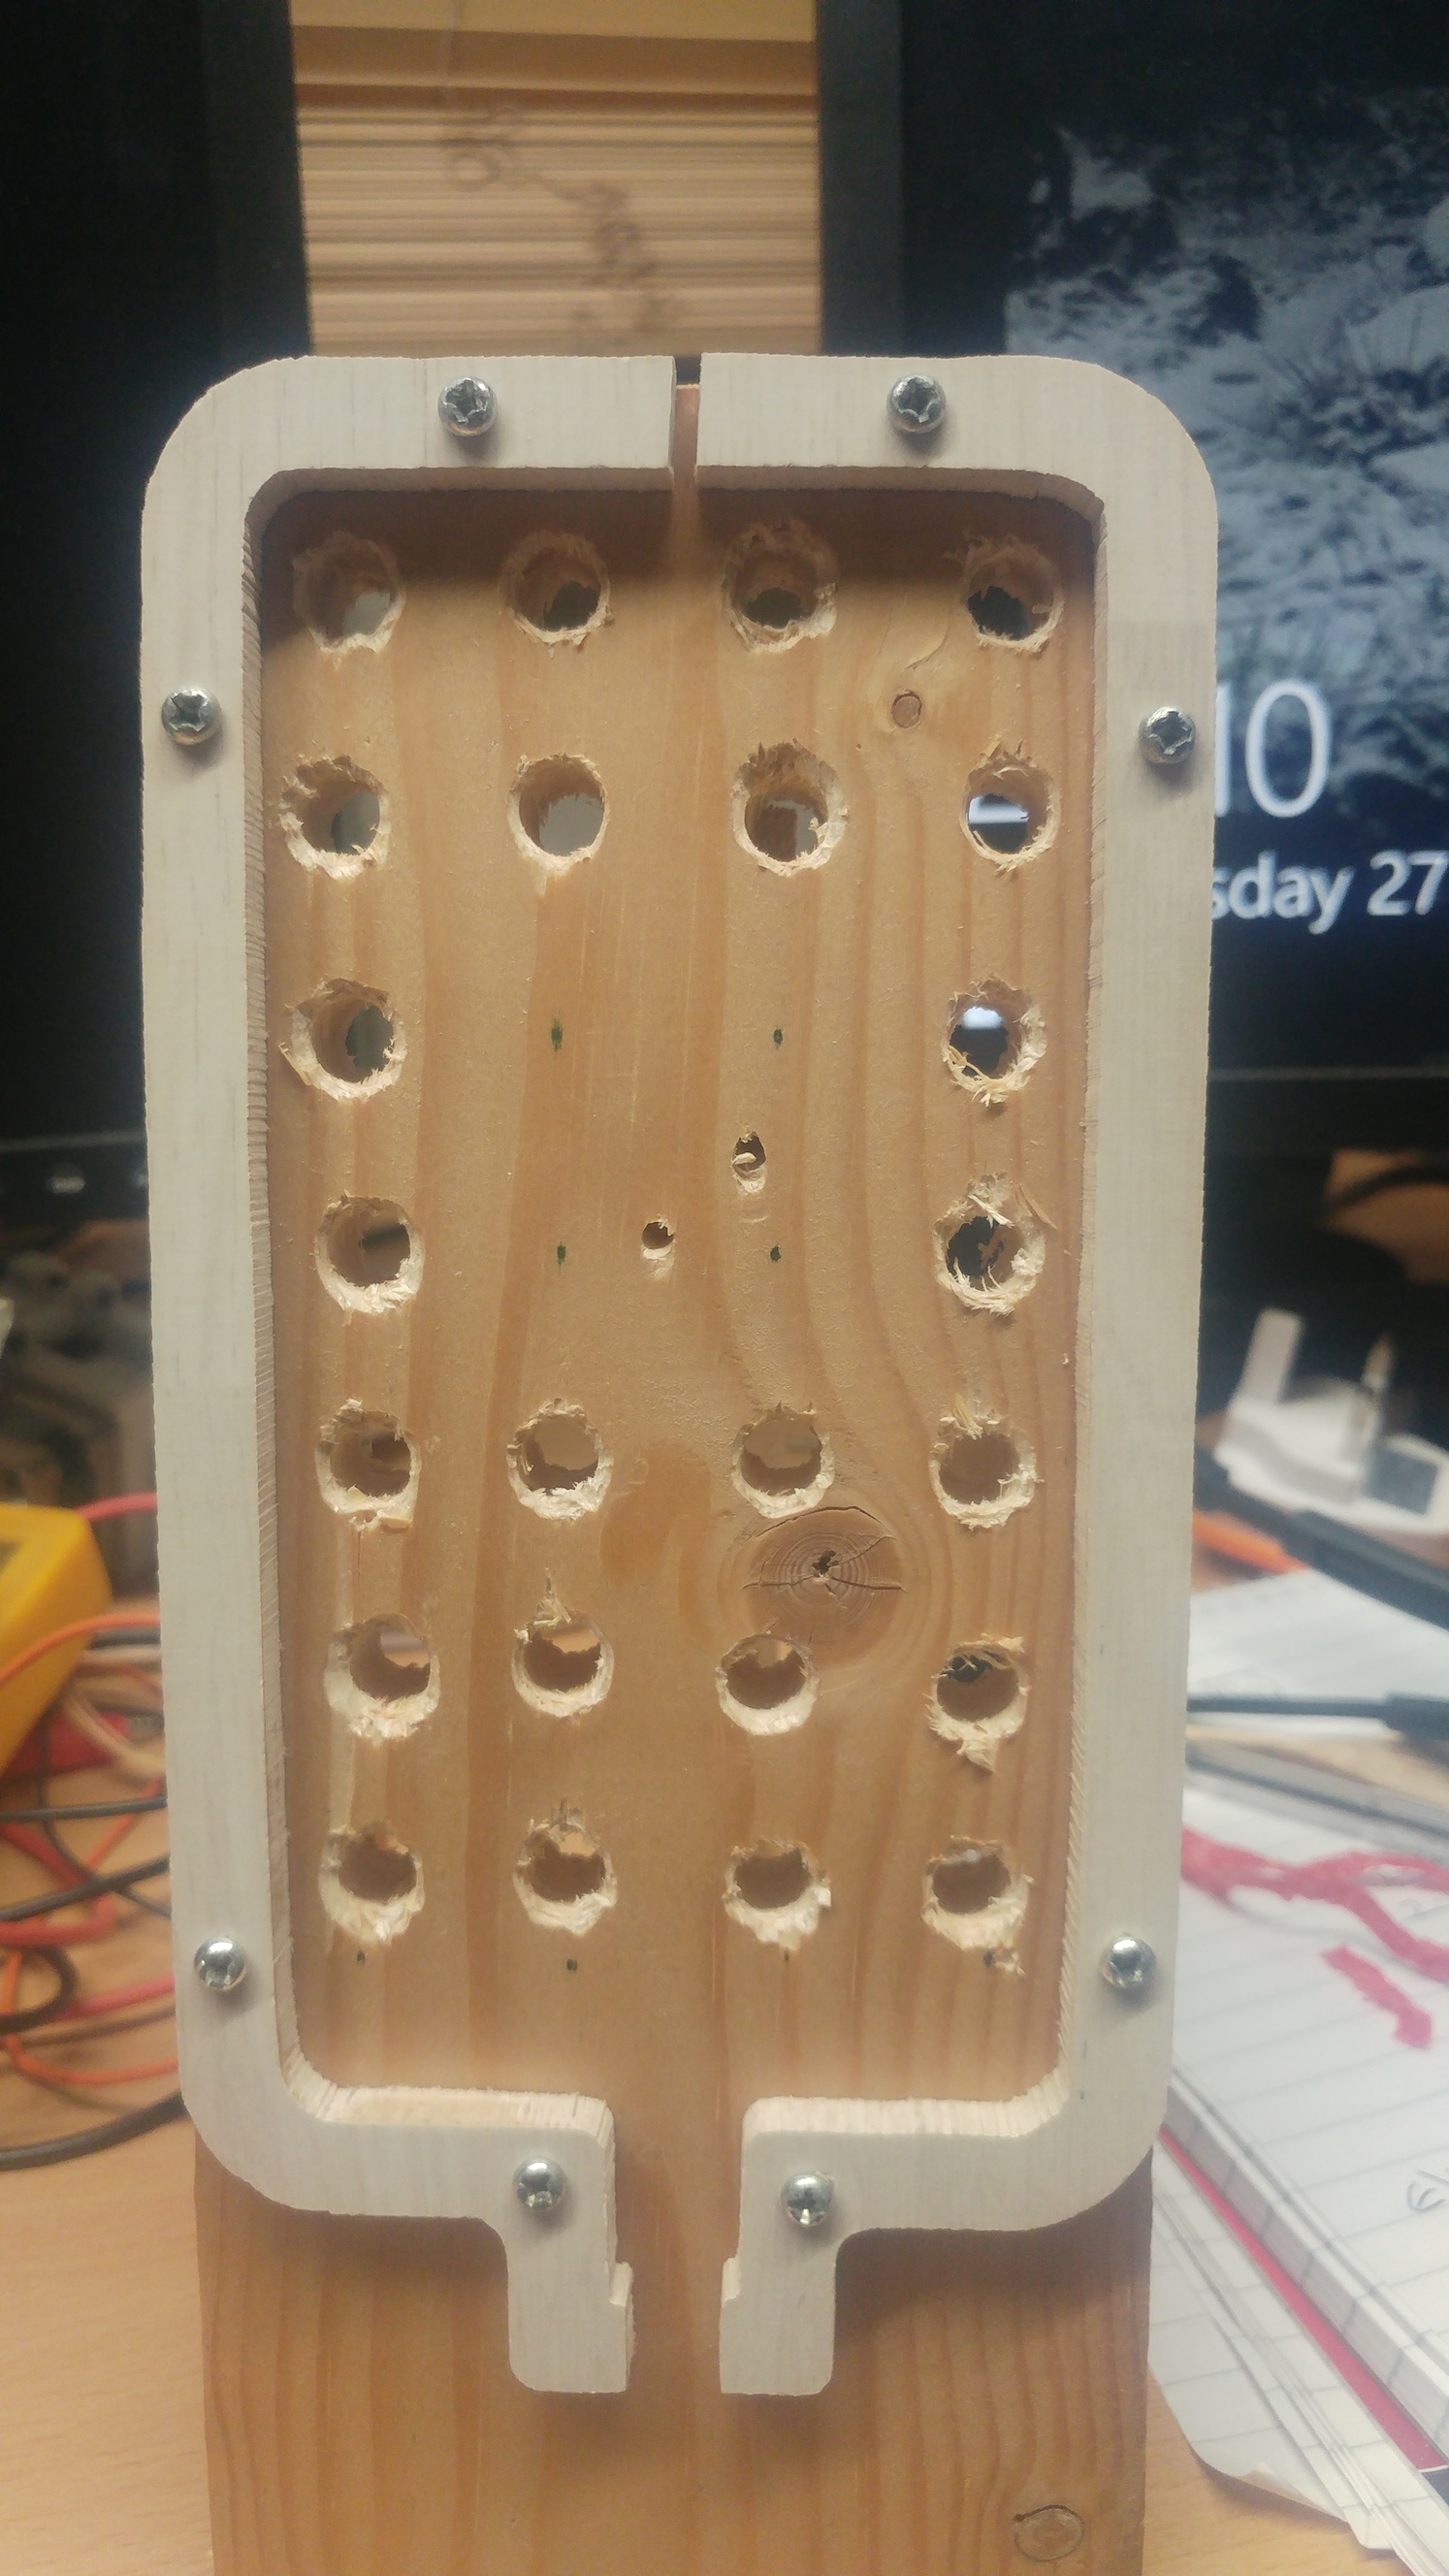
I measured the dimensions of the phone its 75 by 150mm. Height wise it seems fine but width wise it at least a mm too narrow.
I double checked the bit and its about 3.17 versus 3.18mm in my settings. I wonder if my 0.01mm diff in the bit diameter would cause the error im seeing but i doubt it. I used the auto detect in the estlcam to generate the cuts.
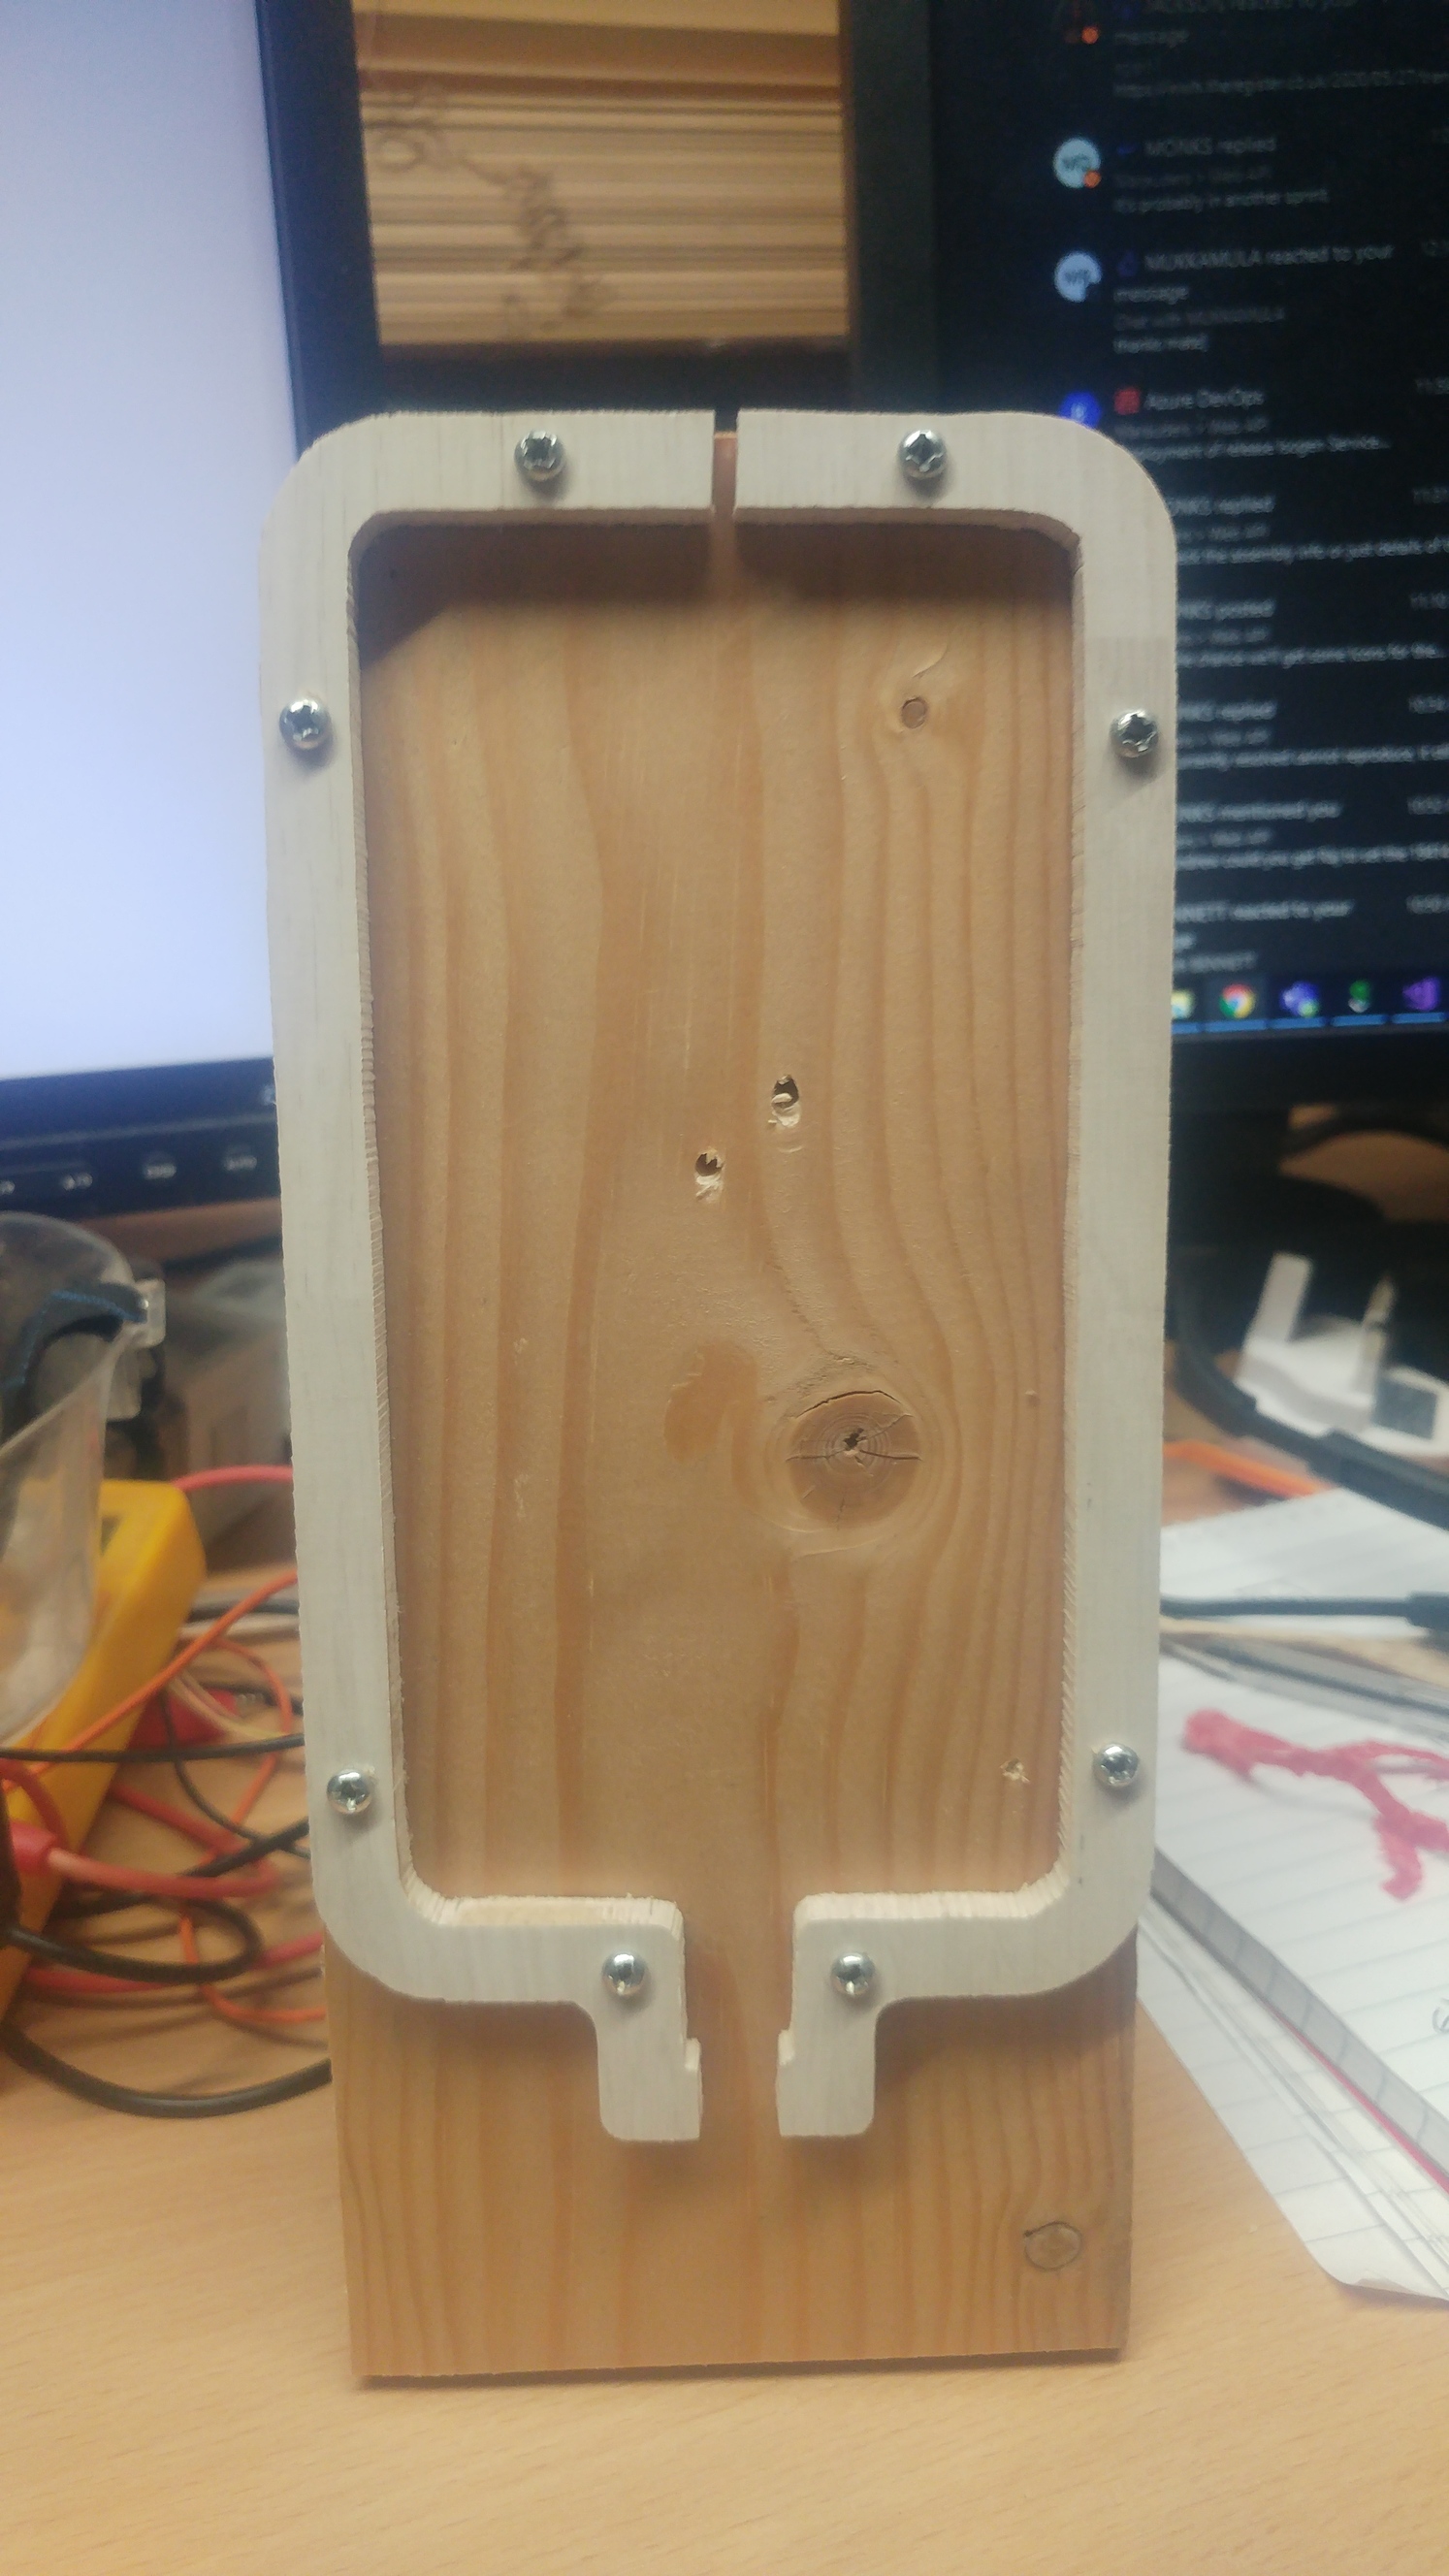
The roughness you see is the fact it didnt cut all the way through so i cut down the routed lines with my bandsaw. I dont think a finishing pass would have made the difference i am seeing. As a functional tool i may just cut at the top centre with the bandsaw and stick it behind another one i will cut better. That way its not wasted and not seen.
This is the phone holder i made. I was going to cnc more layers but it works fine like this. Helps for those lockdown teams meetings for work. I finished the untidyness on my bandsaw and i think i came out ok. gap a the top is to accommodate the width not being the desire full 75mm needed by the phone. must work out why the x is not right.
my phone warned me today of a hot battery which was probably me in lots of meetings with my phone charging in the holder as was. Now it has a few rough cooling holes. I shall test tomorrow and workout whether i need to make some most drastic changes