So I’ve been working on a few badges as gifts and as practise because the whole CNC/CAD/CAM is rather new to me. I’m pretty pleased with how they came out: good enough for an amateur as my dad used to say. It’s true you learn so much from just doing stuff. I made at least ten of the PERFX one before I got it right. The Arsenal badge gcode was courtesy of @JakeB, many thanks!
Key learning points: you can get away with murder with these, the paint distracts the eye!
I like it when the knots appeared prominently, I don’t know why.
I did learn that if you incorporate different tools into a piece, estlcam inserts a stop for you to change the tool, probably obvious but I didn’t get it.
Another observation: if I start my spindle before the board or whatever is controlling the motors, there is enough vibration for the Z-axid/spindle to drop into the board slowly. How did I discover this? When for the umpteenth time I started a job and the endmill dragged right across my piece. Well, at least I know now.
I had a bit of an experiment last night with feedrate. I made all these badge things at a pathetic feedrate of 2.5-5mm/s with a 1/8" endmill (2 flute I think), 2mm depth per pass, and all to avoid the noise and vibration of faster rates. I thought the noise and vibration were a signal that either the feedrate was too high or the tool was getting blunt. I assumed these faster rates would lead to poorer cuts too, but that’s not the case. On the left are 1mm doc, 2mm on the right, with feedrate increased way beyond what I thought reasonable, up to 30 mm/s, which seems insane. Of course what’s clear is that at that feedrate, there’s a huge deflection when the cutter hits the material.
Is there a way to mitigate this? Angled descent then return to cut full depth?
Still, I’m amazed at the capacity of this system to cut, it’s much more powerful than I expected
Well it is more complicated that this. You rtest cuts look like slots, the absolute hardest thing to do with any CNC. Try a pocket with a .6mm finishing pass…thn test from 2-8mm deep and test the speeds as well.
Super clean an easy with a vbit and the carve function.
Thanks for the advice, I’m something of an empiricist, I need to see and feel the limits of a technique as part of learning how to get the best out of it. I’ll keep at it!
2mm DOC at 30mm/s is the same load as a 6mm DOC at 10mm/s, which is a common setting (and spreads the bit wear over more than just the tip). If (as Ryan suggests) you do a pocket at 50% step-over, that’s half the load - and more space for the chips to leave the tool.
It’s interesting that 1mm cuts had torn edges, while 2mm didn’t. I can’t imagine why that happened!
Angled descent then return to cut full depth?
Yes. If you set a descent angle in Estlcam, it descends at an angle to half depth, then reverses and descends at the opposite angle to the start depth, then cuts normally at full depth. That way it’s always cutting with the side of the bit. If you drill straight down, the middle of the bit often isn’t sharp, and isn’t moving fast. It basically has to squash material out to where it can be cut.
That’s a really good point about spreading the wear over the whole cutting surface. I’m pretty sure I’m just trashing the last 2mm of my bits! I do need to look at stepover too, which I understand but haven’t really tried yet. Lots to learn, thanks for the help!
As for the torn edges, this isn’t a homogeneous board, it’s from an old TV cabinet, so it could be that, slightly different materials.
My v bit order arrived. As @vicious1said, small text is now a breeze.
I had a crack at inlay too, but just a rush job, and remarkably, it came out OK despite me simply carving inside and then carving outside (mirror image) on some meranti.
There are a couple of poor areas where I think glue got trapped and compressed the soft pine, and it was blind luck that it all fit tightly (I had at least a 1mm gap between the faces of the clamped pieces), but a useful rough technique before I get the time to learn the proper way.
This was a 30° bit, just a pack of ten, cheap rubbish off ebay, I have ordered some decent ones in larger angles. I really like the large lettered signs some people have made and want to have a go.
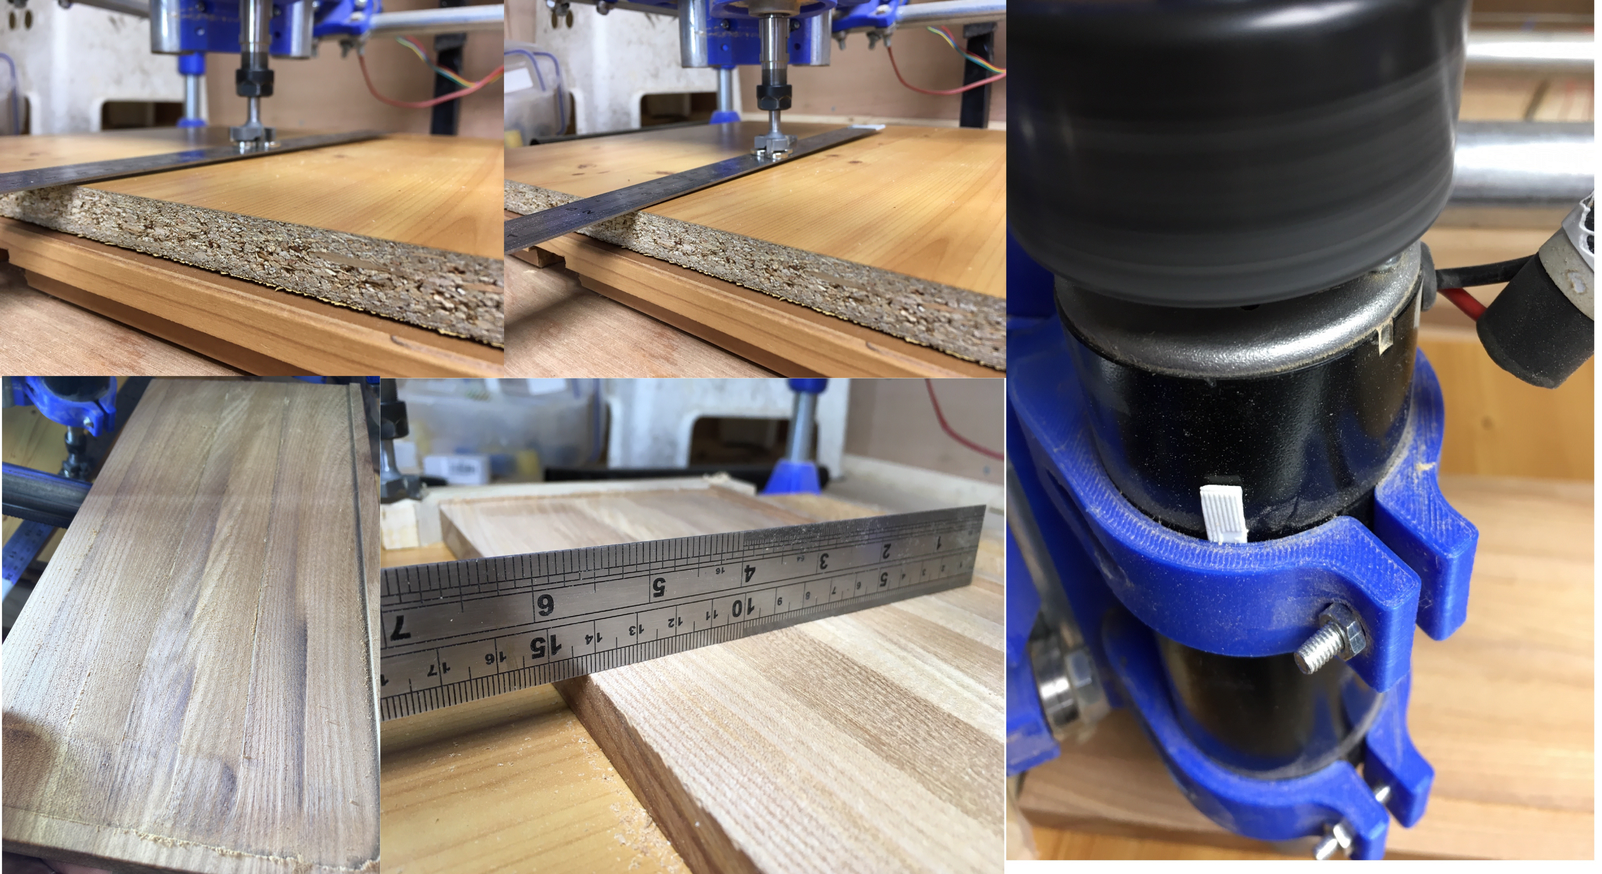
Time for a short update. I bought a 25mm flat bit for surfacing, and the result was horrible. Nowhere near square to either X or Y axis. I’ve not really used the machine for anything that exposed this before, but it was clear. I was in the shed and although I know there are bits of code to help with this, I went empirical. Magnets holding a metal ruler to the bottom of the cutter (rotated to check for bends etc, obviously), and the results were remarkably good (although not perfect)
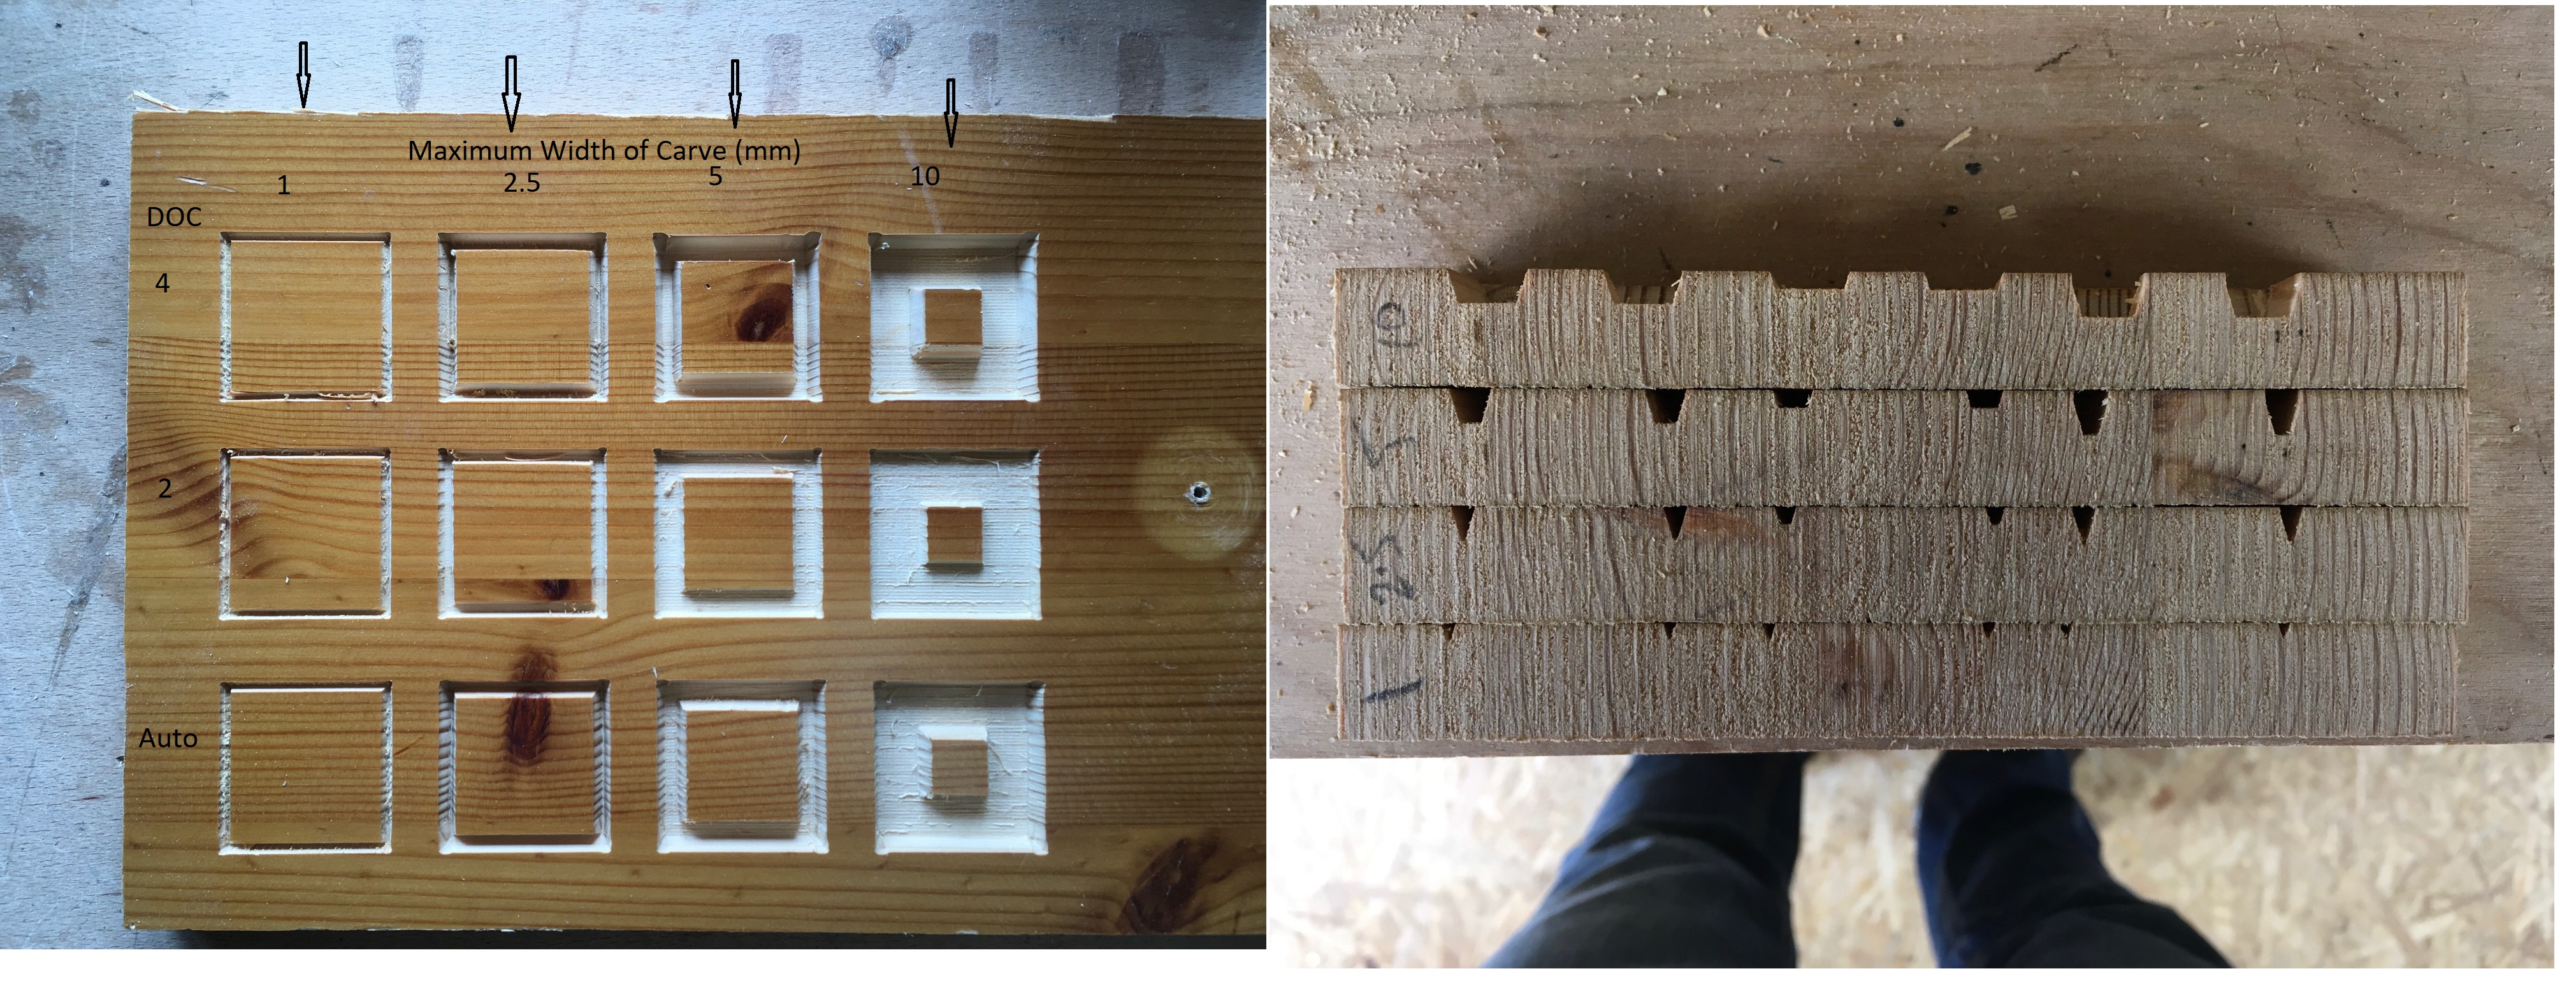
I also had a look at Estlcam (it’s getting easier with use) and its carving strategy. I was never quite clear what the profile of the carved area looked like (I didn’t realise the bottom of the width of the cut was flat, and the edge defined by the tool, although what else it could’ve been I don’t know). I also wasn’t clear how ‘auto’ for DOC worked, so I set the machine up to cut some squares with varying DoC and width of carve, then cut where the arrows indicate. It helped me understand, even if it was mostly obvious!
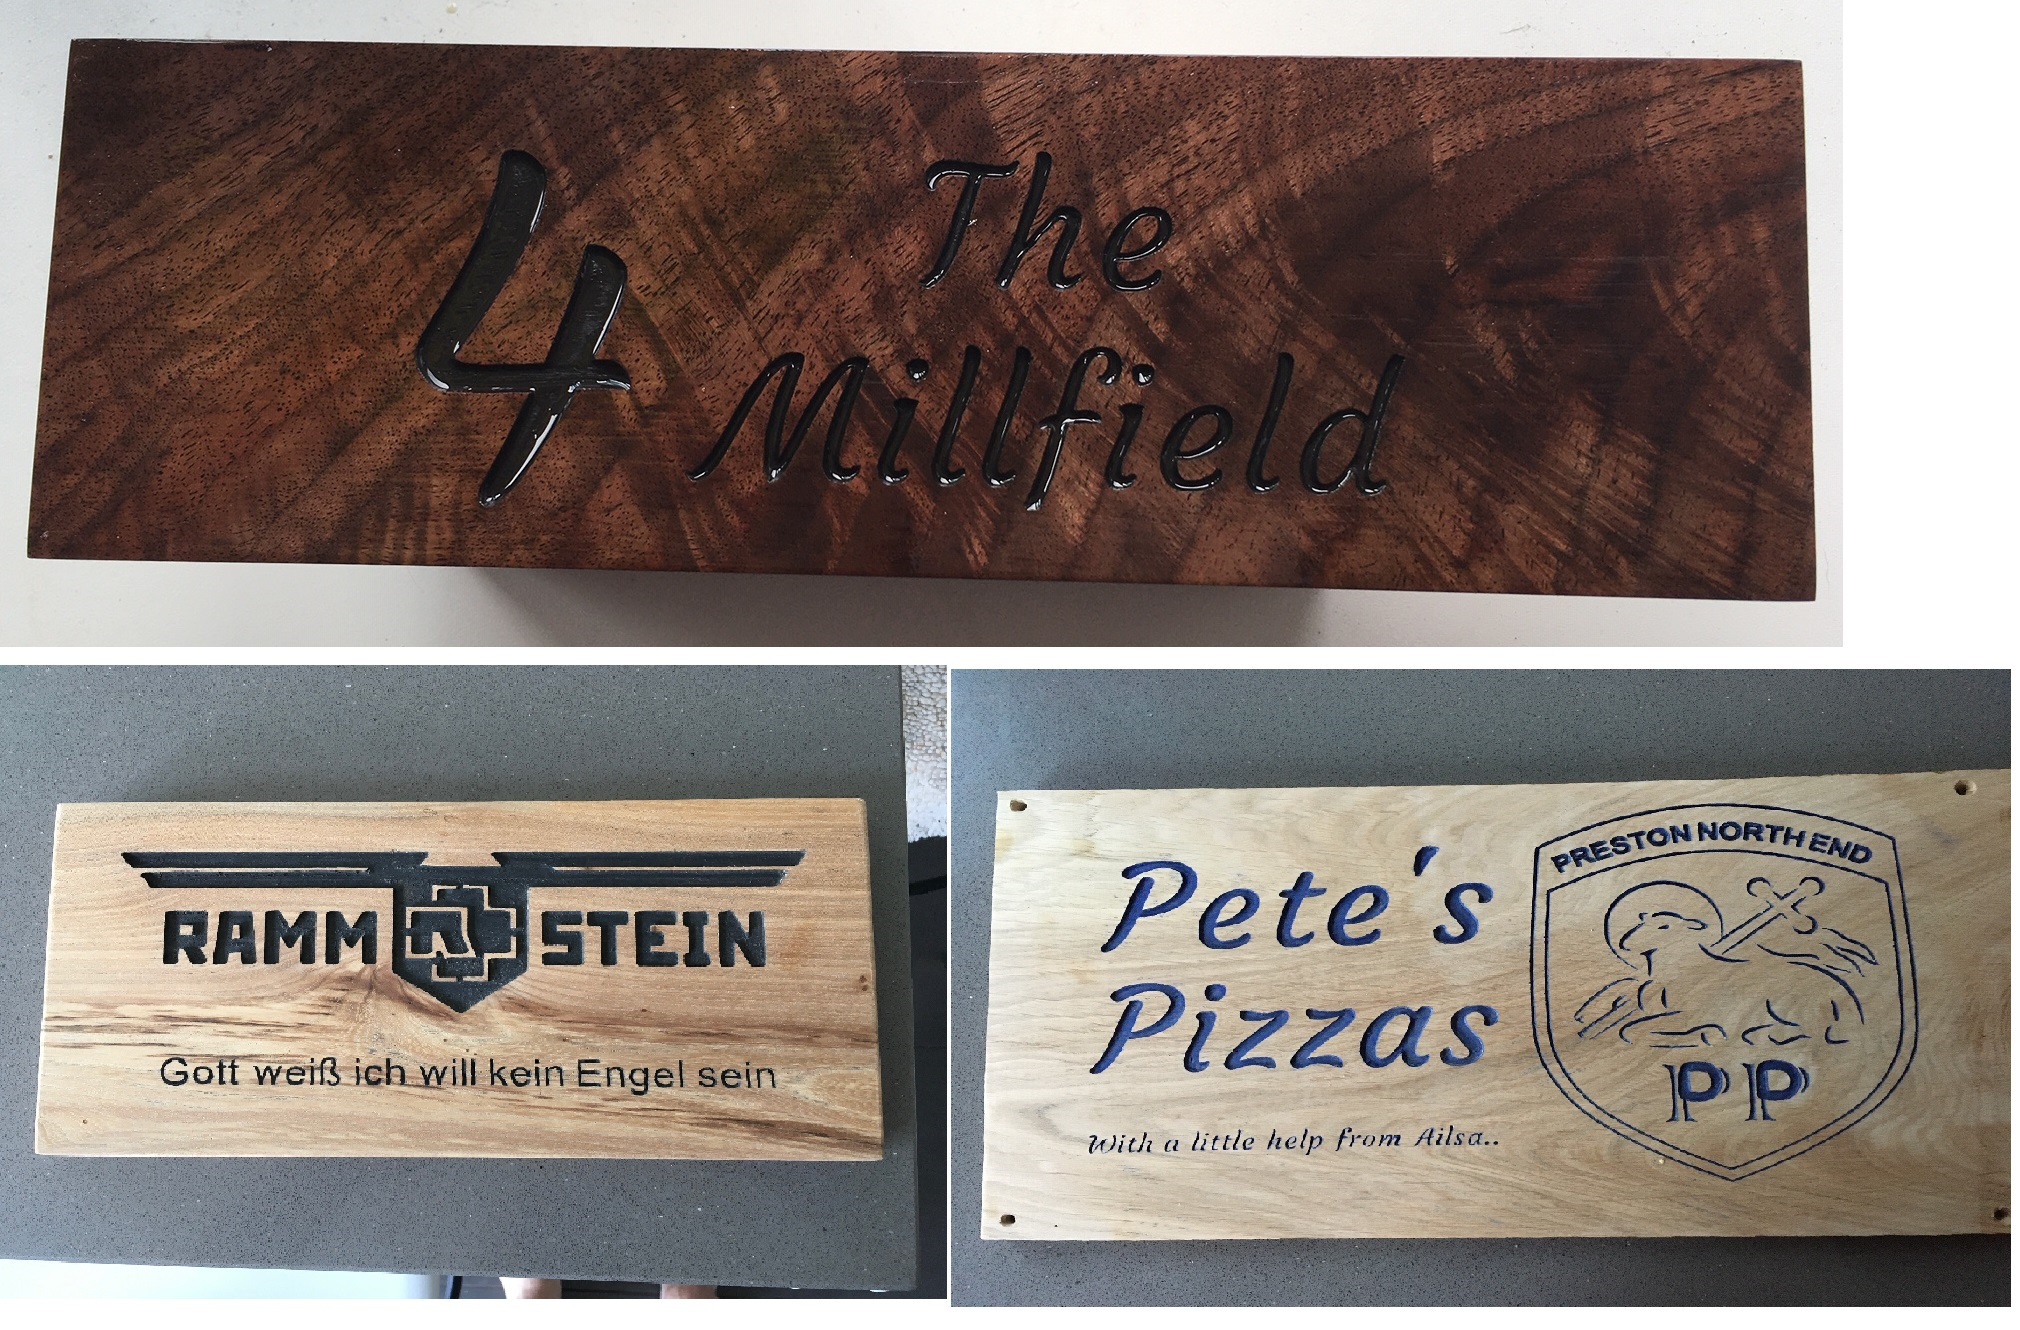
Made a couple of fun things too, for a pal who likes Rammstein, a friend with a new pizza oven and FiL’s new house sign. I’m heading back to the yard where I got the walnut as soon as I can, because it’s really lovely wood.
The pizza one showed me a warning: softer (if not actual softwoods) which don’t sand to a fine finish tend to incorporate bits of paint outside the desired area that looks almost invisible. Until you varnish, then it stands out horribly. Fortunately I bought the cheapest planer-thicknesser on the market, £160 from Aldi (Ferret), and it is amazingly good considering the price. So much of my bits and pieces lying around are now flat and suitable for more signs. This machine continues to amaze me. Onwards and upwards!
For softwood, it might be worth sanding and applying at least one coat of varnish before you carve, or before painting. That will seal the wood, so the paint doesn’t soak into the pores of the wood, and is easier to sand off.
I think that’s a good solution, and reminds me why I need to work on more than one project at a time (so I don’t get impatient and press on without proper preparation!).
I’ve been playing with resin a bit recently (epoxy) and this worked so well I can hardly believe it.
Estlcam, standard letters cutting, varnished (thanks @RobinBennett) with matt, dried on the roof of the shed in the bank holiday sunshine, dropped in the resin, gave it 24 hours, threw it through the thicknesser, quick 120/400 sanding and we’re all good.
The flaws aren’t really obvious, but there are air bubbles in several places which collect dust when sanding. Other than that, there’s essentially no bleed into the wood and no tear out of the resin from the thicknesser. Sadly this is not heat resistant resin, so it will probably be destroyed after a hot pan or two is placed on it.
Yes, I think so, for two reasons, one real, one possibly not. The real reason is the top layer of wood is always a little torn from the cutting process, so removing this top layer en masse tidies things up. I have tried the same trick with V carved signs, but some of the edges, not reinforced by resin, chip out. The second, and possibly imaginary reason, is the uniformity of the resin across its width masks the lines from the cutting process (even with a very small step over, paint never covers these). This seems to me to create a much stronger contrast which looks very clean, although I’m not sure it really is. I hope this doesn’t sound like utter gibberish.*
The dye was a set off ebay (epoxy resin dye set), they seem to work, although I suspect they’re just something like food colouring. They’re miscible and don’t appear to appreciably weaken the resin, can’t ask for much more really.
*Edit: After doing some further work, when the resin is not coloured and is transparent, the crispness is partially lost.
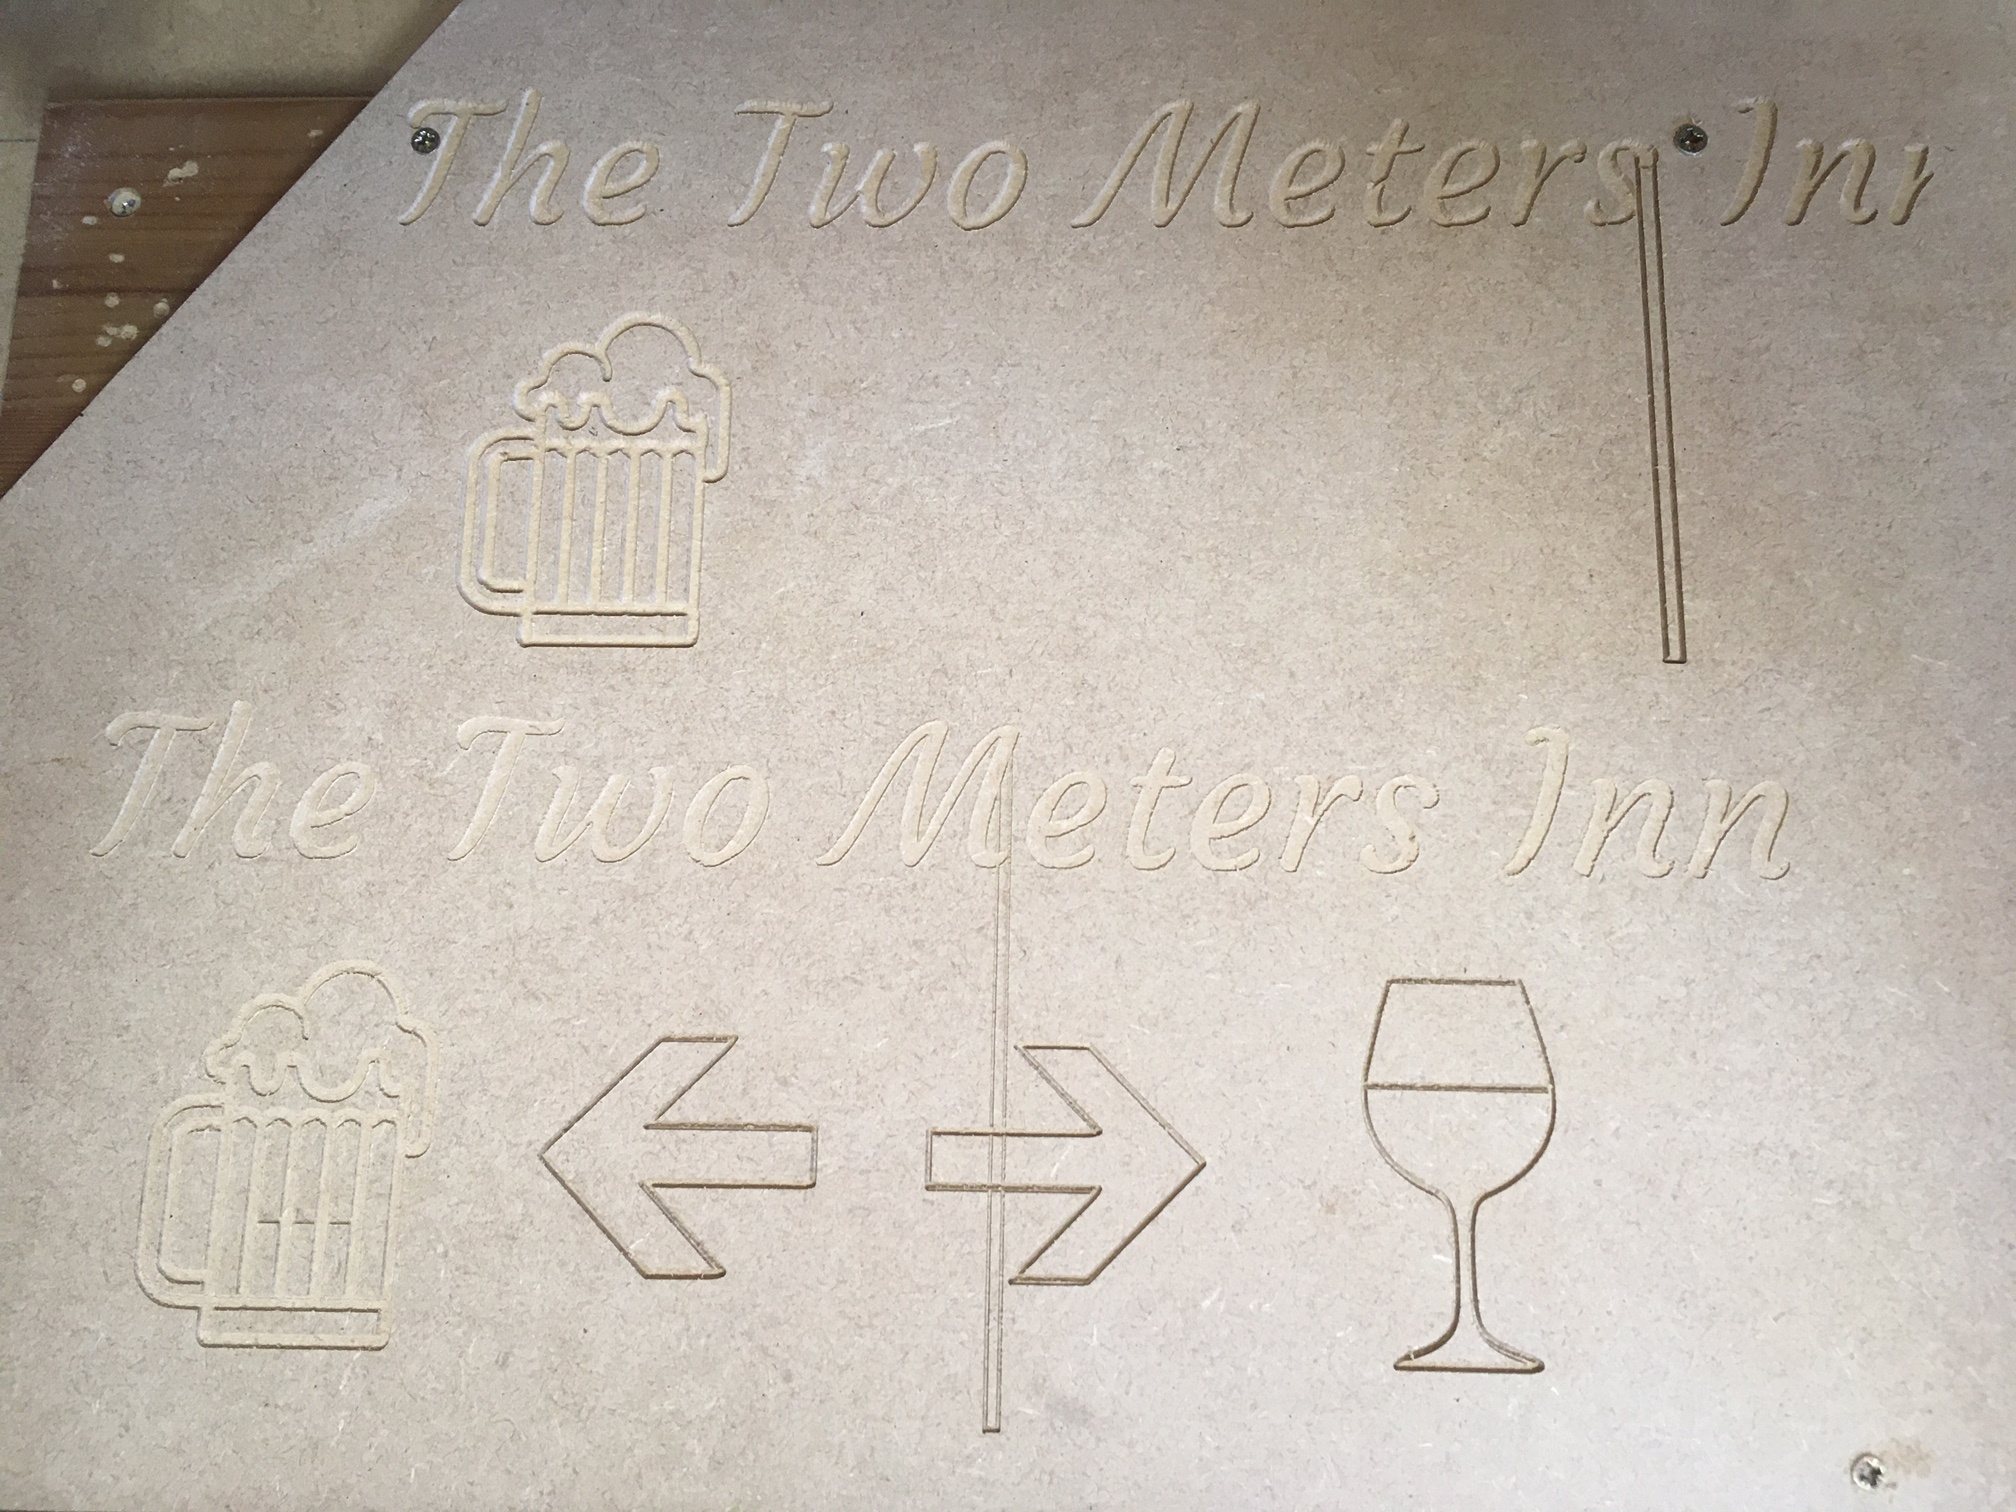
The vertical lines were not planned (in case it’s not obvious).
Very frustrating indeed. Fortunately, only mdf is spoilt in this case.
(Mini-Rambo 1.3, Estlcam, gcode saved to SD card, LCD display)
The machine is dumb. It just follows the commands, one at a time, from the gcode. There are many errors while running that would result in skipped steps, or it just taking off, but it would never return. It doesn’t know when it made a mistake, so it can’t come back and draw a wine glass after that.
I’m assuming the repeated pattern was intentional? Like, those are two different runs? If it did start in the bottom left, and then take off and cut in the upper right, then you have skipped steps (although that would be a very clean mistake).
Yes, the repeat was intentional, I have bookmarked that site, that’s fantastic!
In the two cuts, the errant parts are in different positions, so I think this is coming from outside the gcode. It’s a puzzle. The cutting pattern, apart from the vertical score, seemed normal.
As @jeffeb3 notes this is probably not a skipped step issue, as it wouldn’t return to finish the job correctly.
Both lines look like they might end at the same distance below the beer stein? It looks like it might have gone to X=0? (or possibly Y=0, not sure what the orientation is). I’m guessing it received one G1 gcode where the digit portion of the coordinate was missing, so it assumed 0. Using absolute coordinates (G90), the following gcode would have sent it back where it belonged. Mind you this is complete conjecture. 8^)