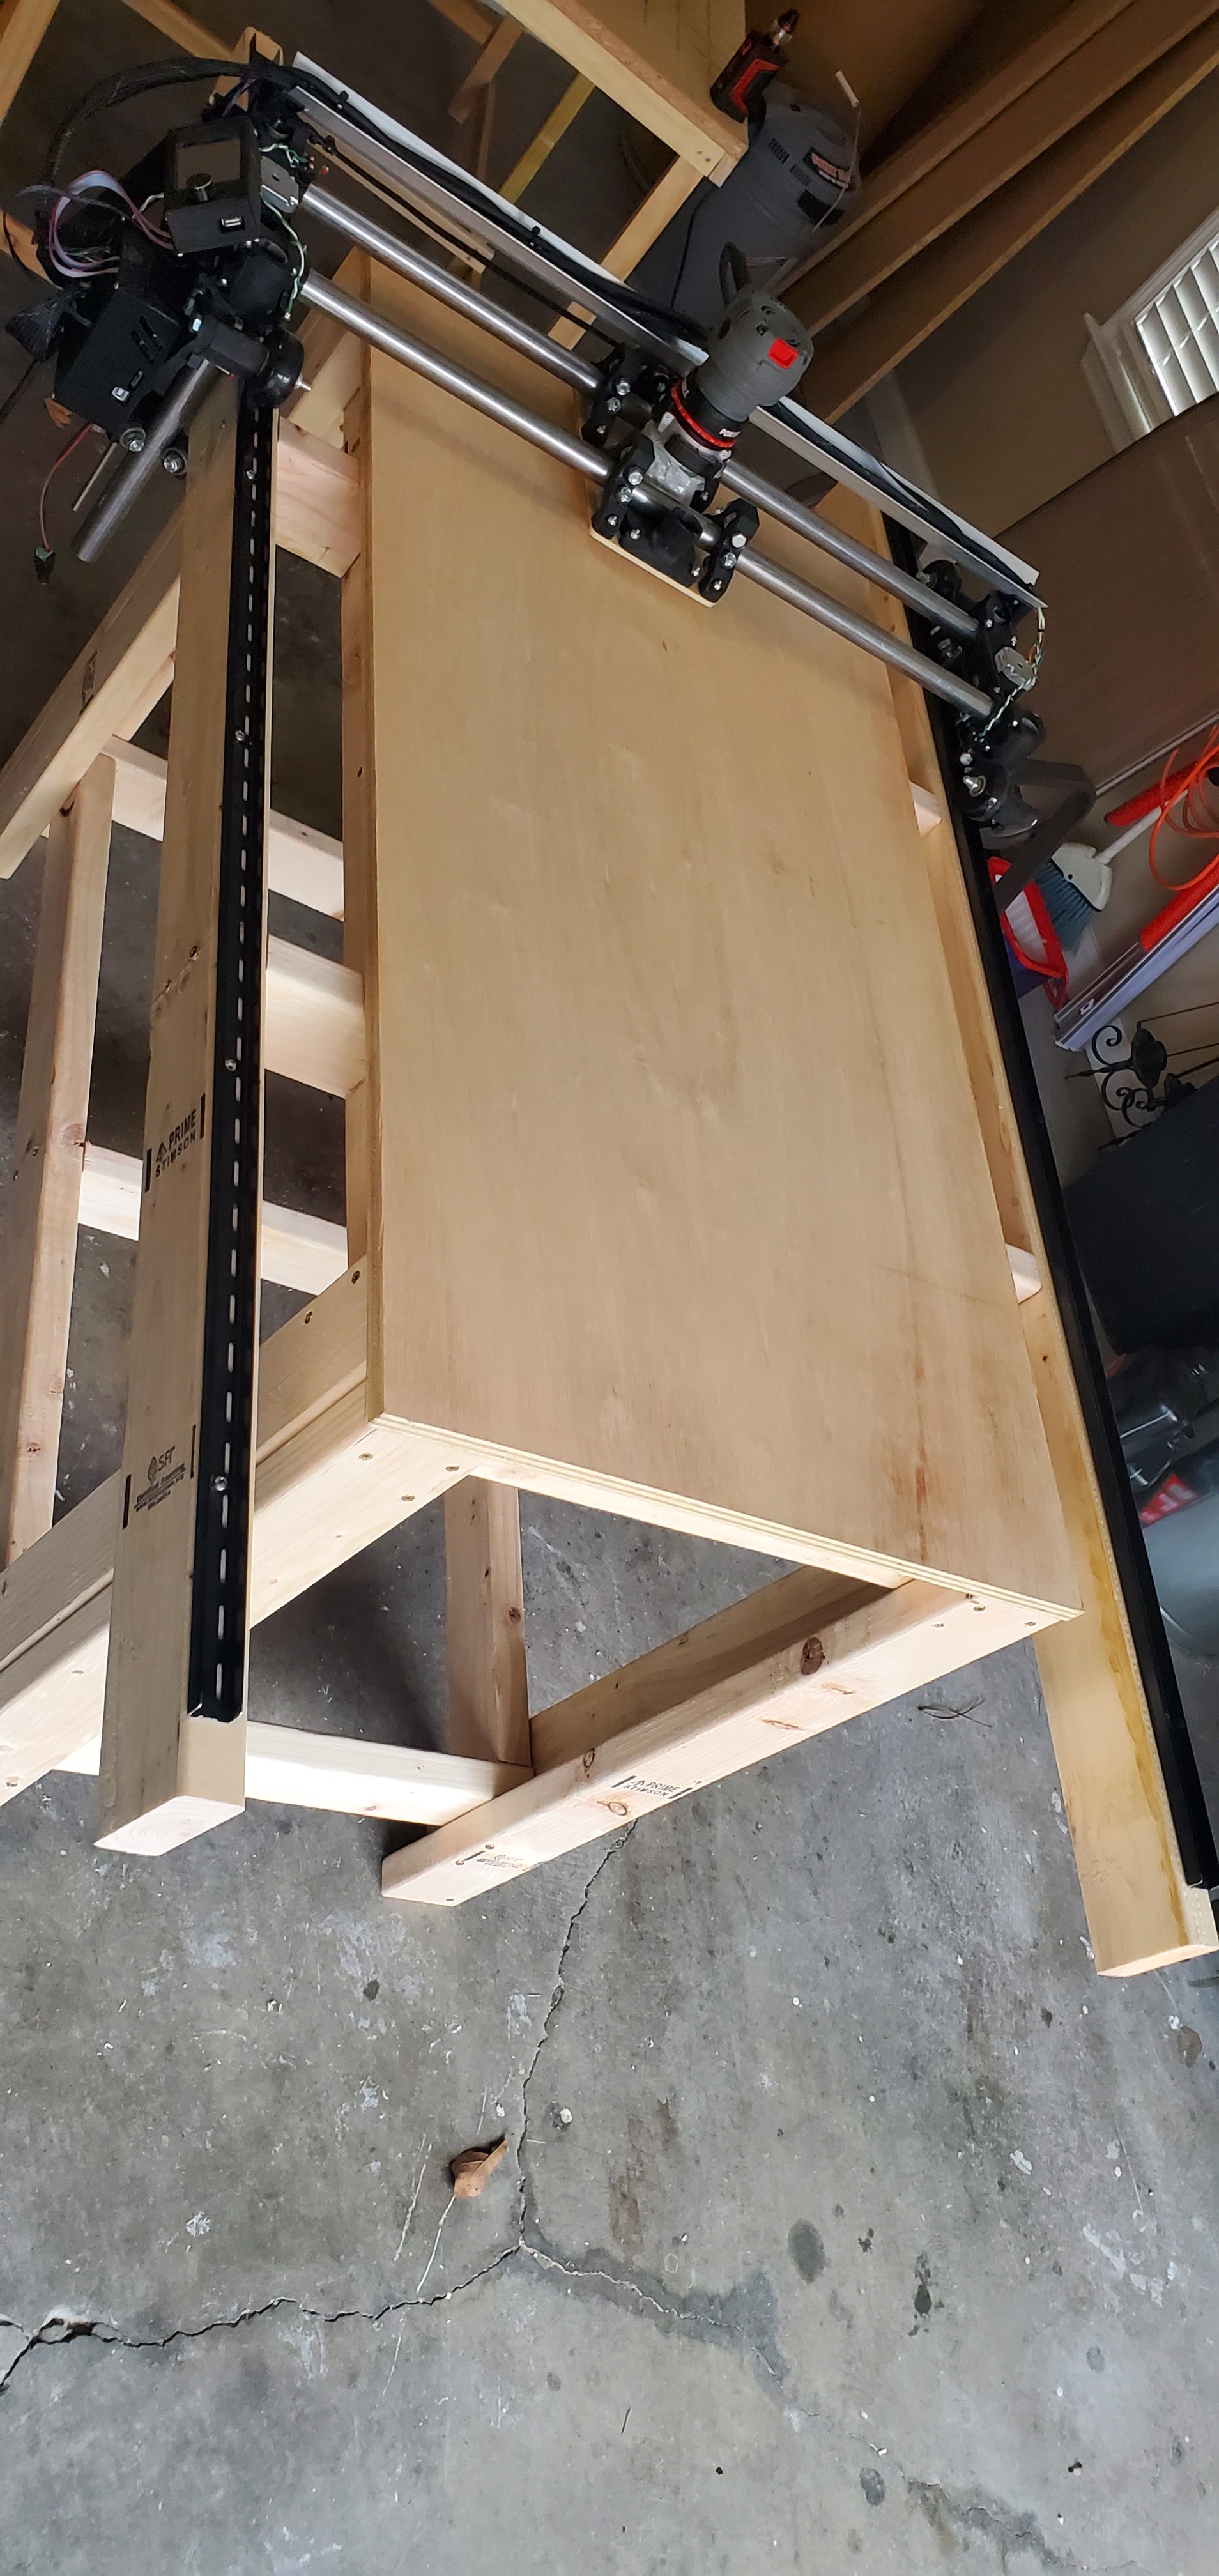
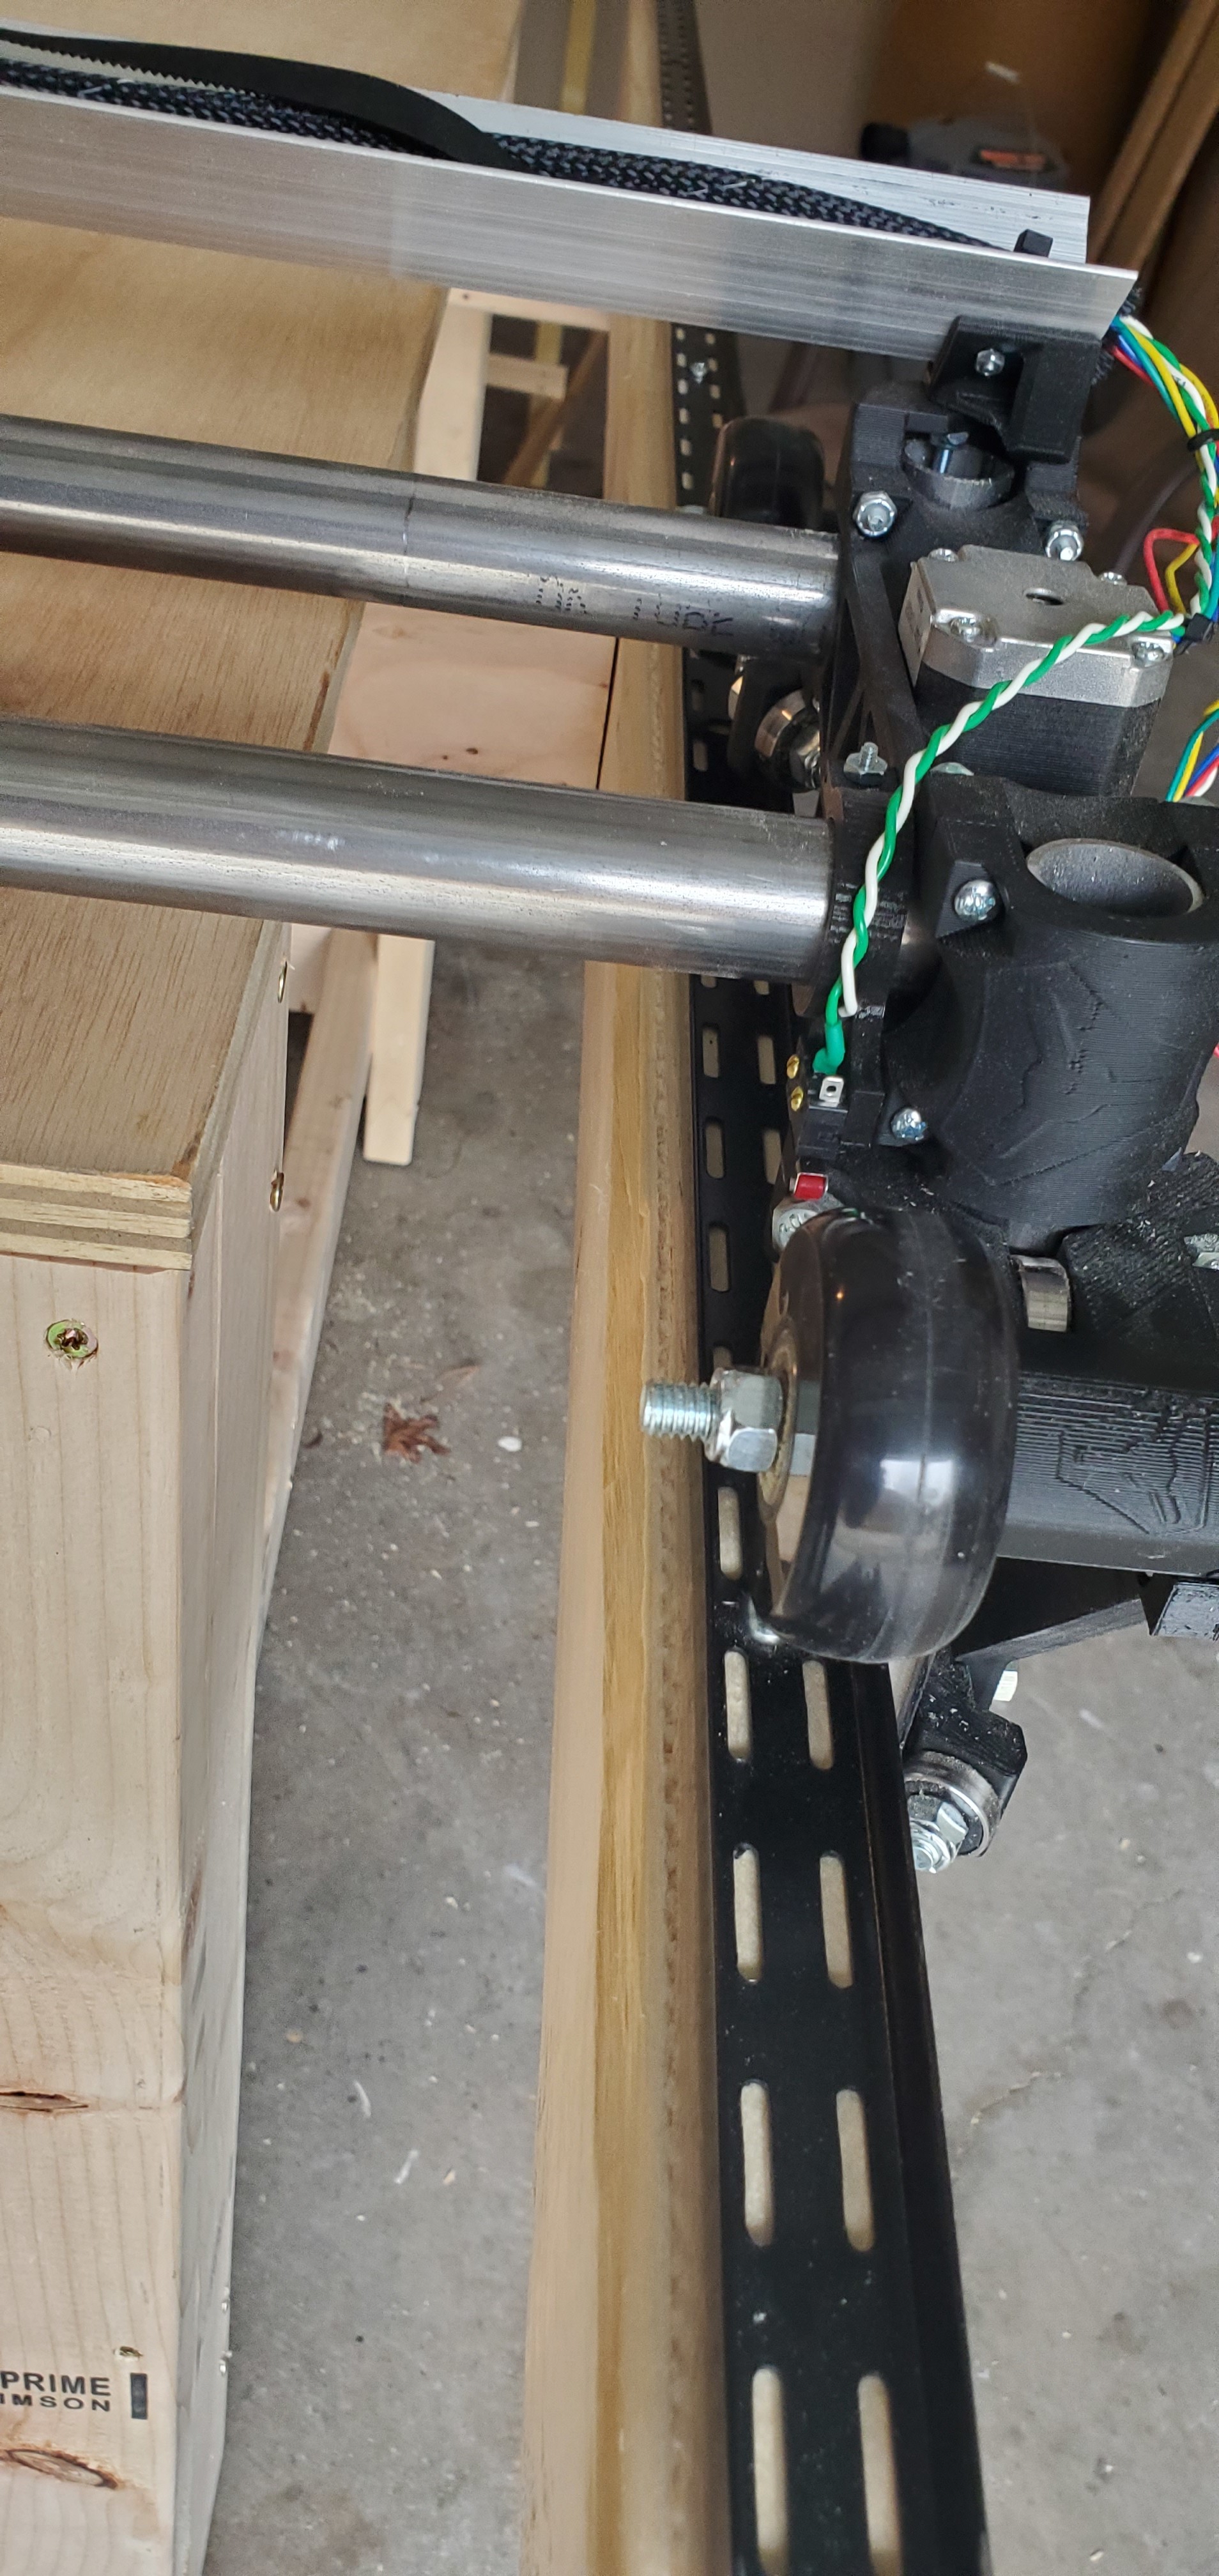
This is my 2nd table build as I was having issues keeping things square. So I built this 2nd table and its hard to come by square lumber. As you can see below, or maybe not, its hard to pick up on camera, my left rail twists and bows slightly inward pushing the right y-axis plate off the rails. Ive considered welding together some steel rails with square steel cross beams instead of the wood. I designed this 2nd table so the rails and cross beams holding them can be removed. The table itself was built rather well. Any other suggestions?
Concept I had in mind for changing to 1-1/4" steel square tubing, but I will have some space on all sides if I change to the square tubing. (steel seems to be cheaper than aluminum at the moment around here by about HALF!) I blame the beer canning facilities, but not the beer. Yay beer!
Make friends with someone with a jointer. It’s about a 5 minute project to square two adjacent faces with a jointer.
You could use rips of plywood instead of the 2x4s. One 3/4 x 3.5 rip would support your metal channel with no problem and if you have access to a table saw or can have your lumberyard do the rips for you it will be straight over it’s length. If you can find a good flat piece to start with this could be a good option.
You could also probably do it with your lowrider by laying a different rail piece diagonally on your bed and support it with wedges so that your not “clamping” it flat but instead supporting it firmly in the shape that it is… say a wedge every 6 to 12 inches. Then run a surfacing on the entire thing similar to how you would a spoilboard. Finally flip it over so your surfaced side is down and surface the other side (optional) and also have it cut a straight edge for the wheels to ride on. You could clean up the other side with a table saw. This whole thing assumes that you can get your whole rail length in your work area diagonally.
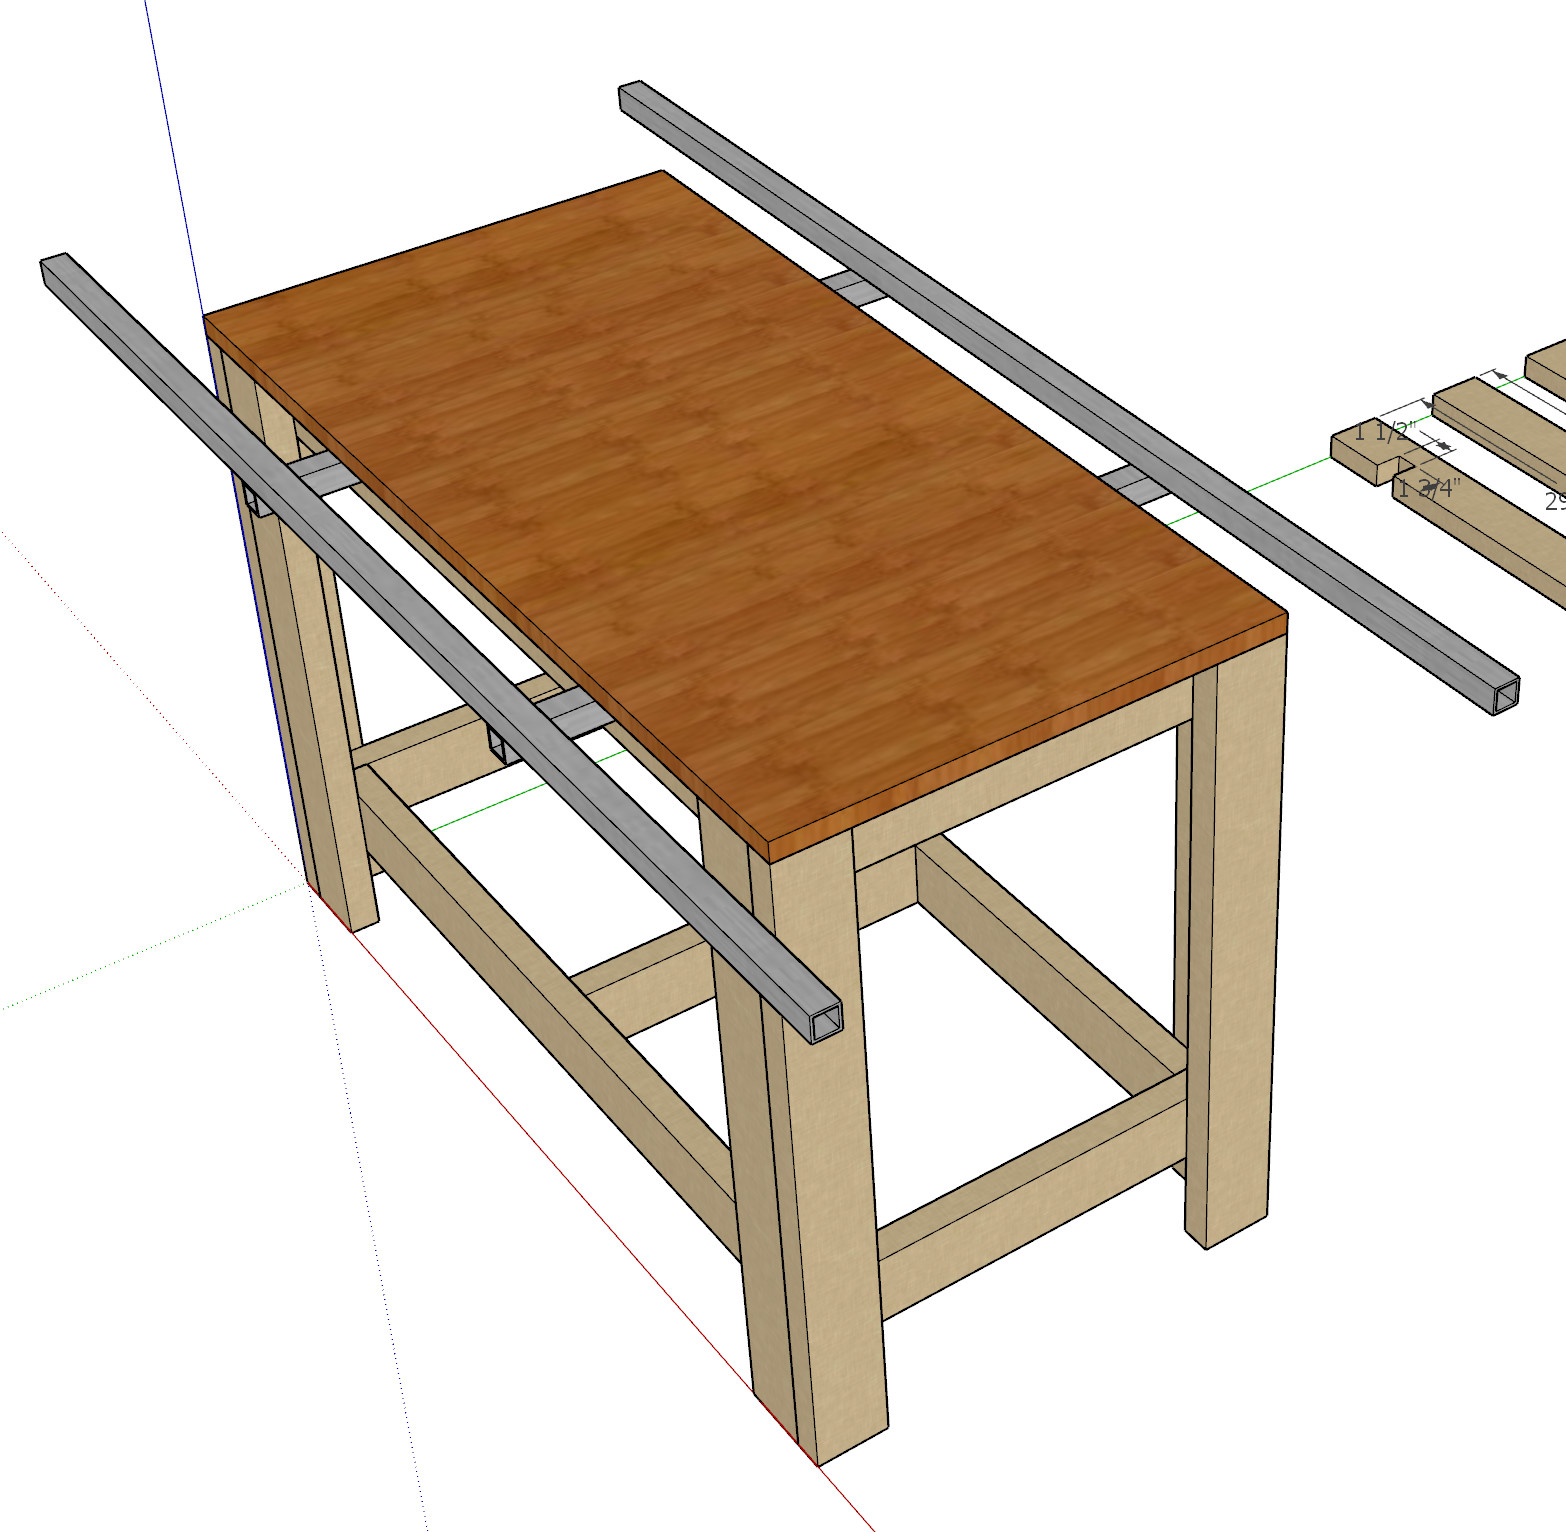
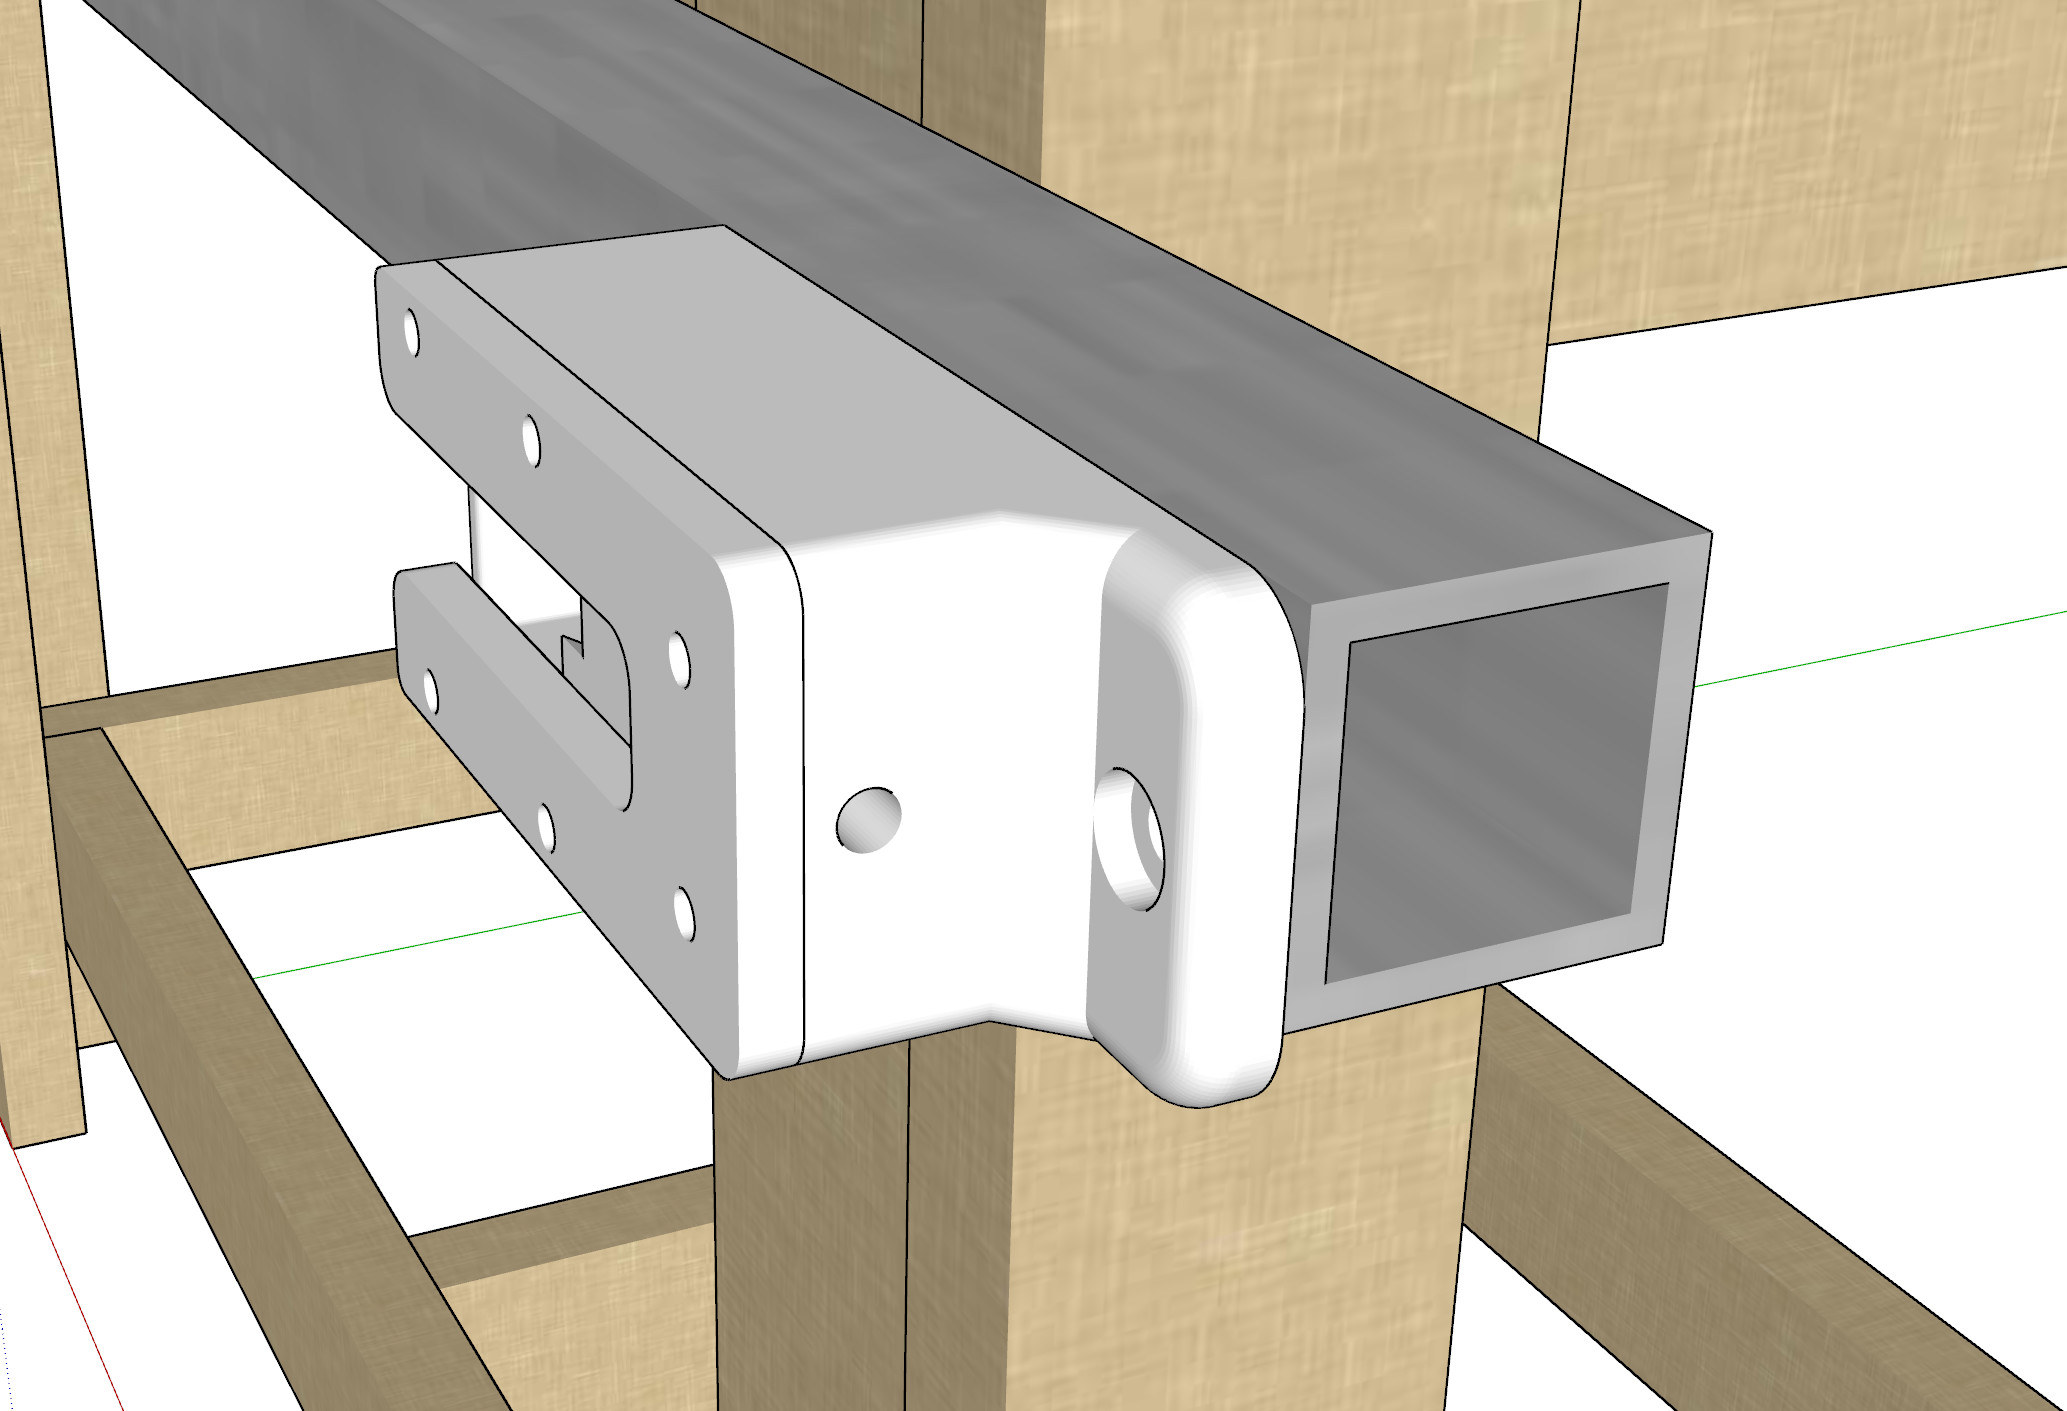
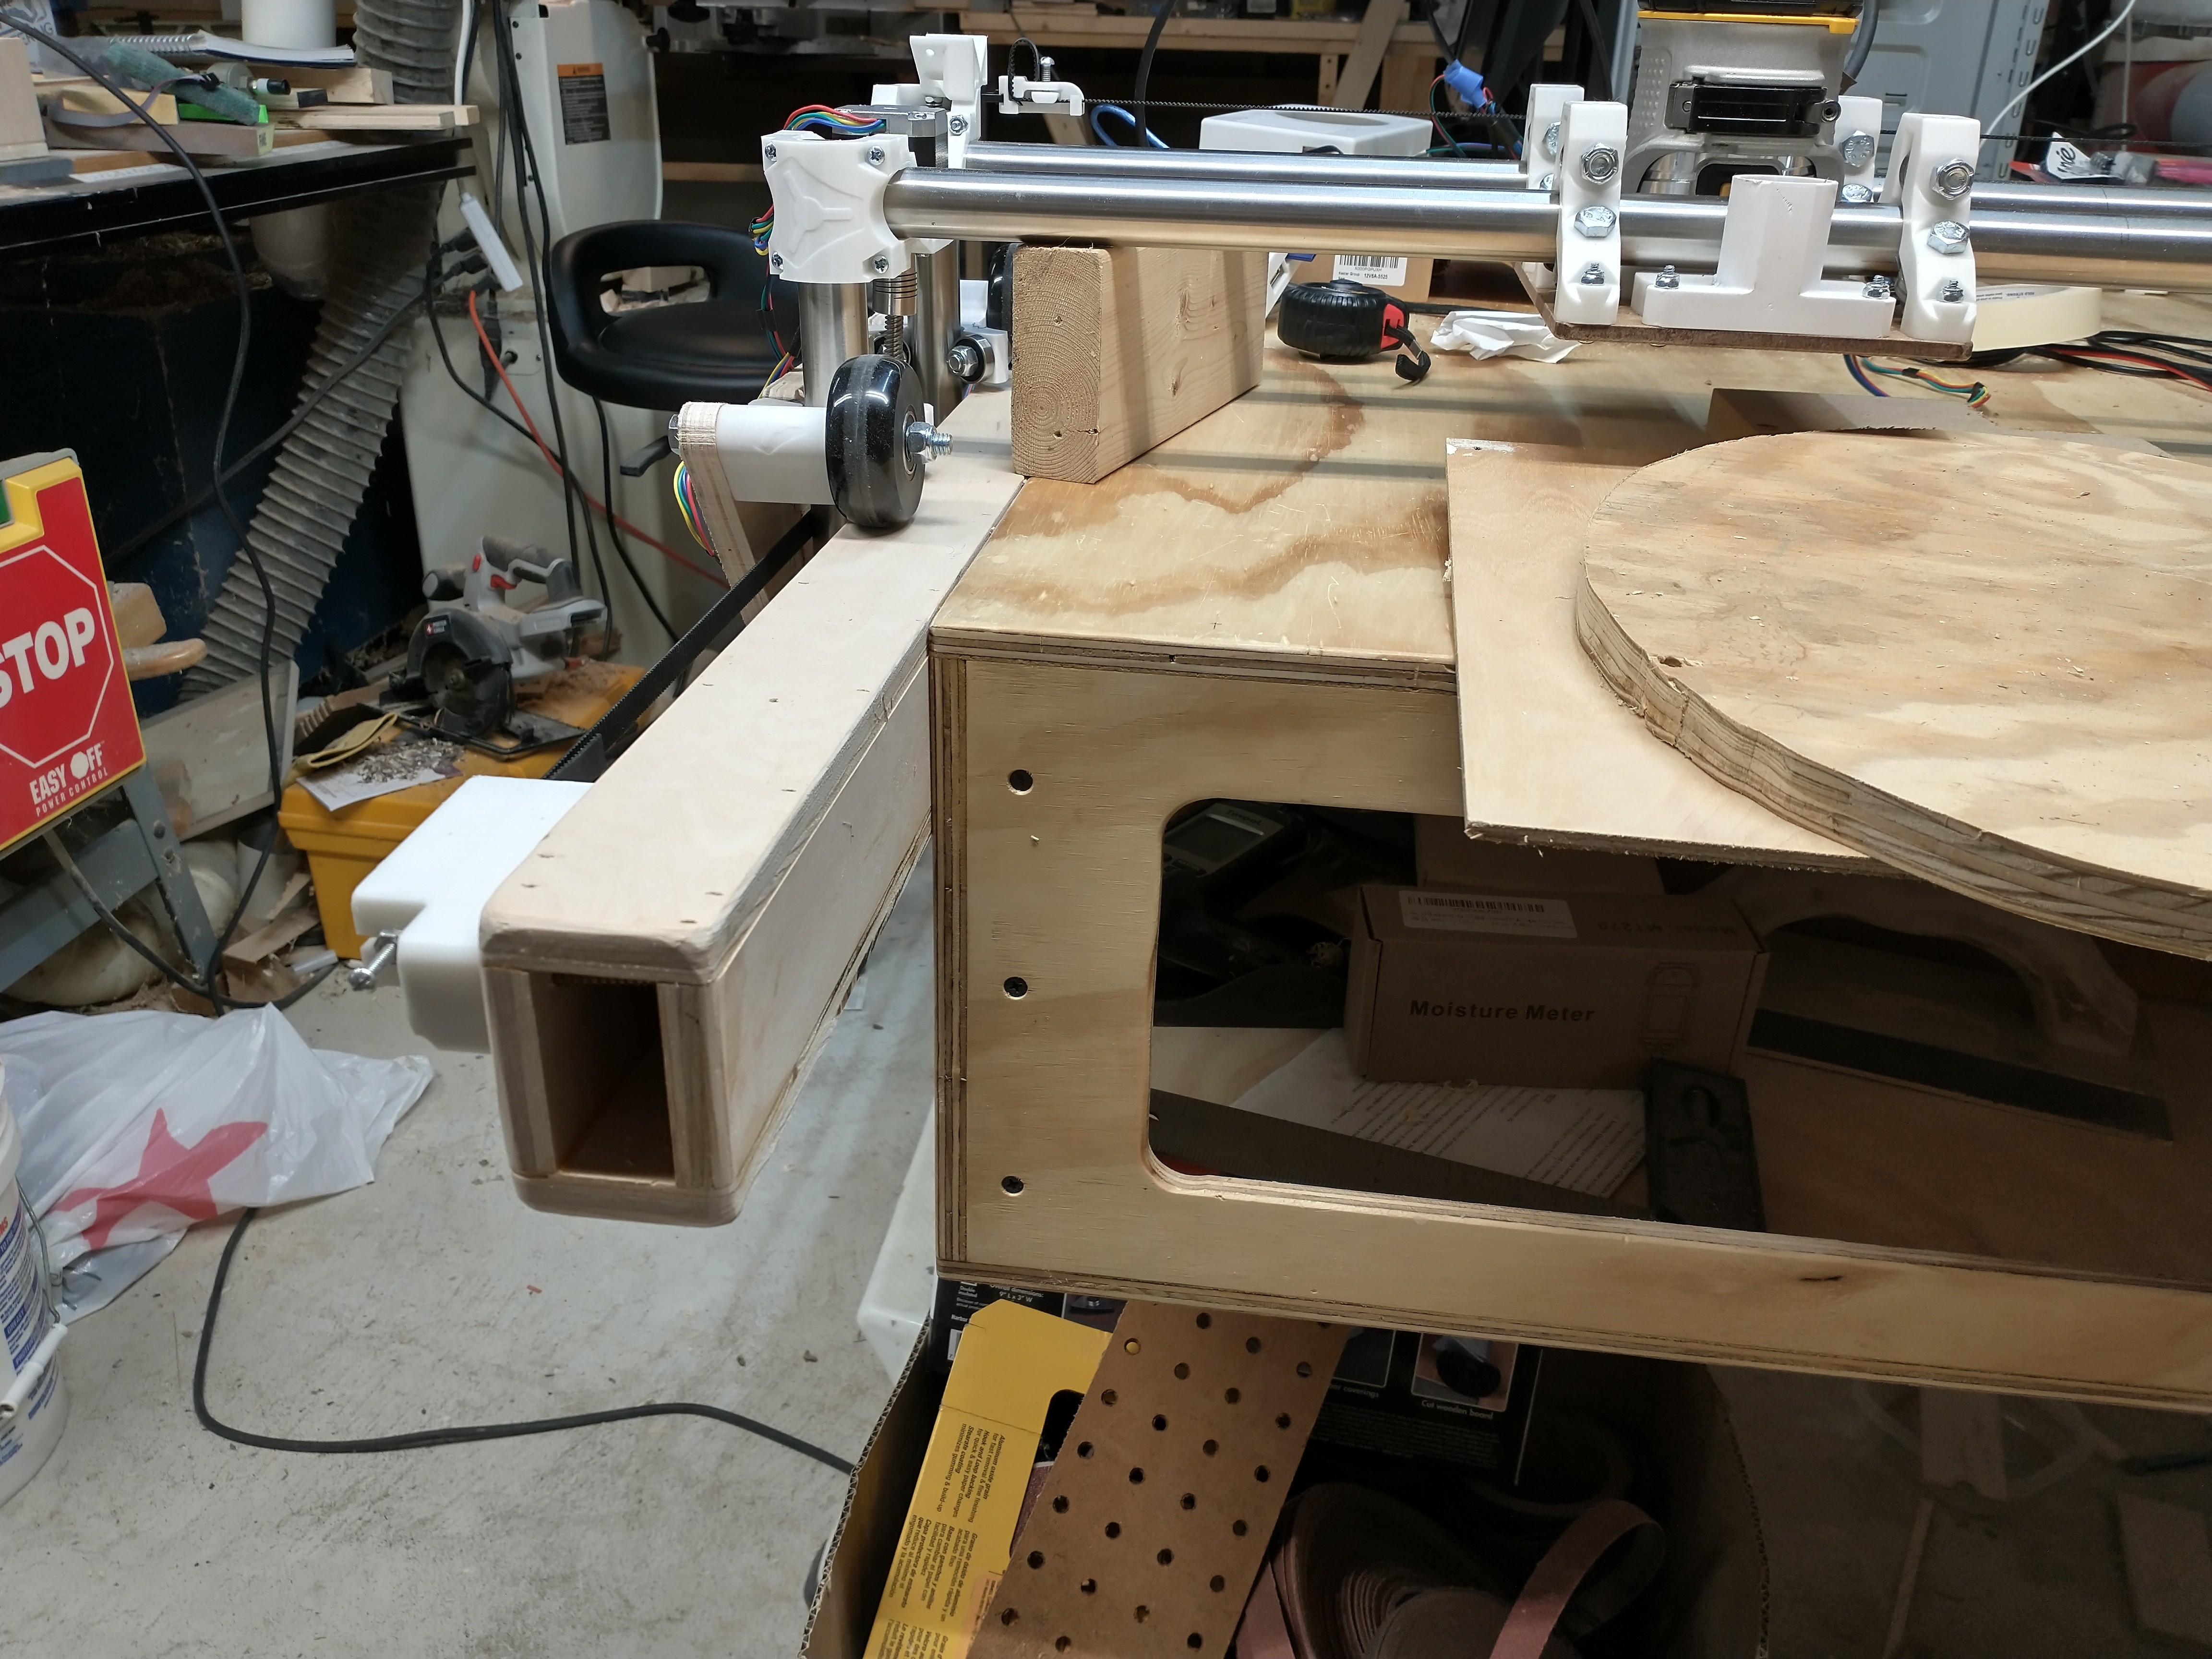
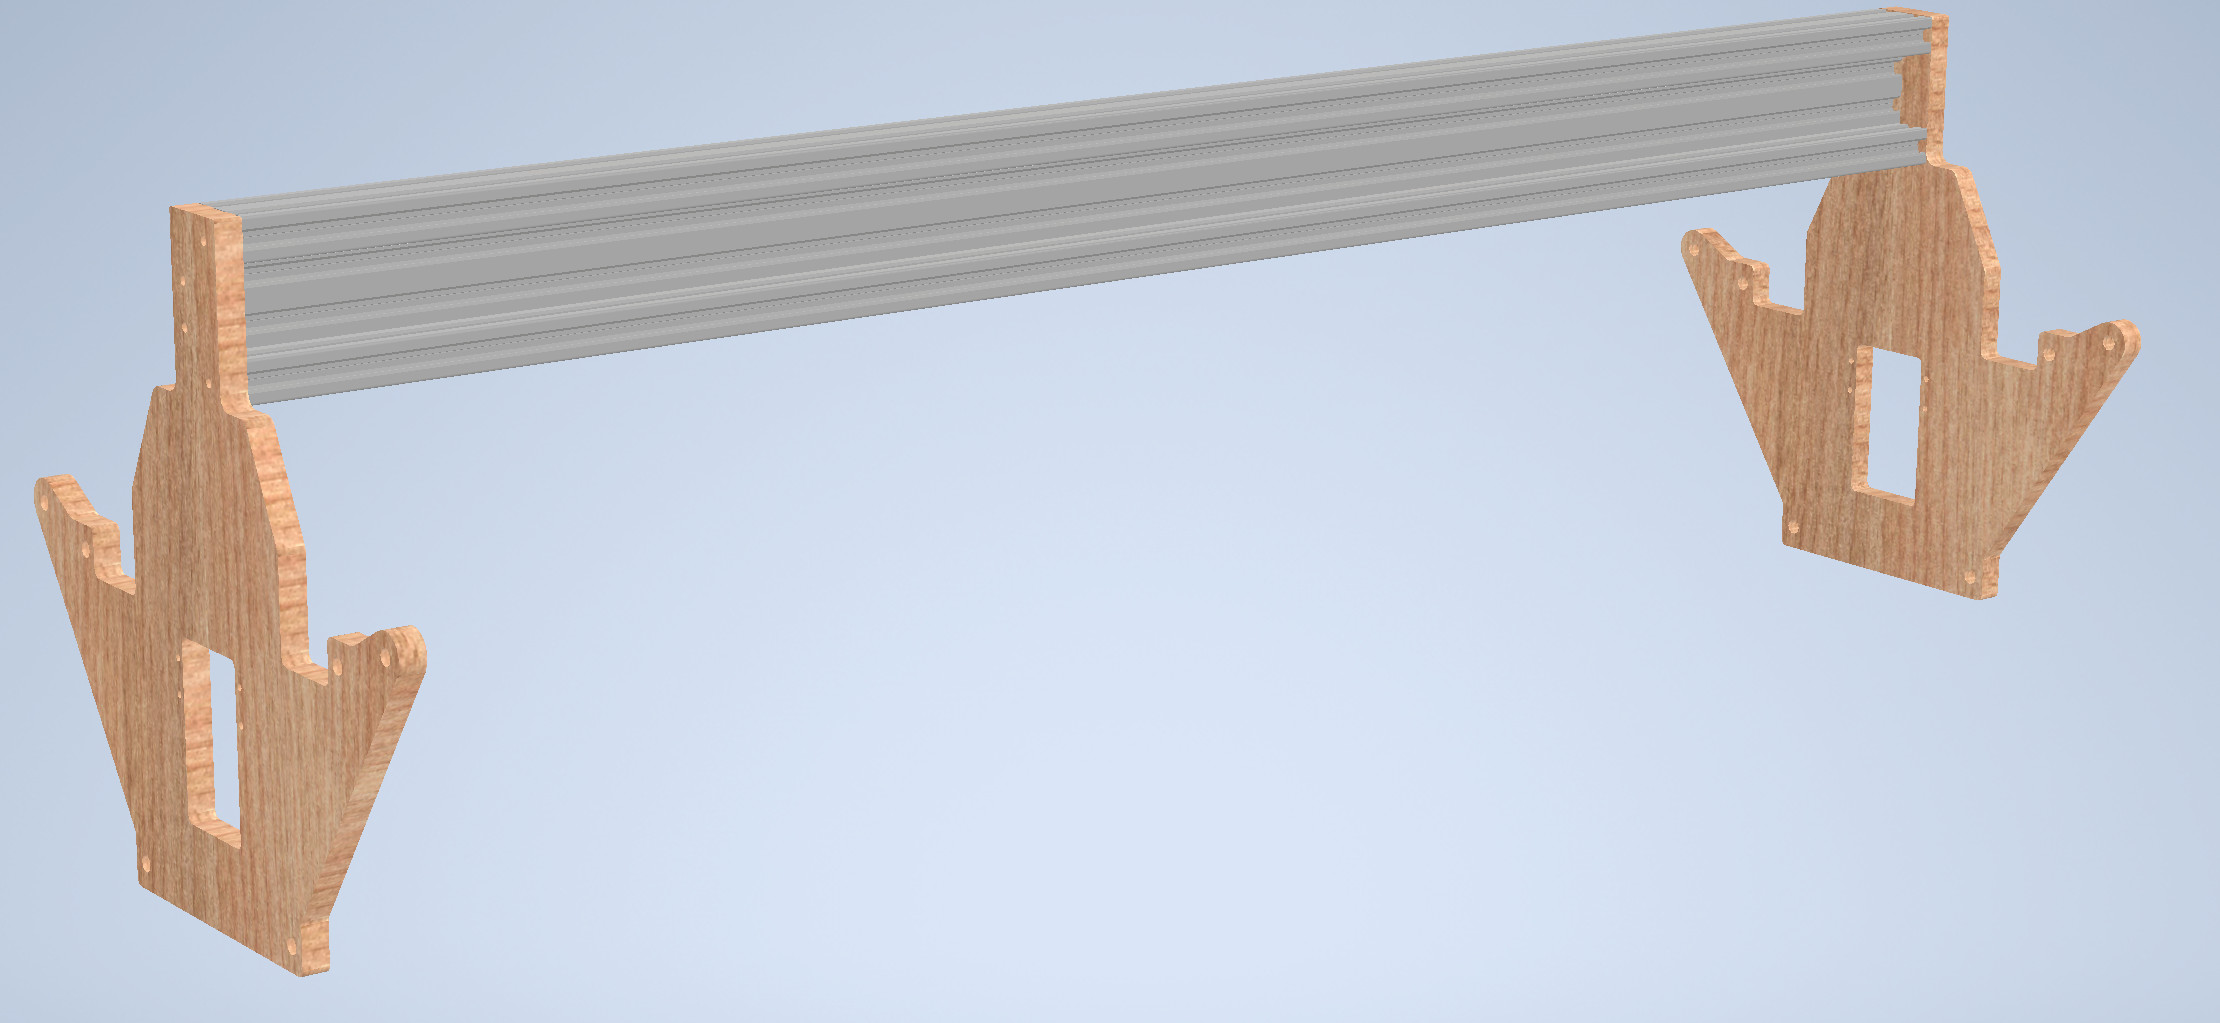
I was going to use unistrut but had some spare 1/2" ply and built these box beams. Saved me some jingle and a trip to the box store. Maybe that’s an option for you?
Most of my friends are auto mechanics, computer nerds or alcoholics. I am the oddball whilst still enjoying a brew.
I do however have quite a bit of scrap 3/4in particle board, but it’s prone to sagging over time. My table saw also lacks in the quality department. I have considered building a few jigs for it. 1st may be a jig to lay in the miter track to attach boards to for planing. 2nd, a better fence, and finally something for stepping lap cuts. However, my last attempt at lap cuts, I noticed my blade would drop with each pass.
My table saw also lacks in the quality department.
The beauty of something like a simple box is that even a mediocre tablesaw can create something quite straight, if you aren’t too picky about the aesthetics. So long as the fence doesn’t move, you can still count on the maximum width of the material to be consistent enough to make something square.
A better fence would be nice, of course, but if the one you have is at least parallel to the blade and doesn’t move once set, that’s good enough for what you need.
That said… I personally believe that a tablesaw is one of the most dangerous pieces of equipment in a shop, and I will refuse to use one that had one of a list of defects to it. If the blade has noticeable runout, it’s done. Something like the blade height changing is probably not an immediate fail, but I don’t generally like things moving that should not. I would probably work out a clamp for the blade height adjustment, and add one for the angle adjustment, and put them in place before using the saw. I would make sure that the base itself is solid and stable. If it should not move, I don’t want it moving. I’ve seen how fast a table saw can change someone’s life for the worse. I have a lot of respect for power tools in general, but the table saw, I treat as if it is actually out to get me.
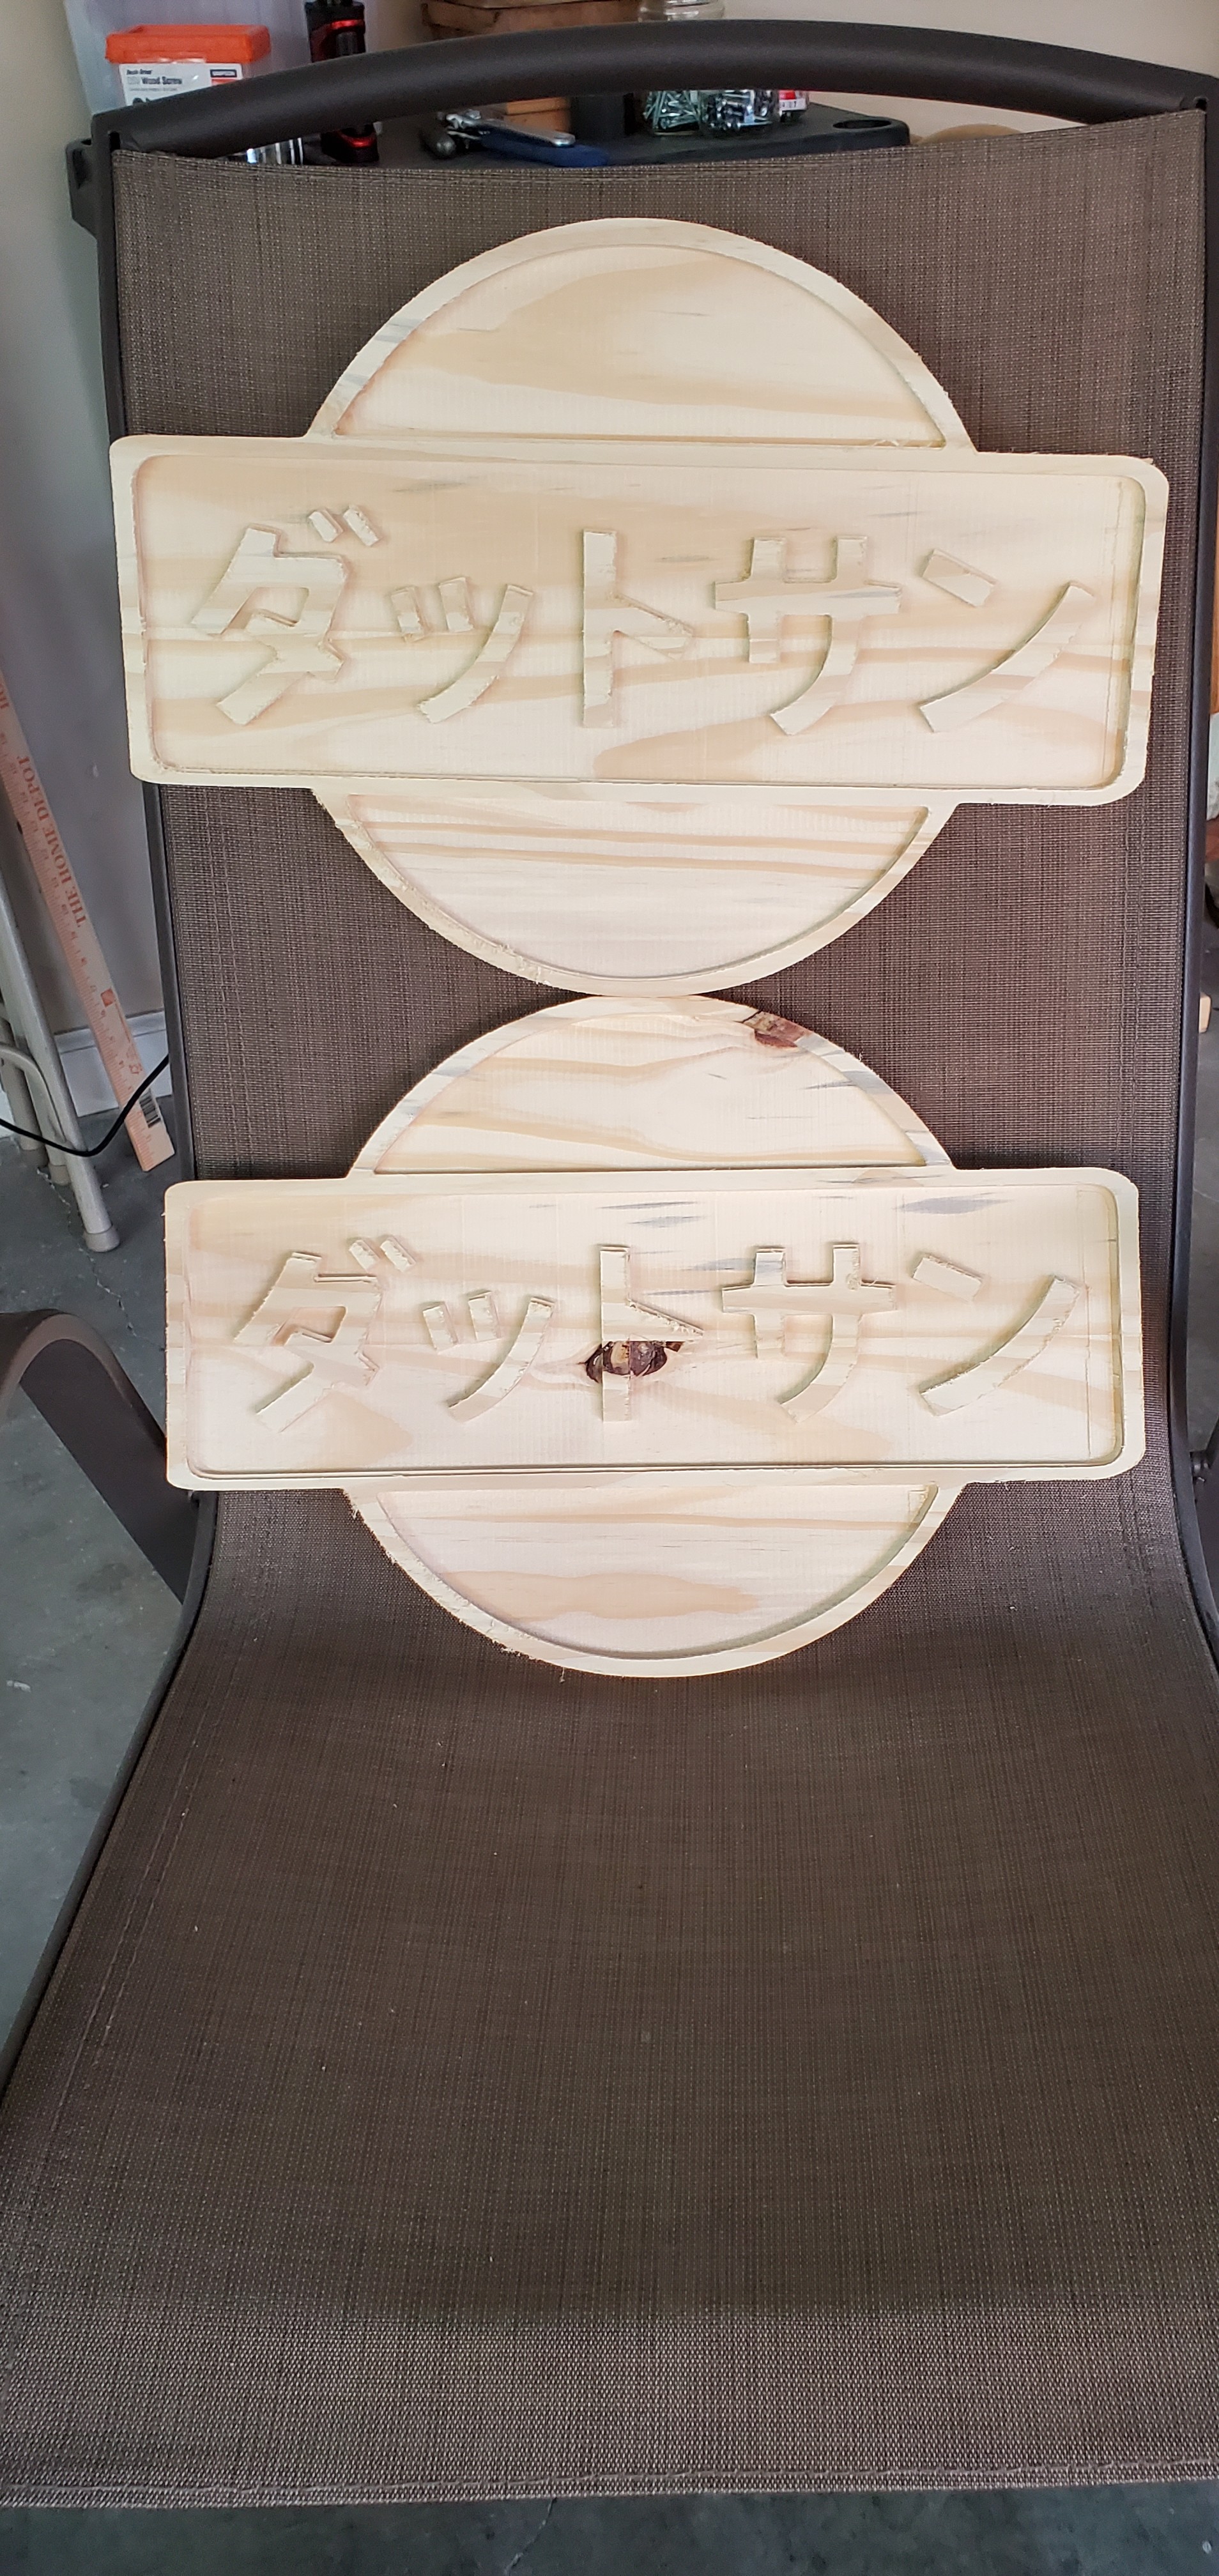
Well I was finally able to cut something successfully. However I have a new problem. Z-axis gets stuck for a moment during a plunge and sorta drops into place, thankfully before x/y start moving.
Check the sawdust building on the your z tubes. The drop is because your lead screw pulls down but your gantry isn’t moving stretching the coupler. Also happens when you have an endmill that doesn’t like the plunge. Changing plunge to something like 60 degrees might help. Also check that your two vertical z tubes are parallel.
I managed to get my rails squared up and z-rails cleaned up. I haven’t had too many more issues. I still need to add dust collection. In the mean time, I’m testing some methods for an attached laser. I am currently using this branch and using M106 commands. I’m going to set it aside and test with this branch tomorrow. It should allow for laser control with G1 commands. I’ll need to tweak my post processor in Aspire too.
M106 P1 turns the laser on.
M106 Sxxx controls the power / PWM
It works great for cutouts, not so much for raster images.
I’m giving up and selling my LR2. The laser works great for raster engraving. Milling however, I have yet to successfully complete a job start to finish without a mishap. My latest job was with a 2mm bit 600mm/m Feed rate at a 100mm/m plunge, 2mm/pass and still… not even 5 mins into the job, the Z fails to lift and drags the bit across the workpiece.
Suggested Z plunge speed? I can give it a few more tries, but Im all out of wood, and lumber is getting expensive here in the states!
EDIT!: I think I found my actual problem. Tool Stepover was cranked up to 100%!
EDIT2: Actually, these are cutouts so even then, stepover wouldn’t matter as it plowing through the wood on the first cut. Stepover matters more in pocketing if i understand it correctly.
EDIT3: this may be the culprit. Ima take that [F] feed rate out of my post processor. THAT may have been the stem of my Z issues? Especially with a Feed rate of 1200!
My z plunge rate is typically around 2mm/sec and my cutting feed rate is 20mm/sec. I would suggest maybe walking away from the machine and coming back to it. I can appreciate the frustration but I can attest that these machines work and all the problems can be worked out. It might be frustrating and it might make you want to sell it but you will get through it so don’t sell it just yet.
It sounds like your machine works if you are running it with a laser but the load you are putting on it when using it as a router is just too great so just dial it down. Go back to the basic setup page and follow it to a T. Also if you are using fushion 360, I suggest estlcam. There is less chance of a silly check box being checked. It’s simple and it works.
I just had another thought, are you plunging straight or with a ramp? Some bits don’t like to plunge straight causing the couplers to stretch and then snap down


