First of all, I want to thank Ryan again for his work here. The MPCNC and LowRider builds ended up changing my life in amazing ways. I’ve never had as much fun as I’m having now. I could have retired but decided instead to expand the business and keep going. Then CNC happened. It’s like I’m starting my third career and learning so much!
I wanted to do this as soon as my LowRider was finished. I was doing loose tenon mortises, easy for the stiles, not so much for the rails. The idea was to add a vice to the end of the table to hold rails upright to cut the mortises just off the end of the table. Things were moving fast though. we moved into the new shop first week of April, then the quarantine hit. Because of building the LowRider, I learned enough to make a solid case for buying a full blown industrial CNC. Once that decision was made, there was much to learn. I self quarantined at home for almost four weeks and immersed myself in learning CAM with Fusion 360 and cabinet building using Mozaik. The shop continued working all this time, it’s big enough that everyone was able to keep plenty of distance from each other. It took a while to get the new machine installed and working, there were a couple of hiccups. More issues getting Mozaik working with it.
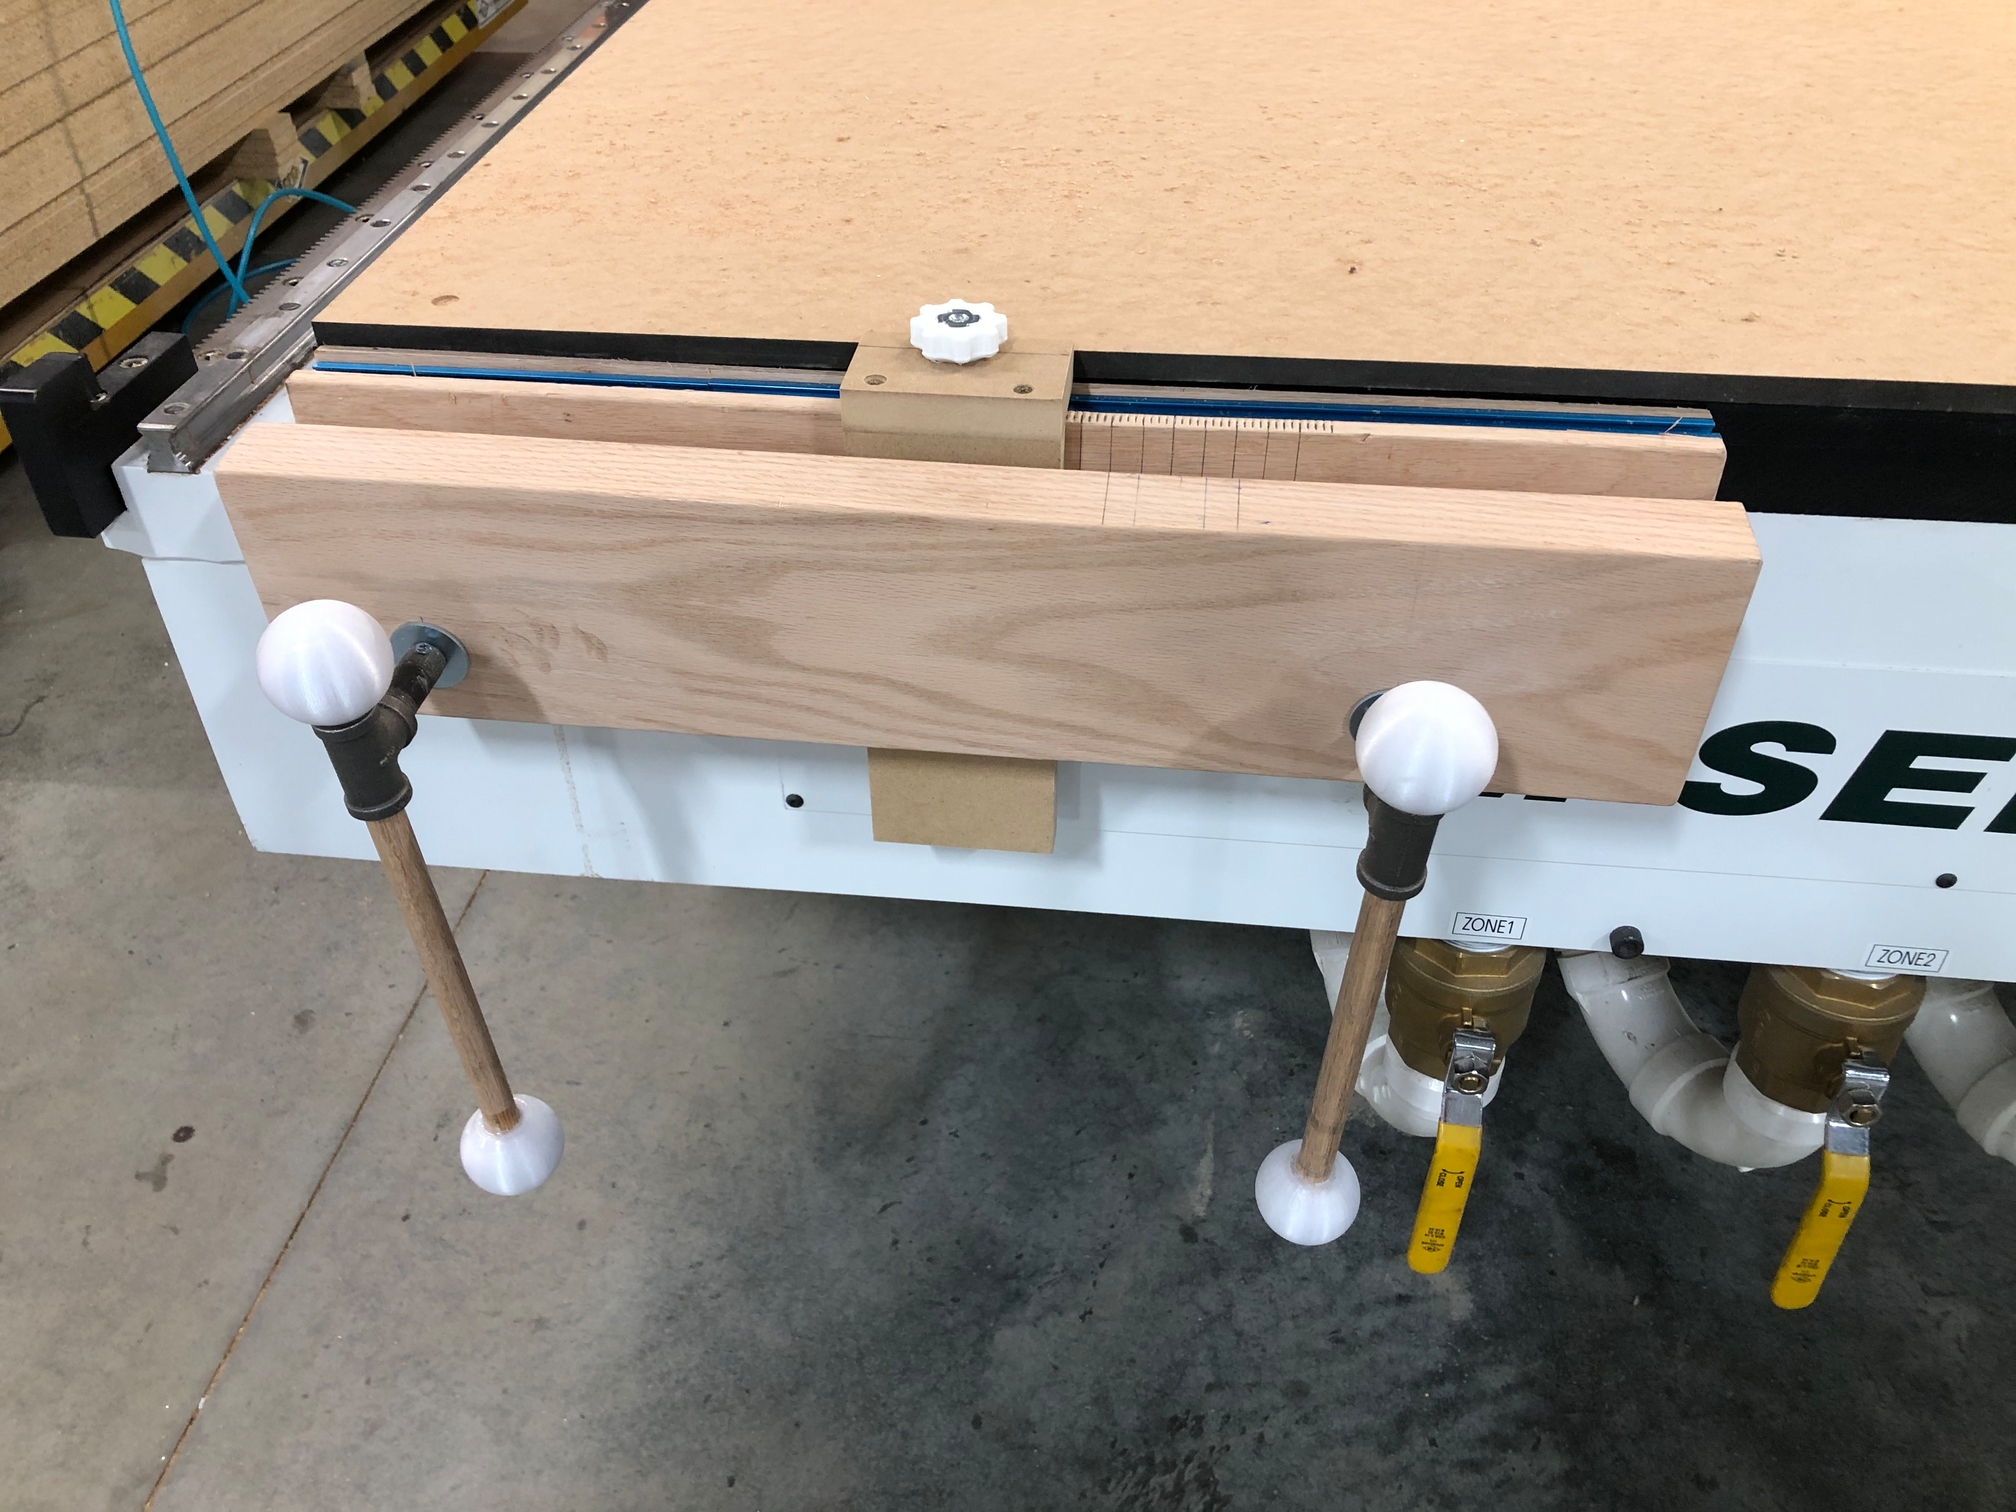
The need for the tail vise still existed and last Monday (Memorial Day) I got busy. A trip to Home Depot netted everything I needed.
3’ of 1/2" allthread
Two 3/8" pipe nipples
Two 3/8" pipe Tees
One 3’ x 1/2" oak dowel.
There were some 8/4 red oak pieces laying around so that became the jaws.
Luckily, the end of the router bed is 3/8" steel so I could just drill and tap two holes for the allthread.
I ran the same tap through the 3/8" pipe nipples (perfect fit!), ran in the allthread and drilled a cross hole and tapped that for a small screw and lock nut. A little grinding removed the threads from the ends of the pipe tees to allow the dowel to slide easily. Four 3d printed balls capped off the dowels.
I programmed the router to cut a slot in the top of the jaw next to the bed to fit a piece of T-slot track I had laying around. I wrote another program to cut shallow V cuts every 1/8" to help index the placement of rails in the jaws. An L-shaped piece of MDF made an adjustable fence to set the rails straight in the jaws. A 1/4" x 20 bolt in the track, through the fence and held with a 3d printed knob finish things off.
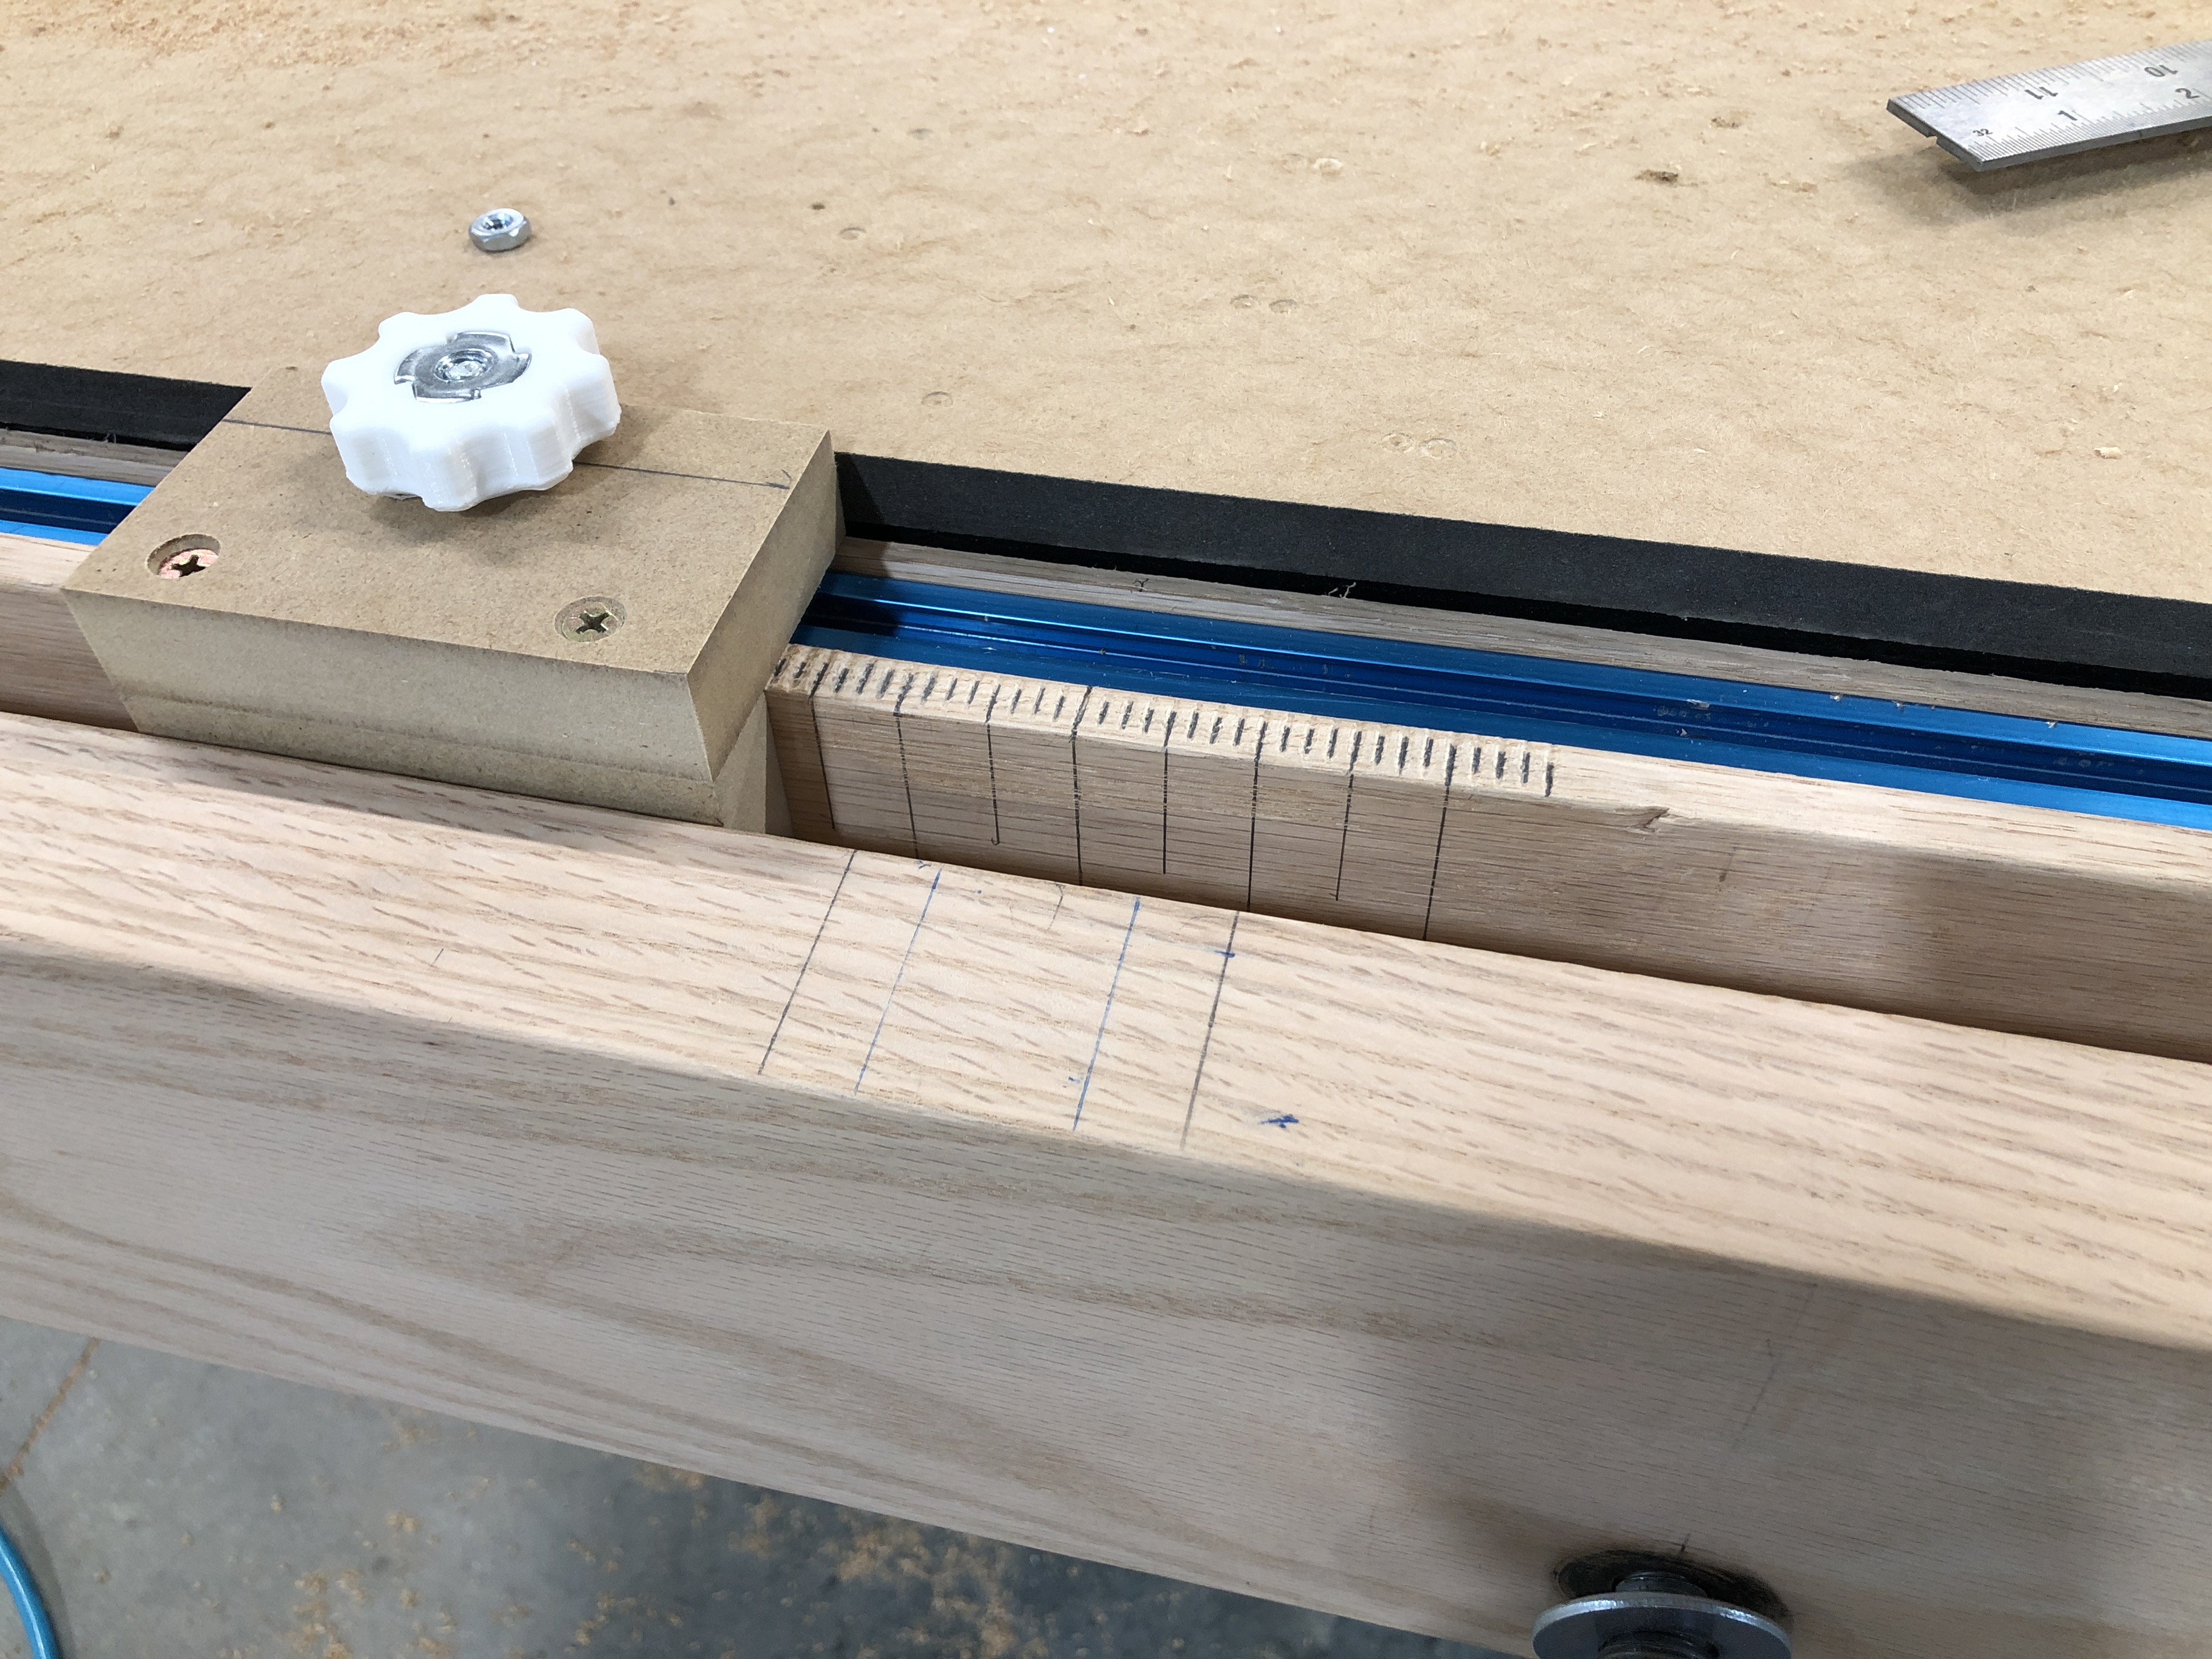
The video was taken before I put in the T-slot track, but you can see how it works. The piece of mdf on the table with the piece extending off the end is used to set the height of the rails. The whole process works perfectly and there is no reason it wouldn’t work the same on a LowRider. Cost was next to nothing. Here’s the knob: https://www.thingiverse.com/thing:4435334.
And here’s the ball: https://www.thingiverse.com/thing:4435377.