The inevitable build... 2x3ft MPCNC

Figured I better stop lurking in the shadows on the forum and finally share my own MPCNC build…

I was first introduced to the MPCNC platform a little over two years ago when I began my ME master’s program at the University of Washington. The combustion research lab I worked for (and would be continuing to work for through the completion of my thesis) ran out of funding, leaving me with the need to find a funding source to pay for grad school. I applied to be a teaching assistant in the ME department and was lucky enough to be awarded a position. I found out I would be helping teach an additive manufacturing course which focuses on introducing engineering students to all different types of 3D printing technology, molding/casting techniques, gcode, and various CAD computational techniques. I had taken the course myself as an undergrad and considered myself fairly well-versed and in-the-know when it comes to CNC and 3D printing, but when I walked into the additive manufacturing lab the first day I noticed a box full of these bright colored printed parts and adjacent to the box was this intriguing looking machine that I didn’t recognize. I asked the professor (my new boss) what the heck the thing was and he gave me this dumbfounded look; he couldn’t believe I had never heard about the MPCNC. Turns out that box of parts was full of most of the parts needed to build thirteen mini-MPCNC’s, all of which would be built by students in the coming year. Due to how inexpensive and versatile these little machines were, they ended up being a perfect platform for allowing students to get hands on with designing/building/troubleshooting/operating a CNC platform.

[attachment file=“54853”]

Well almost two years later and many hours spent troubleshooting/maintaining a bakers dozen worth of mini-MPCNC’s, I decided I had to have one of my own…

My main goal in building an MPCNC was to have a CNC router that would fit my limited budget and fit in my small garage wood-shop. I ended up deciding on a 2 ft x 3 ft work-area with about 5 inches of z-travel, which I thought was a good compromise between work-area and machine-rigidity.

I have had some 1" 4130 chromoly tubing laying around my shop for a couple years leftover from a bike frame project, so I decided I would make use of it by using it for the main x and y axis rails. This left room in my budget to spend the money on stainless tubing for the remaining rails needed for the gantry and the z-axis. Luckily, my neighbor has a big horizontal band saw and a lathe, so cutting down the tubing to length and squaring the ends was piece of cake.

I have a CR-10 printer that I used to print the 25.4mm version of the MPCNC. All the parts printed without issue, which was a surprise since this was the first big project I used the printer for.

I ended up ordering the Rambo kit, with anticipation of using dual-endstops in the future. I had developed a love-hate relationship with RAMPS through my work with the mini-MPCNC’s, when I ordered the kit I was leaning more towards hate… lol

Jumping to where the build is at now:

The machine is built and moves. I have a router mounted to the gantry, but I have only used the machine for pen plotting so far, mostly for troubleshooting hardware issues. I have the machine mounted to a mobile base that I plan on adding drawers to for storing miscellaneous tools and supplies as well as a sealed cabinet space that I can put my CR-10 in. The goal is to have a compact mobile maker-space.

My current to-do list is:

  1. Wire management, probably drag-chain style.
  2. Connect and mount my "Oh Sh!t" button.
  3. Finish the mobile base cabinet.
  4. Dual-endstops.
  5. Dust collection for the router.
  6. Build some stuff!
[attachment file="54854"]

More details/pics to come…

1 Like

WHATTTT!!! 13 of them, I am beyond jealous! That has to be one of the coolest pics I have seen, even if they are using “tiny” parts. I want to know so much more. How were they implemented into the class? Gcode, projects, plotting?

…I have a few new parts ready and some are dual endstop specific…I will release them pretty soon.

I am sure you will love the Rambo, so much better and the digipots, they are amazing. Without having a bunch of students messing with it I bet it will work so much better than you are used to.

1 Like

Are those going to be extruding clay? It looks like they have tubes for extruding clay on the beds.

Awesome build. Stick around, I think you’re knowledge will be useful around here.

Digging the controller board mounts as well.

1 Like

Ryan -

The class is taught twice a year and is usually composed of 80 students. Last spring was the first time the mini’s were incorporated into the class. I was busy teaching a different course at the time, but during that quarter the students broke into small groups and were responsible for assembling a mini and then verifying it worked by doing some basic pen-plotting.

This past fall I was back helping teach the course. One of the main projects was teaching the students how to create a g-code generator using python, which they would use to convert true-type font characters to bezier-curves and then to g-code, all with code they produced themselves. They were then responsible for using the mini’s to plot the font characters their code output.

After verifying their code, we tasked the class with extending their code to 3 dimensions and to include extrusion. Each group was then responsible for figuring out how to output a 3 dimensional true-type font character that they would then have to print using a syringe-extruder that extruded cake icing or a FDM-extruder on one of the mini’s. They were also responsible for assembling and integrating their chosen extruder assembly (this resulted in quite a few blown components/boards).

We are currently preparing to teach the class this spring and it looks like our main project is going to be focused on having students incorporate dual-material extrusion onto the mini’s with either dual-syringe extruders or dual FDM-extruders. The dual-syringe extruders have my vote… having a 3d printer to print peanut-butter cups has been a lifelong dream of mine…lol

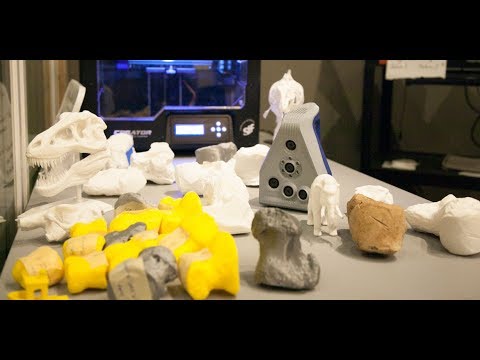
Your platform was also incorporated into the beginning stages of a massive printing project for the Burke Museum (museum @ UW). The goal was to print a 1:1 scale Woolly-Mammoth skeleton and a scaled up version of the MPCNC was used as an initial prototype printer to accomplish this. Unfortunately, the project ended up getting outsourced and the big MPCNC was disassembled.

You should be proud to know that for the past couple of years nearly 160 engineering students per year are being introduced to your platform, a good portion of which leave the class wanting to build one of their own. I always give a plug for your website whenever introducing a project that incorporates the mini’s. I am also trying to convince a good friend of mine who is the dean of STEM education at one of our top local community colleges that he needs to incorporate some MPCNC’s into his curriculum’s as well.

The educational value your platform provides for students is priceless for us. Before MPCNC’s it was too much of a liability to let students get hands on with any type of CNC platform because they were too expensive and too dangerous. Now students can get knee deep in CNC design and all we really have to worry about is a blown arduino, RAMPS, or stepper-driver, which are easily replaced and can be used as a learning experience in itself.

Open3DP is the name the lab goes by.

Link to the mini-MPCNC thingiverse page:

6 Likes

And yes, I already love the Rambo. It goes without saying that RAMPS and students don’t go very well together… I don’t care to think about how many hours were spent making sure all 13 mini’s were fully operational and then to find out a good portion of them had boards blown within just a couple hours of students using them… but after 2 or 3 times students begin to learn don’t unplug things or go prodding around with a screwdriver until you disconnect power!

Looking forward to checking out the new dual-endstop parts!

1 Like

Here are some more pics of my own build…

[attachment file=“54897”]
[attachment file=“54898”]
[attachment file=“54899”]
[attachment file=“54900”]
[attachment file=“54901”]

And pics of my controller box…

I wanted something rugged and that could centralize all of the electronics. Hence the junction box. It ain’t pretty, but it is practical…

[attachment file=“54904”]
[attachment file=“54905”]
[attachment file=“54906”]
[attachment file=“54907”]
[attachment file=“54908”]

Dang we could use that on the ZenXY.


What!!! and double What!!! Please tell me there are some pictures of this somewhere?


You have no idea, how amazing this all is to me. I called my Mom…heck yes I am proud. Thank you for being a part of it!


That is why I built it, I was more than frustrated that my school had a few very nice Mills but there was no way to get any experience on them, I even tried getting a job in the machine shop but they only took freshman because they felt it took 3 years to teach them enough to be valuable to the shop… I honestly did not know we even had a machine shop until my second year and didn;t go anywhere near it until my third year. What you are doing will 100% give the next generation of engineers a leg up on the competition. Even if it just gives them a grasp on what parts are actually machinable on what type of machine.


A million heart felt thanks.

2 Likes

I love the de-shelled power supply! No doubt you will have some cool projects coming off this thing in no time the build does look very solid.

Don’t get mad but you might have to run a few more wires if you havn’t already.

Here is a preview.

[attachment file=54916]

Here is a video of one of the big ones they built and an article about the project (pretty sure they built an even bigger one, but not 100% sure):

Ha! I can totally relate, I have big things happening in the combustion lab I work in and unfortunately for my girlfriend, we are renting a house next door to my parents, so I burst over there quite often sharing the next big idea or thing happening.

That is the goal. Sadly, I had the same experience you had in the machine shop at UW. Although, luckily I went to a community college for most of my undergrad career, which had a surprisingly large machine shop where they were practically begging students to come in and use machines… so of course I took advantage of that. Once I got to UW and realized that it was nearly impossible to even get on the list to be trained to use a machine, I said screw it and found myself a job in a research lab as a designer/fabricator and ended up getting access to a privately owned fabrication shop through a sub-contractor on the project we were working on.

It makes me legitimately sad when I see a junior or senior level engineering student that doesn’t know how to use a ratchet or a screwdriver… yes… even a screwdriver…

lol… I had to take it apart to solder some leads to it to connect it to a different power cord connection. Figured it looked “cooler” naked.

I just ordered the dual-endstop wiring kit from you last week, so I haven’t ran the new wiring yet. Still need to make up leads for the endstop-switches, order drag-chains, and I have been waiting for more goodies from you in regards to dual-endstop hardware/parts. I like the simplicity of those parts in the preview! Those would take no time to print and swap onto an existing machine.

I asked a team mate to hand me a Phillips screwdriver during our first semester of senior year…He did not know what it was. I very carefully tried to introduce him to as many tools as possible over the course of our next few semesters.


My jaw is on the floor…your school, the museum, seriously in shock. There is/was a class that heavily involved the MPCNC in college, and an MPCNC featured in a museum exhibit. Can it get any better than this? Is this peak V1 Engineering? If it is I am am okay with it, I am so very happy about all of this. Jeez…

Yes!

Oh I sure hope not…

I am working on putting together a maker-space type project in Côte d’Ivoire, West-Africa. The MPCNC has been on the top of my list of hardware to include in the project.

You did the hard part, we are just helping expand the intellectual value of your creation and this new generation of manufacturing technology.

Dude…I did not think you could possible tell me anything else ever to top the two things you have just dropped on me in the last 24 hours…Is there anything else you have that is going to knock my socks off? Wow, just wow…

Sorry, the inspirational bombs have been dropping a little fast…

The only other thing we have going on is we are adding 10-12 MPSCARA’s this quarter to the team of mini’s we have. One of the grad students in the additive manufacturing lab took some inspiration from the MPCNC and designed a SCARA printer that can be “mostly-printed”. I am going to be building one of them next week, so I have at least some idea how to help students troubleshoot them when they build them out sometime next month. Pretty cool little machines that can almost fit in your pocket.

https://www.thingiverse.com/thing:2487048

Awesome being surrounded by talent like that! The forums give me a strong feeling of that as well. Some of the people in here have some crazy day jobs…the rest are just smart as heck.

Agreed dude. And intimidating at the same time…


Thank you! This video validated my idea of using 3/4 EMTs as my build’s main legs and mounting a 4th axle somewhere in the air, plus a drop table. Or a really tall Z.

Time to add some brackets and skin it with some 1/4 panels etc.

Unrelated, but I have to jump in here. I spent quite a bit of time in Côte d’Ivoire, both in Abidjan in various places as well as Bouaké. I lived quite close to the school in Bouaké, and visited it a couple times. Where are you planning this project (and hats off to you for doing it!)?