Everyone keeps posting their finished builds and its frustrating me as I want to see all the trials and tribulations of someone failing and succeeding (ok not all)
So to remedy that, I shall start my own build log to show an idiots first build.
Lets get into it shall we:
Still deciding on electronics and hardware and a few other bits and bobs but I have time. The machine wont be built until all my little aquatic creatures have been moved from it to their new owner. (±2-3 weeks)
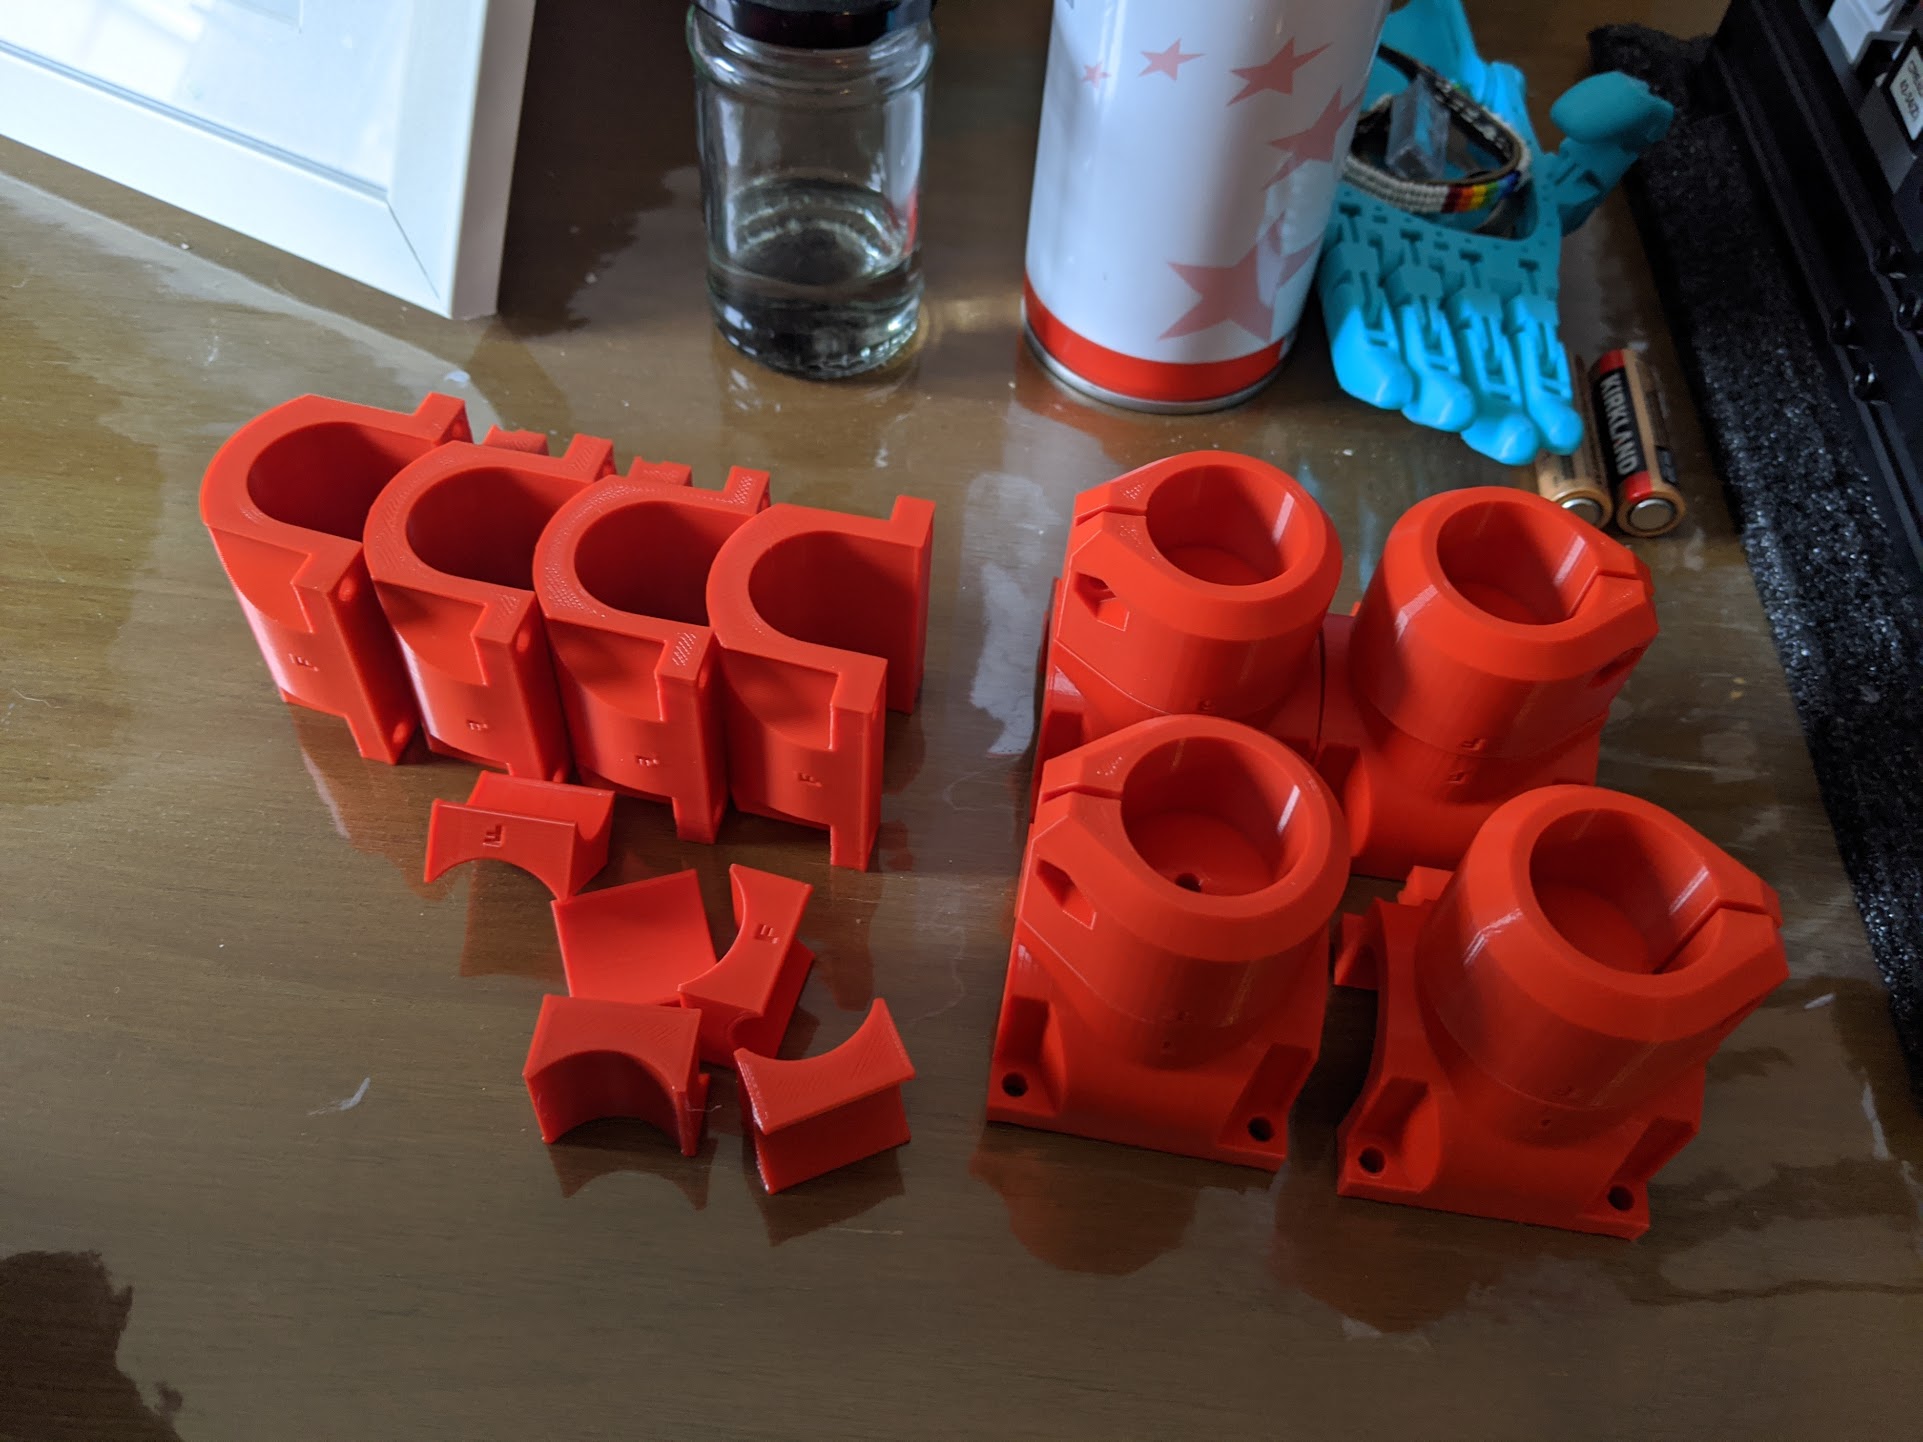
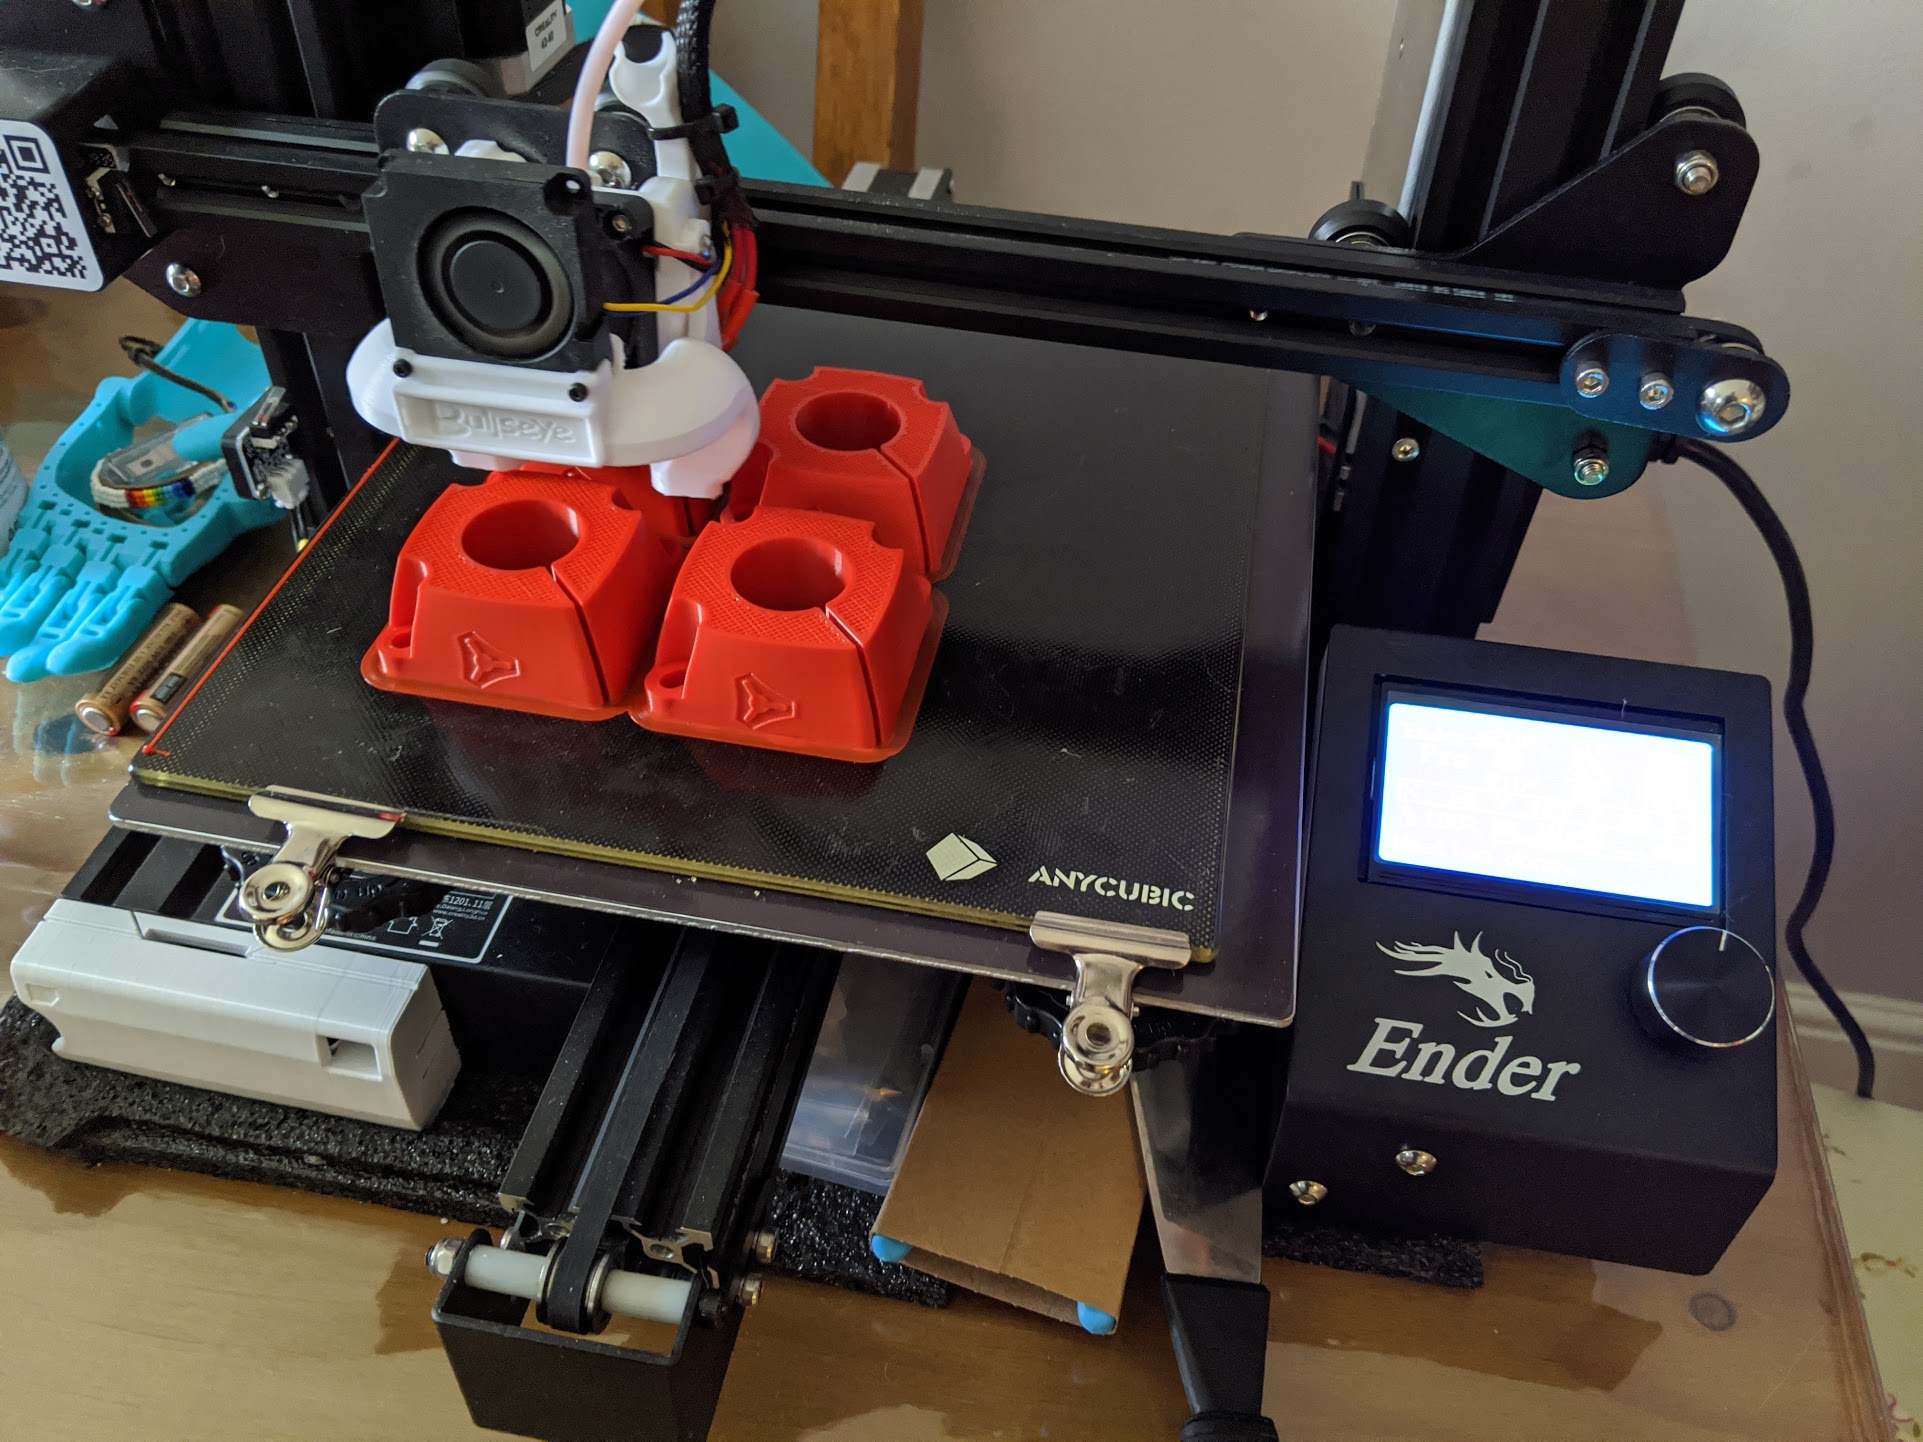
Currently printing the parts and into my 4th set of components.
Printing on Creality Ender 3 Pro (mod with yellow springs, glass bed and printed PETG Bullseye fanduct.
Currently printing parts in eSun PLA+ Red
210 hotend and 60 bed (lower and my corners lift when not using a brim)
60mm/s with walls at 30mm/s and initial layer at 15mm/s
35/55/65% infill as per instructions on v1 site
0.4mm nozzle with 4 walls.
More details to come as I finish parts and decide on stuff to buy for the build.
Also decided on the first machine Ill be using (thanks loads @robevens) as I can actually find this model in the UK.
With this collet - but used to consult for a massive retailer, so might get it cheaper from them…
Also need to add this to my printing schedule:
Half a roll of PLA gone… hopefully will be done end of this week however giving my family a night off when it comes to the noise my printer makes…(shed aint ready yet…)
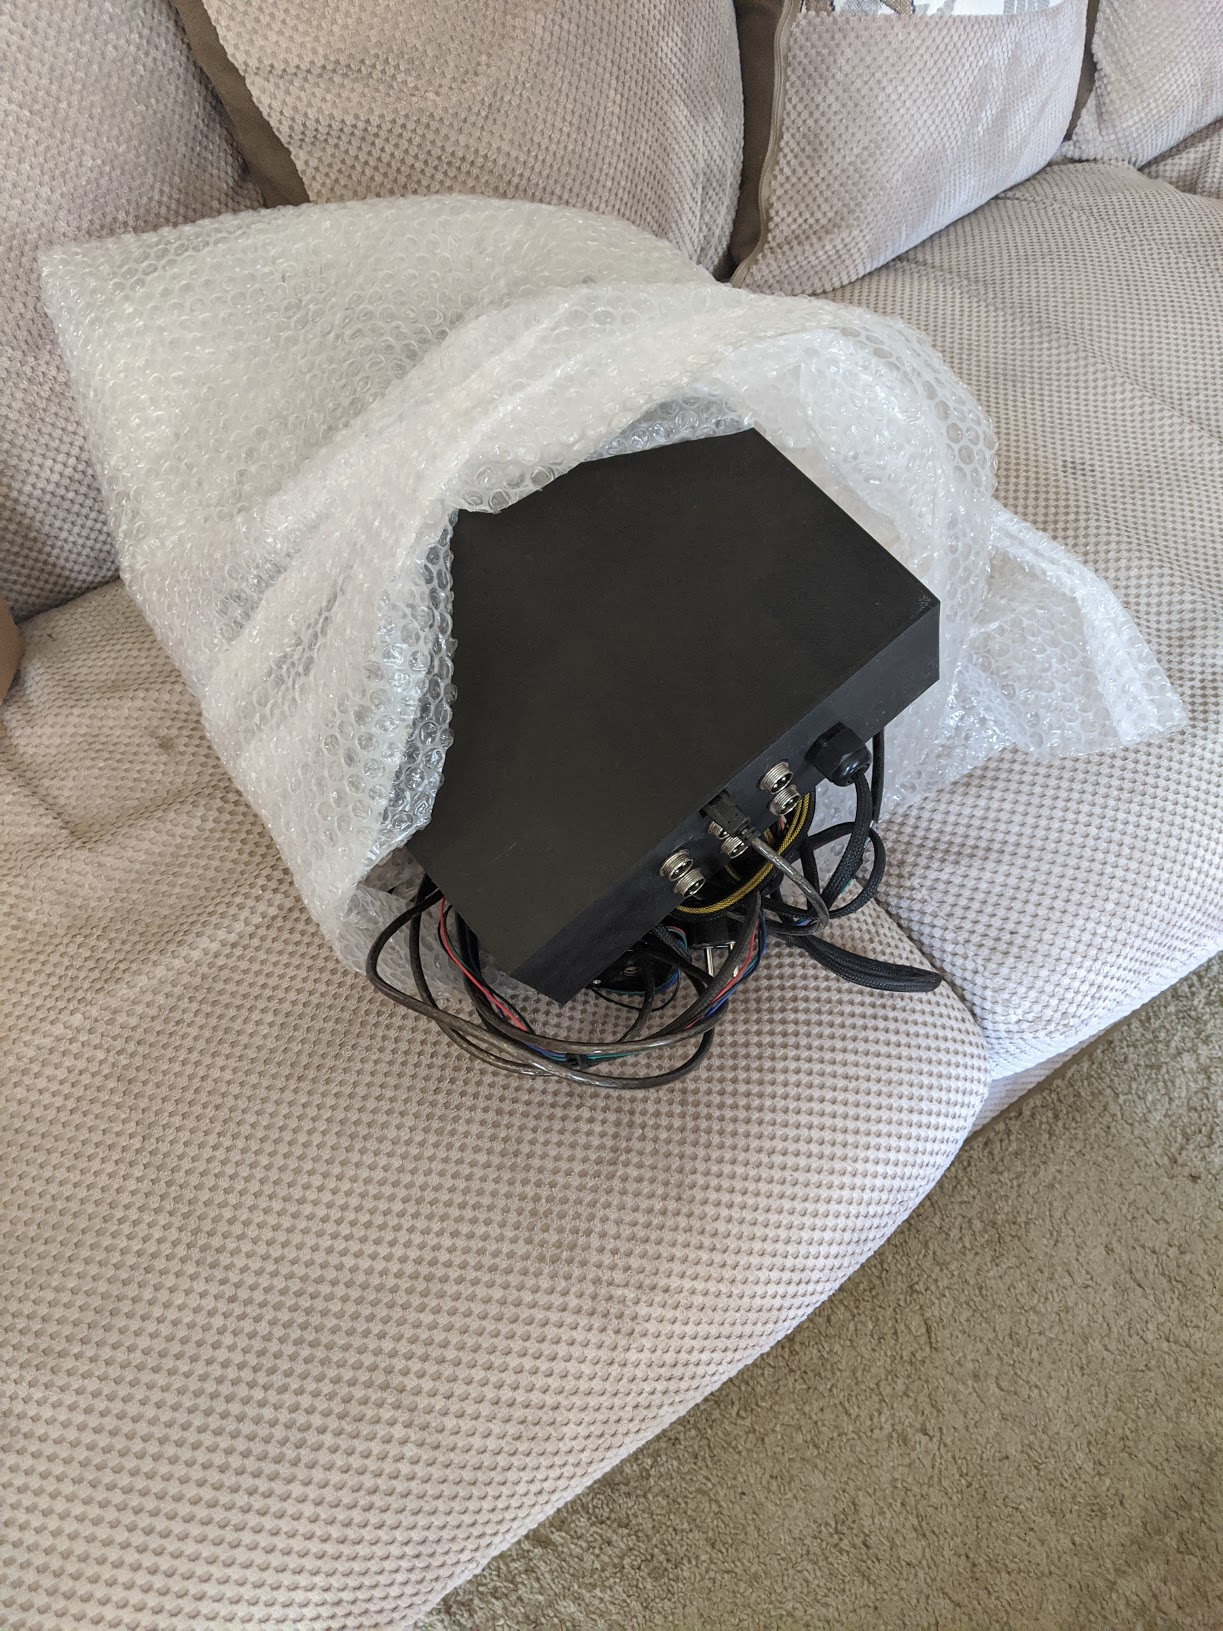
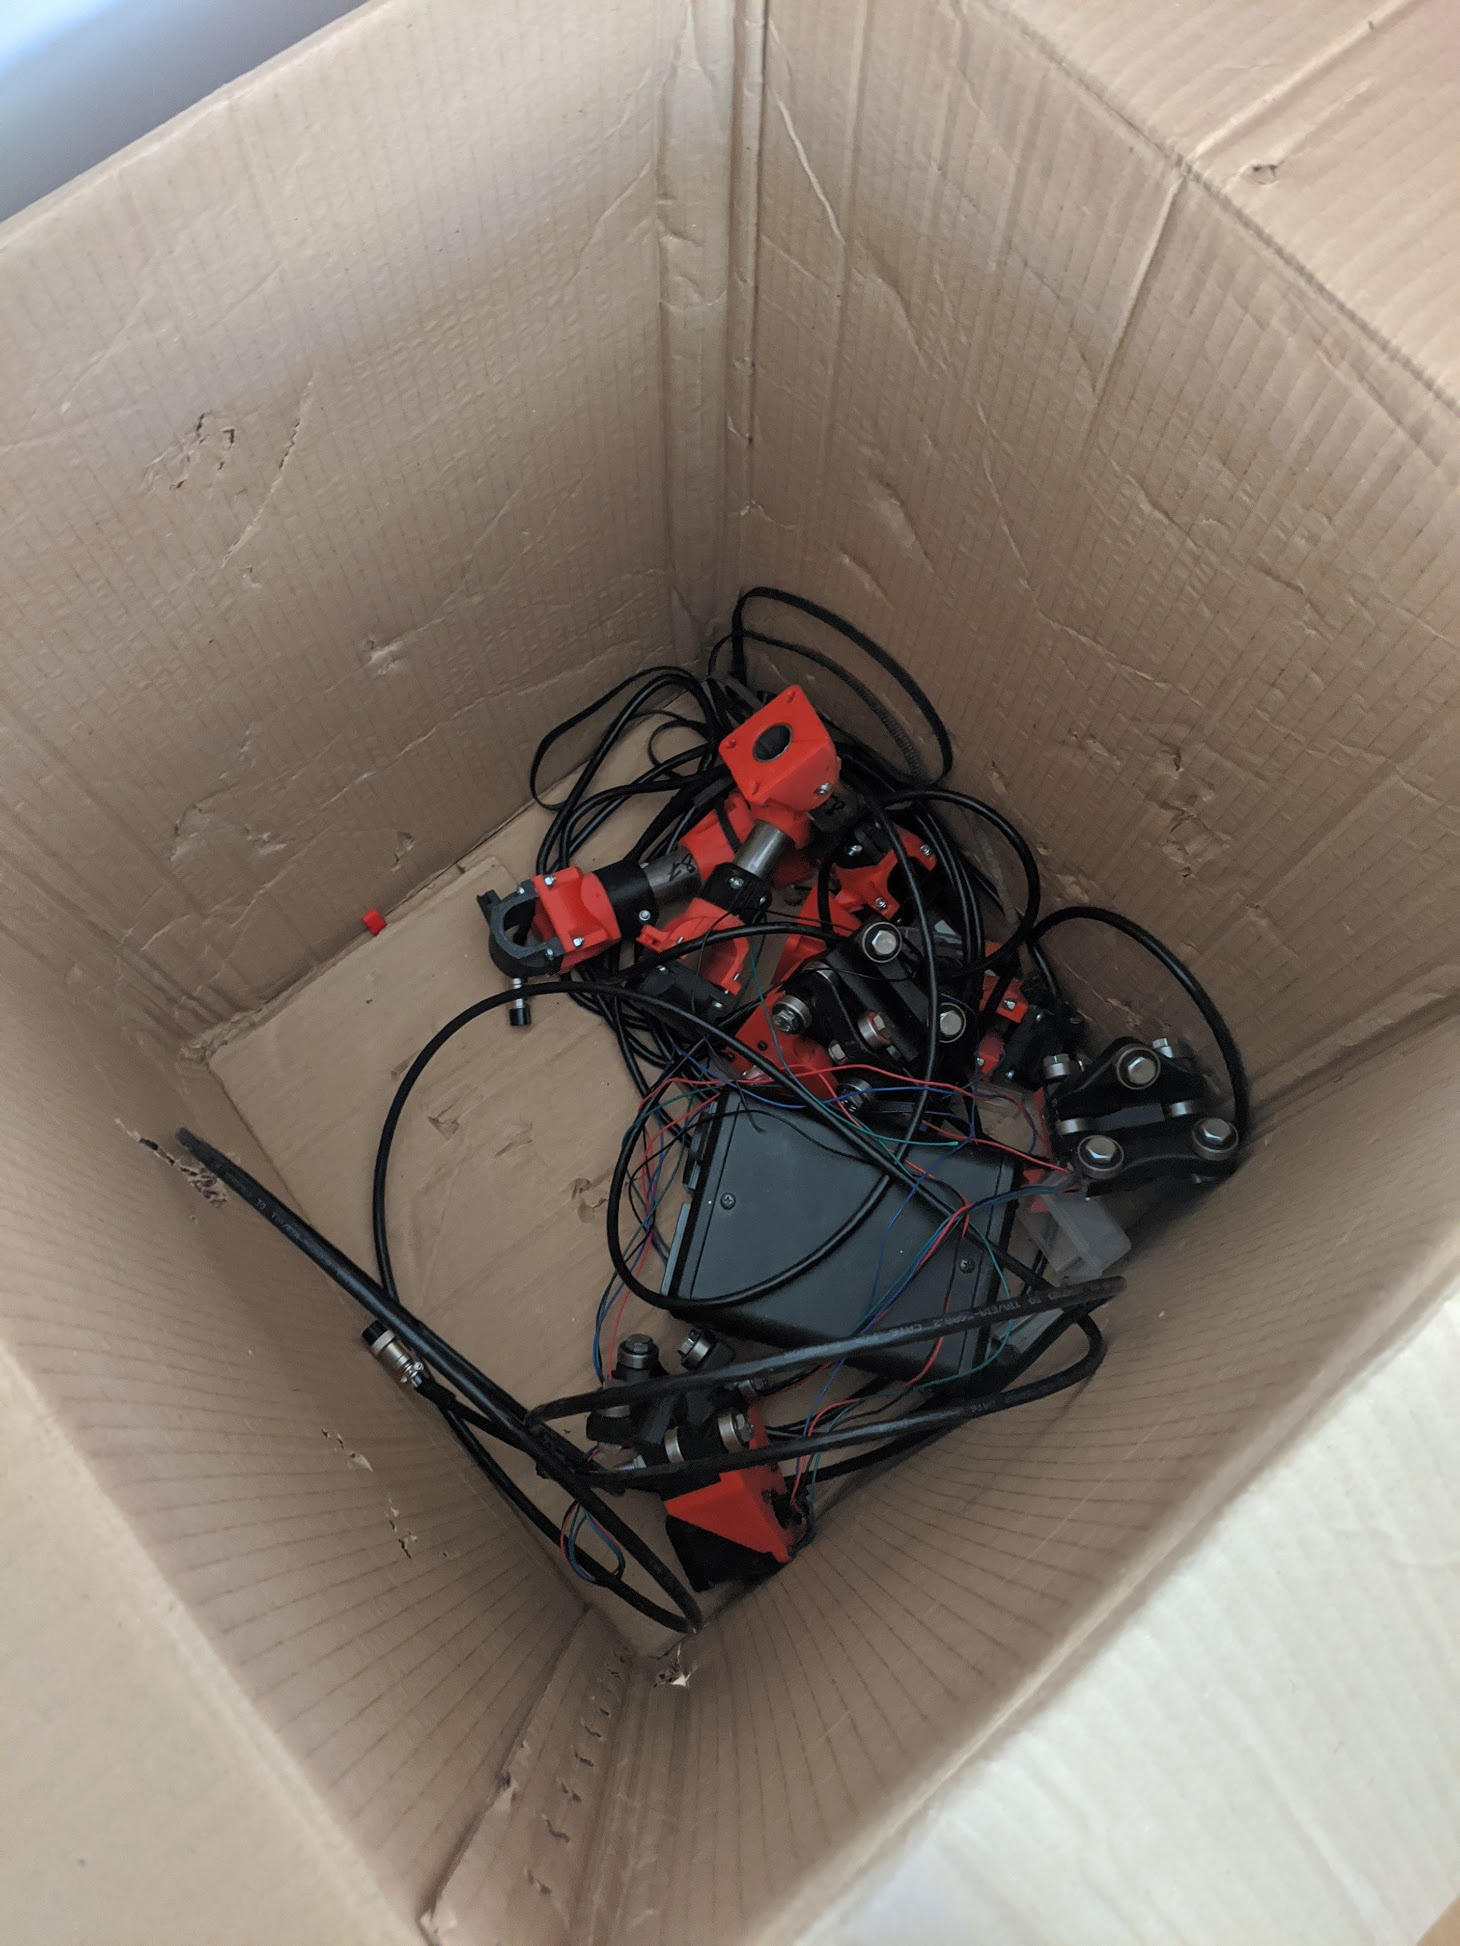
So this box of joy just arrived at my house… dude I bought it from LITERALLY just tossed it all in the box, no padding bar some bubble wrap around the electronics and spindle (NOT EVEN TAPED). Broken plastic all over, bits everywhere and even the spindle sticking through the box…
Wired SNAPPED off NEMA motors…
This is what I get for trying to make my life a little bit easier!
I will be asking more questions than originally thought on this forum
Tried to test it all yesterday and the board seems blown or damaged as there is NO lights and PSU fan is spinning, so just ordered a multimeter to test if its working.
200 quid… Multimeter arriving today so I can diagnose and hopefully get it to work… if its the board, then its just 30 quid for a new one, but if its PSU and board etc etc, the ill be sending it back
That is not worth all the stress I think! But I wish you all the best that it will be running soon!
You already started printing and those parts looked really nice so I do not understand why you bought those parts?
Of course you did not expect it to be crap but printing and making progress is what makes this project so special and interesting!
I did not even sleep well while I was printing the biggest parts as I was expecting it to fail but everything went well.
You now spent money and have to reprint parts anyway and do trouble shooting on the electronics and stuff.
But the good thing is you now own a multimeter! Everybody should have one!