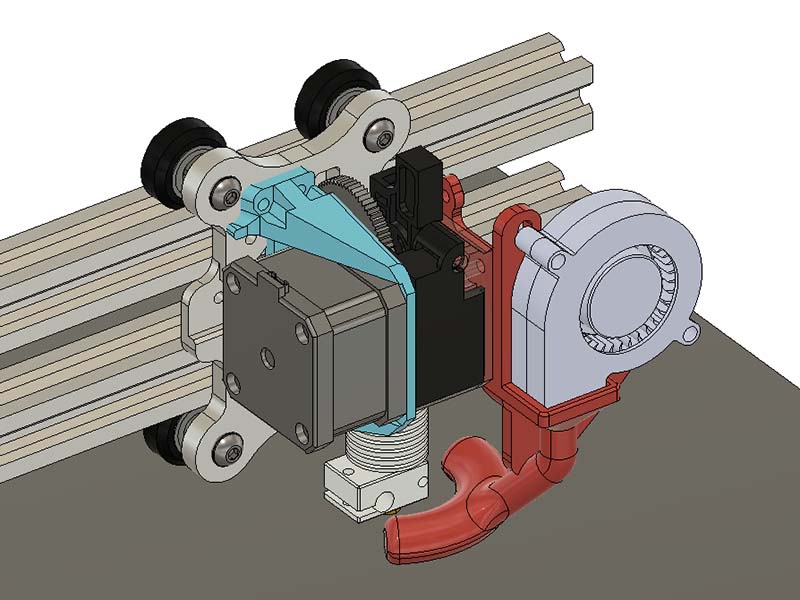
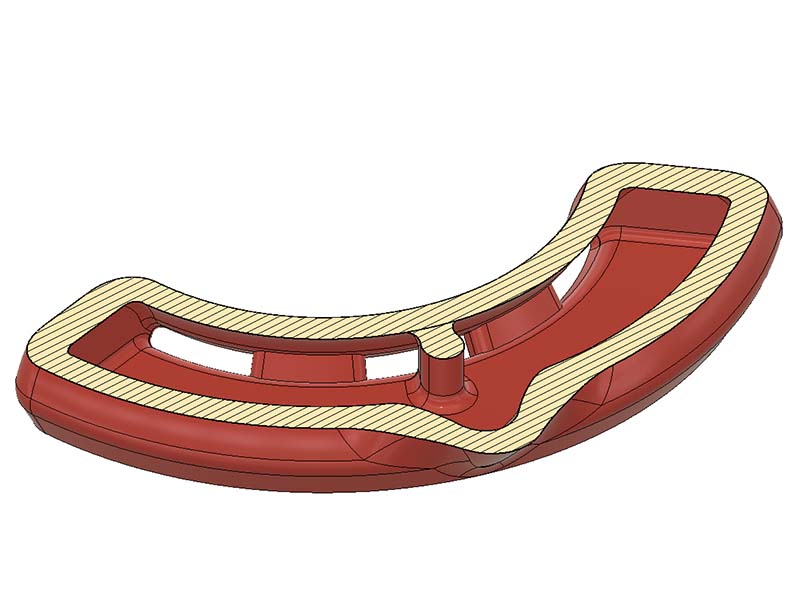
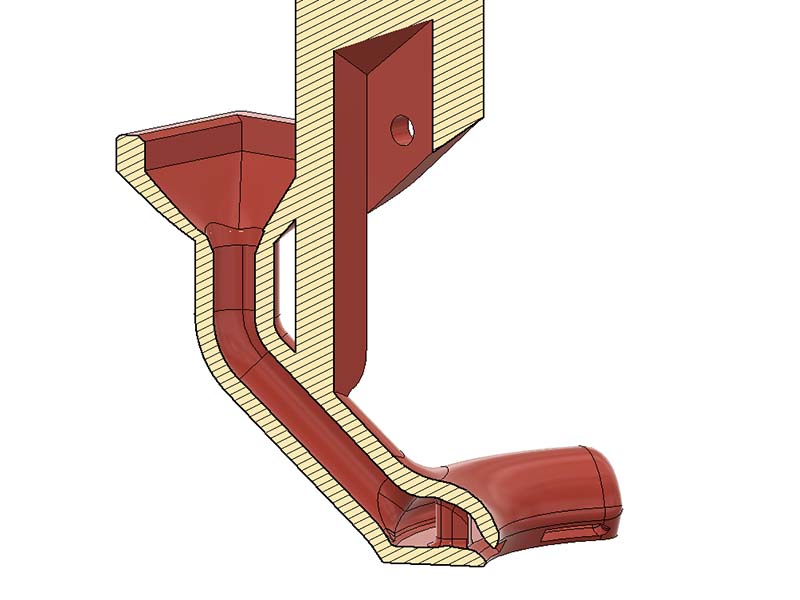
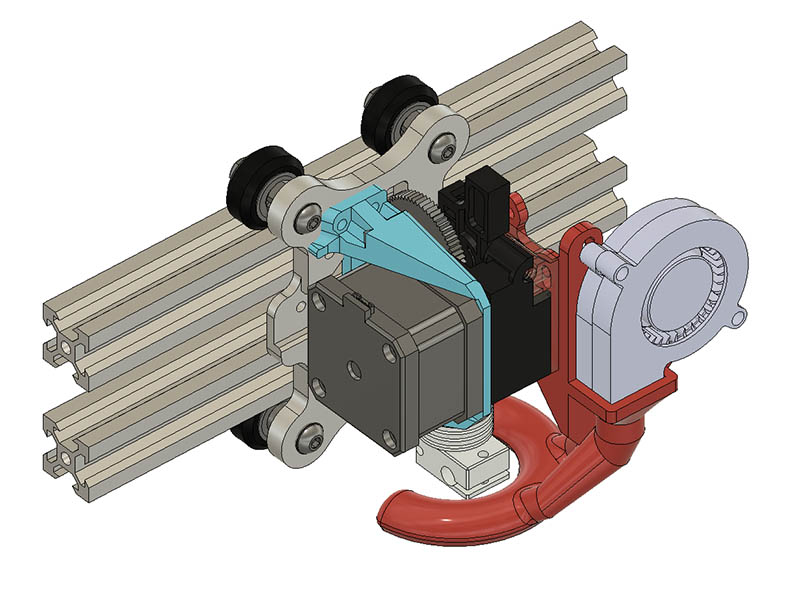
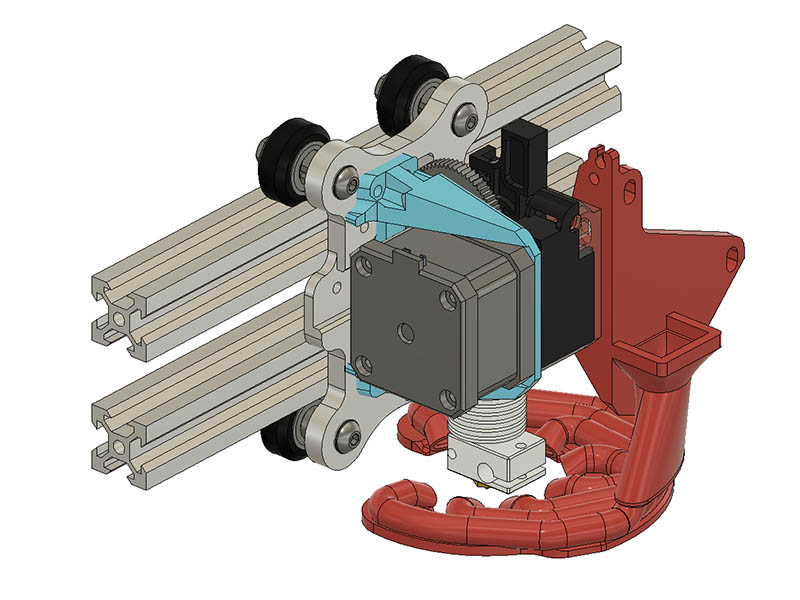
After having printed for more than 5 years without a print cooling fan, I decided to finally try one to see if it helps my prints. I couldn’t find a mount that fits my machine & tried starting with a couple different ones I found on thingiverse, but turned out to be easier to just start from scratch. I did use https://www.thingiverse.com/thing:2162427 as a mounting orientation guide for the fan. I originally made the bottom outlet ring 180 degrees with 5 outlets, but 120 with 3 outlets seemed to be enough. I would have liked to cut some more of the opening back, but was too much trouble for now. First test print with 180 degree bottom seems like it puts a nice amount of air out. I added a little wall in front of center outlet to help divert more air to the other 2 outer outlets. I added one break away support for the tube, but no other supports in the print. I am printing my 1st version to try in PETG. Here is what the design looks like.
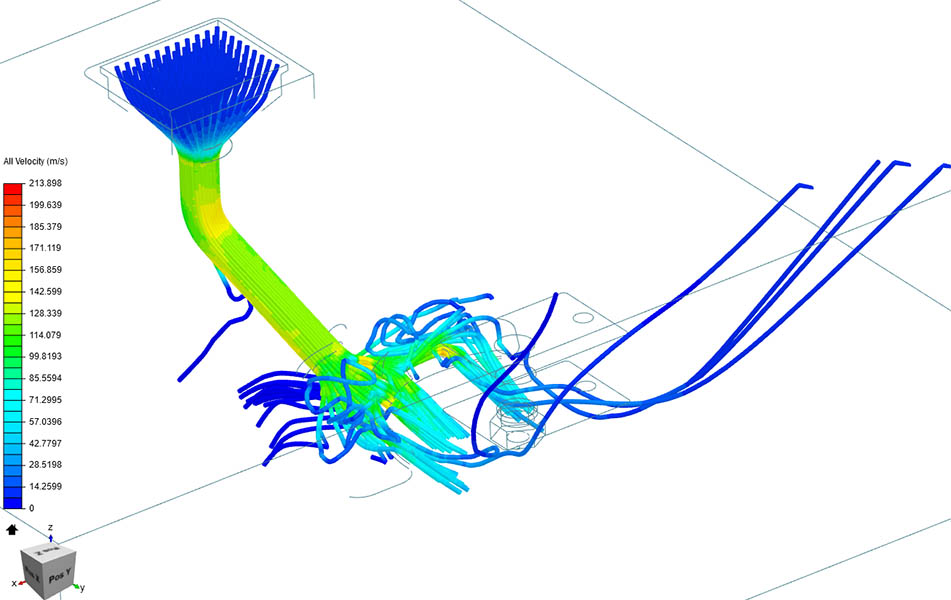
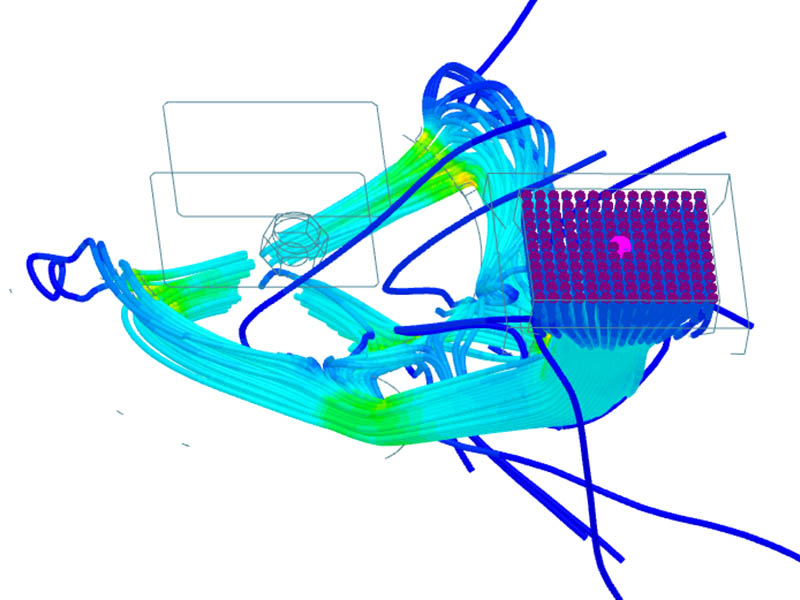
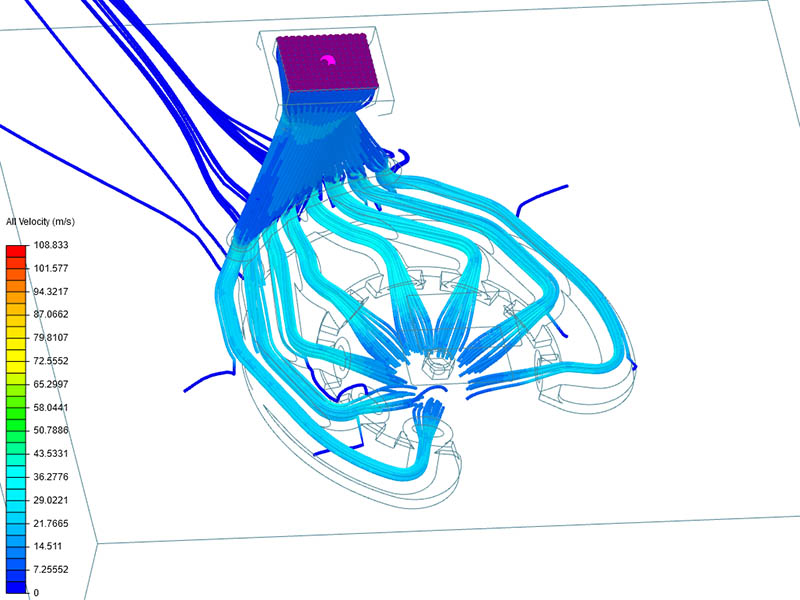
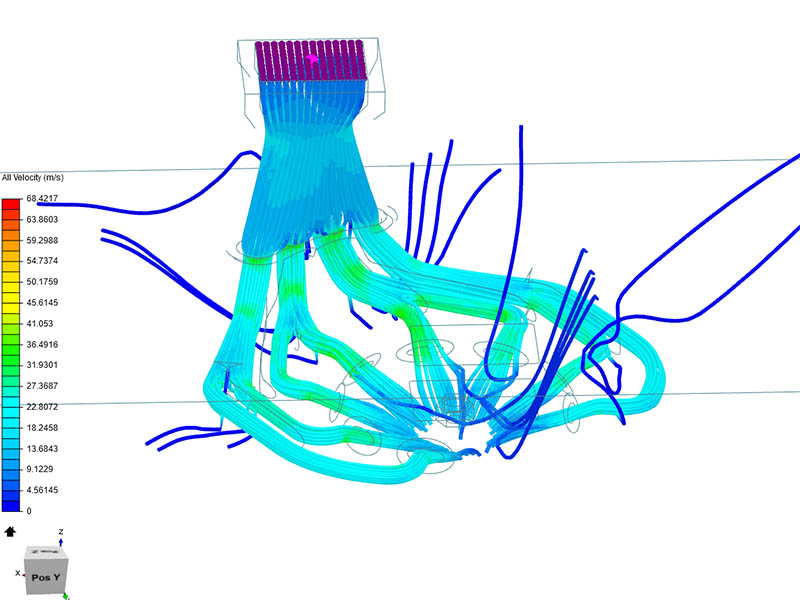
Since Teaching Tech did a video recently on simulation of air flow for these part, I had to try it. Doesn’t look too bad, but could use some adjustment to the design.
If you’ve printed it already, you can put a bowl filled with water under the nozzle and see where the surface moves from the fan. That uses a higher fidelity physics model 
Thanks, I will have to try that water bowl. For my 1st fan cooler it will probably serve my needs.
I printed a few parts with this version & it is working good, so I decided to fine tune the design some more. First I started making a full torus around it, but that seemed too much for now. I then had the idea of using something like a horseshoe shape at the bottom. At first I just used 2 outlets 180 degrees apart which looked pretty good in the simulation. I then added a 3rd outlet halfway between the 2 stems feeding into the horseshoe. I like the horseshoe idea & simulation looks promising, so I am printing that version to try next. If I added some internal baffles to the torus design, it might work better, but I think this horseshoe will be sufficient for now.
Here is what the full torus version looked like with 8 outlets. Probably needed to adjust the location of the outlets better & maybe use less than 8. I might need to increase the diameter of the torus if I go with that design later on.
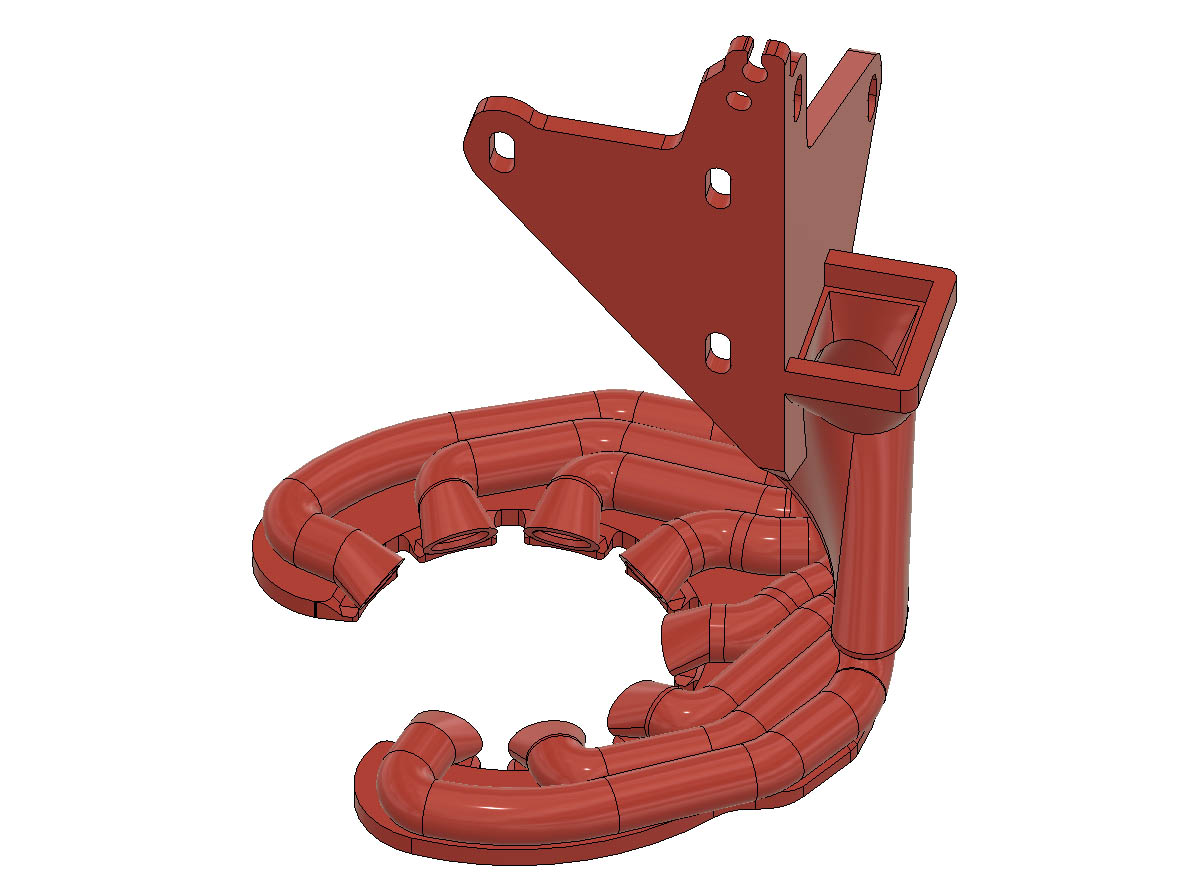
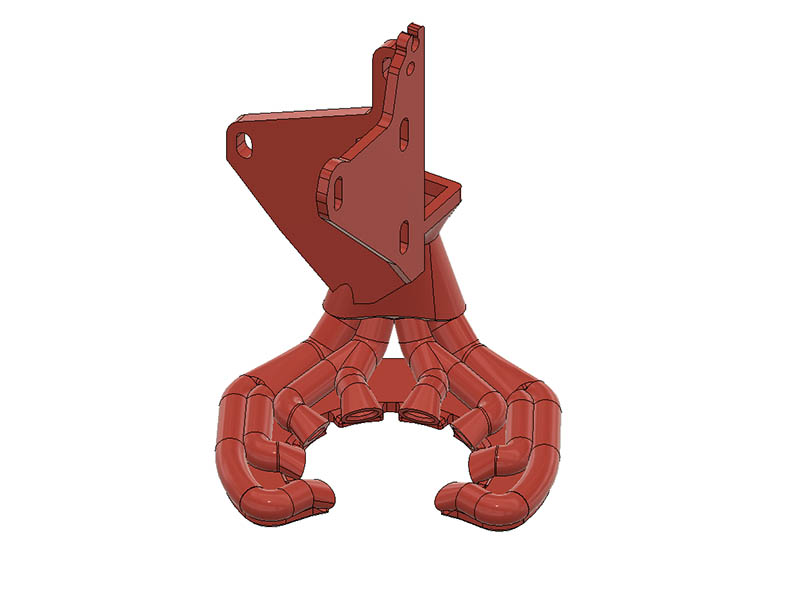
I have my design working pretty good with 12 outlets & had a interesting idea of how to change it even better when I woke up yesterday morning. I spent yesterday drawing it up to see if looked good & today I redrew it to get rid of all the junk in the file & also make it so it would run in the simulator. I made an 8 port manifold design so each nozzle gets its own pipe. I am going to print it tonight & see how it looks tomorrow. Here are 3 screenshots.
Are you going to do that in layers and glue them together, or fiddle with it a bunch to remove the supports? 
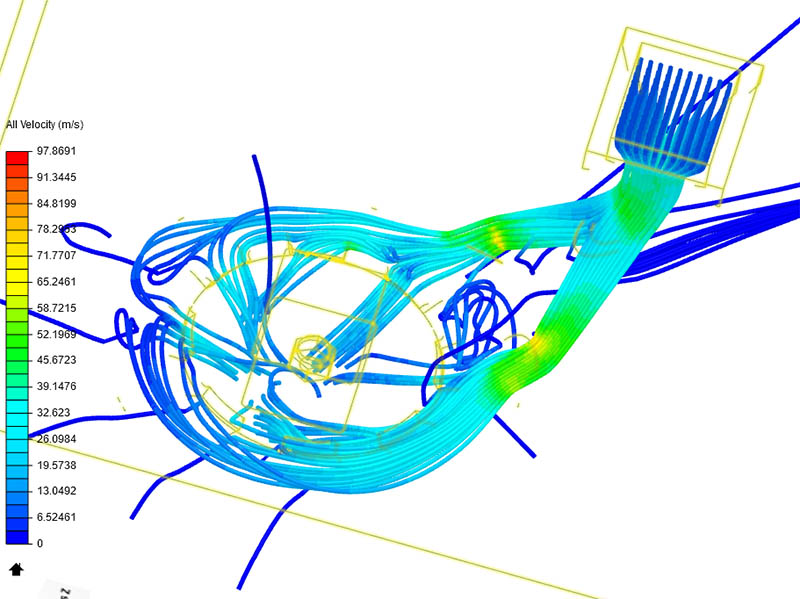
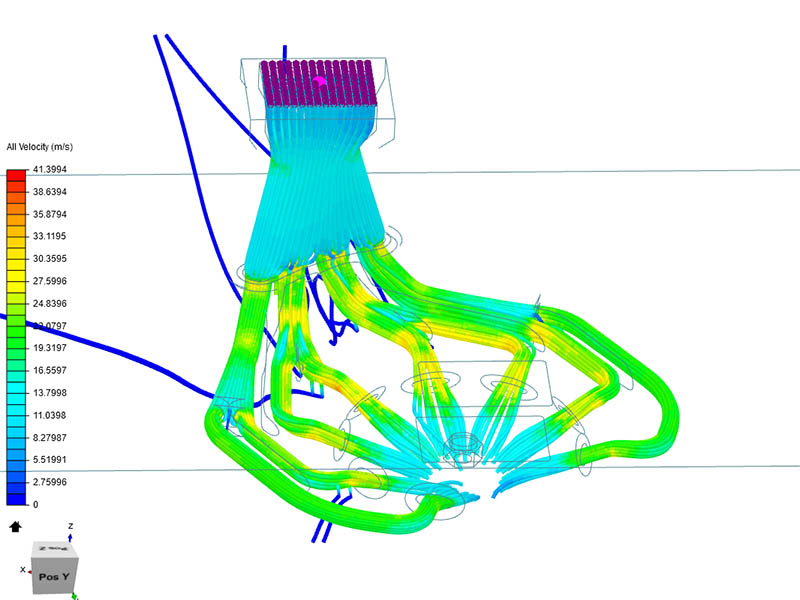
It prints with no supports without any problem & seems to push more air than previous design. It was a little heavier & I could not get it as level at the bottom as previous design, but have cut out 12% of the volume & will reprint today. Simulation actually takes less time than previous design. Latest Simulation looks even better & now I am adding some internal chamfers & running sim again. The simulator has barfed before when I added the chamfers, but likes it ok this time. Here is what the previous run looks like. Seems like I am getting more velocity than before. Velocity starts at 8.83m/s
Looks like the chamfers smoothed out the speed at the splits. Bill, you did get me thinking about what it looks like inside those tubes after the print, so I will make a cross section test print this morning. It will probably be slightly rough at the top, but it does get plenty of air thru those tubes.
Is there any way to download this model?, It seems pretty efficient and i’d like to try it.
I would use the newer design for the Zyltech as it is more efficient & takes up less space, although the previous design does look cooler.
Thank you so much for your fast answer.
It seems your design is quite bulky compared to other, simpler design, has it affected ringing?
I don’t think the 2nd design is bulky. I used manual input shaping with klipper & ringing is hardly there now.
