Have added the tmc2208 to my tornado and delta kossel. The tornado also had rubber balls as feets.
But the fans 
The Prusa mini is amazing. I really like the design and small footprint. Now I am just waiting for firmware update to make it wireless.
Have added the tmc2208 to my tornado and delta kossel. The tornado also had rubber balls as feets.
But the fans
The Prusa mini is amazing. I really like the design and small footprint. Now I am just waiting for firmware update to make it wireless.
I use 40mm fan for the hotend, so it’s quieter, and a 5015 for parts cooling but most of my printing is petg so I keep it at 40%. The board is cooled by dual 80mm fans turned way down.
Also a tornado or?
Self-built Hypercube BLV Fusion. About 60% self-designed or modified from other sources.
Nice.
I have never tried petg but have a role.
Maybe I should give it a try for your clamp.
I like it because it’s more stable at higher temperatures and the slightly increased elasticity means the parts are less likely to crack. But it does flex a bit so it isn’t as solid as PLA. For my design though, it’s reinforced by the direct bolting to the Z conduit so it doesn’t flex at all.
For PETG: Print slow, 40mm/sec ideally, 60mm/sec max once you have your settings tuned in, and print hot. Typically closer to the top of the temperature range. No fan or only low speed 25-50%.
just to be sure. I have the Burly F 25mm model.
is this the files i need to print
Yes, that’s correct.
Hi Peter
Do you use a dustshoe that works with your makita mount?
I ended up with Peter’s modified makita mount. I have saved yours for later use.
I finally made my first cuts but now I need a dust shoe 
I use this dust shoe: Z-Axis Independent Dust Shoe for Makita RT0700 RT0701. It works quite well if you mostly cut flat plates of wood (like in your picture above for example). I also printed the brushes in TPU, works fine.
The clamps to attach it to the center assembly were not that great though. They work, but especially the upper clamp is a bit “loose”. So I designed my own: clamps.zip (186.7 KB). Mounting the upper clamp requires you to take out one of the bolts in the center assembly, put the clamp in place, and put the bolt back the other way around. You need to loosen up some other bolts before you can take that bolt out, but it’s not too hard. Also note that the clamps are designed for M3 bolts and nuts.
My clamps also make it easier to adjust the height of the dust shoe, because a) the inner diameter of the clamps is slightly oversized, and b) the hex nut is retained in the clamp.
The clamps are designed to be mounted on the right-hand side (as seen from the picture above). If you want to mount the dust shoe on the other side, maybe you can mirror the parts in the slicer.
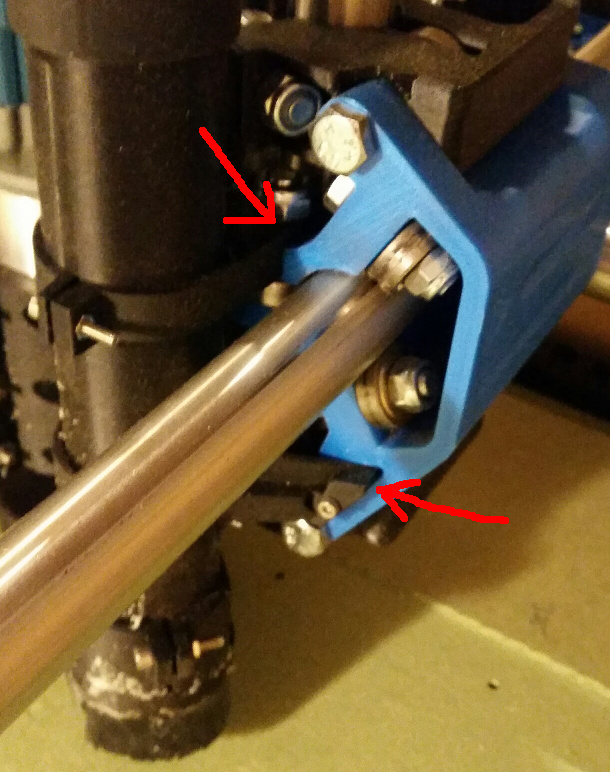
Here’s a picture of how the clamps are attached to the center assembly:
You can see that the upper clamp is attached with the bolt of one of the bearings in the blue center assembly part. The lower clamp simply goes through an existing hole in the blue part. (It needs quite a long M3 bolt, forgot the exact length but it’s something like 35mm or 40mm. You can also use a bit of M3 threaded rod cut to size with a nut on each side.)
If you attach it on the other side of the router, you may also need to “swap” the clamps. What I called the lower clamp may need to be mounted above the other one.
Also, if you’re going to cut a lot of wood and have issues with dust / chips clogging your vacuum, check out my cyclone thread: My cyclone does not work
Oh, I like that! I just did a similar search, didn’t find this clamp and wasn’t completely happy with the one I built. I much prefer the places you’ve chosen for attachments. It also looks like you’ve tucked the vertical tube in tighter to the central assembly - does it hit the front roller?
Also, what is the keyhole shaped piece in the shoe for? Is it specific to the Makita router?
I designed the clamps myself and have not published them anywhere.
The lower clamp hits the roller. If the tab with the bolt is rotated a little it might save 8mm of work area (it would require a minor change in the design, but would also make it harder to access it for making adjustments). To save more space, you’d need to make the vertical tube rectangular or something, so it would extend less beyond the center assembly.
Yes, that keyhole is just for a Makita. It’s has a small pin you can push in to lock the spindle when tightening or loosening the collet nut.
Hi Peter
thanks i will look into it.
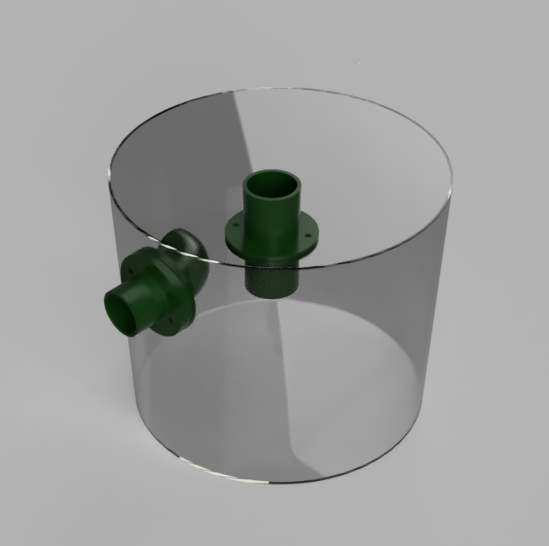
i was planning on this dust collector solution.
I’m a little surprised that that design works well. A more common design uses a “Thien baffle”. It’s very similar to the one in the video, but there is an extra disk inside, with a slot on the side. This helps to separate the dust (even) better.
If you have a 3D printer and want to spend less time building it, then I’d still recommend the cyclone I use.
I actually have seen a couple off these designs and people state it works.
I need the 30L bucket anyway so I will give the 12,5 L bucket only ( a couple off dollars extra) a try. If it don’t work I will try the cyclone.
Hi Peter
I have printed the parts. Do you mind uploading more photos showing how it is put together and set up on the router?
How is the part between the shoe and lid mounted?
What did you do for hose connection?
I don’t think I can take a better picture than the one above.
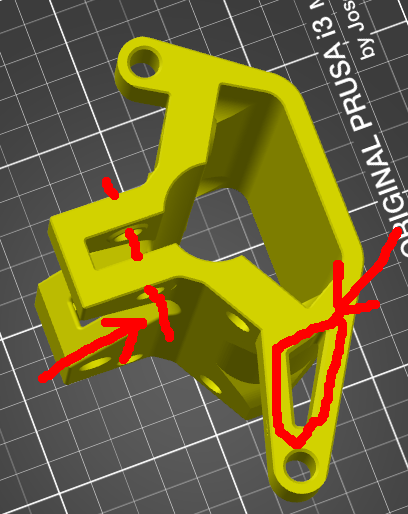
I tried to make the mounting points clearer in this picture:
One clamp fits inside the triangular hole (the large piece on one side, the small piece on the other side, connected with a long M3 bolt). The other clamp is mounted using one of the M8 bolts that is already in your MPCNC.
Position the two clamps such that a 40mm OD tube fits vertically into them. (You find an STL of such a tube on the thingiverse page of the dust shoe I think). Or, alternatively, buy a 40mm OD PVC pipe at a hardware store for example, and cut it to size.
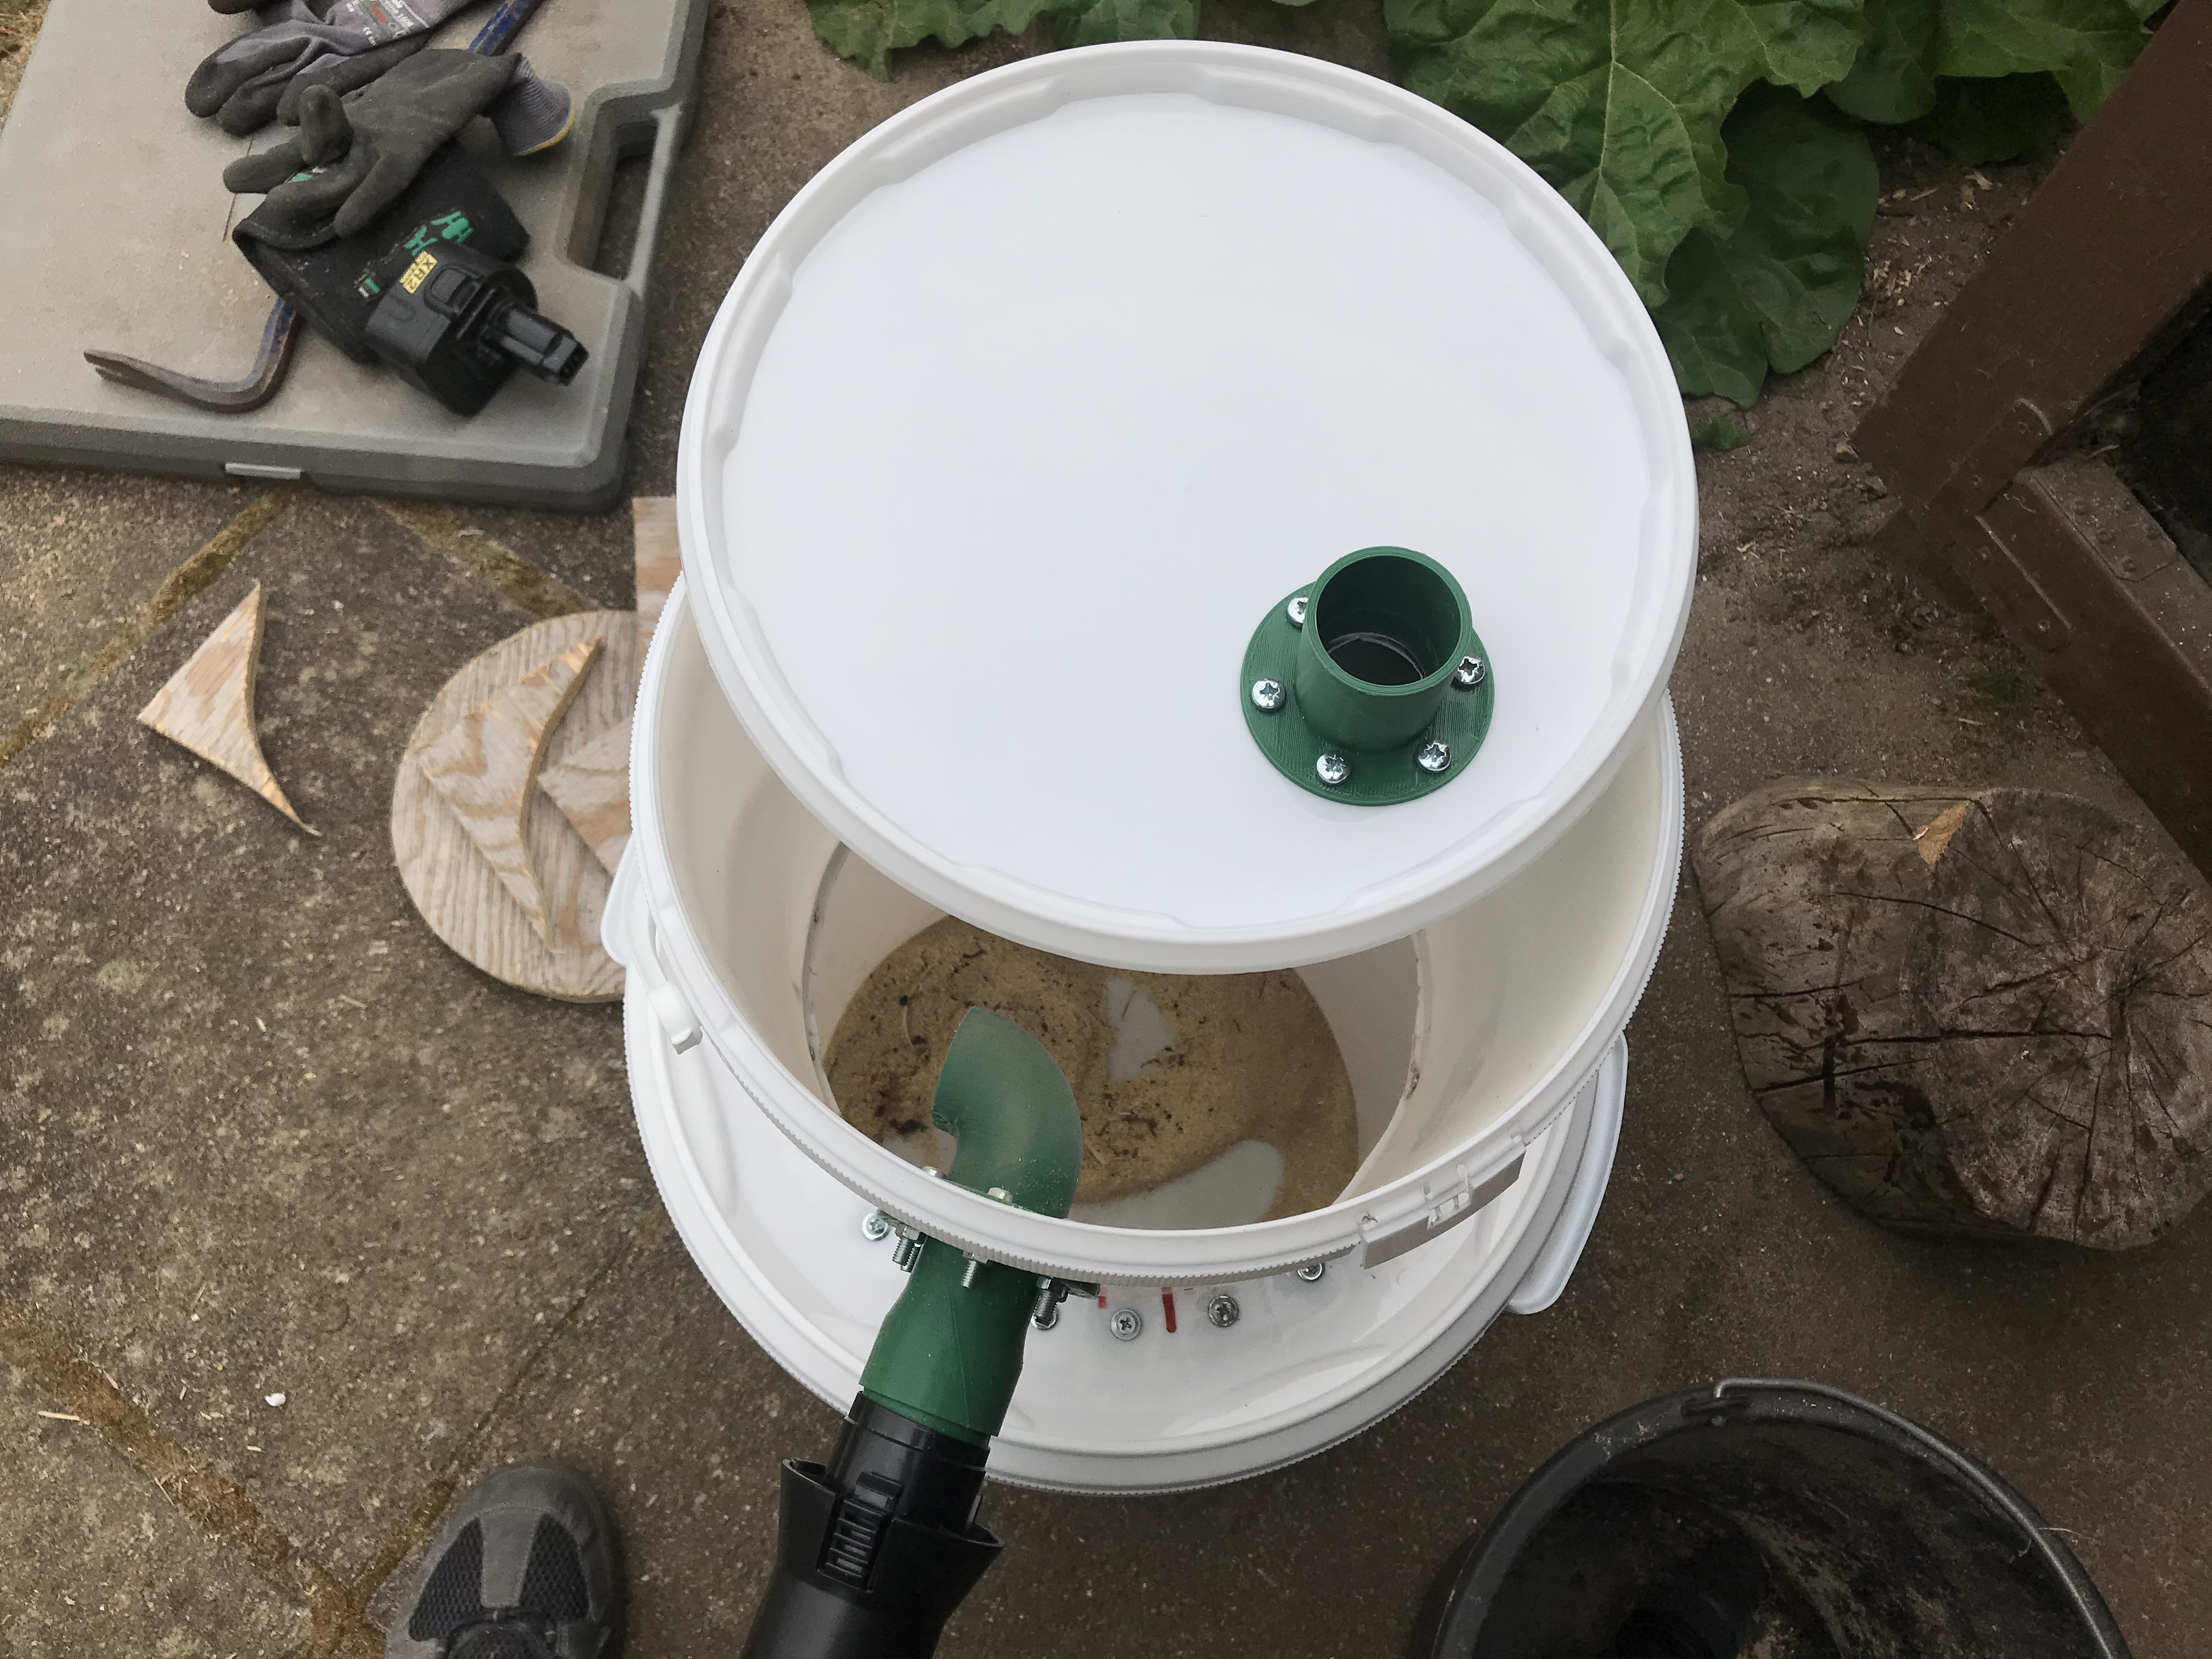
The dust shoe slips onto the 40mm tube and you fasten it using a single bolt. I simply glued the lid onto the dust shoe with some hot glue. Make sure the thing next to the collet nut fits into the hole at the orientation you want your router to be.
I have simply inserted the hose of my vacuum into the top of that tube. There was a little plastic part at the end of the hose to attach things to it, and it happened to fit very well into a 36mm ID tube. It’s a bit loose, but it doesn’t fall out.
When I need to change the height of the dust shoe, I loosen the two bolts in the clamps a little, move the tube up or down, and fasten them again.