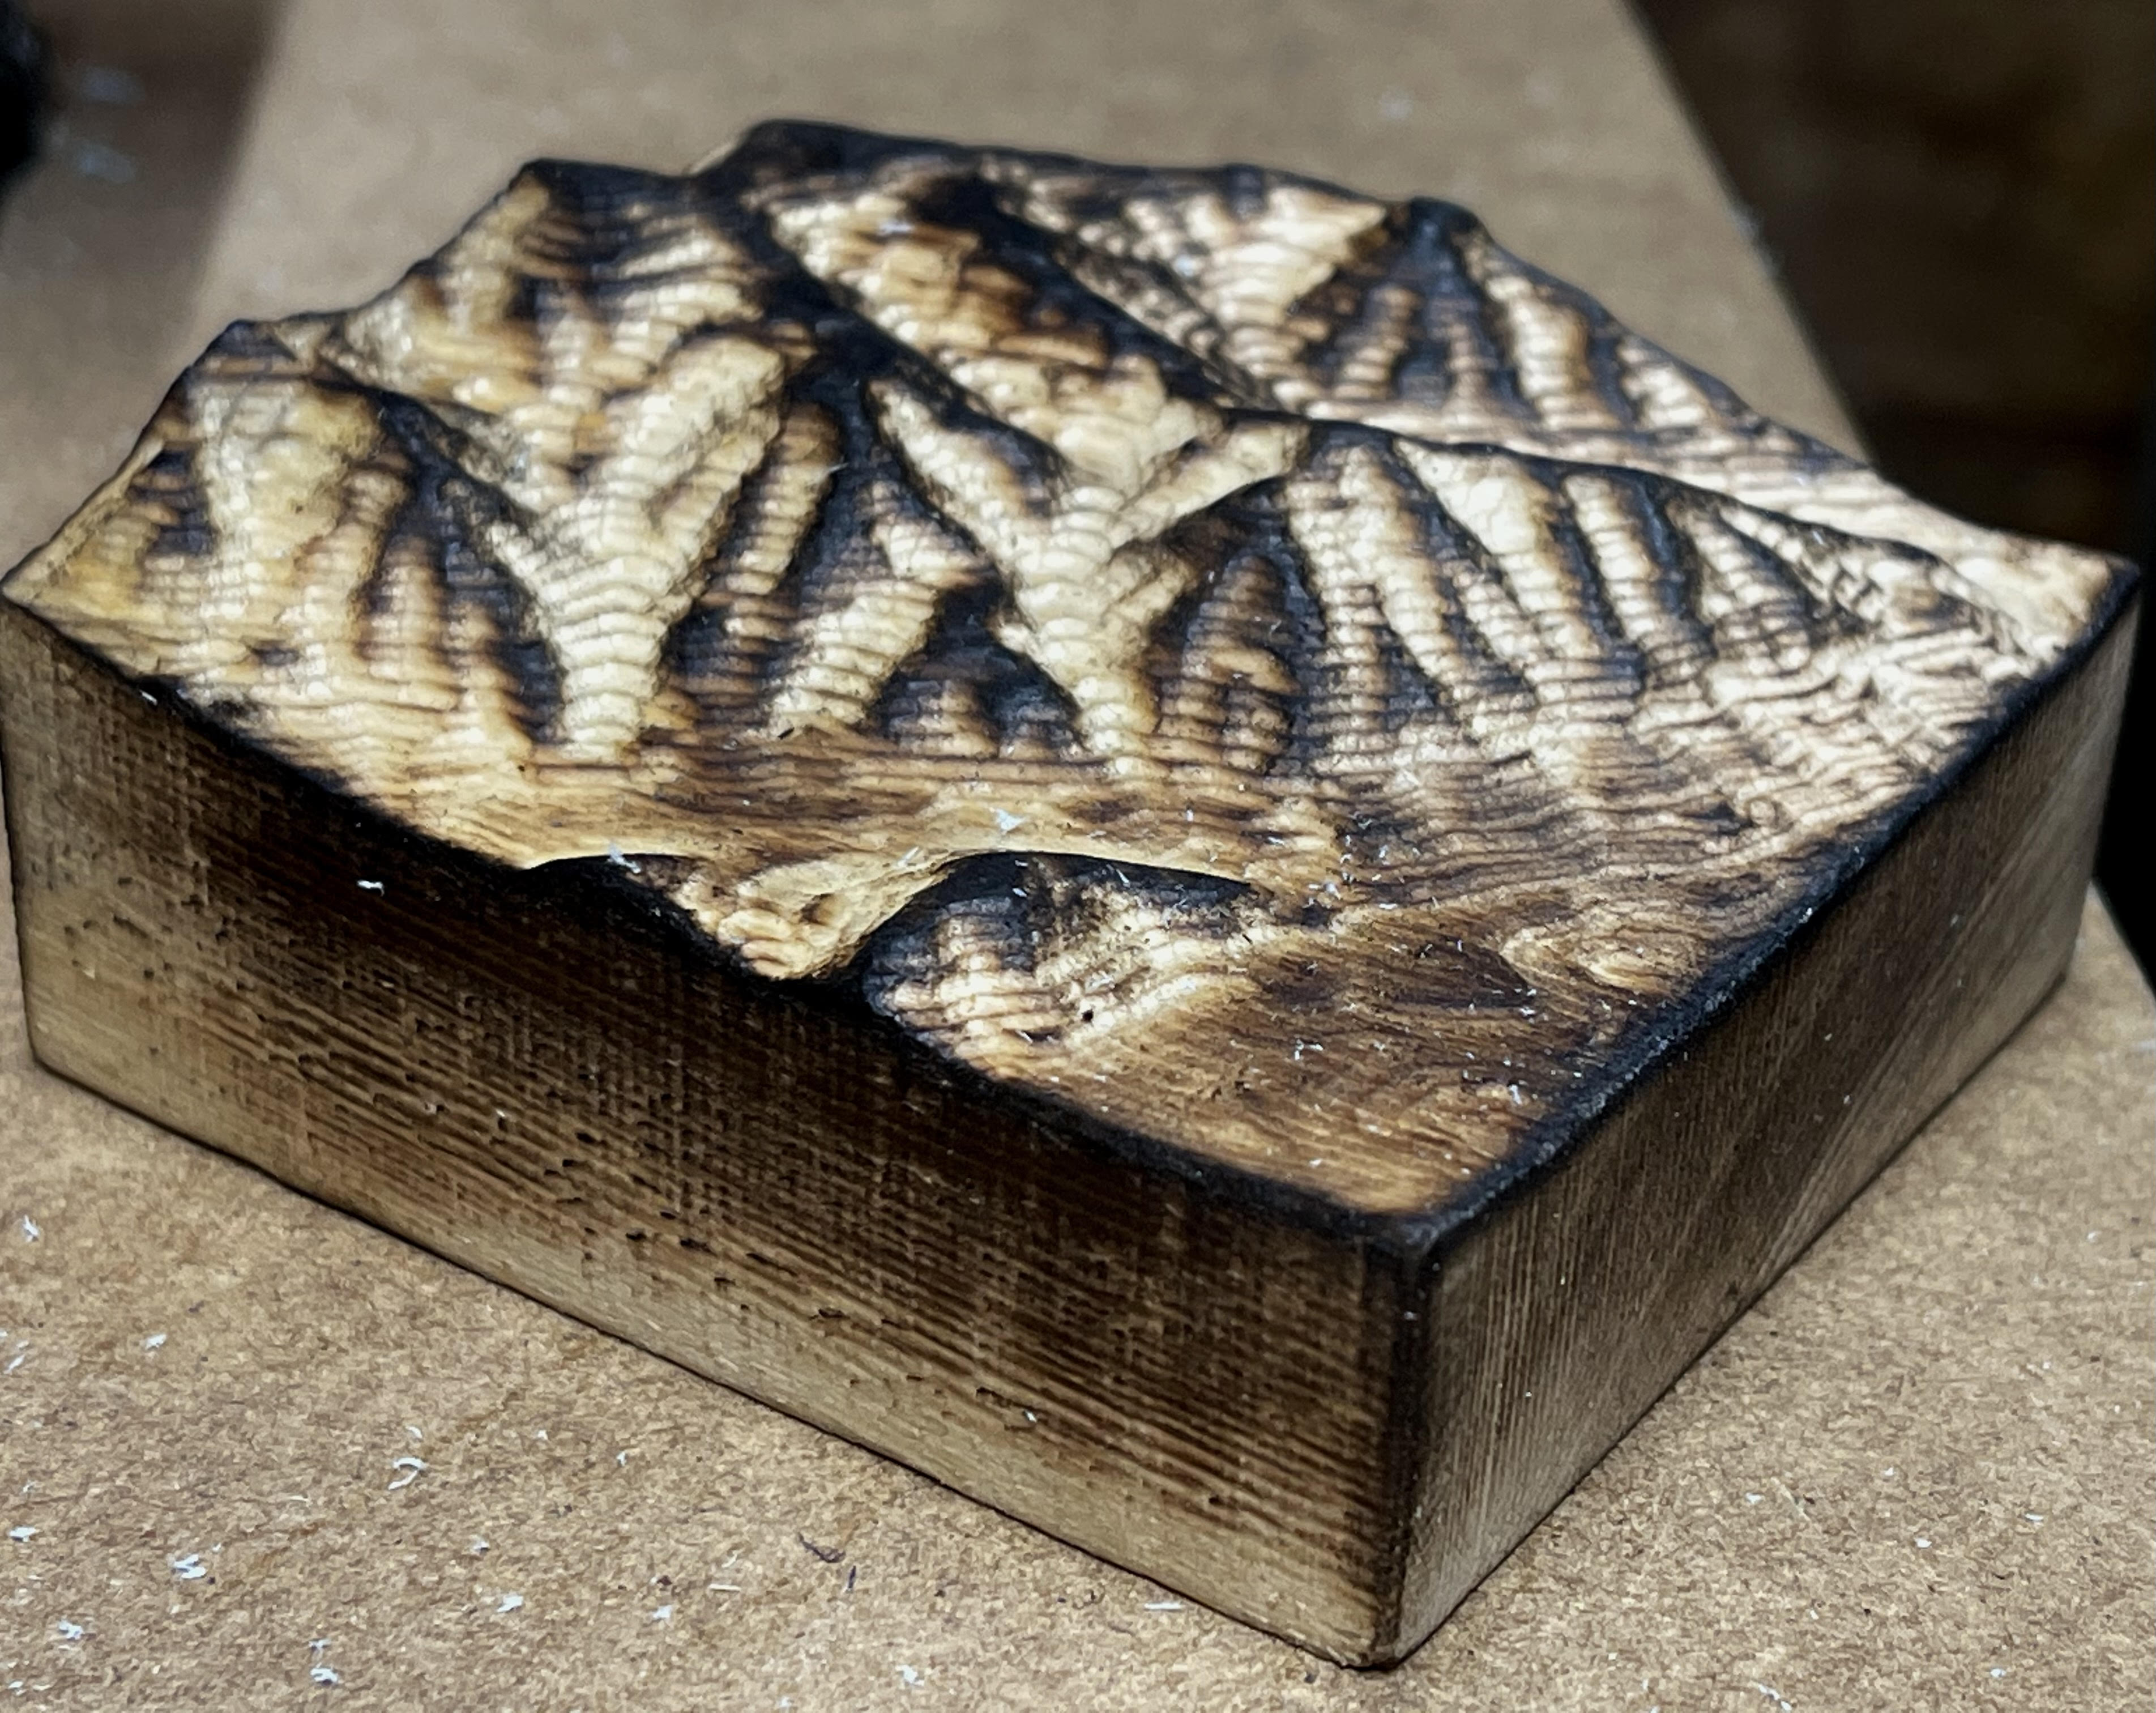
Tired a topo carve today, with a little blowtorch action for contrast.
Hoping to try a much larger project soon.
14 Likes
Very nice
Looks cool!
I would love more details, where or how did you get the 2.5d graphic for milling. Did you do this with a v bit or a ball end mill?
Someone else posted this link in another thread to https://touchterrain.geol.iastate.edu/ but you can select an area and download an stl. Ran that through ESTLCAM - roughing with the 1/8 flat endmill. Finished with a Ball End. Still need to do a few more tests to see what I like better for finishing vBit or Ball end. I kinda like the topo lines I’m getting with the ball end.
It was @mulze32’s post that I found the link.
2 Likes
That looks great. I think you want to stick with the ball end, I usually use 5% step over I believe. Have you seen instances of using a v-bit for the finishing? The ball end takes for ever but I must think a v-bit would be even longer.
Yeah the time is my hesitation for jumping right to the v-bit. I think it would have a finer finish, but for what I’m thinking I’d prefer having those defined topo lines. As I was even doing the roughing pass I was thinking about using a 1/4 flat bit for a faster rough out, but that would leave more material for the ball nose to remove since the roughing pass wouldn’t be as fine. This was a 3"x3" and that took somewhere around 1 and a half to 2 hours. For a larger piece I’m certainly going to spend some time out there.
I would say you would be perfectly fine using the 1/4" bit. That is what I used for the yellowstone topo and the Glacier topo. Its just the roughing so I wouldn’t really worry about it. It will also reduce total machine time, so 1/4" rough at about 40% step over and 1/8" ball nose finish with 5% stopover would be my recommendation but you do what works!
2 Likes