After seeing what Rich did to his machine in Upgrades on stiffness. I have been working on plans to update my machine with some aluminum components. Not because I had any problems with the 3D printed parts, mainly because I could and I have easy access to all sorts of aluminum scrap. I also don’t have a 3D printer so modifications to 3D parts have been limited.
I tried and tried to get good cuts using single flute endmills. After trying all sorts of feeds and speeds in my test cuts I said screw it, I don’t know what else to try and tossed in a 2 flute Kyoerca (I think) high quality endmill and it worked fantastic. On thin material (3/16") I was able to trench cut no problem, no air, no lubricant. I had an IR thermometer that I used to ensure my bit or aluminum was not getting warm, I only ever saw a 3 degree rise in temp.
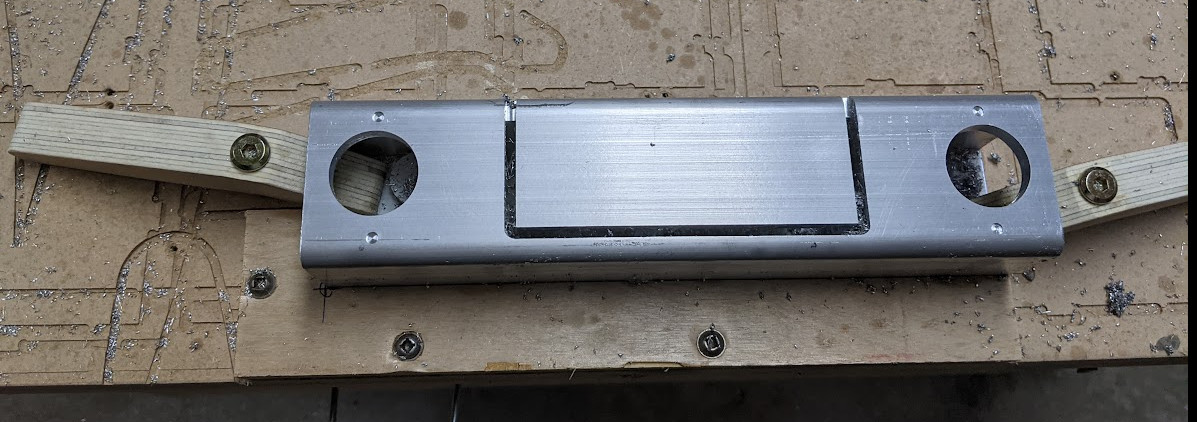
I machined a square edge onto the table as a reference point, then made some hold down clamps and created some G code in cnc.js so I could use the bit to touch off on the same datum as the part rotated.
10mm/sec
0.5mm DOC
30deg ramp
Makita router just a hair over “2”
Left 0.4mm on the first run, then added another full depth tool path to do two more passes to clean up to final size which was bang on.
I didn’t drill the holes for the fasteners as I was too chicken and didn’t want to drill that deep with an endmill so I just marked them with the machine and drilled them with a drill press.
I also didn’t do the fancy triangle cutouts, mainly because I didn’t want to risk an error during the operation.
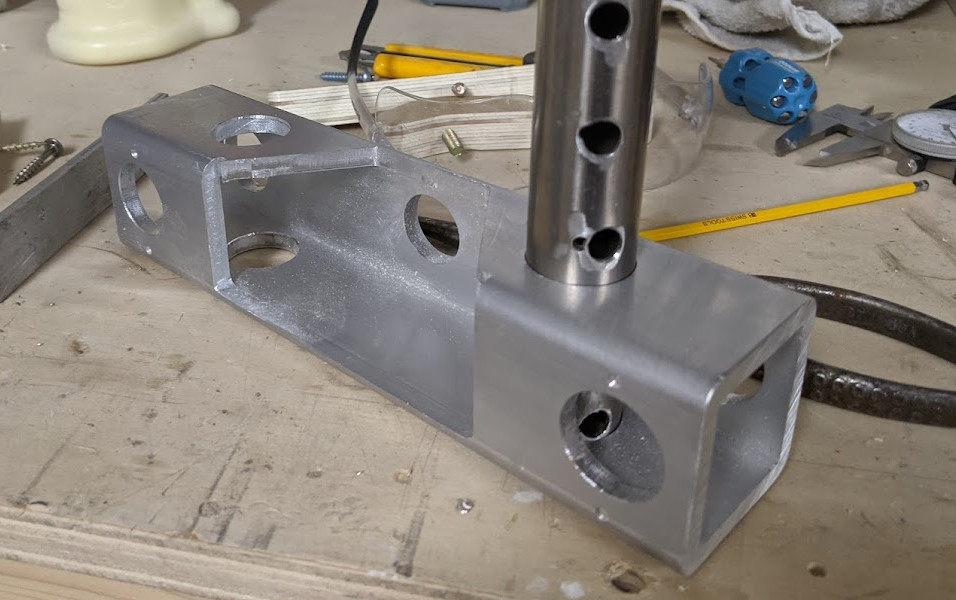
On the actual 0.25" thick material, I did use a little bit of WD40 on the deeper trench cuts.
A friend owed me a favor and had cut me some XY plates a while back out of 0.25" aluminum. My wood plates have some features that are handy for limit switches and mounting my electronics so I decided to use the aluminum plates as doublers on the inside. This really stiffened everything up and i’m excited to see how that will help with gantry flex. I will also make a small cover panel for that Y motor opening and it will really help keep chips away from the Z screws. One could easily make this out of wood or MDF and get awesome results in rigidity.
Now as it currently sits as I need to grab some slightly longer X tubes. Luckily this material is used at work so hopefully I can find some “off cuts” this week.
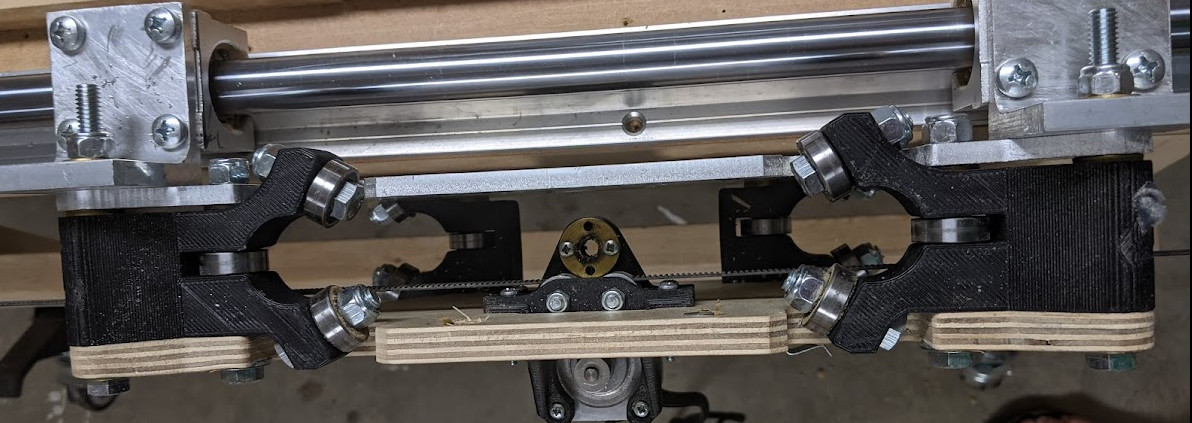
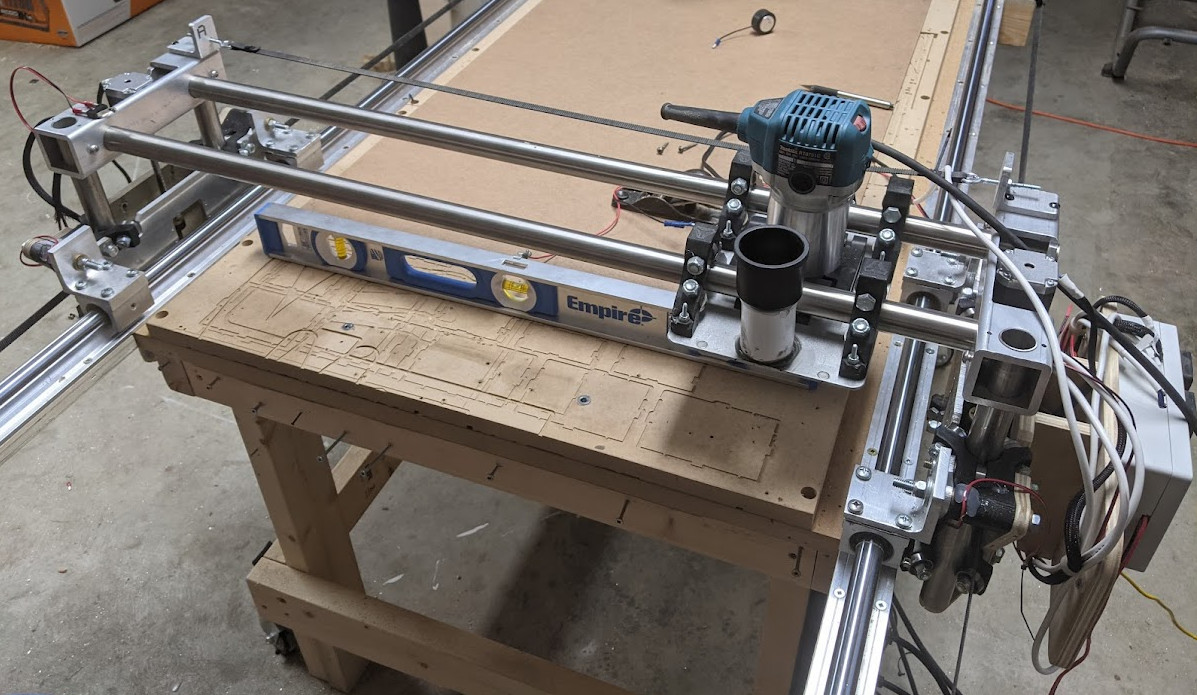
Progress, All parts are together, I need to build a new wire tray but was focusing on squaring up the end stops. I used a simply 600x800mm triangle to confirm 1000mm on the diagonal. Machine was perfectly square from initial build but my end stops were not exactly the same so I had to compensate slightly. I can drive the whole machine with one y motor and there is no deflection on the other side which is good to see.
In the picture i’m just using a metal level and probing one side and the other across the table to set my Z offsets. This will give me an average and a good place to start for surfacing the spoil board.
Finished off the cable tray. Eventually I will probably do the tape measure trick but for now a little twist in the wire is going to be good enough to keep them out of the way. Just waiting for a dial indicator to show up so I can make sure my router is trammed properly and then I will surface my spoil board and call it done for a while. Need to start getting some Halloween decore going… Also noticed a but of runout when plunge drilling a hole but am suspecting my cheap reducers to be the issue.
This looks great! Keep us updated. I’m in the process of doing the same thing too (metal parts and rails) - can’t wait to see more!
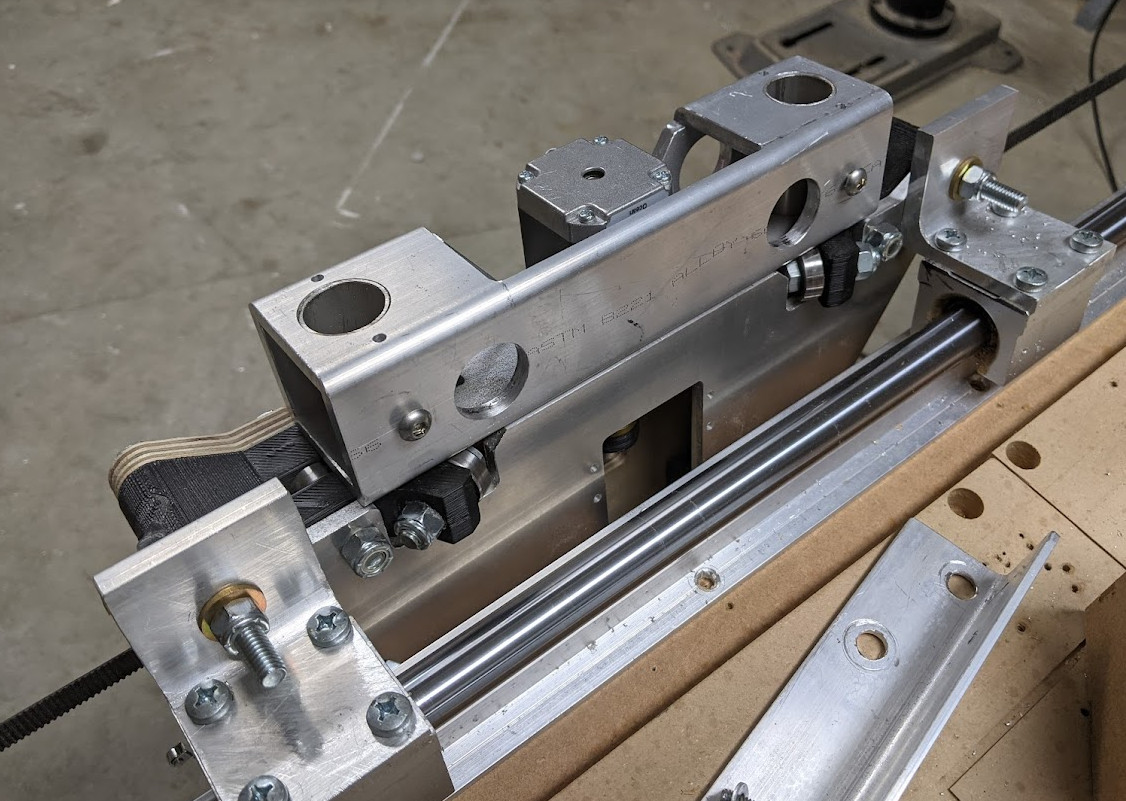
Have you noticed that adding the rails raises the entire whole gantry? I’m still tinkering, but mine ended up not being able to make through cuts after installing the rails, as it now sits too high. I have 2 layers of MDF for the bed, which raises the bed surface a little, but my longest bit still does not reach. My setup is very similar to yours - including the angled brackets attaching the y-plates to the slide blocks. Did you have any similar issues, and how did you overcome?
I actually run a metal spindle mount that I got on Amazon for my router so it sticks out the bottom of the 611 plate more than stock. My entire spindle nut and red button on the makita are below the plate. This allows clearance for mounting a dust skirt under the plate without losing depth of cut and allows for easy tool changes.
I am also running a 3/4" spoil board which helps bring everything back to normal. At the moment I can cut 2mm into the spoil board before the metal tubing bottoms out on the y plates