Hi Rich, thanks for sharing your model on Thingiverse.
I’m planning to mill those aluminum parts and have a question.
In US I can only find 2x2 with wall thickness of 1/8" (3.17 mm) or 1/4" (6.35 mm)
Naturally I think I should go with thicker stiffer material, but not sure if that would give enough clearance to fit stepper motor inside.
Any advise appreciated.
Hi Alex, thanks for this information. I did not know which wall thickness you get in the US.
I adjusted the 3D file and checked the space between stepper motor and square tube. Even with the 1/4" tube, there are still 1,82mm of space between the side walls. 
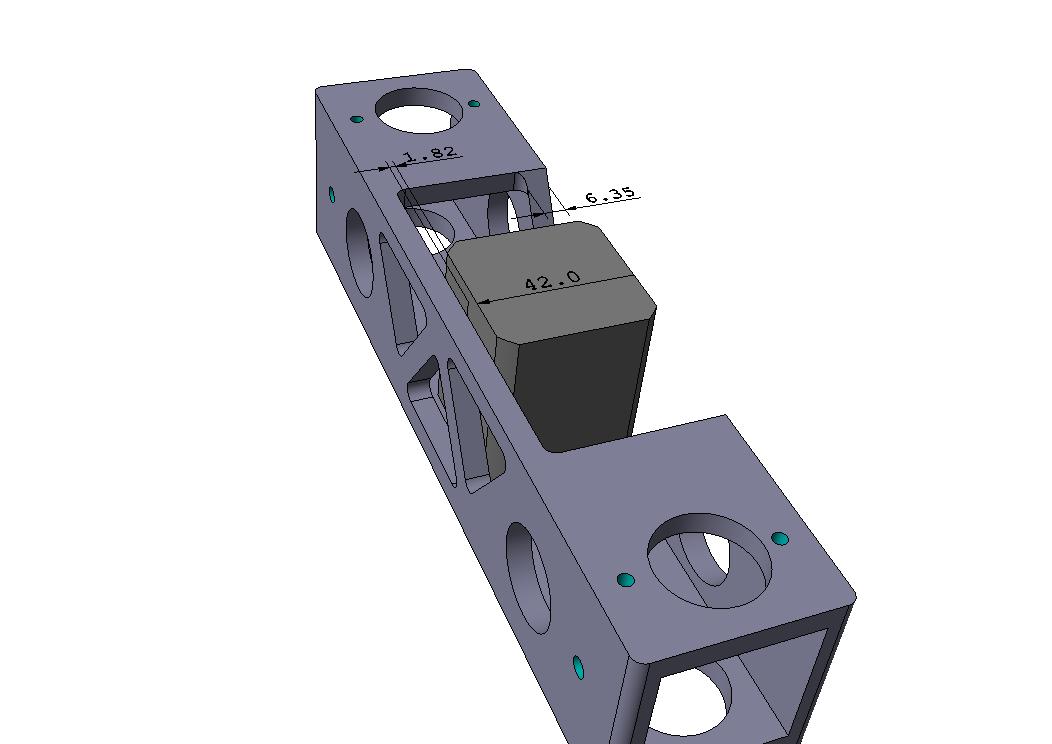
I just uploaded the new .stp and the new .dxf file to Thingiverse
1 Like
I know I can just bookmark this and silently follow this thread then pillage the information for my own benefit - and a great benefit it will be! Rich - amazing upgrade! I just moved homes/States recently and am getting ready to re-build my LR2 and get some projects off the To-Do list.
I wanted to say how nice this forum is to glean some brilliance off of other people’s obstacles. I am an Army Engineer and busting through obstacles are what we are bread/educated to do. You sir, have busted a huge one in my view! Well done! I particularly like the aluminum rails you have for your Y axis - will be stealing that one for myself. I have a table I use that is one I can move around and level out as needed - thanks to Paoson.com - a carpenter out of Barcelona. I have bench edging with a miter gauge slot on top that I can raise and lower as needed. But I will now flip these over to add rails for smooth transit.
A note to Ryan - it’s amazing how a forum like this can support so many makers work through the issues that arrive. Thank you for the platform to mind-meld with others to work through stuff. With the news being to blight for the past 12 years, I’m finding I am more and more cynical about people. But recently I returned to the forums and I find therapy is much cheaper here!
4 Likes
Rich, thank you sir, this it great.
Now I’m obligated to make those
I’m confident I can do it, it’s being nothing but Aluminum cutting for me for last month.
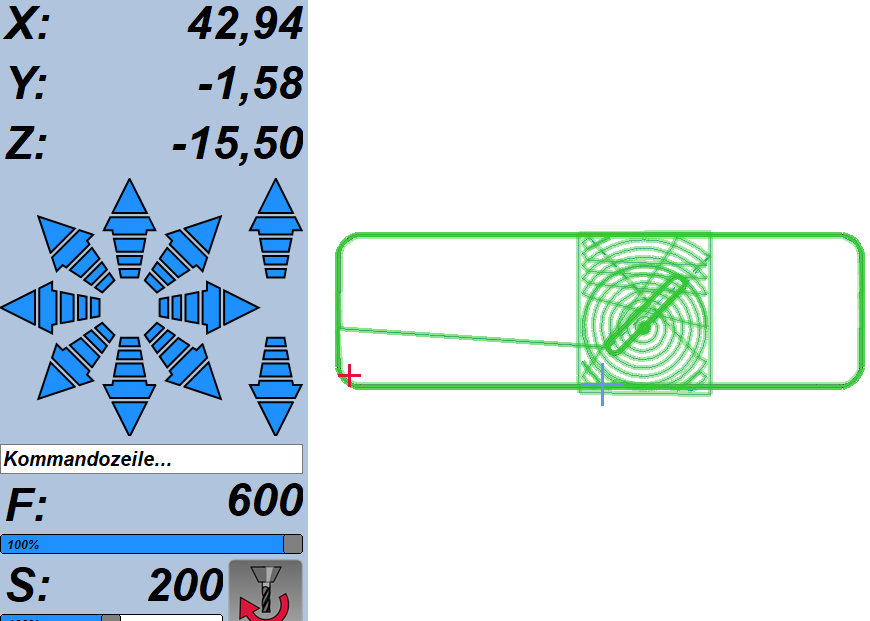
Only thing I have not solved properly is how to consistently find X/Y zero point, which will be critical for this 4 side job.
Not to high jack this thread but any build details on that router mount?
Thank you for your appreciation. I hope my designs work also for other people and that their / your workpieces turn out at least as good as mine
@spacegrey: as I wrote, the most important thing is a rectangular cut on the left side of your square tube. This ensures a consistend reference. For the repeatability at switching the sides, you may carve a pocket in some scrap wood where you could put in and clamp down the aluminium tube. Just an idea if you don’t have the touch plate option…
@RobP: I already posted the mount but I did not publish the files yet because they need some optimisation 
Lowrider2 - router carriage with quick release mod - LowRider CNC / Hardware Development - V1 Engineering Forum
Cheers
Richard
Super cool mods, but I’m going to ask the tough question: What was the improvement in cut quality in the end?
1 Like
Thanks! The cut quality became very precise and fast enough for me
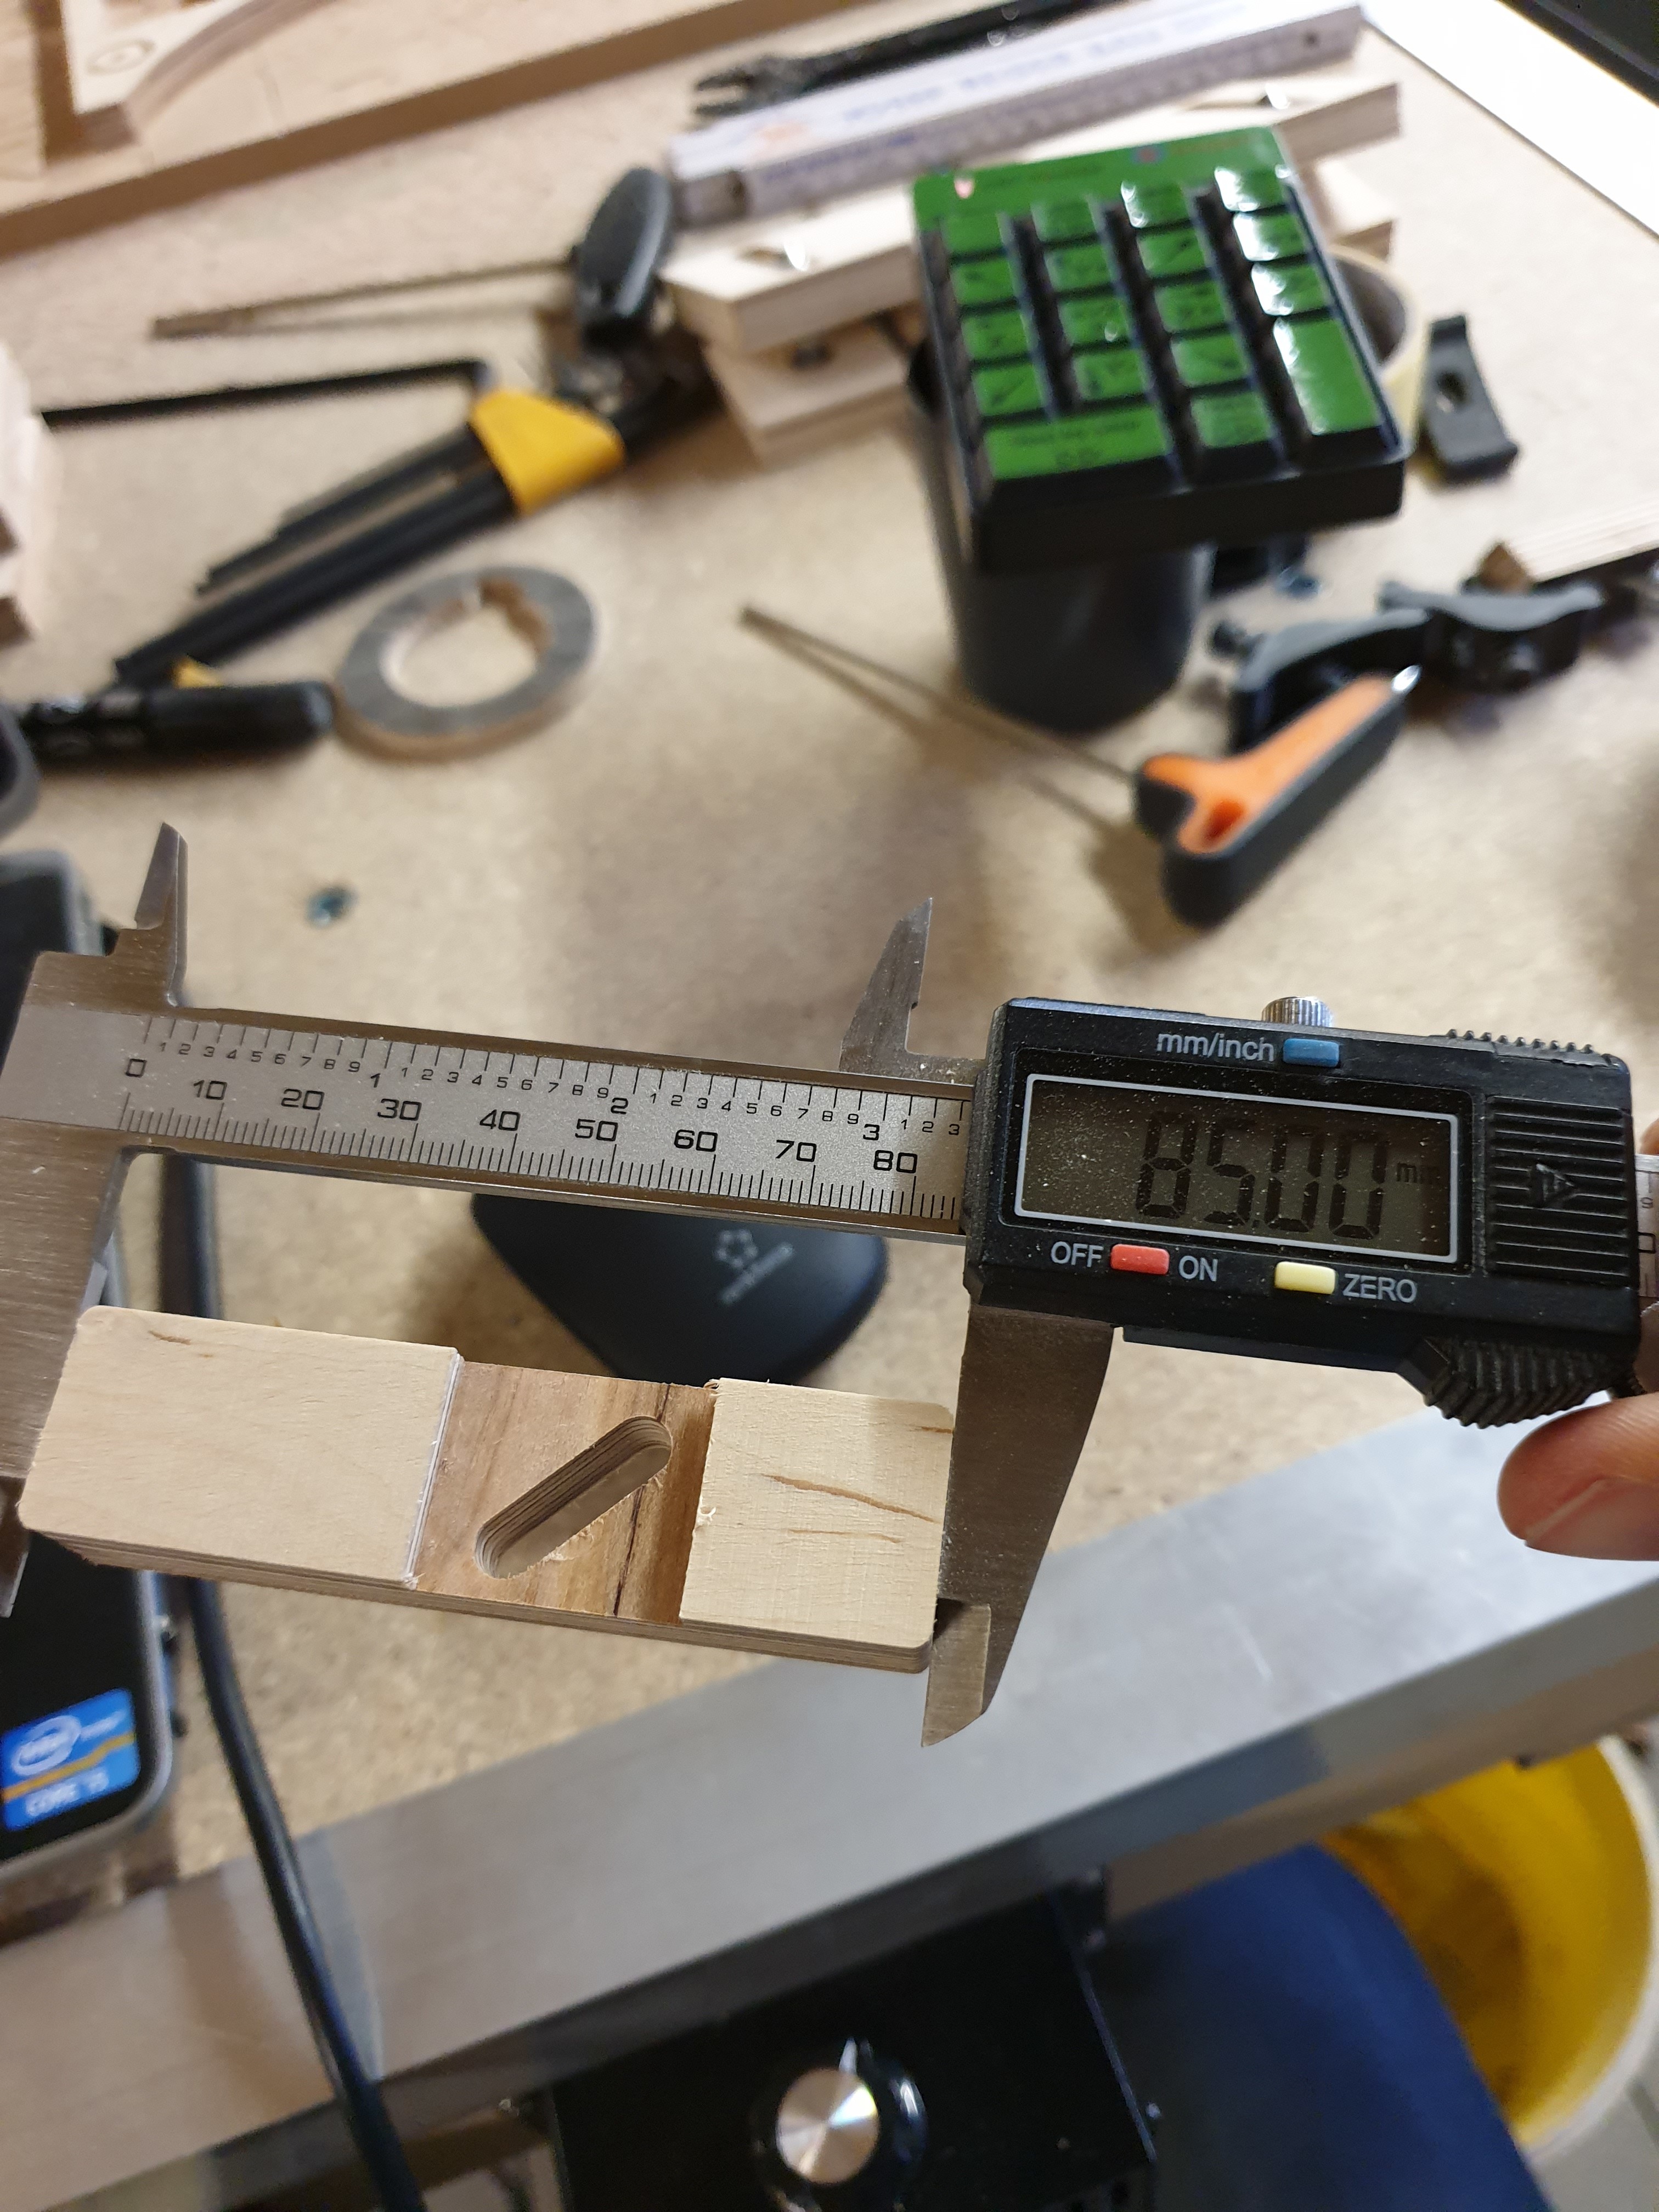
This is just a result some minutes ago: DOC 3mm with 2 flute 3,175mm UpDown Bit, 800 mm/min pre-cut and 600 mm/min finishing pass
Maybe I could go faster
4 Likes
I mean…could be better were you trying to hit 90mm?
1 Like
 nope. exactly 85mm
Dang, now I’m going to have to do this too. Thanks for making my project list longer!
1 Like
I’m planning on a new house with a shop by September 21, and wifey has already said I need to build a full sheet. I know Ryan is working on a lowrider update, but MAN could this sure fill the bill.
1 Like
As long as you buy from the V1 store!
Yes, I’m certain you could.
1 Like
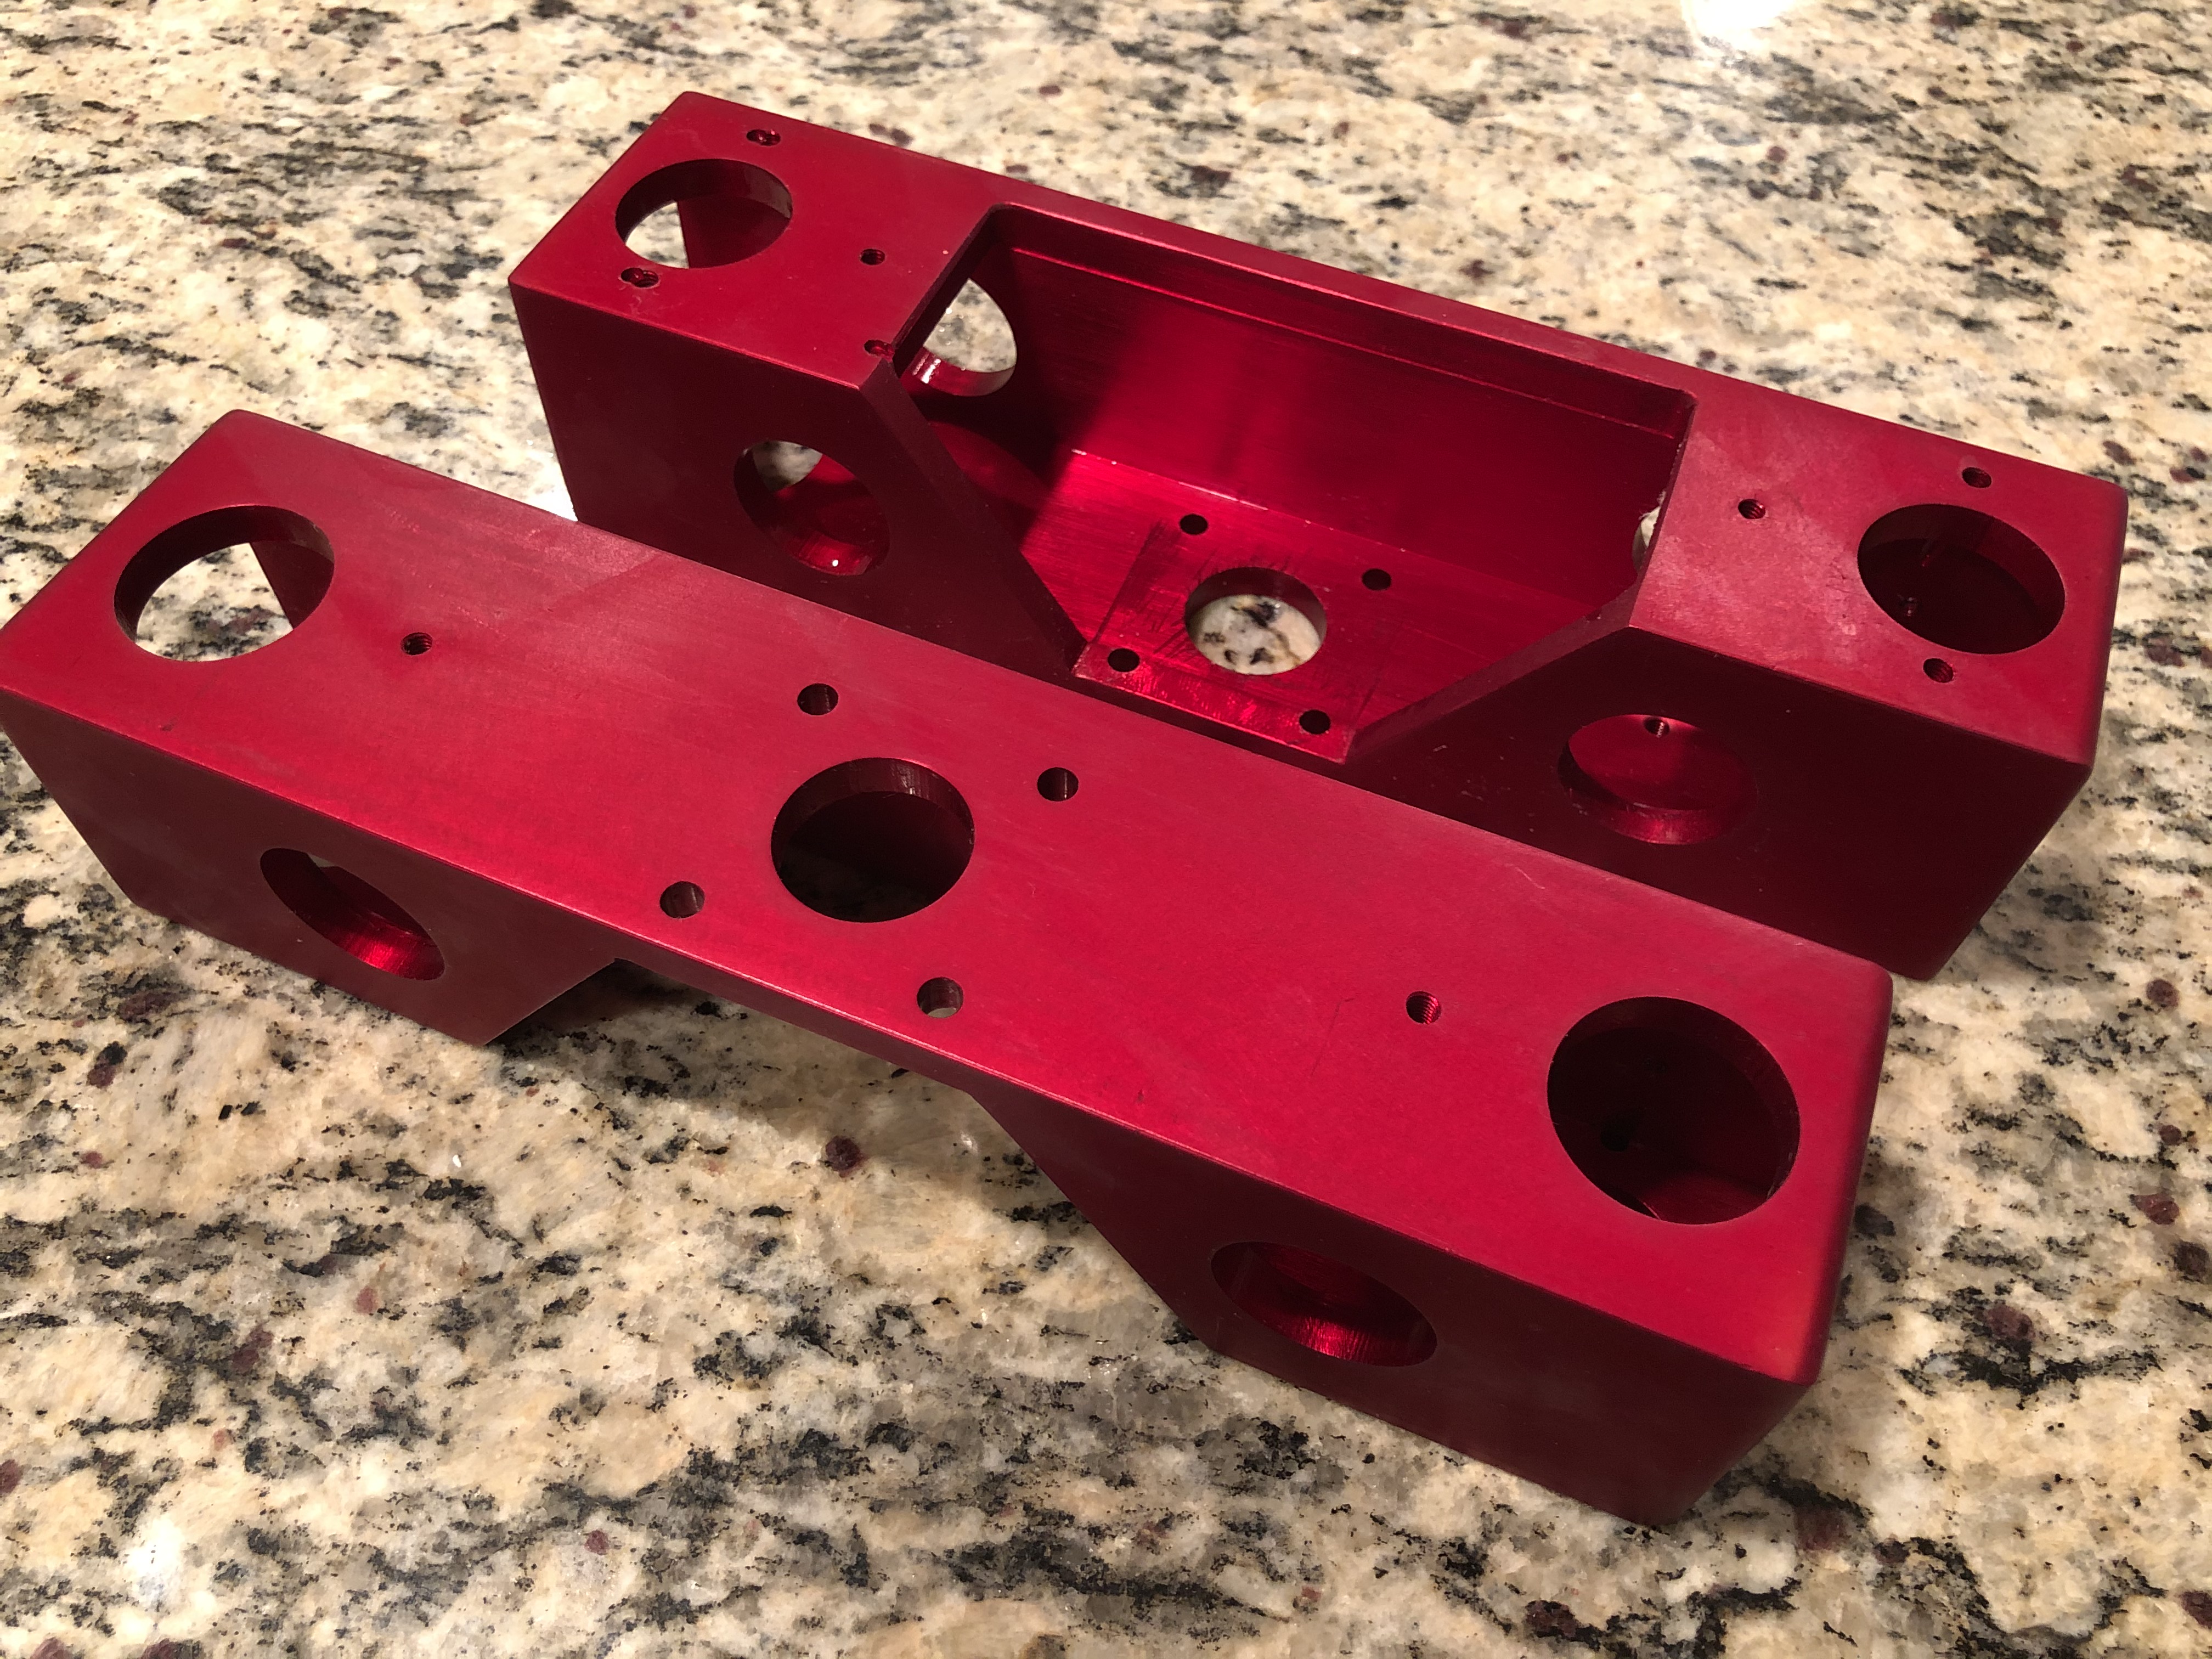
It is a tight fit and the tubes are secured by M6 screws.
Just looking at this again… Is there any interference between the screws securing the horizontal tubes and your Z-Roller Tensioner pieces when your Z axis is low? I was wondering why they were inserted from the bottom rather than the top.
1 Like
That’s a good question I think I inserted them from the inside and from the bottom to a clean look 
Of course they could also be inserted from top and outside
In my case the screws never come in interference with the z rollers - my router sticks quite far out of the x carriage so my gantry never gets so low
1 Like
9 Likes
Are you guys cutting these with single flute 1/8 bits? I’m just starting to play with aluminum but no where near the accuracy you guys are getting yet.
Neat! 
RobP, yes single flute 1/8 carbide, I tried HSS and that didn’t work well.
1 Like