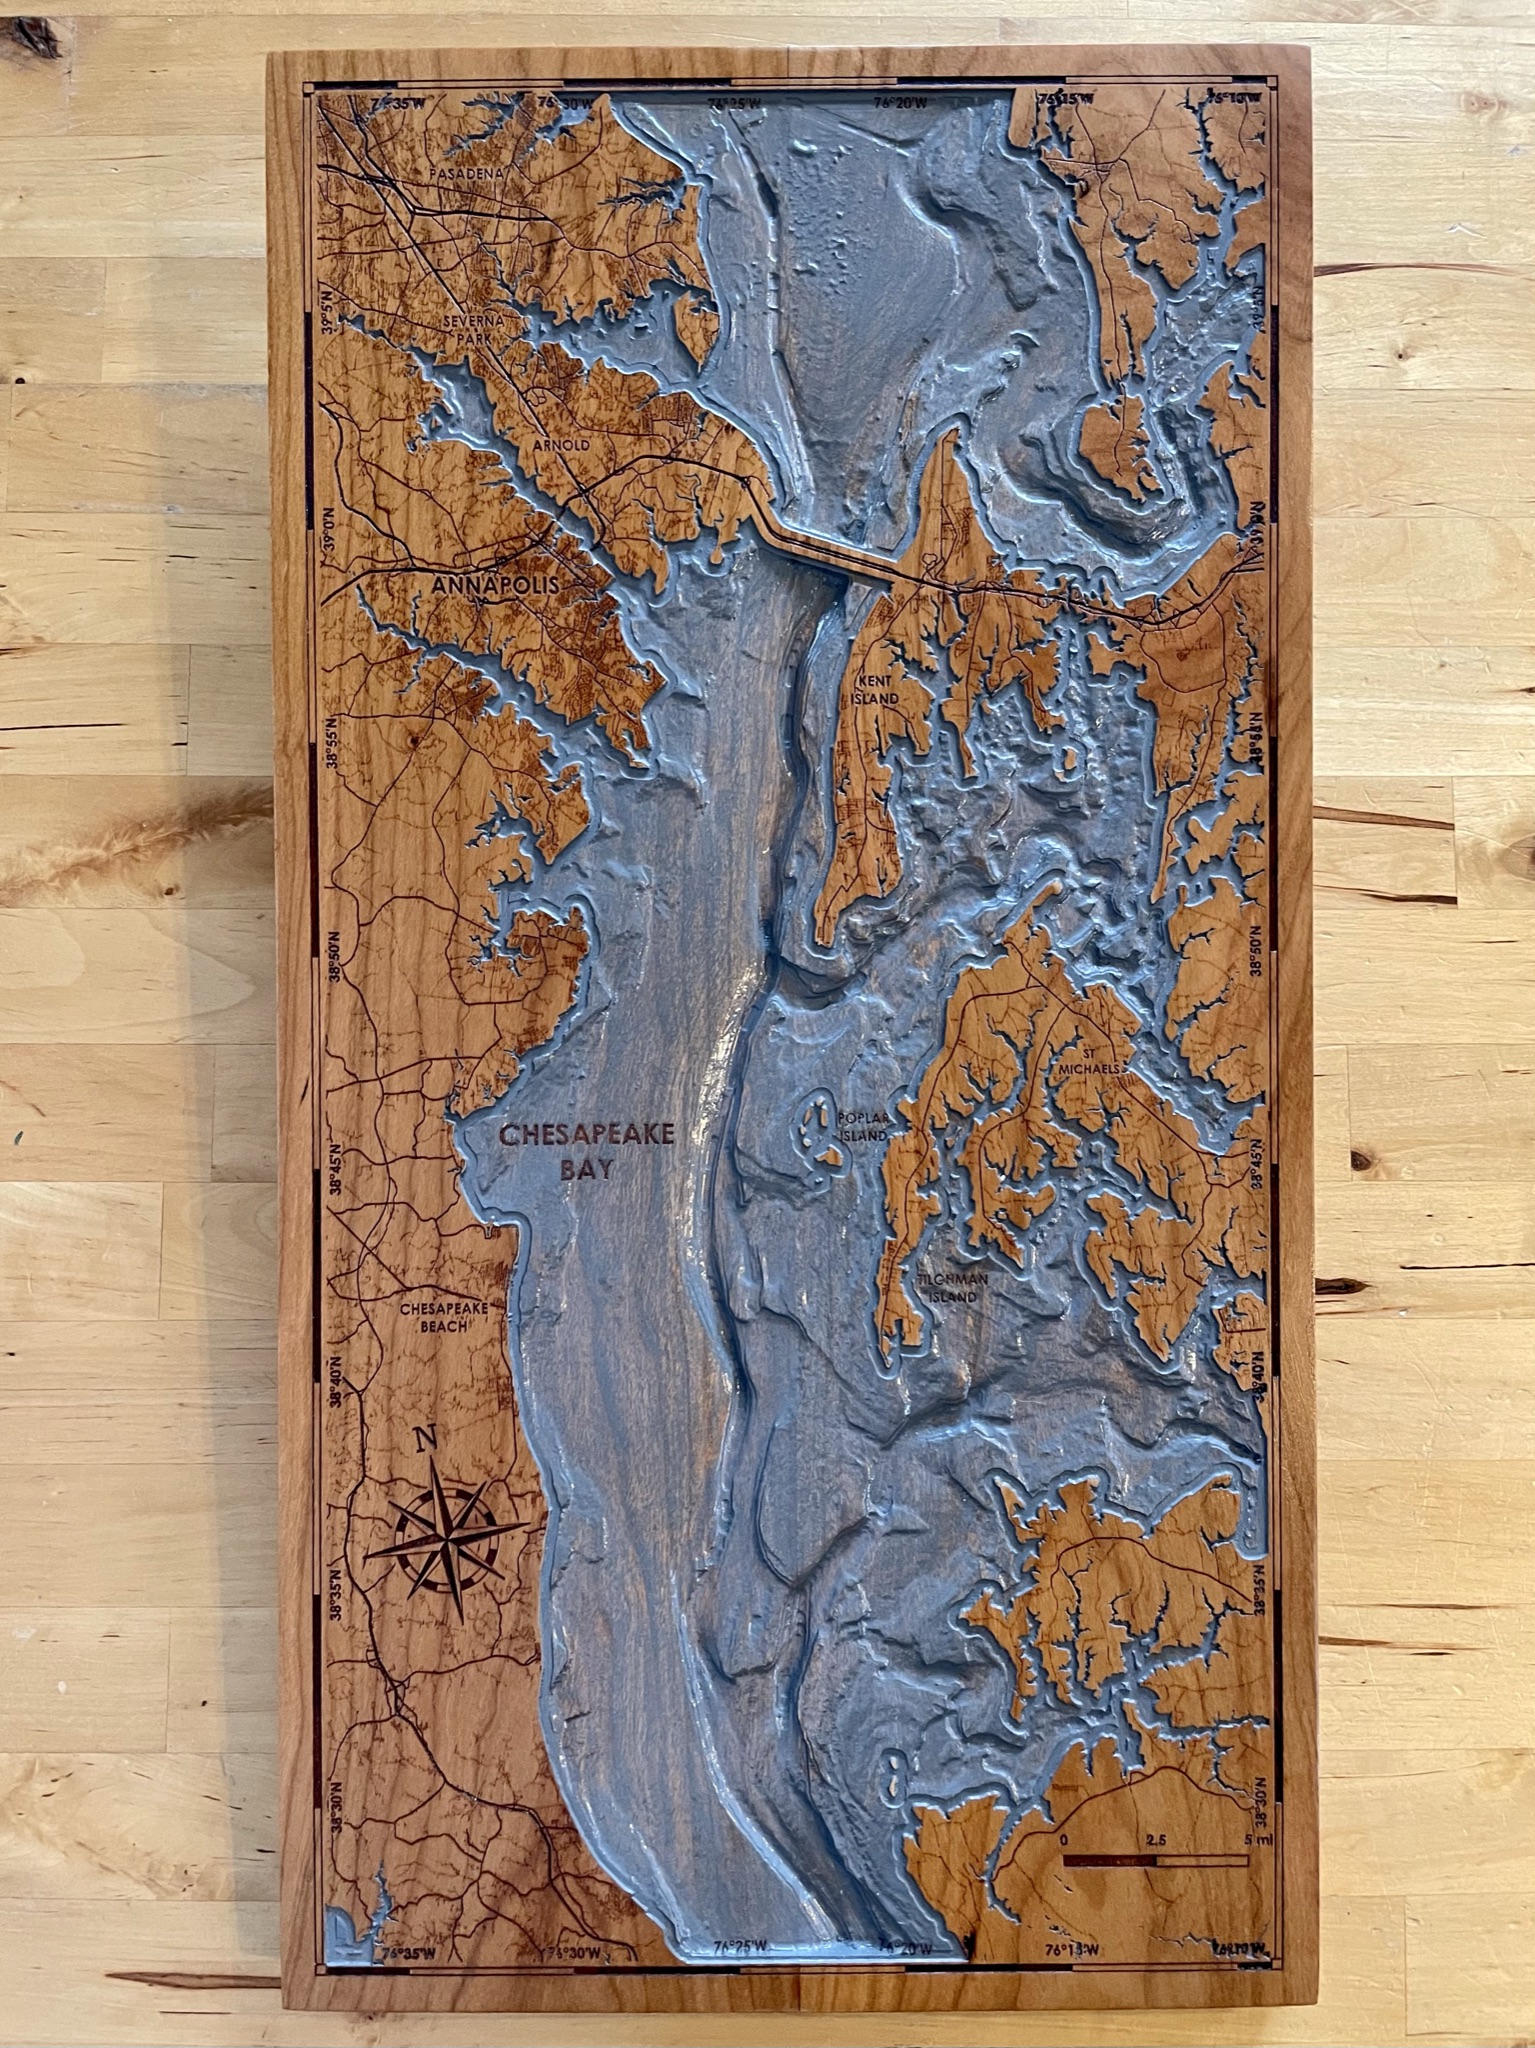
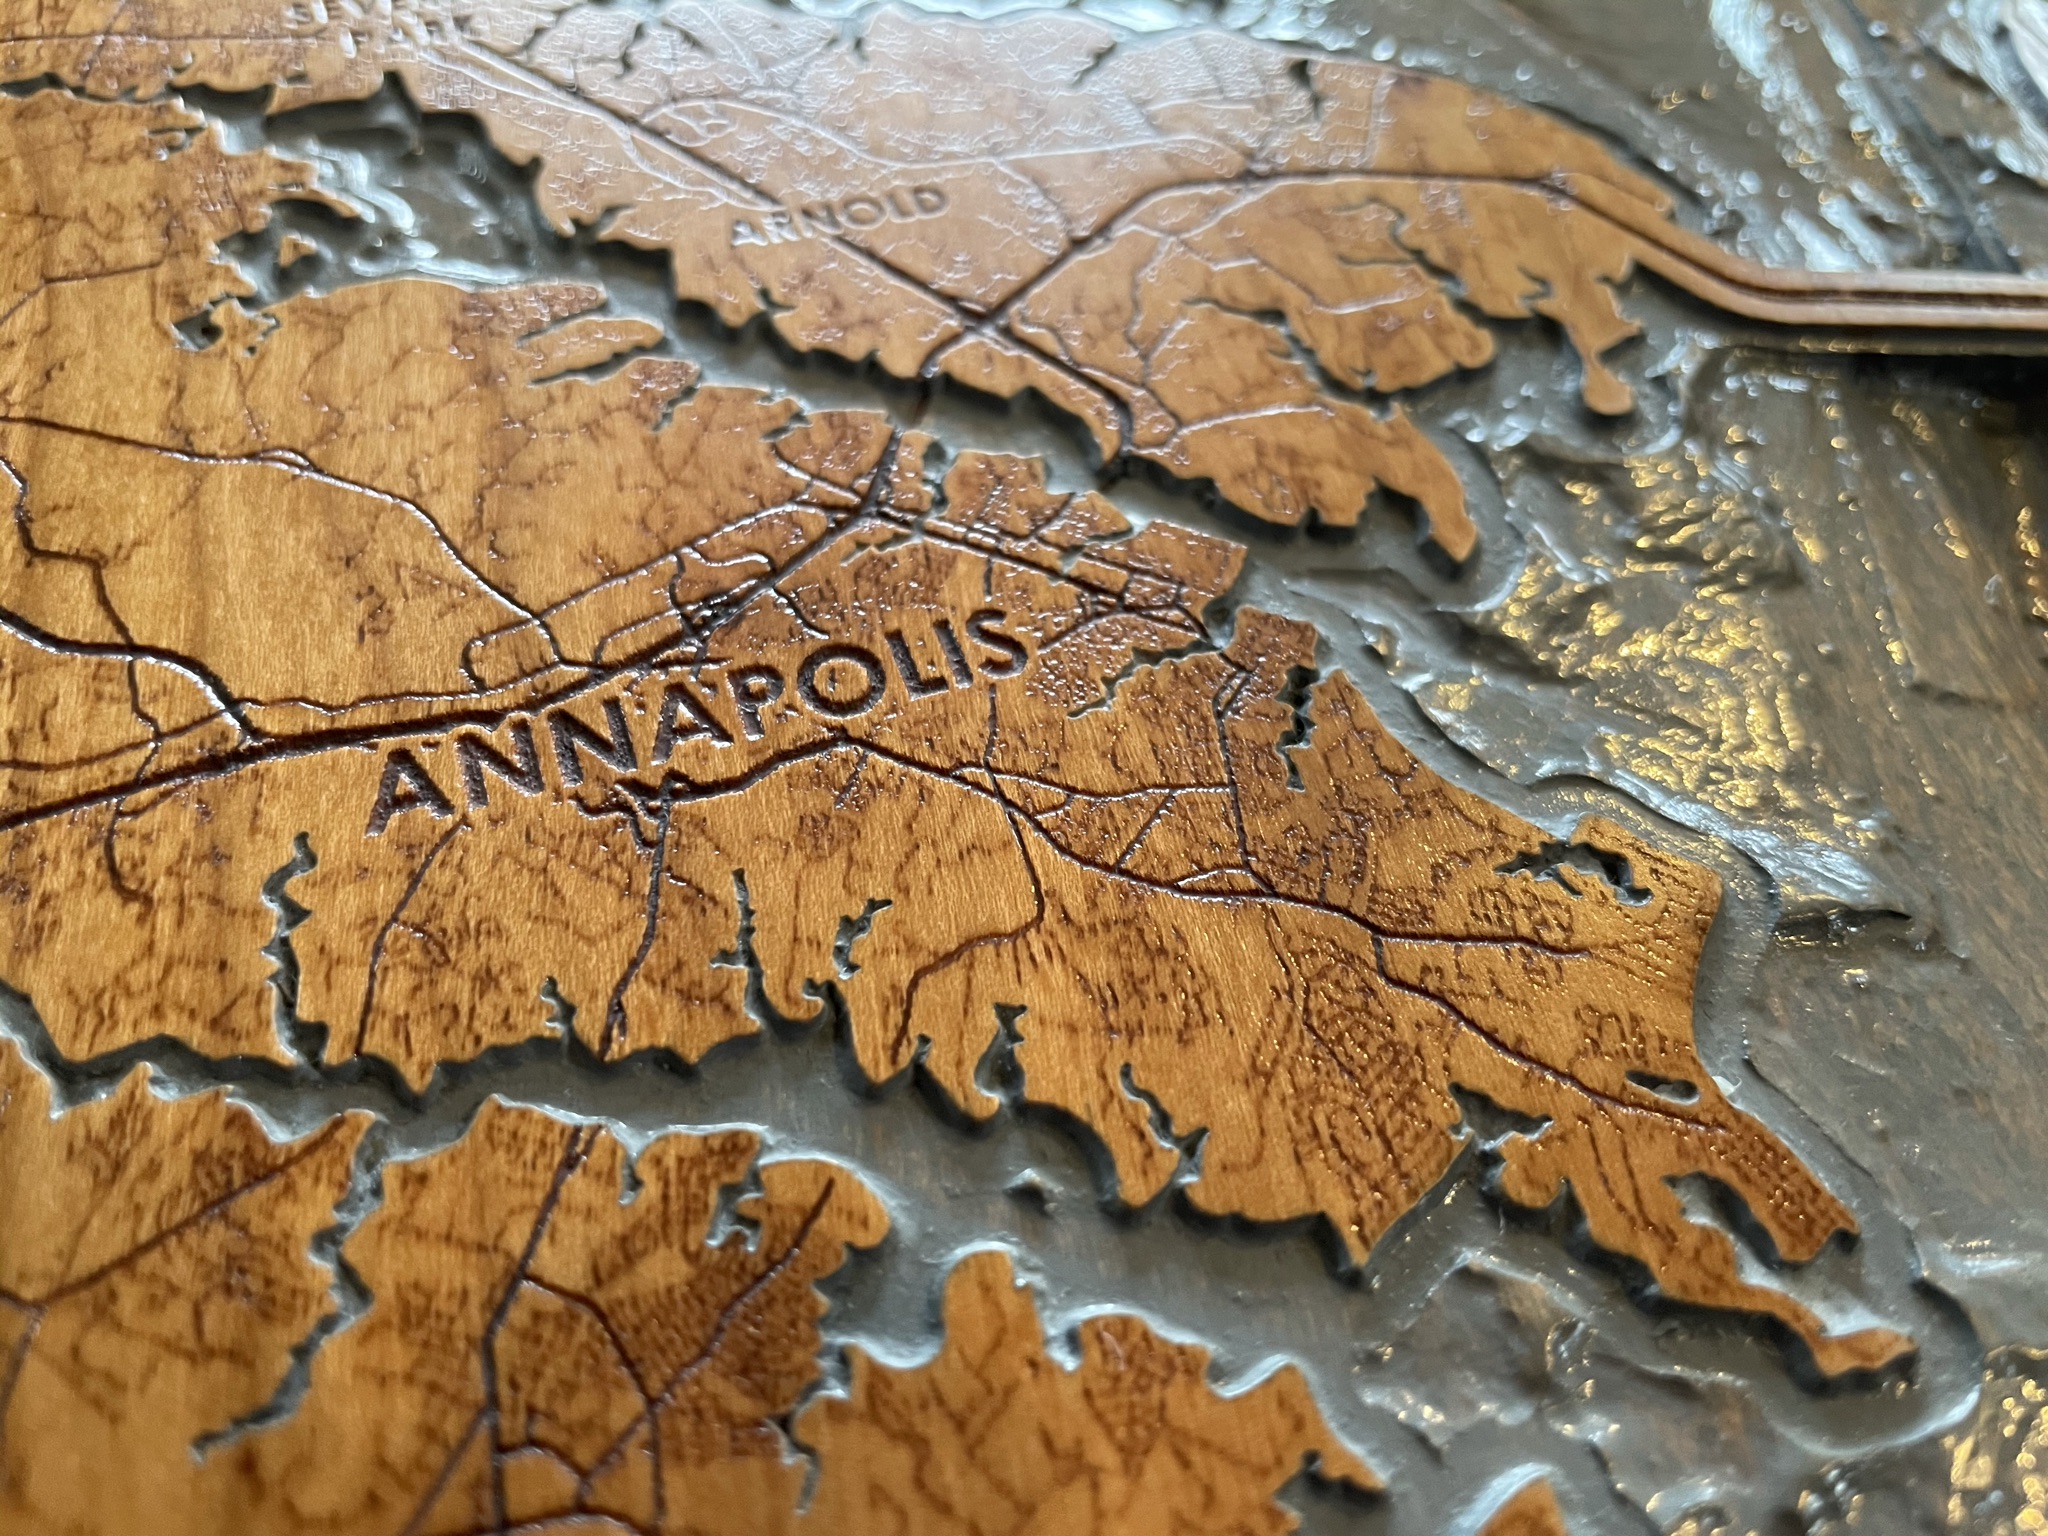
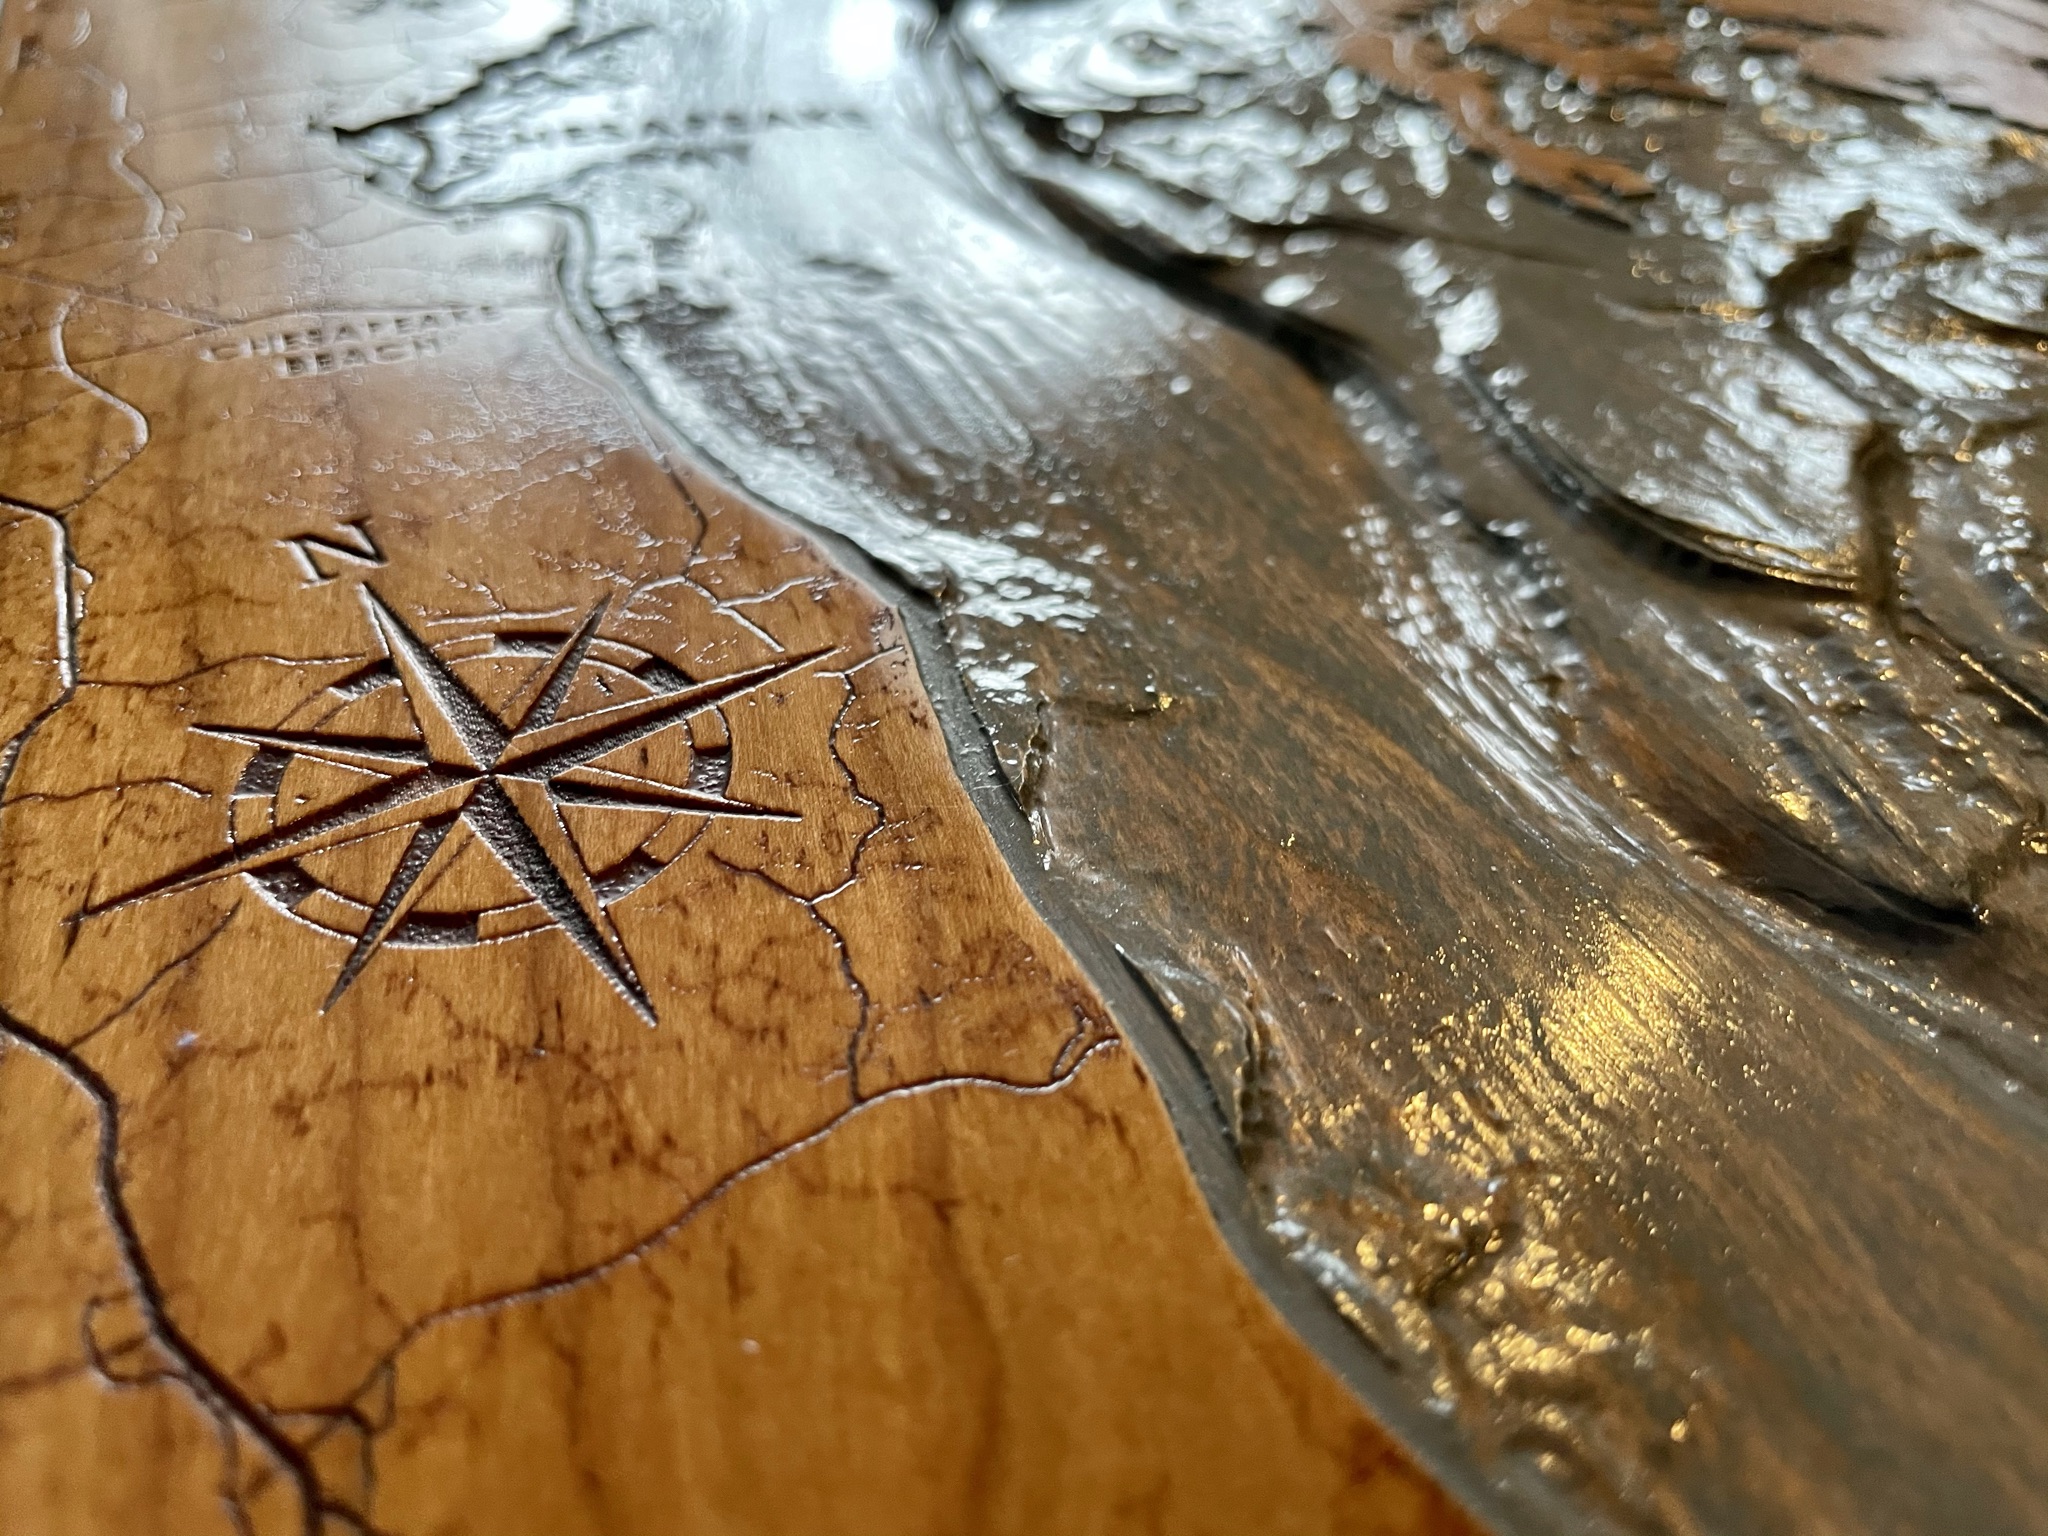
I just finished my first MPCNC project using both a router and laser: A 3D carving of the Chesapeake Bay near Annapolis. Machine time was around 20 hours, but the vast majority of my time was spent on the design. I used QGIS to create a map with bathymetry (depth) and street data, which was a steep learning curve. From there, I generated tool paths using Estlcam (vcarve for the coastline and 3D carving for the water) and Lightburn (laser raster for streets and labels). The stock is cherry with linseed oil base coat and a shellac/wax top coat. I stained the water after carving and wiped the excess off of the land areas using mineral spirits (does not dissolve shellac).
Happy to share more details of the process if anybody is interested.
Beautiful piece of work! And I’d bet I’m far from the only one who’d be happy to read any other details you’d care to share. Really nothing in particular but even if someone’s not planning a similar project there’s always little twists that others will no doubt find useful sometime in the future.
QGIS
Note: This is an outline of the general process, but be prepared to spend some time learning QGIS.
a. CRS:
Choose a project CRS such as 3857 (web standard) for reasonable local projection. It should be cylindrical and compatible with DEMto3D. Do not use default 4326 (Mercator will appear stretched) or conical projections.
Most source data will be 4326 (WGS 84). Set manually if layers do not show up.
b. Add Content:
Download and import DEM bathymetry files (shaded relief) and Raster/Merge tiles. Alternatively, add a WMS layer (slower but no download required).
Raster Calculator to convert DEM depth units (m to ft) and set above-water elev to 0
(“bathymetry_ft@1”<=0)*“bathymetry_ft@1”
Processing Toolbox / Rasterize (overwite with fixed value) to add features such as bridges using polygons
Raster Calculator to create negative copy of elevation DEM (so contours have positive number labels)
Processing Toolbox / SAGA Contour Lines to generate coast. Use Elev = -0.1 (or so) to avoid noise at sea level.
Add mapbox layer and select roads only. Tiles are raster, not good for labels.
Add MapTiler layer for place names (allows labels to be adjusted later, in Inkscape). Use Streets and limit visibility to city, town, island, islet. Clear data overrides to specify font sizes and line widths. Specify size in mm, roughly 10mm for city. Wrap Value in upper() for all caps
c. Add Layout:
Page / Item Properties to match stock size.
Add map. Set CRS to same as project.
Map / Item Properties / Position and Size to set map size. Subtract about 6mm from each dimension to account for 3mm border. Drag to center on canvas.
Map / Item Properties / Scale to zoom for desired region.
Map / Item Properties / Grid for border. Set grid CRS to 4326 (WGS 84) to show degrees. Set Frame Margin to about 1 mm to clear cuts.
Map / Item Properties / Interactively Set Map Extent, then drag map to set displayed region.
Add features such as scale and north arrow. Rotate by magnetic declination if using imported north arrow.
Add rectangle shape inside of border. Set stroke style to hairline (0). Set size to match map and center.
Map / Item Properties / Clipping Settings / Clip to item / choose rectangle and Clip Feature Before Render. This will crop the vector features.
d. Create cropped DEM based on layout extents:
Get extents of layout (listed under Item Properties after clicking on map). Should be inside of grid border.
Create a csv file with columns id,x,y and 2 points at corners of extent. id can be anything.
Add layer as Delimited Text and select csv. Set CRS to project CRS (should be same as layout).
Raster / Clip Raster by extent of csv layer.
e. Export:
Export labels, border, and symbols as svg from Layout. Set visibility of layers using main map. Disable grid for all but grid export.
Export coast as separate svg (needed for Estlcam masking)
Export roads and other raster content as png.
DEMto3D to export cropped DEM to STL. Set width same as rectangle from layout, height to lowest point, vertical exaggeration to 10. Verify height also matches layout extent.
Scale height in meshmixer. Ensure ~5mm stock under deepest portion, and that cutter can reach.
Inkscape
Note: Use small (0.01) mm stroke widths to avoid changing outer dimensions
a. Format/reposition text labels as needed
b. Add text buffer to separate from roads: Duplicate text layer and add 1.5 mm white stroke to background version
c. Separate content into land and water layers, one layer for each depth
d. Add stroke to page layer (will ensure alignment to stock edge in LightBurn)
e. Export layers as png
f. Process coast for Estlcam (separate versions for carve and 3D machining mask). This provides closed shapes and prevents the 3D machining toolpath from touching any of the narrow river areas.
Add border, same size as map. Make sure it’s slightly overlapping with the coast paths to create closed polygons.
Select paint bucket, threshold 50, Grow/shrink -0.5 mm, Close gaps to None.
Select any foreground color, no stroke.
Make new layer for water and fill all water areas. Fill effect is screen pixel-based, will need to zoom and pan to fill each area. There may be a better way to do this, but I couldn’t find one in Inkscape.
Select all water shapes and Path / Union to combine.
Remove fill and add stroke to water shape(s).
Remove original coast and page layers, save.
Repeat above process with a -1.5 mm offset. The -0.5 offset will be used for the v-bit carve, and the -1.5 offset will be used as a 3D machining mask.
Toolpaths:
Estlcam carve (v-bit) - Optional to achieve sharp corners on river mouths:
a. Open modified coast file, set width to map width|
b. Select coast for carving and click in water area (arrows should be pointed toward water|
c. Check for any areas where the carve switches to the land side (where the coast splines cross over each other). Modify these paths in Inkscape to prevent crossover.
d. 0.7 mm depth limit, 1.5 mm width limit. This will flatten areas that the 1/8" flat mill can’t reach during the 3D operation. NOTE: This is easier to blend with Vectric Vcarve or Aspire.
e. Use 5% v carve stepover
Estlcam 3D machining for water profile:
a. Open STL and set width to map width (should already match)
b. Mask workpiece using coast with 1.5 mm inset (to avoid vcarve areas). Select same areas as carving.
c. Make sure mask does not extend past borders (select 0 margin)
d. Use waterline machining, 0.5mm roughing allowance, 5-10% finishing stepover, 0.05 precision
e. Save Roughing and Finishing cuts separately. Be sure to select correct tools for each (flat end and ball end).
Lightburn for laser:
a. Open surface raster image (roads, border, symbols, labels, etc.)
b. Set as raster. Jarvis works best for me.
c. Open water raster image(s) and set appropriate z offset based on local water depth.
Build:
Join and plane the stock, 4/4 cherry in this case. I don’t own a planer, so I used a the MPCNC with a 1" surfacing bit. Make sure your z axis is well-trammed.
Sand and stain or oil for desired color. I used boiled linseed oil.
Apply several coats of shellac.
Run the carve and 3D router jobs for the coast and water.
Sand and stain the water area. I used 3 coats of gel stain. It’s okay to get stain on the land area because it will wipe off easily.
Before the stain dries completely, cleanup the land area with mineral spirits (will not harm the shellac). It may take a pile of q-tips and some patience to clean all the fine detail.
Run the top and water laser jobs. Remove any charring with vinegar.
Thanks! I’ve been thinking about doing a “continents” wall hanging based on an 18th or 19th century map. Lots of possibilities.
The Library of Congress has lots of high-resolution, antique maps available for download if you need ideas or source material: https://www.loc.gov/maps/
I used one of them for my first laser project, mostly as an experiment: