I am struggling to figure out what to print for a tool mount. I printed one for my Dremel which attached directly to the z-axis on my primo. I want to build this needle cutter (https://www.thingiverse.com/thing:4056438) but not sure which mount I need for it. Searching for mounts gives an overwhelming amount of options and not all say what machine they are made for original, burly, primo, etc. Not sure if their were changes to the mounting setup this is my first time building one. Any recommendations on a good mount?
I also want to mount Ryan’s pen mount, but again not sure what I need for the back mount.
I designed a plate in Fusion 360 to connect to the Burly MPCNC, I also designed three adaptors to fit to that plate.
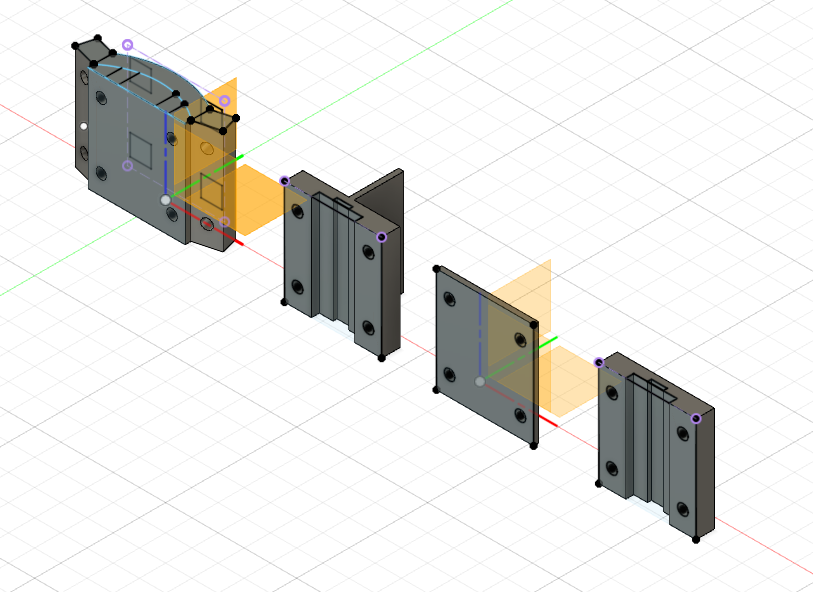
One of these may be of use to you, though the first one may be the best to use as it conncts straight ont the burley plate that Ryan provides. The others were attachments for a digital vernier gauage so I could check the Z axis was level (or the spoilboard was).
MPCNC Mount Plate v18.f3d.zip (93.9 KB)
If you don;t use Fusion 360 I can export them as STL’s for you.
Rob
2 Likes
The needle cutter you reference is designed for the Burly. Almost all mounts on Thingiverse are for the Burly at this point. Since Ryan left the hole spacing on the Z tubing the same, you can 3D print the Burly Tool Mount with extra perimeters and then drill the holes out to accommodate Primo’s larger screws. With this modified tool mount, you will be able to install any Burly tool mounts on your Primo machine. If you upgraded to Primo, you already have a tool mount left over from your Burly. If Primo is your first machine, download any of the part sets for the Burly and you will find a tool mount.
Note the price you pay by using the Burly tool mount on the primo is that tool are further from the Z axis of the machine and the full plate adds a bit of weight to the Z axis. This does not matter for a needle cutter or a pen mount.
Edit: The first mount in list Rob’s looks like it would work also. @rwillett this might be useful to have on Thingiverse if you put things up there.
The first mount definitly works on a burley as it was designed for that. I wanted to find out the height of my spoilboard or rather the variance in heights.
See this thread (Mounting plate DXF file - Is one available? - #7 by rwillett) for pictures of it in action.
It should really go on thingiverse but I hate thingiverse, no excuse though 
Rob
Should the first mount, mount directly to the z-Axis pipes? Or should there be something between it and the pipes? My primo is 75mm between the mounting holes, this mount appears smaller. Am I missing something?
You are right that Rob’s file has only 25mm between the holes, and there needs to be 75mm. The Burly mounting plate has holes 75mm apart, but the holes are too small for the Primo hardware. They need to be drilled out, or alternately you can replace the Primo nut traps with the Burly nut traps and use the Burly mounting bolts.
On the Burly MPCNC there is a part called the Tool Mount

You can see it here between the two Z axis pipes. The Tool Mount is fixed permanently to the Z axis pipes and you connect your CNC cutter or whatever to the Tool Mount.
Here’s another picture of the same component but from the STL file
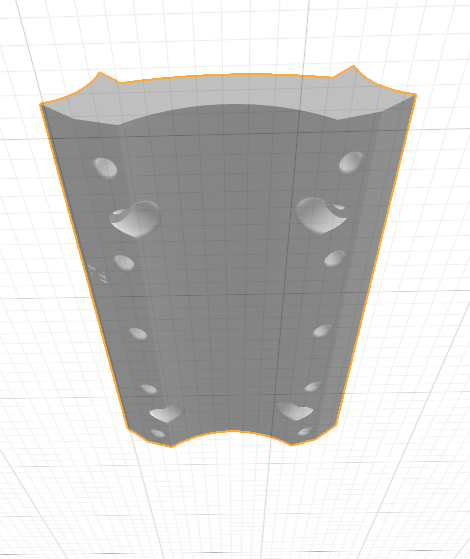
As the Tool Mount is standard for most people, you can connect what ever you like to it, so long as it follows the standards for radius of curve, separation of holes etc etc.
The first mount that I provided in the Fusion 360 files fits straight onto that Tool Mount. Note the curve on the back so it just fits straight on, the holes on the side are angled so they are perpendicular to the Tool Mount holes. To make it easy for me, I then present a simple rectangular plate with four holes in that you can mount simple things to, in my case it was a digital vernier gauge, but there’s no reason why you can’t take my first design and adapt it to put your cutting tool on to it. This would then mount back onto the Primo.
I don’t have a Primo as I’ve only just finished my Burly so have no desire or need to upgrade as it doesn’t give me much more. @robertbu knows far more than me about this sort of thing and it appears that you need to download the Tool Mount plate from the MPCNC Burly parts, print it and the backing adaptor and then connect them to the Z Axis tubes of the Primo using the Nut Traps.
These may be the links to the parts you are looking for:
https://cdn.thingiverse.com/assets/d9/ab/ef/9f/56/Tool_Mount_C_4mm.STL
OR
https://cdn.thingiverse.com/assets/78/45/f6/f8/6e/Tool_Mount_C_6-32.STL
AND
https://cdn.thingiverse.com/assets/94/e0/1e/29/e6/Nut_Trap_Burly.STL
However you need to check your tube size (25mm or 25.4mm or whatever) so you are happy you are printing the right ones.
Hope this helps.
Rob
That is exactly what I needed. I can grab this plate and now adjust it for the Primo. Thank you both for the help. My machine went together perfectly and much faster then I thought it would. For some reason I really hit a wall trying to picture the Tool Mount setup lol
I have put the designs up on Thingiverse, I actually did it some time ago.
Rob
1 Like