Has anyone 3D printed the Y-Plates and 611 Plate? If so what infill did you use? Will 30% be enough?
Hi David. I have printed them as some of the others. I have used 40% infill. Cant say if they will work, cause I am still in the building phase  I have used stl files mentioned somewher in this forum : LowRider2 CNC Y Side by braingame26 - Thingiverse
They will probably work long enough to mill out proper wood plates, but I wouldn’t recommend keeping them long term.
I 3d printed a 611 plate to drive around a diode laser. I had 3 walls and 30% gyroid fill. I could hear the thing creak as it moved around and changed directions. It was ok for what I was doing, but I wouldn’t recommend it for that, much less milling. Now, if you want to go super high like 6-10 walls, 60+ infill, it could be completely different. I’ve got some printed t track about that way and it’s quite stiff.
All that said, if you have a flush trim router bit (included in just about every set I’ve ever seen, especially the cheap ones) you could print one and use it as a template. Hot glue it to the board and let 'er rip.
Thanks for the replies! I am printing them as I type as I want this one to be my prototype for my learning curve. Once I get this one going and get the hang of it for milling wood, aluminum, drag knife and markers then my next one will be for a Plasma cutter. I am a newb and have a lot to learn and I don’t have any more room for 3d printers! So I felt I could find room in my garage for a CNC or two!
1 Like
I should also say that I took the original DXF files and loaded then in Fusion360 and extruded them, then exported to STL files.
I used the following templates and a flush trim bit with great success.
Thingiverse thing:3899373
Thingiverse thing:3899300

5 Likes
I printed a 611 plate at 8th inch thickness with 3 walls and 50 percent infill in polycarbonate, and then wrapped them in about 20 layers of unidirectional prepreg carbon fiber, and and used my printers bed as a base for the vacuum pump, and to control the curing cycle (trip up to 350 degrees). Didnt release from my print bed, and warped slightly (probably print bed flex).
It was fun, I then promptly bought the flat parts from here.
2 Likes
What? No pics. 
That does sound like fun.
I’m resurrecting this thread a bit:
I’ve messed up my order for the aluminium flat parts and I need to replace the baseplate: I have a makita router and I got the 611 plate. Some of my options are:
- Print the baseplate by printing it standing on a short side (i use a tall printer). I only have PLA and I’m afraid it would be too fragile/brittle even at high infill.
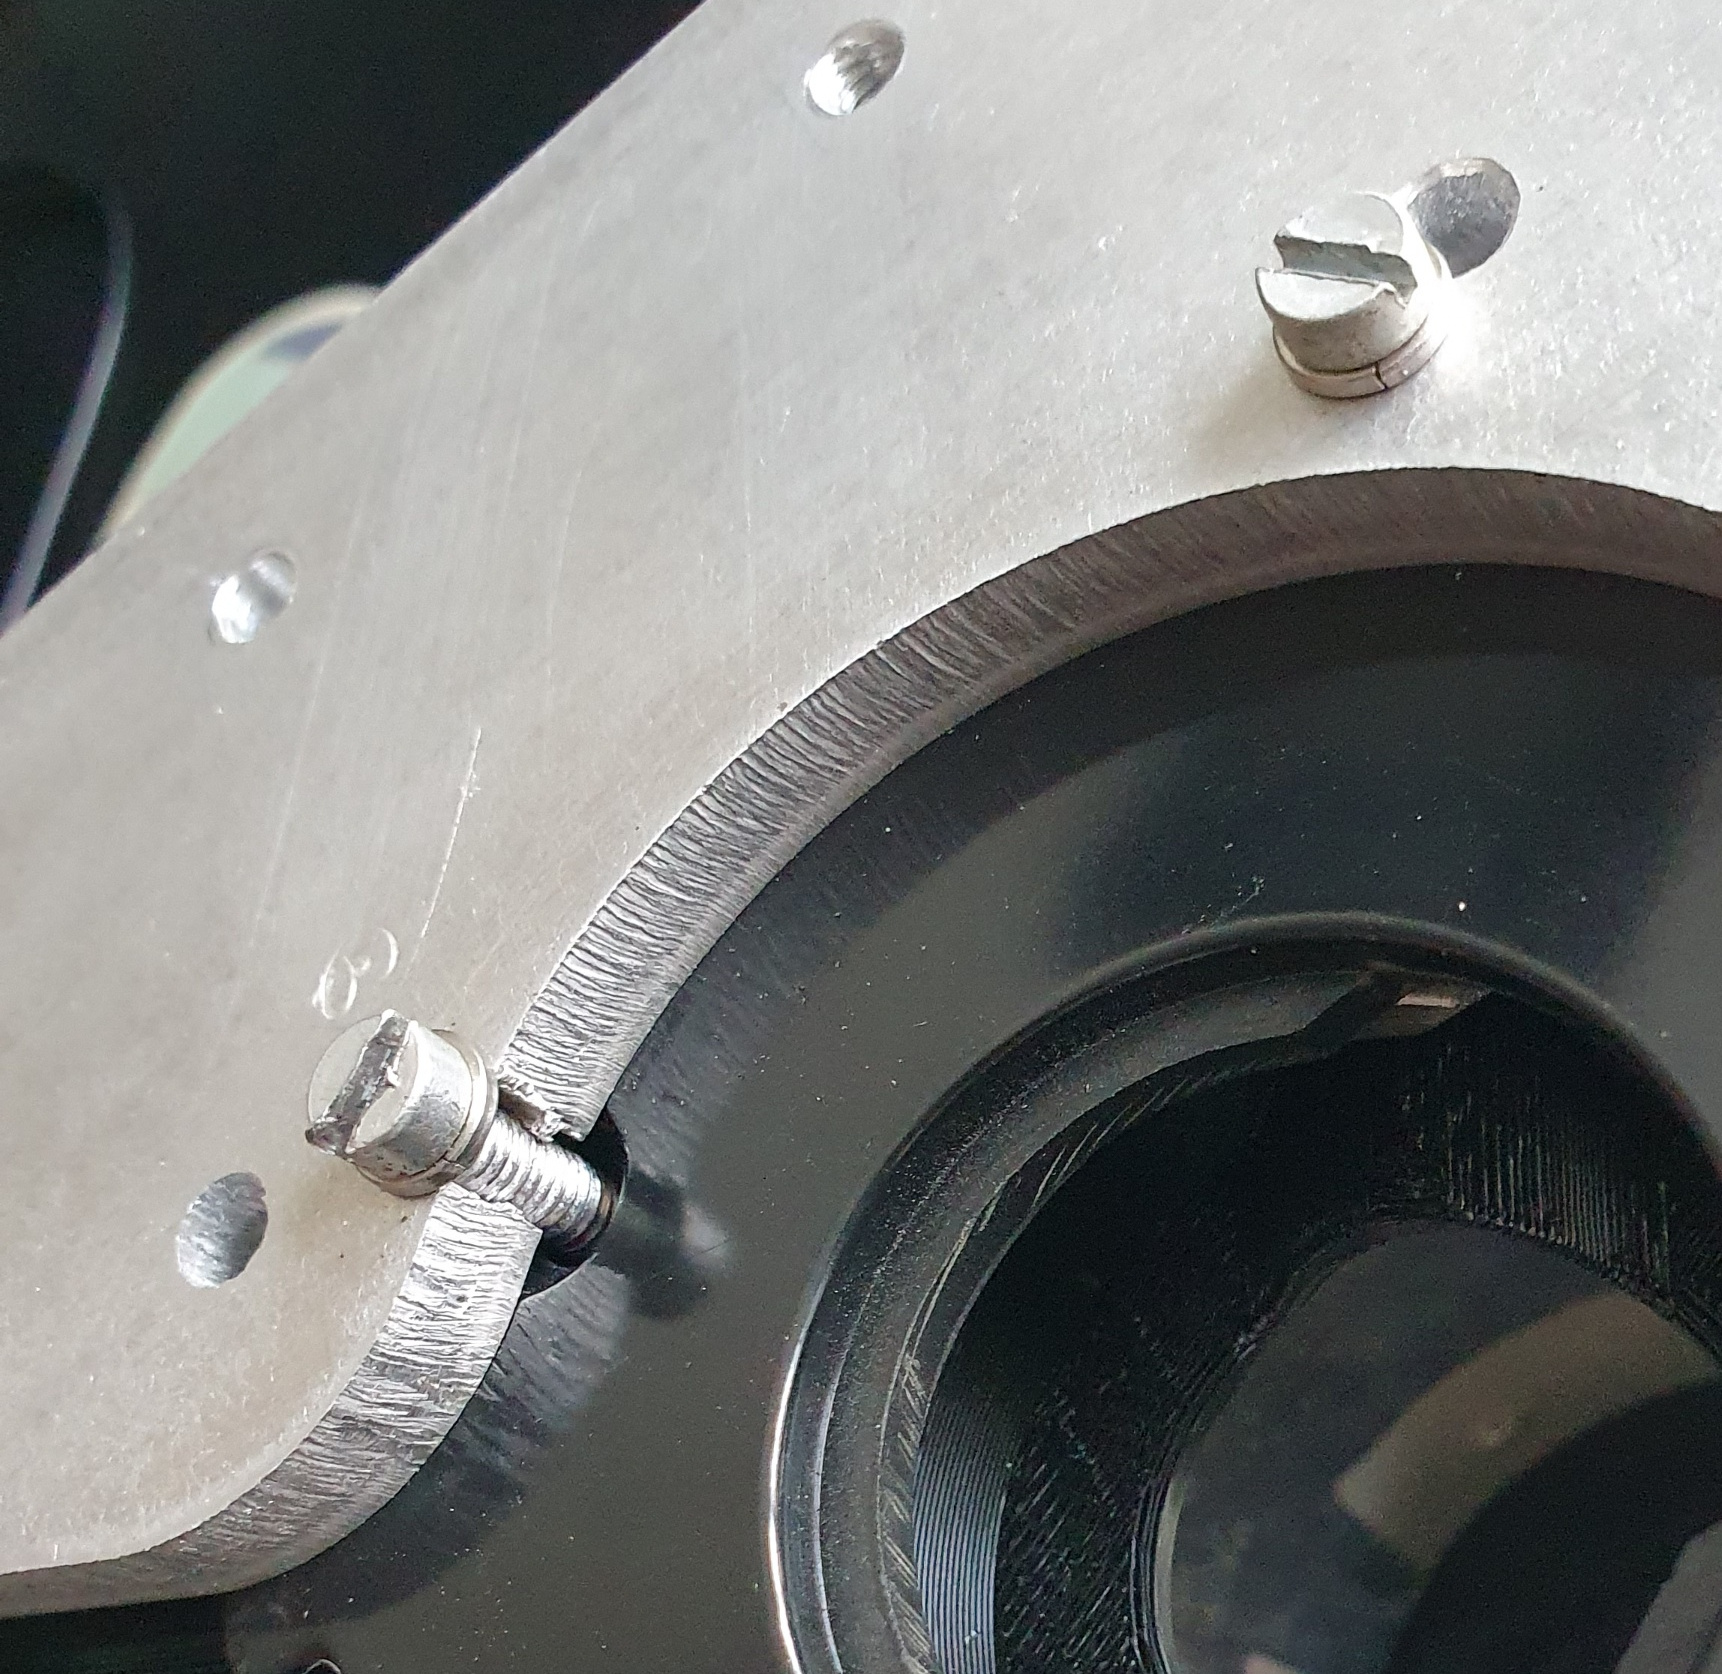
- Printing it and sandwich it to the 611 plate: I would have to countersink the 4 screws keeping the router in place and use longer ones everywhere else. The printed part would take all lateral, tilting and upward forces in the 4 little screws, not sure how durable this solution is
- Create and print an “adapter”. That would allow to the adapter to completely replace the round base of the router giving it enough thickness and can be designed to protrude and fit in the 611 cutout supporting much better against laterall forces. Not very sure my CAD skills would allow me to take this option …
- Use plywood or mdf (I was trying to avoid hand cutting and drilling)
What would you guys think is the way to go?
You can also do one of those things, until you have a working LR and then cut a new one from mdf. The force on it are really just twisting the router. It doesn’t have to be very strong.
I would consider 3D printing out a template that I could follow with a router. But honestly, the only critical dimensions on that plate are the drill holes, so you could definitely do it with a 2D printer and a brad point bit on a drill press.
I’m at the moment using a 3D printed base for the Katsu-Makita cheap version, and I’ll be using it to cut the wooden part…I’m afraid using a 3D printed PLA base is a short term solution, not a defo one, although mine will probably stand a few jobs as I did it on a 70% infill and 3Dcross whatever it’s called…very tough…but doubt will be rigid enough to take the router pushing back and side when under full load.
My point…of course,
Àlex
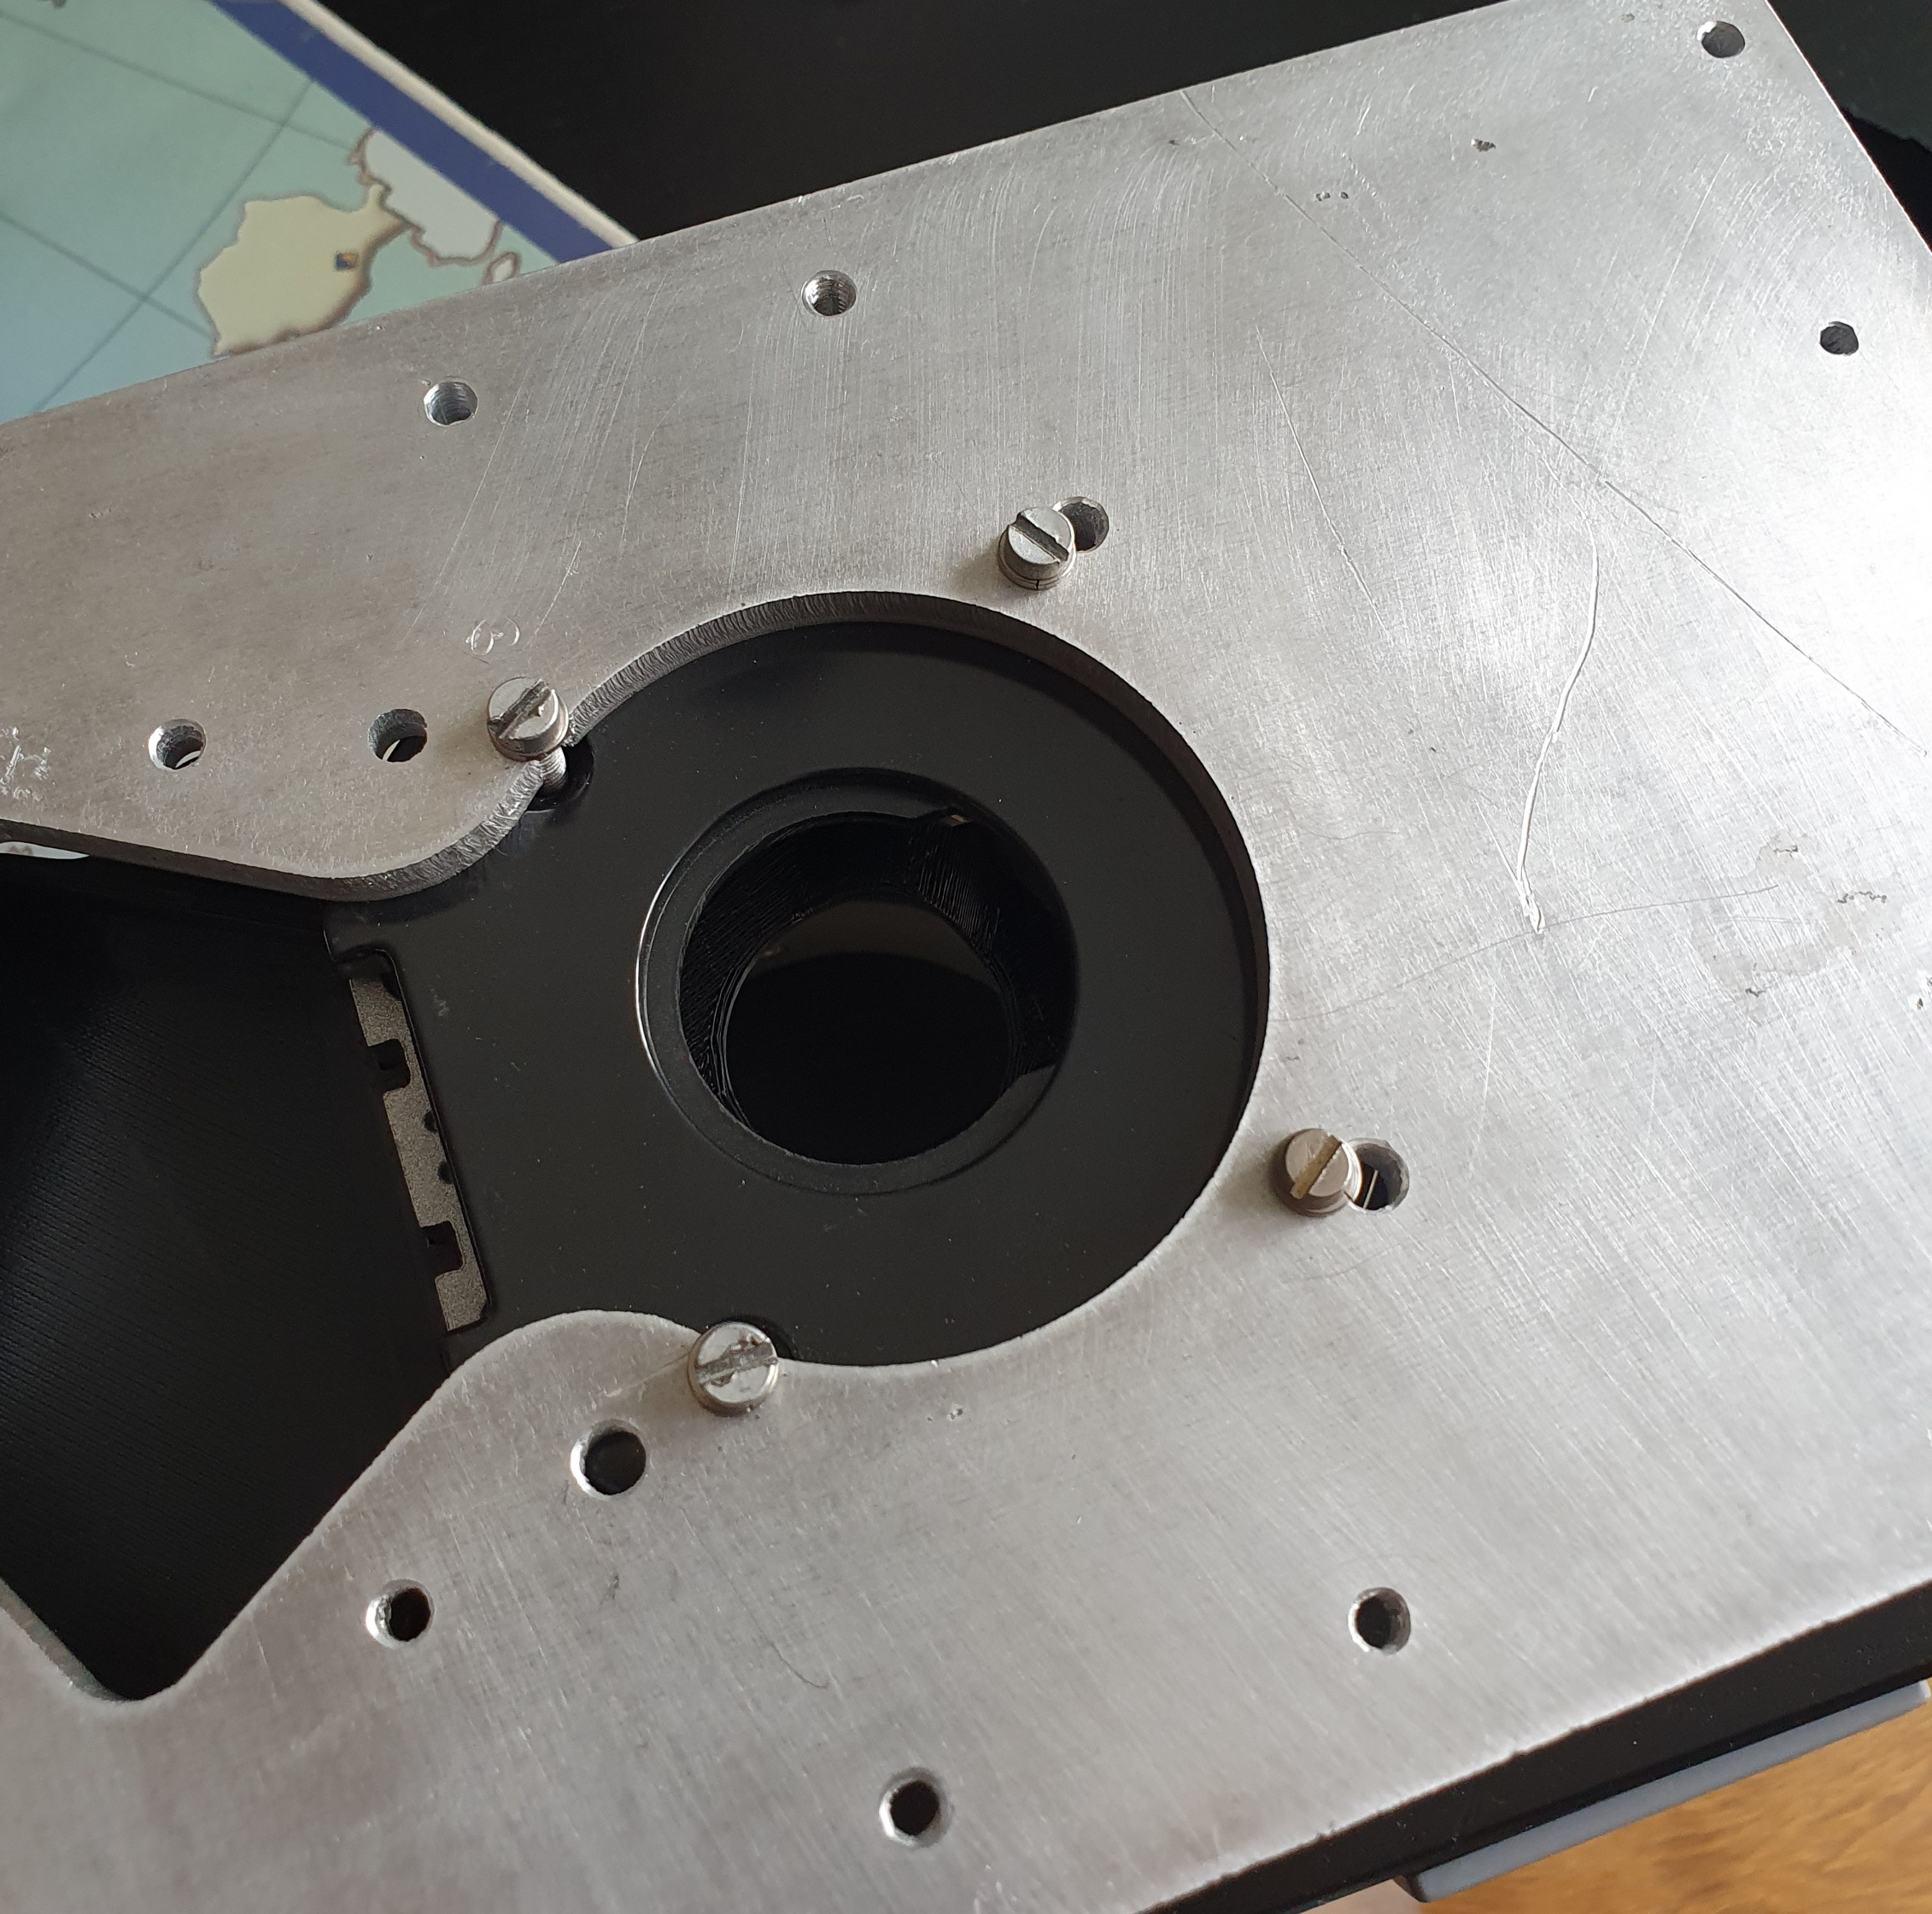
I ended up printing a Makita base template. I used the common holes to align the template to the 611 alu base then drilled it on a column drill to take my router. 2 of the holes are very close to the dewalt ones but not actually touching while the other two are open on a side towards the larger round opening. These were very difficult to make as the drill bit was flexing out of position very quickly so I had to start them on both sides and finish up with a router bit and a round file … However, this proves that it is possible to design a plate that can be used for either of the 2 most popular low-rider routers.
1 Like