Oh neat! That looks much more convenient. Please upload a remix to my Thingiverse thing. Would love to try this as well!
Might also make attaching the cable to the hose a bit less awkward. What’s your experience with that?
Oh neat! That looks much more convenient. Please upload a remix to my Thingiverse thing. Would love to try this as well!
Might also make attaching the cable to the hose a bit less awkward. What’s your experience with that?
Well I haven’t proceeded just yet, as I wasn’t sure if there was some reason I was missing, that this wasn’t done.
It’s late where I am, so i’ll bolt it up tomorrow and try it out abs take some pics.
I had to recreate the part using pictures of your remix, as it wouldn’t convert in Fusion for some reason, then I realised after I printed it, that it’s basically the original part, except the edge connected to the router is blocked off haha, oh well.
I’ll upload a remix or send you the file if you like tomorrow also, when i’m at my PC 
Perfect, thank you!
Hey Frederick,
Could you please send me a pic of how you’ve run your vac hose / cables at the moment?
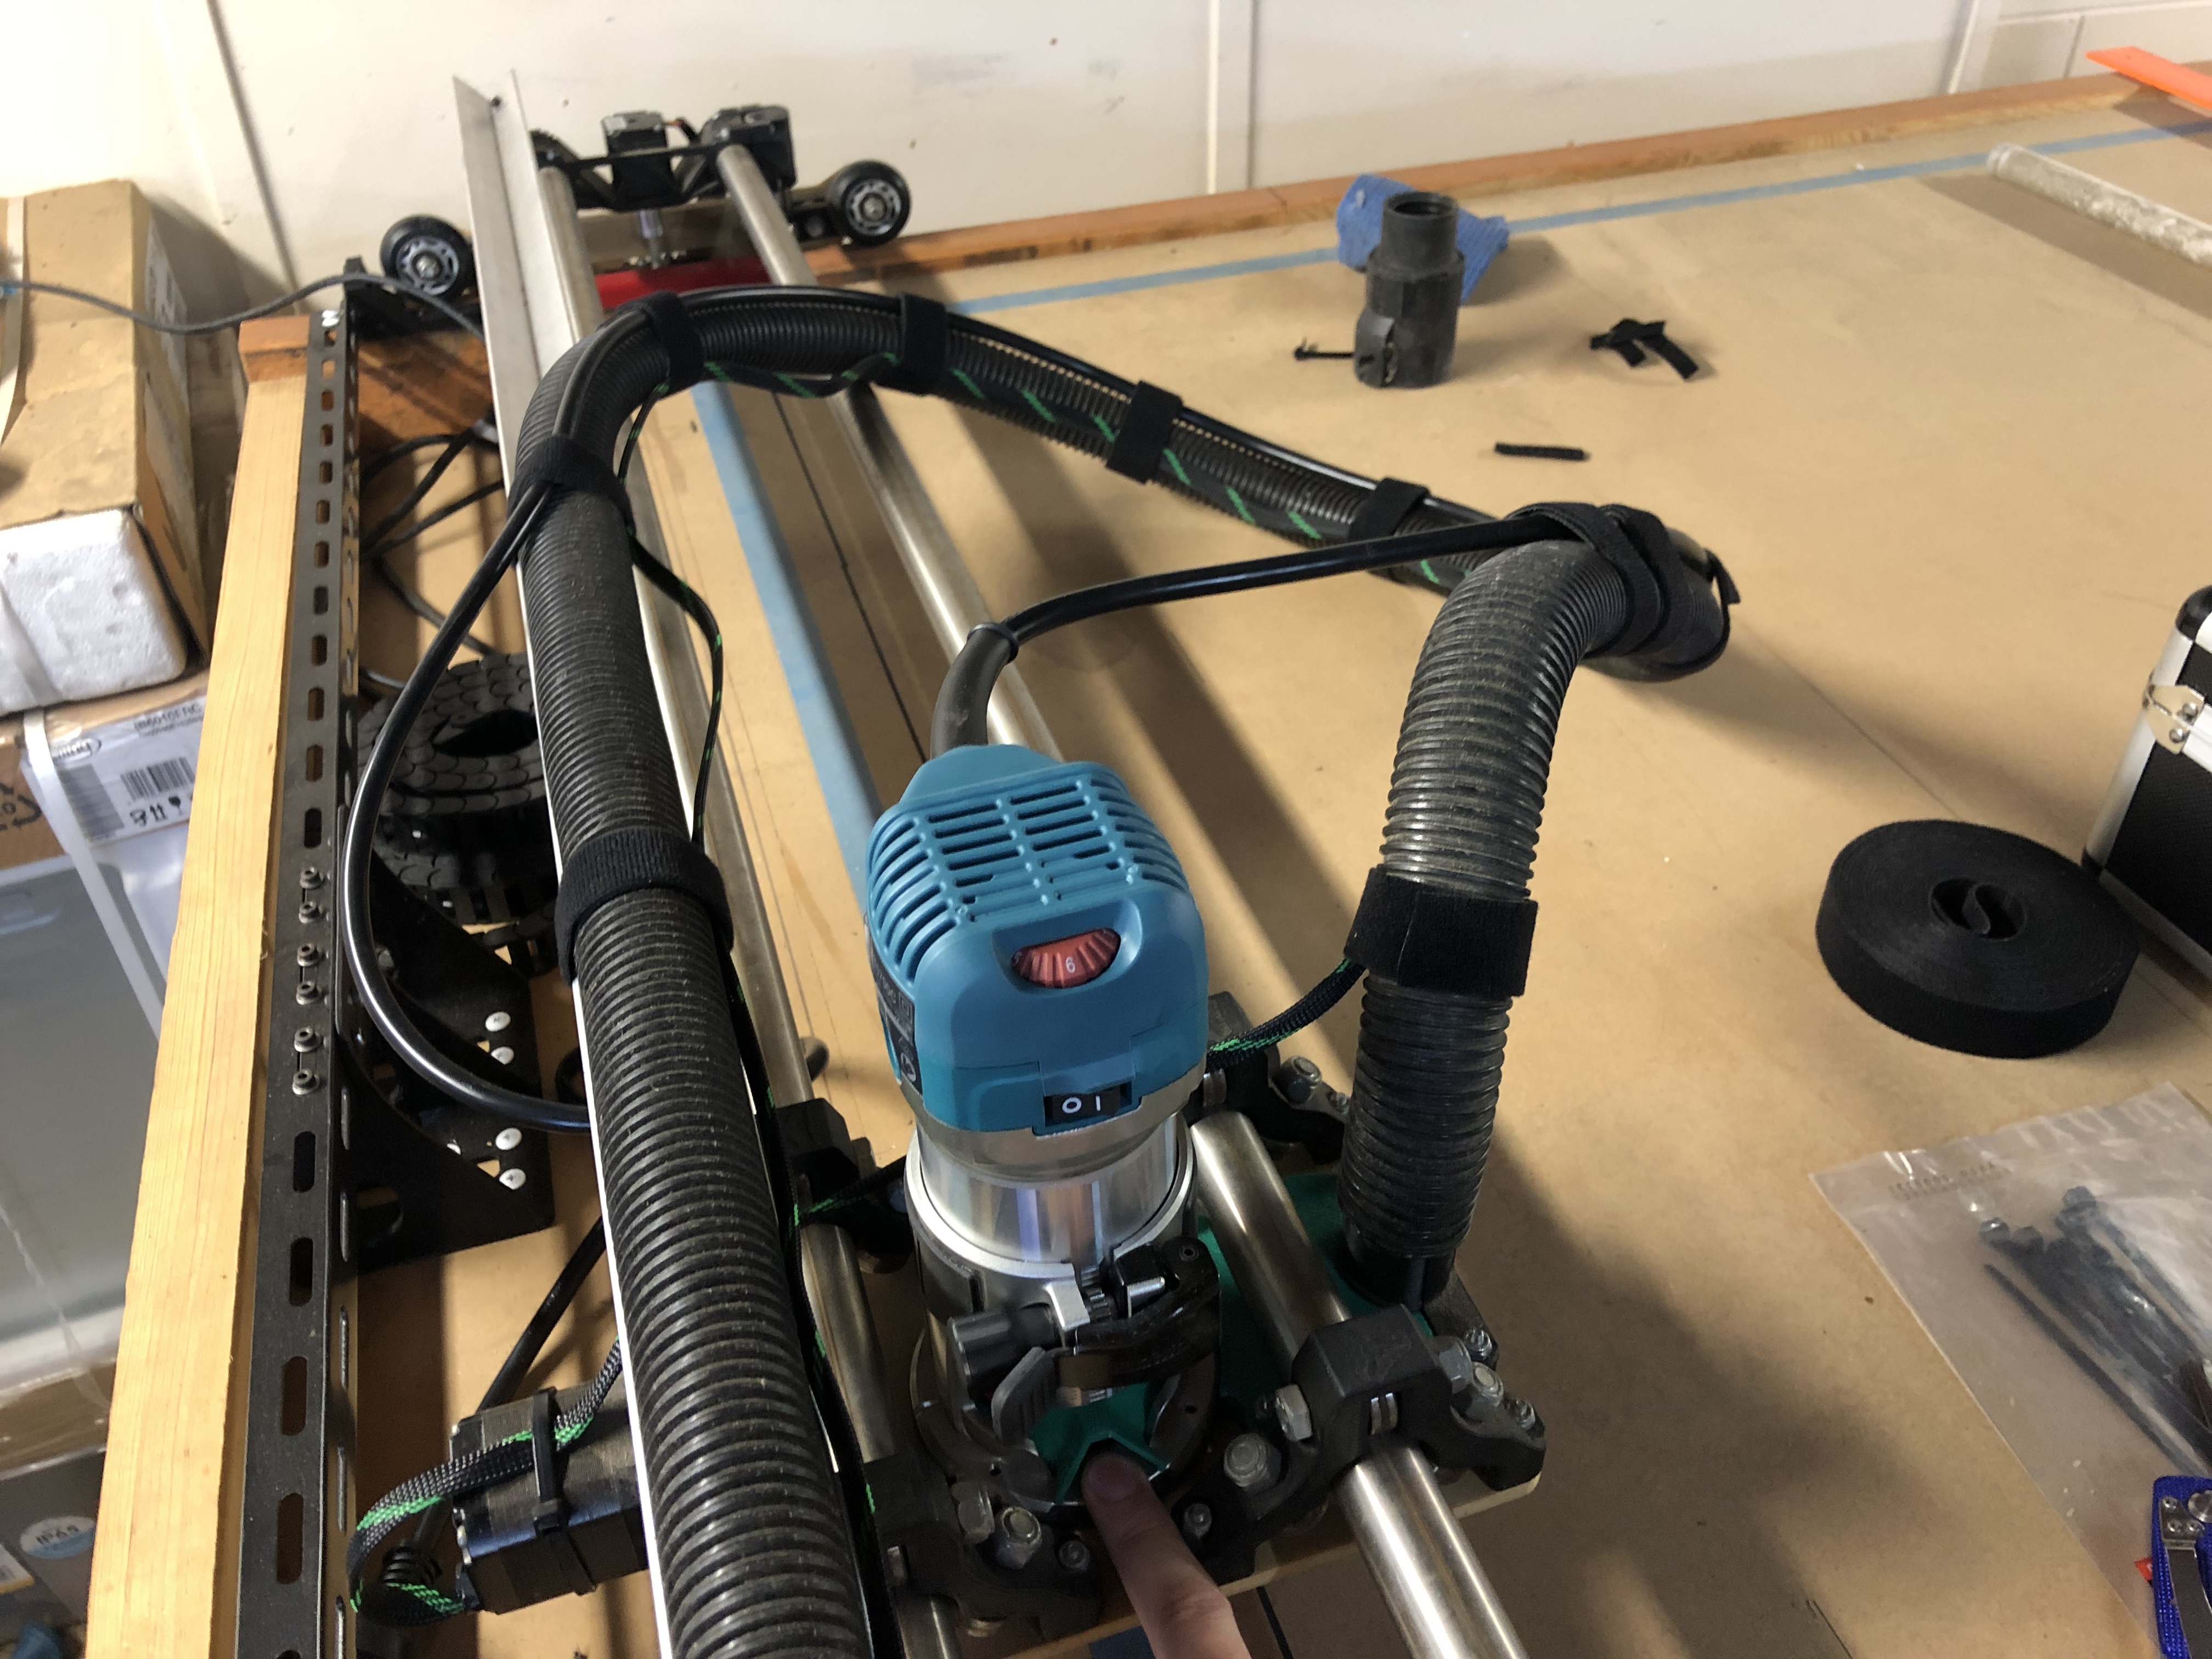
Just did a test run, and I dunno if it’s because of the hose in running, or if i’m running it the wrong way, feels like the hose for the vacuum is going to end up binding while in use.
Once I see an example i’ll run it again abs take some pics, even the vacuum alone feels too loose when it comes the one extreme, and too tight at the other end /shrug
Kirt
Sadly my LR is currently disassembled since I’m rebuilding my workbench. This is the best
All good, I can work with this.
I’ll get back to you shortly.
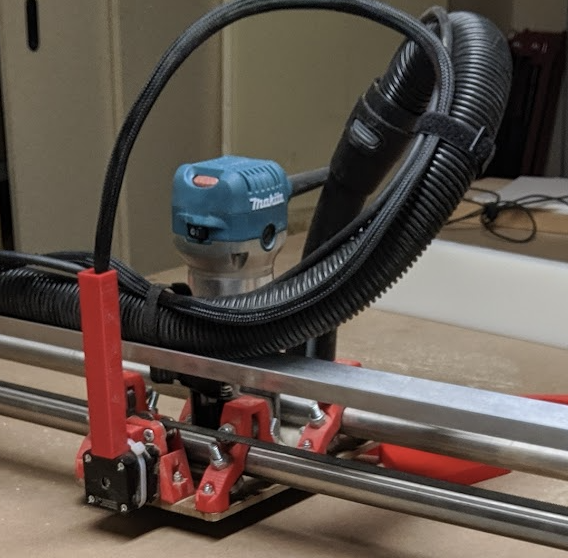
So, this isn’t the hose i’m going to end up using, just an old vacuum hose, seems to rout fine and is ok at both ends.
I’m not really happy with how the hose hangs, especially at the far end, needs something to hold it up I feel.
Router is still loose atm, as I wanted ti test everything before I modify the base plate.
Thanks for all the help thus far
Looks like you’re almost there. Maybe the other hose will be holding up by itself. Or you could attach some tick trimmer line or something to give it more strength.
Has anyone found Makita colored filiment? I just think it would be cool if the 3d printed parts matched.
No, and I’ve looked.
I did find a spray paint that almost matches at Walmart. Rust-oleum satin “Lagoon”. It takes a fairly critical eye to see a difference, and that was largely texture.
Large companies tend to trademark their colours so getting stuff to exactly match is often impossible, because legal issues. They don’t want imposters putting out knock-offs in the exact colours and changing one letter in the brand name.
Same thing with DeWalt yellow. An exact match is difficult to find, but there are many near matches in standard paint.
Other brands sometimes do license paints and the like. You can buy “John Deere Green” paint for example, or “Caterpillar Yellow”.
3d printing filament though? Doubtful.
Did anyone find or have a correctly formatted base plate for the makita router?
Edit: I THINK I was able to scale it properly; if anyone else is in a similar position.
I will be purchasing my router tomorrow so I can check my measurements then.
not sure where I can upload my pdf/dxf of it. If that is allowed. They are not my designs after all. I do not want to violate ToS or licenses.
Thanks @frederik , all of the parts printed and fit beautifully.
Once I have my machine running I’ll experiment a bit with some thoughts I’ve had. In the meantime can anyone report on how effective the vacuum is in this setup from a dust collection perspective?
@frederik I am yet to fire a shot in anger with my machine - but am considering turning the router through 90 degrees or perhaps 180 to get a nicer cable run and better access to the speed controller.
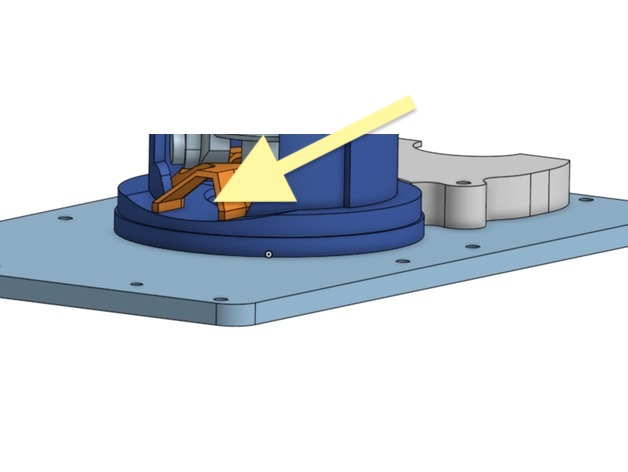
Can you tell me please, what the purpose of the “Vent” in the vac duct is?
Can anyone who has used this setup advise how if dust escapes from there and if so how much? It’s a bit counter-intuitive to me.
@kirt - could I have a copy of your remix please? Of course I could use a file… 
The purpose of this piece is to redirect the flow of cooling air through the router. Normally, this blows straight at the cutting area, in order to clear chips. The problem is that thie volume of air moved is far greater than the volume of air that the vacuum/dust collection unit can suck in.
The result is somewhat like trying to fill your kitchen sink with a fire hose, and expecting that all of that water will somehow end up going down the drain without splashing all over the kitchen.
With the vent part, the cooling air blast is directed out of the router shoe, and an opening exists for some air to be drawn into the tool area where it will then direct that towards the dust collection. This avoids overwhelming the dist collection and allows it to function efficiently and (hopefully) collect up most of the chips that the router cuts.
Thanks, yes I get that - it’s the raised “vent” part of it which connects the sub base (router bit) to the outside air that has me puzzled. The router exhaust exits over the top of this piece and it appears be an inlet for the vacuum? If I rotate the router on the base, I’ll be forcing air through either 90 or 180 degrees beyond the design intent. I could block it off with a bit of tape I know, but Frederik has gone to a lot of trouble to model it, so I’m guessing there’s a bit more to it than appears to me.
I am about to pull my base apart to countersink the router bolts (thanks for that! :D) and put locktite on the stepper pulley (thanks for that as well!) so I figured now is a good time to make some preliminary changes!
Thanks for that - don’t get me wrong - I’m really impressed with the fit, just wondering what the impact of turning the mount sideways will be!
As long as it can vent the air from the router and suck in air for the vacuum it should be fine.
I’m more concerned about dust escaping from that inlet - it’s obviously not a problem for you! I’m a bit serious about dust collection (I have a rather nasty allergy to find wood dust) so I wonder about the need to have it.
I have promised myself I won’t get distracted before I have my build complete so I think since I have all the parts installed I might just go with it as is!
Thanks Again.
So long as it can generally take in air past the tool towards the dust collection vent, it will work OK. Ideally, the direction would also be towards the dust collection, but an angle isn’t going to harm anything. This is really only needed when the X plate is really close to the material, such that there isn’t adequate space around the plate to suck air in from. It relieves excess pressure differential from sucking the X rails downwards or lifting the work upwards.