I have always wondered what the correct belt tension should be (or feel like). And even, how to get about the same tension in all belts.
Today I built a very crude test rig to do some tests and experiment how well a frequency analyzer phone App would work in measuring belt tensions.
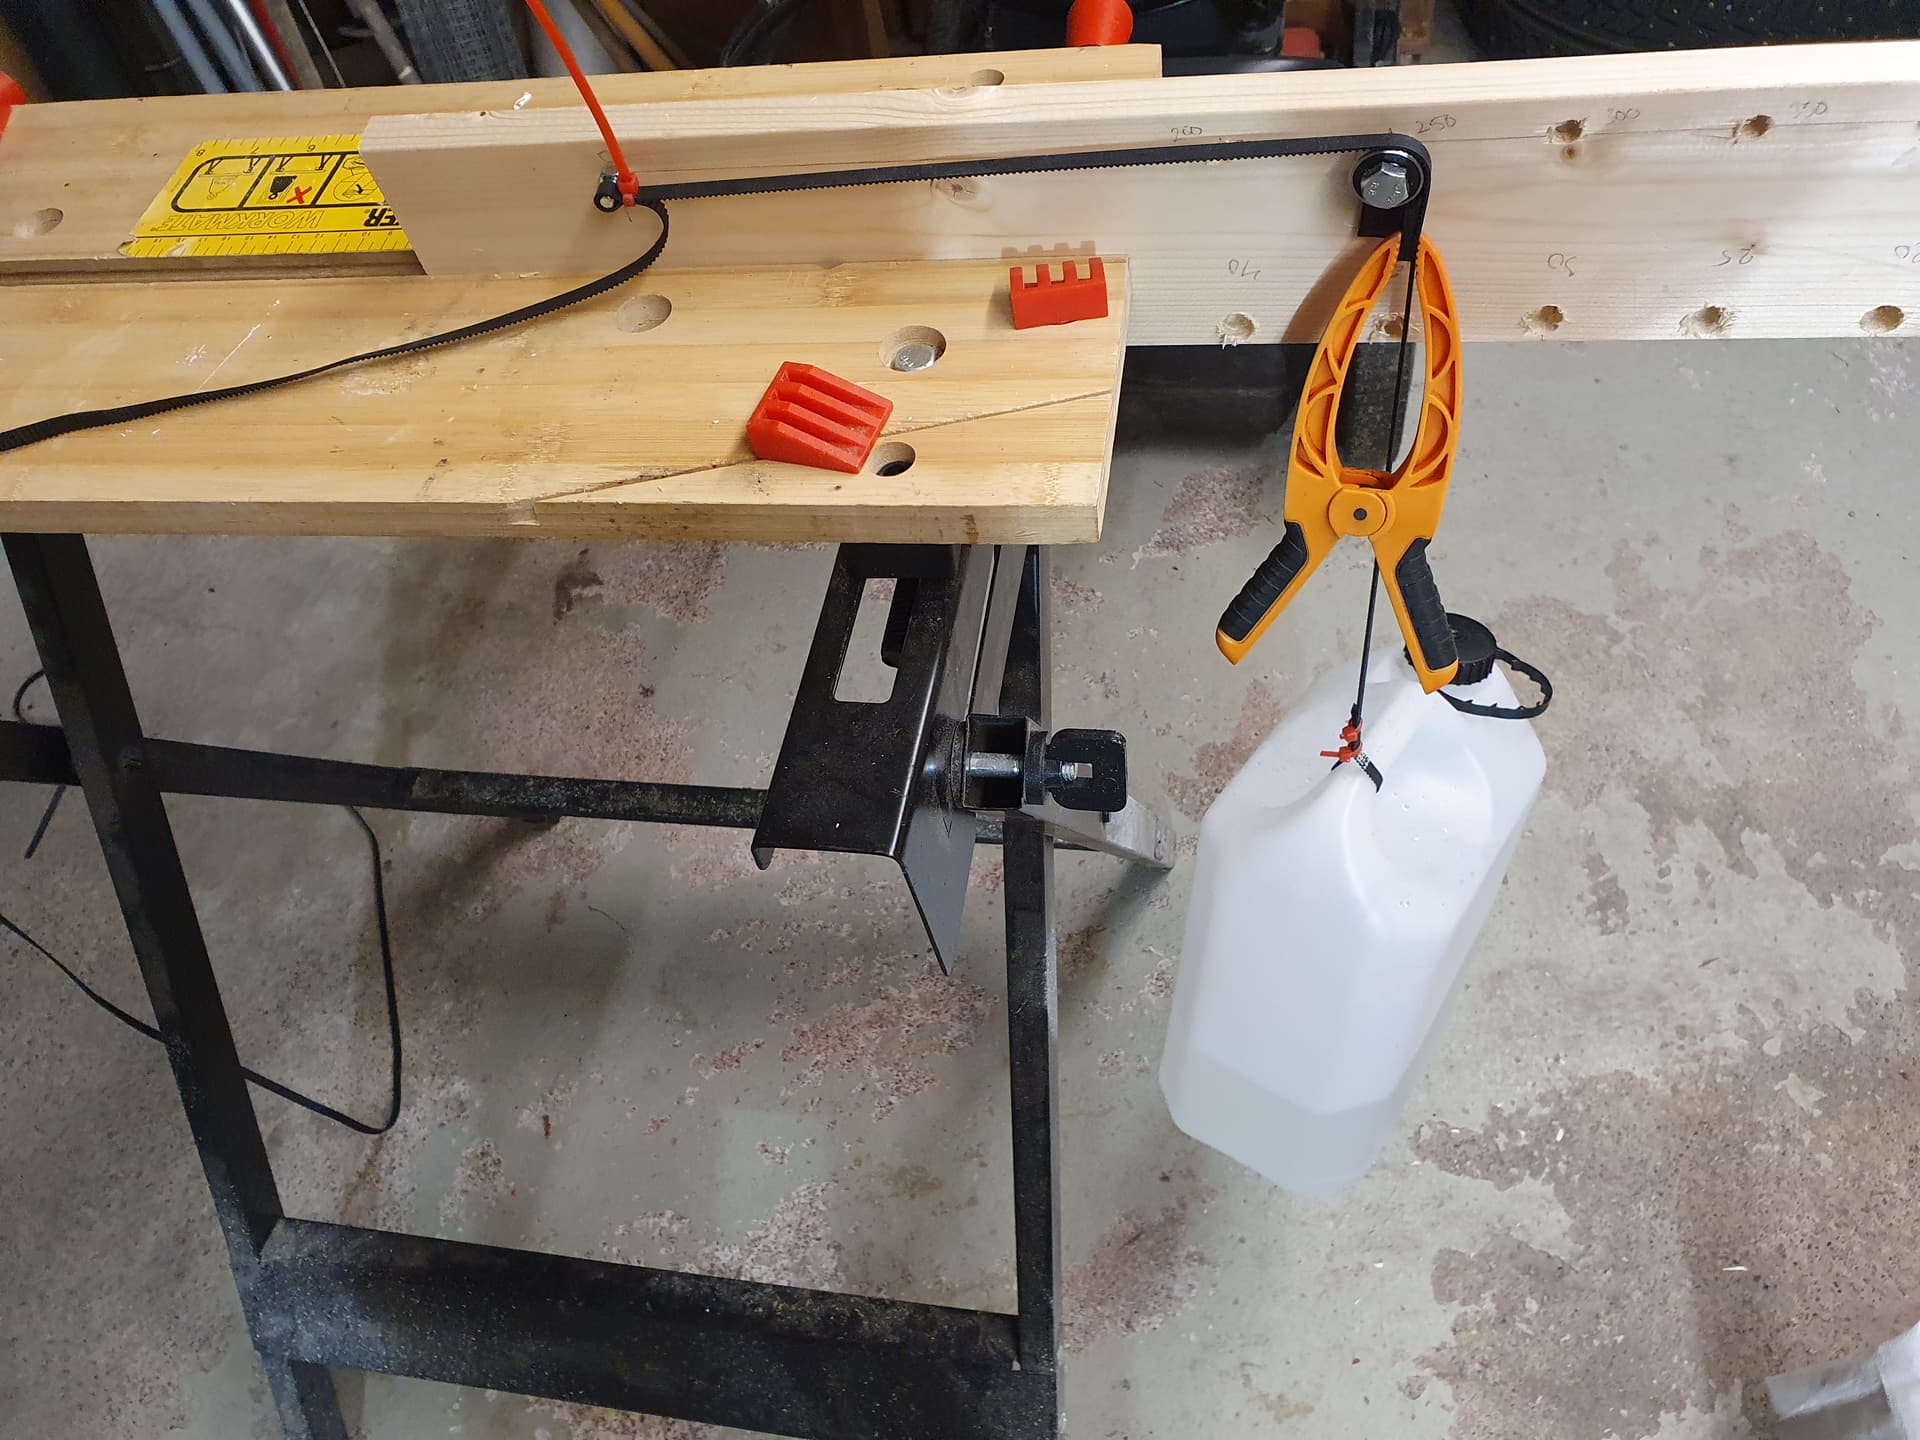
My test setup:
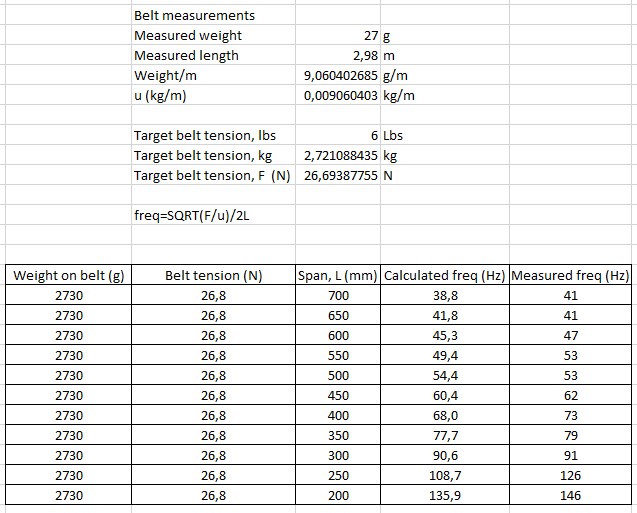
A length of 6 mm belt. Measure length and weight of the belt.
Drill some holes in a piece of wood in equal steps (200, 250, 300, 350mm etc.)
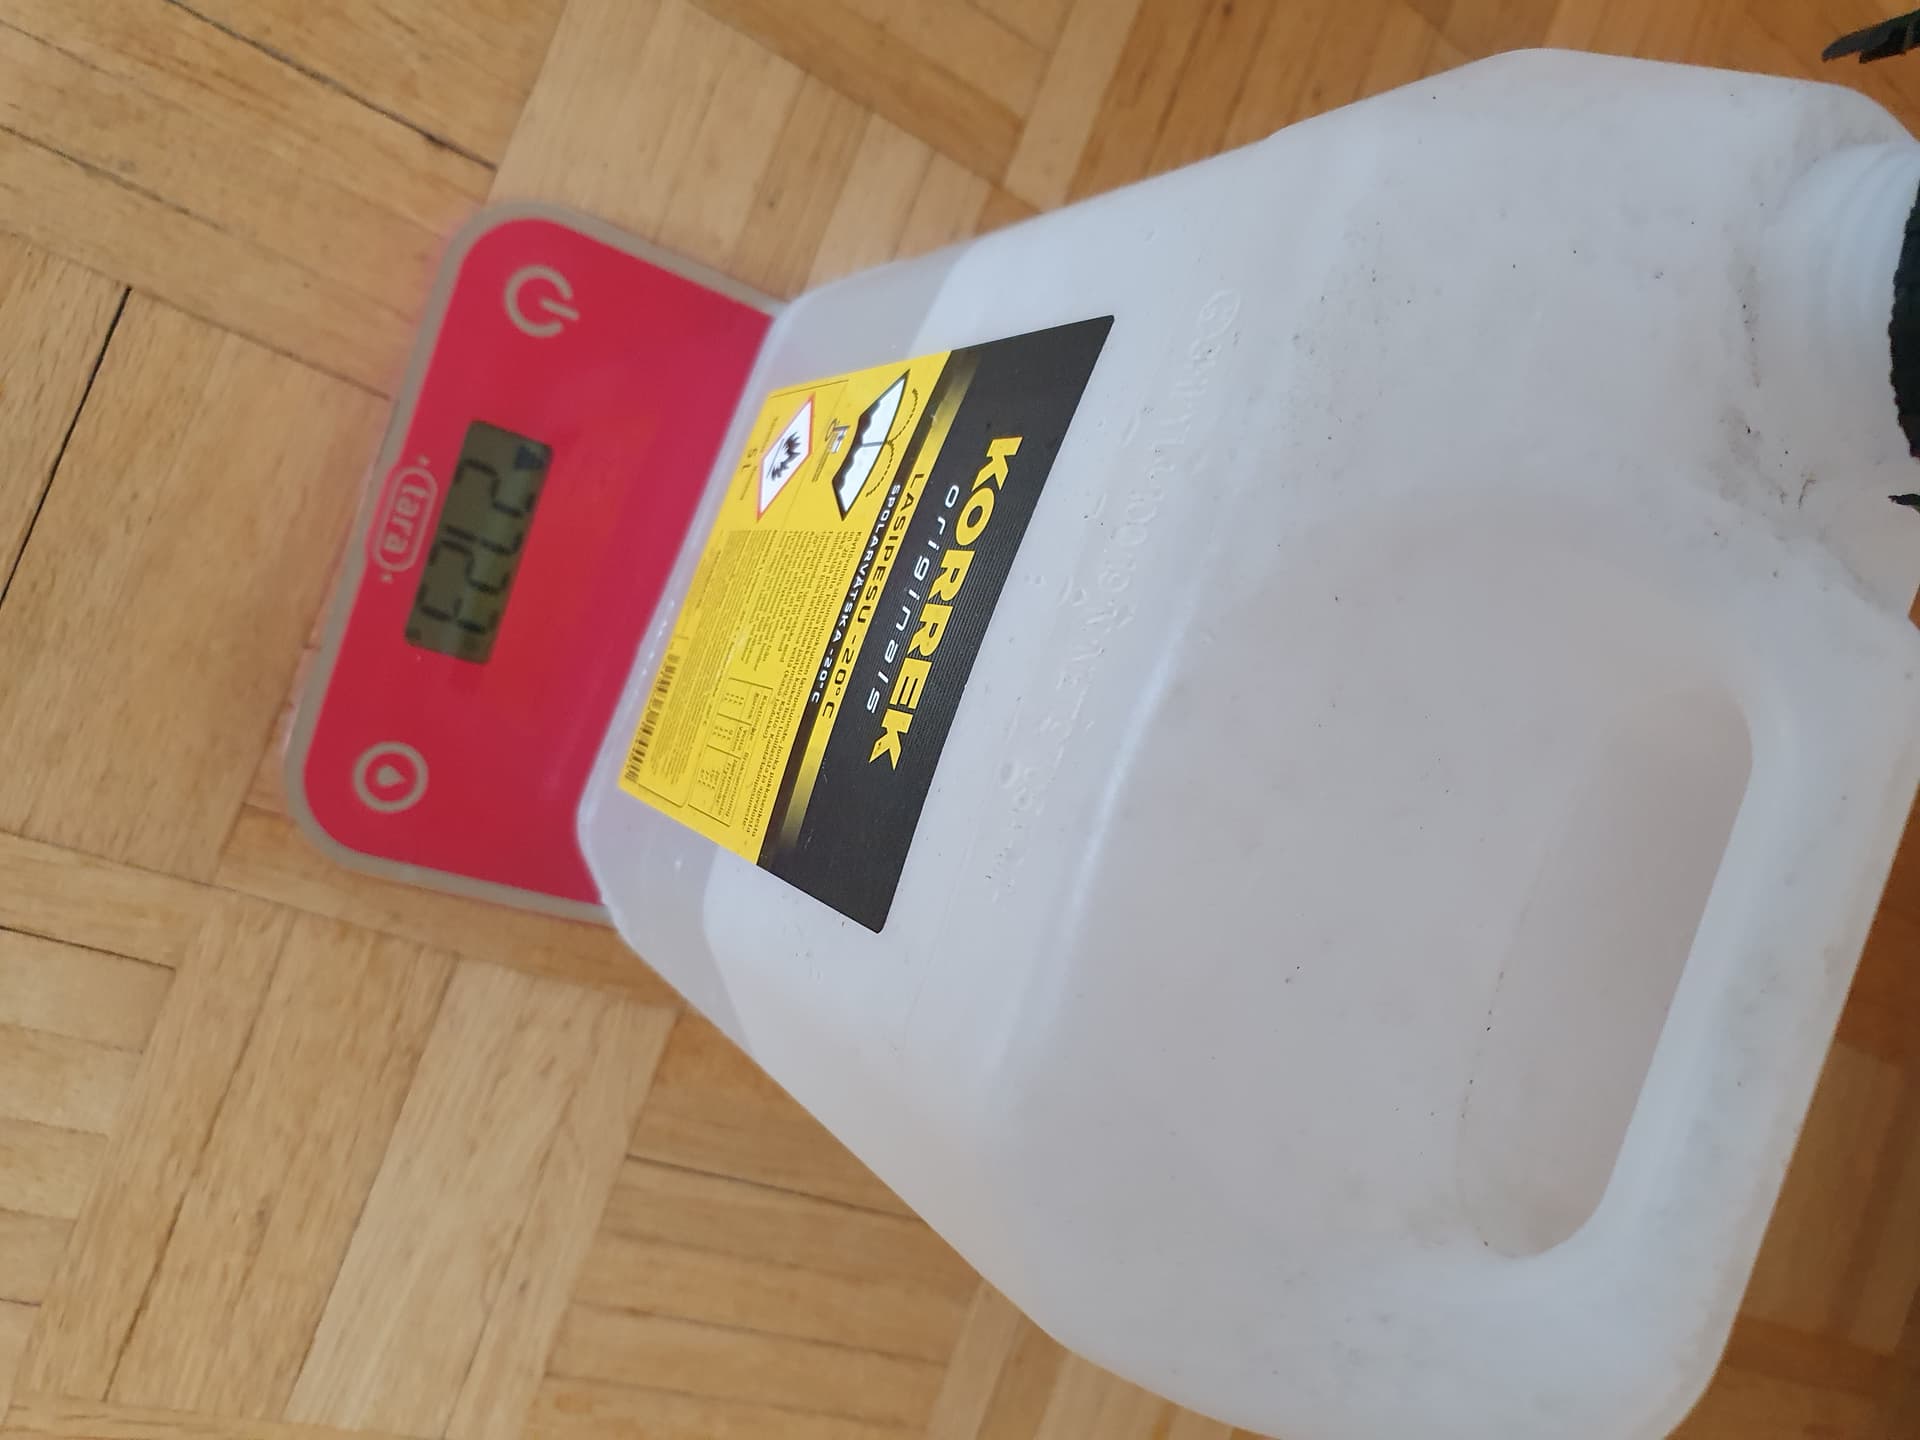
Fill a canister with water to the target weight (6 lbs)
Attach the belt to the rig and with the aid of a bearing hang the water canister from the belt (so we have a known tension on the belt).
The belt should vibrate at a known frequency. This frequency can be calculated from the factors: weight of belt (kg/m), tension in belt (N), and span/length of belt.
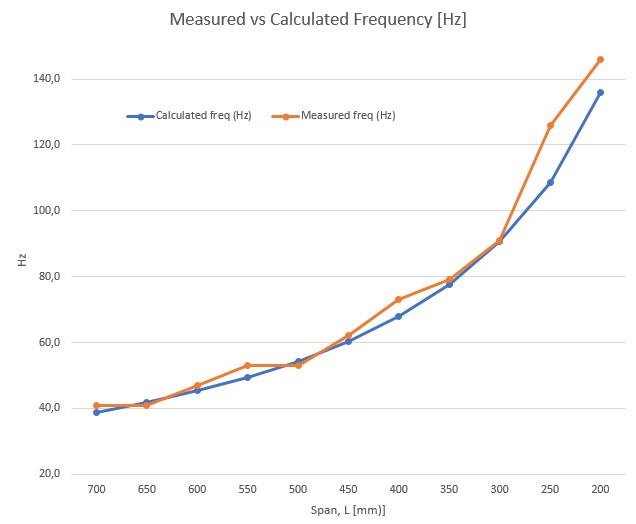
Compare measured frequency to the theoretical frequency.
Then use the App to measure and adjust the belts on my MPCNC.
GT2 6mm Belt was the belt that came with the kit. I have not upgraded it. 10mm would likely be better.
6 lbs came from some already forgotten source. I created the spreadsheet for this test quite some time ago, but only today actually did the measurements.
This is great work, and the results are impressive.
I am wondering about two things, one is the orange clamp, and the other is how or whether the stiffness of the belt is a factor. I suppose the idealized model based on mass, tension, and length must assume a constant tension. For small deflections of the belt, this seems reasonable, and the deflections from vibrations should be quite small.
The orange clamp should act as a hard attachment, so it should do a decent job at modeling the stiffness (which shouldn’t matter if the reasoning above is correct). Without the clamp, the entire length of the belt to the weight would contribute to softness, instead of just the segment under test.
That’s my interpretation. Maybe you just have the clamp so it doesn’t fall off by accident .
@jamiek Yes, my idea with the clamp was to have a hard attachment near the pivot point. So I would not be lifting the weight during the test. I.e. first pull the tension on the belt, and then lock it in place for the test.
Just to set a known and consistent belt tension on a MPCNC, I suppose it would be simplest just to have an extra length of belt, two clamps and two blocks. No math required
Attach the belt to a vertical surface (say a door). Use a block of wood in-between to get the belt away from the door surface, so it can vibrate freely (and the weight can also hang freely).
Hang the weight on the belt
Based on your MPCNC dimensions pick a suitable span length.
Clamp the second block on the said length
Measure frequency with a phone
Adjust MPCNC belts to match the frequency measurement

 .
.