I’m thinking of trying to get the surface of some plywood to be black, and then carve a pattern into it, which will end up being white. So I need the surface to be very dark, but I would like the wood texture to remain strong. But, I don’t want the dye to seep into the wood too far or unevenly, or the carving will be black in some areas.
I’m thinking something like a thin sealant on the surface first, like wipe on poly, then applying some kind of dye or stain, then carving through that and applying the wipe on poly to the carving.
Has anyone tried something like this? Anyone have any tips?
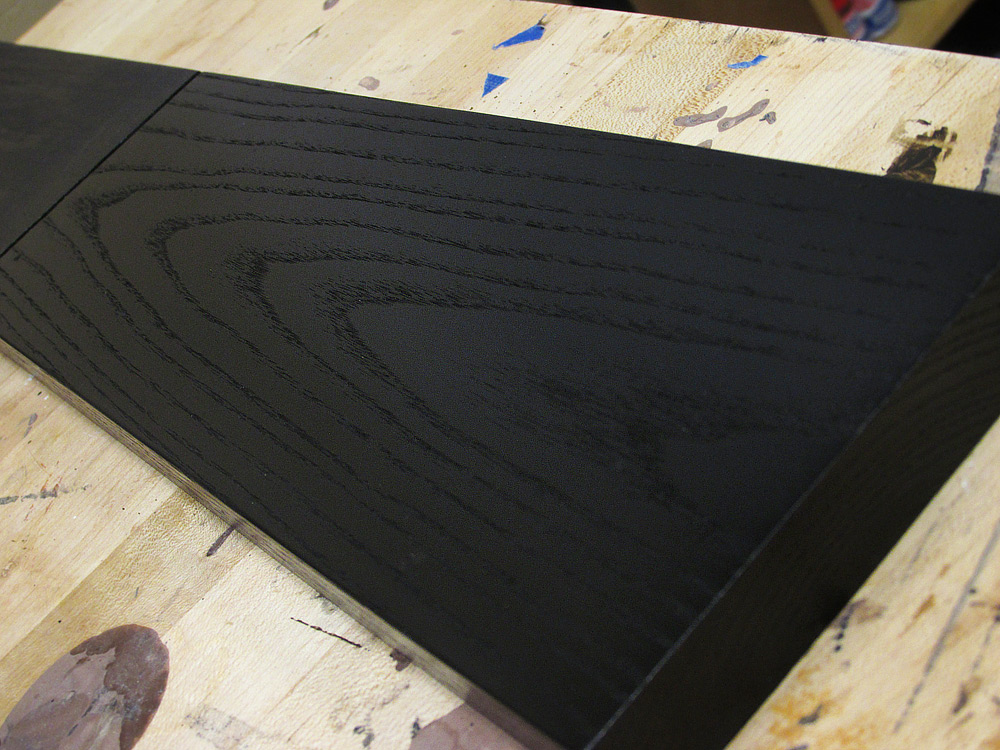
Iwould love it if it ended up looking like this, except where I carve:
My grandfather many years ago used some kind of sealer on a hutch he built for my Mom and then stained over the sealer. Fast forward to a few months ago Mom decided she wanted a different look and wanted to paint it instead of it being stained. So she went to remove the clear coat to prep the wood and the stain wiped right off. It was the strangest thing. Literally right back to the original wood color below.
All that being said, I think your sealer and then stain idea would work. Problem is the finish might be too easily removed. You should experiment first. However that hutch survived over 20 years in my parents dining room with little damage. As long as you apply a top clear coat for protection it should be fine.
Dont know If you’ve already tried it but, a good wood conditioner might work. I dont know if it will prevent the stain from penetrating the wood too deep, but it should atleast make the penetration depth even across the piece.
That’s cool. I definitely don’t need it to last a generation. I’ll test something like this as well. I think it’s time I cut a few chunks out and get something started.
Mix Titebond I with water, for 1 coat, then apply black acrylic paint? Or are you saying mix black paint with glue and water in one coat? Or just black paint and carve through it?
Finally getting back to some fun things after a few hectic days. I was referring to two different approaches.
Use the acrylic paint and then carve thru it, then put a poly or some other sealer on it if you want. If you use a strong grain wood (like the oak in your original post) you should still be able to see the grain after painting.
Titebond and water (one part Titebond to 10 parts water). Let it dry and then apply the stain - the glue/water mixture should limit the depth the stain soaks into the wood so that you wouldn’t have to carve too deep into the wood.
There are other options out there instead of glue size, but I haven’t tried them so I can’t speak to their effectiveness or cost.
I tried a few things that haven’t worked. I started with something I could find at home Depot, which is this stain/poly combo. It is supposed to be completely black, but it’s very streaky, so I bailed on that. I have since bought some “India ink” and some black acrylic paint. I will try the samples a few ways. The prestain seemed to actually be the opposite of what I thought I wanted, in that it helped seep further into the wood. It did seem to stop at the first veneer though, so I’m still going to try it again. Having the first veneer perfectly stained would be excellent.
This india ink is cool. The top two are the ink, the bottom section is the acrylic. The acrylic is about 1000x cheaper, but I dont think I need a lot for this printer. I need to see how it lookes when you carve it. This piece has the glue to seal it first. I have some samples without that. The poly samples didnt let the ink seep in.

 . It would probably be the least consistent depth though.
