I am not much of a CAD person. Anyone have free time to make a tool mount 42mm for both burly and primo?
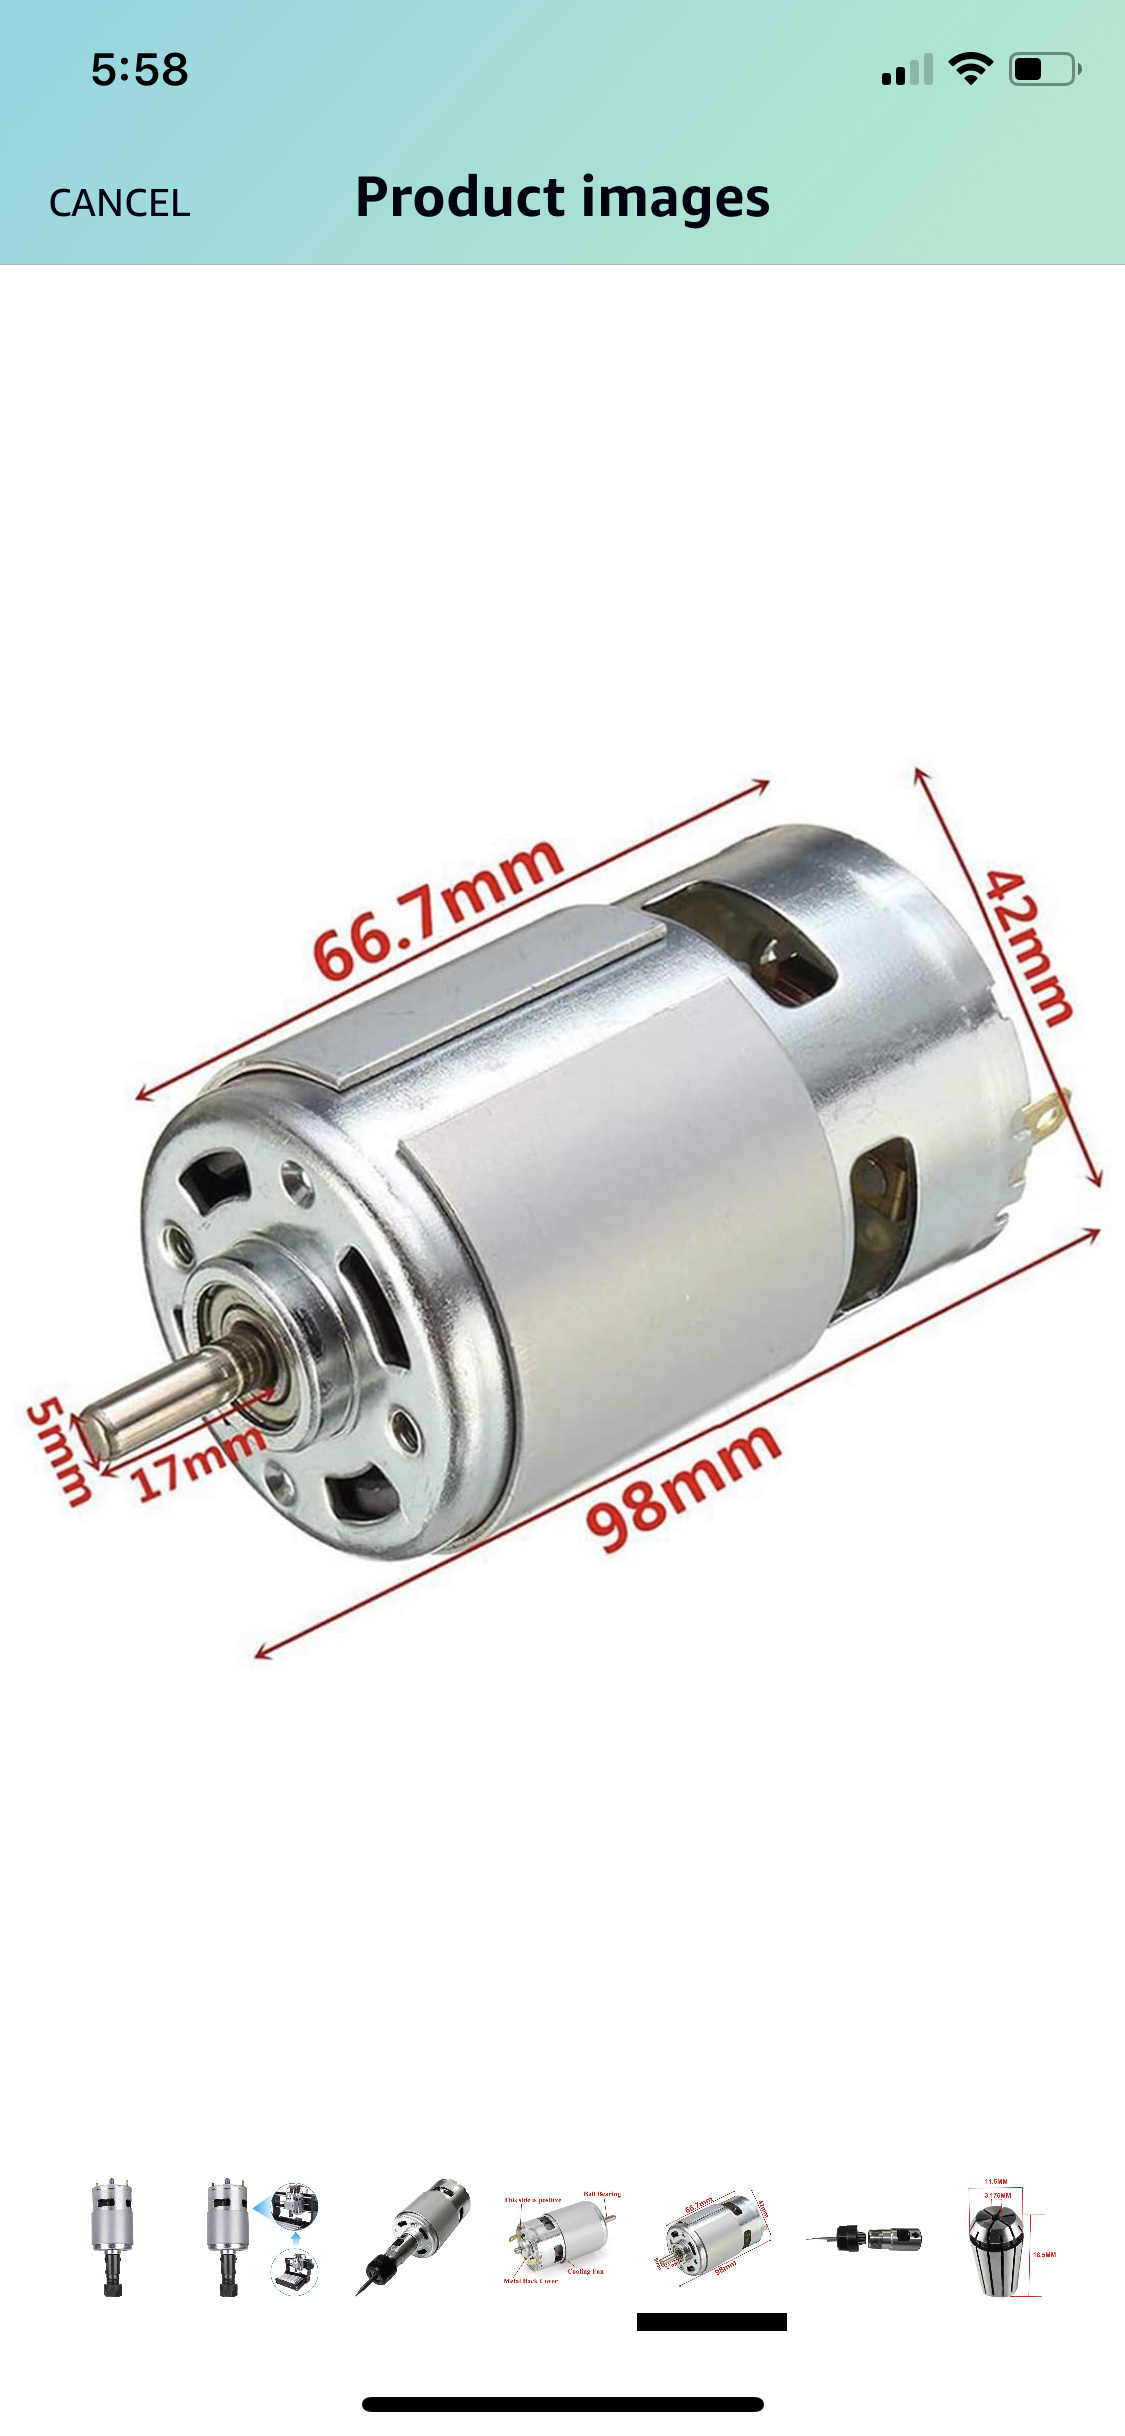
The distance between the mounting holes on the Z tubing is significantly more than the length of the mounting area on this motor. For the Primo, either you will only have two screws holding this motor to the tubing (problematic), or a whole back plate will need to be modeled that spans behind the holes. In other words, you cannot just scale down the mounting solutions that exist for the Primo. On the Burly, this is not a problem since there is a mounting plate that spans between the holes and provides a 5 mounting points on each side at 25mm intervals.
So my suggestion is instead to create only one Burly mount, and then print out and use the Burly tool mounting plate on the Primo. The hole spacing on the tubing is the same between the two designs. You would either have to 1) use the Burly nut traps on the Primo, or 2) bore out the holes and countersink area on the Burly tool mount to use Primo screws. If you bore out the holes, it wouldn’t hurt to add some perimeters when printing the tool mount.
Also if you already have the motor, you might measure it with calipers to make sure it is really 42mm and to provide measurements for other areas of the motor…length of the tool mount area, diameter of the back end etc…
I’m hoping al this makes sense once the machine is together, it’s still only about half built. There is quite a lot of length off the end of the spindle once the er11 collet adapter is installed, could probably have it mounted high enough to span two bolts.
Here is a quickly done and untested Burly mount for a 42mm motor. As mentioned, I’d use the Burly mount plate on the Primo. I placed the closure ‘ears’ forward since the orientation of the spindle vs. the tubing is different between the Primo and the Burly. The holes in the ‘ears’ are sized for #6-32 machine screws, but I did not do a nut trap in case you want to use different sized machine screws. I did not know how hot the motor will run, so I added some air channels. I included the .STEP file in the .ZIP archive in case you need to make changes.
Burly_42mm_Mount.zip (236.6 KB)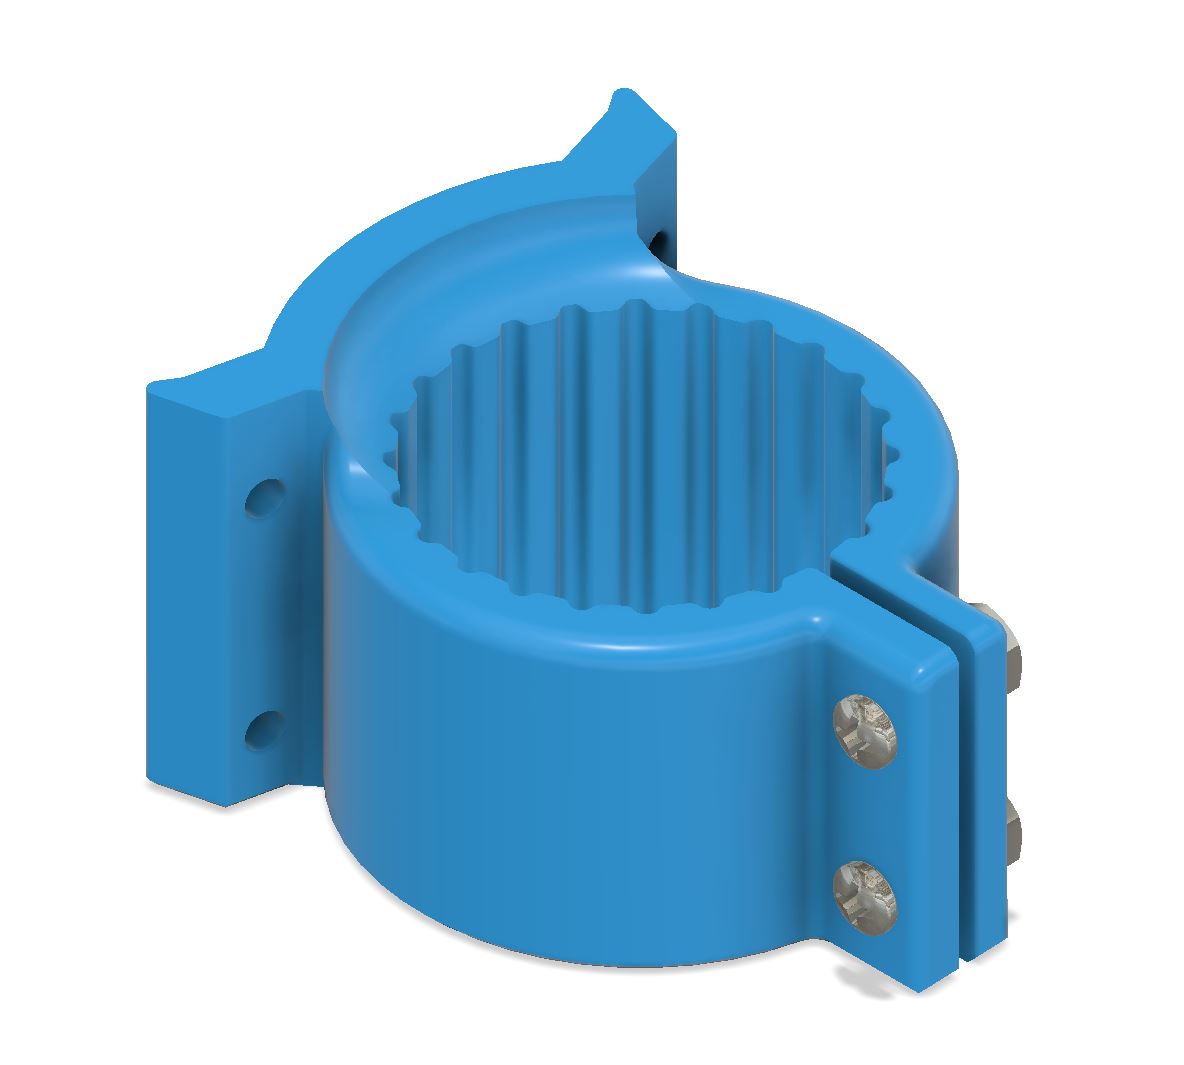
2 Likes
Wow, your awesome, I will report back once I have a chance to use it. Thanks much!!
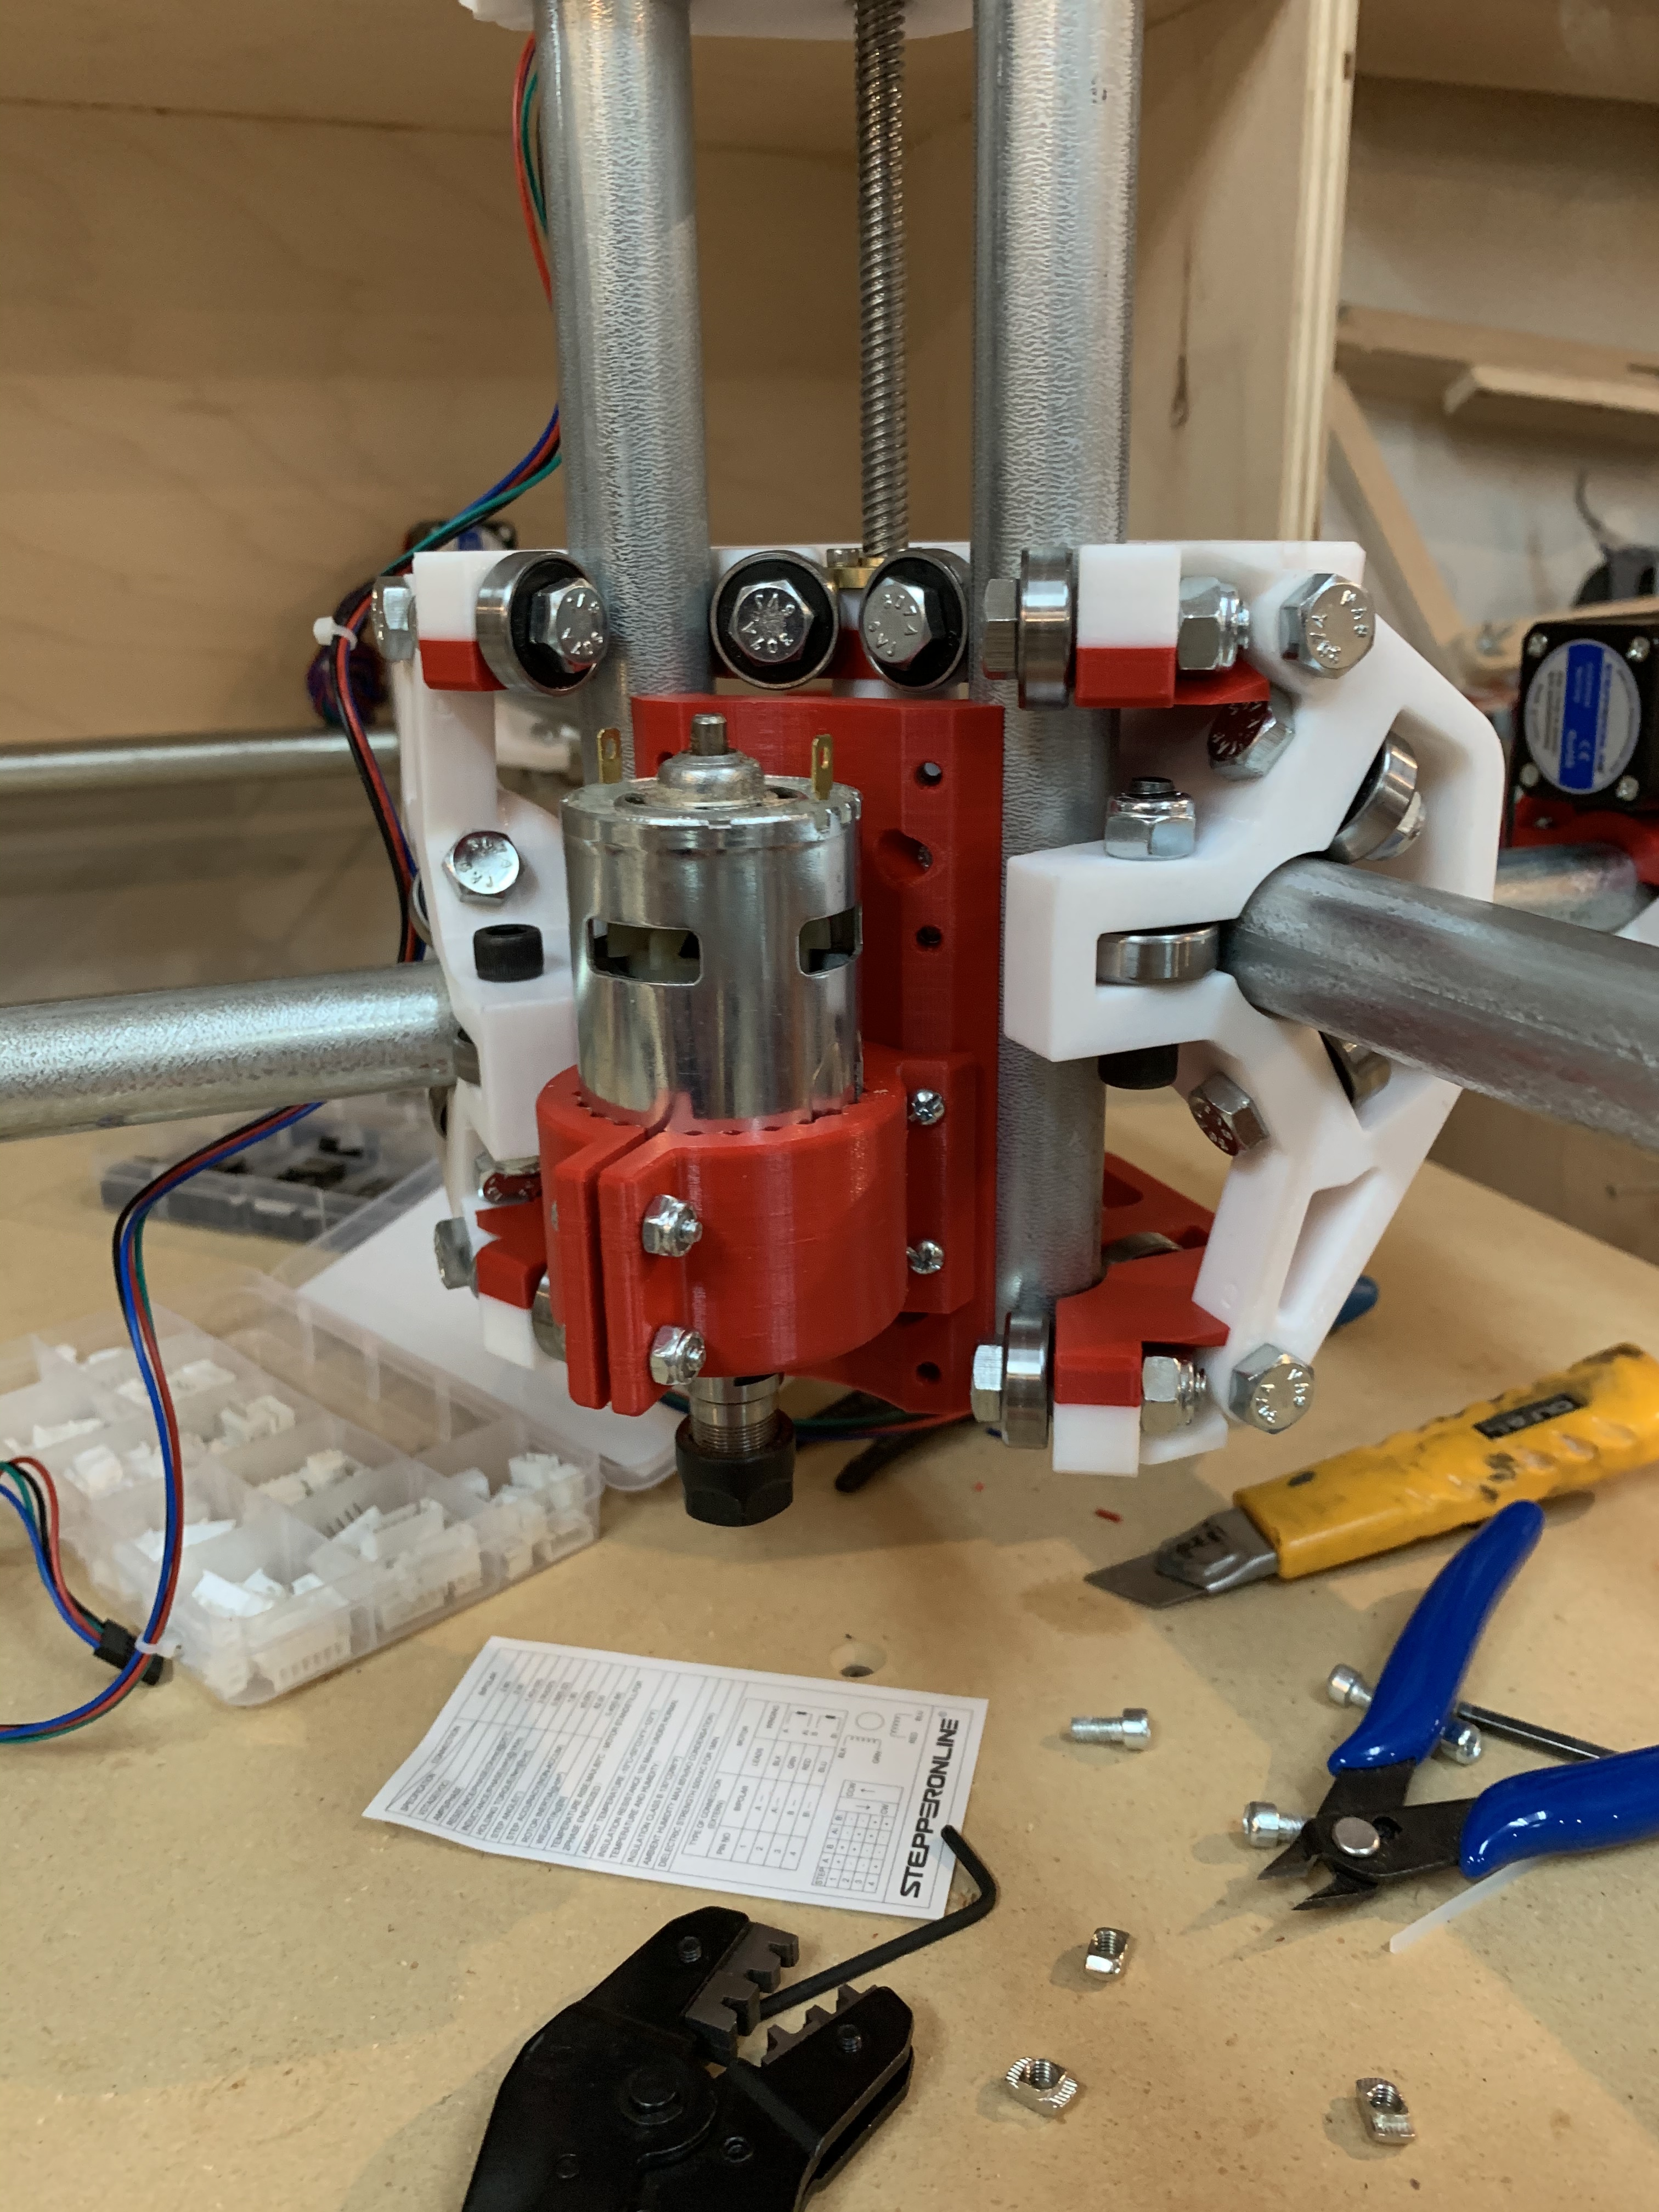
I’m glad it worked first shot. Not knowing your application or having “real” measurements for the motor, I expected it to need some tweaking.
1 Like