Just putting the finishing touches on my Lowrider2
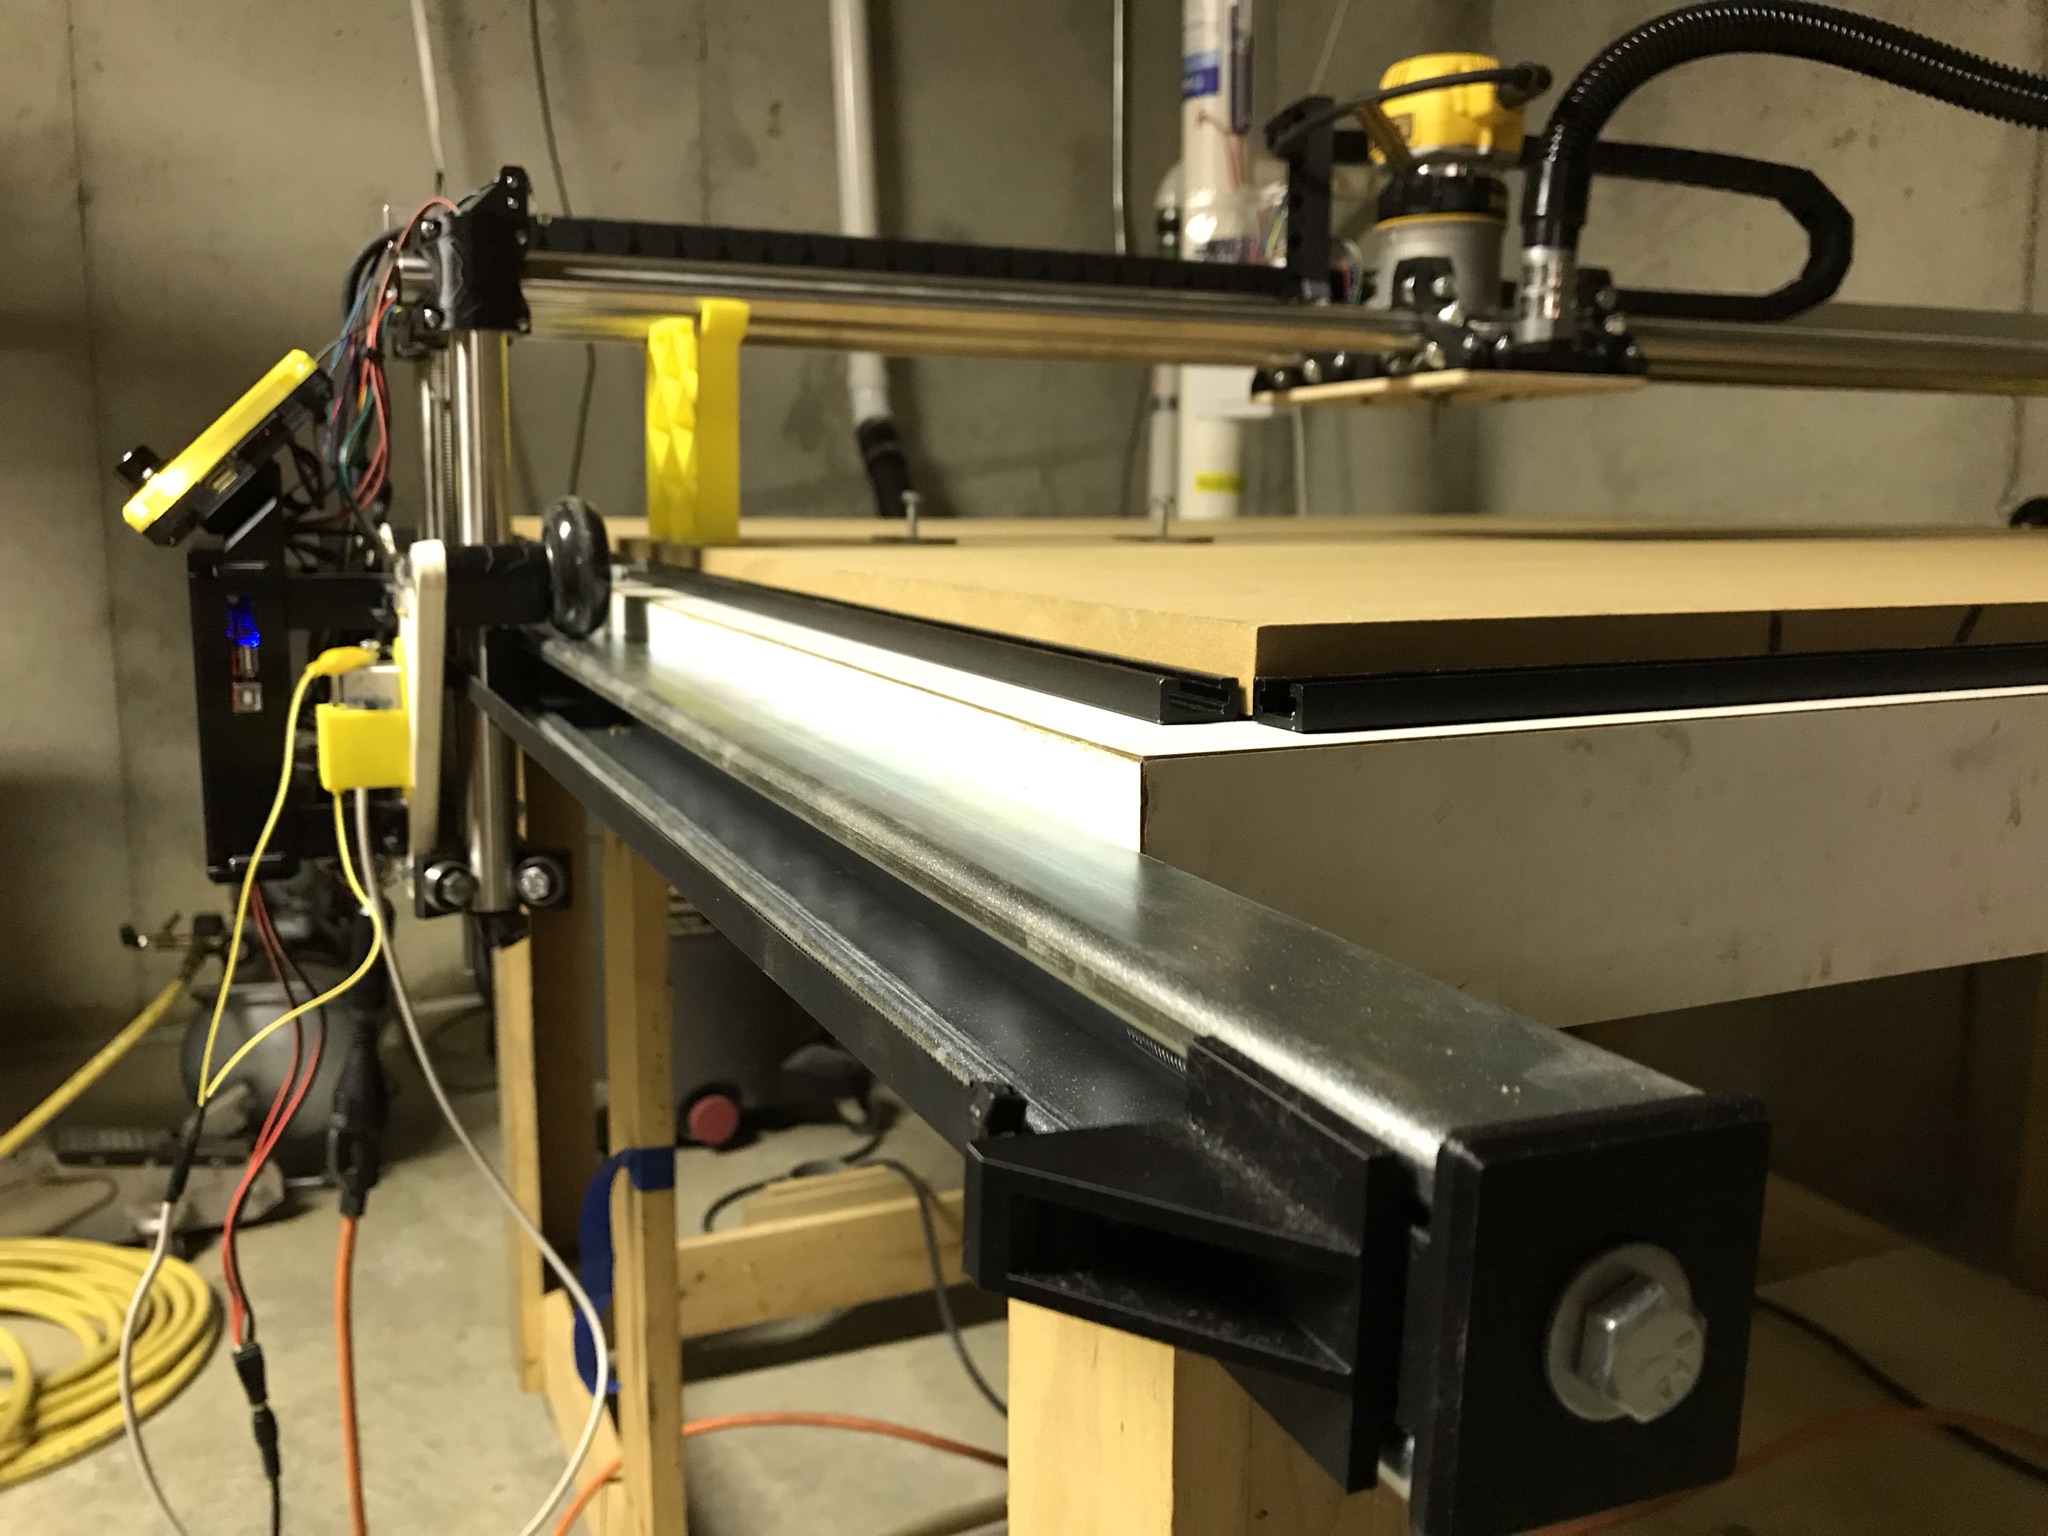
- 50"x47.5" working area
- SKR PRO1.2, 5X 2209 DRIVERS, TFT35 E3 V3

Reused existing table that was 51x51, added SuperStrut rails along sides to give additional travel in Y (now X), which also added an inch or so to X (now Y). Made custom belt holders for the SuperStrut
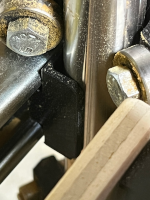
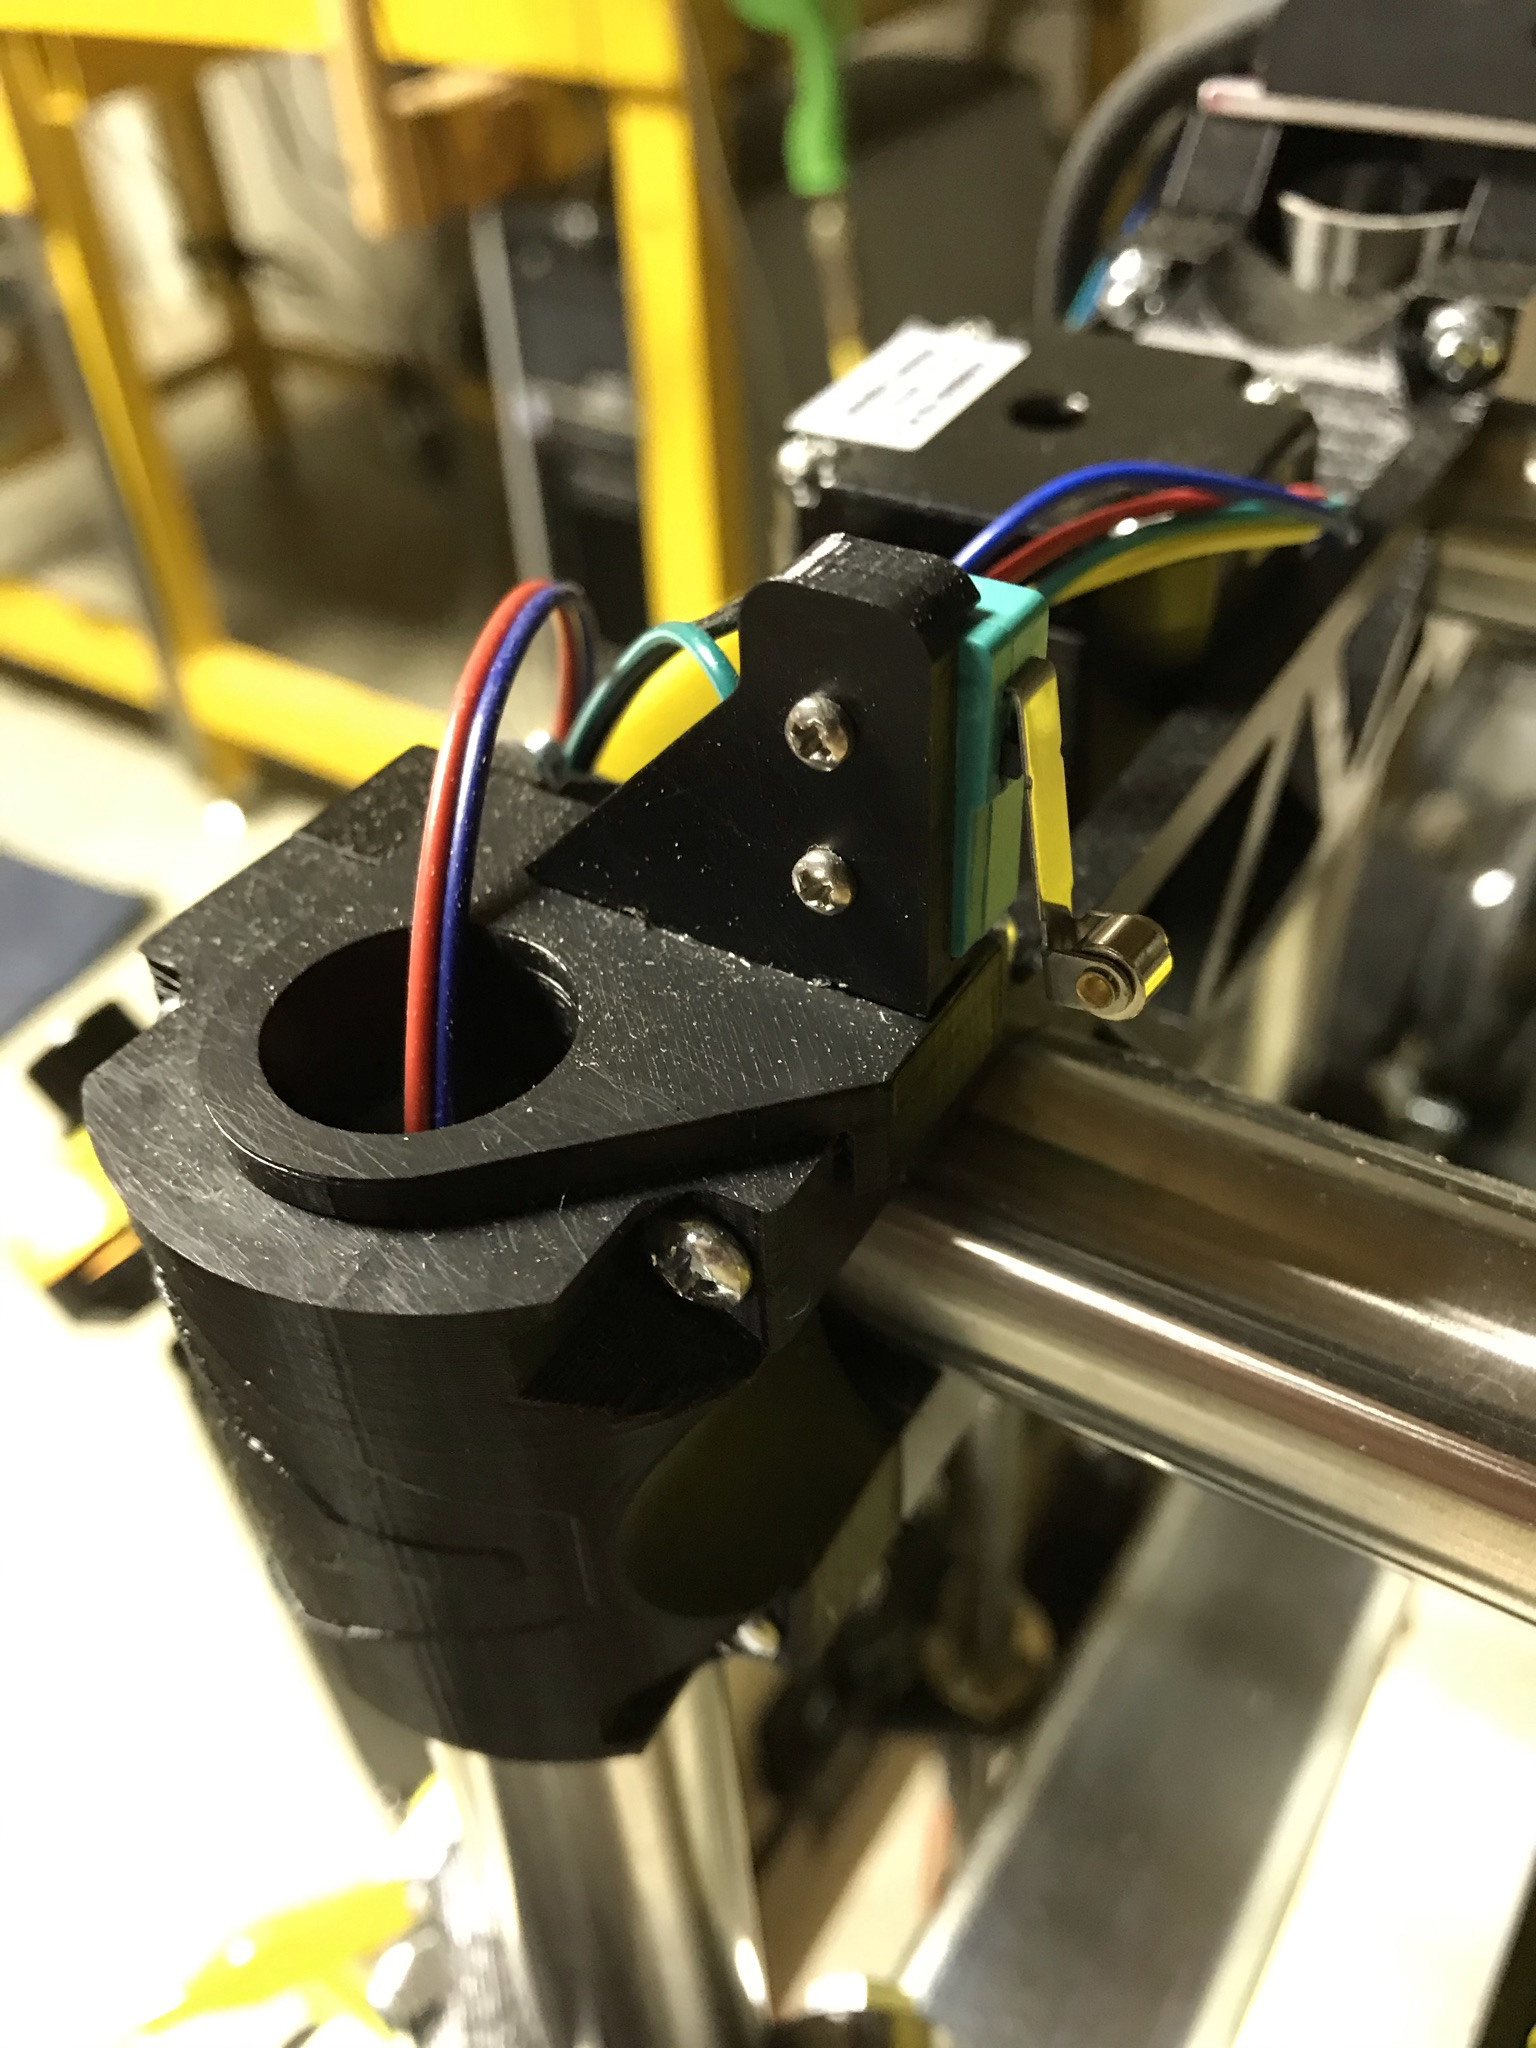
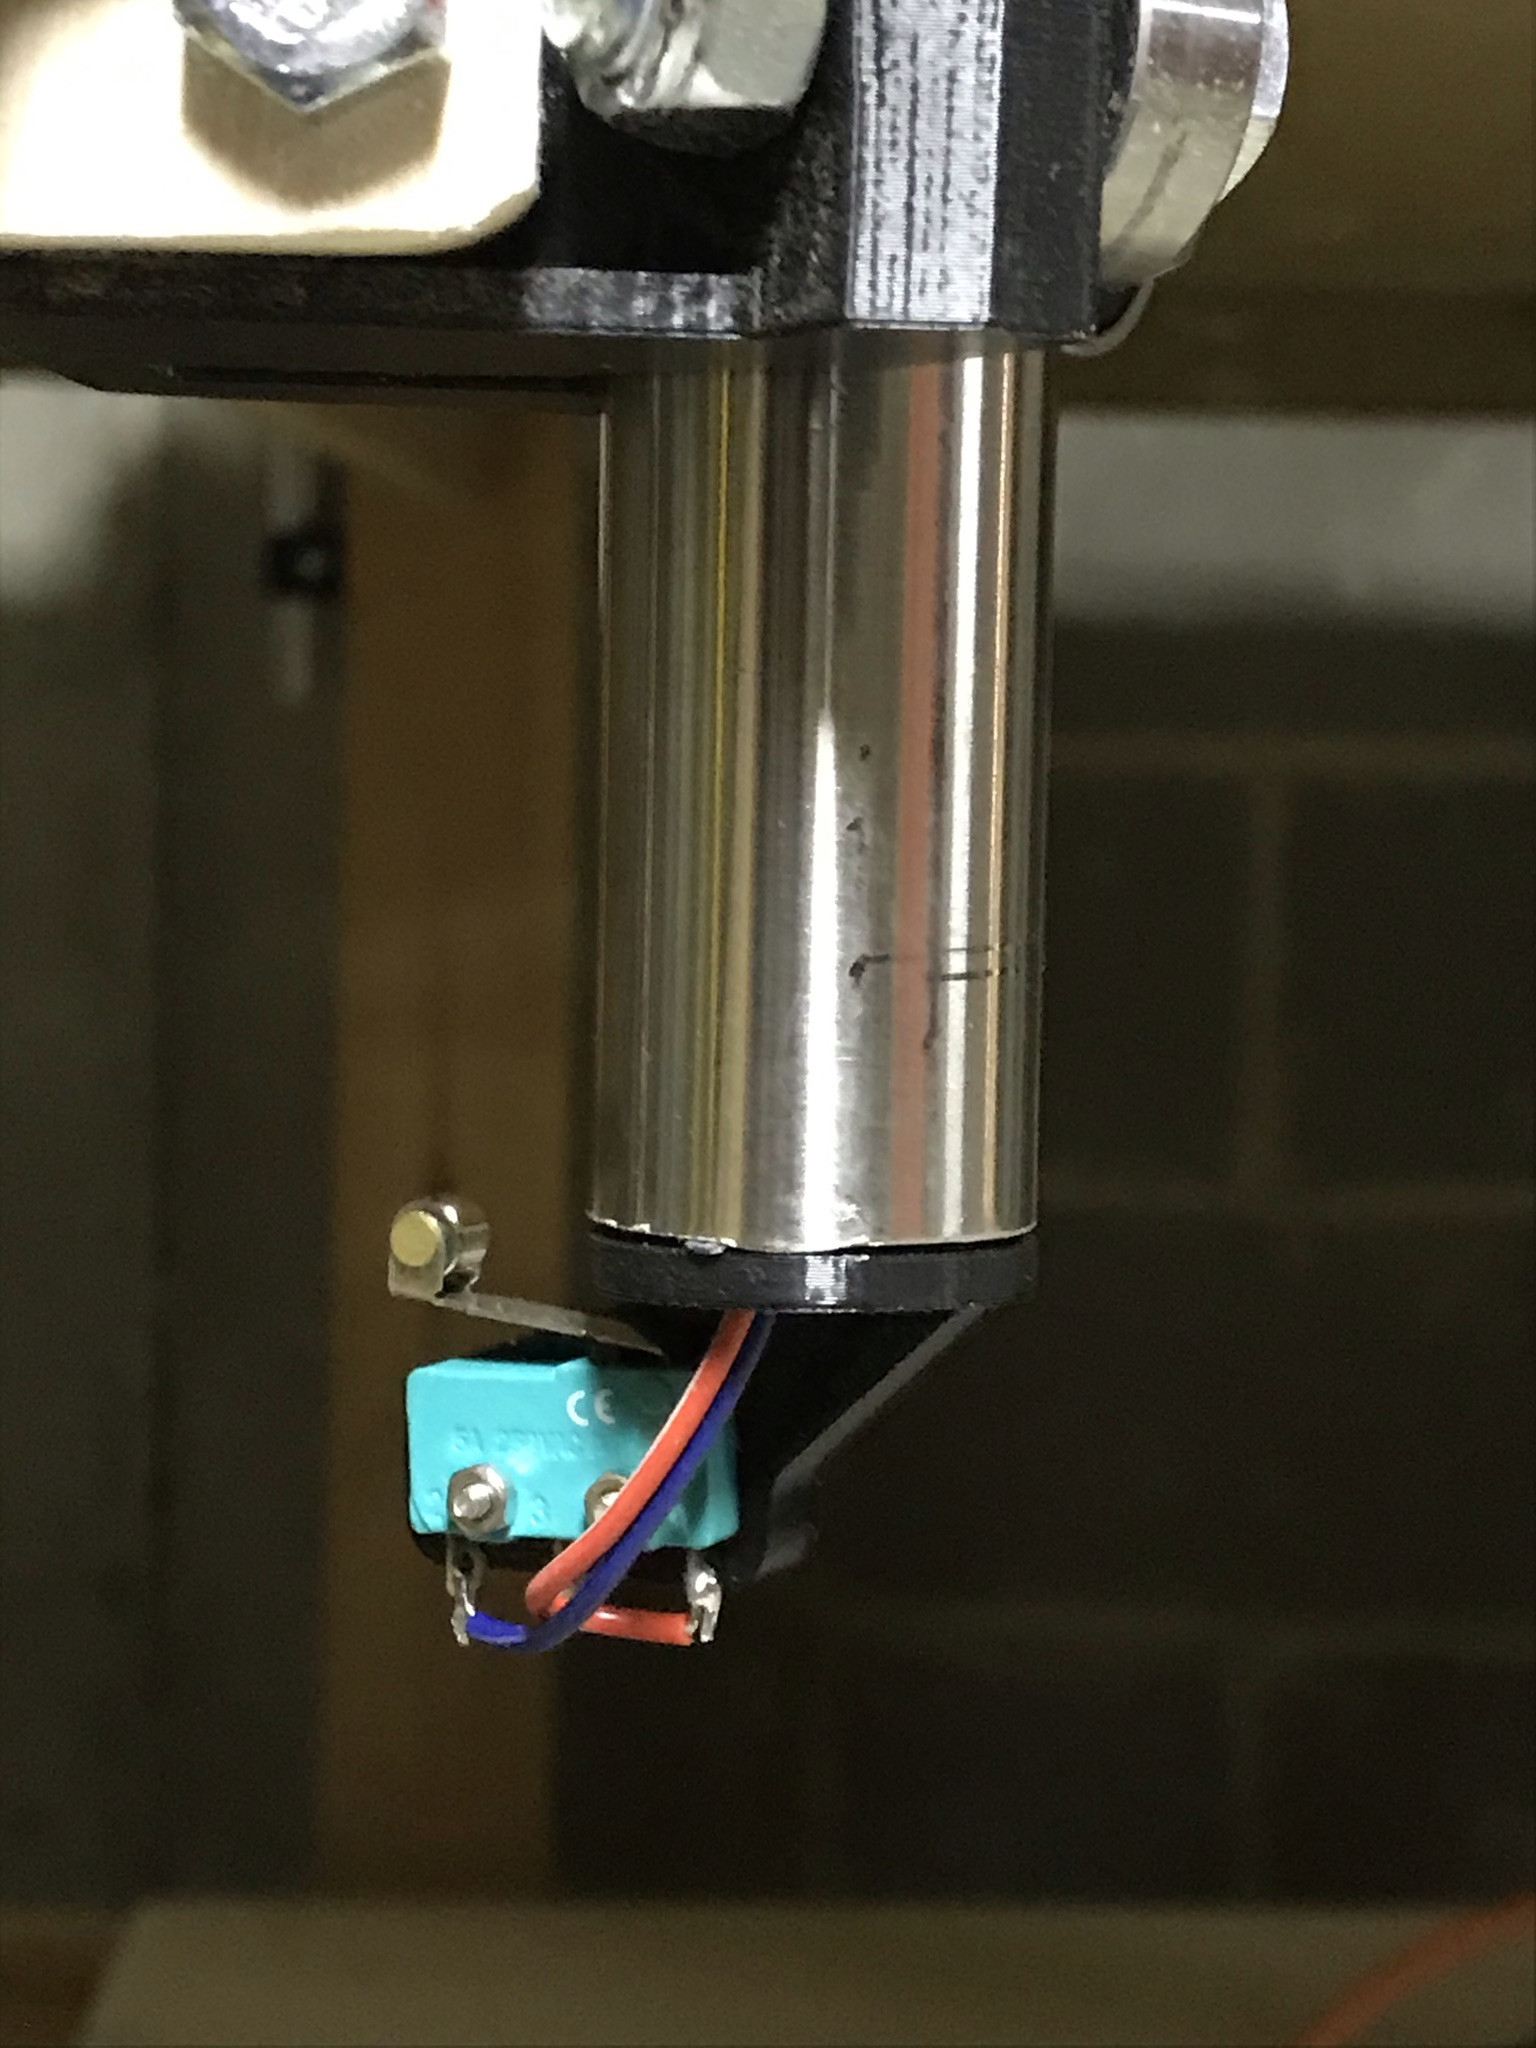
Created home switch holders that press into tubing ends:
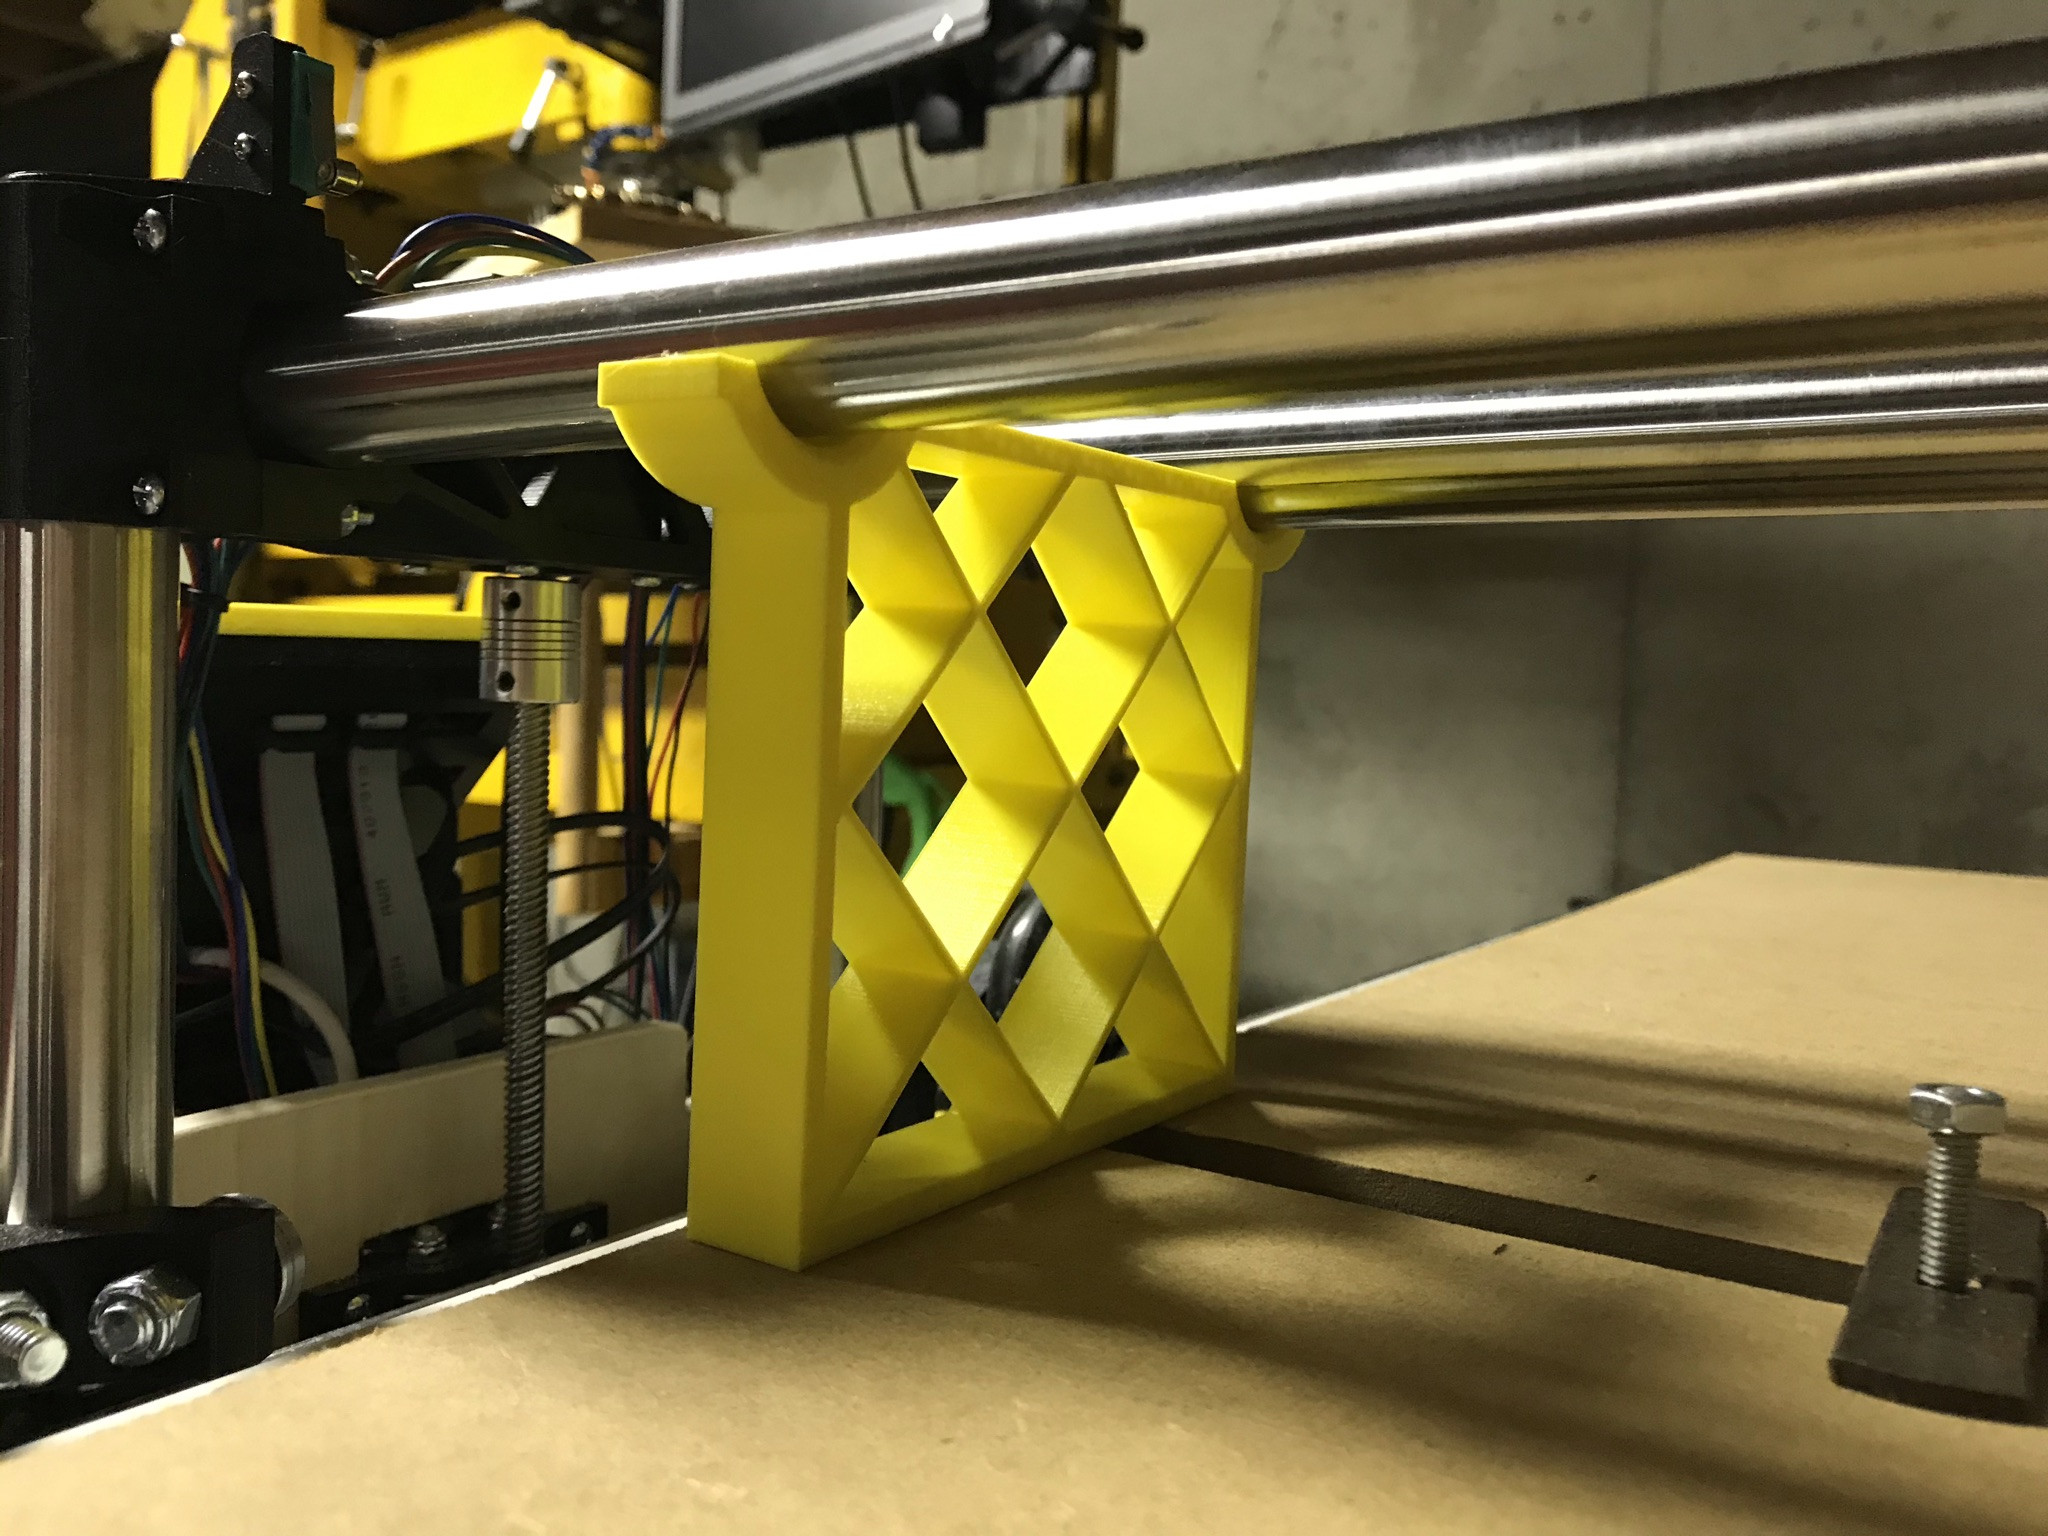
Mounted aluminum angle in flat orientation to accomodate cable chain, created modified X Roller Assembly to attach the cable chain
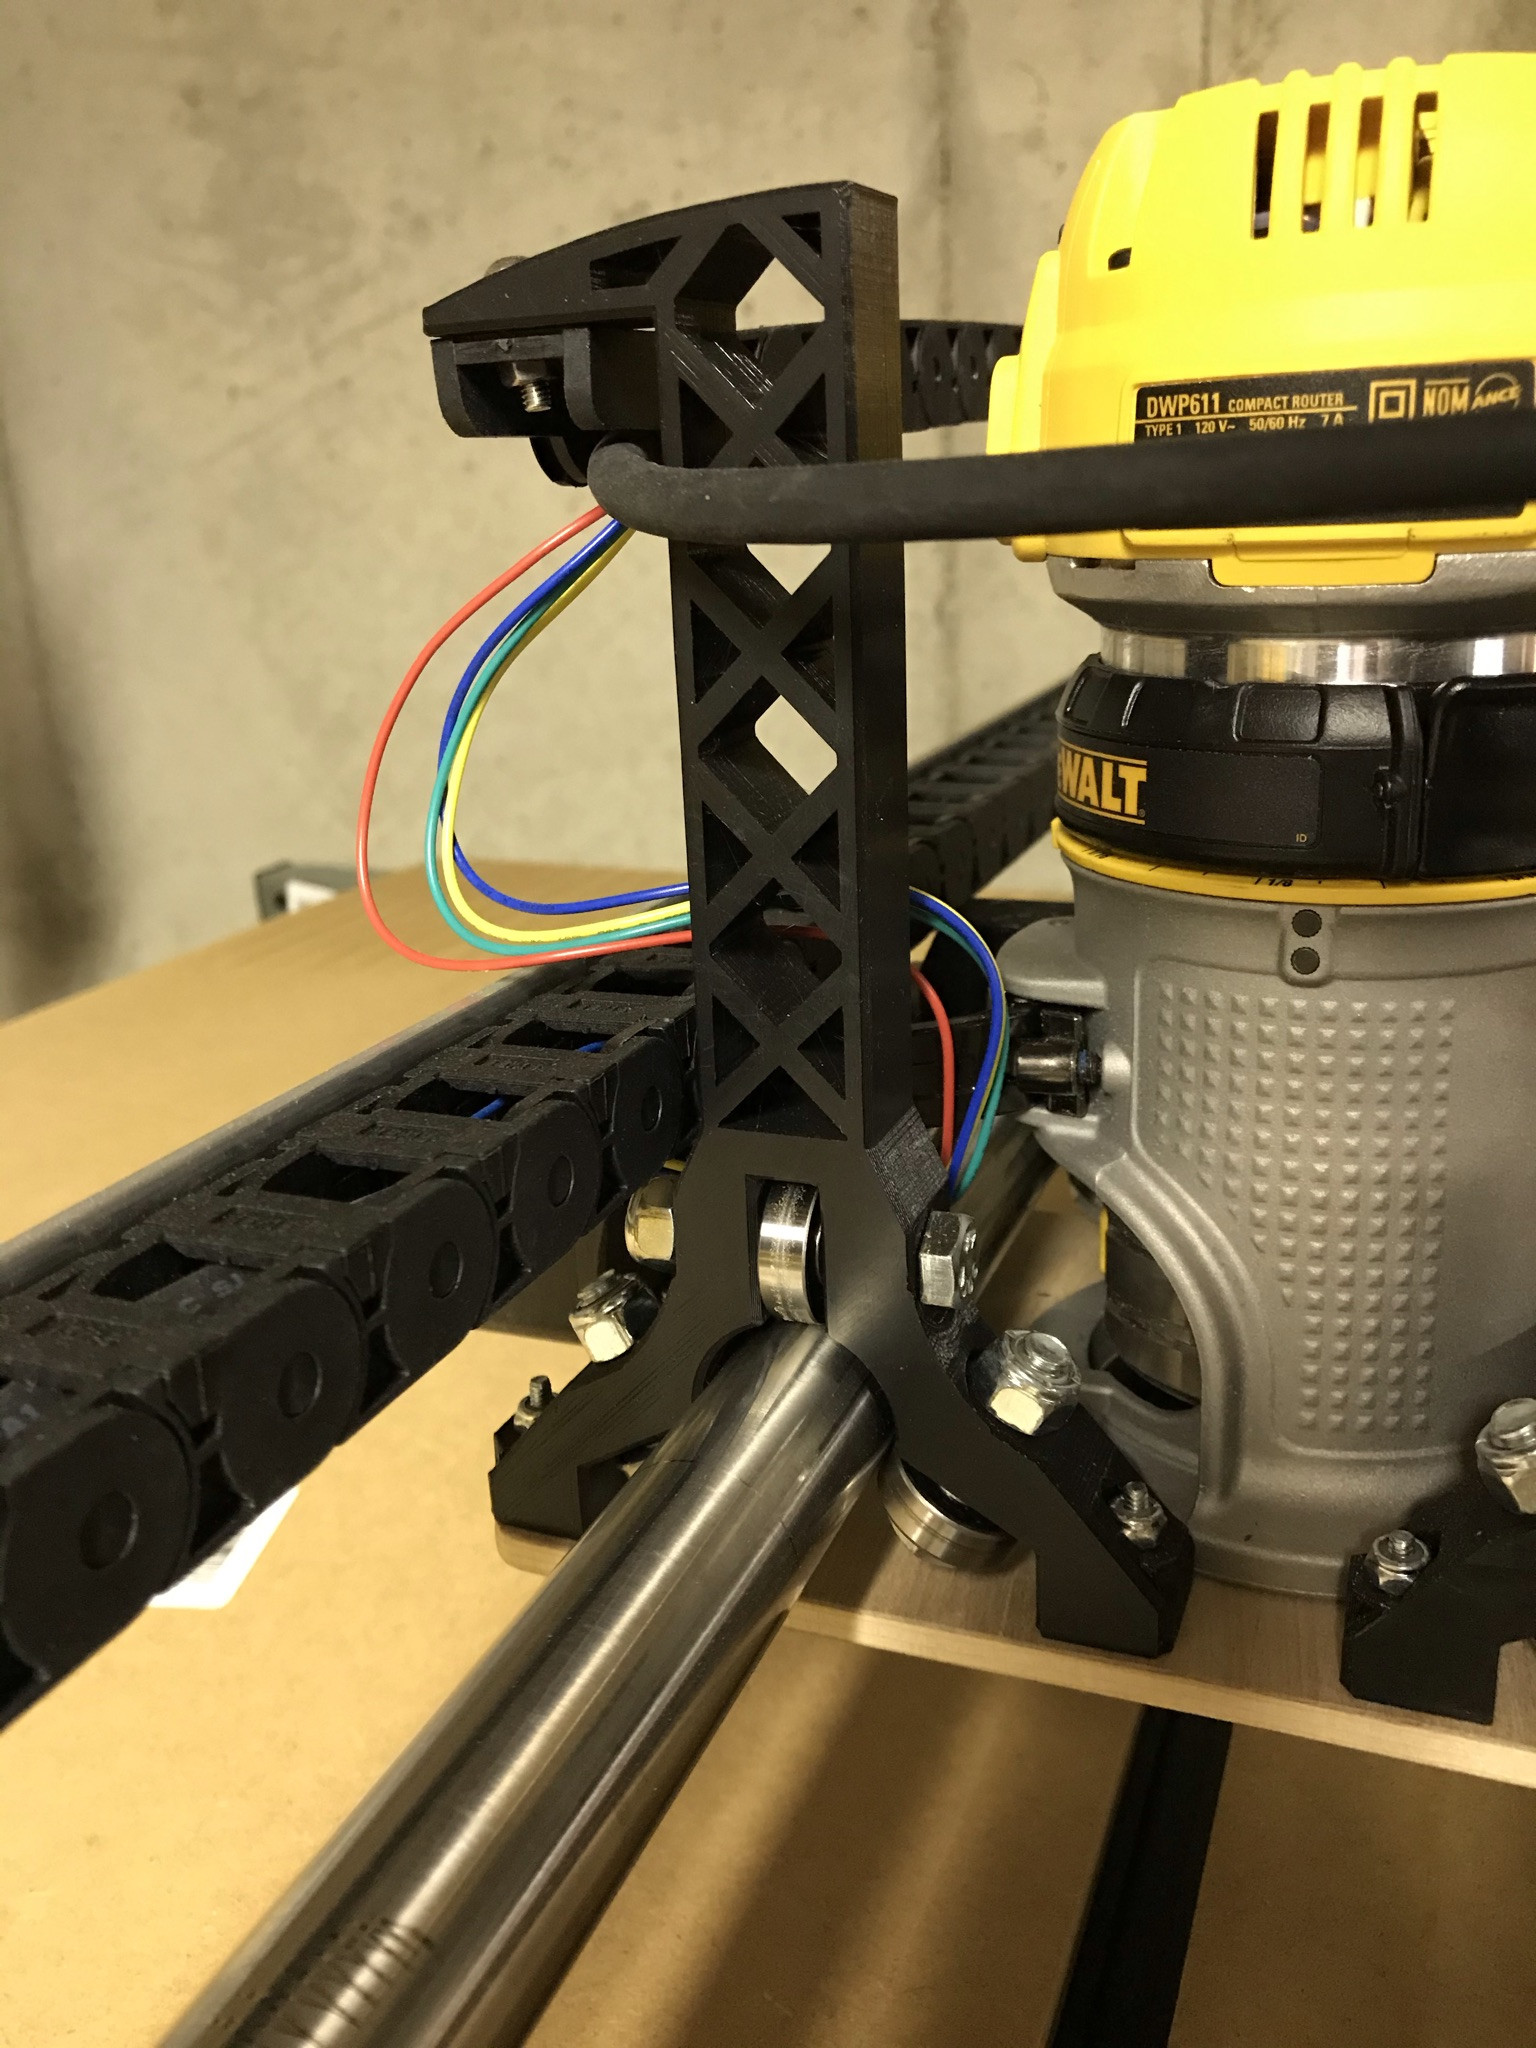
Printed two supports to hold gantry up when power is removed. This lets me keep a tool mounted in the spindle, and prevents torquing the structure by uneven settling.
Limit switches and what they stop:
Xmin = X1 motor
Xmax = X2 motor
Ymin = Y Motor
Ymax = Touch Probe
Zmin = Z2 motor (see note)
Zmax = Z1 motor
Whenever homing is configured for the positive direction, the firmware automatically selects the ‘max’ end stop. My Z homing is in the positive direction so the firmware automatically chooses the Zmax end stop. I therefore configured ZMIN for the second Z motor.
Marlin uses the homing to establish the machine bounds. I also added a touch probe for setting the tool height. The only remaining end stop was Ymax.
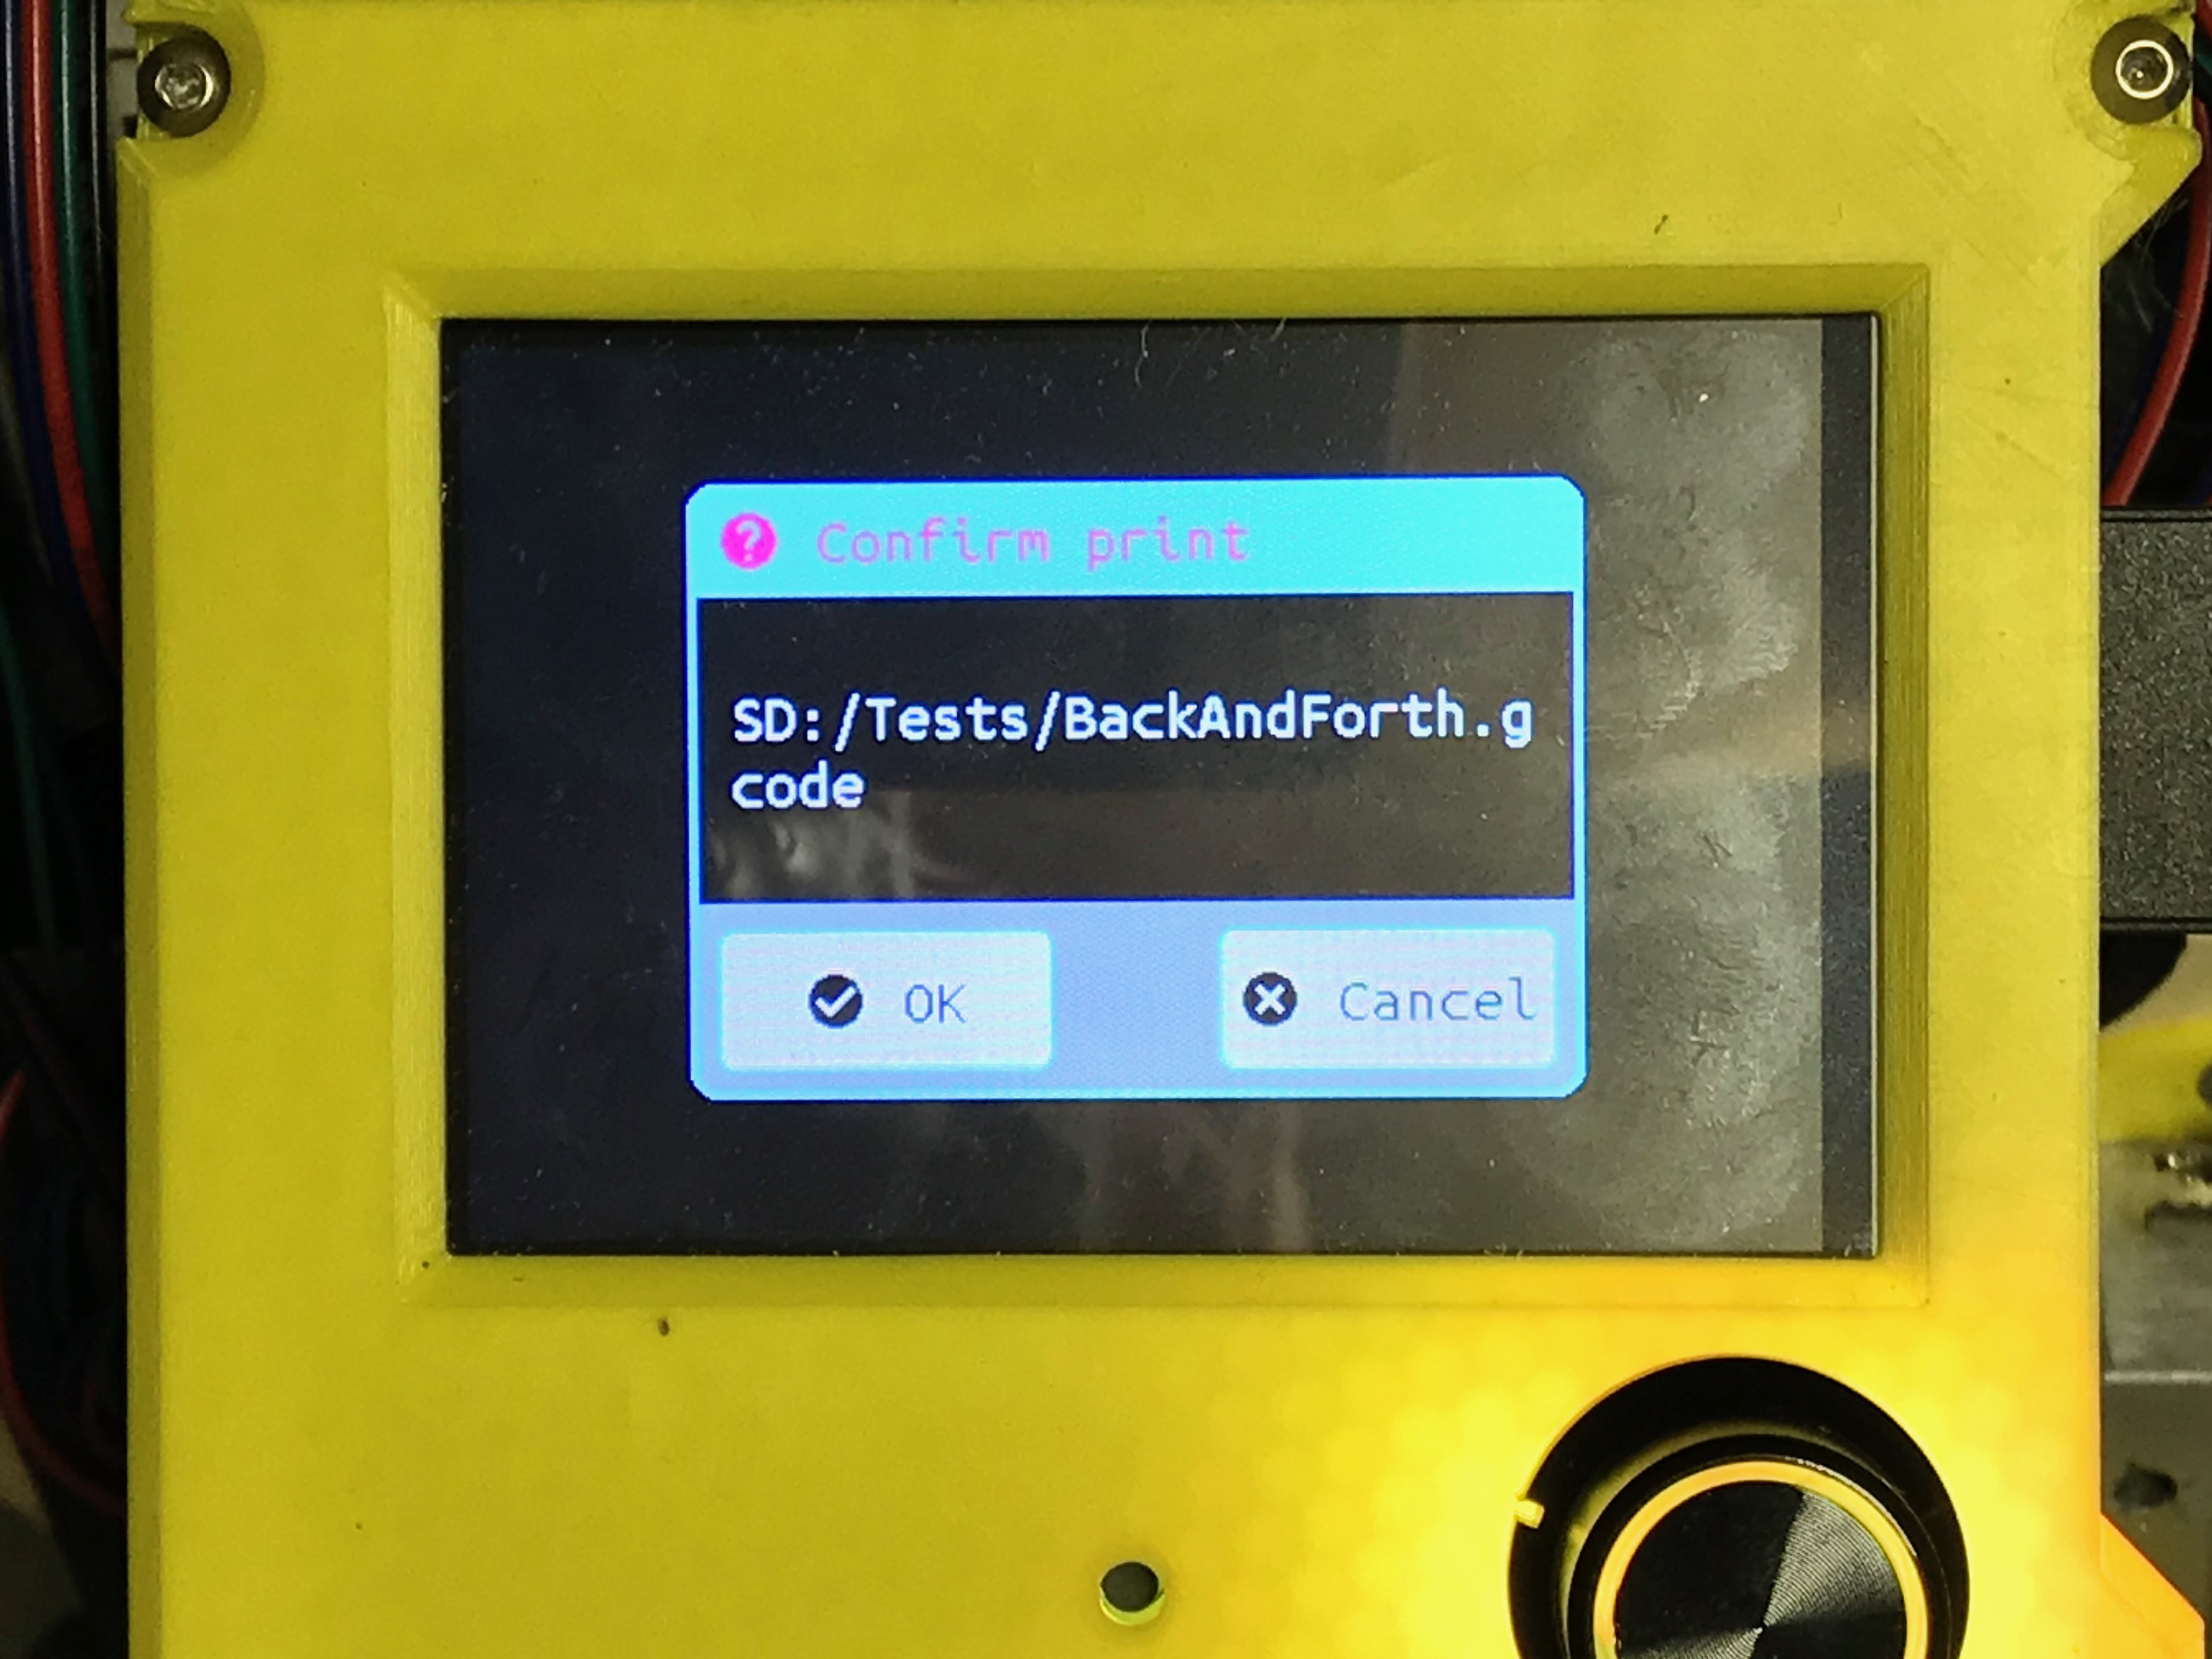
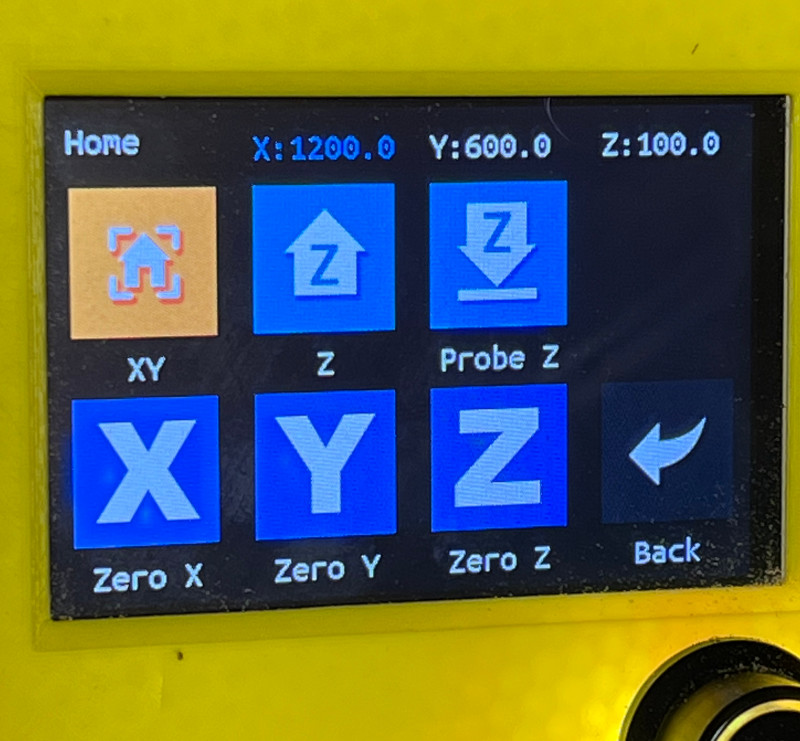
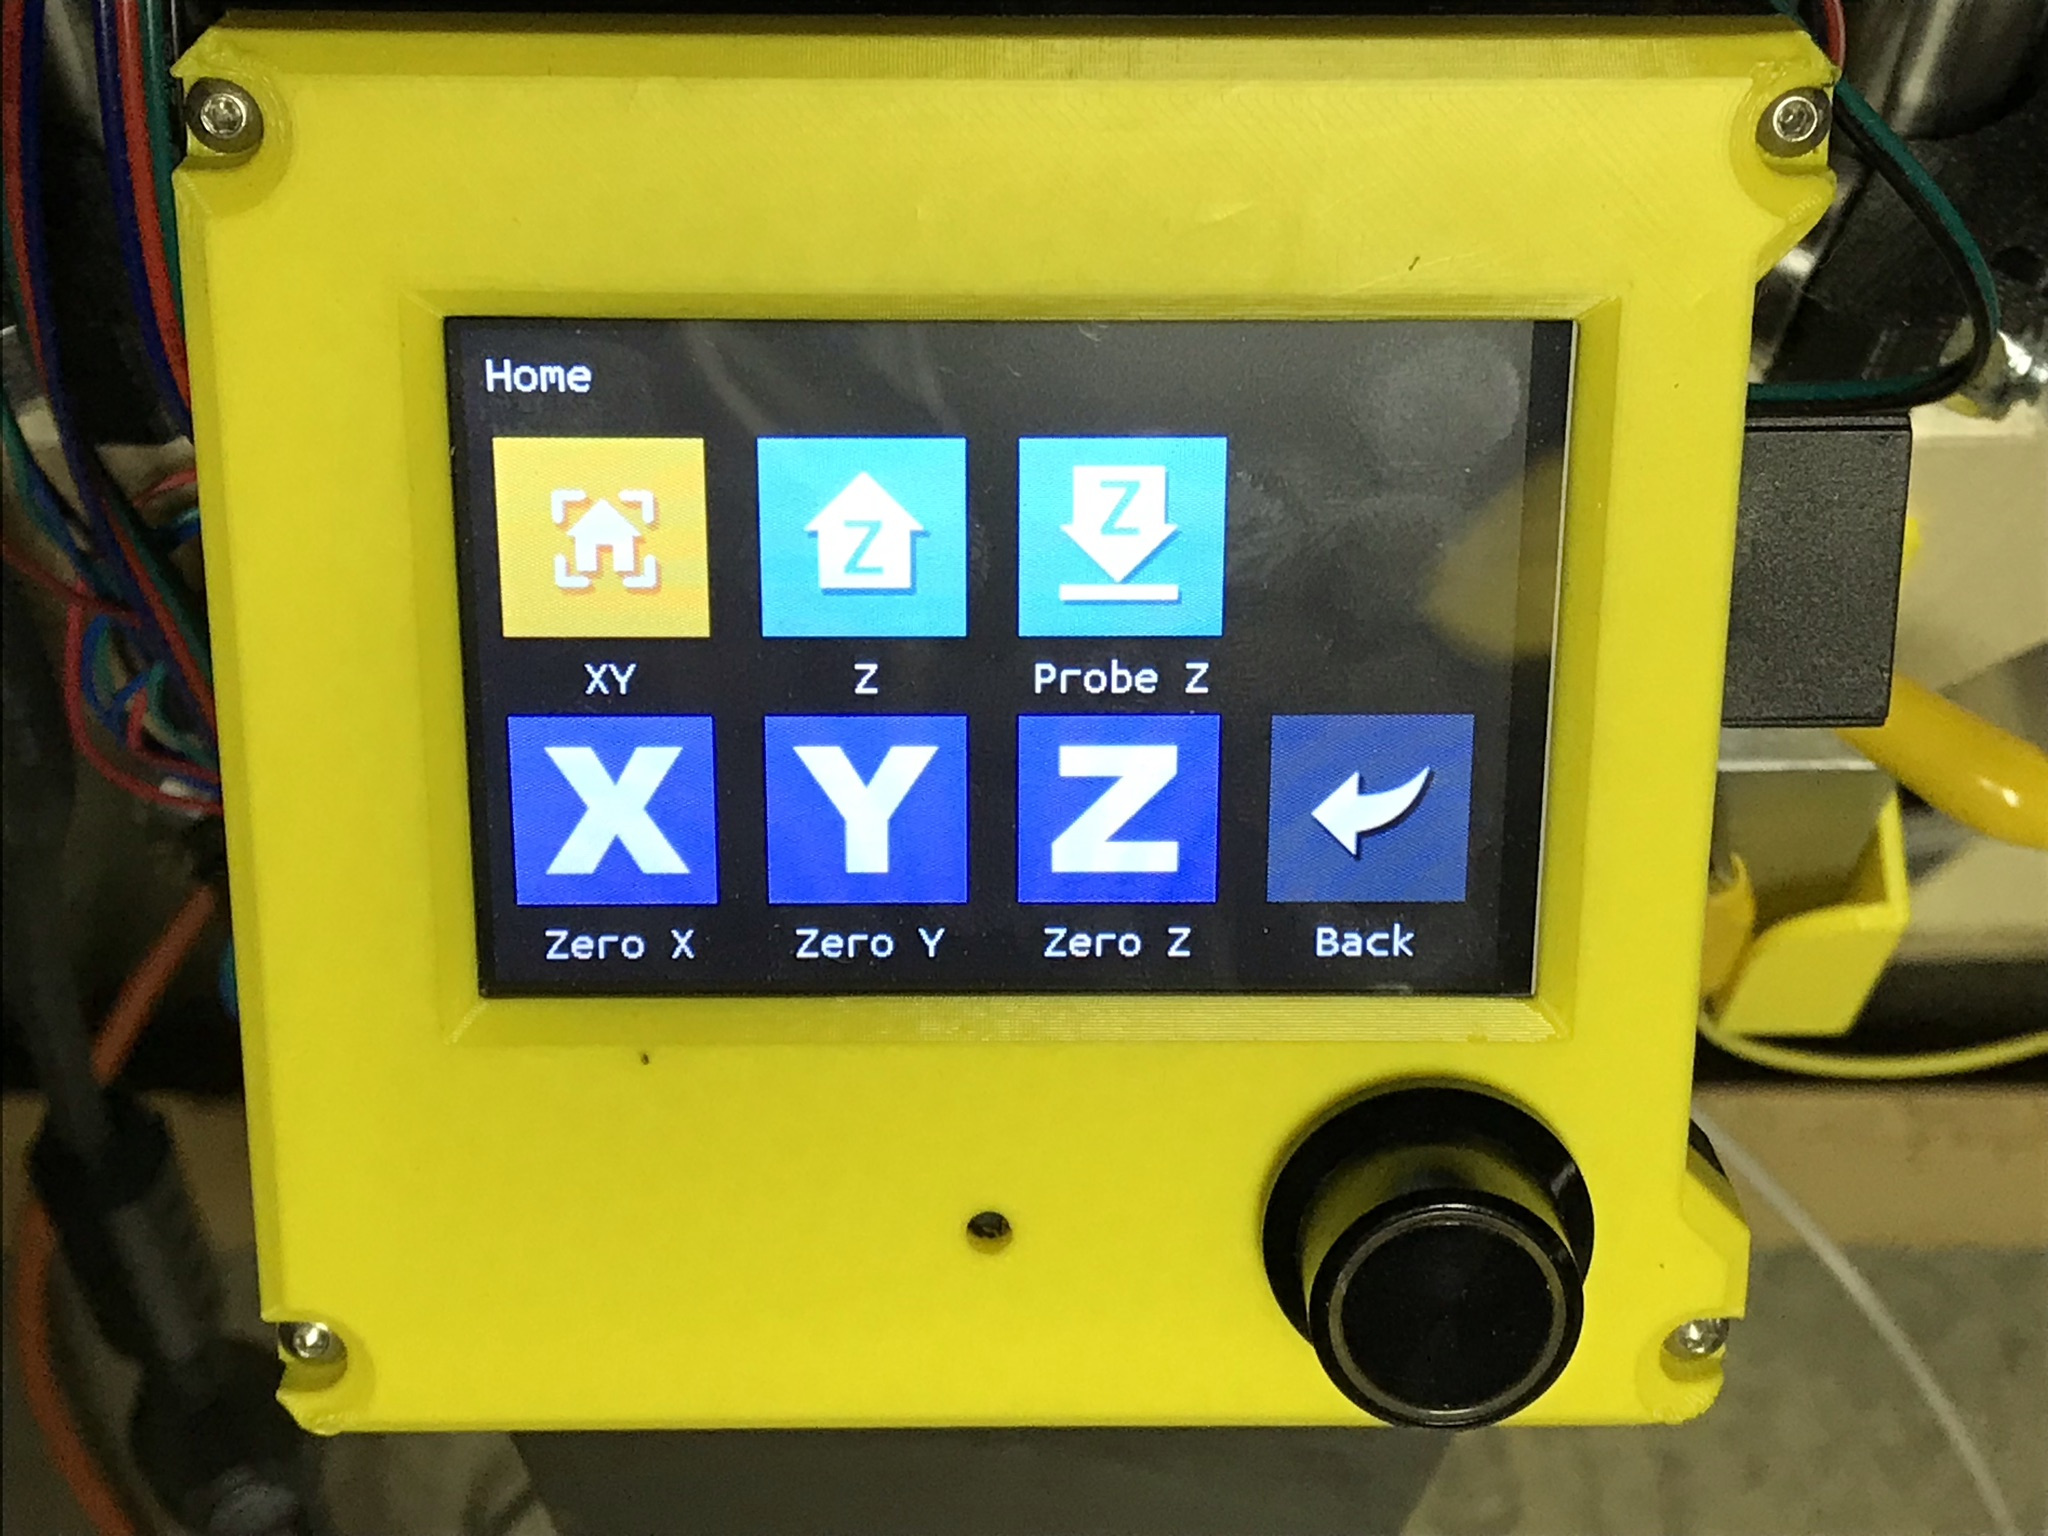
I manually touch off my workpiece before the job using the TFT controls. Thus I added a “Probe Z” button to the home menu:
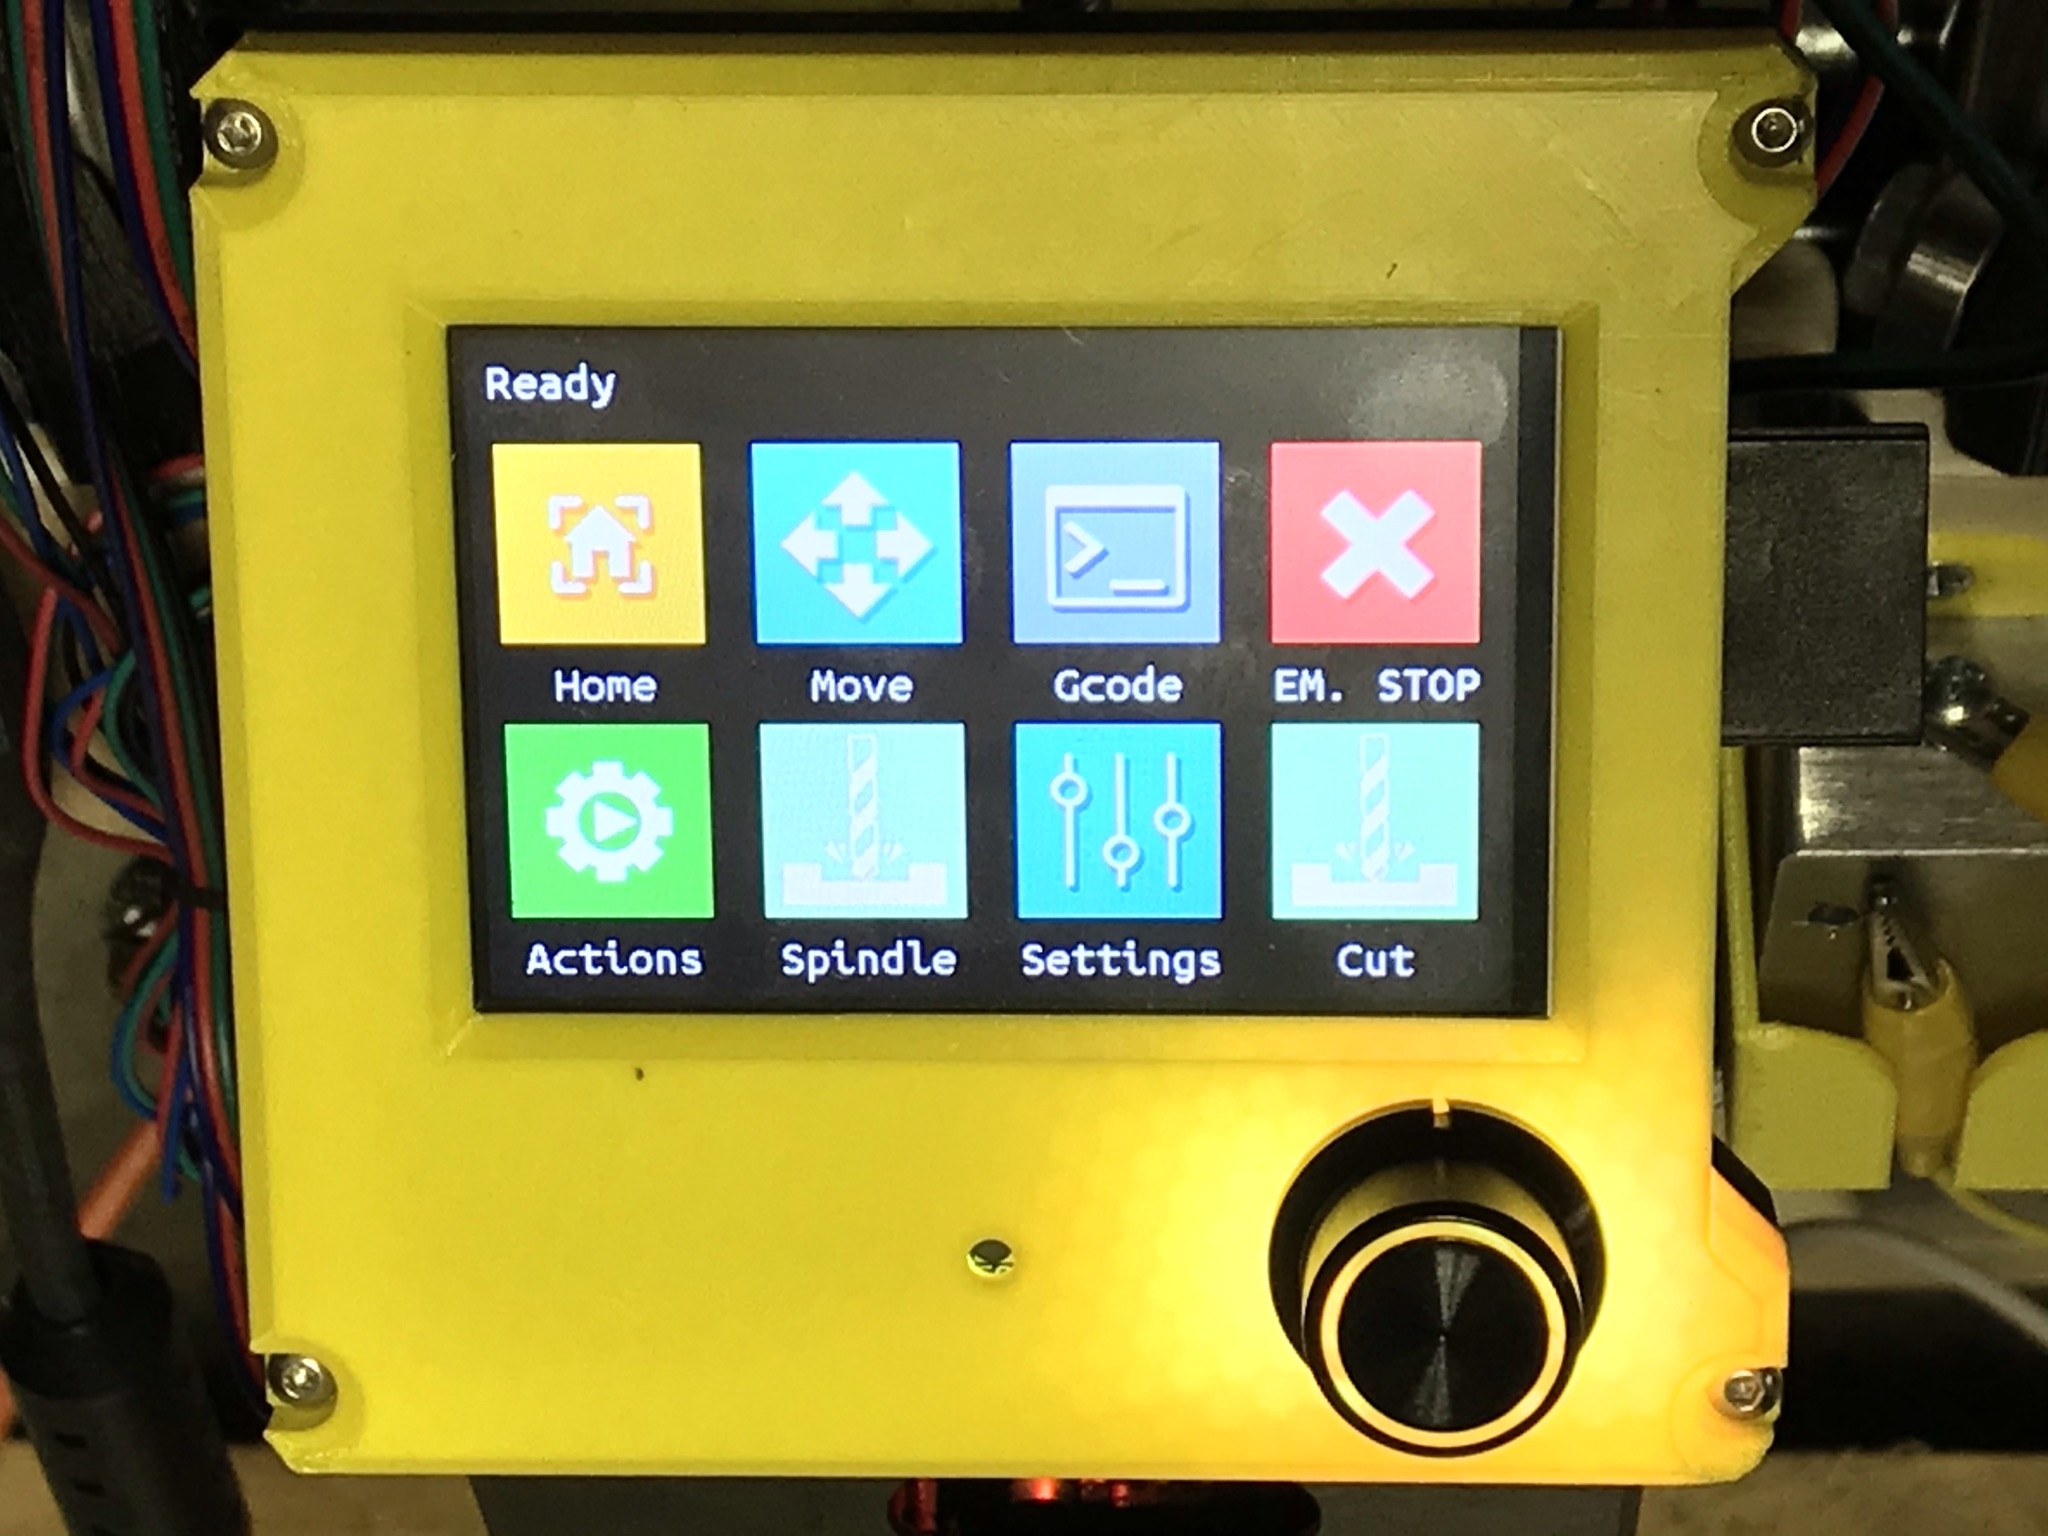
I also want to have the canned ‘custom’ GCODE routines accessible from the main menu, I thought ‘Actions’ was a better name for them:
To create a new button in the TFT firmware, I created an 95x95 pixel BMP and stored it in the TFT35 folder. I added a line to TFT/src/API/icon_list.inc with the base name of the new icon.
To define a new label for the icon, I added the base name in TFT/src/User/API/Language/Language.inc, then added that term to all of the language header files
Once the icon and label are created, they can replace items in the menus.
I put my changes up in a fork on github: