Sorry! I got it already! Thank you alots! Now I’m figuring out how to flash the DLC32 v2.1 with corexy. I’m currently working on a chromebook. The MKS website is a mess. I think I have to change workplace to install it from a proper workstation.
It moves!! I’m just really confused by the FluidNC. I never got the hang of it last time I tried it out. Sometimes the motors just doesnt move. etc etc. Trying out more tomorrow. This is great! I wish I could embed videos here, but I don’t know a quick way to do it.

1 Like
I’m super chuffed to see another one out there in the wild.
Mine is still running on GRBL_Esp32, I’m only getting up the nerve to try it on FluidNC now, since I have another working sample running. Maybe it will play nicer when connected to LightBurn.
So far though, uploading Lightburn code to the SD card and running it from there seems to work great.
2 Likes
I really like it! Thanks a lot for sharing it and for your help! The design is easy to build and adjust, very functional and to the point. My plan was to have a simple corexy that I could use indoors, mostly for plotting. I might also use it for a dedicated laser, time will show.
FluidNC seems super useful, once you get to wrap your head around it. Still don’t fully understand it. I miss my cncjs!!
I was going to figure out a stepper based pen lift, because I really don’t like the creaky servos. But I realize now that it might be too heavy to push around. Maybe a solenoid setup could be fun! I’ll see what materialize.
1 Like
I have a half-finished design for that core based on a 9g servo that was supposed to hold either a pen or the drag knife, but I never completed the design. I think I got as far as modeling the servo mount and left it.
Come to think of it though, I have a 3D printed linear actuator design that was supposed to be 30mm square. My test model is kind of power hungry, I think that I need more turns of wire for it to work and have less power draw…
Edit: Nope. not gonna finish that when stuff like this is available so cheap…
1 Like
Fluidnc should act almost the same as grbl to cncjs. Have you tried connecting to it directly with cncjs over usb?
1 Like
I have, but there are some connectivity issues. FluidNC on MKS DLC v2.1 seems a little troubled, but I’ve got hopes.
I’ve been trying to model a mount based in the middle of the carriage. Modelling is complicated stuff! Especially when you’re not sure about the mechanics. I’ve skipped the solenoid approach. The interwebs is saying that keeping a solenoid powered on for a long time (either both pull or push) is not good. So I’m back to the servo. But I don’t know whether to use rails with linear bearings, plates, or just sliding thin metal rails in the plastic. Many options! Phew!
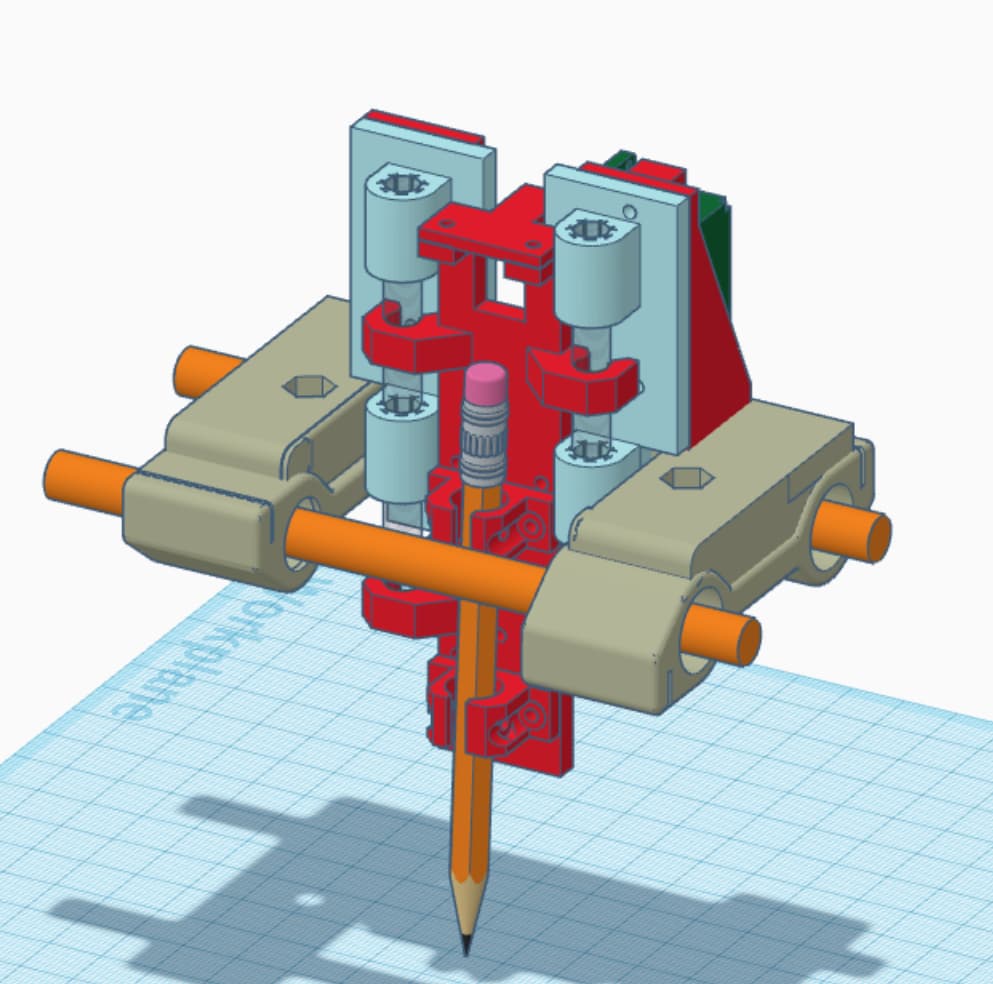
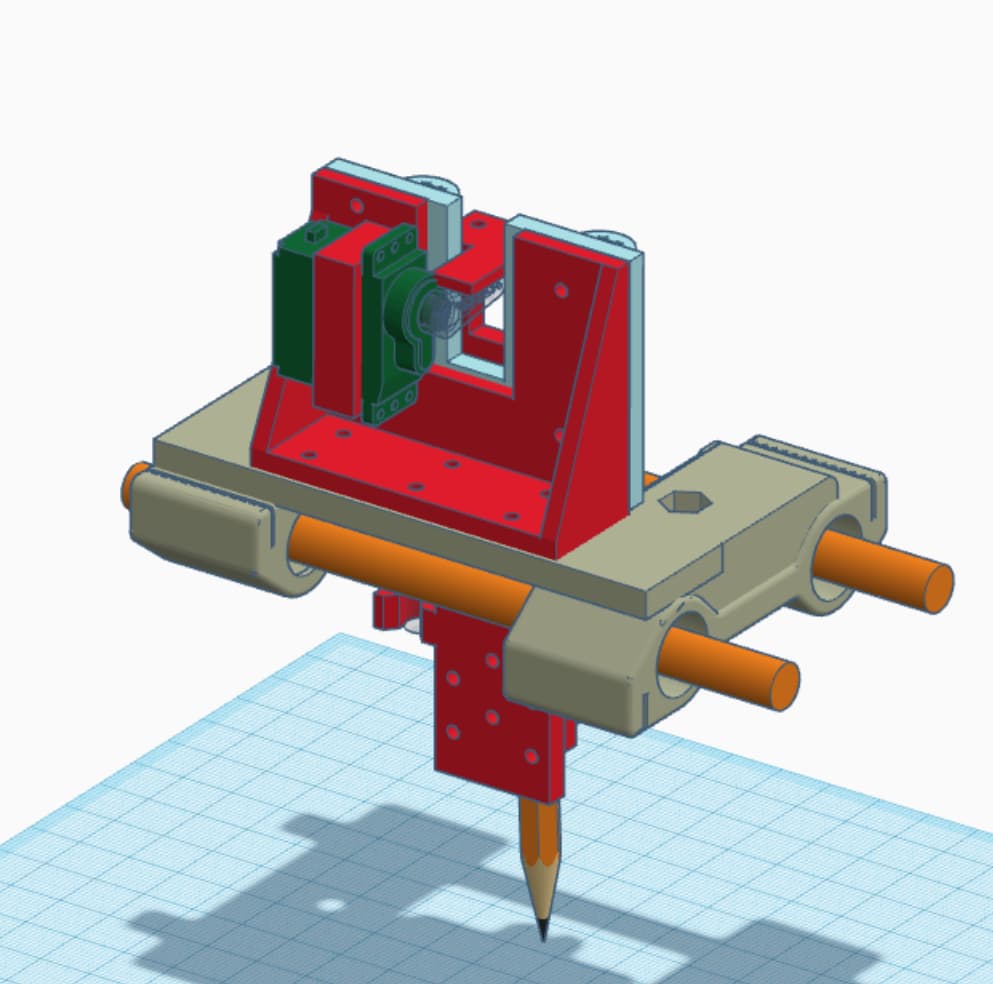
Hi again Dan! 3d modelling is complicated! I take my hat of to all of you guys. I’ve never tried to make something that both moves, should be precise and take up little estate at the same time. Here is my current lifter model. Printing now to see how it works.
1 Like
That looks great! If the pen holder is spring loaded downwards, and lifted against the spring by the servo, it handles things excellently.
Maybe I need to build another one of these as a plotter…
1 Like
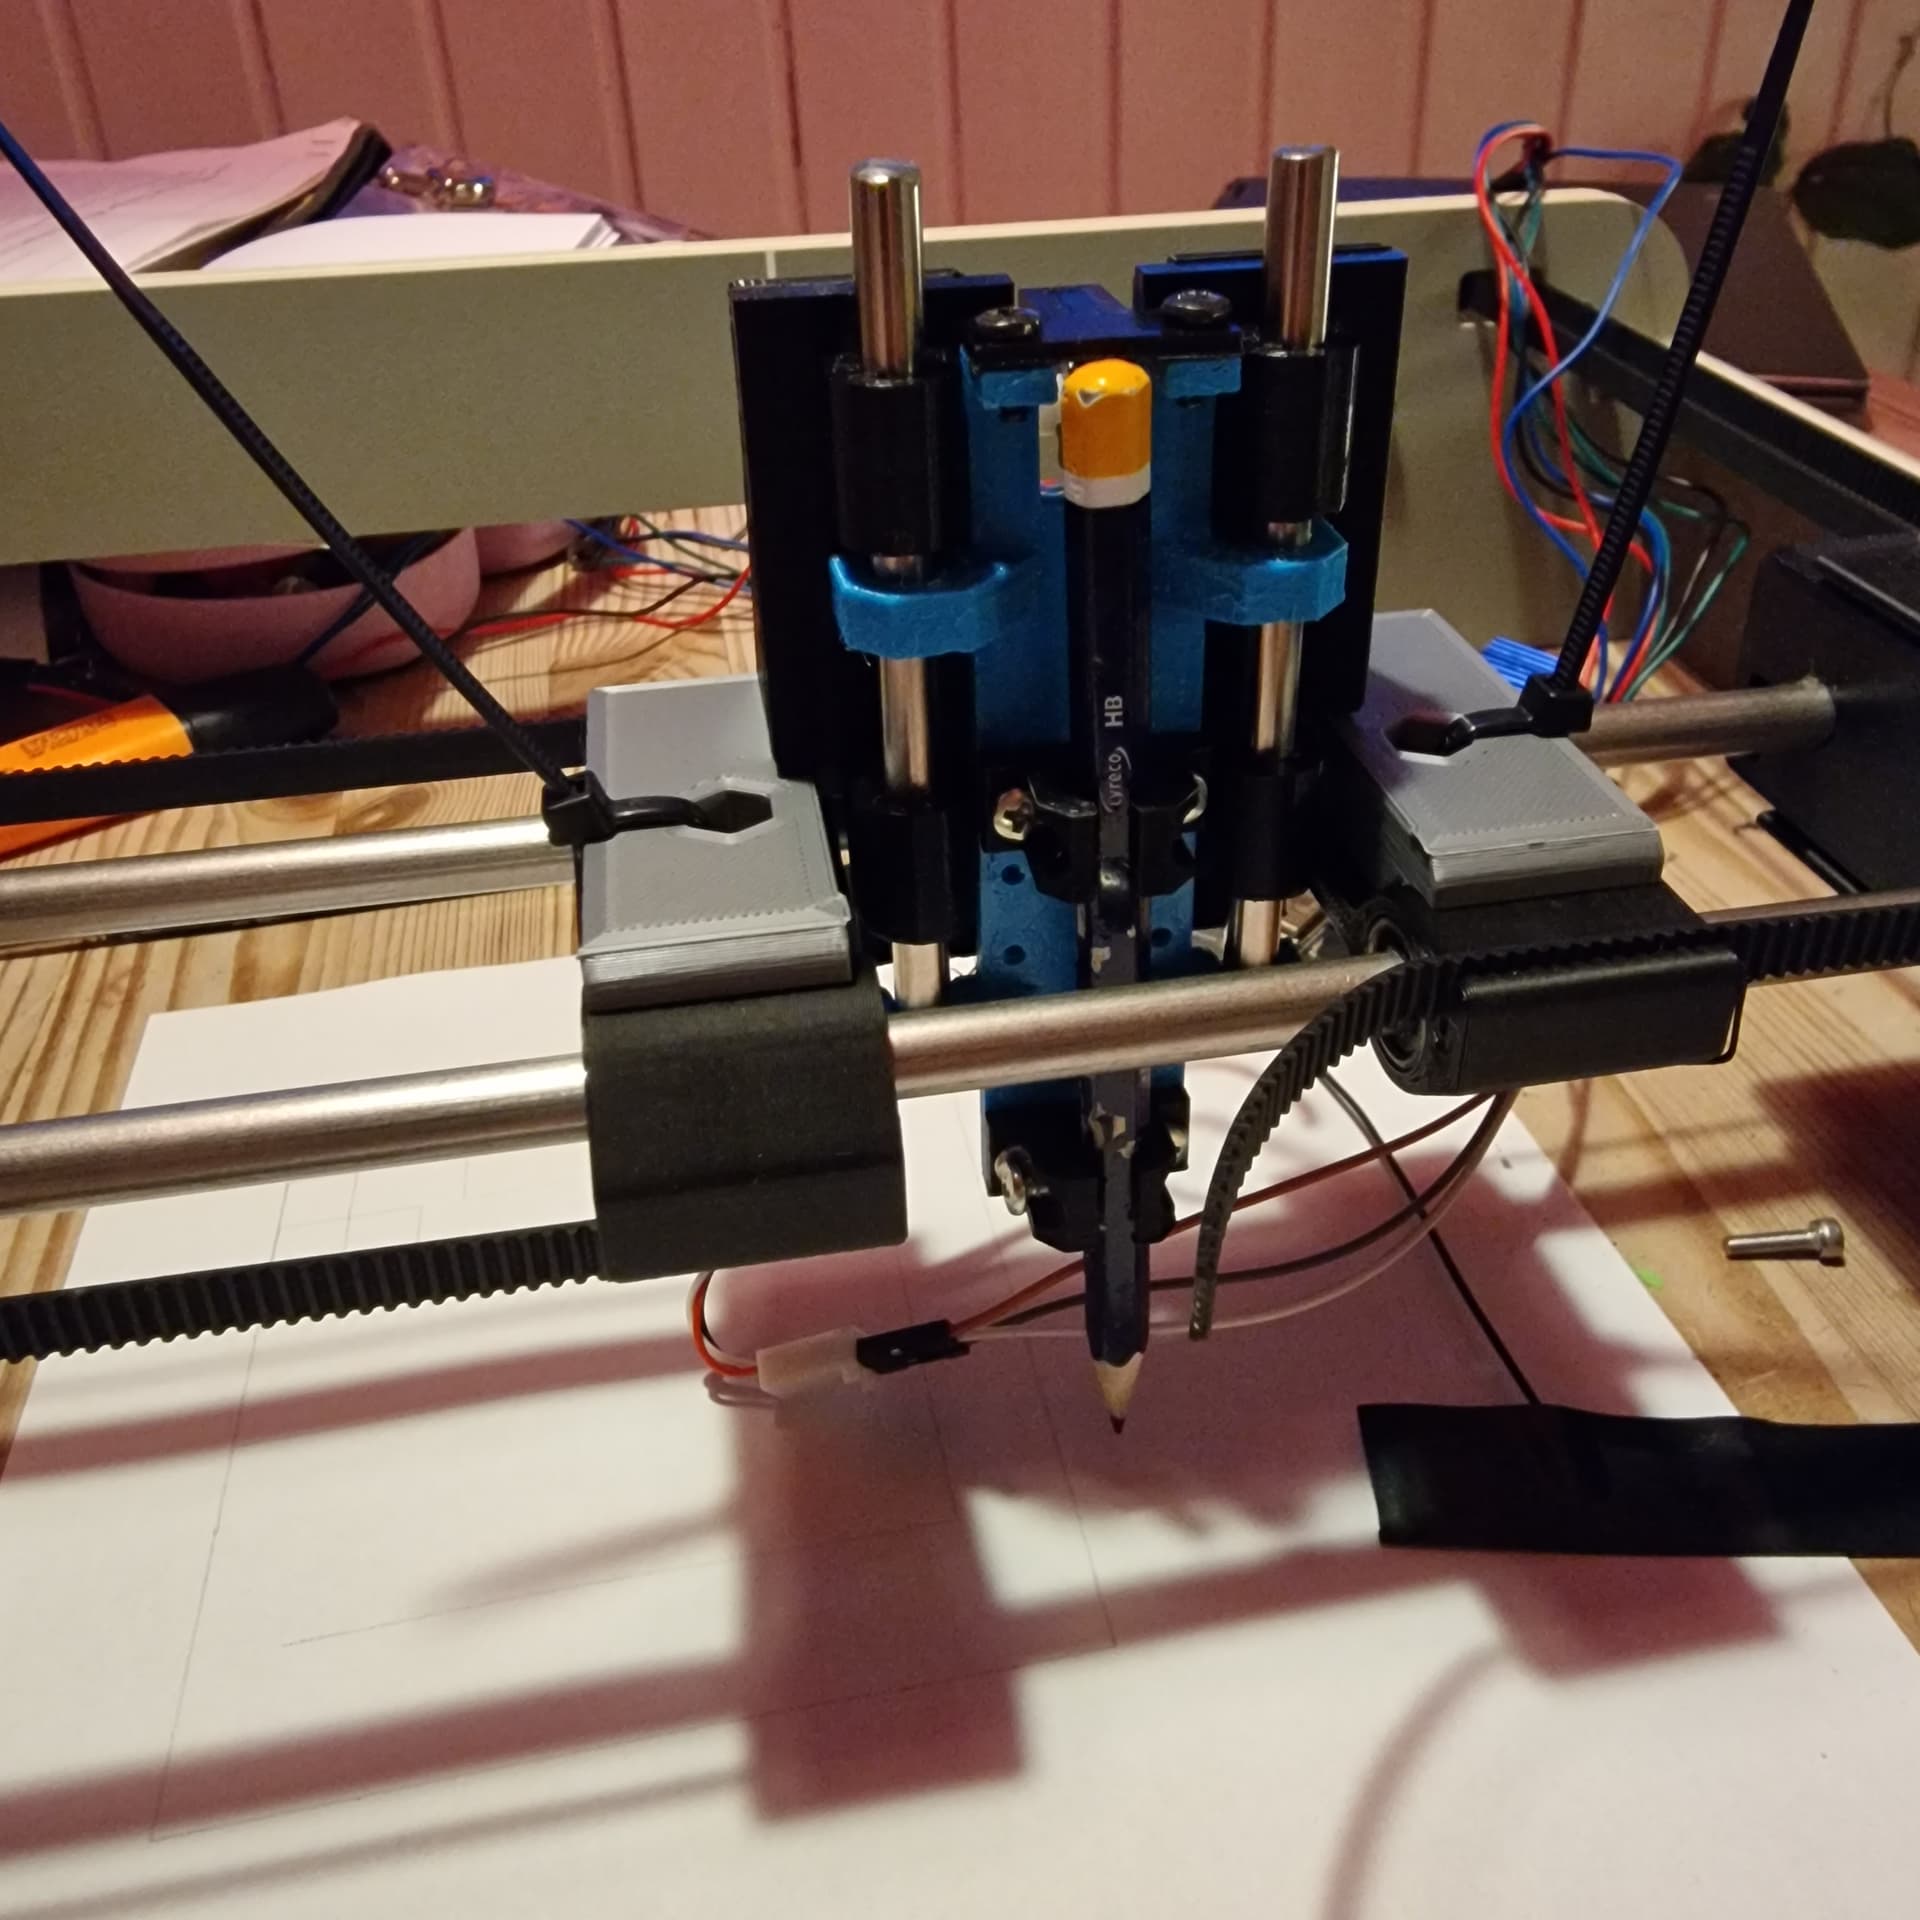
My biggest concern is if it wobbles. How stable is it in x and y direction, since the base is so small? The printer is running, we shall soon see!
The core seems OK for this. The 4 LM8UU bearings are pushed out to the corners, and the load is in the middle, which should make it reasonably stable. If I were making it as a.plotter in the first place, I might have stacked the rods vertically.
I have it do some fairly rapid accel with raster engraving, and it holds, so should be able to handle a pen. If you make the bottom too long, I’m less sure how that will work put though.
1 Like
It’s aliiive! ![]()
![]()
Unfortunately- I’ve spent most of the evening trying to figure out why everything stopped after a seemingly innocent config change. It turned out that I had a few empty spaces scattered around the yaml file, causing fluidnc to stall… annoying to lose precious time - but at the same time beneficial for learning more about the ins and outs of grbl and fluidnc.
2 Likes
Sigh - I got everything moving - but it’s hard to get estlcam to output the right gcode for grbl32/fluidnc to understand! I guess I should look into Inkscape’s gcode tools, they’re just very different from what I’m used to when milling/laser/cutting/plotting with the mpcnc…
Lightburn is amazing for lasers. There are calibrations and tests built in. It is the ideal tool for lasers.
1 Like
Yeah, I know… but I’ve sort of hijacked Dan’s topic trying to troubleshoot using the same build for a pen plotter… and estlcam gives out gcode fluidnc doesn’t like, and I can’t use the plot axis function either, because it starts with G00 and then executes the custom command.
yeah, i use lightburn for the laser, but I’ve also used sandify code with a couple of commands to turn the laser on and off again, and I’ve used estlcam too. Doesn’t Estlcam have a grbl output mode? I thought that it did…
My build runs GRBL-ESp32, not fluidNC (yet) though I have an ESP32 with FluidNC flashed to it that I want to try.
Yes, estlcam has an grbl option, but I cant find many customization options… I guess I should check out the fluidnc discord. They even have a forum option within now!
You can use the grbl setup with estlcam and send the files to your fluid nc . Should work as is.
I’ve tried many times. It works with reversing z, problem is that it only plot travels and not any shapes… ![]()
The gcode for lifting Z that is generated using grbl post processor is not accepted with fluidnc…
Trying out chatGPT:
User
Hello there
ChatGPT
Hello! How may I assist you today?
User
I’m struggling with making the z move in the right direction on my home made pen plotter using fluidnc and a RC servo for the pen lifting. Do you have any ideas to help me in the right direction?
ChatGPT
Sure, I’d be happy to help!
To make the z move in the right direction on your pen plotter, there are a few things you could try:
Check your firmware settings: Make sure that the direction of the Z-axis is correctly configured in your firmware settings. You may need to invert the direction of the Z-axis movement in your firmware settings to get it to move in the correct direction.
Check your wiring: Double-check the wiring of the stepper motor that controls the Z-axis. Make sure that the wires are properly connected to the stepper driver and that the stepper driver is connected to the correct pin on the controller board.
Check your G-code: Make sure that the G-code you’re using to control the Z-axis is correct. For example, if you’re trying to move the Z-axis up, you should use a positive value for the Z-axis movement in your G-code.
Check your servo: If you’re using an RC servo for the pen lifting mechanism, make sure that the servo is properly connected and that the servo arm is positioned correctly. You may need to adjust the position of the servo arm to ensure that the pen lifts and lowers in the correct direction.
I hope these tips help! Let me know if you have any other questions.
User
The z axis moves correctly when inverting the gcode, in opposite direction. But when using the regular direction the z only moves down and stays there.
ChatGPT
If the Z-axis only moves down and stays there when using the regular direction in your G-code, there are a few things you could try:
Check your endstops: Make sure that the Z-axis endstop is not triggered or stuck in the “down” position. If the endstop is triggered, the controller will think that the Z-axis is already at its lowest point and won’t allow it to move any further in that direction.
Check your limit switch connections: Ensure that the limit switches are correctly wired to the controller board and are working properly. If a limit switch is not functioning correctly, it could prevent the Z-axis from moving in one direction.
Check your G-code: Check your G-code to make sure that there are no commands that are preventing the Z-axis from moving in the desired direction. For example, if there is a “G28 Z0” command in your G-code, this will move the Z-axis to the home position (which is usually the lowest point) and set it to zero, which could prevent the Z-axis from moving down any further.
Check your firmware: Make sure that the firmware settings are configured correctly for the Z-axis. You may need to adjust the maximum and minimum travel limits for the Z-axis to ensure that it can move in both directions.
I hope these tips help you get your Z-axis moving in the correct direction. Let me know if you have any other questions or if there’s anything else I can help you with!
2 Likes