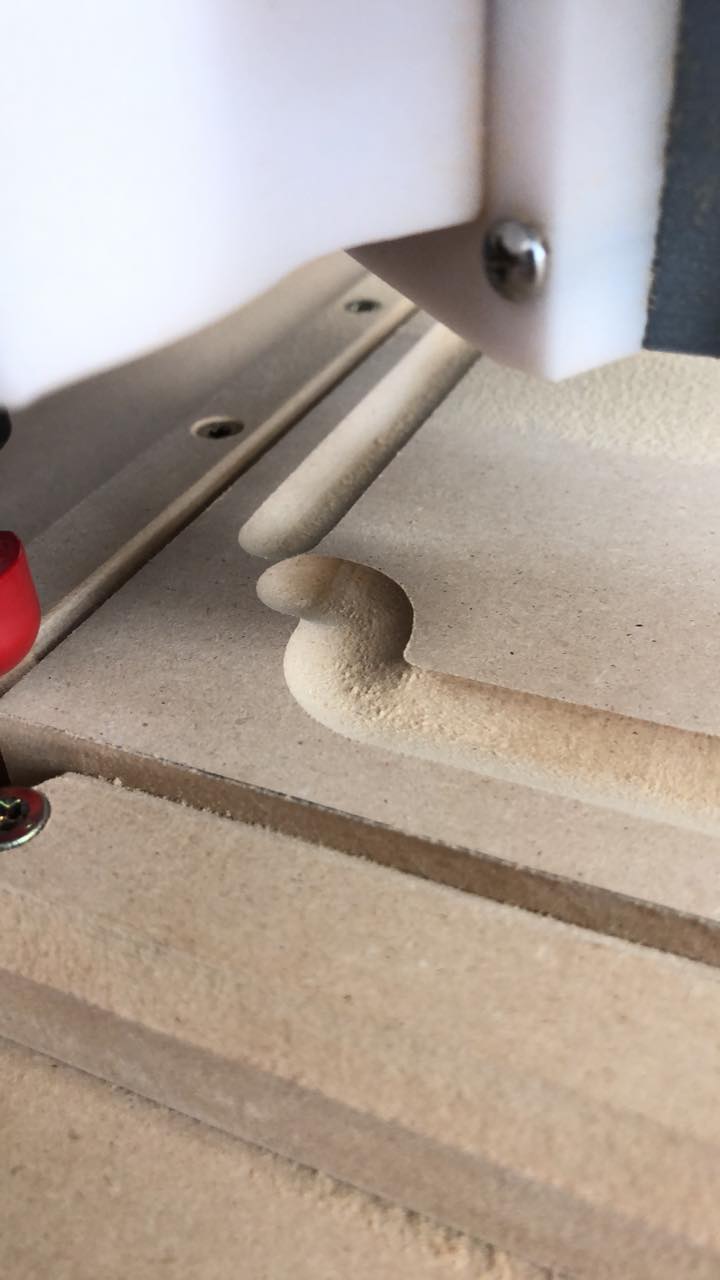
In EstlCam, what would you all use for a cutting board juice groove? I just did a test with an engrave path using a 3/4" ball bit. it ran the path but as seen in the preview it stopped short of going back over itself thus creating a missed spot. How to I fix that?
What was the path supposed to look like? Did it skip steps or was this an error in the CAD?
You could use a smaller ballnose bit and use a pocket like or 3D contour path.
You should be able to do that with a 3/4" ballnose if that’s the look you want. Just be careful with the DOC. as it gets deeper, it is going to bite off more, so you may consider two toolpaths. One that steps down to 2/3 of the way there and one that finishes the last 1/3 with smaller DOC.
The path is supposed to turn 90* and run up into that vertical path. What I have found out is that using Engrave and then choosing left/right as opposed to Center will do just what you see above. But I wanted it to cut outside the line, but up against it. So in my final version I’ll have to widen the tool path shape and have it cut the center of the path, this I have confirmed WILL work as expected.
1 Like
Along the same lines of thinking, I’m also getting this odd result:
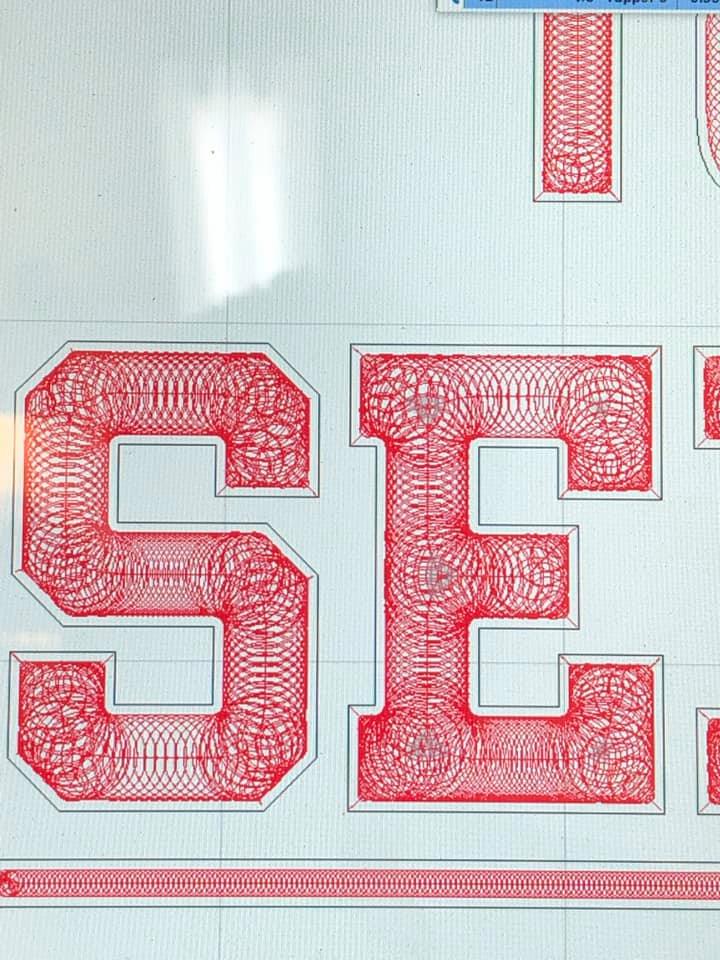
This is my font and the tool path. All looks good.
Below is the result using the 60* vbit that Ryan sells. Not sure why it’s so “pointy” in the corners instead of flattening the ends of the lettering out.
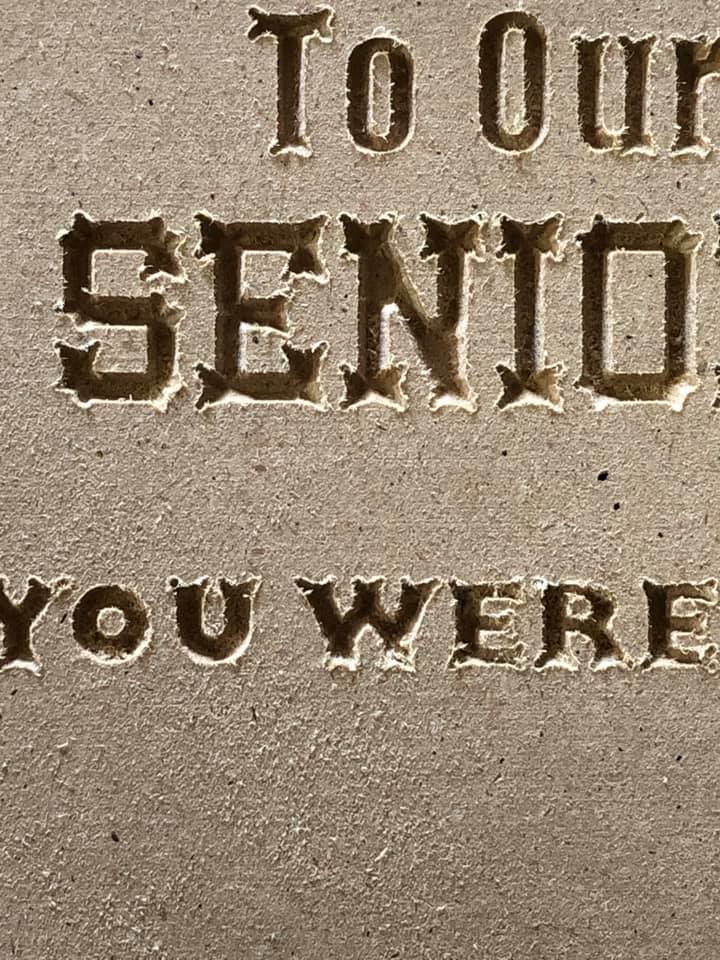
Settings for the bit are as follows:
3.18 dia
60* tip angle
Running a Carve tool path with a depth of 4mm
Also tried the same carve with a 1/4" 90* V bit. It didn’t go as deep obviously, otherwise the lettering would have been to wide, but I still got the same pointy ends to the lettering as with the 60* bit.
I’d guess it’s trying to carve the bottom of the letters as pockets, and what you’re seeing is the dia of the v-bit pushing out. I don’t have EstlCAM on this machine. Are you sure you want carve, and not engrave (or something to that effect)? Or some other reasonably “simple” CAM choice…
Or use F-Engrave 
Pretty sure engraving is what is meant to be use for this type of thing. But maybe I should look at F-Engrave. I’ve seen people talk about it a few times but haven’t tried it yet. I just know there are a bunch of people doing this sort of work with their MPCNC so was hoping someone knew what was going on and how the resolved it.
Oh, I’m sure it can be done, and probably quite easily, in EstlCAM. I just don’t know off the top of my head. But I’m sure someone who does will be along shortly…
Hopefully so because I think what I am trying to carve out is a bit too complex for F-Engrave. It’s a short paragraph in length with multiple fonts and font sizes.
Yeah, F-Engrave seems really good for simple images and single font items, but the price is right! 
I’m sure people have seen this around the Internet these last few weeks. I’m trying to engrave a piece of wall art for my daughter who’s currently a high school senior with this letter. I think it’s just a bit more than is really possible with F-Engrave. 

Isn’t the bit Ryan sells a 45* bit? It looks like you’ve got the wrong angle set. Those little dogbones in the corners are a sure sign of a wrong angle.
The toolpath circles in Estlcam aren’t really representative of the paths it will take. You have to loot at the preview for that. I don’t know why they are different, but I think you are doing it right.
1 Like
Crap you’re right, it is a 45*. I swore I read that it was 60* somewhere.
I’ll have to make that change and see if that fixes my problem. Thank you.
And actually I did check the preview, it didn’t show any indication of those little points showing up at all, preview looked good.
Frikin’ genius @jeffeb3, thank you!
It’s not perfect, but it’s damn close and good enough for this project. They will be filled with epoxy probably anyway.

1 Like
If it was a 60 deg it probably would’ve very nice it will be appreciated I’m sure
The tool paths for carves look like different sized circles. But in the preview, they end up being a bunch of smooth lines. That’s all I was saying. I thought K might have been piqued by the funky look in the estlcam image.
Your result looks much better. I am not sure if the angle is still a little off, or if it is just error in Z. I agree that when you polish it all up, it will look great, and not be noticeable.
1 Like