Ryan might be pleased to know that Grblgru has posted a new video to YouTube titled ‘Grblgru How to use Advanced GCode’.
The first part of the video features the MPCNC with a 4th axis (running with GRBL Mega 5X on an Arduino Mega 2560 with a RAMPS card).
Both the Lowrider and MPCNC are available in his program as simulations as well as many others. They are modeled with and without a 4th axis.
You don’t need a machine to use them either. Grblgru can be used as a purely virtual program, or GCode generator, GCode sender, and machine controller. He continues to refine his features particularly for the use of a 4th axis. All for free. There are still some great deals out there in the wide world.
Hi Ryan. Grblgru has posted a new video detailing the use of a 4th axis on his Youtube site:
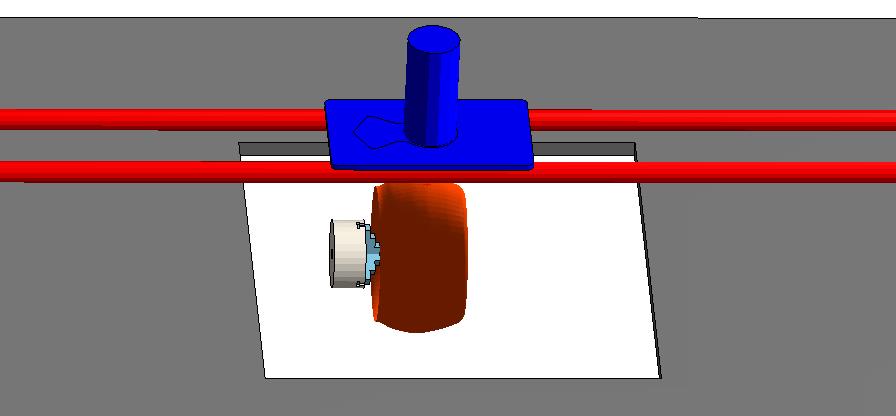
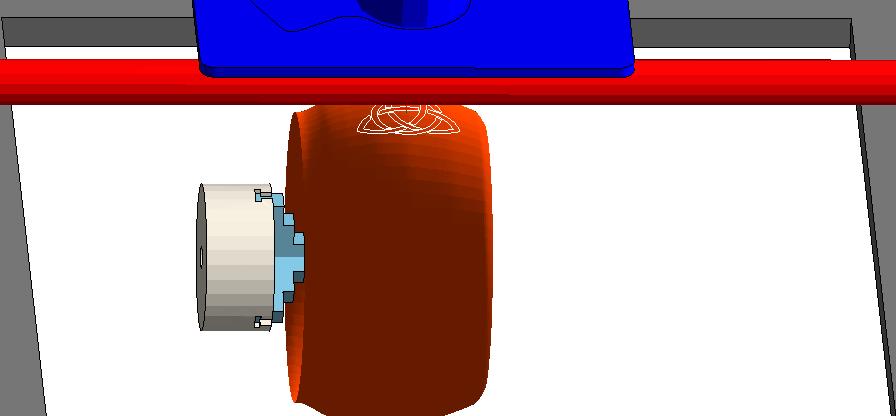
He shows how to measure a form like a bowl, make an STL, project a DXF or SVG onto the STL. That will generate the appropriate GCode to run a machine controlled with an Arduino Mega + Grbl Mega as discussed above. The importance of this is that 2D images can be used as design elements to be put on a 3D form. This will be especially useful for Laser work because his software will follow both curves - around the circumference and up the side. Diode Lasers as you know have a very short focal length and this ability to follow the curves allows the laser to stay at a fixed distance from the form surface and maintain focus. Router work is easy as well. Depth can be specified in the Job setup.
Both the MPCNC and LowRider feature in his pictures of machines with a 4th axis. I have previously posted pictures of my machines on this site with a hole in the work surface to get to a 4th axis rather than building out on one end. I think it keeps my machines more rigid doing it that way.
I have made very simple Z Axis probes to accomplish the surface scan as well as used the aluminum tape strip on the surface and tool tip method. The scan resolution can be adjusted up from 1mm, or made at something like 5 mm with 1mm or more interpolation.
The images I’ve attached show a simple maple leaf design mapped to a sinusoidal curve and projected onto the side of a small bowl. The pattern wraps entirely around the form. Have fun.
Wow, that is really shaping up to be really powerful!
As soon as the new community docs (close… docs.v1engineering.com) are done being transferred I/we can start working on a controls page and add this to the list of awesome ways to drive a machine.
I managed to get my laser working under GRBL Mega 5X which was written for an Arduino Mega 2560 and RAMPS 1.4. The way Gauthier Briere has written the control pin for Spindle PWM places it on D8 which is ordinarily for the heated bed and runs at 12V. My little 3.5W laser runs on 12V but has a third wire for TTL which wants 5V. I have read a variety of solutions, some simple and some complicated. I finally found this solution:
In short, it uses the D6 Pin located in the Servo area on the RAMPS board. This pin doesn’t seem to be used for anything else. It is associated with an 8 bit timer which gives 255 power levels (instead of a 10 bit timer and 1000+ levels with D8) but this seems to work just fine for me so far. To implement it I downloaded the Mega 5X Edge file with all of the various GRBL related folders, Cut and Pasted the solution into the cpu_map.h file over the one specifying D8 (right at the end of the file), recompiled everything in Arduino IDE, created a Hex file which quickly uploaded with Xloader. In the end this was a very easy solution so a big thanks to the guy who figured it out and posted it!
The big bonus is that I can use the laser with Grblgru and a 4th axis. The program makes the laser follow the curves I map in and so stays in focus!
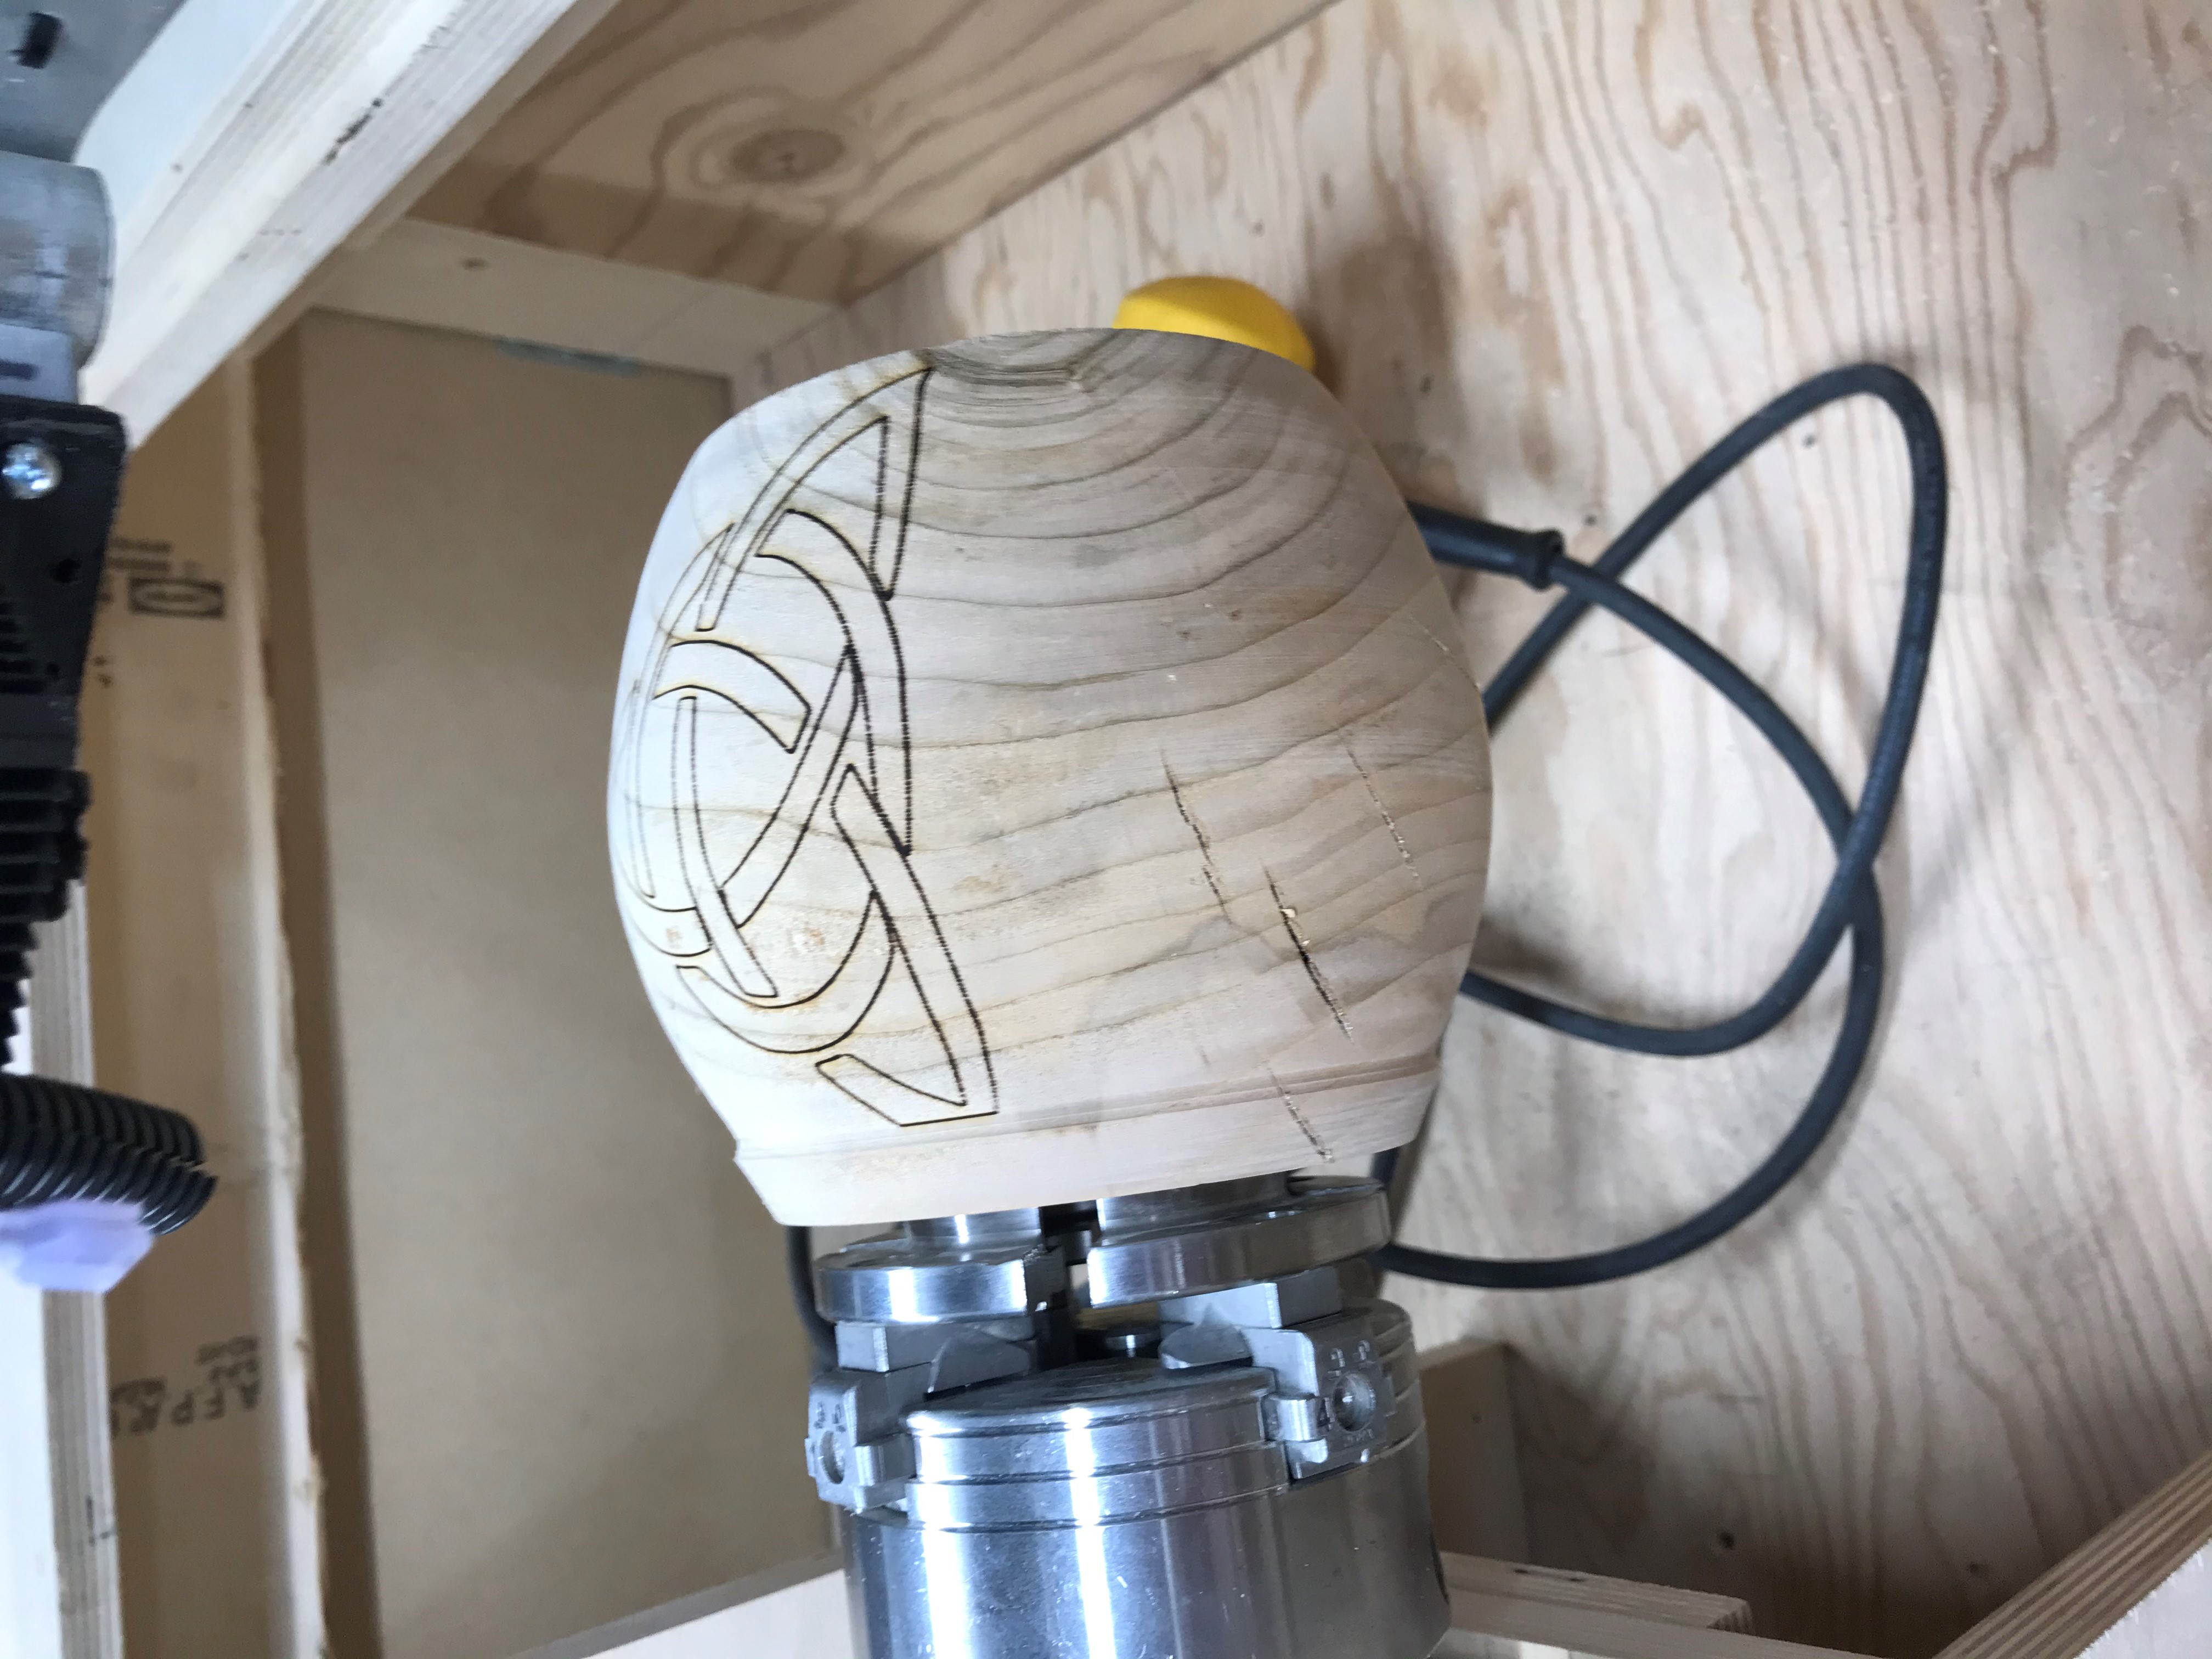
I tried out the combination above - Mega 2560 + RAMPS + GRBL Mega5X - with the laser for a few minutes. I found GRBL is still looking for 1000 for full power. I haven’t figured out where to change that in GRBL Mega back to 255 but it works with Lightburn just fine. I burnt these images on plain old hardboard. You definitely have to decide on power levels with each different material. Darker surfaces are better. White is tough. These are on a flat surface. I’ll try to upload some examples of burning on a curved surface tomorrow.
The Celtic cross is at 3000mm/min and 100% power. 1 pass
The Bouquet is at 2000mm/min and 80% Power. 2 passes
I didn’t bother getting rid of the double lines from BMP tracing.
I am doing this with a Canaduino ESP32 board and a Arduino style CNC shield now too. This one is attached to my MPCNC. Very easy upgrade all things considered.
It works just the same with a Mega 2560 and Grbl Mega 5X too.
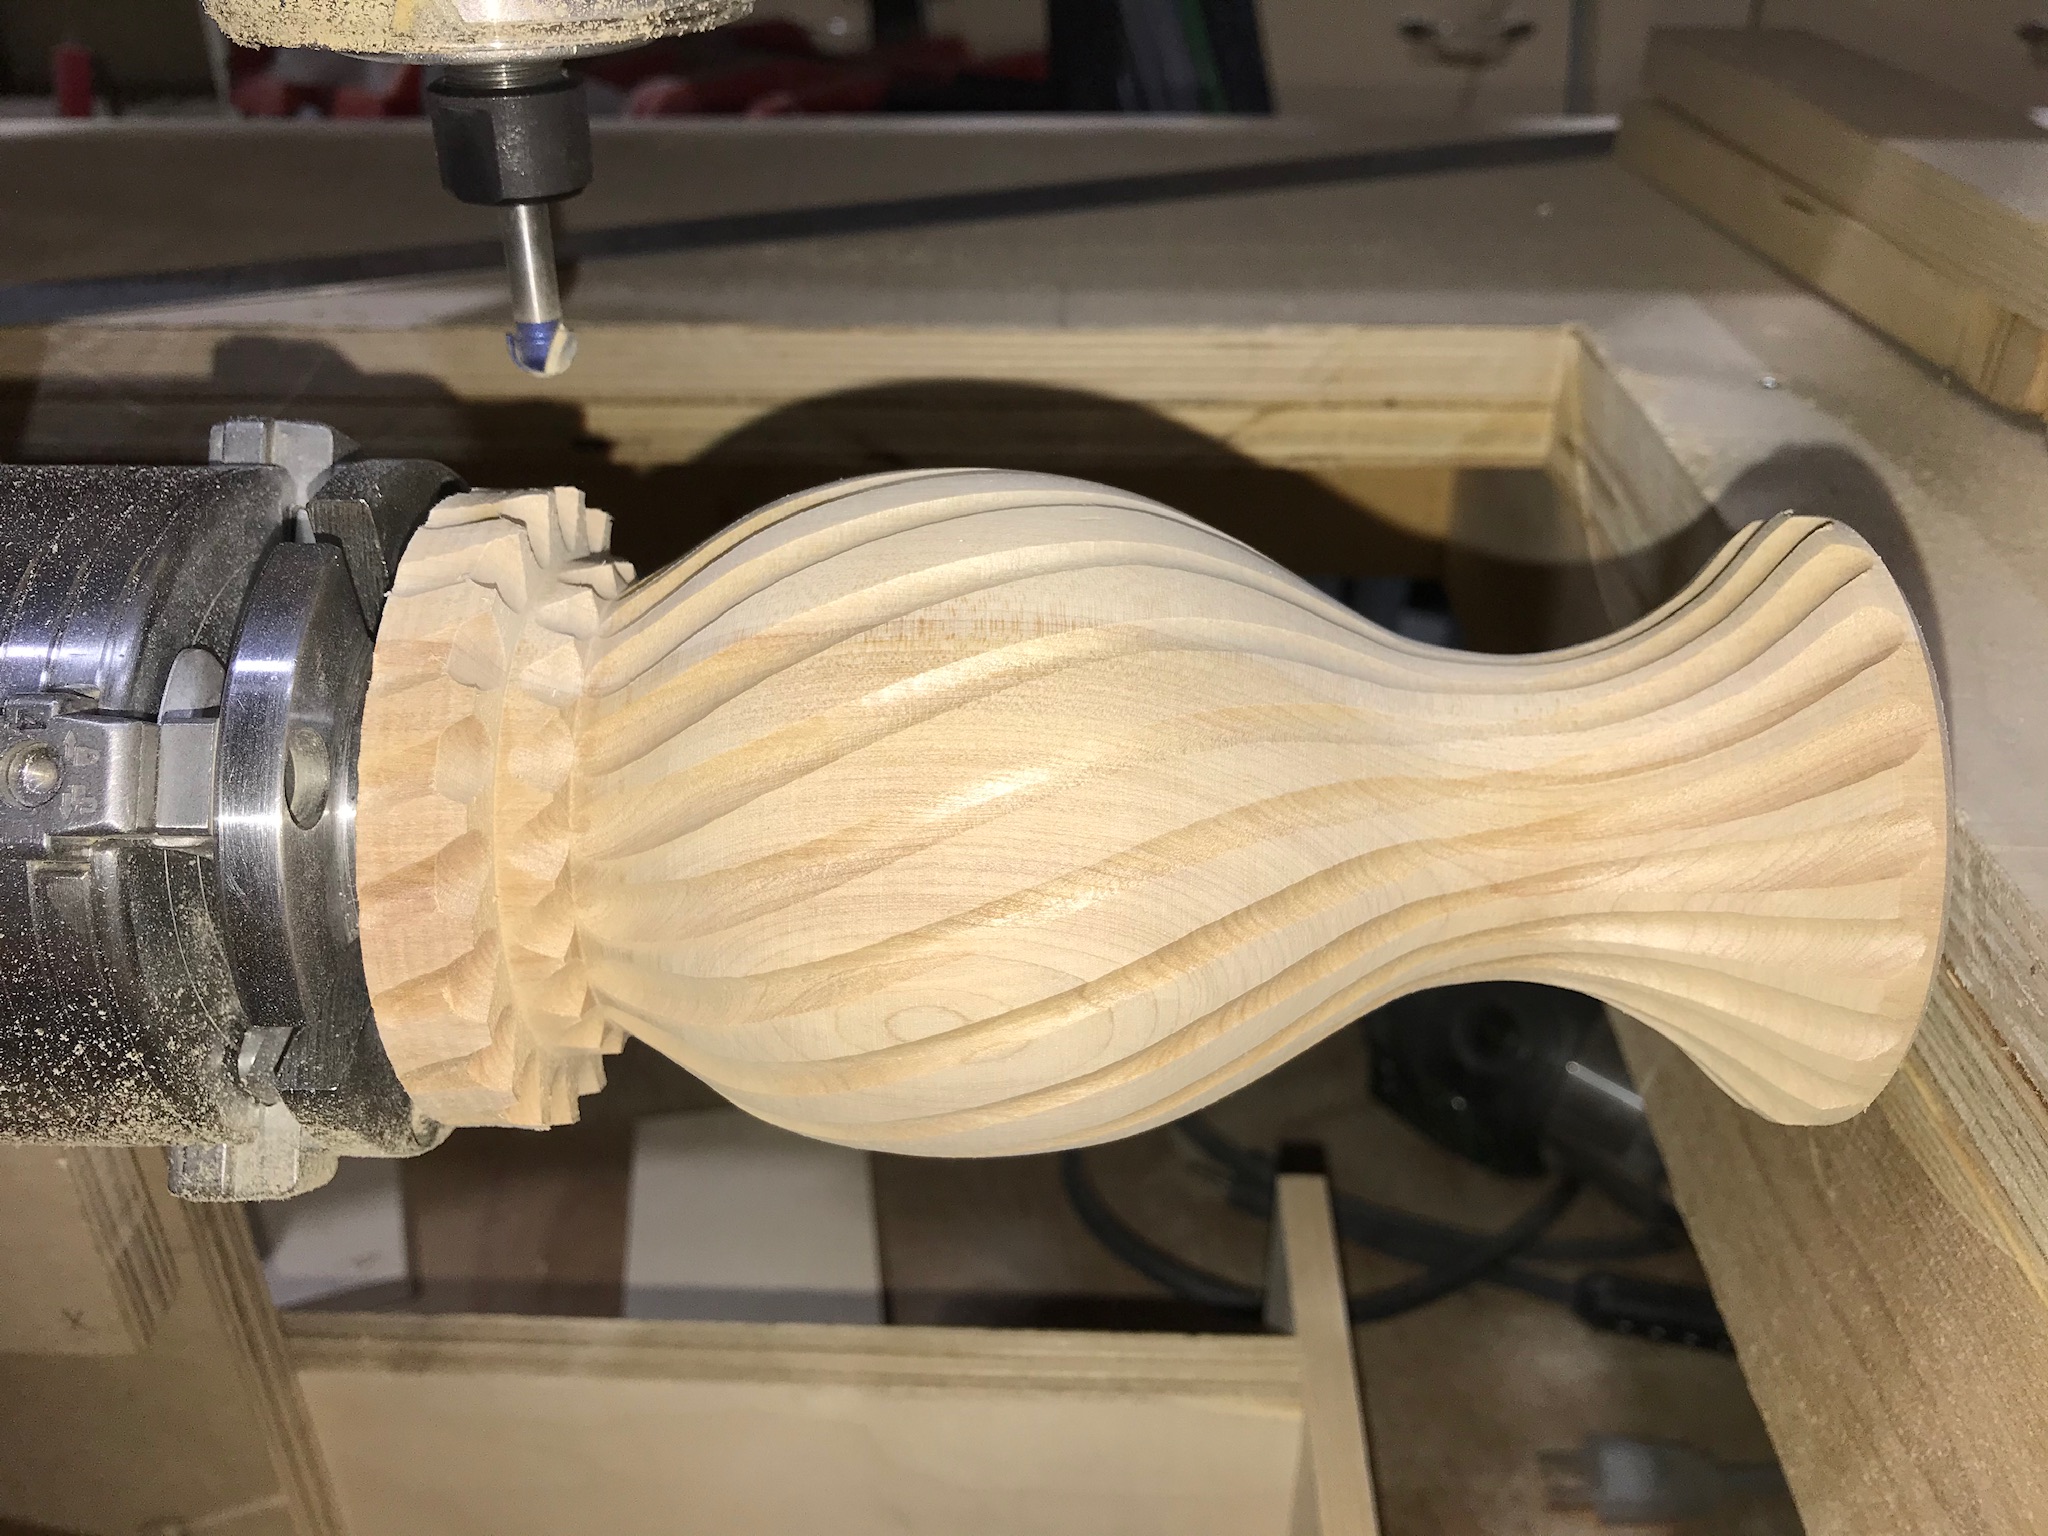
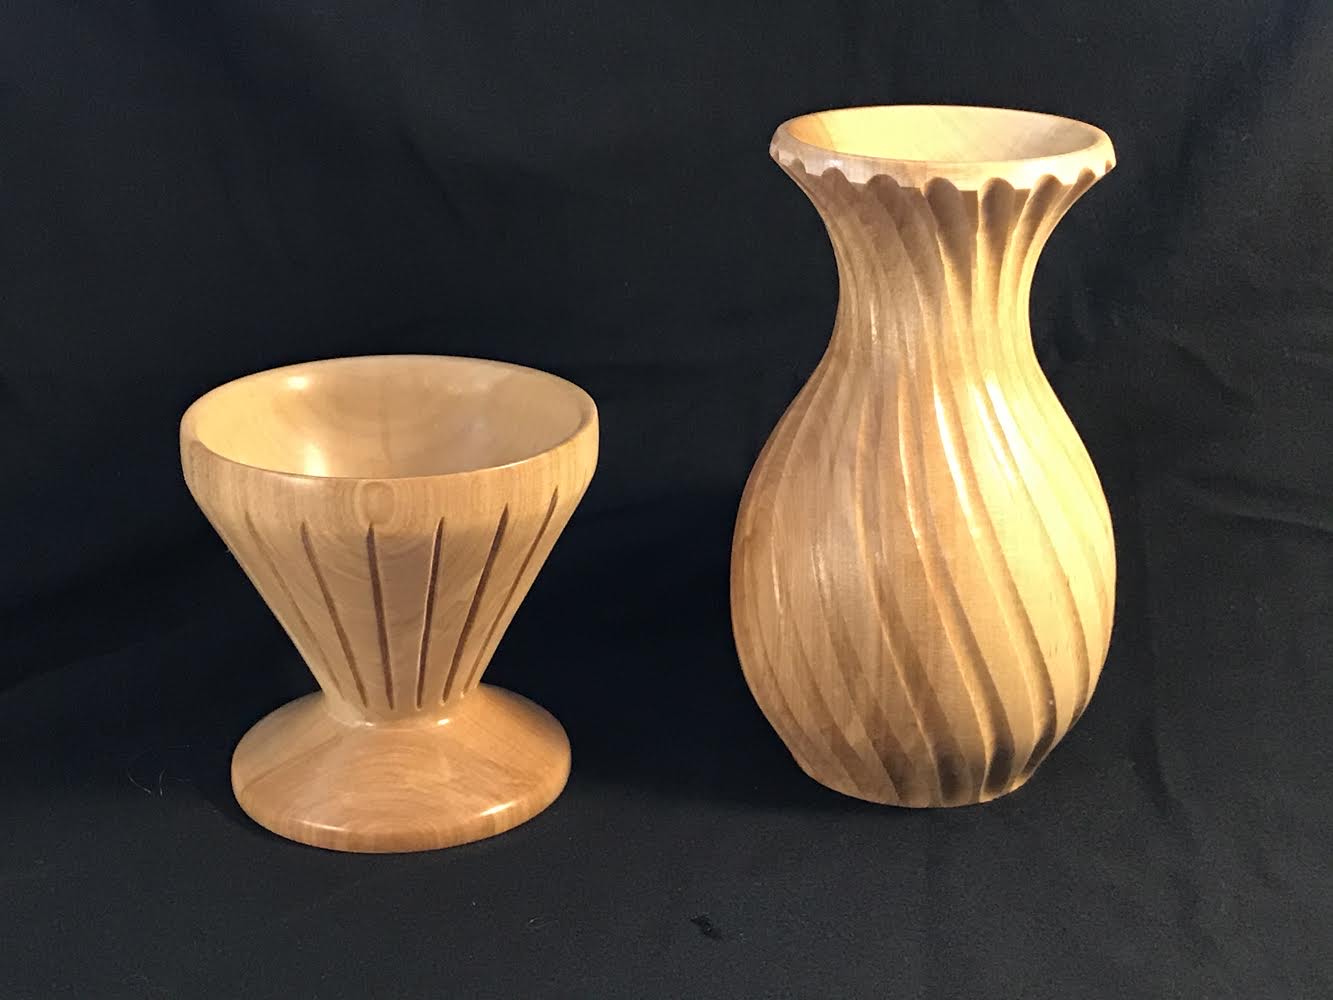
A more complicated shape to follow with the router. I turned this on the wood lathe. The fluting took about 10 min on the CNC. I still have to finish the foot of this little vase but you get the idea where I’m going with this.
The items above are made with just 4 axis control. I’ve since moved on to 5 axes since I came up with a way to write GCode for the 5th axis that is quite simple. However, this use of the 5th axis is quite specific to what I want to do, ie embellishing my woodturnings. GrblGru’s author has been quite helpful applying real mathematics to the process instead of my more ‘intuitive’ approach.