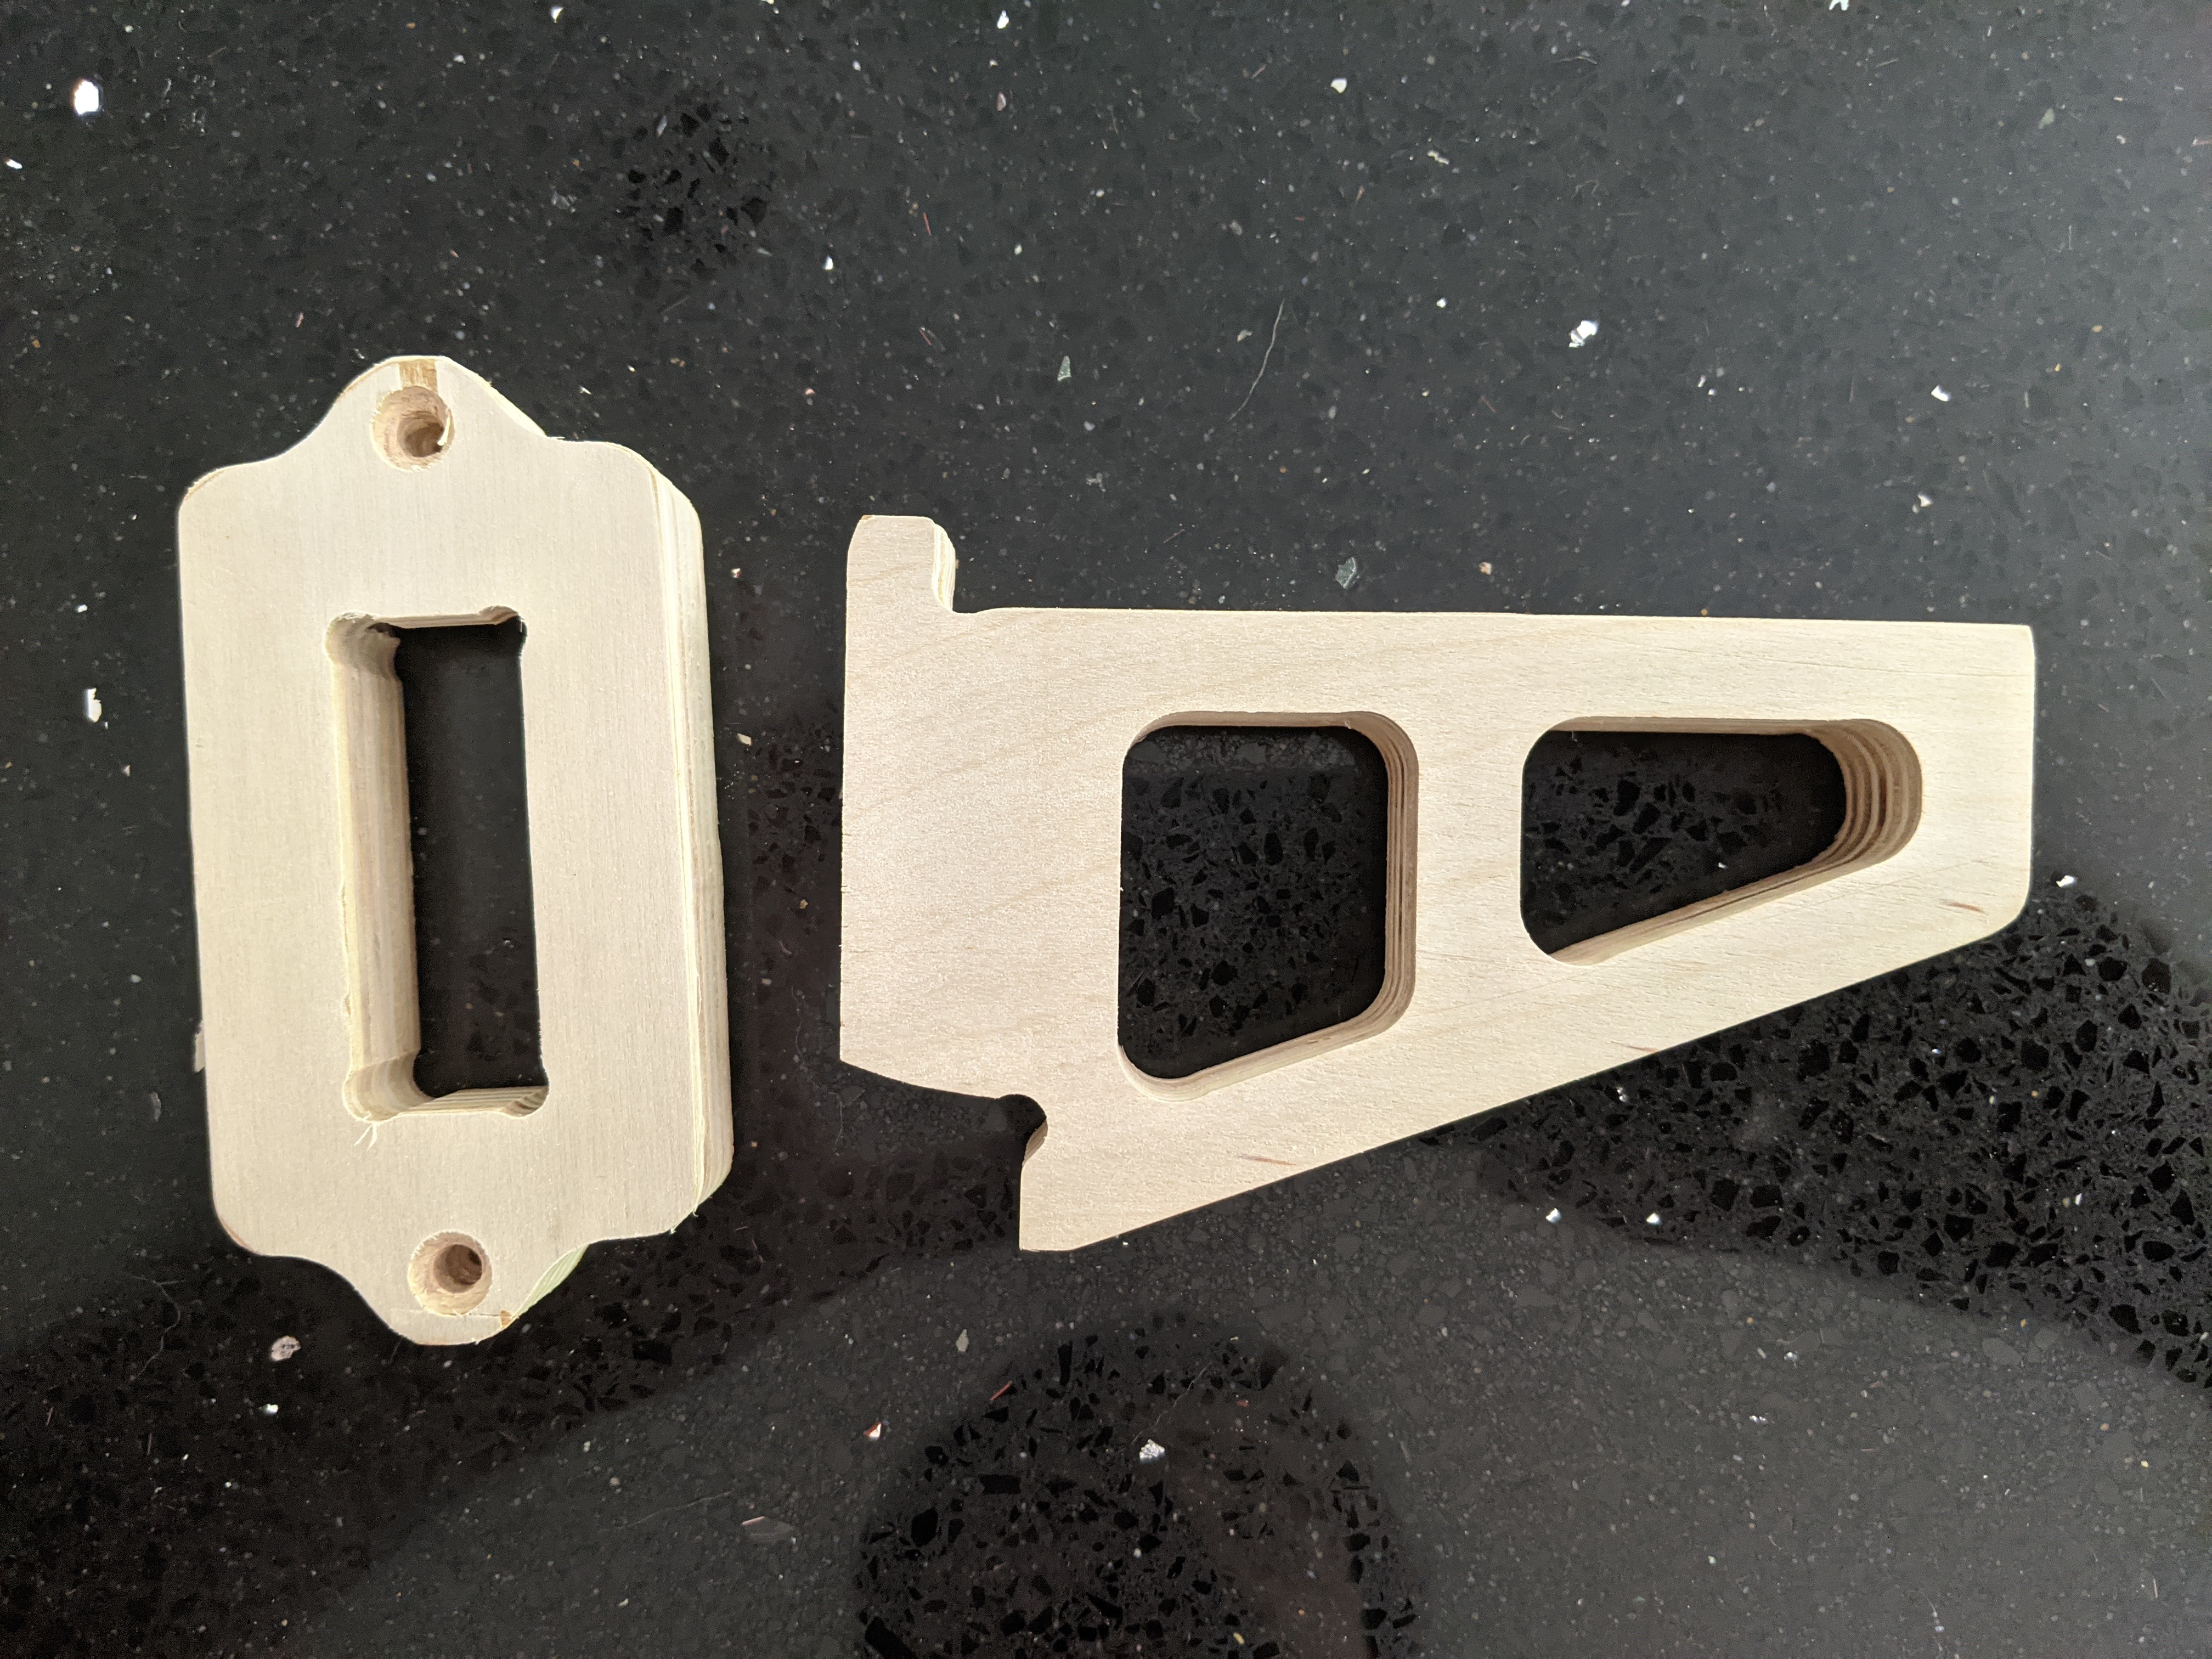
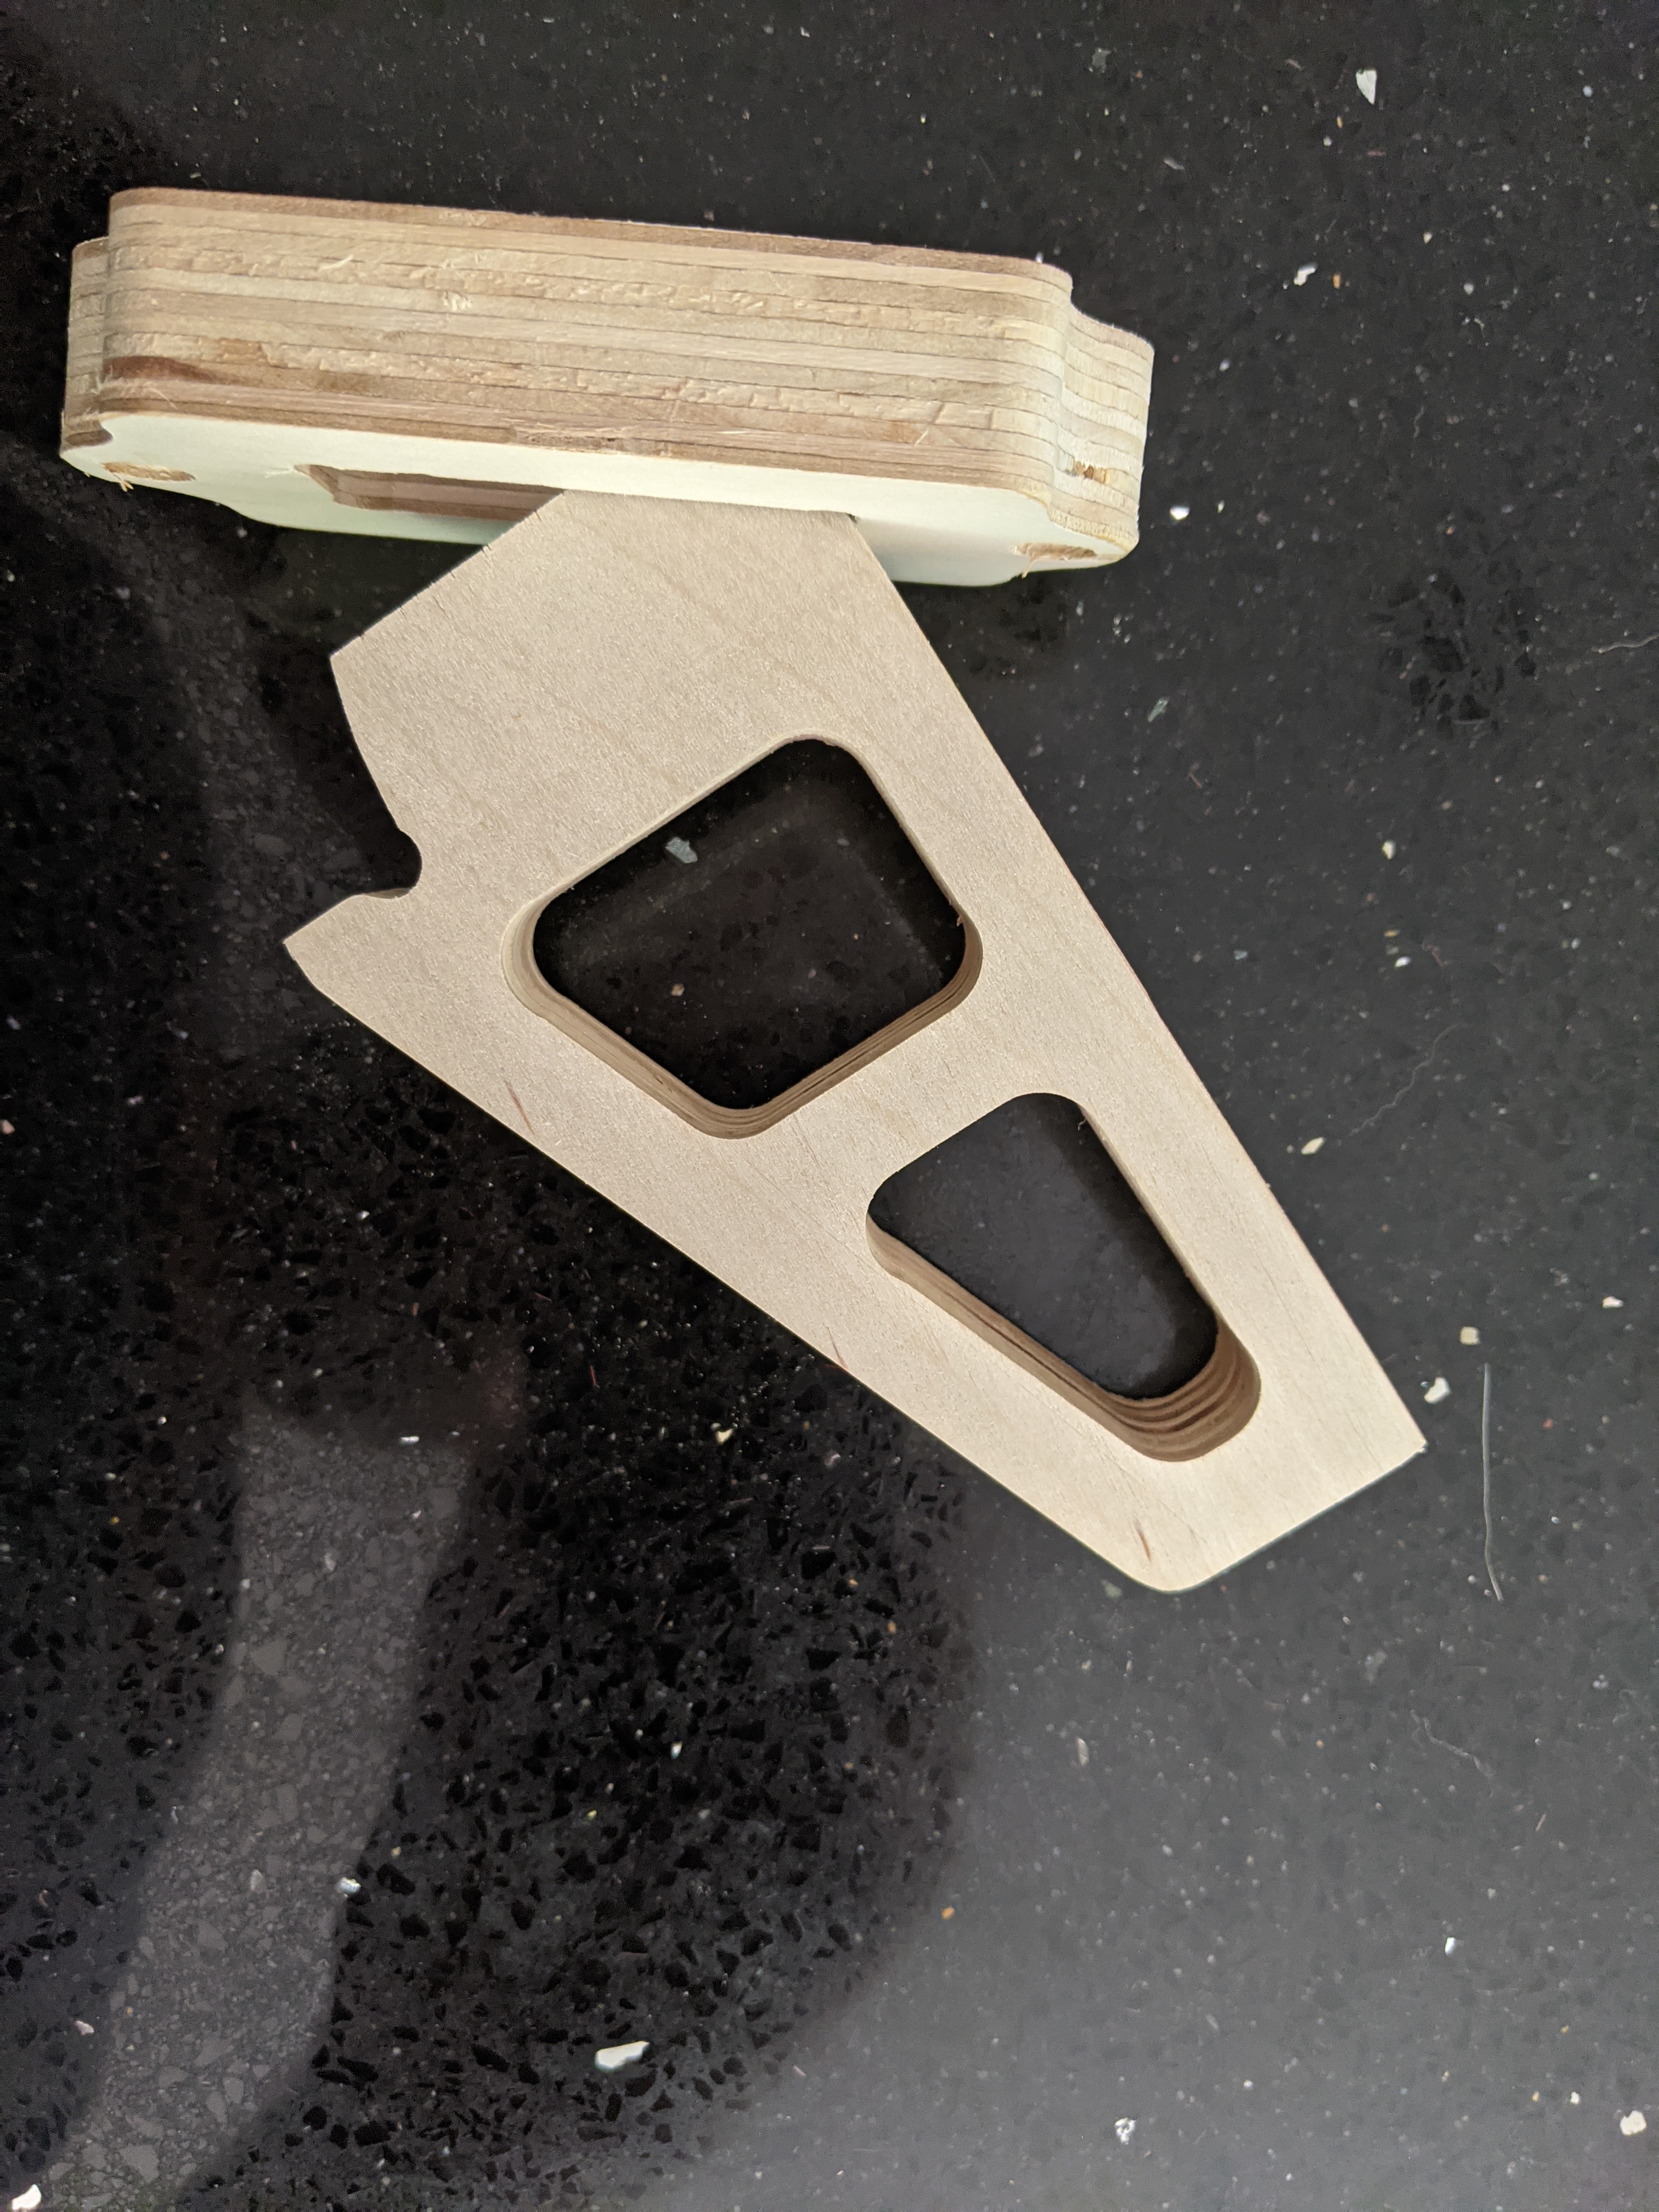
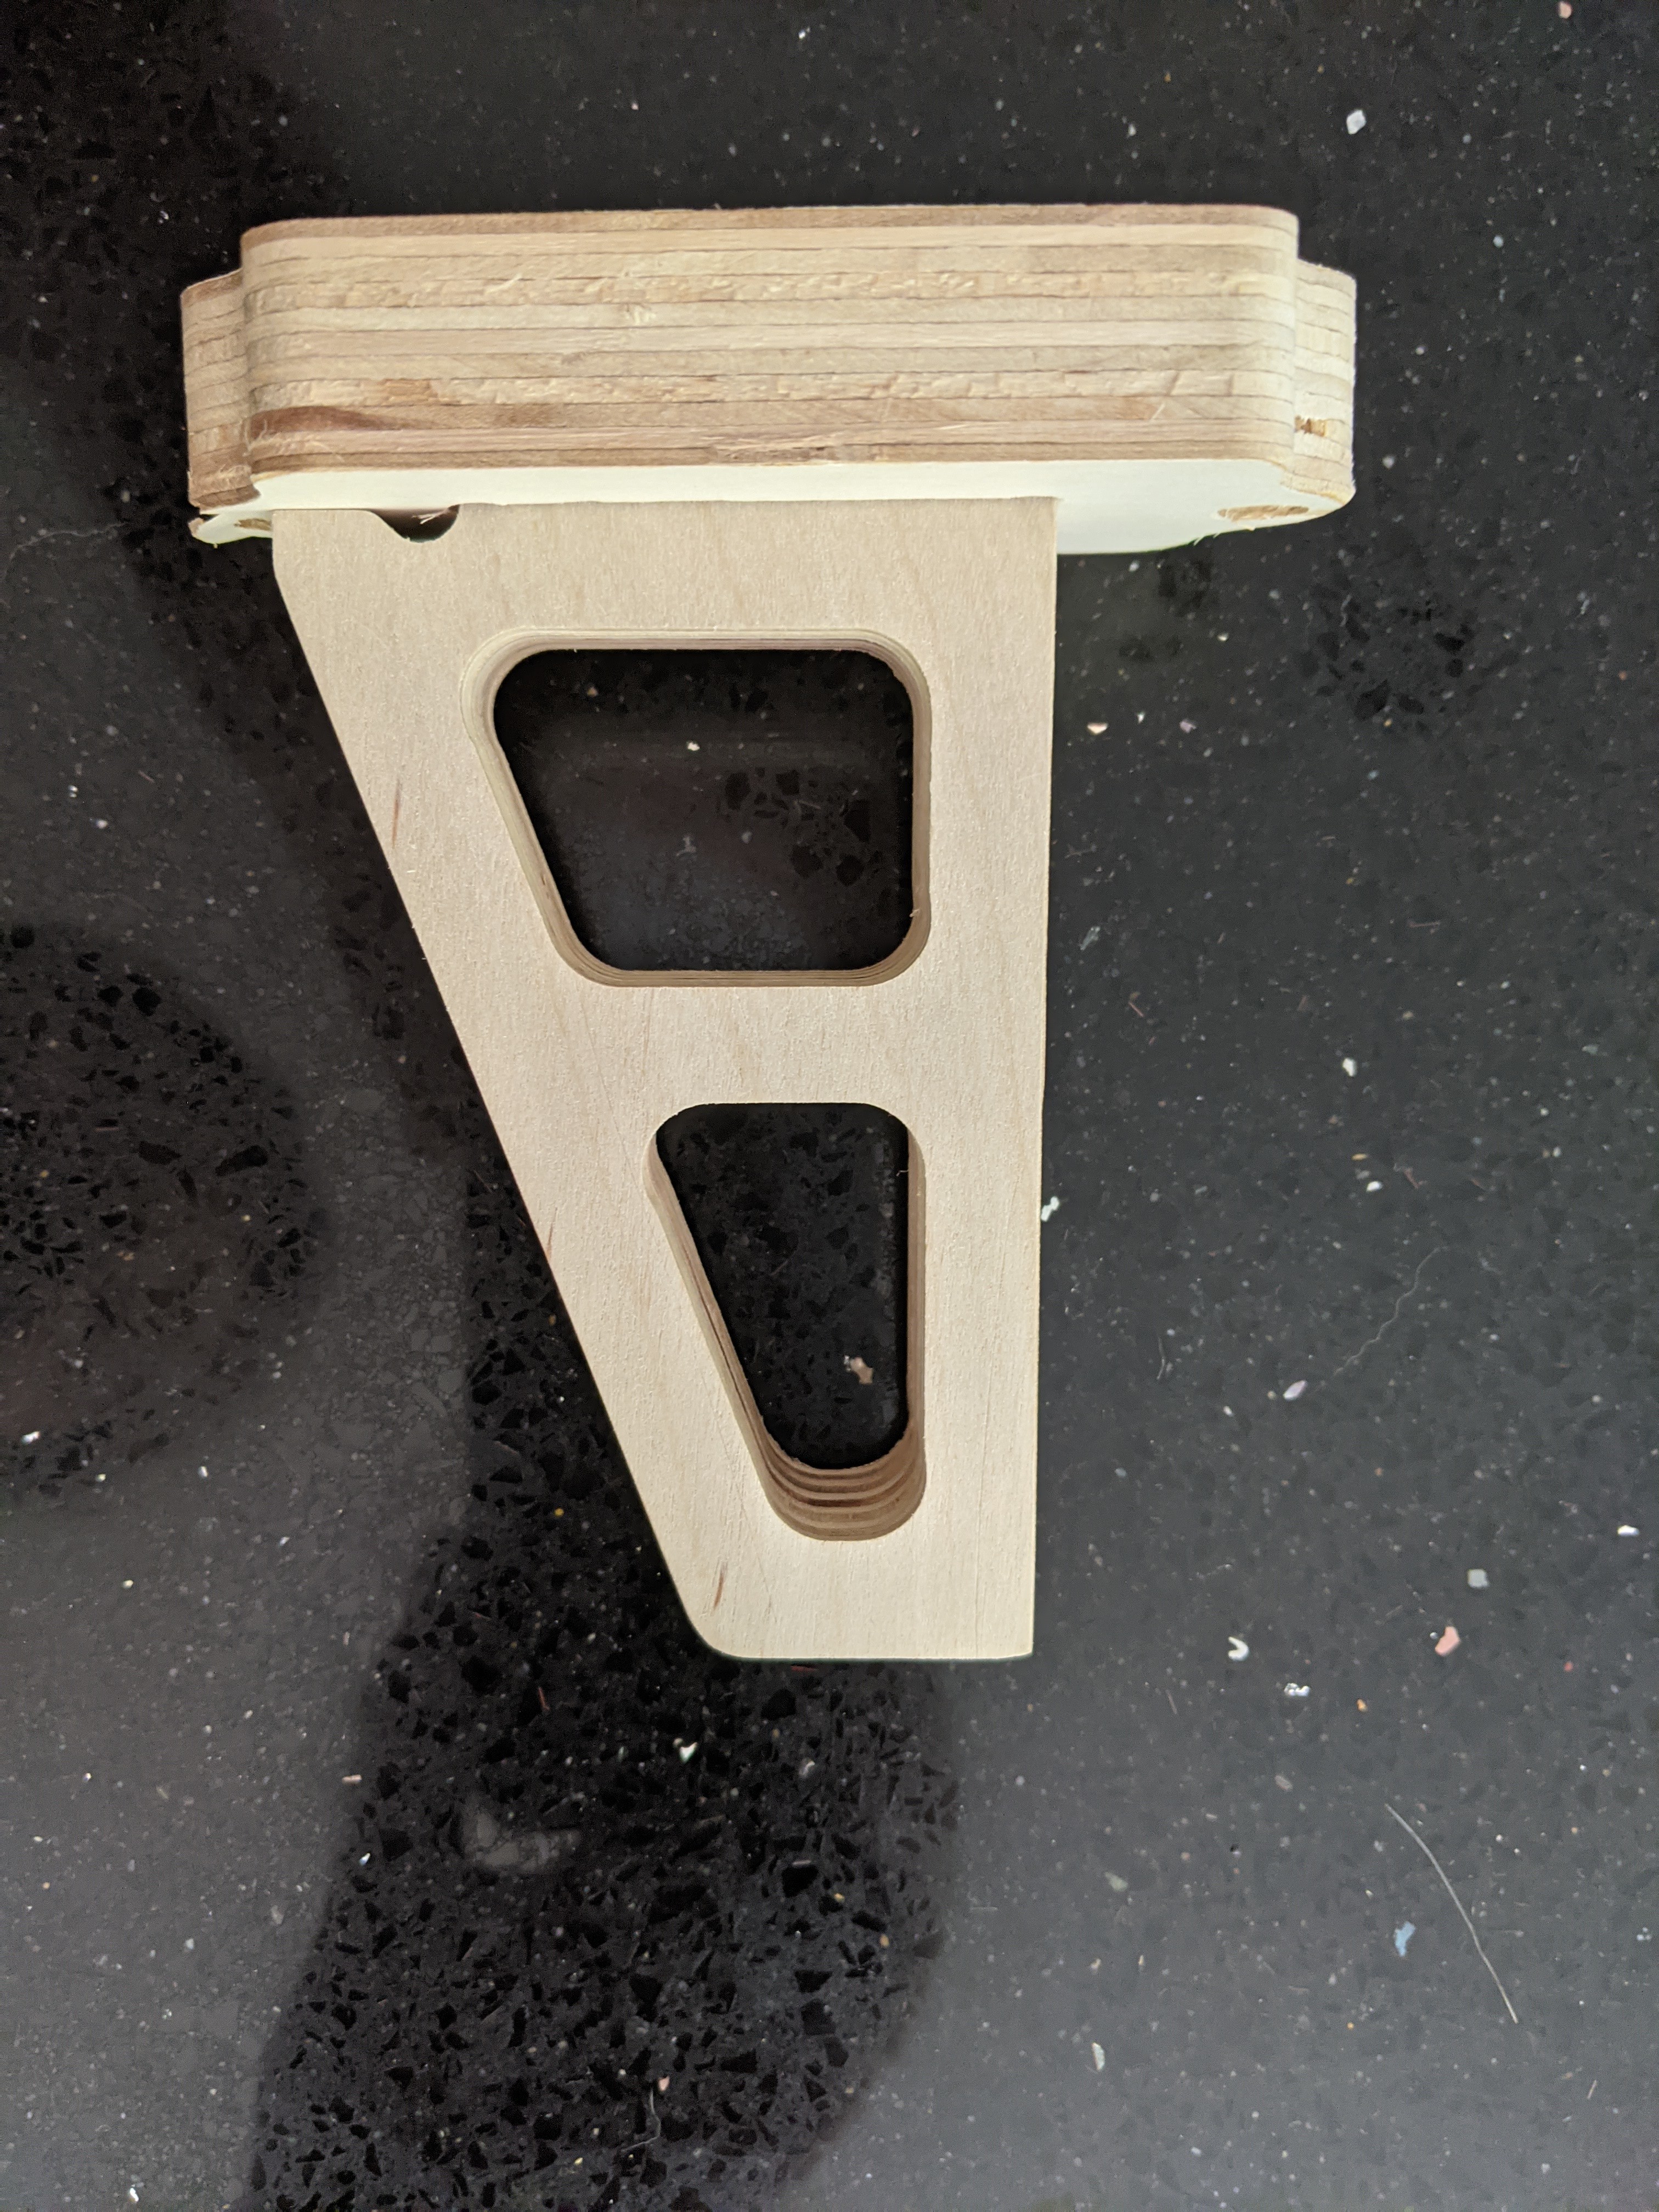
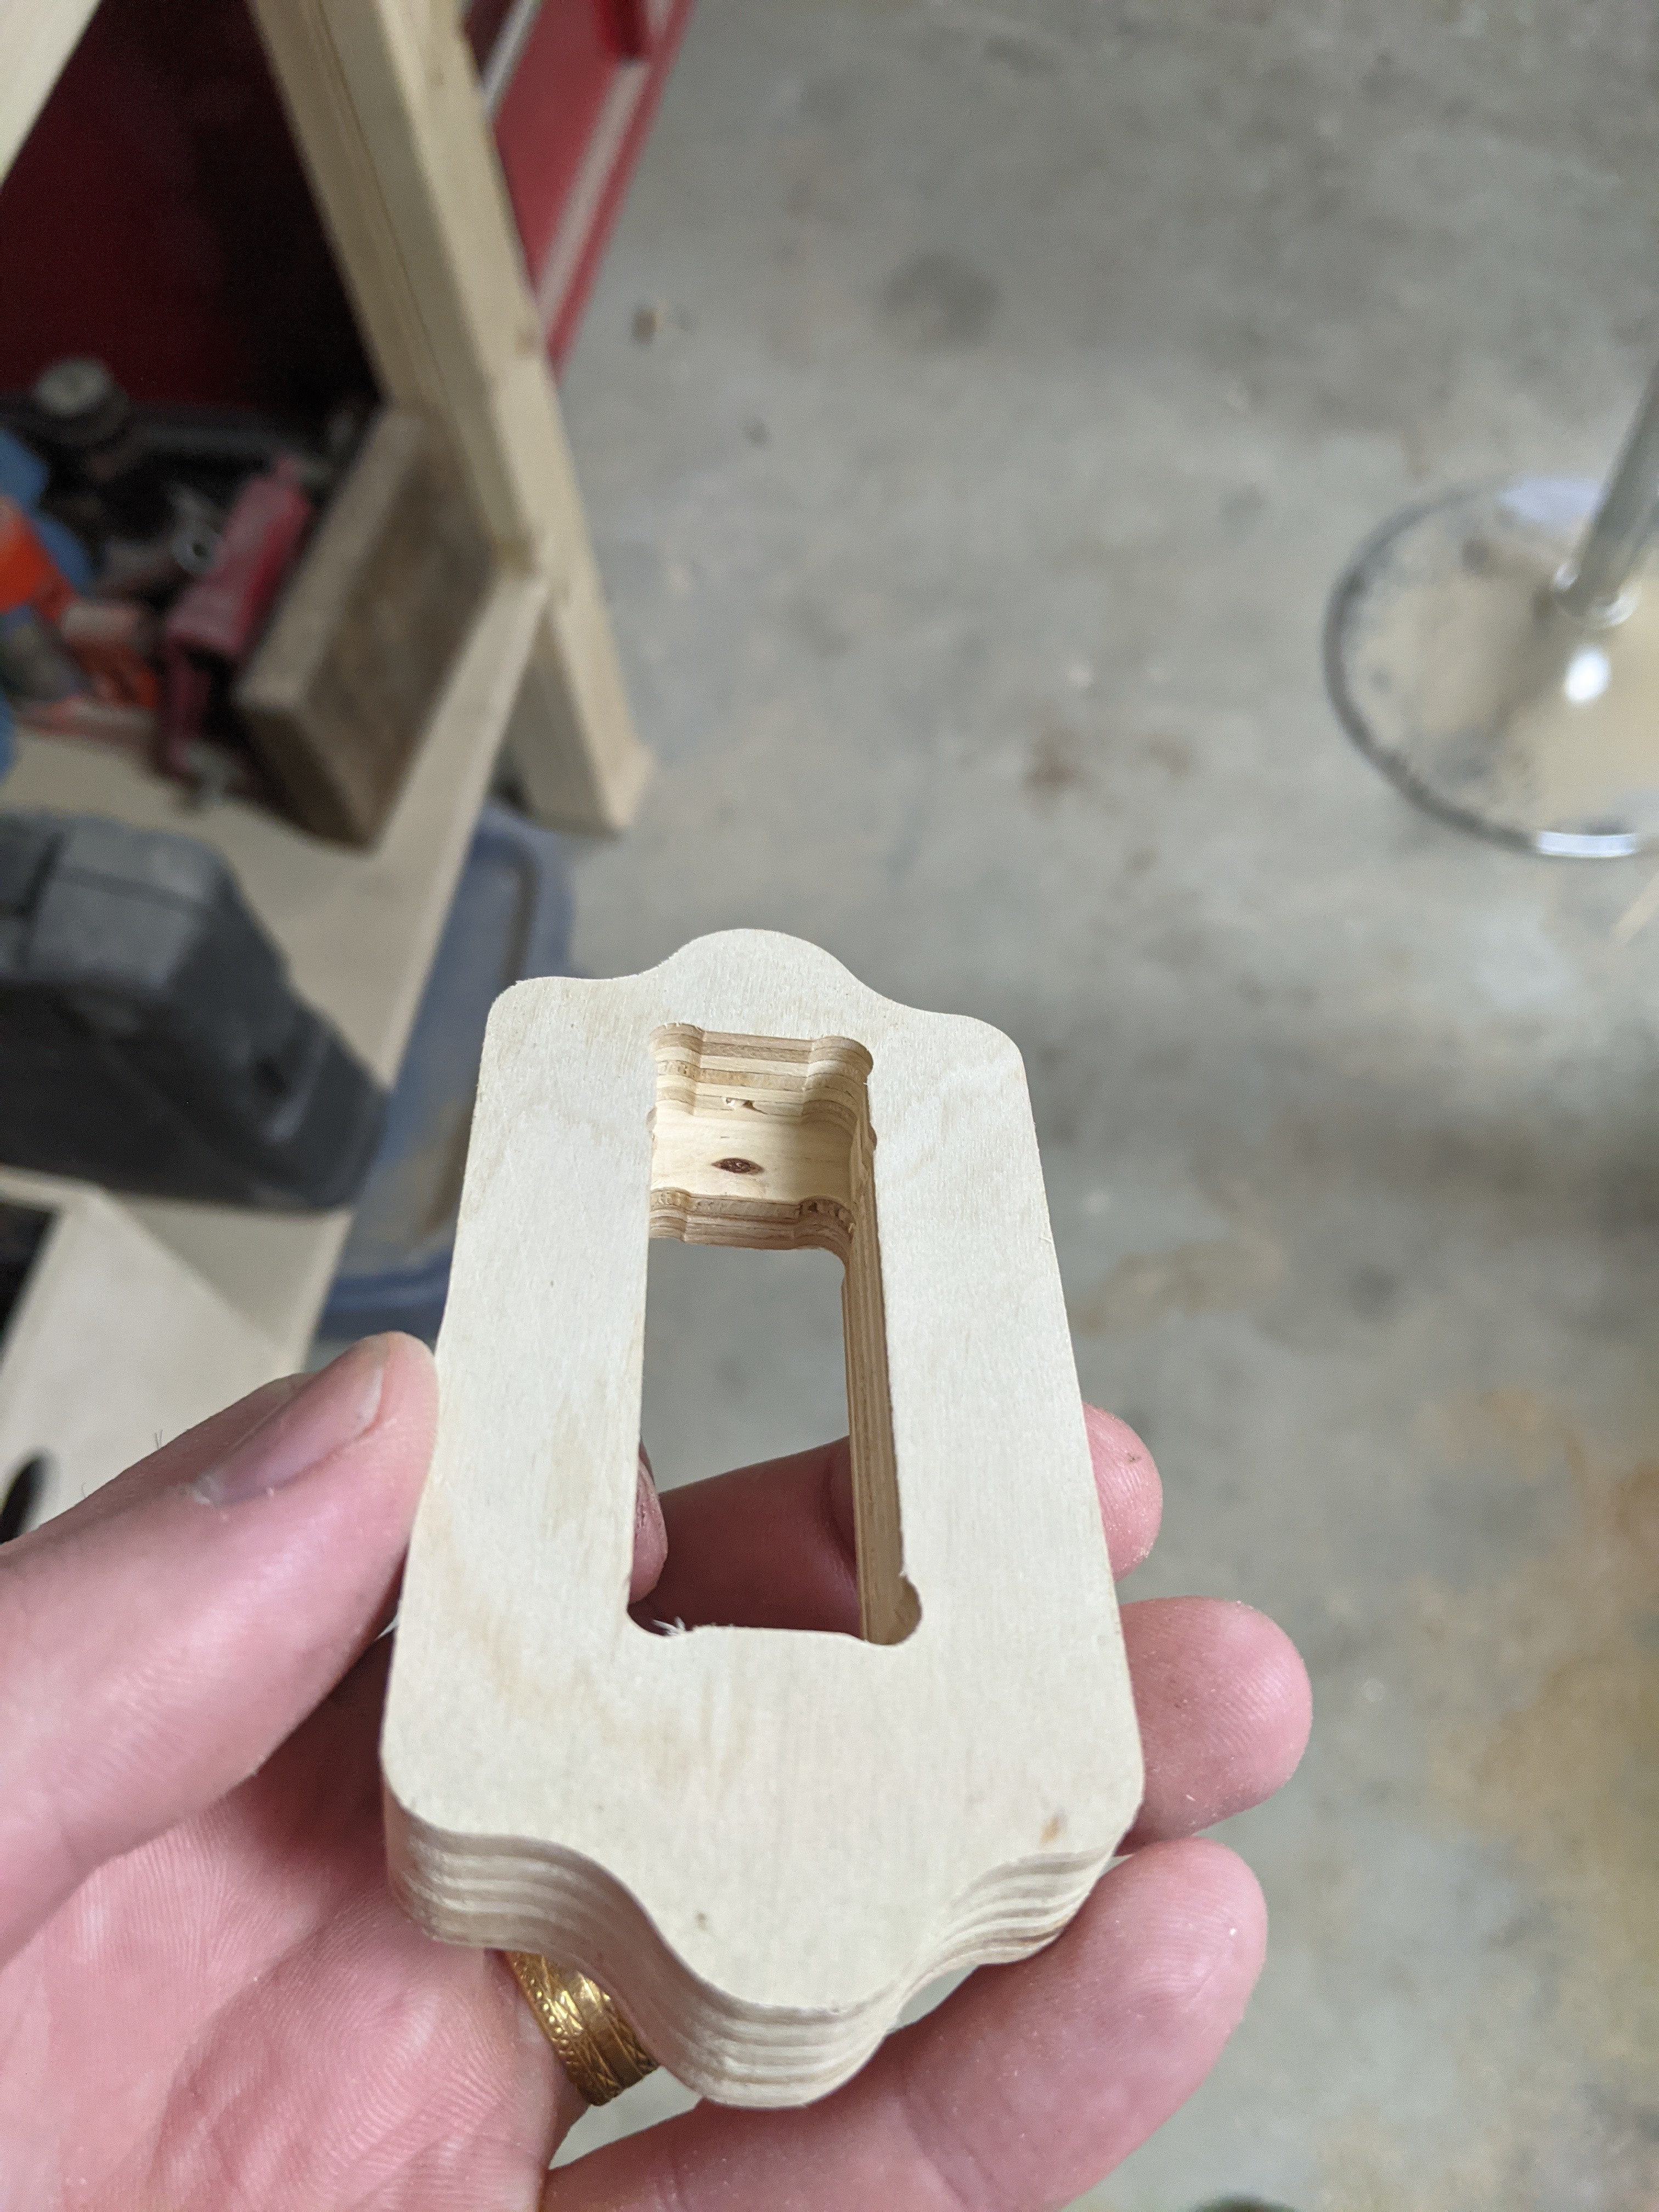
My shop needs organization so I made up these interchangable wall hooks. Once the base ( on the left) is mounted on the wall, different hooks and hangers can be added or removed. The hook does not protrude out the back during the install motion so there would be no wall damage. The load on the hook is also transfered to the front face of the base and not into the drywall. This design is easily scaled.
24 Likes
That is a great project!!! Looks like that could actually hold a lot of weight. Swappable, love it!
1 Like
Yeah I’m going to try to do a weight test, this is just the sample prototype they will be much larger, especially for things like electrical cord hangers. I’m expect it should hold around 100 lbs at 4"
1 Like
That is a cool project!
What reasons would you go with something like this instead something like a french cleat system?
Well if I went with a French cleat system I would still need to create a hook and then screw on or glue on a perpendicular plate with the Chamfer on it. This is all done in one go, one tool, 8 minutes of cutting and it’s ready to go. I also find french cleats a bit constraining when needing to nest things tightly. Most of my garage has birch ply on the wall so I can attach things wherever I need to. French cleats have their place, just not in my shop
2 Likes
Very cool. Is there a notch in the back of the wall bracket to hook the hanger to?
That’s what I figured. Nice execution on your design!
1 Like
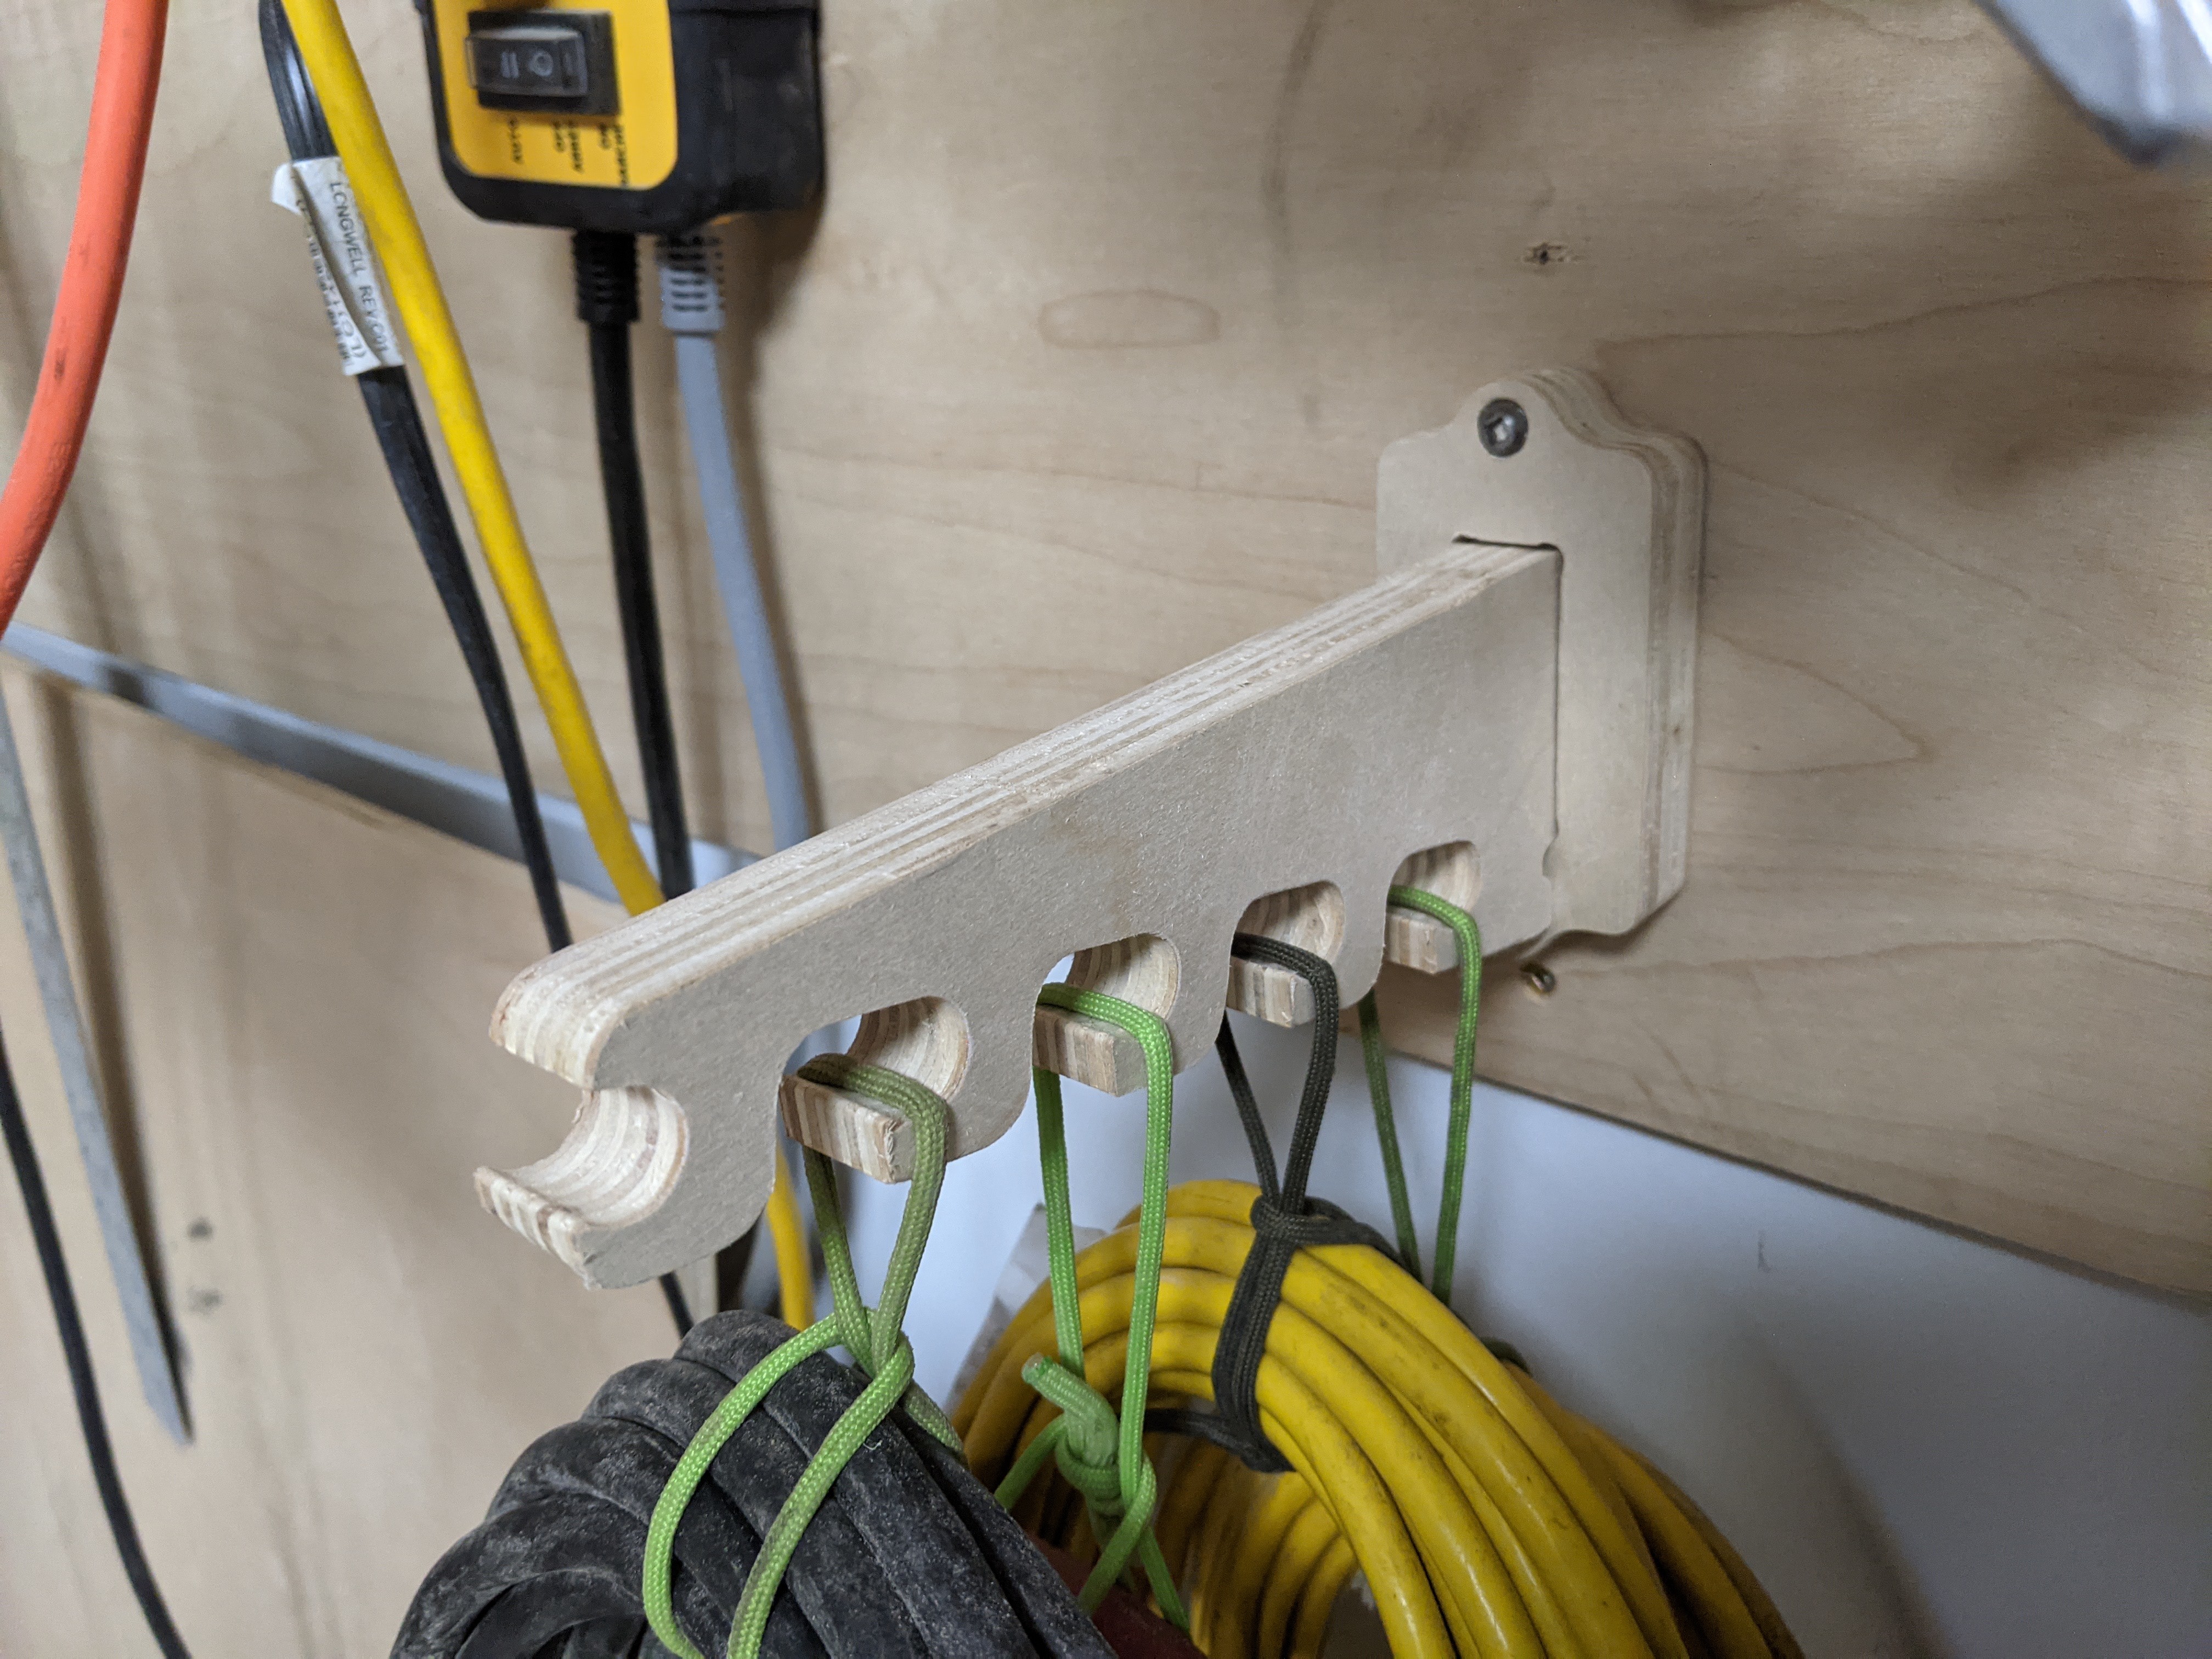
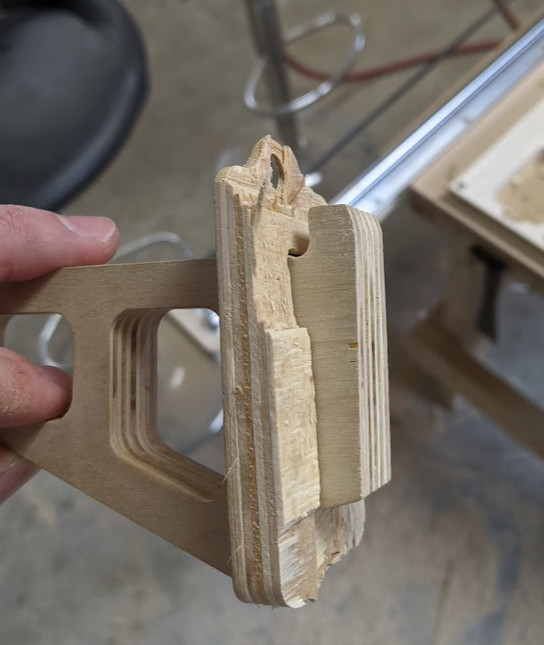
Since everyone loves photos.
250lbs at 3" is the limit of this. Due to the ply direction of the hook the rear tab is surprisingly strong. I was sure that was going to give out first but in reality it was the plywood lamination that failed first. I don’t have a reason to actually put that much weight on but I intend to have longer hooks for things like my circ saw, vac hose etc. where the weight will be further away from the mount.
Let’s see the french cleats hold that 
6 Likes
Carnage!!!
Love test pics. So the fancy math says 125lbs at 6"…I think that is still a whole lot more than any average Jane would stack on there.
Great design, Kinda feel like I should fill my garage with them.
any chance of the .dxf files?
Probably easier if I just send the STEP files? I’ve had to massage the tolerances a bit for my machine but that only effects the width of the slot. It can be easily adjusted for different plywood thickness.
Estlcam works better from the dxf files on the side you’d cut. So for a beginner, the dxf is probably a better thing to share. But I doubt anyone will say no to the step files either.
2 Likes
Well, uploaded my first Thingiverse file so hopefully this works for everyone. Should include DXF and STEP files along with my extension cord hook and the required rear profile for the hook which should allow you to make whatever shape or configuration you want protruding from the wall.
3 Likes
very cool thanks for the files .now if only i could get my shop organized just not enough hours in a day
Thanks mate. Will have a go this week. Just sitting in hospital with a brand new hip due to running into my wife’s bike on my bike and smashing the old one on the road. Not good.
I can see in Estlecam that I will just cut a pocket down to make the shape on the back side and then make a hole right through for the slot…? side by side. Estlecam does not seem to read STEP (beginner) … I imported them into FS360, converted to .stl and will try one out of PLA as well I reckon.
Rob
Sorry there should be a DXF file there that you could drag right into estlcam. The rear step is important so measure it off the solid model to figure out the depth. Cut the slot down to about 11mm (I think that’s what the model says) then cut the smaller slot all the way through. Make sure you cover it your corners if using a router. If you are printing it you might want to adjust the tolerances a bit to get a nice tight fit. Let me know how it goes!
Hope you get better soon!