Jeffeb3 Dupont Crimp Method

I needed to crimp some ends, so I thought I would try recording it and sharing. This is what I do:

I’m pretty sure this is the tool I have. But I mention this only because these are the “cheap” ones, not the $1000 correct ones. I don’t think there is any difference between the pololu ones and the amazon special.

I still keep the pliers with me when I go to install them in the black housings. I still need to adjust them sometimes.

11 Likes

Another good method (which I used to use) is outlined here:

That’s what I try to do, and maybe I’ve just got super cheapo connectors, but they give me no end of problems. Either the tabs are to angular (they ‘V’ out too sharply, and don’t catch the jaws right, or the connector rolls to one side), or they just aren’t wide enough for the insulation on the wires I use (pretty standard 4-connector 22ga LED ribbon wire). So I either ruin connectors (and a couple of mm of cable at a time), or spend a lot of time carefully prepping each individual fiddly connector, that still may or may not work properly…

I have considered just cutting the connectors that came with the steppers and soldering in extensions and the aviation connectors I got to connect to my (eventual) electronics enclosure.

You might find a lot less trouble with 24ga. The thickness of the insulation matters a lot too. Too thick, and they need to be perfect to get into their plastic homes.

I also had a hard time with these until I saw this instructable for Dupont Crimping . It made all the difference for me. I also found that not twisting the wire seemed to make for stronger connections.

3 Likes

This is similar to what I do. Sometimes the wire is smaller and I don’t have a good feeling (very scientific) about the section that grabs the copper.
image
I will sometimes strip 2x as much wire and fold it back on itself, or if the insulation and wire are thin, I might even strip 3x the wire and fold it back over the outside of the insulation. In that case the crimp on the insulation and crimp on the copper wire have a chance to keep contact.

And like Jeff showed, I often have to squish the crimp slightly with pliers afterward to get it to fit into the housing.

3 Likes

This is because the vast majority of those cheap crimpers do not have a proper round die for the insulation crimp, instead they use “W” (or “M”) shaped die which folds the insulation ‘wings’ on the connector back down into the wire itself. Someone on another forum recently pointed out that affordable crimpers with a proper round insulation crimping die have begun to show up on AliExpress. Here is one example:
https://www.aliexpress.com/item/4000497324950.html

If you look closely at the inner-most position (#4) you’ll notice it appears to have the proper shape for actual Dupont connectors. The guy on the other forum ordered a set, but has not yet reported back whether they actually work or not (probably he hasn’t received them yet). At only $17 I was sorely tempted to just go ahead and order a set also…

3 Likes

Nice. I am assuming it’s two quick steps, one to fold the wings over and a second crimp in the 4th position to make it the proper round size? Because the 4th position by itself looks like it wouldn’t fold the wings over. Still an improvement over pliers though.

1 Like

I’m pretty sure it’s just one action - but since I don’t actually have one can’t say for certain or vouch for how good of a job it actually does. I’m hoping they work well though, because I have a bunch of those crimp pins and the crimpers I have do a very crappy job on them.

1 Like

bookmarked!

Where do you order your cables?

I have a selection of red, black and white in guages from 28 to 22 from pololu. I also have a multicolor pack from adafruit or sparkfun. If I need to wire steppers, I have some 4 color ribbon cable I bought on amazon. That isn’t very fun to crimp though.

1 Like

Would 24 awg be versatile enough for most hobby projects? If not - what situations needs a thicker/thinner type? I understand that this varies a lot on the power supply side, but now I’m thinking of from the controller and “out”.

Many of my project need small digital wires that don’t send any current. Something like wiring up a button. 28ga is much easier to solder in tight places and it fits better in connectors. I actually keep small segments of wire that I find, because I sometimes need to solder very tiny things. That’s maybe my use case.

If you were to wire an endstop, for example, you could use 28ga. wire, which crimps easily, fits better in cable chains, and would be fine for long runs.

But you can get by with 24ga. I think one small spool of black 28ga. wouldn’t break the bank and would be helpful to have, and you’d figure out quick where it was useful.

1 Like

Another thing I’ve bought that really helped my soldering is thin solder wire. I bought this a long time ago, and I have 90% of it left, but it makes a big difference, along with a sharp tip on my soldering iron: https://www.amazon.com/gp/aw/d/B004L4VHJE?psc=1&ref=ppx_pop_mob_b_asin_title

1 Like

That instructable had a fantastic tip: leave a bit of the metal strip on the pin! Don’t wiggle off the pin, but cut the metal strip between two pins.

When I read the article I thought to myself, well, you know, you can just wiggle the pin off the strip and then crimp it on the wire. But actually, if you leave a bit of that strip on the pin, you’ve got something to hold on to while you try to hold the wire in place! (If this paragraph doesn’t make sense, read step 5 and 6 of the instructable). It makes it SO easy to just use a needle nose plier to make the pin grab the insulation of the wire.

I never had a good experience with the crimp tool (I have the same as the one in the video), because I could never see how far to insert the wire, or I’d push out the pin a little bit or something. Today I crimped some pins with just a pair of needle nose pliers because it was so easy now. Next time I’ll try the crimp tool too.

And btw, after you crimp the pin, it’s still very easy to wiggle off that piece of strip.

1 Like

yea – leaving the “tail” on was definitely a game changer for me.

I think left over CAT5/6 wire would be good enough for digital signals, while for running motors 26 or 24 AWG. The more I learn, the more I realize that there is no tool/material that fits all needs… :exploding_head: :partying_face:

1 Like

Love that Kester solder. I picked up a 1lb spool like that for $15 at a hamfest 6 or 7 years ago and have used to for tons of projects but it still weighs in at 14oz so TONS left. Always been a fan of Kester’s solder.

That and MG’s superwick desoldering braid. Not even worth trying to use cheap braid if you need to desolder. The MG braid is like magic. I keep a variety of sizes on hand because having the right size make a big difference as well.

I got a set of the IWISS SN-2549 crimpers that were highly touted for dupont pins…but found them harder to use than my old method of a magnifier and some precision needle nose pliers. But a few weeks ago I gave them another try and finally had good luck getting reliable crimps out of them.

Picked up a cheap $2 pair of flush cutters off wish a few months ago as well and they’ve blown me away. Bought them on a whim because of how cheap they were…but they’re now one of my favorite tools and by far the best flush cutters I’ve owned. “Plato model 170” for what the markings on the handle are worth. Though even buying the same ones from the same listing again I wouldn’t be surprised if I got something totally different :smiley:

I also just a month or two finally found a pair of wire strippers I actually like. I’ve hated wire strippers for as long as I can remember since I never had good luck with them. About a year ago I got a set of ideal 45-125 that were recommended by the designer of a radio amplifier kit I was building. And they just reinforced my hatred of wire cutters. Actually had to get replacement wire for one of the transformers after they ruined it trimming the insulation after winding. Then I saw a youtube video from Becky Stern recommending the Hakko CHP CSP-30-1 strippers on Amazon and decided to give them a try. Wow! These actually work!

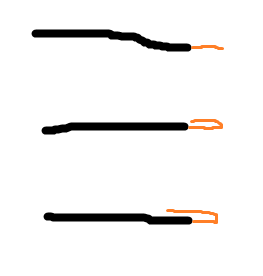
Comparing the Hakko to the ideal strippers the difference is obvious. It looks like the holes on the idea are all one size larger than indicated. 26 on the Ideal’s is the same size as the 28 on the Hakkos. That explains why the Ideals usually shred insulation instead of stripping it in my experience.

The Hakko strippers also have more sizes (20,22,24,26,28,30 compared to the Ideal’s 22,24,26,28,30) Though the Ideal also marks each opening differently for solid vs. stranded with the stranded marking one size smaller so the smallest hole on the Ideals is marked 30 solid, 32 stranded but is the size of the single 28 on the Hakkos…and size 30 solid wire pulls right through the ideal strippers but gets stripped perfectly on the Hakkos.

The one complaint I do have about the Hakkos is that the markings are harder to read. They’re engraved so won’t rub off…but they aren’t colored at all. I rubbed some white acrylic paint in them to make them readable.

The ideals were also $2 more on Amazon. So the Hakko’s are cheaper and work better - big win!

3 Likes

The best wire strippers I’ve used were from Germany, and I have no idea what they were called. They were hinged in the back, and you put the wire into the front, but not perpendicular to the handles, in parallel. There was a depth gauge you could set, and you adjusted the gauge of the strippers by another knob. You could easily do a bunch of wires one after the other (as long as they were all the same) to the exact length, and really fine tune the fit of the cut. I can’t find them anywhere though.

Now that I’m looking again, I’ve found something similar: